
After three years of rigorous travel across diverse terrains, including an unforgettable journey to Alaska and back, my Swagman RV-approved bike rack has consistently exceeded expectations. Installed in the summer of 2021, this robust bike rack has proven to be an invaluable addition to our RV setup. This article provides an in-depth, updated review of the Swagman Rv Bike Rack, detailing my long-term experience, modifications, and why it remains my top recommendation for RV enthusiasts seeking a reliable and durable solution for transporting bikes. If you’re looking for a bike rack that can withstand the unique stresses of RV travel and keep your bikes safe and secure, read on to discover why the Swagman RV-approved bike rack might be the perfect choice for you.
Road-Tested Reliability: Three Years with the Swagman RV Bike Rack
In the world of RV accessories, where failures can lead to costly damages and travel disruptions, finding dependable gear is paramount. My Swagman RV-approved bike rack has been a shining example of reliability, performing flawlessly for the past three years. Unlike some RVers who have unfortunately experienced bike rack malfunctions – even during our Alaska trip – my Swagman rack has been completely trouble-free. It consistently performs its intended function without any issues, a level of dependability I wish I could experience with every RV component I own.
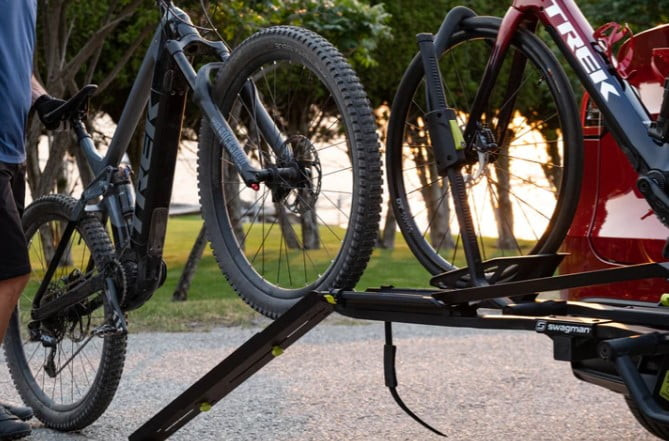
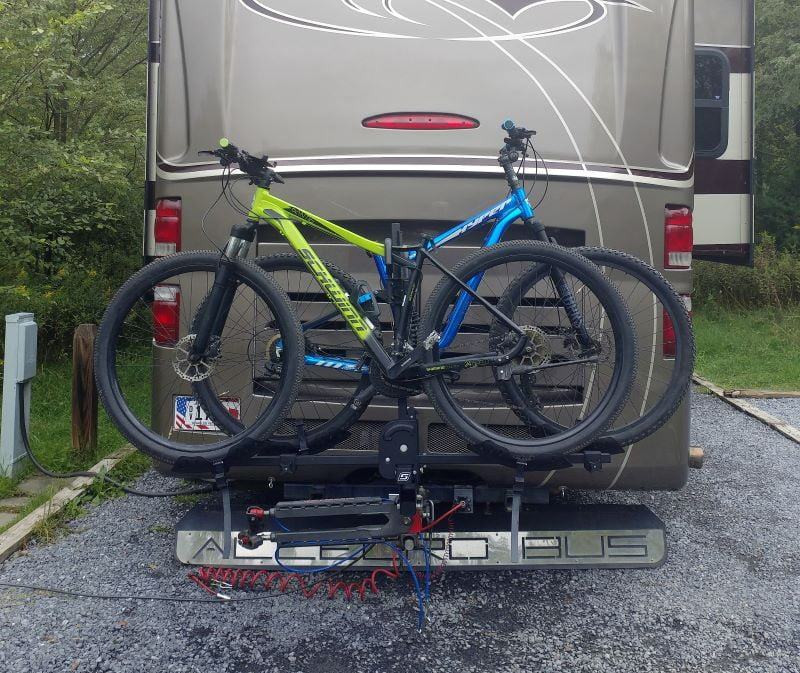 Bikes attached to the Swagman RV-Approved Bike Rack before cover and electrical cable installation
Bikes securely mounted on the Swagman RV bike rack, awaiting protective covers and final electrical cable connection.
Our bikes are strategically positioned between our RV and tow car, a setup that relies heavily on the bike rack’s integrity. A failure here could lead to a domino effect of damage, potentially impacting our tow vehicle. Having witnessed firsthand the horror stories of bike racks failing, especially on challenging routes like the Alaskan Highway, I knew upgrading to a robust RV-specific bike rack was not just a preference, but a necessity for peace of mind and the safety of our equipment. This concern led me to invest in the Swagman RV-approved bike rack and reinforce our tow hitch assembly back in 2021.
Originally Featured on Do It Yourself RV
My initial positive experience with the Swagman RV-Approved Bike Rack was documented in an article published by Do It Yourself RV in 2021. This current review serves as a companion piece, offering a long-term perspective and updates based on three years of real-world use. Do It Yourself RV is a valuable resource for RV enthusiasts, and I appreciate their partnership in sharing information aimed at helping consumers make informed decisions and maximize value when investing in RV equipment. You can find the original article here: Do-It-Yourself-RV-Bike-Rack.
![]() Do It Yourself RV Logo
Do It Yourself RV Logo
The logo of Do It Yourself RV, highlighting the original publication of the Swagman RV bike rack review.
Addressing Internet Best Practices: Unique Content for a Comprehensive View
Understanding the importance of unique content in the online world, this review is designed to be distinct from the original article published on Do It Yourself RV. To gain a complete understanding of my experience and recommendations, I encourage you to read both articles. This updated review provides a deeper dive into the long-term performance and durability of the Swagman RV-approved bike rack after three years of use.
E-bikes and RVing: The Swagman Rack Handles It All
One of the frequently asked questions I receive revolves around transporting e-bikes on RVs. Yes, we successfully carried our e-bikes on our Alaska trip, secured by the Swagman RV-approved bike rack mounted on the back of our RV. Furthermore, the Swagman RV-approved bike rack is also featured in my e-bike e-book as a recommended solution for bike transportation. For detailed information about choosing the right bike rack for your car or RV, you can refer to the dedicated section in my e-book: Everything you need to know about a bike rack for your car.
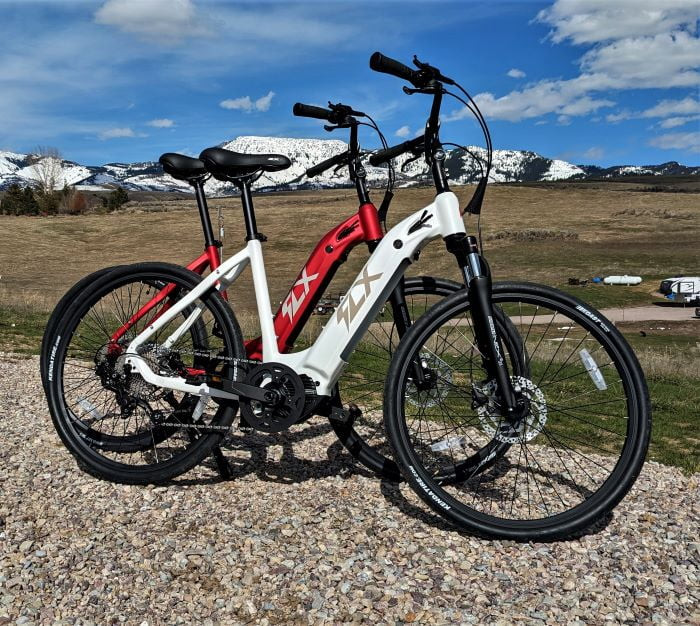 E-bikes and the guide on choosing the best electric bicycle
E-bikes featured in the guide “How to choose the best electric bicycle,” highlighting the rack’s compatibility with heavier bikes.
My comprehensive e-bike e-book aims to address all aspects of e-bike and bicycle selection, making it a valuable resource for anyone considering e-bikes or needing guidance on related accessories. You can access the e-book here: E-bikes 2024: How to choose the best electric bicycle: Free e-bike e-book.
It’s crucial to understand that not all bike racks are engineered to handle the specific demands of RV travel. Many RV bumpers simply lack the structural integrity to safely support a bike rack.
Strength You Can Trust: The Robustness of the Swagman RV Bike Rack
To truly emphasize the strength of the Swagman RV-approved bike rack, consider this: I can confidently stand on it. As shown in the picture below, I’m standing on the bike rack, suspended a couple of feet above the ground, demonstrating its remarkable load-bearing capacity.
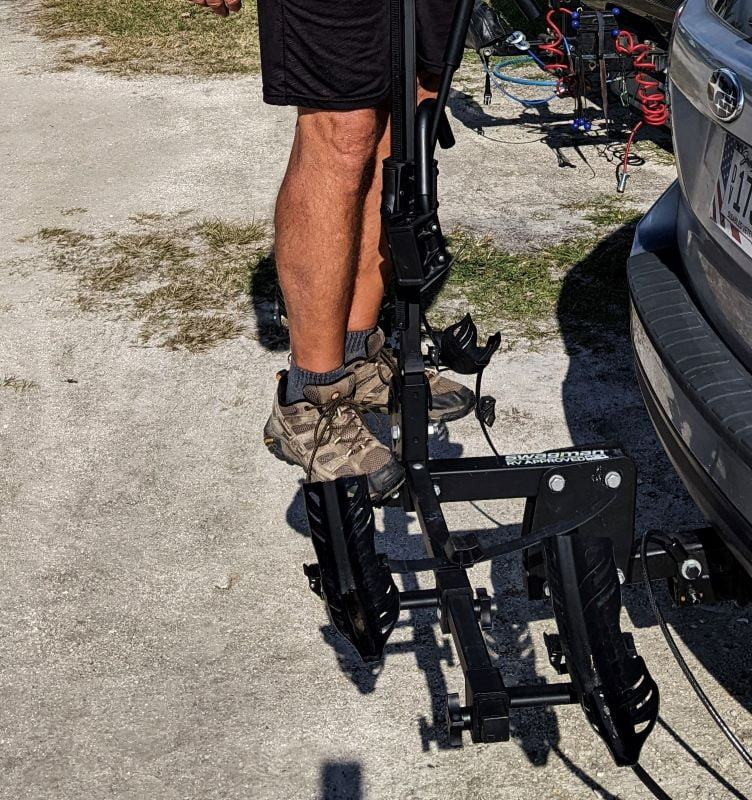 Demonstrating the strength of the Swagman RV bike rack by standing on it
The author stands on the Swagman RV bike rack, showcasing its robust construction and weight-bearing capability.
This wasn’t a test, but rather a visual confirmation of the inherent strength I already knew the rack possessed. My weight surpasses that of two e-bikes combined, and the Swagman RV-Approved Bike Rack handled it effortlessly. However, it’s important to remember that RV bike racks endure more than just static weight. The dynamic motion of an RV – the constant up-and-down movement and swaying – exerts significant stress on the rack while driving. I delved into these details in my article for RV Life.
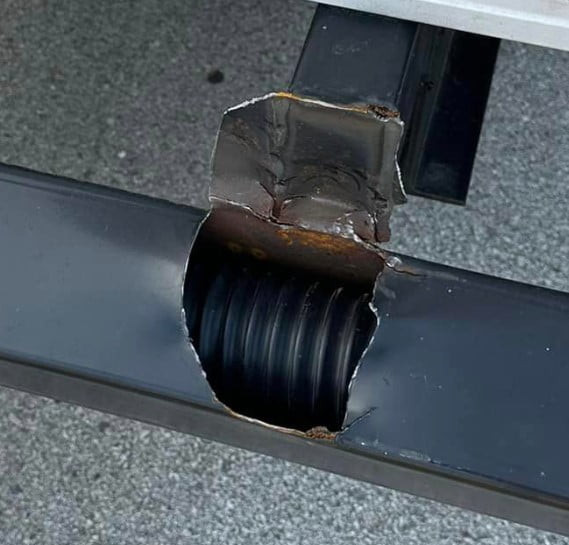
The following image serves as a stark reminder of the potential consequences of inadequate bike rack setups. It depicts a damaged dual hitch from an Alaska trip – not mine, thankfully – where a solid 2-inch steel bar was bent due to stress.
 Bent dual hitch adapter after an Alaskan journey due to bike rack stress
A friend’s bent dual hitch adapter, illustrating the extreme stress RV bike racks endure, especially during long trips.
In this scenario, the RV was attached to the left side of the hitch, and the tow car to the right. The bike rack was mounted on the upper section. The weight of the bikes and the bike rack itself was the sole stress factor on the bent steel shaft, as the tow car doesn’t add weight to this section when towing. This incident underscores the immense forces at play and why choosing an RV-approved bike rack is non-negotiable. Countless RVers have unfortunately experienced the nightmare of their bikes dragging on the road. In my case, a bike rack failure wouldn’t mean dragging bikes, but rather bikes colliding with my tow car – a potentially very expensive scenario.
 Trailer bumper failure due to bike rack attachment
A trailer bumper that has failed under the weight and stress of an improperly mounted bike rack.
Never attach a bike rack to a trailer bumper. Trailer bumpers are simply not engineered to withstand the dynamic loads imposed by a bike rack and bikes. They will fail, and often quickly.
Construction and Design of the Swagman RV-approved Bike Rack
 Steel construction of the Swagman RV-Approved Bike Rack
Close-up view showcasing the robust steel components of the Swagman RV-approved bike rack, emphasizing its durability.
Except for the wheel straps, every visible component of the Swagman RV-approved bike rack is constructed from steel. In the picture above, you can see the rack is wet from rain. Since then, I’ve made a minor modification by drilling small drainage holes in the wheel trays to prevent water from pooling. This bike rack is intentionally designed as a non-folding model. While folding bike racks exist (and I’ll include links to some later), I opted for the added strength and reduced potential failure points of a fixed design. Moving parts inherently introduce weaknesses. The only folding elements are the upper support hooks, which are folded down in the picture. I fold these down to simplify bike loading.
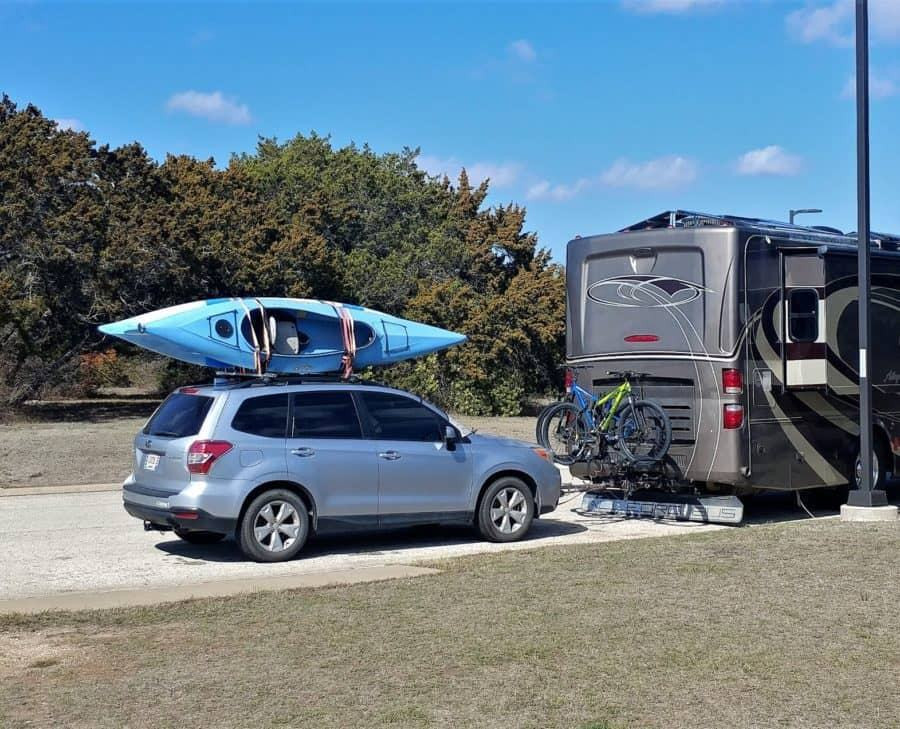
Bike Positioning and Travel Configuration on our RV
We prefer to travel with our bikes positioned between the RV and our tow car. The bikes remain covered during both travel and when parked. While we could travel with them on the car rack, this would increase the overall vehicle length and necessitate uncovered transport.
 Bike rack configuration just before attaching the tow car to the RV
The Swagman RV bike rack setup ready for travel, with bikes positioned between the RV and the tow vehicle.
Optimizing Space: Bikes Between RV and Tow Car
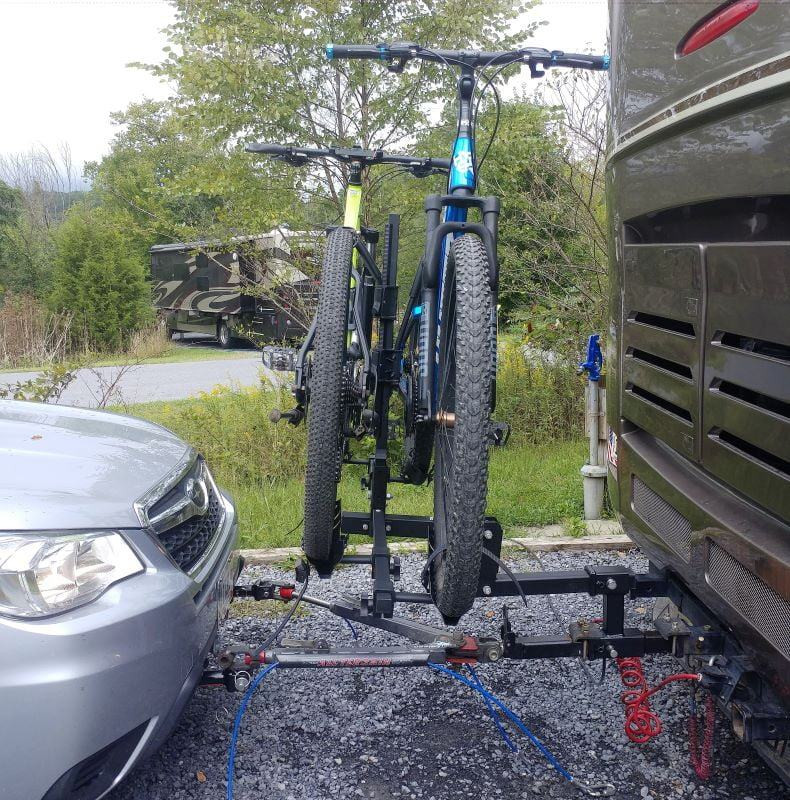
Our standard setup involves positioning the bikes on the Swagman RV-Approved Bike Rack mounted on the back of the RV. This places them neatly between the RV and the tow car for both travel and storage.
 Bikes positioned on the rack between the RV and tow car
Illustrative image showing the bikes mounted on the RV bike rack, positioned in the space between the RV and the towed car.
My initial attempt to install and use the Swagman RV-Approved Bike Rack wasn’t without its challenges. In fact, I initially had to revert to my old rack to resolve a compatibility issue.
Installation Journey: Initial Setback and Ultimate Success
While the Swagman bike rack is undoubtedly a significant upgrade in quality, my installation process wasn’t entirely seamless. However, it’s crucial to emphasize that the setback was not due to any flaw in the bike rack itself. The Swagman rack is exceptionally well-made. The issue stemmed from a compatibility problem related to my specific dual hitch setup. As I explain the solution, I’ll use images to illustrate why my previous bike rack didn’t encounter these same issues.
The Double Hitch Receiver Challenge
Our bikes are mounted on the upper receiver of our double hitch, but the vertical distance between the lower and upper receivers proved insufficient for simultaneously accommodating the Swagman RV-Approved Bike Rack and the Roadmaster tow arms.
 Old bike rack with a bent tube for double hitch clearance
The previous bike rack, showing a bent 1.25-inch tube designed to provide extra clearance within the double hitch setup.
Insufficient Height of the Original Double Hitch Receiver
My original double hitch receiver lacked the necessary height to comfortably accommodate both the new bike rack and the tow arms. In the image below, I’ve used a framing square to represent the bike rack’s spatial requirements. While there was ample room for the tow arms themselves, there wasn’t enough vertical clearance to stow them properly when not in use.
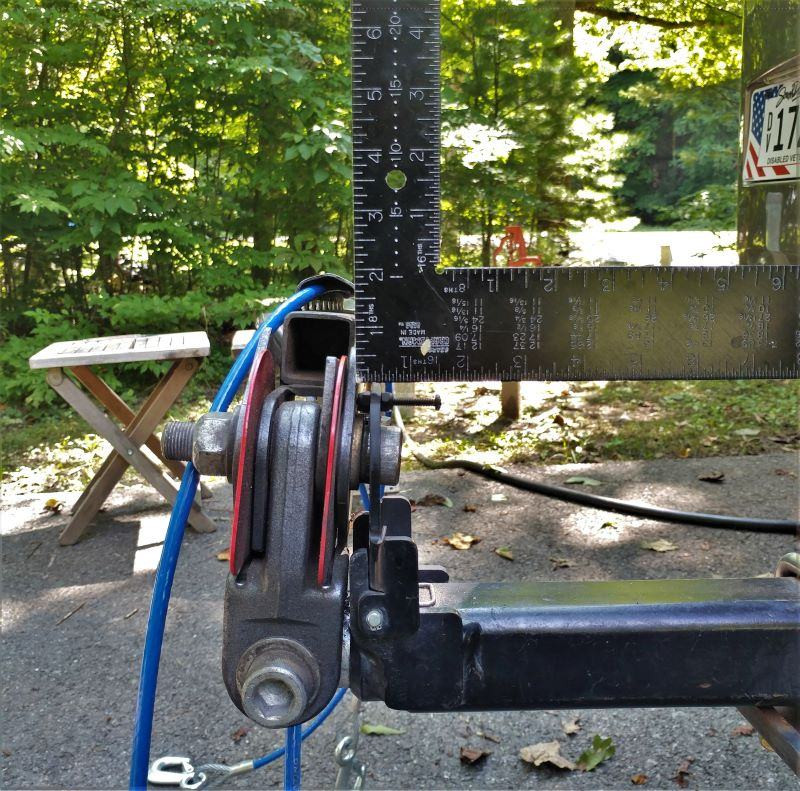 Framing square illustrating the height issue with the original double hitch receiver
A framing square used to demonstrate the limited vertical space within the original double hitch receiver, causing interference with the tow bar in the stowed position.
 Finished configuration with a taller double hitch receiver
The successful setup with a taller double hitch receiver, providing adequate clearance for both the bike rack and tow bar.
The solution was to replace my original double hitch with a taller model. This seemingly simple change made all the difference, resolving the compatibility issue and allowing for a successful installation. Therefore, if you’re using a double hitch receiver, ensure it’s tall enough to accommodate both your bike rack and towing components. For more details about our towing system, you can explore this article: How to tow – what we tow .
Unboxing and Initial Assembly of the Swagman RV-approved Bike Rack
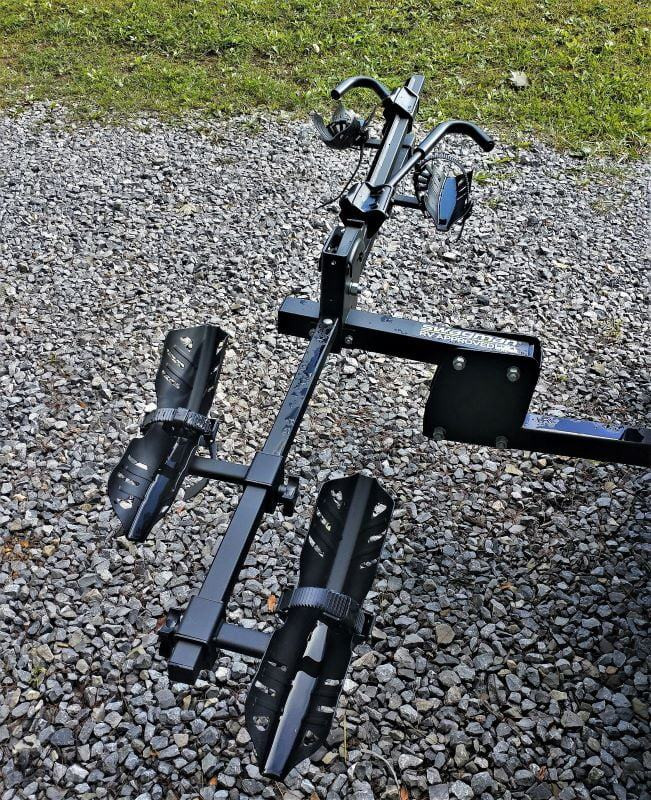
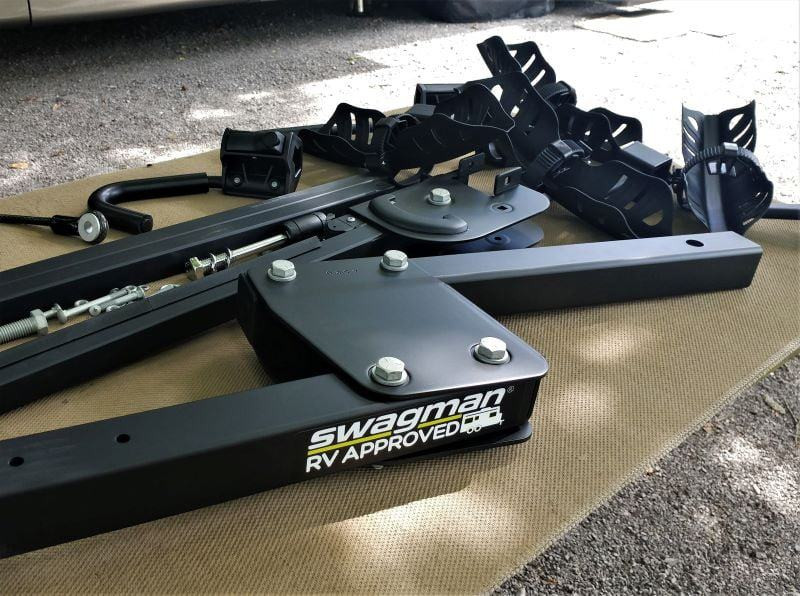 Swagman RV-Approved Bike Rack parts laid out after unboxing
Components of the Swagman RV-Approved Bike Rack neatly arranged after unboxing, ready for initial assembly.
Upon unboxing the Swagman RV-Approved Bike Rack, a small amount of pre-assembly is required. The image above displays the parts after unpacking and removing the protective plastic. The tire cradles are visible at the top, and the support bracing is at the bottom of the image.
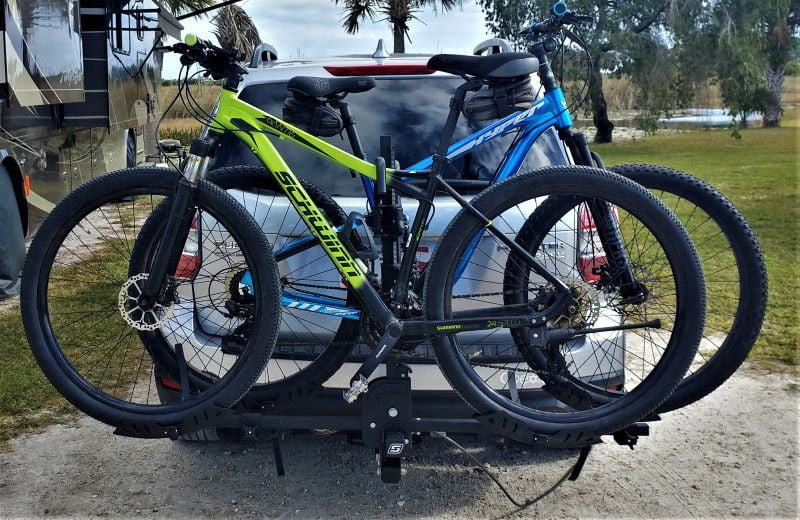 Carrying bikes on the Swagman bike rack mounted on a car
The Swagman bike rack mounted on a car, transporting bikes, illustrating its versatility beyond RV use.
Self-Securing Connection and Anti-Rattle Hitch Pin
In the following image, you can see our previous bike rack and double receiver hitch setup. With our old rack, we encountered an issue with vertical bouncing during use. To mitigate this, I employed a steel plate and U-bolt with large nuts to stabilize the connection between the rack and the hitch receiver.
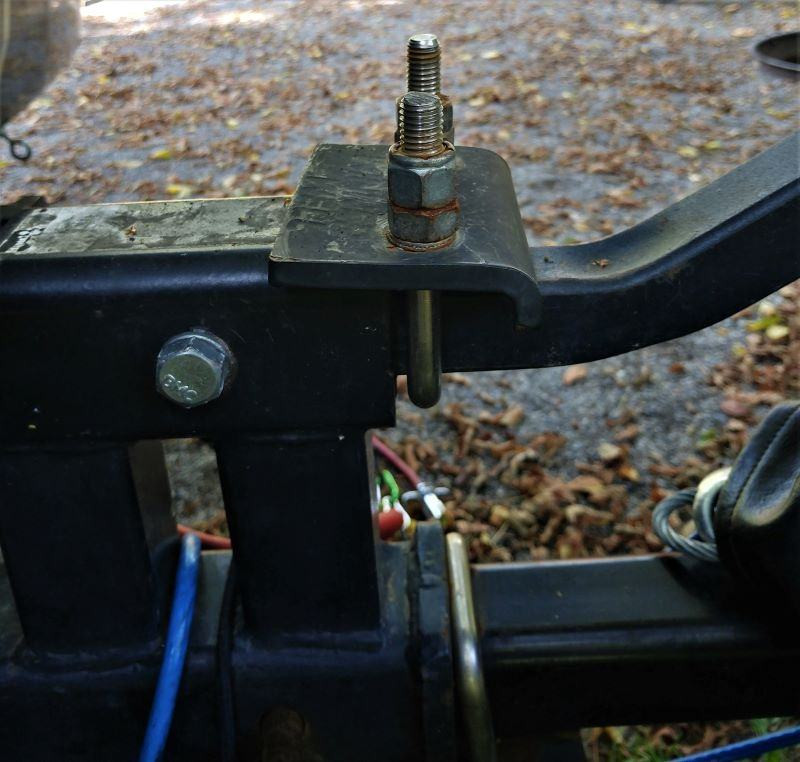 Stabilizing plate and U-bolt used with the old bike rack to prevent movement
Close-up of the stabilizing plate and U-bolt mechanism used to minimize movement between the old bike rack and hitch receiver.
Fortunately, the Swagman RV-approved bike rack eliminates the need for such makeshift solutions. Its precise engineering incorporates a threaded hitch pin that effectively prevents movement, rendering my U-bolt clamp unnecessary. This Locking Anti-Rattle Threaded Hitch Pin was initially met with skepticism from me, but it performs exceptionally well. Moreover, I don’t need to remove this clamp when transferring the rack to our car, streamlining the RV-to-car swap process.
Effortless Loading with Optional Ramp
Loading bikes onto the Swagman RV-approved bike rack is generally straightforward, especially for lighter bikes like ours. For our e-bikes, I remove the seat and battery to reduce weight before lifting them onto the rack. However, as bikes (and perhaps myself) have become slightly heavier over the years, Swagman offers a ramp to facilitate loading bikes by rolling them onto the rack, rather than lifting. While I haven’t personally used the ramp and am unsure of its compatibility with my specific bike rack model, it’s an appealing option to consider for easier loading. Here’s a link to the Swagman ramp: Swagman Ramp.
 Swagman bike ramp for easier bike loading
The Swagman ramp accessory, designed to simplify loading bikes onto compatible Swagman bike racks.
Integrated Locking System for Enhanced Security
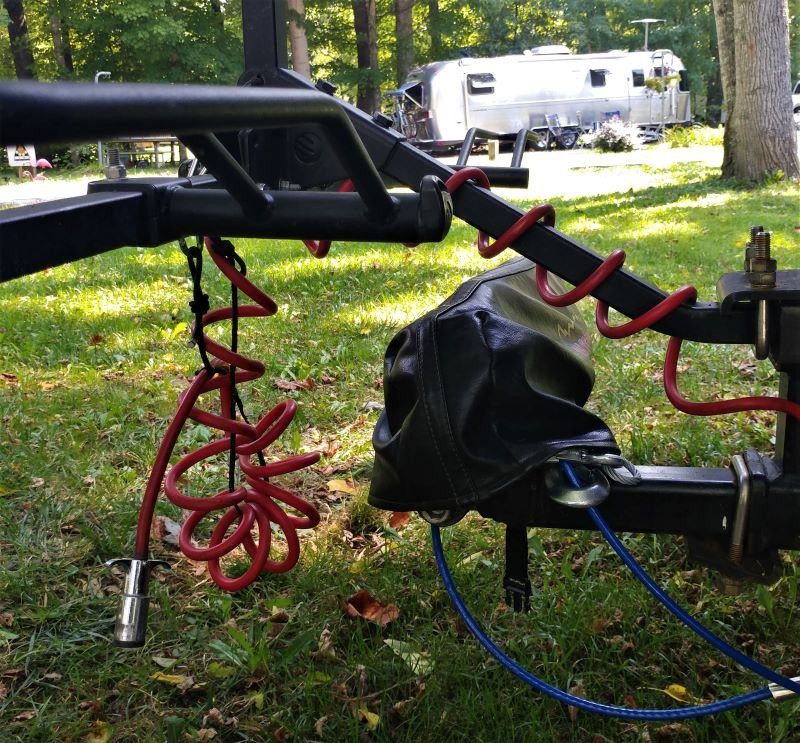
The Swagman RV-approved bike rack includes a built-in locking system that secures both the bikes to the rack and the rack to the vehicle. A cable lock is integrated with the hitch pin. One end of the cable attaches to the hitch pin, and the other end forms a loop that can be threaded back onto the hitch pin. This single lock effectively secures both bikes and the rack.
To utilize this feature, thread the cable lock through the bikes with both ends facing forward. Then, pass the bolt end of the cable through the loop end. Align the bolt end of the cable with the hitch pin and install the hitch pin lock at the end of the hitch pin.
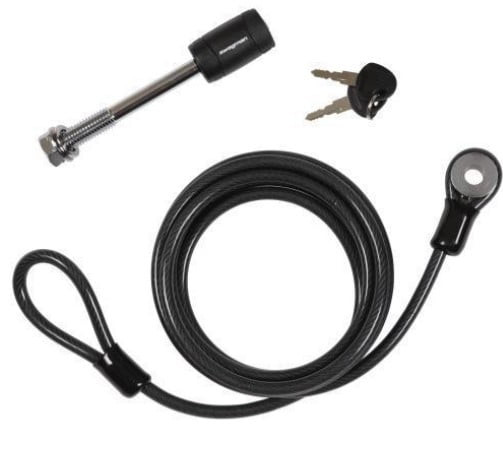 Swagman cable lock integrated with the hitch pin for security
The Swagman cable lock and hitch pin system, providing integrated security for both bikes and the bike rack.
For added security, I’ve bolted the cable to the rack and use a secondary lock with a longer cable to further secure the bikes. I also employ a separate chain and lock wrapped around both bikes as an additional deterrent.
Weight Capacity Considerations: Robustness Has Limits
While the Swagman RV-approved bike rack is undeniably robust, it’s important to acknowledge that it has a weight limit. To explore this, I mounted a friend’s extra-long and heavy Pedego cargo e-bike on my rack. Due to the significantly longer wheelbase of the Pedego, I could only fit one bike on the carrier. Given that this single bike weighed approximately twice as much as my standard mountain bikes, I suspect that carrying two such heavy cargo e-bikes might exceed the rack’s intended weight capacity.
 Pedego cargo e-bike mounted on the Swagman bike rack
A heavy Pedego cargo e-bike mounted on the Swagman bike rack, testing the rack’s capacity with heavier and larger bikes.
A Comprehensive Guide to Choosing the Right RV Bike Rack
Installing a bike rack on a motorized RV is generally simpler than on a towable RV. Bike racks must be securely attached to a frame-mounted two-inch receiver. Attaching a receiver to a motorized RV is typically easier than on a trailer, as the frame of a towable RV often terminates before reaching accessible attachment points for a receiver. Remember, repeated dynamic stress is the primary cause of bike rack failures in RV applications.
Avoiding Trailer Bumper Mounts
Crucially, never attach a bike rack to a trailer bumper. Trailer bumpers are not designed to withstand the dynamic loads generated by a loaded bike rack during RV travel. These dynamic loads, caused by the rack moving up and down and swaying, can far exceed the static weight of the bikes.
 Bike rack dangerously attached to a trailer bumper
A bike rack improperly mounted on a trailer bumper, highlighting the danger and instability of such setups.
 Trailer bumpers are only designed for sewer hose storage
A trailer bumper correctly used for its intended purpose: storing a lightweight sewer hose, emphasizing its limited load-bearing capacity.
Considerations for Towable RVs
Towable RVs often lack shock absorbers, relying solely on springs for suspension. Shock absorbers play a vital role in dampening vibrations and maintaining bike rack stability. The absence of shock absorbers in most towable RVs increases stress on bike racks.
Motorized RV Advantages
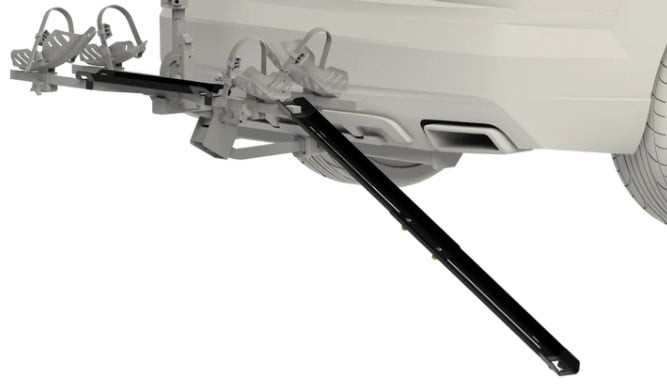
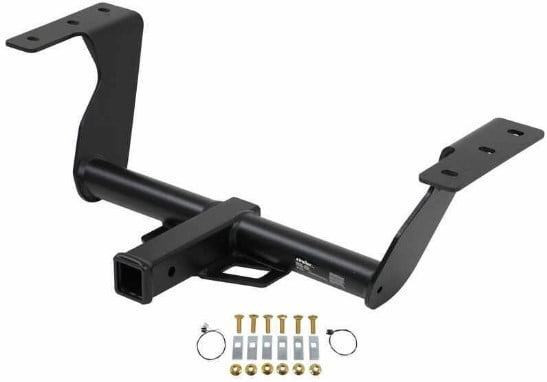
Motorized RVs typically come equipped with a two-inch receiver, often used for towing a secondary vehicle. Adapting a bike rack to a motorized RV often involves using a dual hitch receiver. Opt for a 10-inch rise dual hitch receiver if possible, as this provides optimal clearance for the tow bar beneath the bike rack.
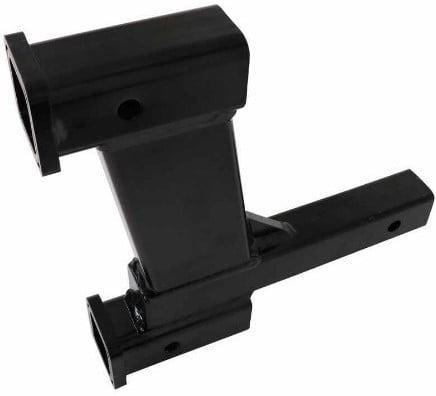 Roadmaster Dual Hitch Receiver Adapter for motorized RVs
The Roadmaster Dual Hitch Receiver Adapter, a common component for mounting bike racks and tow bars on motorized RVs.
The Benefit of Air-Ride Suspension
Motorized RVs with air-ride suspension offer a significantly smoother ride, benefiting both passengers and the bike rack. Air suspension minimizes dynamic loads caused by uneven road surfaces, reducing stress on the bike rack compared to RVs without air suspension. The ride quality difference is comparable to the stark contrast between a school bus and a city bus.
Prioritize RV-Approved Bike Racks
I strongly recommend choosing bike racks specifically labeled as “RV-approved.” While my experience is primarily with Swagman, the “RV-approved” designation signals a manufacturer’s confidence in the product’s suitability for the rigors of RV travel. Without this explicit approval, it’s reasonable to question whether the company stands behind the product for RV use. Conversely, a company is unlikely to label a bike rack as RV-approved if it cannot withstand the demands of RVing.
 Swagman RV-approved bike rack label
The “RV-approved” label on a Swagman bike rack, indicating its suitability and durability for RV applications.
Stinger Length and Strength are Critical
The “stinger,” or receiver bar, is the two-inch square tube that extends from the receiver. It must be sufficiently long to ensure bikes don’t contact the RV when mounted. My dual hitch setup adds approximately eight inches of extra space between the bikes and the RV. If a dual hitch isn’t necessary for your setup, avoid using one, as it increases the leverage the bike rack exerts on the receiver.
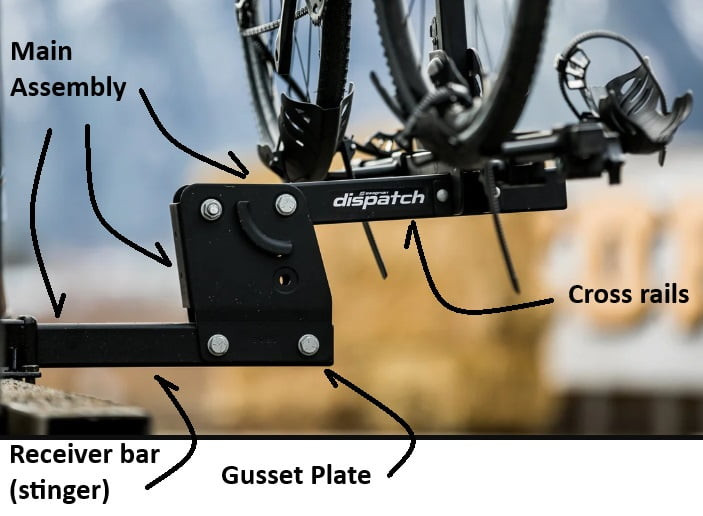 Swagman Bike Rack Components diagram
Diagram highlighting the components of a Swagman bike rack, including the stinger (receiver bar).
The stinger’s strength is paramount. It must bear the weight of the bikes and withstand dynamic loads during travel. Again, avoid dual hitches unless needed, as they amplify the lever arm effect on the receiver. The further the bikes are positioned from the vehicle, the stronger the stinger must be.
Tow Car Interference and Ground Clearance
For RVers towing a car, like our Subaru, and positioning bikes between the RV and tow car, a higher bike rack is essential to prevent interference with the tow car. Swagman utilizes a gusset plate to increase the rack’s height, addressing this issue. Adequate ground clearance is also crucial, even for RVs without tow cars, to prevent the bike rack from dragging on dips and inclines.
Avoid Hinged Bike Racks
Bike racks with hinges are inherently weaker than non-hinged models. Opt for a rack with a solid, robust design, minimizing potential weak points.
Platform Bike Racks are Superior
Platform bike racks, where bikes rest on their wheels, are preferable to hanging racks, especially for heavier bikes like e-bikes. Platform racks distribute weight more effectively and minimize bike sway during travel. Hanging racks are also unsuitable for step-through bikes or bikes without a traditional top tube.
 Hanging style bike rack supporting bikes by their top tubes
A hanging bike rack, illustrating how bikes are suspended by their top tubes, a less stable and versatile design compared to platform racks.
Non-Contact Bike Racks: The Ideal Choice
Non-contact bike racks, which secure bikes by the tires without frame contact, represent the best design. While my Swagman rack is excellent, a non-contact design would be even better, especially for carbon-frame bikes where frame contact should be minimized or avoided. If your bikes have fenders, consider racks designed to accommodate fenders and hold bikes vertically without resting weight on the fenders themselves.
 Non-contact bike rack supporting bikes only by the tires
A non-contact bike rack design, showcasing how bikes are secured solely by their tires, protecting the bike frame from damage.
E-bike Rated RV Bike Racks: Future-Proofing Your Investment
Choose an RV-approved bike rack rated for e-bikes, even if you don’t currently own e-bikes. E-bike rated racks are built to be more robust and handle heavier loads, future-proofing your investment should you decide to switch to e-bikes later.
Loading Ramps: Convenience and Ease
Bike racks with integrated loading ramps offer unparalleled convenience, eliminating the need to lift bikes. The ease of rolling bikes onto the rack is a desirable feature, especially for heavier bikes or for those who prefer to avoid lifting.
 Loading a bike using a Swagman bike ramp
Action shot of a bike being loaded onto a Swagman bike rack using the optional ramp accessory.
Recommended Products and Links
Two-Inch Hitch Receiver for Cars
To facilitate easy transfer of the bike rack between our RV and car, we installed a two-inch hitch receiver on our Subaru. This allows us to use the Swagman rack on our car when we want to take bikes without the RV. While not the exact model we used, the E-trailer Trailer Hitch Receiver 2″ for a Subaru Forester is a comparable and robust option. Remember to select a hitch receiver compatible with your specific vehicle.
 e-trailer Trailer Hitch Receiver for Subaru Forester
The e-trailer Trailer Hitch Receiver, a strong option for adding a 2-inch receiver to a Subaru Forester or similar vehicles.
Subaru Forester 2-Inch Receiver
Dual Hitch Receiver Recommendation
If the Roadmaster Dual Hitch Receiver Adapter had been available when I was searching for a new drop hitch, I would have chosen it. Its 10-inch drop/rise would have provided even better clearance and adjustability.
Roadmaster Dual Hitch Receiver Adapter for motorized RVs
The Roadmaster Dual Hitch Receiver Adapter, offering a 10-inch drop/rise for improved tow bar and bike rack positioning.
Roadmaster dual hitch receiver 10″ Drop/Rise
Our Reliable Tow Bar
We utilize the Roadmaster Falcon All Terrain, Non-Binding Tow Bar for towing our Subaru behind our RV. It has proven to be a consistently reliable and trouble-free component of our towing setup.
Roadmaster Falcon All Terrain, Non-Binding Tow Bar Roadmaster Falcon All Terrain Tow Bar
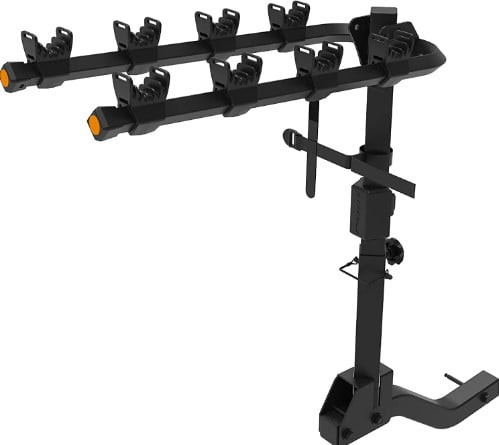
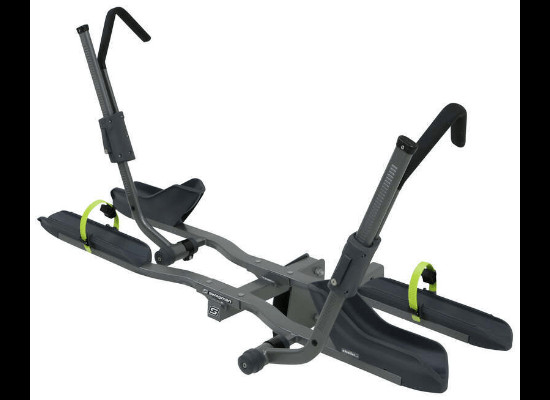
Swagman RV-approved Bike Rack “Dispatch” Model
For our RV bike rack, we selected the Swagman RV-approved bike rack “Dispatch” model, designed for two standard bikes. At the time of purchase, we didn’t own e-bikes, and the Dispatch model was a slightly more economical option compared to e-bike specific racks.
 Swagman Dispatch Bike Rack for standard bikes
The Swagman Dispatch Bike Rack, a robust and RV-approved model designed for carrying two standard bicycles.
Swagman RV-approved bike rack “Dispatch” model.
Recommended Swagman RV-approved Bike Rack Alternatives
Swagman RV-approved bike rack “E-Spec” Model for E-bikes
For RVers with e-bikes, the Swagman RV-approved bike rack “E-Spec” model is an even more robust option. While more expensive than the Dispatch, if choosing between the E-Spec and the Escapee model (below), I would lean towards the Escapee due to its non-frame contact design.
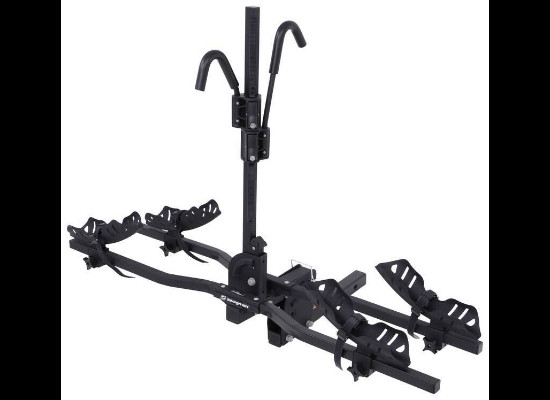 Swagman E-Spec Bike Rack for Electric Bikes
The Swagman E-Spec Bike Rack, engineered for the heavier weight and specific needs of electric bicycles in RV applications.
[Swagman RV-approved bike rack “E-Spec” model.](https://www.swagman.net/collections/hitch-mount-racks/products/espec-rv-approved)
Swagman RV-Approved Bike Rack “Escapee” Model with Non-Contact Design
The Swagman RV-approved bike rack “Escapee” model is another excellent, albeit pricier, choice for RVers. Its key advantage is the non-contact design, where vertical braces and hooks secure the bikes by the wheels, making it suitable for carbon-frame bicycles.
 Swagman Escapee Bike Rack with non-frame contact
The Swagman Escapee Bike Rack, featuring a non-contact wheel-holding design ideal for protecting bicycle frames, especially carbon frames.
[Swagman RV-approved bike rack “Escapee” model](https://www.swagman.net/collections/hitch-mount-racks/products/escapee)
In Conclusion: Invest in a Reliable RV Bike Rack
Even if you don’t own an RV, the robust construction of Swagman RV-approved bike racks makes them a worthwhile investment for any cyclist seeking a dependable bike transportation solution. Witnessing instances of bikes detaching or being damaged during travel reinforces my confidence in our decision to choose Swagman. For peace of mind and the safety of your bikes, opting for a high-quality, RV-approved bike rack is a smart choice.
Subscribe to Our Journey!
Stay updated on our RV adventures and gear reviews by joining our email list. We send out weekly updates and valuable content. Subscribe here: Subscribe
Transparency Regarding Our Links
Our blog operates without income, ensuring our independence and commitment to providing honest information. We do not receive commissions or engage in paid endorsements. We offer recommendations based on our genuine experiences and preferences. The links provided are solely for reader convenience and quick access to product information.
External Links
Swagman RV-approved bike rack “Dispatch” model.
[Swagman RV-approved bike rack “E-Spec” model.](https://www.swagman.net/collections/hitch-mount-racks/products/espec-rv-approved)
[Swagman RV-approved bike rack “Escapee” model](https://www.swagman.net/collections/hitch-mount-racks/products/escapee)
Swagman RV-Approved bike rack “Traveler XC2” model
Swagman RV-Approved bike rack “Nomad” model
Roadmaster Falcon All Terrain Tow Bar
Roadmaster dual hitch receiver 10″ Drop/Rise
Subaru Forester 2-Inch Receiver
RV Life, Do-It-Yourself-RV-Bike-Rack
How to tow – what we tow
Commenting Policy
We appreciate your comments and value your engagement. To protect our blog from spam and maintain relevant discussions, comment moderation is in place. Each comment is personally reviewed and published to ensure blog security and topic relevance. Please be aware that there may be a delay in your comment appearing after submission. We look forward to hearing from you and appreciate your understanding.