Biker shorts are a fantastic staple for warm weather and active lifestyles. They offer comfort and flexibility, making them perfect for workouts, casual outings, or just lounging around. But let’s face it, standard biker shorts often lack a crucial feature: pockets. The struggle to carry your phone, keys, or small essentials is real!
What if you could have the sleek style of biker shorts with the practicality of pockets? Good news – you absolutely can! This tutorial will guide you through easily adding pockets to the free Erinus Biker Short pattern by Mood Fabrics. Yes, you heard right, FREE! Transform basic biker shorts into super functional Biker Shorts With Pockets in just a few simple steps. It’s so straightforward, you’ll want to add pockets to all your makes!
Ready to ditch the pocketless dilemma? Let’s get sewing!
Supplies You’ll Need
Before we dive into adding pockets, gather your materials. For this project, you will need:
- Erinus Shorts pattern from Mood Fabrics (Free download!)
- Tracing paper
- Pen or pencil
- Ruler
- Scissors
- 1 yard of double knit fabric (you can also use two contrasting fabrics for a fun look)
For my version, I repurposed a knit maxi skirt – giving old fabric new life! Scraps work great for the pocket accents and waistband too. Even an old t-shirt can be used if you’re looking for budget-friendly options.
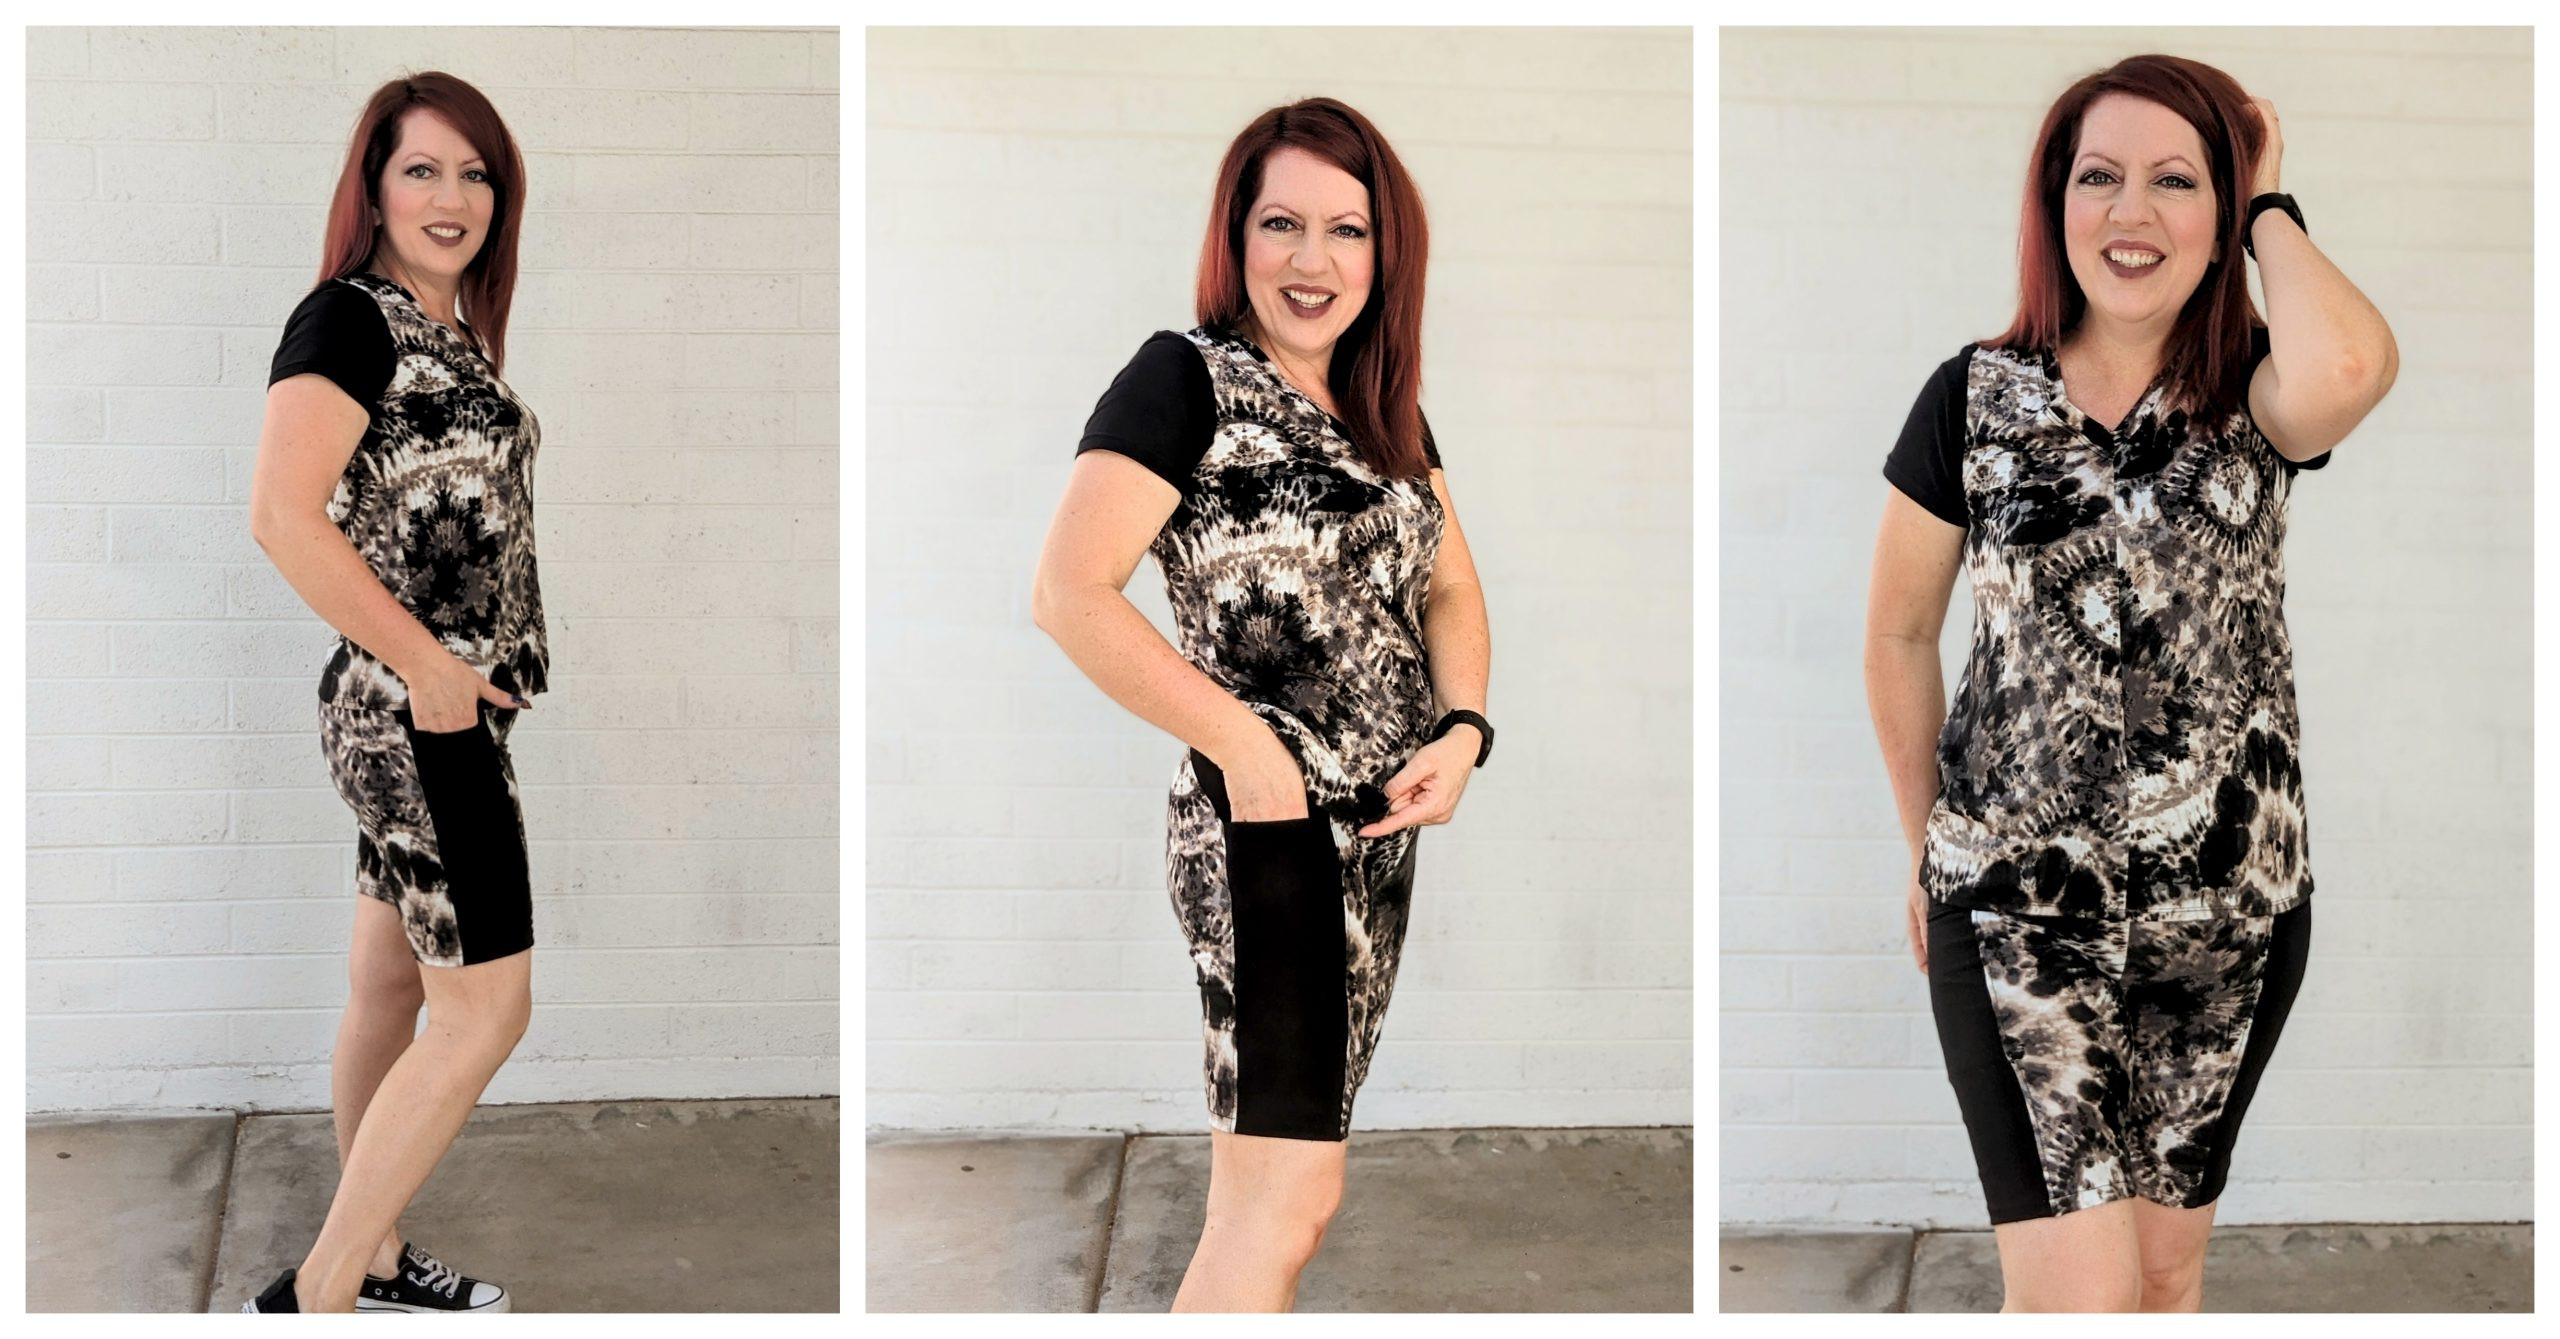
 Close-up of the finished biker shorts and matching top, showcasing the side pocket.
Hacking the Side Panel: Creating Your Pocket Pieces
The secret to adding pockets to these biker shorts lies in modifying the side panel piece of the pattern. We’ll create three new pattern pieces that layer together to form a functional and stylish pocket.
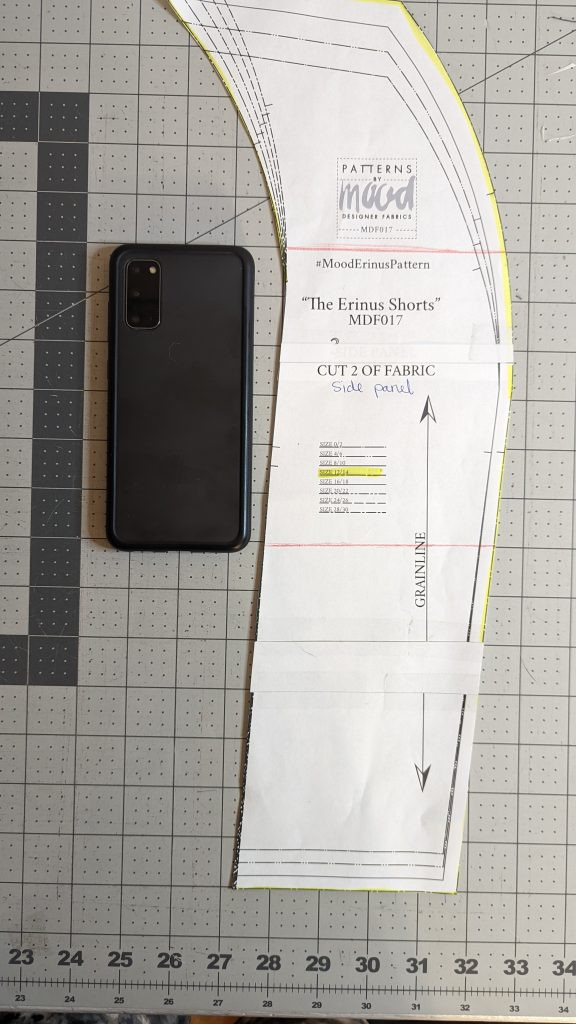
 Fabric pieces and pattern pieces laid out on a table, ready for sewing.
You’ll be drafting these pieces directly from the original side panel pattern piece. Make sure to transfer all markings and label everything clearly as you go – this will save you confusion later! I’ve named mine “pocket bag,” “pocket liner,” and “pocket outside,” but feel free to use names that make sense to you.
 Three pattern pieces labeled pocket bag, pocket liner, and pocket outside, laid out to show layering.
1. Pocket Bag
The “pocket bag” is the main part of the pocket, designed to hold your phone or other items securely.
- Take your side panel pattern piece.
- Measure 5 inches down from the top edge of the side panel and draw a horizontal line. This marks the top opening of your pocket.
- From that line, measure down another 6 inches and draw a second horizontal line. This determines the depth of the pocket.
- Trace the side panel pattern piece between these two horizontal lines.
- Add a ⅜” seam allowance to both the top and bottom of this traced piece.
- Mark small triangles at the ⅜” seam allowance points to help with alignment during sewing.
- Label this piece “pocket bag”.
 Close up image showing the pocket bag pattern piece being created with measurements and markings.
2. Pocket Outside Panel
The “pocket outside panel” forms the visible exterior part of the pocket that blends with the side panel of the biker shorts.
- Take your side panel pattern piece again.
- Trace from the top red line you drew for the pocket bag down to the bottom of the original side panel piece.
- Add a ⅜” seam allowance to the top edge of this traced piece.
- Mark a triangle at the ⅜” seam allowance point.
- Label this piece “pocket outside”.
 Image showing the pocket outside panel pattern piece being created, highlighting the traced section and seam allowance.
3. Pocket Liner
The “pocket liner” piece provides a clean finish to the inside of the pocket and adds a layer of reinforcement.
- Take your side panel pattern piece one last time.
- Trace from the top of the original side panel down to the second red line you drew for the pocket bag (the lower line).
- Add a ⅜” seam allowance to the bottom edge of this traced piece.
- Mark a triangle at the ⅜” seam allowance point.
- Label this piece “pocket liner”.
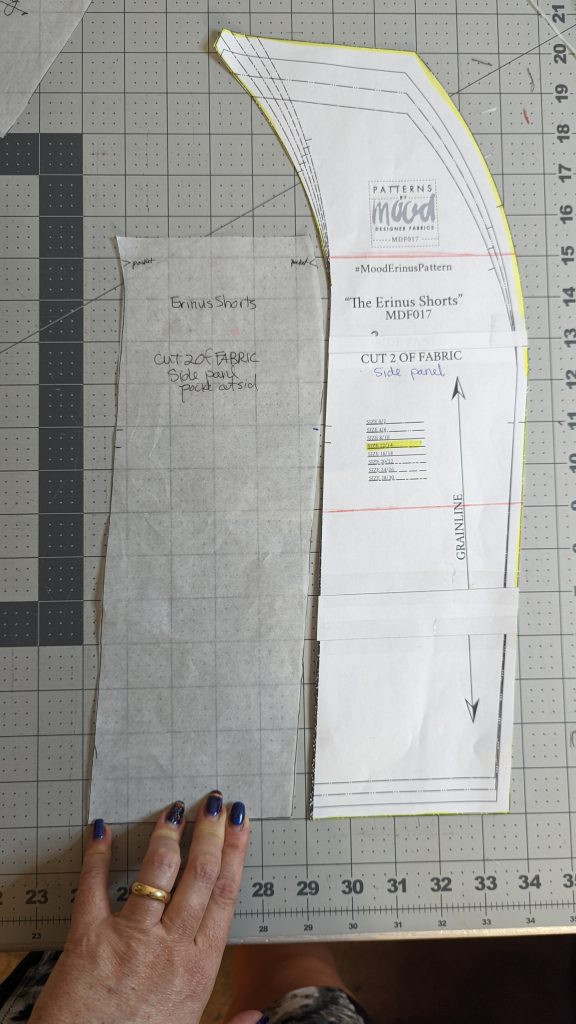 Image illustrating the creation of the pocket liner pattern piece, showing the traced area and seam allowance at the bottom.
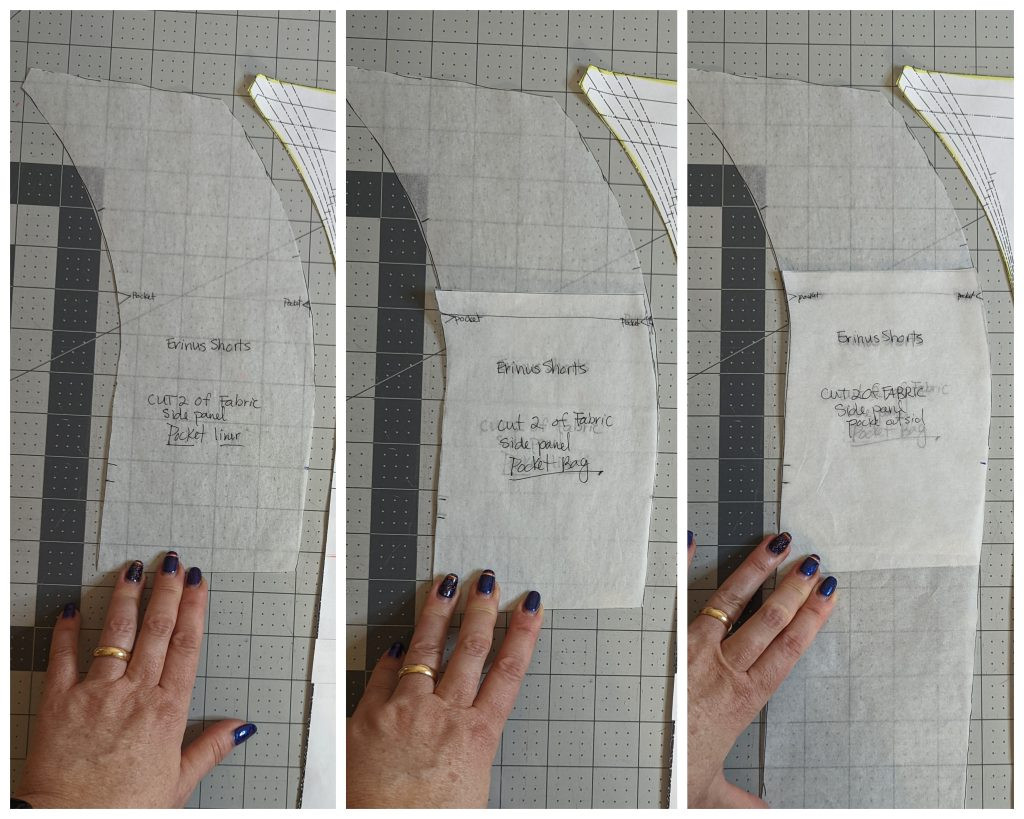
Once cut out, these three pieces will layer together in this order: Pocket liner, then pocket bag, and finally pocket outside on top.
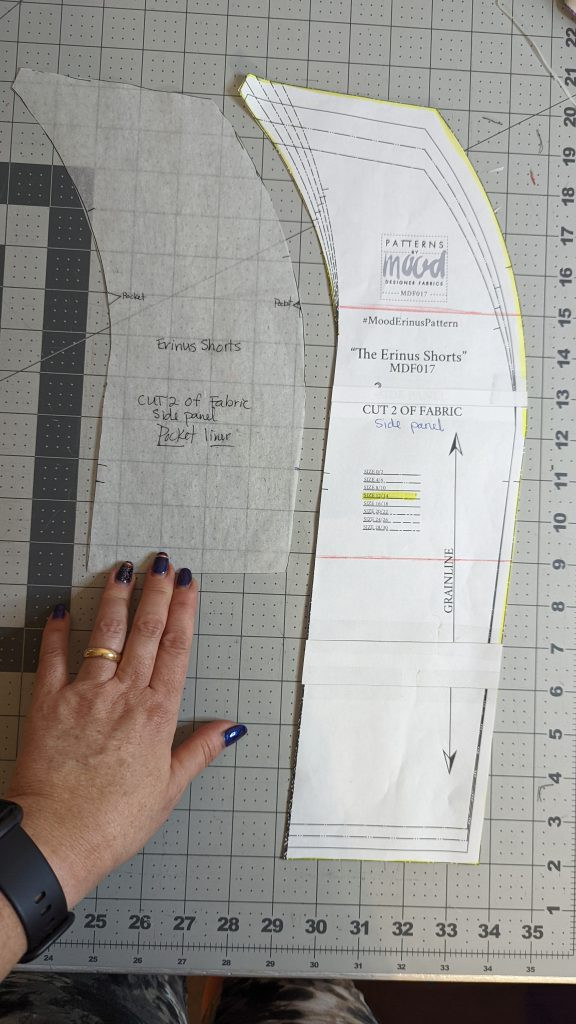 Diagram showing the layering of the pocket liner, pocket bag, and pocket outside pieces.
Assembling Your Pocket Side Panel
Now for the fun part – putting the pocket together!
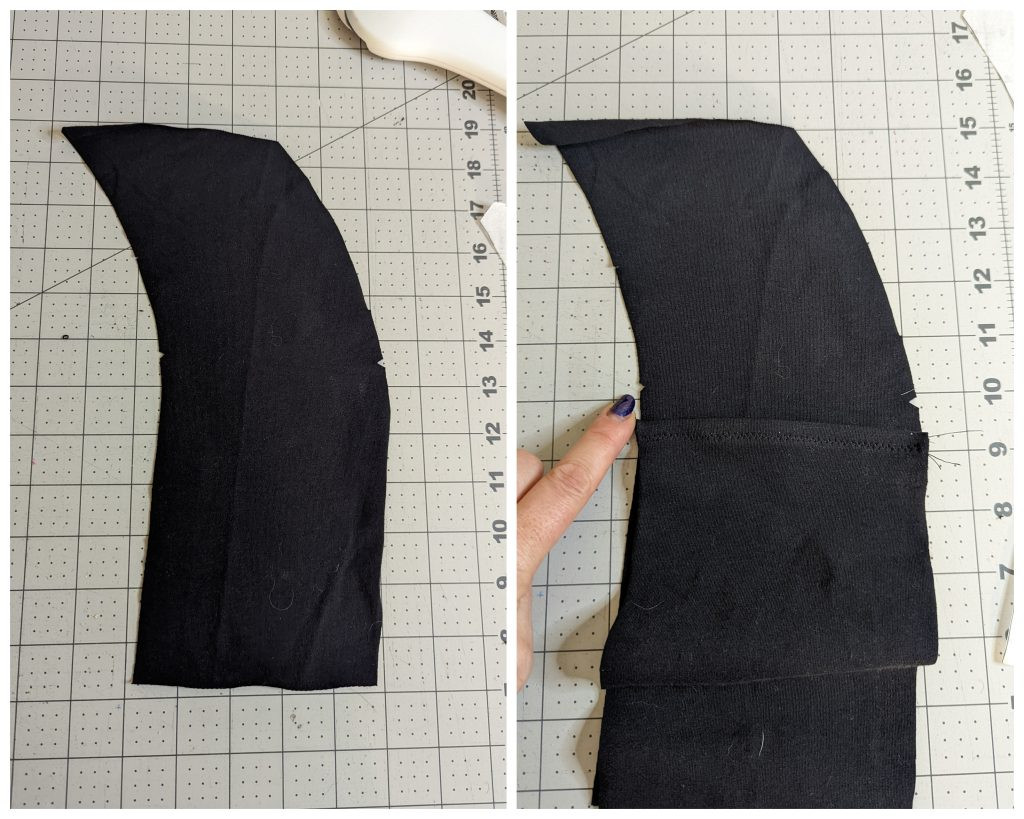
- Place the “pocket outside” and “pocket bag” pieces wrong sides together. Align the top edges – they should match perfectly. Notice the pocket bag is shorter; this is correct!
- Use a stretch stitch to sew across the top edge, securing the pocket bag to the pocket outside.
- Flip the pieces right sides out and do a zig-zag stitch along the same top edge. This helps flatten the seam and gives a neat finish to the pocket opening.
 Step-by-step photos showing the assembly of the pocket pieces, including stitching the top edges.
- Take the “pocket liner” piece and place the assembled “pocket outside” and “pocket bag” on top of it. Align the triangle markings you made earlier. The pocket bag will now be sandwiched between the pocket liner and the pocket outside. The pocket liner and pocket bag should be the same length.
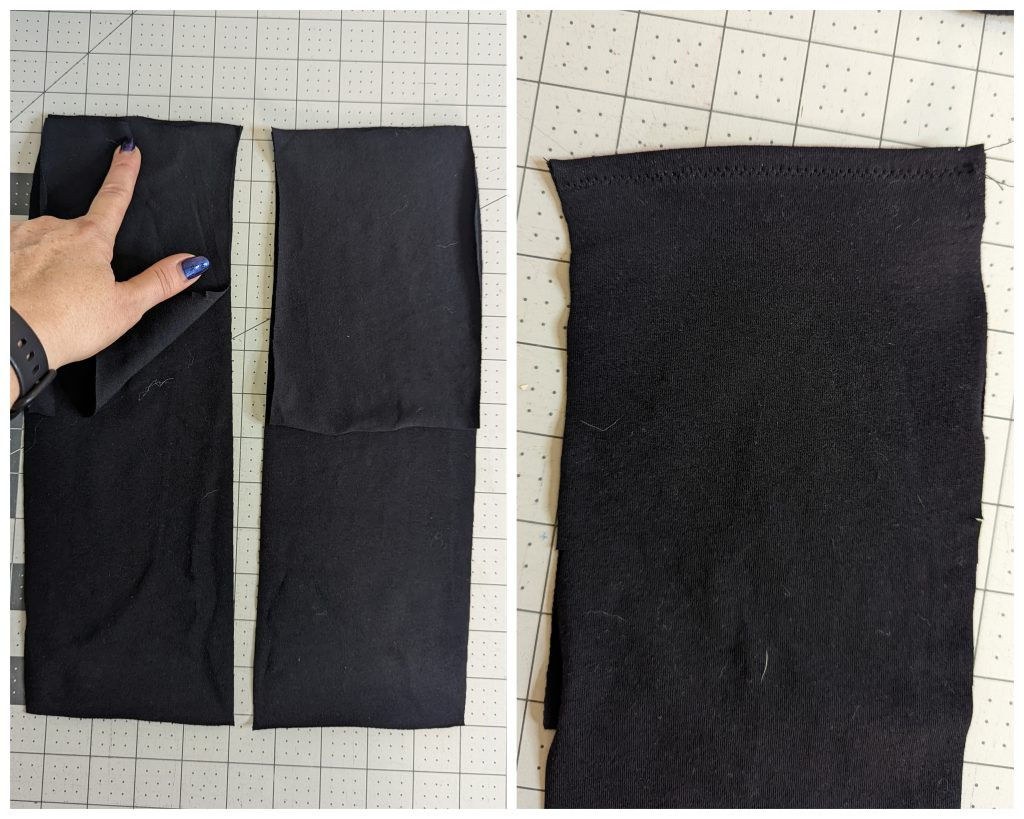 Image showing the pocket liner being placed underneath the assembled pocket bag and outside pieces, aligning the triangle markings.
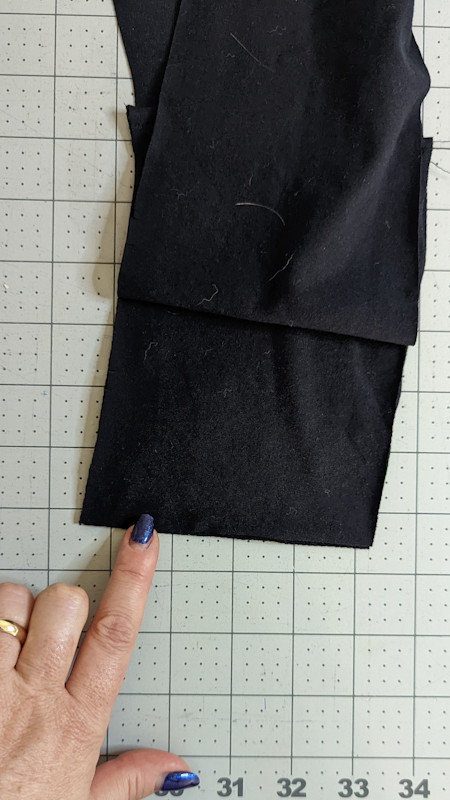
- Carefully lift the side panel pieces and sew across the bottom edge of the pocket liner and pocket bag, attaching them together.
- Pin along both sides of the pocket to secure all layers together. Use a basting stitch down both sides of the pocket panel. This keeps everything in place while you sew it into the rest of the biker shorts.
 Photos showing the stitching and basting steps for securing the pocket side panel.
Congratulations! You’ve created a side panel with a functional and discreet pocket, ready to be incorporated into your biker shorts.
 Finished pocket side panel, showcasing the completed pocket construction.
Sewing the Rest of Your Biker Shorts
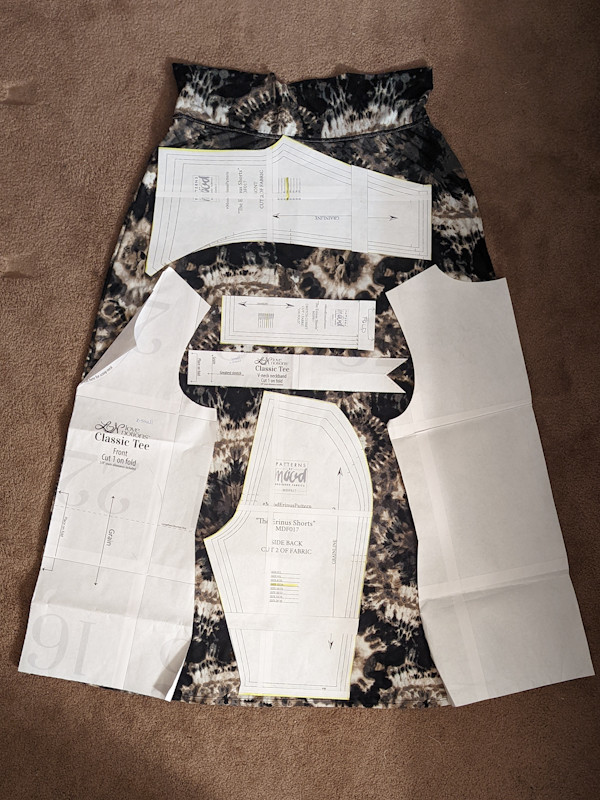
With your pocket side panels complete, you can now proceed with sewing the rest of the Erinus Biker Shorts pattern as instructed. The pattern pieces include the side back, front, and gusset. Remember to adjust the gusset piece if it’s meant to be cut on the fold to account for seam allowances.
For the waistband, I used black scraps, but you can use any coordinating knit fabric.
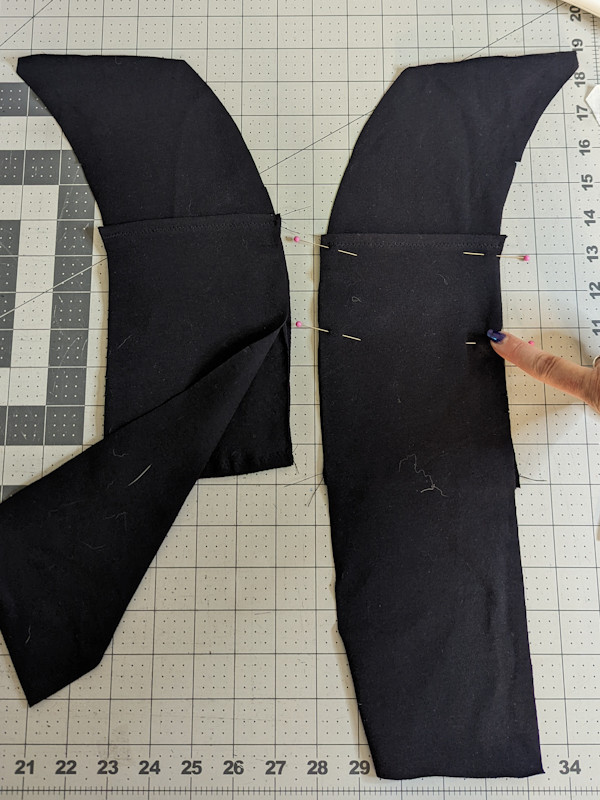 Image showing the cut out pieces of the biker shorts and top, ready for assembly.
Attaching the pocket side panel is the same as attaching the original side panel piece. Simply follow the pattern instructions to sew the side panel to the front and back pieces of the shorts.
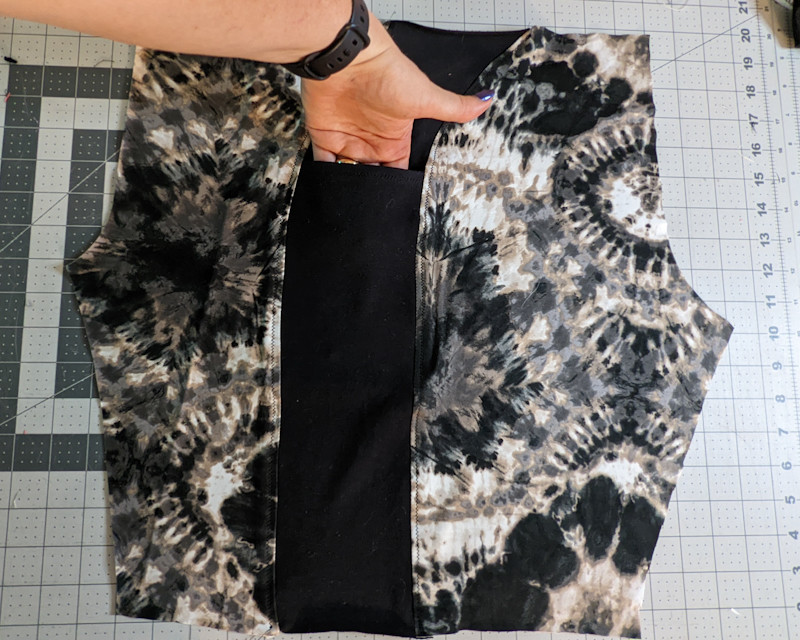 Image showing the side panel with pocket attached to the other biker shorts pieces.
Bonus Tip for Extra Comfort: I highly recommend adding a narrow elastic to the waistband of your biker shorts. Sewing a ½” elastic to the inside center of the waistband, and then folding the waistband over, creates a comfortable and secure fit that prevents slipping. This little trick makes a big difference!
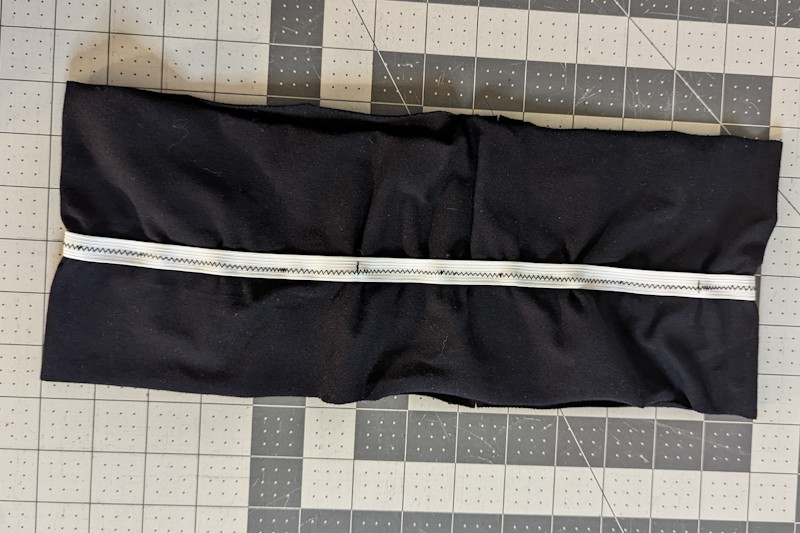 Close up photo demonstrating how to sew elastic into the waistband of the biker shorts for added comfort.
You’ve Got Pockets!
Once you’ve assembled the shorts and added the waistband, your biker shorts with pockets are complete! Imagine the freedom of having pockets on your comfy biker shorts – perfect for workouts, errands, or just relaxing.
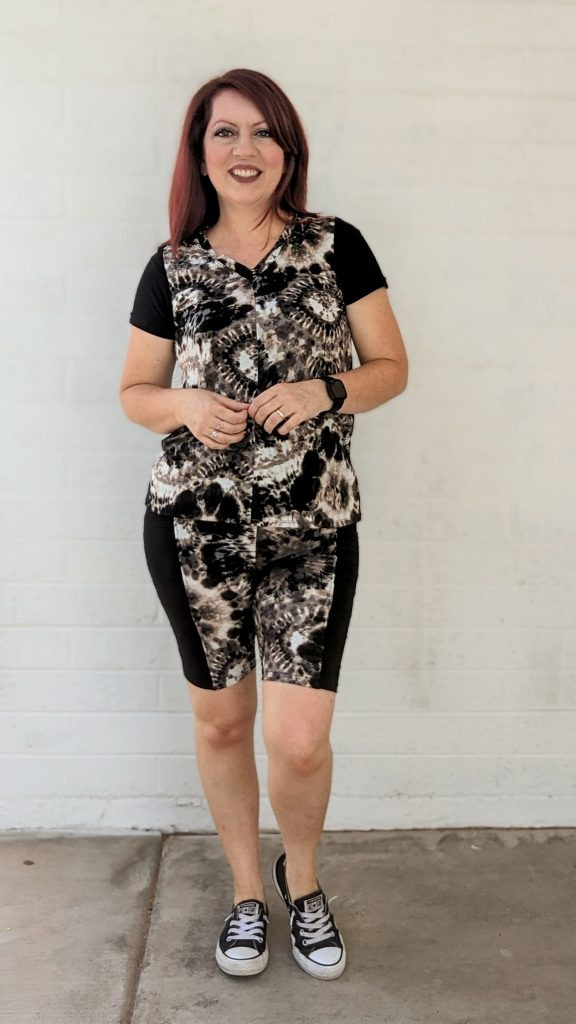
 Full shot of the finished biker shorts and top outfit, modeled and showcasing the pocket detail.
Now you can confidently make your own functional and fashionable biker shorts with pockets. Download the FREE Erinus Shorts pattern from Mood Fabrics and get started today! Happy sewing!
For a complete outfit, consider pairing your new biker shorts with a matching top using the Classic Tee by Love Notions.
 Image of the Classic Tee sewing pattern cover.