
Restoring a vintage arcade cabinet is a labor of love, a journey back in time to when pixelated graphics and joystick controls reigned supreme. Recently, I undertook the rewarding task of reviving a classic arcade machine, aiming to bring it back to its former glory and, most importantly, to enjoy timeless games like Donkey Kong Bike (and other classics!) on original hardware. This project involved tackling everything from deep scratches on the joystick ball to rust on metal components and even a full monitor overhaul. Let’s dive into the process of breathing new life into this piece of gaming history.
The first area of focus was the joystick. Years of enthusiastic gameplay had left their mark, with some significant scratches marring the surface of the ball. To address this, I turned to Novus Plastic Polish, using Novus 3 for the deeper scratches and following up with Novus 2 for a finer finish. While not every scratch vanished completely, the improvement was substantial.
 Before cleaning the arcade joystick ball with deep scratches.
 After polishing the arcade joystick ball, showing significant scratch reduction and improved clarity.
Next on the list was rust removal. The upper marquee retainer, top bezel bracket, and lower bezel retainer all showed signs of corrosion. My method of choice for tackling rust is a white vinegar bath. Submerging these metal parts overnight in white vinegar effectively loosened the rust. After a thorough rinse, I sanded away the remaining rust and old paint before applying a fresh coat of Rust-Oleum Universal satin black paint + primer. This combination provides both protection and a clean, classic look.
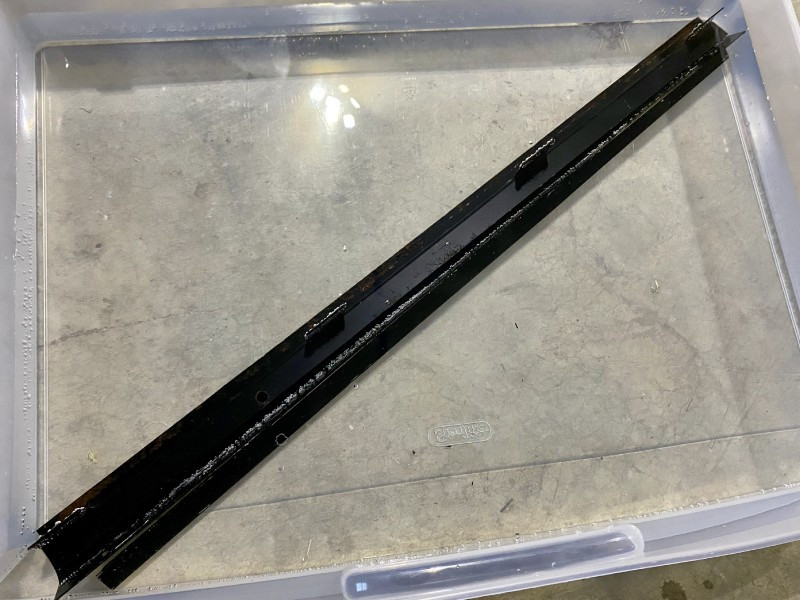 Arcade cabinet metal parts submerged in a white vinegar bath to remove rust and old paint.
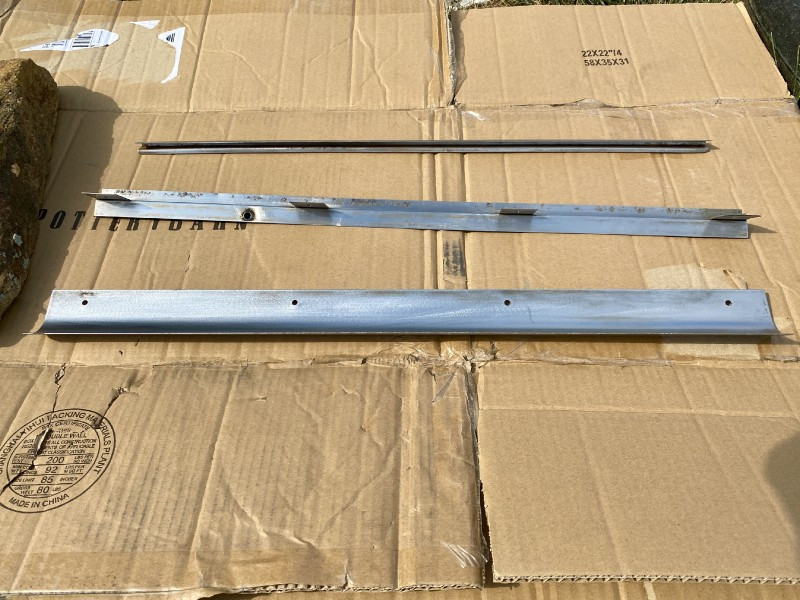 Arcade cabinet metal parts sanded and prepped, ready for a fresh coat of satin black paint.
With the physical cleaning and rust removal underway, I shifted my attention to the heart of the arcade experience: the monitor. In a previous step (documented elsewhere), I had carefully washed the 20-EZ monitor. After allowing a full five days for complete drying, I cautiously plugged it back in. Relief washed over me as the screen flickered to life, functioning perfectly post-wash, just as it had before its bath.
Emboldened by the monitor’s survival, I moved onto a more in-depth monitor service. Two evenings were dedicated to recapping the chassis and audio board, a crucial step in restoring vintage electronics. Following the recap, I replaced all the potentiometers (pots), implemented the well-known “Nintendo hum fix,” and carefully dialed in all the adjustments. During this process, a few anomalies caught my eye.
Several metal oxide resistors, particularly R253 on the neck board and R240, appeared to have damaged casings. Despite their rough appearance, testing with a multimeter indicated they were still within spec.
 Close-up of a metal oxide resistor (R253) on an arcade monitor neck board showing signs of casing damage.
Capacitor replacement revealed further interesting points. Several capacitors, including C303, C410, and C467 on the main chassis, and C372 and C374 on the audio board, showed signs of potential failure, like discoloration. Intriguingly, capacitor C407 had an incorrect 4.7 uF value installed, despite the manual specifying 10 uF. Research revealed that JamBurglar had encountered a similar issue with an odd capacitor value at C407 in an early model 20-EZ monitor, further suggesting variations in early production runs.
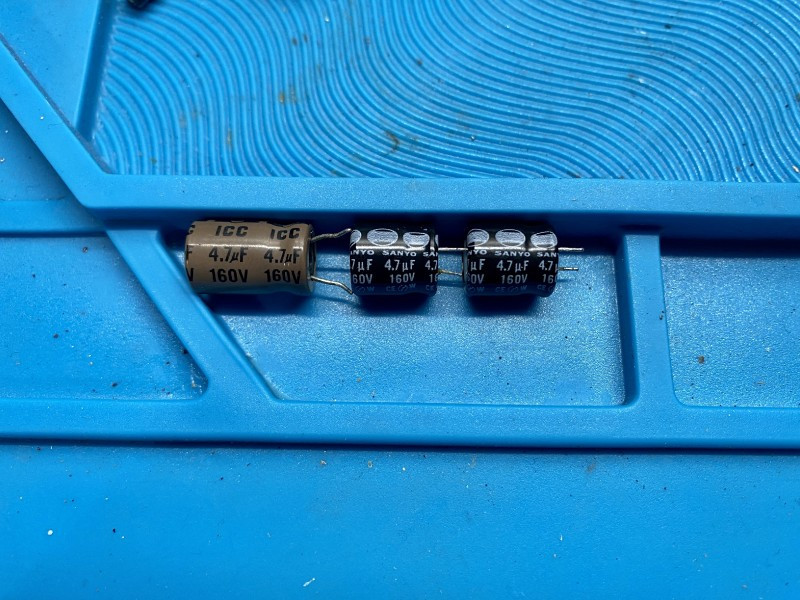 Close-up of capacitor C407 showing an incorrect 4.7uF value, contrary to the 10uF specification in the service manual.
To address this, I replaced C407 with a correct 10 uF 250 V capacitor from the Arcade Parts and Repair cap kit. Moving on to the potentiometer replacement, I used the Sanyo 20EZ Neck PCB Trimmer Pot Kit from Arcade Parts and Repair. However, I noticed discrepancies between the kit instructions and my neck board’s labeling for VR251, VR252, and VR253 (Bias pots), as well as VR255 (Drive pot). My physical board and the 20-EZ manual aligned, but differed from the kit’s documentation. Despite these labeling differences and a noted discrepancy in the resistance value for the drive pots (kit instructions said 500 ohms, manual and board showed 200 ohms), the installation of the pot kit proceeded smoothly.
I also installed most of security0001’s 20EZ Remote PCB Trimmer Pot Kit, with a slight modification. Instead of using the 50K ohm pot intended for the volume control at VR355, I repurposed it for VR371 on the audio board as part of the “hum fix”, relocating the ceramic capacitor to C379. Additionally, I replaced the B+ adjustment pot at VR601 and the sub-brightness pot at VR301, and intended to replace the horizontal hold pot at VR451, but an ordering mishap meant the replacement part was incompatible. Fortunately, after testing, the original horizontal hold pot proved to be functional. Finally, the B+ filter capacitor was replaced as a preventative measure.
With the monitor chassis reassembled, it was time for testing. Initially, powering up the monitor resulted in a garbled display, suggesting a sync issue. My initial concern was the horizontal hold pot, but before further troubleshooting, I checked the B+ voltage. Using my new 12″ Non-Conductive Fiberglass Monitor Adjustment Tool and adjusting the new B+ pot, I successfully locked the voltage at a stable 108.0V.
While the B+ adjustment didn’t resolve the sync issue, it turned out to be a simple fix. Fine-tuning the original horizontal hold pot and then adjusting the vertical hold pot on the remote board quickly brought the image into sync.
 Arcade monitor displaying a garbled image before sync adjustments were made.
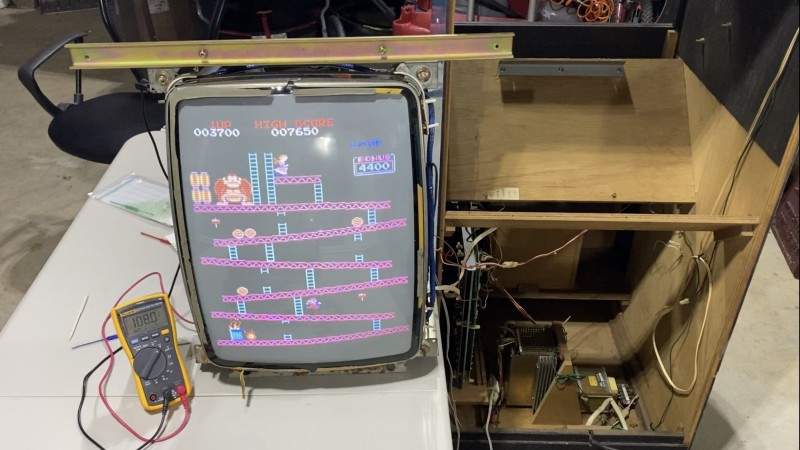
After these adjustments, a few more minutes were spent dialing in the focus, color, brightness, and image size and position. With the monitor performing beautifully, it was time to reinstall it in the cabinet and experience the fruits of my labor. And what better way to test a restored arcade machine than with a classic gaming session?
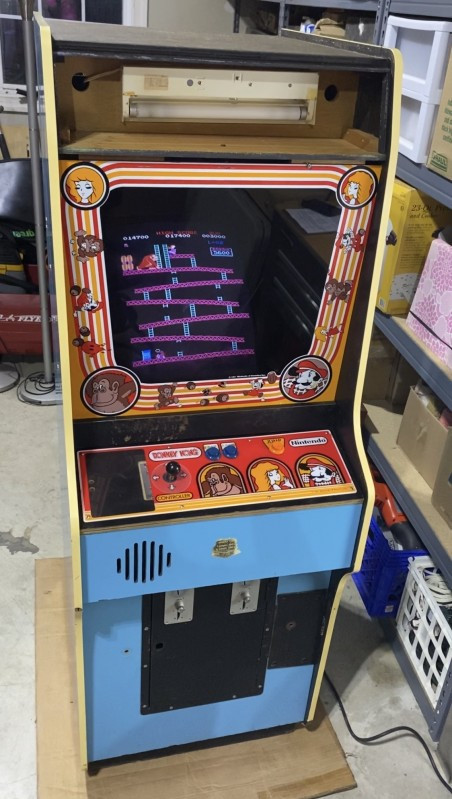 Donkey Kong arcade game displayed on the restored monitor, showcasing vibrant colors and sharp image quality.
Firing up Donkey Kong (and imagining the thrill of a Donkey Kong Bike game, if only it existed!) on the revitalized cabinet was incredibly satisfying. While this restoration project has made significant progress, there are still a few items on the to-do list. The joystick spring, salvaged from a rusted Super Bike joystick, is functional but needs replacement. However, for now, it’s time to enjoy the classic arcade experience and continue the journey of bringing this cabinet back to its peak performance, ready for countless more hours of retro gaming fun, perhaps even dreaming of that elusive Donkey Kong Bike adventure!