Like any hardworking component on your bicycle, the chain endures significant wear and tear. Many cyclists are often surprised to learn that a bike chain is a consumable part, not designed to last forever. Despite being constructed from hardened steel, the constant friction, stretching, and exposure to grime will eventually necessitate its replacement. Ignoring chain wear can lead to poor shifting, drivetrain damage, and even chain breakage at inopportune moments. Understanding when and how to change your bike chain is a crucial skill for any cyclist looking to maintain their bike’s performance and longevity.
To determine if your chain needs replacing, investing in a chain checker tool is highly recommended. This simple and inexpensive tool accurately measures chain stretch, removing the guesswork and preventing premature wear to your cassette and chainrings. Replacing your chain at home is a straightforward process that can save you money and keep your bike running smoothly. This guide will walk you through each step of How To Change A Bike Chain effectively.
- Time Required: 15-20 minutes
- Cost Savings: Approximately $10-15 USD compared to shop service
- Tools You’ll Need: New Bike Chain (compatible with your bike’s speed), Chain Tool, Cleaning Supplies (degreaser, brushes, rags – optional but recommended)
Important Tip: Ensure your new chain is compatible with the number of gears (speeds) on your bike. While most chain brands are cross-compatible with Shimano and SRAM groupsets (except Campagnolo which often requires specific chains), always double-check with your local bike shop or the manufacturer’s specifications to confirm compatibility.
Step-by-Step Guide to Replacing Your Bike Chain
1. Removing the Old Bike Chain
First, we need to remove the worn-out chain. The removal process depends on the type of chain you have. Some chains utilize a quick link, a two-piece connector that can be easily separated, usually by squeezing the plates together and pushing inwards.
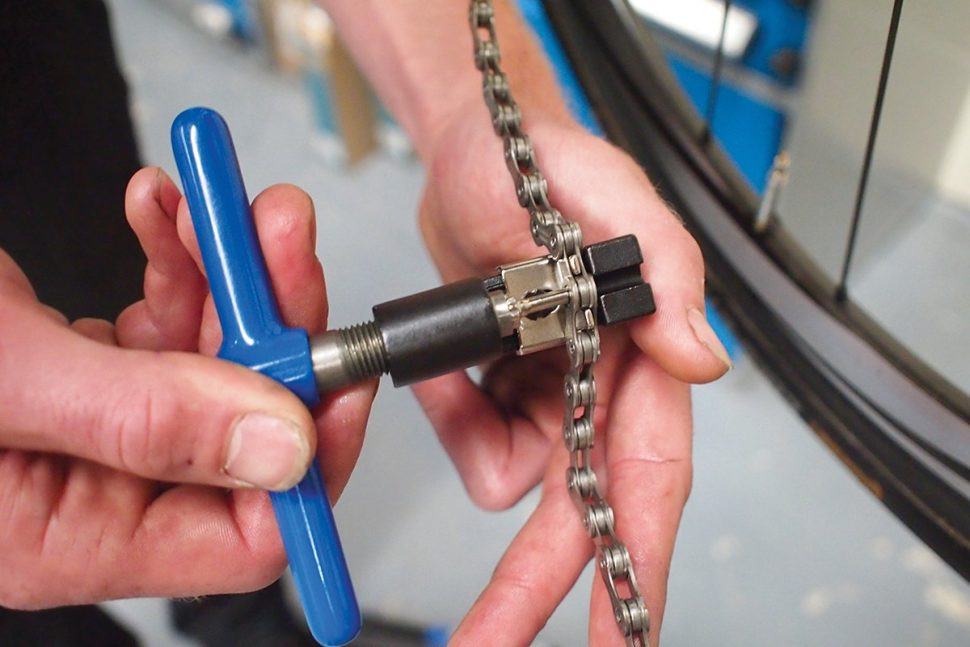 Removing old bike chain with chain tool.
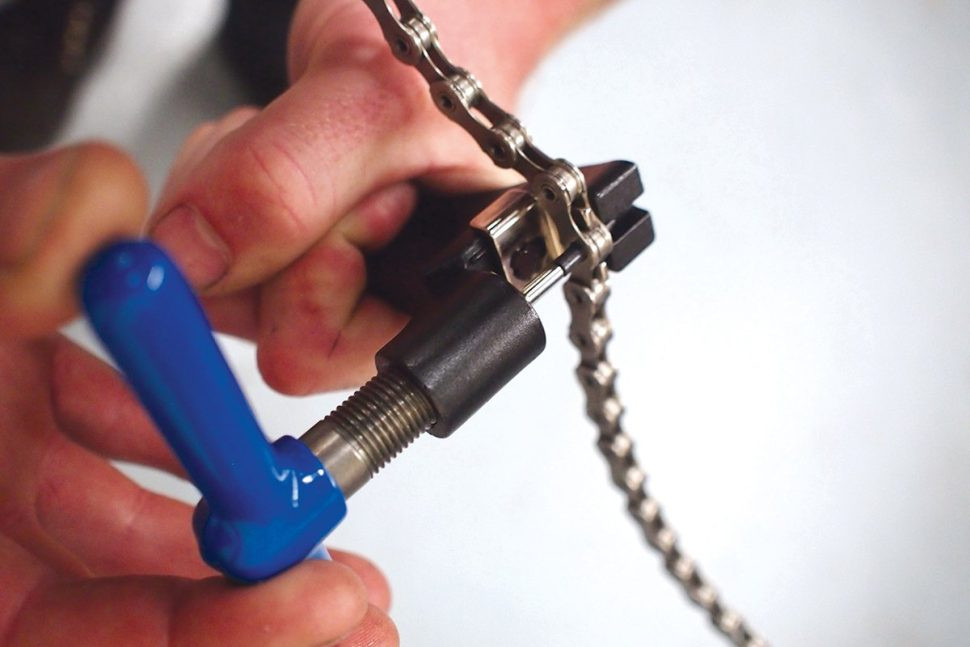
If your chain, like many Shimano chains, doesn’t have a quick link, you’ll need to use a chain tool. Position the chain in the chain tool so that the pin of the tool aligns with a chain pin. Turn the handle of the tool to push the chain pin outwards, effectively breaking the chain. You only need to push the pin partway out to separate the chain links.
2. Cleaning and Inspecting the Drivetrain
With the old chain removed, now is the perfect opportunity to clean your cassette and chainrings. Accumulated dirt and grime on these components can accelerate wear on your new chain and negatively impact shifting performance.
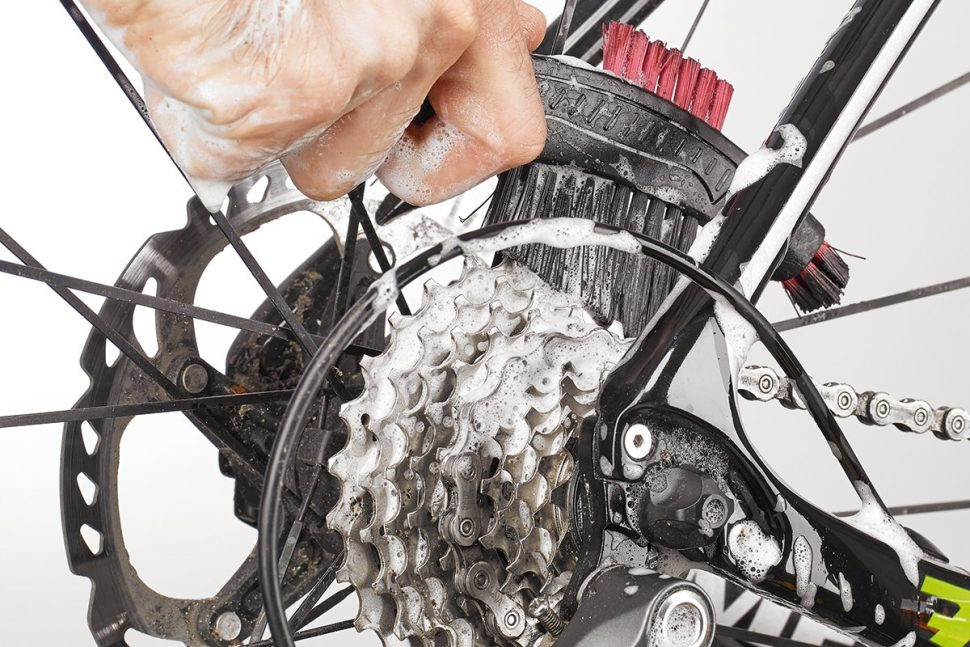 Cleaning bike cassette with degreaser.
Inspect the teeth of your chainrings and cassette for wear. Healthy teeth should have a symmetrical, even profile. Worn teeth often develop a pointed, asymmetrical shape, sometimes described as “shark-toothed,” as the chain wears into them. If your cassette or chainrings show significant wear, consider replacing them along with the chain for optimal drivetrain performance.
Regardless of wear, thoroughly clean the cassette and chainrings using a degreaser and brushes. Ensure all dirt and old lubricant are removed. A clean drivetrain will prolong the life of your new chain and ensure smooth, efficient shifting.
3. Threading the New Bike Chain
Before installing the new chain, shift your bike’s gears to the smallest sprocket at the rear and the smallest chainring at the front. This position provides the least tension and makes chain threading easier.
Begin threading the new chain through the front derailleur cage. Then, guide it over the rear cassette and around the upper jockey wheel of the rear derailleur. Continue threading the chain through the derailleur cage, making sure it passes inside the guide plate, and then around the lower jockey wheel.
4. Determining the Correct Chain Length
An accurately sized chain is crucial for proper shifting and preventing damage to your drivetrain. New chains are typically longer than needed and must be shortened to the correct length for your bike.
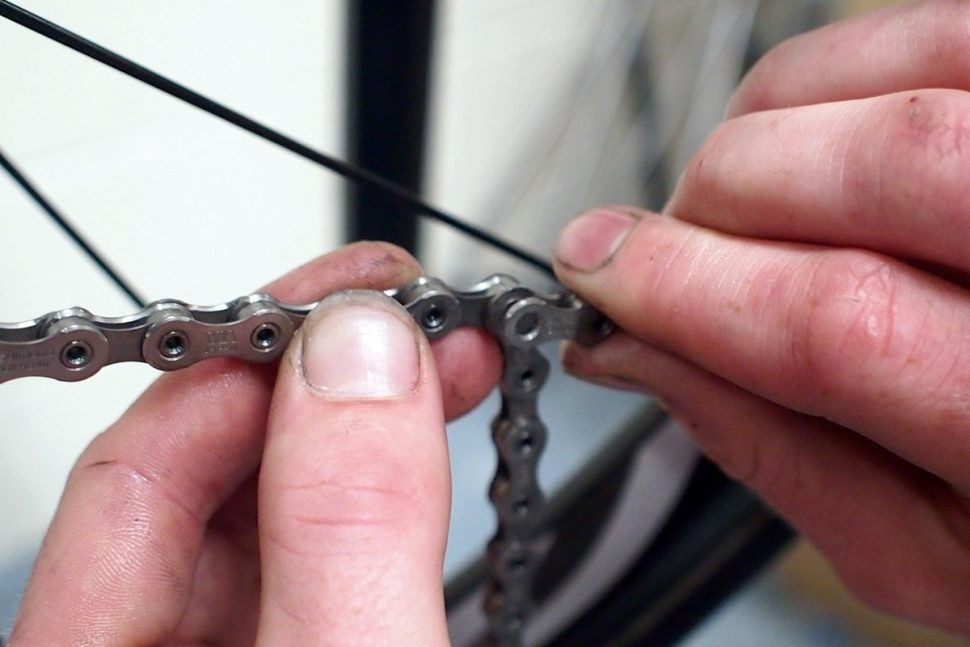 Measuring bike chain length for correct sizing.
With the chain threaded through the derailleurs and positioned on the smallest sprocket and chainring, bring the two ends of the chain together below the chainstay. The correct length is the longest possible length that still maintains some tension on the rear derailleur in this small chainring/small sprocket combination, preventing the chain from dragging or being excessively slack.
When determining the length, remember that you will be joining an inner link to an outer link to create a closed loop. This pairing is necessary for proper chain connection.
5. Cutting the New Bike Chain to Length
Once you’ve determined the correct link to remove for proper chain length, it’s time to use the chain tool again to shorten the chain.
 Cutting bike chain to size with chain tool.
Shimano often recommends orienting the open end of the chain backward. Place the link you intend to remove into the chain tool. Carefully align the tool pin with the chain pin and turn the handle to push the pin out. Be sure everything is aligned correctly to avoid damaging the chain tool or the chain. Push the pin out just far enough to separate the chain.
6. Inserting the Connecting Pin or Quick Link
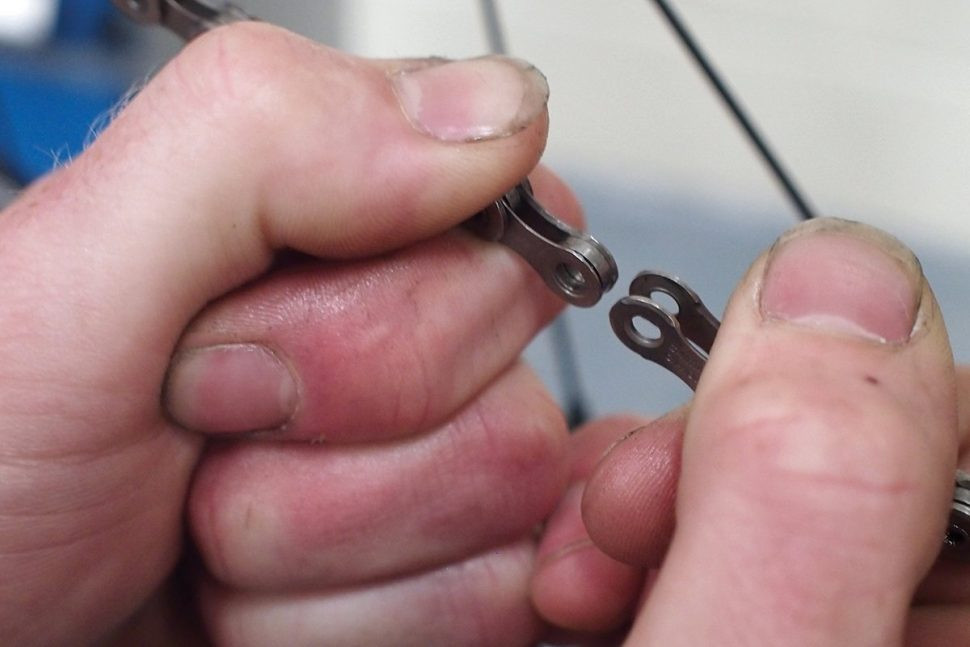
Now you are ready to join the two ends of the new chain together. Most new chains come with either a connecting pin or a quick link for this purpose.
 Inserting chain connecting pin for bike chain.
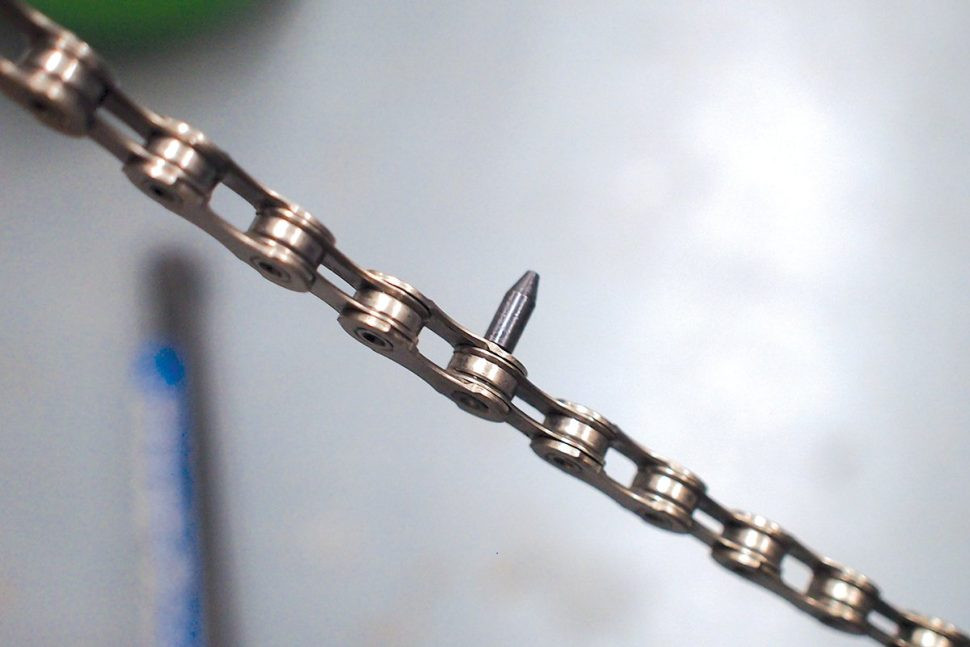
Using a Connecting Pin: Locate the special connecting pin that came with your new chain. Align the two open ends of the chain and insert the pointed end of the connecting pin from the drive side of the bike, pushing it through the links to hold them together temporarily. The pin should stay in place without needing to be held.
Using a Quick Link: If your chain uses a quick link, simply align the two ends of the chain and insert the two halves of the quick link into each end.
7. Pushing the Connecting Pin Home or Securing Quick Link
The final step in joining the chain is to fully insert the connecting pin or secure the quick link.
 Pushing bike chain pin home with chain tool.
Connecting Pin: Place the chain link with the partially inserted connecting pin into the chain tool again. Slowly and carefully turn the handle to push the pin fully into place. As the pin becomes flush with the outer plate of the chain link, the handle will become easier to turn. Avoid pushing the pin out too far. The end of the pin should be exactly flush with the outside of the chain plate. Once flush, remove the chain tool.
Quick Link: For quick links, you can usually secure them by applying hand pressure or by positioning the quick link at the top of the chain and applying the rear brake firmly while pushing down on the pedal, forcing the link to snap into place. You may hear a click when it is properly seated.
8. Final Check and Ride
Congratulations, you’ve successfully changed your bike chain! Now, perform a final check to ensure the newly joined link moves freely and smoothly.
 Completed bike chain replacement, ready to ride.
If the link appears stiff, and the connecting pin isn’t perfectly flush, re-attach the chain tool and give the pin a very slight push to adjust. If it looks correct but is still stiff, try gently flexing the chain horizontally at the joined link to loosen it up.
If you used a connecting pin with a breakaway end, snap off the excess length at the back of the pin using the back of the chain tool or pliers.
After confirming the chain moves freely, test your shifting through all gears to ensure everything is working smoothly. If shifting is hesitant or noisy, double-check your chain installation and derailleur alignment. Otherwise, you’re ready to enjoy smoother, more efficient rides with your new bike chain!
Bike maintenance