Bike ownership often follows the n+1 rule – the number of bikes you need is always one more than you currently own. As your collection grows, finding efficient storage solutions becomes crucial. Like many cycling enthusiasts, I’ve long been a collector, constantly seeking better ways to manage my ever-expanding fleet. Recently, after moving, I faced the challenge of completely redesigning my bike storage. Exploring various options, I consistently returned to the simplicity and effectiveness of Bike Hanging Hooks. In a market saturated with complex storage systems, could the most straightforward solution be the best?
For years, I’ve used basic hooks, often whatever was available at the local hardware store. But this time, I decided to explore specialized options, specifically bike hanging hooks from Park Tool. Were these purpose-built hooks truly superior to the generic versions that had served me for years? A box of Park Tool hooks arrived, and I was ready to find out if they could revolutionize my bike storage.
Why Choose Bike Hanging Hooks?
[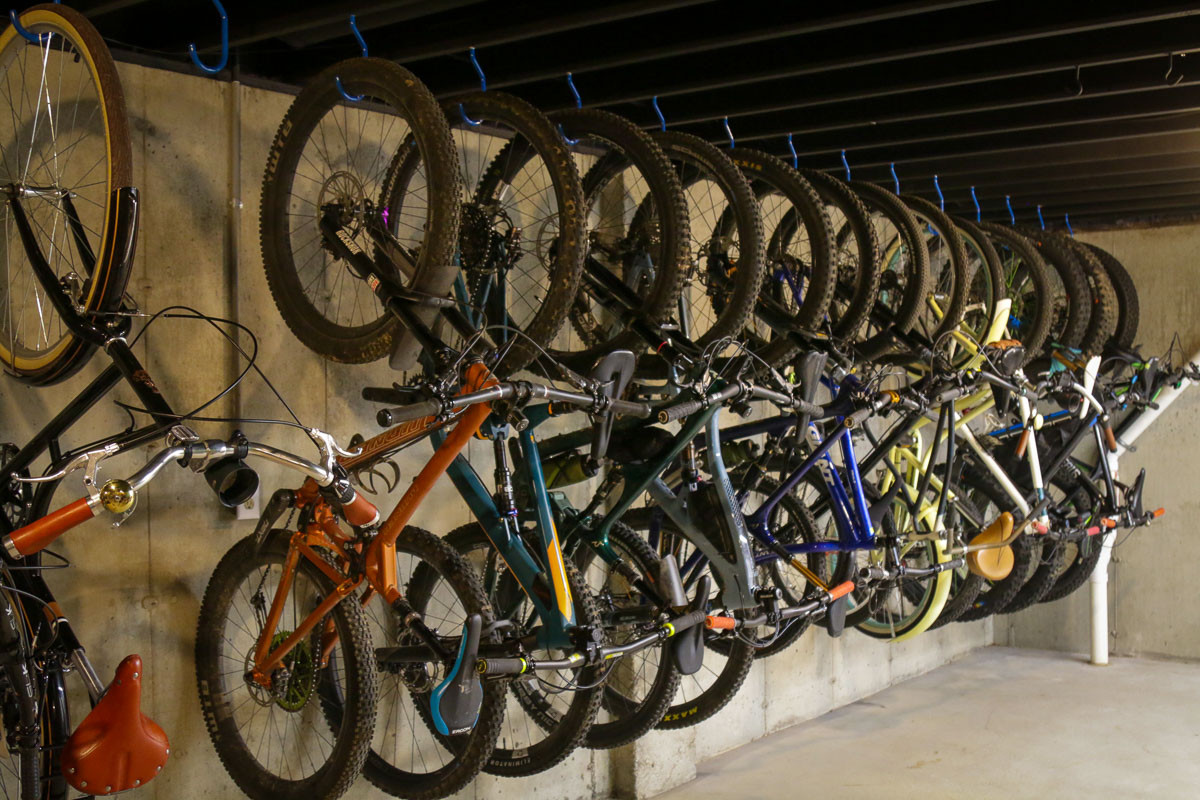 Park Tool Bicycle Storage Hooks vertical bike storage hanging](Vertical bike storage using Park Tool hooks in a basement setting, showcasing efficient space utilization.)
When it comes to maximizing storage capacity while minimizing complexity and cost, bike hanging hooks are unmatched. If your space has sufficient ceiling height and exposed joists, you likely have the perfect built-in framework for this system. Basement ceilings, typically constructed with joists spaced 16 inches apart on center, offer an ideal grid for installing bike hanging hooks. The process is remarkably simple: drill a pilot hole into the center of a joist, screw in the hook, and instantly, you have robust bike storage. This method requires no additional materials or complex construction. Whether your ceiling is finished or bare, this method works – just be sure to avoid drilling into any hidden utilities like electrical wiring, plumbing, or HVAC systems.
My preferred method for hanging bikes involves alternating their orientation – one bike with the handlebar up, the next with the handlebar down. This staggered approach is key to maximizing bike density, allowing you to store numerous bikes in a compact area while maintaining relatively easy access to each one.
[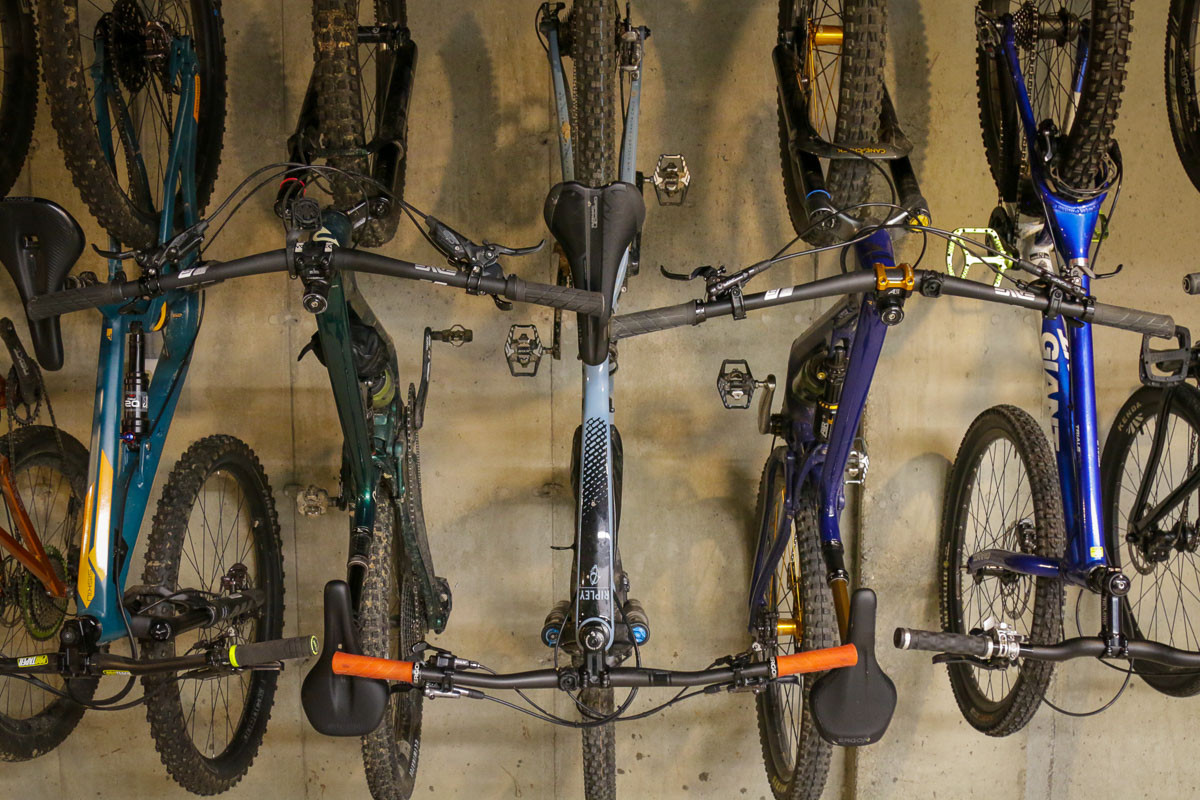 Hanging mountain bikes upside down on a storage hook](Efficient bike storage using hooks, demonstrating three mountain bikes with wide handlebars hung in close proximity.)
As illustrated above, even with modern mountain bikes boasting handlebar widths of 800mm (including grips), the standard 16-inch spacing between bike hanging hooks remains effective. The efficiency of this storage method is hard to surpass. While hanging racks can condense bikes into an even smaller footprint, the spacing often becomes too tight for practical use, especially with mountain bikes. A 12-inch spacing might suffice for drop-bar bikes, but maneuvering bikes in and out, even gravel bikes with wider bars, can be cumbersome.
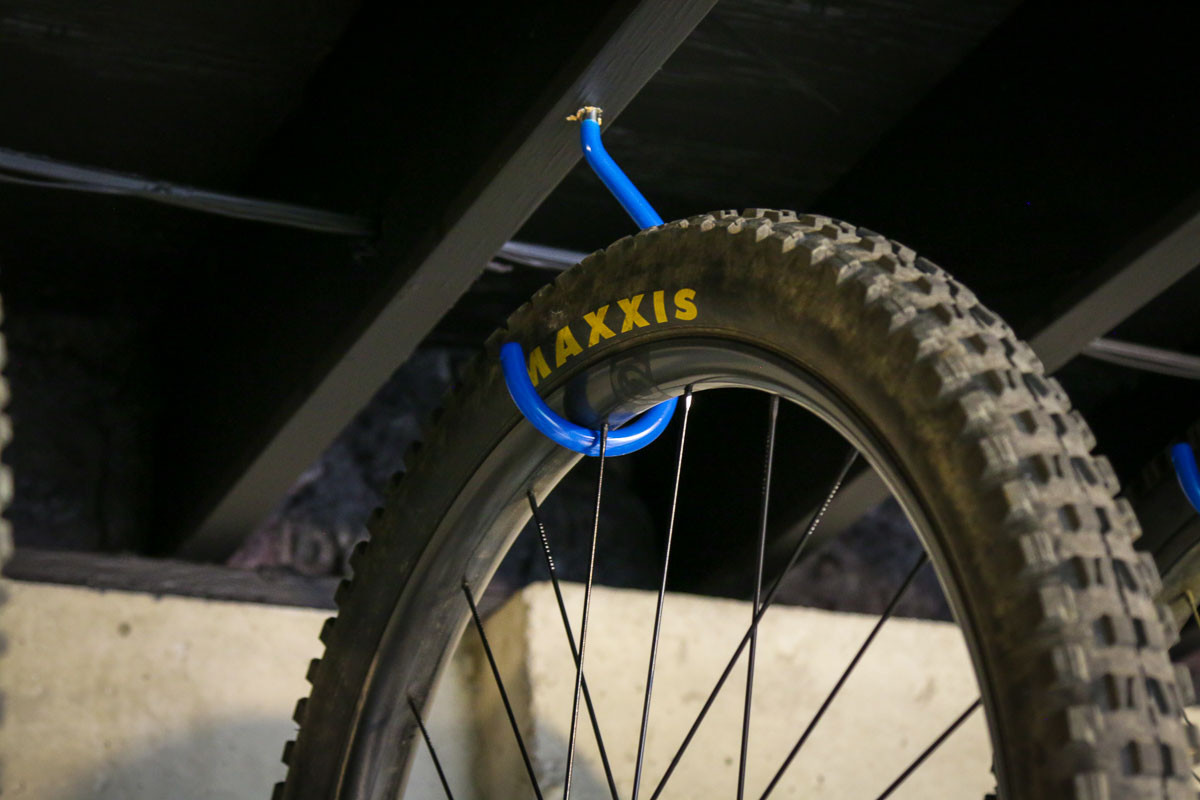
[ wheel base considerations with bicycle storage hooks](Consideration for wheelbase length when using bike storage hooks, highlighting the importance of ceiling height.)
When planning your bike hanging hook setup, particularly if ceiling height is limited, remember to account for the wheelbase of your bikes. Longer wheelbase bikes require more vertical clearance to hang properly without the wheels hitting the ground or ceiling.
Is Hanging Bikes by the Wheels Safe? And What About Upside Down?
A frequently asked question revolves around the safety of hanging bikes by their wheels, especially in an upside-down orientation. Anecdotal stories about brake malfunctions after upside-down storage are common. However, in my extensive experience hanging all types of bikes in various orientations, and observing similar practices in bike shops, these issues are rare.
To definitively address this concern, I consulted with leading brake and suspension manufacturers – SRAM, Shimano, and Hayes/Manitou. The overwhelming consensus was that hanging bikes with hydraulic disc brakes or suspension systems is perfectly safe. Shimano and Hayes both indicated that while either orientation is acceptable, hanging bikes with brakes pointed upwards is a slightly safer practice, minimizing any potential issues if air is present in the master cylinder.
Nick Murdick, Shimano MTB Product Manager, explained, “Shimano brakes, like other open system hydraulic brakes, include a reservoir of extra fluid above the master cylinder piston. Our design directs any air bubbles to the top of this reservoir, preventing them from impacting brake performance and simplifying the bleeding process.
A small bubble at the reservoir’s top is normal and usually harmless. Hanging the bike might cause this bubble to migrate into the brake system. However, upon returning the bike to an upright position, the bubble typically returns to the reservoir. Pumping the lever a few times can expedite this self-bleeding process. Using a bleed funnel filled with fluid can even eliminate the bubble entirely.
The primary caution is to avoid pulling the brake lever while the bike is hanging. This action can force any air bubble into the brake line, complicating its return to the reservoir.”
Hayes/Manitou engineers echoed this sentiment, stating, “From a brake and suspension perspective, there isn’t necessarily a right or wrong way to hang a bike.
For brakes, it shouldn’t matter if the system is properly bled and air-free. Any air present would reside in the reservoir. In such cases, any orientation from horizontal to front wheel up will keep air in the reservoir. If a bleed is due, avoid hanging the bike by the rear wheel.
Regarding suspension, some engineers prefer hanging bikes with bushings at the bottom, facilitating bath oil flow to the seals. However, without pressure differences, oil is unlikely to overcome surface tension and migrate down. Similarly, air in the damper should not bypass the check valve unless sufficient pressure is applied. As a precaution, setting the compression adjuster to maximum before hanging can eliminate any potential leak path for air. Should air enter the damper, a few fork compression cycles will typically bleed it out.”
SRAM’s response confirmed the safety of either hanging direction, simplifying the decision. Considering all feedback, hanging bikes with handlebars up seems marginally safer for hydraulic disc brakes, but in properly functioning systems, issues are unlikely regardless of orientation.
Carbon Rims and Bike Hooks: A Compatibility Check
[ can I hang carbon wheels on bicycle storage hooks](A cyclist inspecting carbon rims on bike storage hooks, considering potential compatibility concerns.)
The question of compatibility between bike hanging hooks and carbon rims is more nuanced. While most modern carbon wheels are robust enough for hook storage, some older or more fragile designs might pose a risk. Historically, certain wheels used a carbon fairing over a standard box-section rim for aerodynamic benefits. I recall encountering such wheels in my bike shop days that even featured warning stickers against rim hanging. These rims typically felt fragile to the touch, with noticeable flex under hand pressure. If your carbon wheels feel similarly delicate, it’s prudent to consult the manufacturer for guidance.
In my experience, hanging numerous types of carbon wheels has been problem-free. However, it’s wise to pay attention to rim graphics and valve stems. When lifting a bike onto a hook, there’s a tendency for the hook to contact either the valve stem or a graphic. Both are vulnerable to damage from hook contact. Therefore, aim to position the hook on an area of the rim free of these elements.
Park Tool Bike Hanging Hooks: What Sets Them Apart?
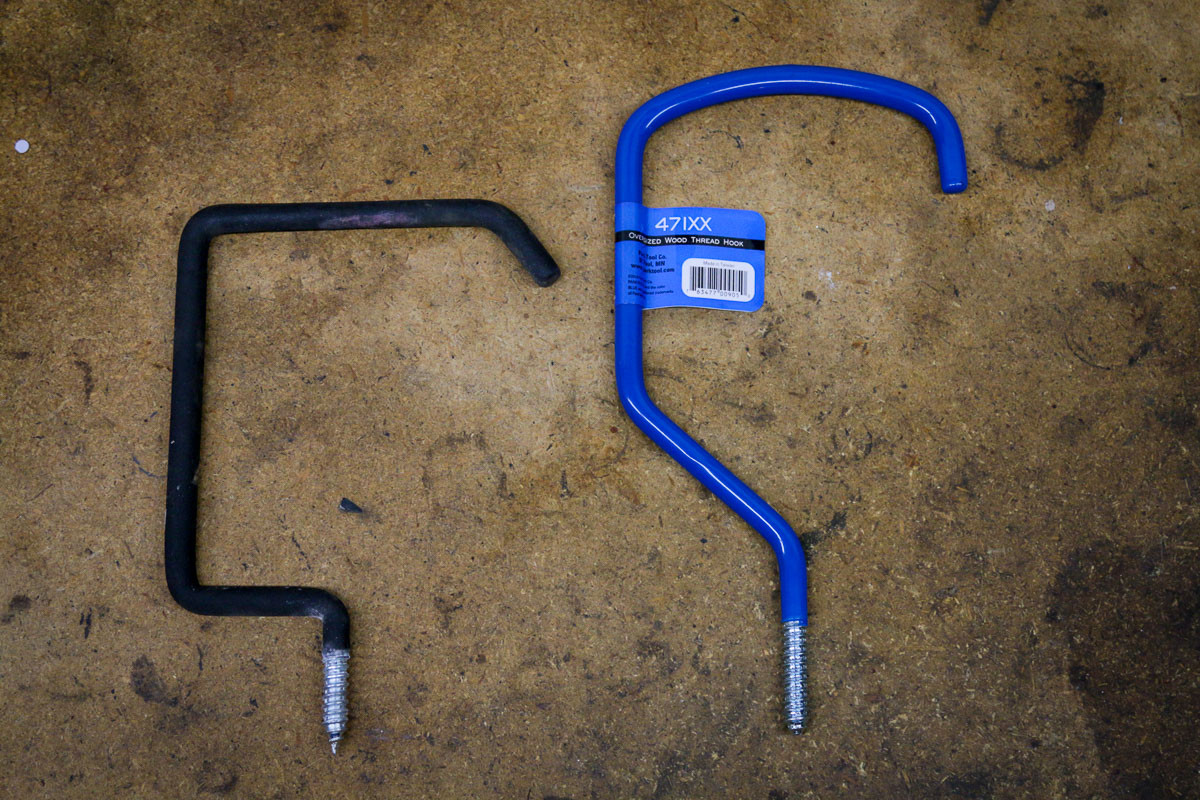
[](Park Tool 471XX and 471 bike storage hooks, highlighting their robust construction and design features.)
Bike hanging hooks are undeniably a cost-effective, efficient, and user-friendly storage solution. But why opt for Park Tool hooks over generic hardware store options? Park Tool offers a range of hooks specifically engineered for bicycles and diverse applications.
[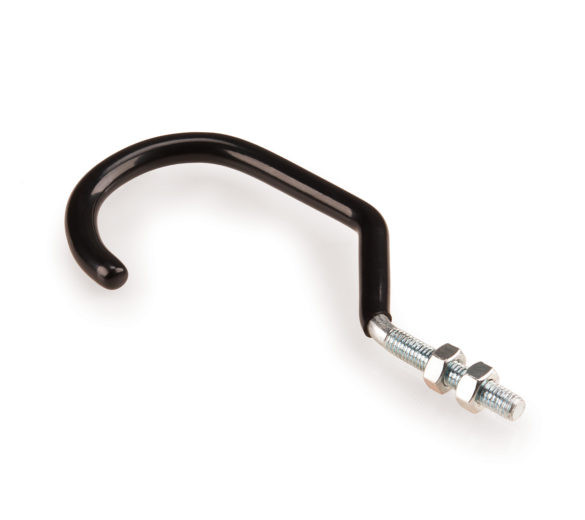 Park Took bicycle storage hook with machine thread](Park Tool machine thread bike storage hook, designed for mounting on metal surfaces.)
Park Tool provides two thread types and three size options for each. Machine thread hooks, identifiable by their black vinyl coating, are designed for mounting to metal surfaces like plates or C-channels, rather than wood. (Note: Only the black hook shown directly above is a Park Tool hook; other black hooks in this article are not Park Tool products.)
Wood thread hooks, in the same three sizes, are designed for direct installation into wood joists after drilling a pilot hole. The recommended pilot hole size varies by hook size. The smallest 451 hook requires a 1/4″ or 6mm drill bit, while the larger 471 and 471XX hooks require a slightly larger 11/32″ bit.
[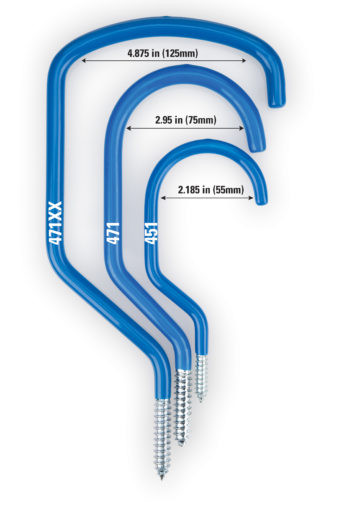 Bicycle storage hook sizes park tool regular MTB fat bike](Park Tool bike hook sizing chart, illustrating the different widths available for various bike types, including road, mountain, and fat bikes.)
The three sizes – 450/451 (machine/wood thread), 470/471, and 470XX/471XX – cater to different bike types. The narrowest 450/451 (55mm wide) is a standard, traditional bike hook suitable for bikes with narrow tires. However, for modern mountain bikes, the wider 470/471 (75mm wide) is preferable, accommodating most mountain bikes, including many plus-bikes. The largest 470XX/471XX (125mm wide) is designed for fat bikes.
My personal setup utilizes 471 and 471XX hooks, as I use a separate rack for drop-bar bikes due to spacing constraints. The 471 handles all my mountain and plus bikes, while the 471XX accommodates my fat bikes. Using larger hooks for smaller tires is perfectly acceptable, although larger hooks are more expensive. Unless exclusively storing road bikes, the 471 offers greater versatility than the 451 for a minimal price difference.
[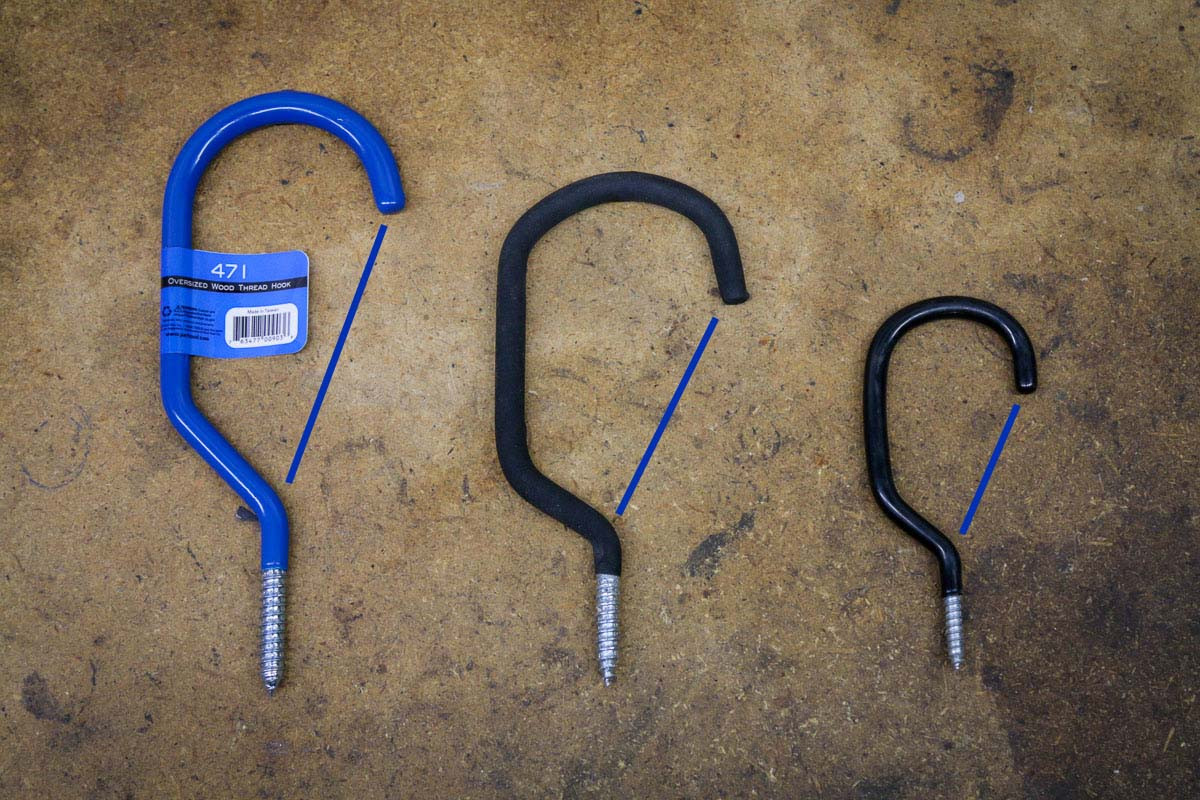 Park Tool Storage hook benefits](Park Tool bike hooks feature a wider opening for easier bike loading and unloading, compared to generic hooks.)
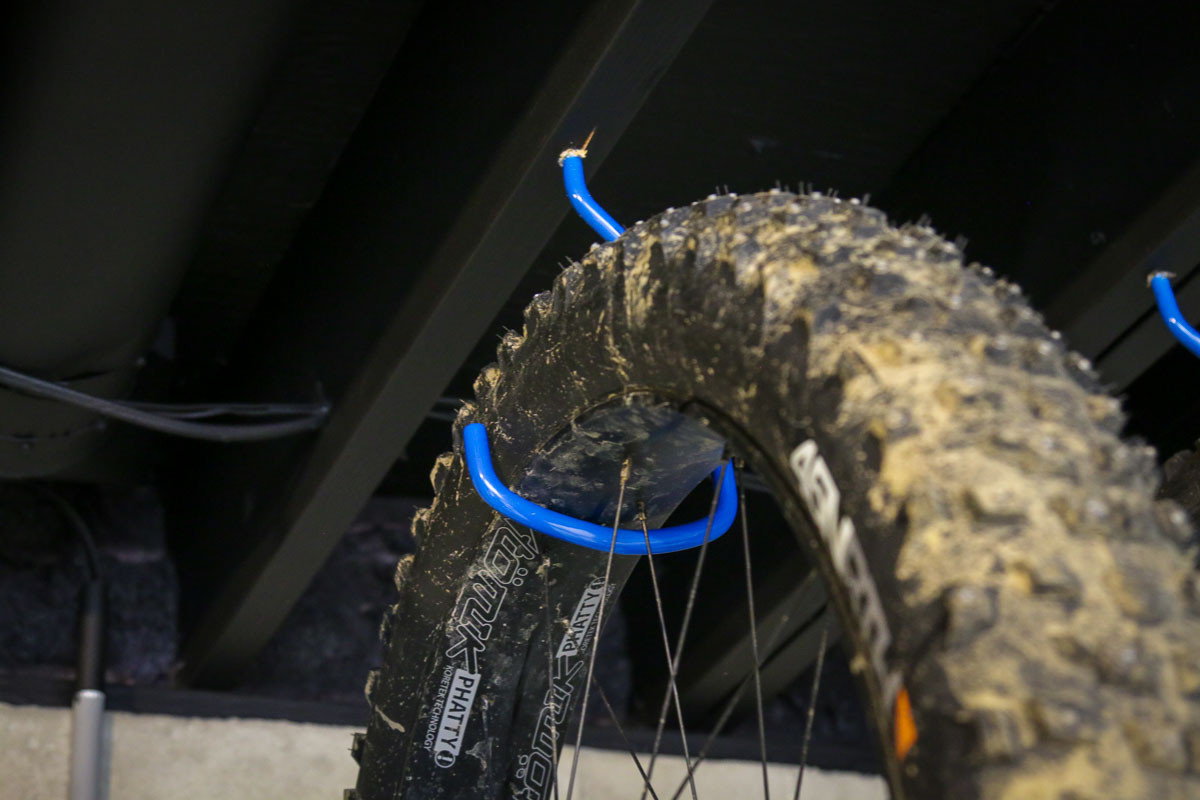
A crucial distinction between Park Tool hooks and generic hooks lies not just in width, but in the opening size – the distance from the hook tip to the shoulder (indicated by the blue line in the image). Larger tires with aggressive tread patterns and higher volumes require a wider gap to facilitate easy wheel insertion. Insufficient gap size often necessitates tilting the wheel to guide the rim into the hook, which can be particularly challenging on high ceilings, especially with heavier bikes.
During my use of Park Tool hooks, I’ve noted a significant improvement in ease of loading and unloading bikes, especially those with knobby tires and wider rims. The larger gap allows for effortless wheel insertion from the side, eliminating the need for tilting in most cases.
[ Park Tool Bicycle storage hook 471 471XX mountain bike fat bicycle storage basement garage review how to 6](Close-up of a Park Tool bike hook, showing sticky residue from packaging labels that required cleaning.)
My only minor complaint with the Park Tool hooks was the stubborn sticky residue left by the packaging labels, requiring some effort to remove.
[ Storage hooks for fat bikes](Fat bike storage using Park Tool 471XX hooks, demonstrating their suitability for wide tires.)
Hardware store hooks large enough for fat bike wheels are often designed for ladders or flat objects, featuring a flat bottom.
[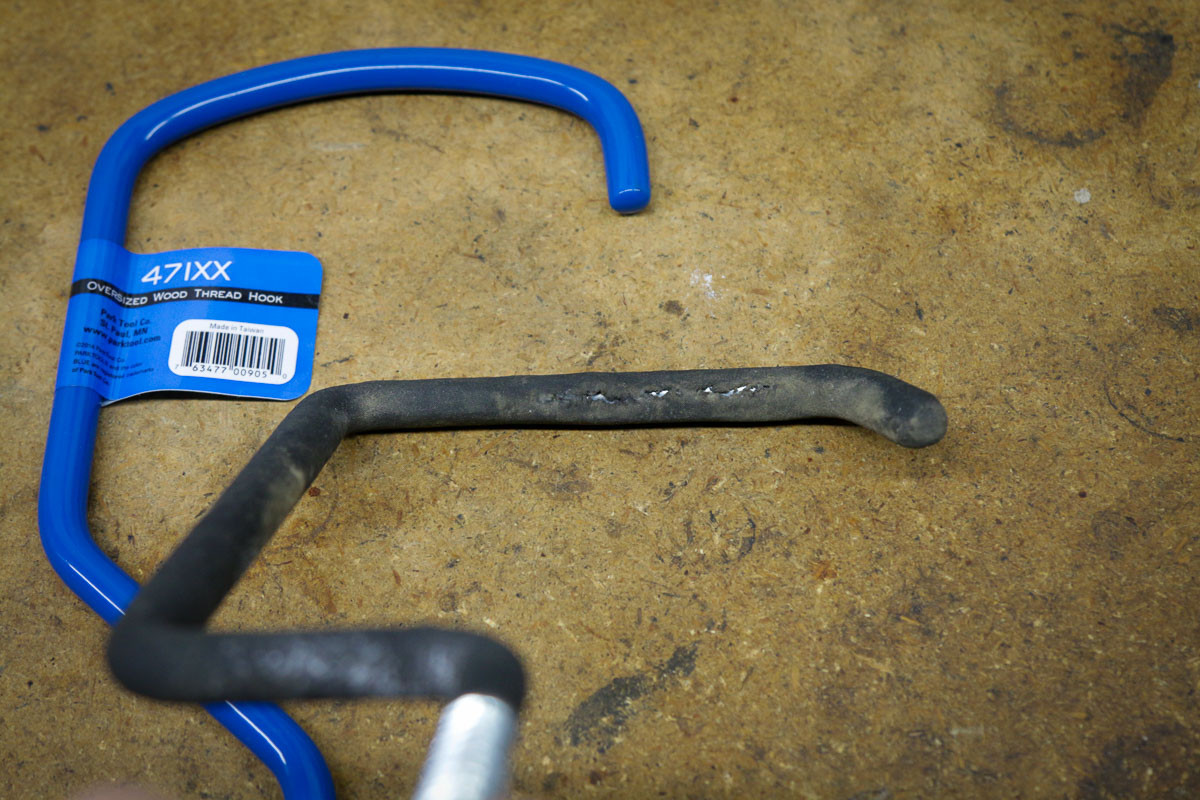 Ladder hook issues for fat bikes](Ladder hooks with a flat bottom can damage bike rims over time due to wear on the vinyl coating.)
While functional, the flat bottom design of ladder hooks can lead to premature wear of the vinyl coating, potentially damaging your rims.
[ carbon fat bike rim on hook](A carbon fat bike rim resting on a Park Tool bike hook, showcasing the curved hook design for better rim protection.)
The curved bottom of Park Tool 470/471XX hooks provides greater contact surface area between the vinyl coating and the rim, theoretically offering improved long-term rim protection compared to flat ladder hooks. Long-term durability remains to be seen, but the design is inherently better.
Pricing and Value
[](Fat bike storage setup using Park Tool 471XX hooks, displaying various fat bike tire sizes.)
While Park Tool hooks are pricier than basic hardware store hooks, I believe the investment is justified. Compared to other bike-specific storage solutions, these hooks are quite affordable at $5.45/$5.95/$8.95 per hook (451/471/471XX). More importantly, they enhance ease of use, accommodate wider rims and tires more effectively, and the signature Park Tool blue adds a touch of professional aesthetic to your storage space.