
Removing the crankarms from your bike is a fundamental skill for bicycle maintenance and repair. Whether you’re replacing worn parts, servicing your bottom bracket, or simply cleaning your drivetrain, knowing how to safely and effectively remove your bike’s crankarms is essential. This guide will help you identify your crank system and provide an overview of the removal process for each type, ensuring you can tackle this task with confidence.
Identifying Your Bike Crankarm System
Before you begin, it’s crucial to determine what type of crankarm system your bicycle uses. Crankarms are the levers that connect your pedals to the bottom bracket spindle, and they transfer your pedaling power to the chainrings and ultimately, the wheels. Different crank systems require different removal methods and sometimes specific tools. Identifying your system upfront will save you time and prevent potential damage to your bike.
If you are unsure about your crank system, take a close look at your crankarms, particularly around the crank bolt and bottom bracket area. Key features like retaining rings, pinch bolts, or spindle visibility can help you identify the type. Let’s explore the common types of bike crankarm systems:
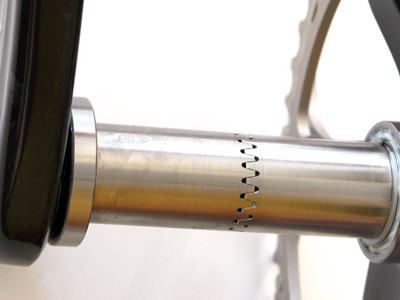
1. Self-Extracting Crankarms
Self-extracting crankarms are designed for easier removal, as the crank puller mechanism is integrated directly into the crankarm itself. These systems typically feature a special retaining ring around the crank bolt.
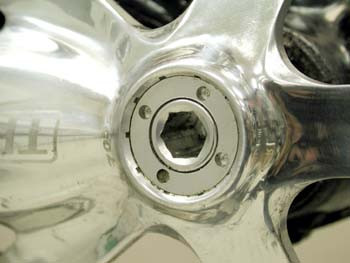 Self-extracting crankarm with pin holes in retaining cap showing a pin hole style self-extractor
 Self-extracting crankarm with hole fitting in retaining cap illustrating a hole fitting self-extractor mechanism
How to Identify: Look for a threaded retaining ring that resembles a dust cap, positioned over the crank bolt. Often, these rings have pin holes or a hole fitting for specific tools, though their primary function is self-extraction.
Removal Process Overview: For self-extracting cranks, you generally only need to loosen the crank bolt. As you loosen the bolt, it presses against the retaining ring, which in turn pushes the crankarm off the bottom bracket spindle. No separate crank puller tool is needed.
Further Details: For detailed instructions, refer to guides specifically for self-extracting crank removal and installation.
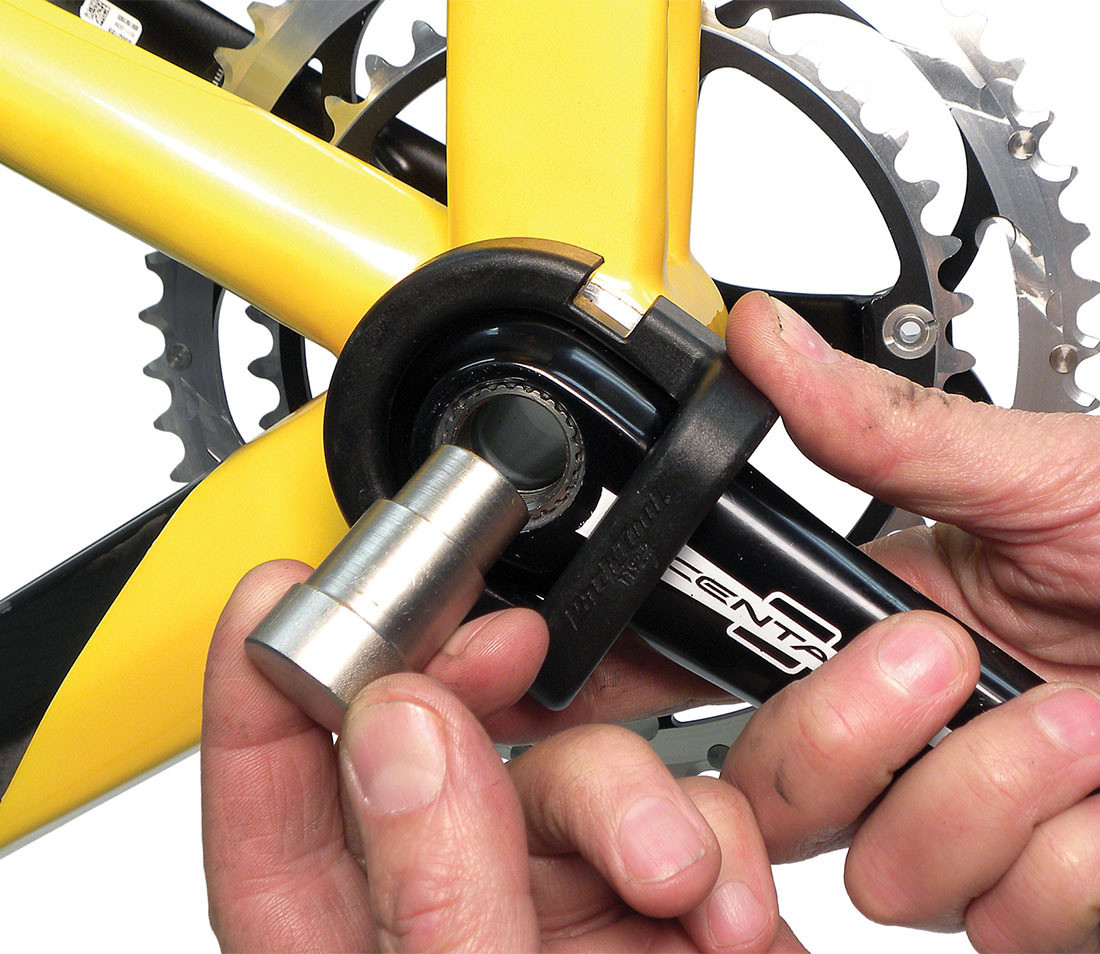
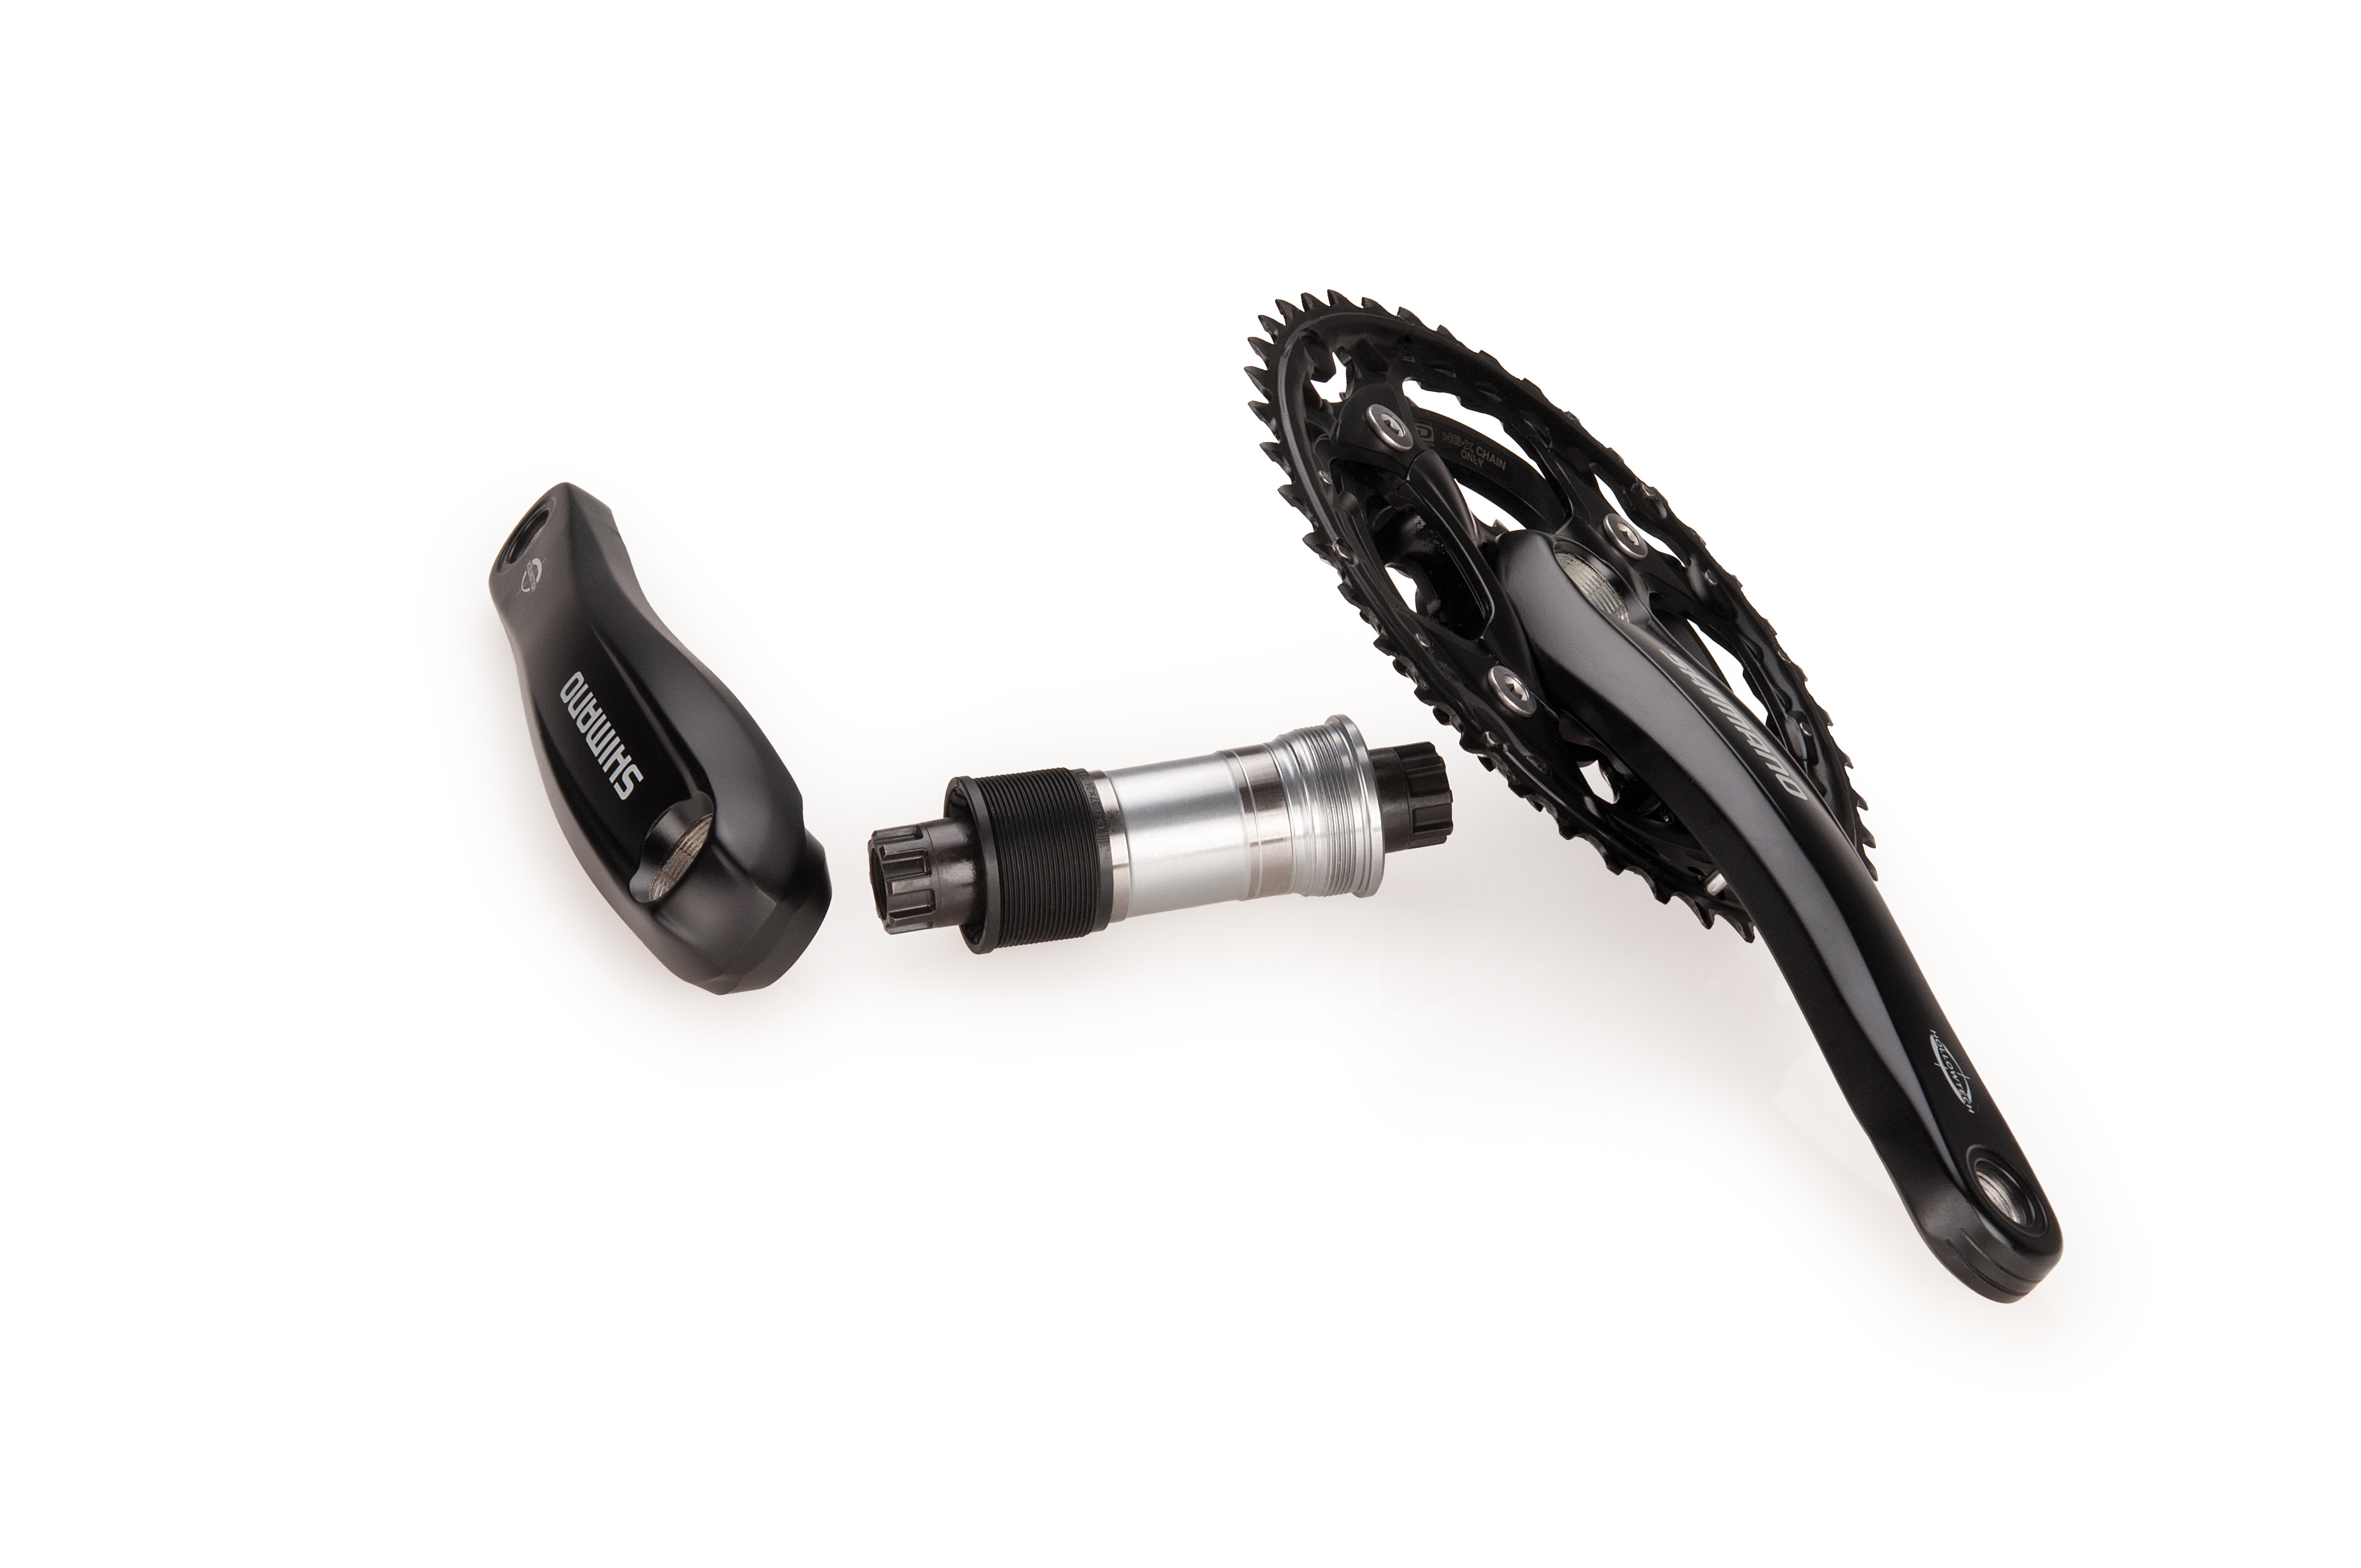
2. Two-Piece Compression Slotted Crankarms
Two-piece crank systems are common, particularly on Shimano and FSA bikes. They are characterized by a left crankarm with a compression slot and pinch bolts, and a right crankarm with an integrated spindle.
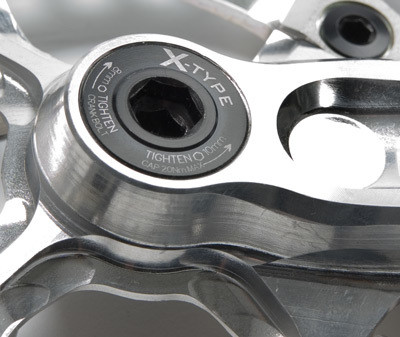
 Shimano Hollowtech II style crankarm showcasing the two-piece compression slotted design
 FSA MegaExo style crankarm demonstrating the two-piece compression slotted system common in various brands
How to Identify: Check for a left crankarm that has a visible slot running along its length, near the bottom bracket. You’ll also see two pinch bolts that clamp the crankarm onto the spindle. These systems use external bottom bracket bearing cups.
Removal Process Overview: To remove these crankarms, you’ll typically need to loosen the pinch bolts on the left crankarm. After loosening the pinch bolts, a specific tool or process might be needed to remove the left crankarm, often not requiring a traditional crank puller. The right crankarm, with its integrated spindle, usually comes out after the left is removed.
Further Details: Consult resources specifically for two-piece compression slotted crank removal and installation for step-by-step instructions.
3. Campagnolo Power-Torque Crankarms
Campagnolo Power-Torque cranksets have a unique design where the spindle is integrated into the drive-side (right) crankarm.
 Power-Torque crankarm showing the installation mold and extension plug used in the system
How to Identify: Power-Torque systems are specific to Campagnolo and are identified by their unique spindle integration on the right side. Removal typically focuses on the left crankarm to access bearings or remove the right crank.
Removal Process Overview: Removing Campagnolo Power-Torque crankarms often involves removing the left crankarm first. Special tools or adaptors are sometimes required for installation and removal due to the specific design.
Further Details: Refer to dedicated guides for Campagnolo Power-Torque crank removal and installation to ensure correct procedures are followed.
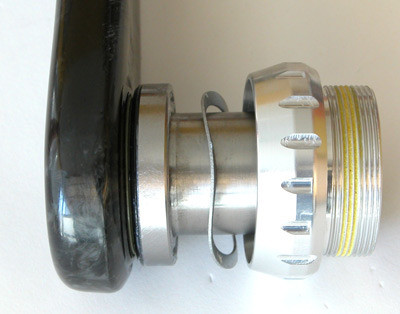
4. Campagnolo Ultra-Torque Crankarms
Campagnolo Ultra-Torque cranksets are another proprietary system where both left and right crankarms each house half of the spindle, which interlocks in the middle.
 Campagnolo Ultra Torque crankarm close up 1 showing the bearing and spindle interface
 Campagnolo Ultra Torque crankarm close up 2 illustrating the splined spindle end for interlocking connection
How to Identify: Ultra-Torque systems, also from Campagnolo and Fulcrum, have a distinct design with interlocking spindle halves. Bearings are mounted onto the crankarms themselves, not integrated into external cups in the same way as some other systems.
Removal Process Overview: Disassembly of Ultra-Torque cranks involves separating these interlocking spindle halves. Specific tools and techniques are generally needed to properly remove these crankarms without damage.
Further Details: For detailed steps, consult specialized guides on Campagnolo Ultra-Torque crank and bottom bracket removal and installation.
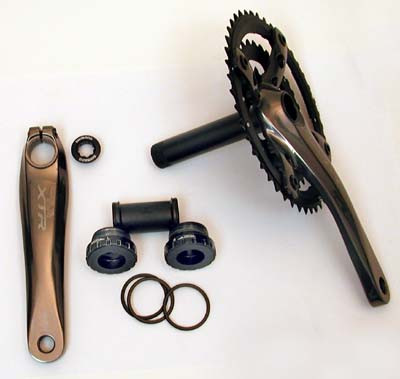
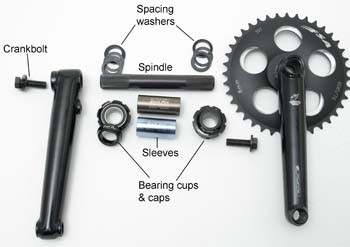
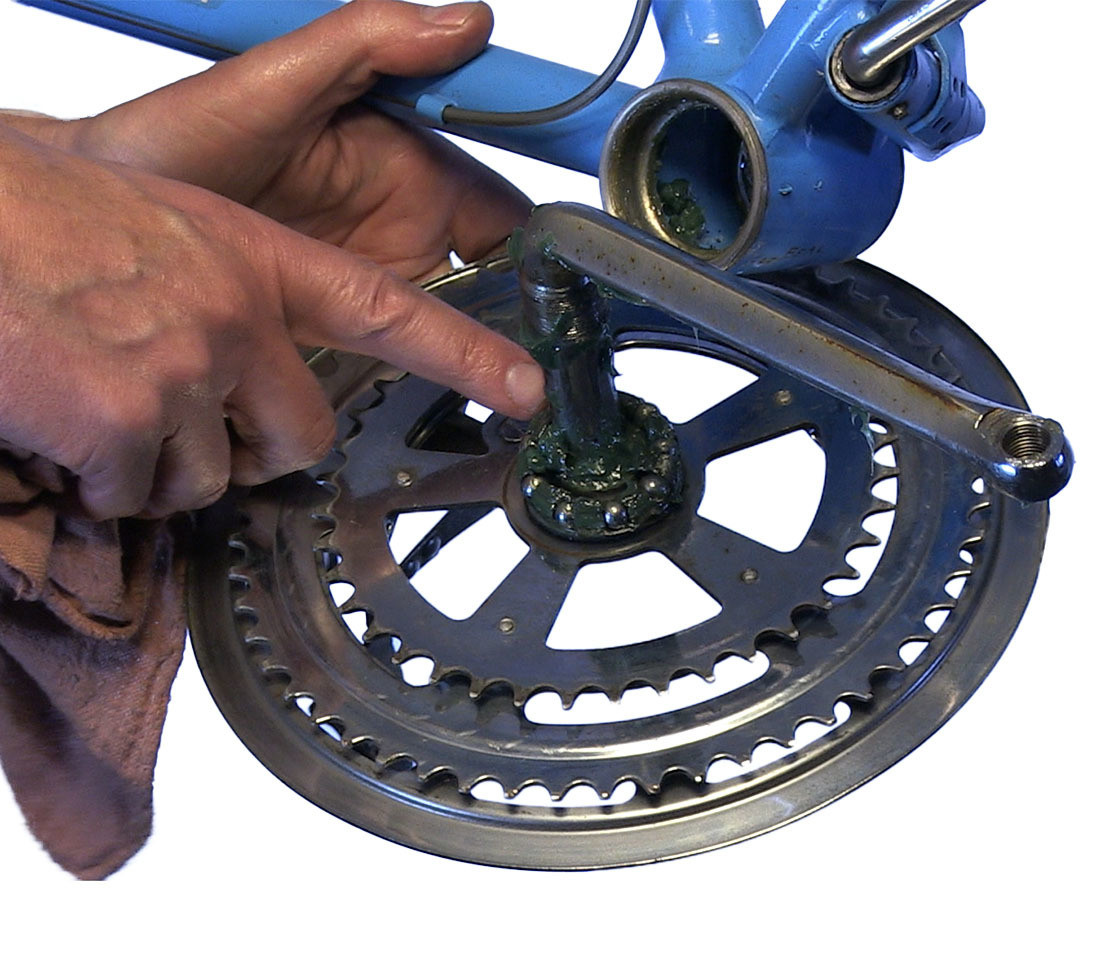
5. Three-Piece Crankarms
Traditional three-piece cranksets consist of separate left crankarm, right crankarm, and a spindle. These systems are common and come in variations like square taper or splined spindle interfaces.
 Three-piece crankarm components illustrating the separate left arm, right arm, and axle spindle
How to Identify: Three-piece cranks are identified by having a separate spindle that is held in place by bearings within the bottom bracket shell. Both crankarms will have bolts securing them to the spindle. Look for either a square-shaped spindle end (square taper) or a splined end where the crankarms attach.
Removal Process Overview: Removing three-piece crankarms generally requires a crank puller tool. The tool is threaded into the crankarm, and then used to push against the spindle, pulling the crankarm off. The process is repeated for both left and right sides.
Further Details: Find comprehensive guides on three-piece crank removal and installation for detailed instructions and tool specifics.
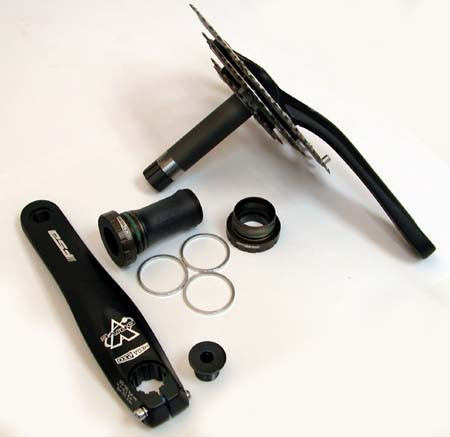
6. BMX Three-Piece Crankarms
BMX bikes often utilize a specialized three-piece crank system, typically featuring a robust 48-spline spindle designed for the stresses of BMX riding.
 BMX Three Piece Crank Service components displayed including tools and crank parts
How to Identify: BMX three-piece cranks are recognized by their heavy-duty construction and the 48-spline spindle interface. While conceptually three-piece, their service and removal can have unique aspects compared to standard road or mountain bike three-piece systems.
Removal Process Overview: Removal of BMX three-piece cranks may require tools similar to standard three-piece cranks, but techniques can vary. Due to the robust nature of these cranks, ensuring correct tool engagement and force application is important.
Further Details: Consult guides specifically for BMX three-piece crank service for detailed procedures.
7. One-Piece Crankarms
One-piece cranks are an older design, often found on older bikes, children’s bikes, and some entry-level models. Here, the crankarms and bottom bracket spindle are formed from a single piece of steel.
 One-piece crankarm design showing the continuous steel construction from pedal to pedal
How to Identify: One-piece cranks are easily identifiable as the crankarms are directly connected and formed as part of the bottom bracket axle itself, creating a continuous loop of steel.
Removal Process Overview: Removing one-piece cranks is different from other systems as the entire crank and spindle assembly needs to be removed together from the bottom bracket. This often involves removing the pedals and then maneuvering the one-piece crank out of the frame.
Further Details: Seek out specific guides for one-piece crank removal and bottom bracket service for detailed steps and potential challenges.
Conclusion
Understanding the type of crankarm system on your bike is the first step to successful removal. By identifying your system and consulting the appropriate resources for detailed instructions, you can confidently remove your bike’s crankarms for maintenance, repair, or upgrades. Remember to always use the correct tools and techniques for your specific crank type to avoid damage and ensure safety.