
Are Bikes Easy To Assemble, even if you’re not a seasoned mechanic? Absolutely! This usabikers.net guide will walk you through the process of assembling your new motorcycle, whether it’s fresh out of the box or you’re just upgrading some parts. With the right tools and a little patience, you’ll be cruising in no time. This guide will cover everything from unboxing to final checks, including selecting the right tools, attaching components, and ensuring your motorcycle is safe and ready to ride. Learn about motorcycle assembly tips, biker safety and crucial maintenance procedures.
User search intent:
- Step-by-step instructions for assembling a bike
- Difficulty level of bike assembly
- Tools needed for bike assembly
- Safety checks after bike assembly
- Tips for a smooth bike assembly process
1. Why Consider Assembling Your Own Bike?
Assembling your own motorcycle might seem daunting, but it offers several advantages. You gain a deeper understanding of your motorcycle’s components, save money on assembly costs, and ensure everything is done to your exact specifications.
1.1 Building Confidence and Knowledge
Tackling the assembly process provides hands-on experience that boosts your confidence. You’ll learn how each part works together, making you a more informed and capable motorcyclist.
1.2 Cost Savings
Professional assembly can cost a pretty penny. By doing it yourself, you save money that can be used for upgrades, gear, or that next big ride.
1.3 Customization and Personalization
Assembling your motorcycle allows you to customize it from the start. You can choose specific components and adjust settings to perfectly fit your riding style.
2. What Tools Do You Need to Assemble a Bike?
Having the right tools is essential for a smooth and safe motorcycle assembly. Here’s a list of tools you’ll likely need:
- Allen Wrenches (Hex Keys): Essential for tightening various bolts on your motorcycle.
- Torque Wrench: Critical for tightening bolts to the correct specification, especially on carbon fiber components.
- Screwdrivers: Both Phillips head and flathead screwdrivers will be needed for various tasks.
- Pliers: Useful for gripping and manipulating small parts.
- Grease: Applying grease to threads prevents seizing and ensures smooth operation.
- Carbon Assembly Paste: Specifically for carbon fiber components to provide extra grip.
- Pump: For inflating tires to the correct pressure.
- Pedal Wrench: If installing pedals, you’ll need a pedal wrench or Allen key.
- Cable Cutters: To trim any excess cable length.
- Work Stand: A work stand makes the assembly process much easier by holding the motorcycle steady.
- Measuring Tape: This tool ensures proper seat and handlebar alignment for a comfortable ride.
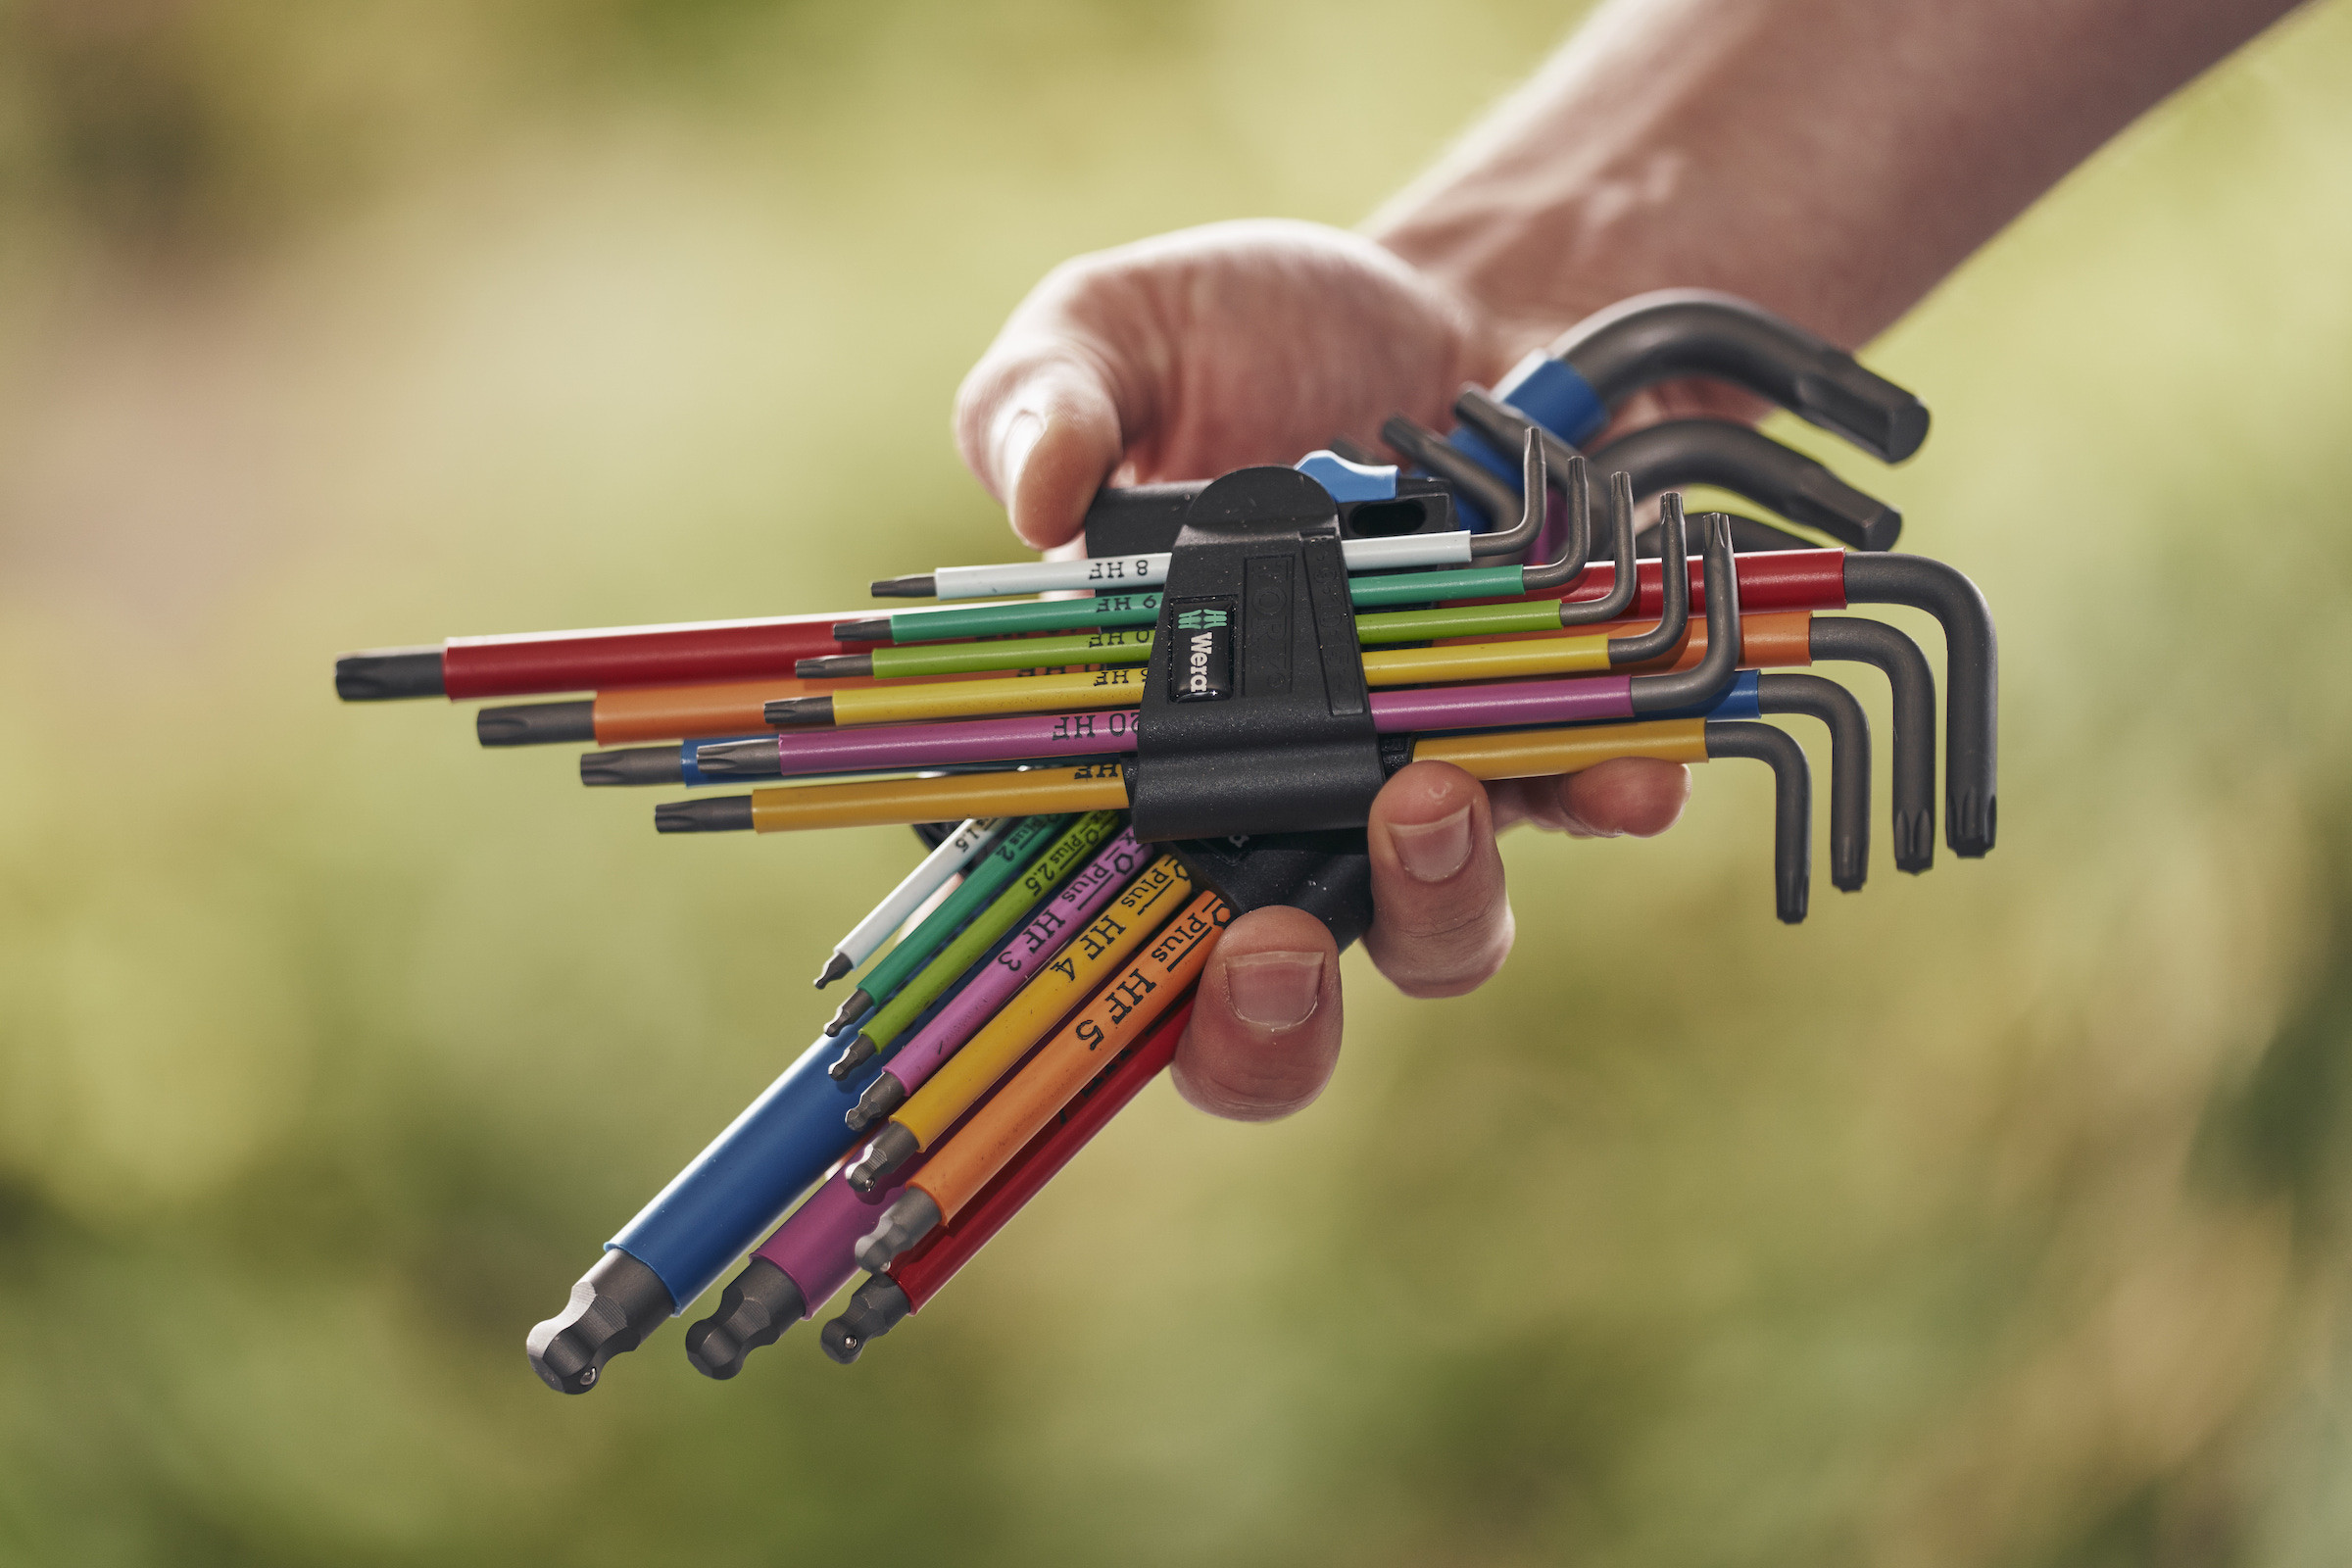 Selection of hex keys for bicycle assembly
2.1 Essential Toolkit for Motorcycle Assembly
According to research from the American Motorcyclist Association (AMA), a well-equipped toolkit can reduce assembly time by up to 50%. Investing in quality tools ensures durability and precision.
2.2 Understanding Torque Specifications
Using a torque wrench is vital, especially for carbon fiber components. Over-tightening can cause damage, while under-tightening can lead to safety issues. Always refer to the manufacturer’s specifications.
3. Unboxing Your New Bike
The first step in assembling your motorcycle is carefully unboxing it. Here’s how to do it safely:
3.1 Opening the Box
With the box upright, gently work your hand along the underside of the top flap to pull it open. Before removing the motorcycle, use a large flat-head screwdriver to lift off any staples in the box lid to prevent injury or damage.
3.2 Inventory Check
Lift the motorcycle, front wheel, and handlebars from the box, and remove any protective packaging. Keep hold of the packaging in case you need to send the motorcycle back or travel with it in the future.
Check the box for the manual or any paperwork, as well as any small parts that may be boxed separately. Keep them safe because you’ll need them later.
3.3 Keeping the Packaging
According to a study by the Motorcycle Industry Council (MIC), retaining the original packaging can increase the resale value of your motorcycle by up to 15%.
4. Step-by-Step Guide to Assembling Your Bike
Now that you have your tools and the motorcycle is unboxed, let’s get to the assembly process.
4.1 Installing the Seatpost
Unpack the seatpost (in most cases, it will have the saddle attached) and put a smear of carbon assembly paste (if the seatpost is carbon) or grease (if the post is metal) around the inside diameter of the seat tube before inserting the seatpost and doing up the clamp. We’ll set the correct saddle height later. Wipe off any excess assembly paste with a clean rag.
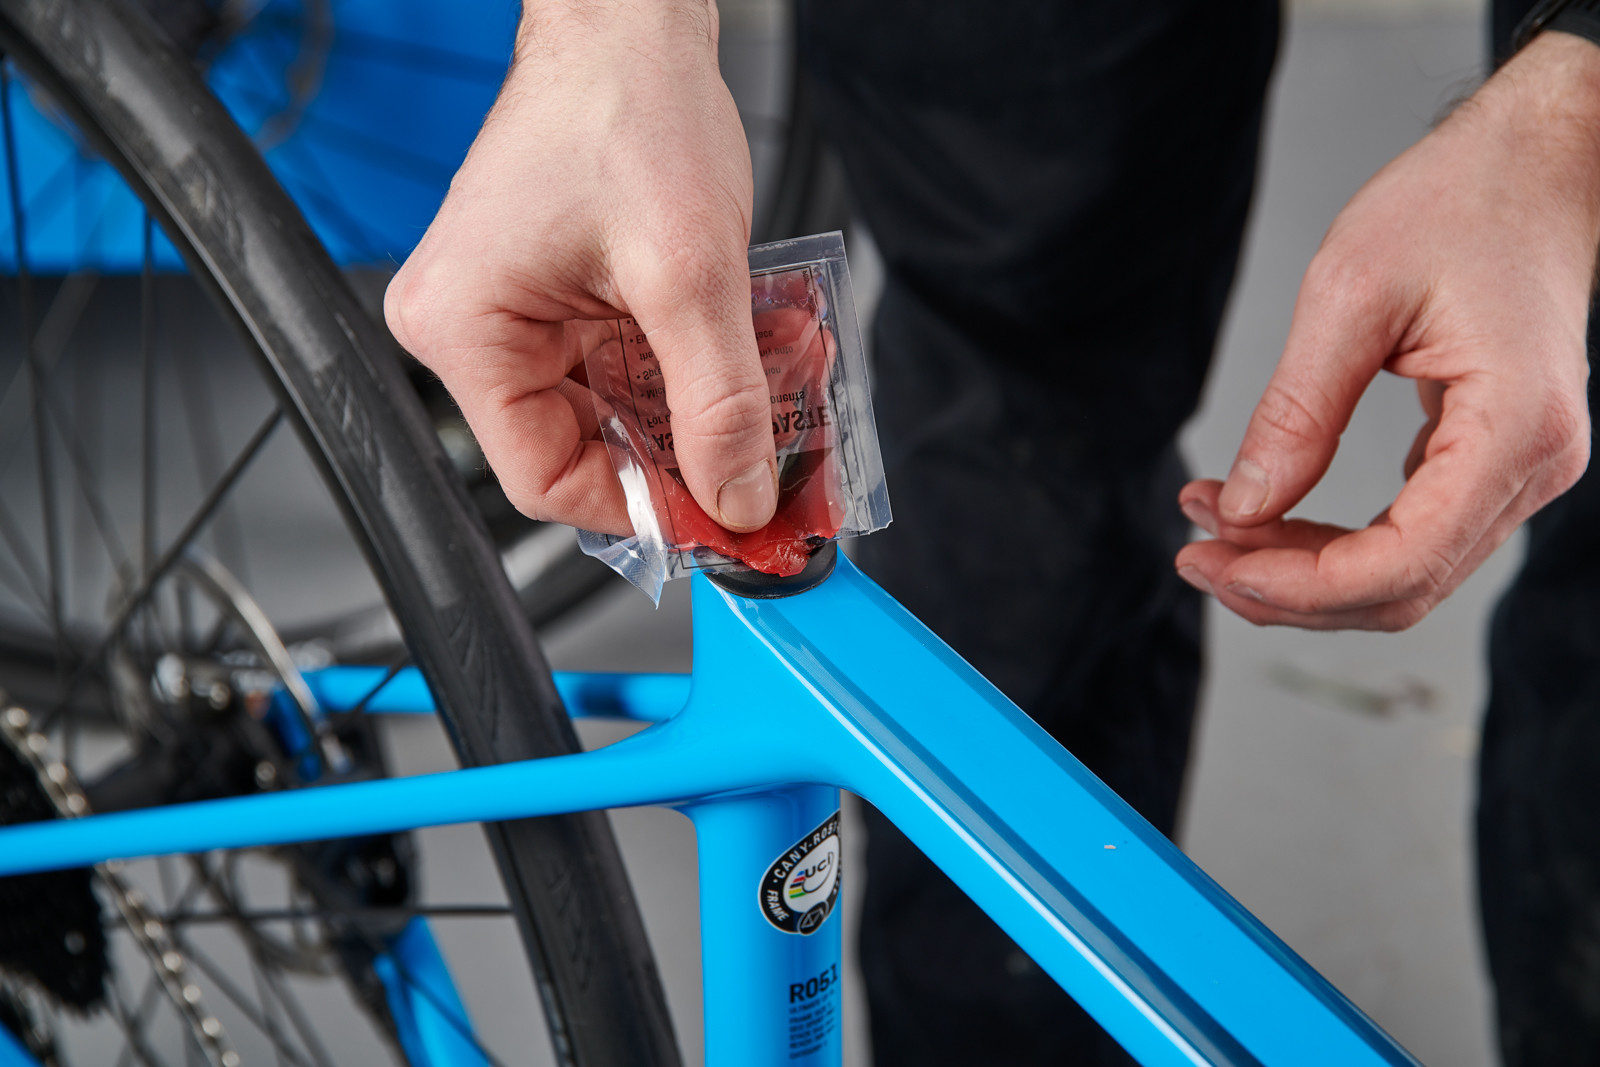 Applying carbon assembly paste to the seat tube
Check the frame, clamp, or manual for the correct torque setting when tightening the seatpost clamp.
4.2 Attaching the Handlebar
Some of the latest motorcycles, particularly mid-to-high-end road motorcycles, have integrated cockpits, with the handlebar and stem in one piece. If that’s the case, check the manual to ensure you fit the handlebar correctly.
If you have a two-piece stem and handlebar setup, then you will need to:
- Remove the plate at the front of the stem (the piece that holds the handlebar to the stem).
- Insert the handlebar and tighten the face-plate bolts to the required torque setting. Note: The bolts should be tightened evenly, usually with an even gap between each bolt and the face plate (some stems differ, so double-check).
- Next, with the bolts at the base of the stem slackened off, tighten the bolt at the top of the stem until you feel some resistance.
- Straighten the stem so it lines up with the front tire.
- Evenly clamp the two stem bolts to the manufacturer’s torque setting.
The above is based on not needing to change the handlebar height. For more information on fine-tuning handlebar position and headset pre-load, check our guide on how to adjust handlebar height.
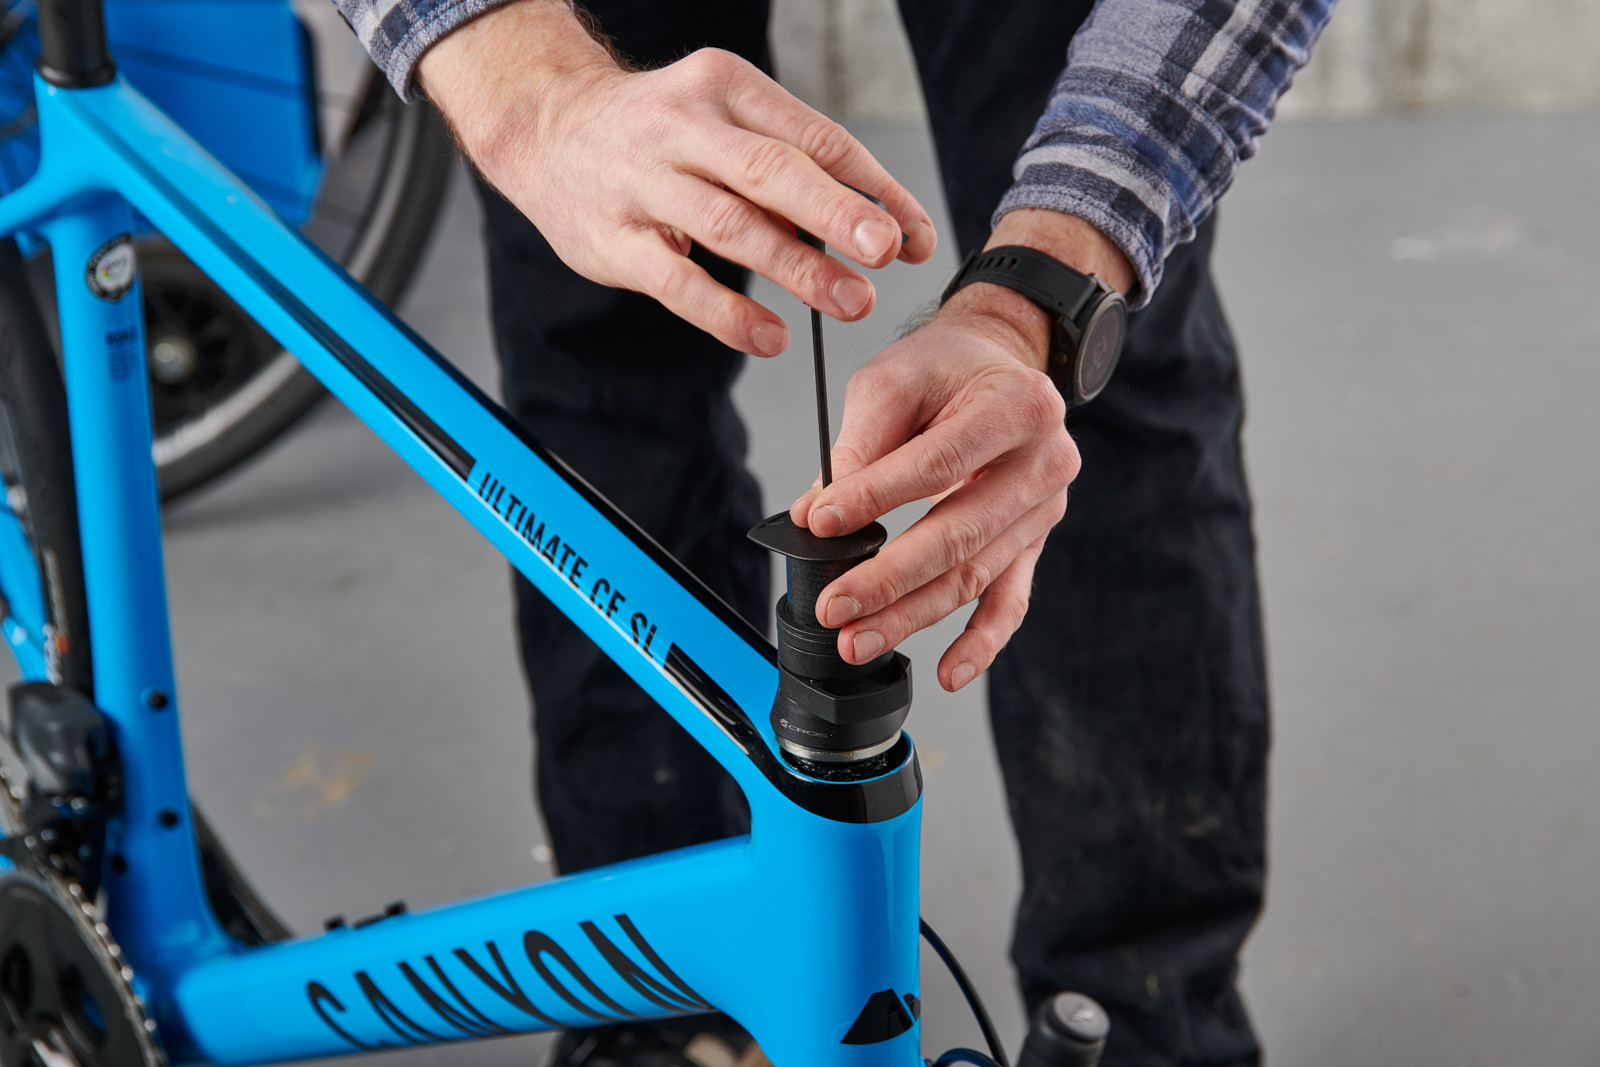 Removing stem top cap for handlebar attachment
4.3 Inserting the Front Wheel
Insert the front wheel into the fork. Broadly speaking, there are two types of axle on a motorcycle:
- Thru-axle: Differing in diameter and length depending on the type of motorcycle, a thru-axle bolts the wheel directly into threads in the fork or frame.
- Quick-release skewer: A narrow skewer that passes through the wheel. The fork and rear of the frame have open slots (dropouts) at the bottom, which sit over the axle of the hub. The skewer is fixed in place using a nut on the threaded end.
If the motorcycle has rim brakes, check the orientation of the front wheel by locating the rotation/direction arrow on the sidewall. If the motorcycle has disc brakes, lightly grease the thru-axle thread before inserting it through the fork and wheel.
4.4 Inflating the Tires
Inflate the tires and, as a starting point, check the pressure against the recommended range marked on the tire sidewall.
4.5 Installing Pedals
Grease the threads of the pedals and install them using a pedal spanner or Allen key (depending on the pedal itself). Pedal threads are side-specific, and both pedals tighten up in a forward direction. If you’re unsure which pedal goes on which side, they should be marked with L and R.
4.6 Setting the Saddle Height
Check the saddle rail bolts are tight, that the saddle is level and straight, and that it is the correct height for you. Now, ensure the seatpost clamp is tightened to the recommended value.
5. Essential Safety Checks Before Your First Ride
Before hitting the road, it’s crucial to perform a thorough safety check. This ensures your motorcycle is in top condition and you’re protected against potential hazards.
5.1 Brake Inspection
Check both front and rear brakes to ensure they engage properly and provide adequate stopping power. Look for any leaks, worn pads, or damaged rotors.
5.2 Tire Condition and Pressure
Examine your tires for cuts, bulges, or excessive wear. Use a reliable gauge to check the tire pressure and adjust it to the manufacturer’s recommended level.
5.3 Chain Tension and Lubrication
A properly maintained chain is essential for smooth power transfer. Check the chain tension and adjust as needed. Lubricate the chain regularly to reduce friction and wear.
5.4 Fluid Levels
Check all fluid levels, including engine oil, coolant, brake fluid, and clutch fluid. Top up as needed and inspect for any leaks.
5.5 Lights and Signals
Ensure all lights, including headlights, taillights, brake lights, and turn signals, are functioning correctly. Replace any burnt-out bulbs.
5.6 Throttle and Clutch Operation
Check the throttle for smooth and responsive operation. The throttle should return to the idle position without sticking. Ensure the clutch lever engages smoothly and fully disengages the engine.
5.7 Suspension Check
Inspect the front forks and rear shock for leaks or damage. Bounce the motorcycle to check for smooth and controlled suspension action.
5.8 Nut, Bolt, and Fastener Inspection
Go over the motorcycle and check all nuts, bolts, and fasteners for proper tightness. Pay particular attention to critical components such as the axles, brakes, and suspension.
5.9 Steering and Handling
Check the steering for smooth and responsive operation. Ensure the handlebars move freely without binding or excessive play.
5.10 Horn Operation
Verify that the horn is functioning correctly. This is an important safety feature for alerting other drivers and pedestrians.
6. Common Mistakes to Avoid During Assembly
Even with a detailed guide, it’s easy to make mistakes. Here are some common pitfalls to watch out for:
- Over-tightening Bolts: This can damage components, especially carbon fiber. Use a torque wrench and follow manufacturer specifications.
- Ignoring Manuals: Manuals contain crucial information. Always refer to them for specific instructions and torque settings.
- Skipping Safety Checks: Never skip the final safety checks. It’s better to be safe than sorry.
7. How to Find the Right Bike for Self-Assembly
Choosing a motorcycle that’s suitable for self-assembly can make the process much smoother. Here’s what to consider:
7.1 Entry-Level Models
Entry-level motorcycles are often designed with simpler mechanics and easier assembly in mind. These models are a great starting point for DIY enthusiasts.
7.2 Bikes with Detailed Manuals
Look for motorcycles that come with comprehensive and well-illustrated assembly manuals. Clear instructions can significantly reduce the risk of errors.
7.3 Community Support
Opt for a motorcycle model that has a strong online community. Forums and groups can provide valuable tips, troubleshooting advice, and support from fellow DIYers.
7.4 Modular Designs
Motorcycles with modular designs, where components are easily interchangeable, are generally easier to assemble and customize.
7.5 Positive Reviews
Read reviews from other motorcyclists who have assembled the same model. Their experiences can provide insights into potential challenges and solutions.
8. The Benefits of Joining a Biker Community
Being part of a biker community offers numerous benefits. You can share experiences, learn from others, and get support when you need it.
8.1 Sharing Experiences and Knowledge
Connecting with other bikers allows you to share your experiences and learn from theirs. You can exchange tips, advice, and stories about your adventures.
8.2 Learning from Experienced Riders
Experienced riders can offer valuable insights and guidance, helping you improve your skills and knowledge. They can provide advice on everything from motorcycle maintenance to safe riding practices.
8.3 Getting Support and Encouragement
Biker communities provide a supportive environment where you can get encouragement and help when you need it. Whether you’re facing a mechanical issue or just need some motivation, your fellow bikers are there for you.
8.4 Finding Riding Buddies
Joining a biker community makes it easy to find riding buddies. You can connect with other motorcyclists who share your interests and plan rides together.
8.5 Staying Informed
Biker communities often share information about upcoming events, rallies, and other activities. This helps you stay informed and connected to the wider motorcycle culture.
9. Final Checks and Adjustments
After assembling your motorcycle, it’s important to perform a few final checks and adjustments to ensure everything is in perfect working order.
9.1 Gear Indexing
Ensure the gears are indexed correctly. This means that the chain shifts smoothly and accurately between gears. If the gears are not indexed correctly, you may experience skipping or difficulty shifting.
9.2 Brake Adjustment
Check that the brakes are properly adjusted. The brake levers should have a firm feel and the brakes should engage smoothly and evenly. If the brakes are too loose or too tight, you may need to adjust the brake cables or hydraulic system.
9.3 Cable Tension
Ensure that all cables, including the throttle, clutch, and brake cables, have the correct tension. Cables that are too loose can cause sluggish or unresponsive operation, while cables that are too tight can cause binding or premature wear.
9.4 Bolt Tightness
Double-check that all bolts and fasteners are properly tightened. Use a torque wrench to ensure that critical components are tightened to the manufacturer’s specifications.
9.5 Chain Lubrication
Lubricate the chain with a high-quality motorcycle chain lubricant. This will help to reduce friction and wear, and will also help to prevent rust and corrosion.
10. Go Ride!
You’ve assembled your motorcycle, performed all the necessary checks, and made the final adjustments. Now it’s time to hit the road and enjoy the ride!
10.1 Taking a Shake-Down Ride
Before embarking on a long journey, take a shake-down ride to test the motorcycle and ensure that everything is working properly. Start with a short ride in a familiar area, and gradually increase the distance as you gain confidence.
10.2 Checking for Niggles
During the shake-down ride, pay attention to any niggles or issues that may arise. Listen for unusual noises, feel for vibrations, and watch for any signs of instability.
10.3 Bedding in the Brakes
If you have new brakes, it’s important to bed them in properly. This involves performing a series of controlled stops to transfer material from the brake pads to the rotors.
10.4 Enjoying the Ride
Once you’re satisfied that the motorcycle is working properly, it’s time to relax and enjoy the ride. Explore new roads, visit scenic destinations, and experience the freedom of the open road.
 Rider ready to ride
11. Bike Assembly FAQs
Have more questions about bike assembly? Here are some frequently asked questions:
11.1 How Long Does It Take to Assemble a Bike?
The time it takes to assemble a motorcycle varies depending on your experience level, the complexity of the motorcycle, and the quality of the instructions. On average, it can take anywhere from 2 to 8 hours.
11.2 Is It Difficult to Assemble a Bike?
With the right tools and a detailed guide, assembling a motorcycle is manageable for most people. However, it requires patience, attention to detail, and a willingness to learn.
11.3 Can I Assemble a Bike Without Mechanical Experience?
Yes, but it’s recommended to start with a simpler motorcycle and follow the instructions carefully. Watching tutorial videos and seeking advice from experienced riders can also be helpful.
11.4 What If I Get Stuck During Assembly?
Don’t panic. Refer to the manual, watch online tutorials, or seek help from a local motorcycle mechanic or online community.
11.5 How Do I Know If My Bike Is Assembled Correctly?
Perform a thorough safety check, including brakes, tires, chain tension, and fluid levels. If you’re unsure, have a professional mechanic inspect the motorcycle.
11.6 What Are the Most Common Mistakes Made During Bike Assembly?
Over-tightening bolts, ignoring manuals, and skipping safety checks are common mistakes. Always use a torque wrench, follow instructions, and double-check your work.
11.7 Do I Need Special Tools to Assemble a Bike?
While basic tools like Allen wrenches and screwdrivers are essential, a torque wrench is highly recommended, especially for carbon fiber components.
11.8 Can Assembling My Own Bike Save Me Money?
Yes, you’ll save on professional assembly costs. However, factor in the cost of tools if you don’t already own them.
11.9 What Are the Benefits of Assembling My Own Bike?
You gain a deeper understanding of your motorcycle, save money, and customize it to your liking.
11.10 Where Can I Find Detailed Assembly Instructions?
The motorcycle’s manual is the best resource. You can also find online tutorials and forums dedicated to specific motorcycle models.
12. Ready to Ride with Usabikers.net?
At usabikers.net, we’re passionate about motorcycles and the biker community. Whether you’re a new rider or an experienced enthusiast, we have the resources and information you need to enhance your riding experience.
12.1 Explore Detailed Bike Reviews
Check out our in-depth motorcycle reviews to find the perfect ride that suits your needs and preferences. We cover a wide range of models, from entry-level bikes to high-performance machines.
12.2 Join Our Thriving Biker Forum
Connect with fellow motorcyclists in our active biker forum. Share your experiences, ask questions, and get advice from knowledgeable riders.
12.3 Discover Expert Riding Tips
Improve your riding skills with our expert tips and guides. Learn about advanced techniques, safety practices, and maintenance procedures to keep you riding safely and confidently.
12.4 Stay Updated on Biker Events
Stay informed about the latest biker events, rallies, and gatherings across the USA. Plan your next adventure and connect with the motorcycle community.
12.5 Find Local Biker Clubs
Discover local biker clubs in your area and join a group of like-minded enthusiasts. Share your passion for motorcycles and forge lasting friendships.
13. Stay Safe and Informed: Visit Usabikers.net Today
Ready to dive deeper into the world of motorcycles? Visit usabikers.net for a wealth of information, community support, and expert advice.
Address: 801 Sturgis Main St, Sturgis, SD 57785, United States
Phone: +1 (605) 347-2000
Website: usabikers.net
Join usabikers.net today and experience the ultimate motorcycle community! Explore our articles, participate in our forums, and connect with fellow riders who share your passion. Whether you’re looking for the latest motorcycle reviews, expert riding tips, or information on local biker events, usabikers.net has everything you need to fuel your motorcycle journey. Don’t miss out – visit usabikers.net now and become part of our growing community!