Inflation is key! How To Inflate A Bike Tire is a fundamental skill for every biker, ensuring a smooth, safe, and enjoyable ride. At usabikers.net, we’re passionate about providing bikers with the knowledge and resources they need to stay on the road. Learn the proper inflation techniques to enhance your motorcycle adventures and maintain optimal performance.
1. Understanding Your Bike’s Tire Valves
Before you grab a pump, it’s crucial to identify the type of valve on your bike’s tires. Knowing the valve type is the first step in understanding how to inflate a bike tire and ensuring you use the correct tools and techniques. There are primarily three types of valves you’ll encounter: Presta, Schrader, and Dunlop/Woods.
1.1. Presta Valve
 Presta valves are found on the majority of bikes
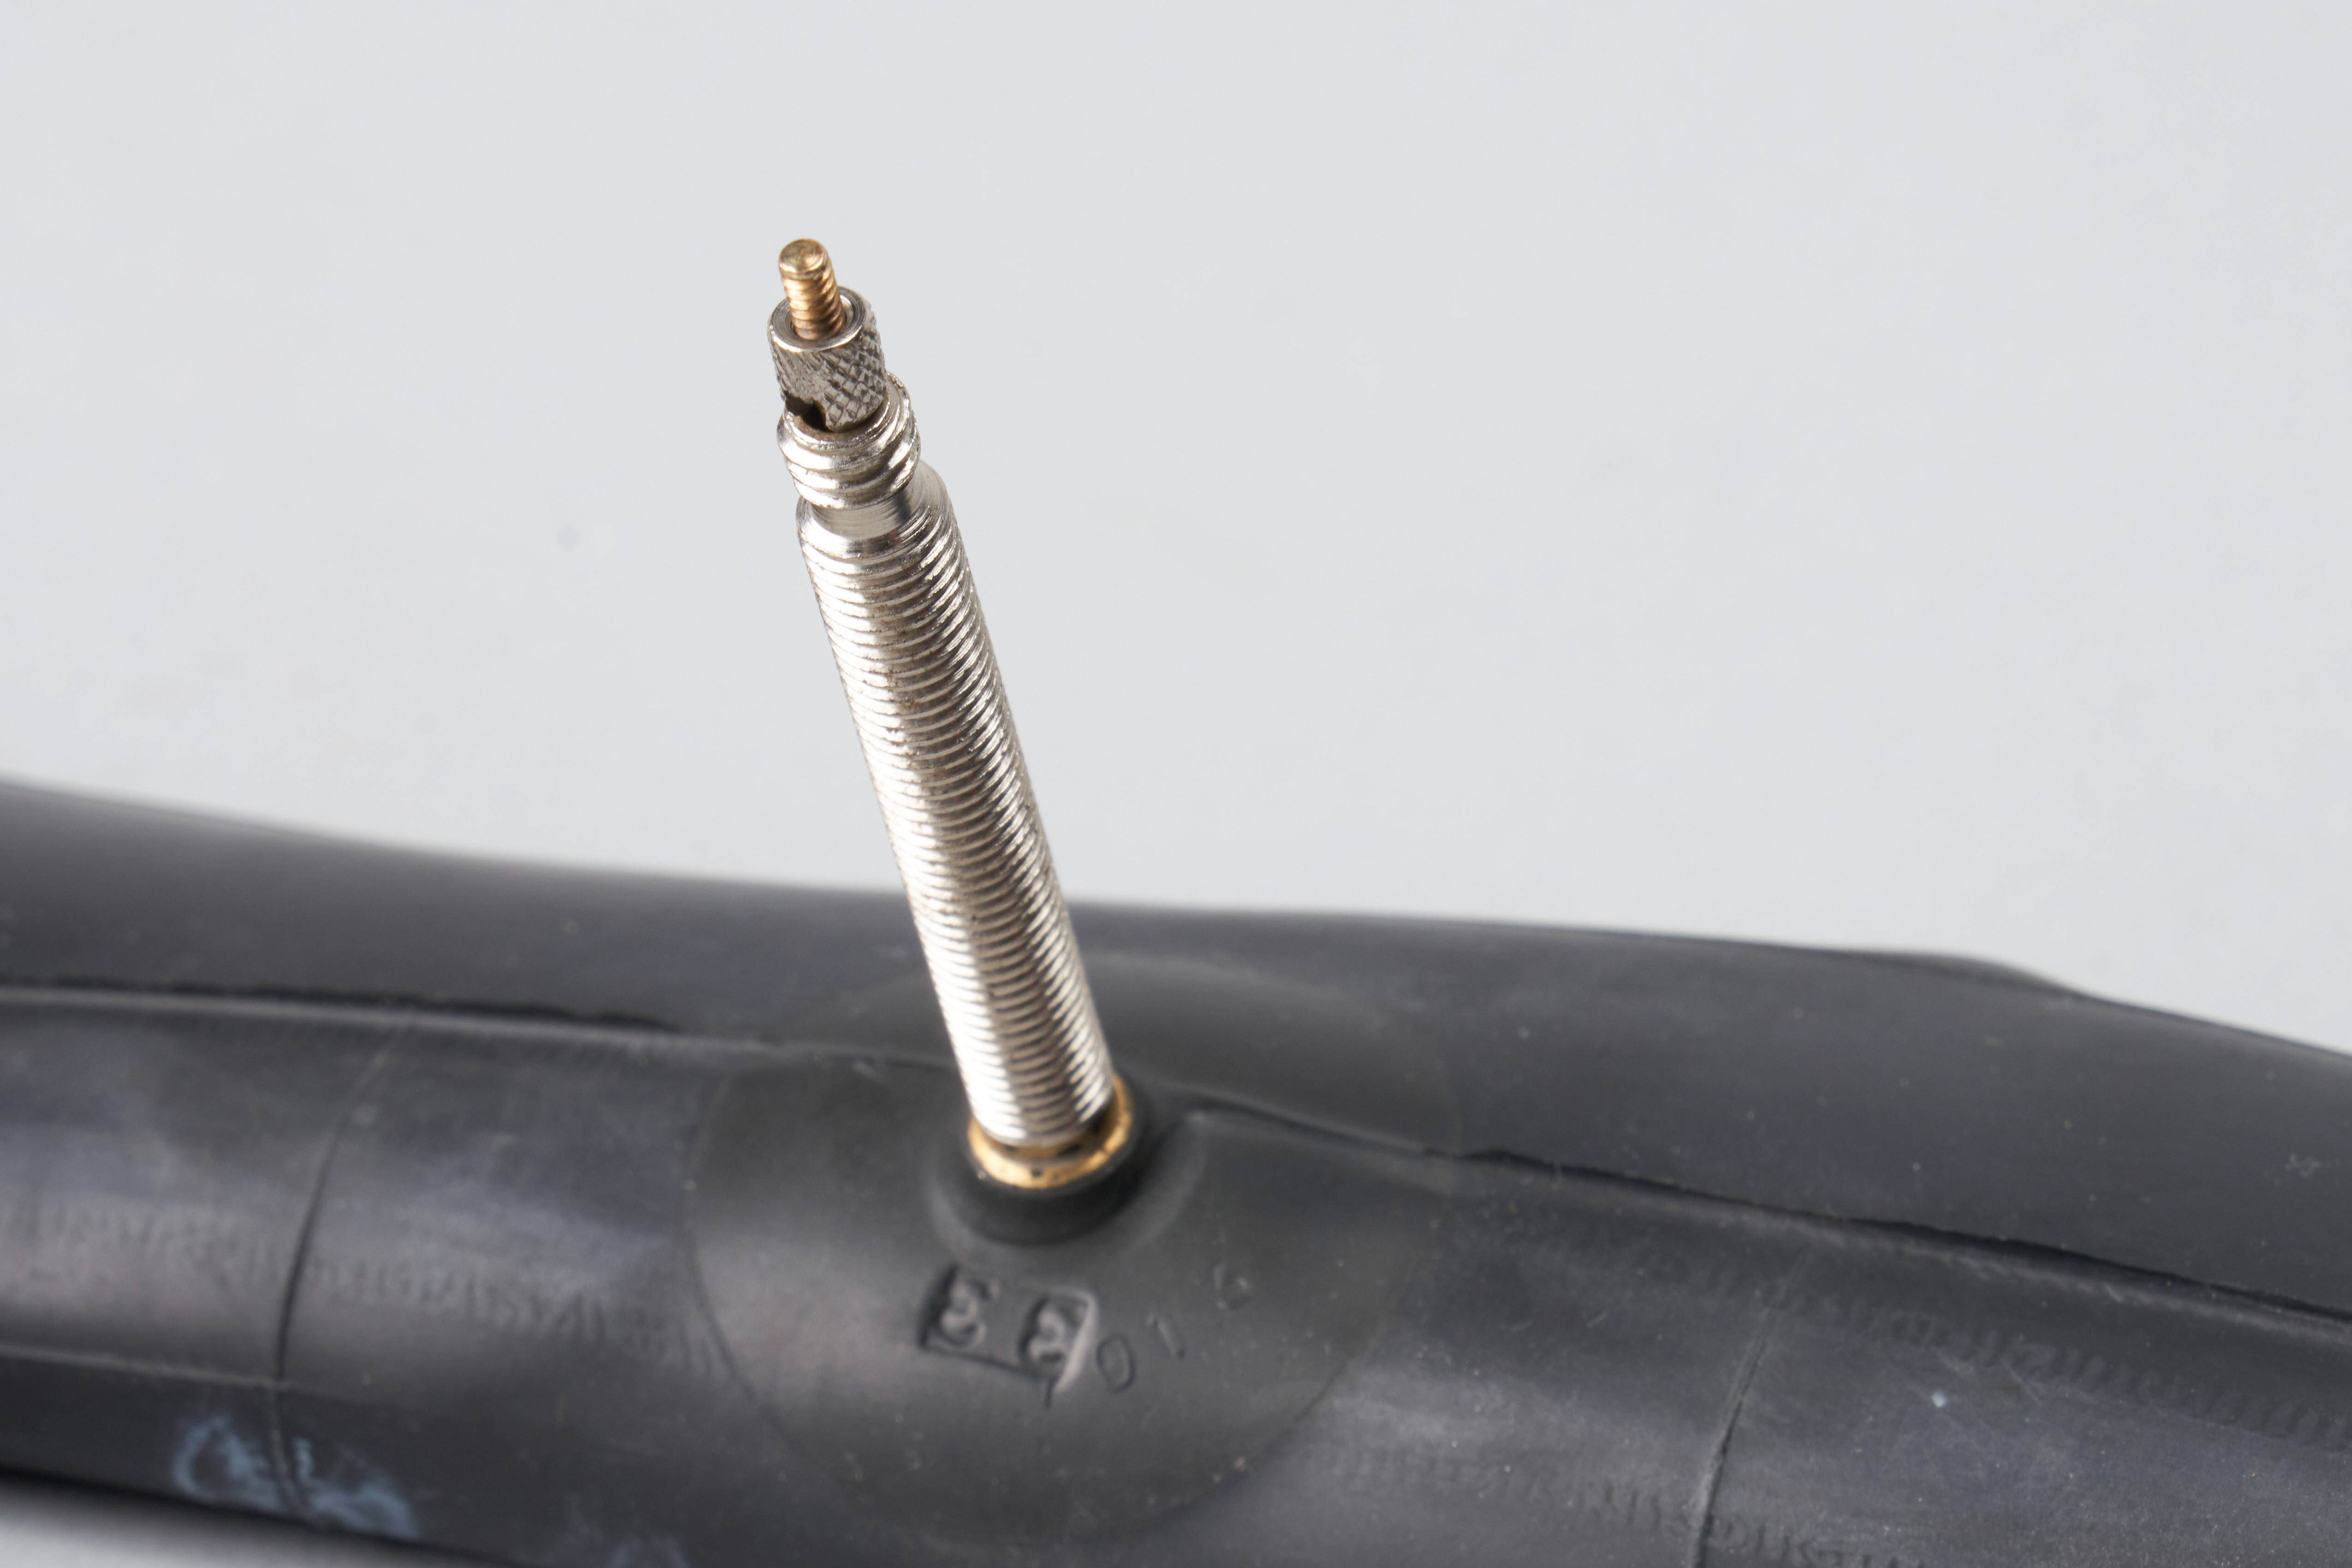
Presta valves are commonly found on higher-end road bikes and mountain bikes due to their lightweight and ability to hold higher pressures. A Presta valve is characterized by its slender design and a small lock ring at the tip that needs to be unscrewed before inflation.
What are the key features of a Presta valve?
Presta valves feature a slender design and a lock ring at the tip. These valves are lighter and can handle higher pressures, making them ideal for performance-oriented bikes. According to a study by the American Motorcyclist Association (AMA), Presta valves are favored by many professional cyclists for their reliable performance.
1.2. Schrader Valve
 Schrader valves are less common, but are still found on some entry-level bikes
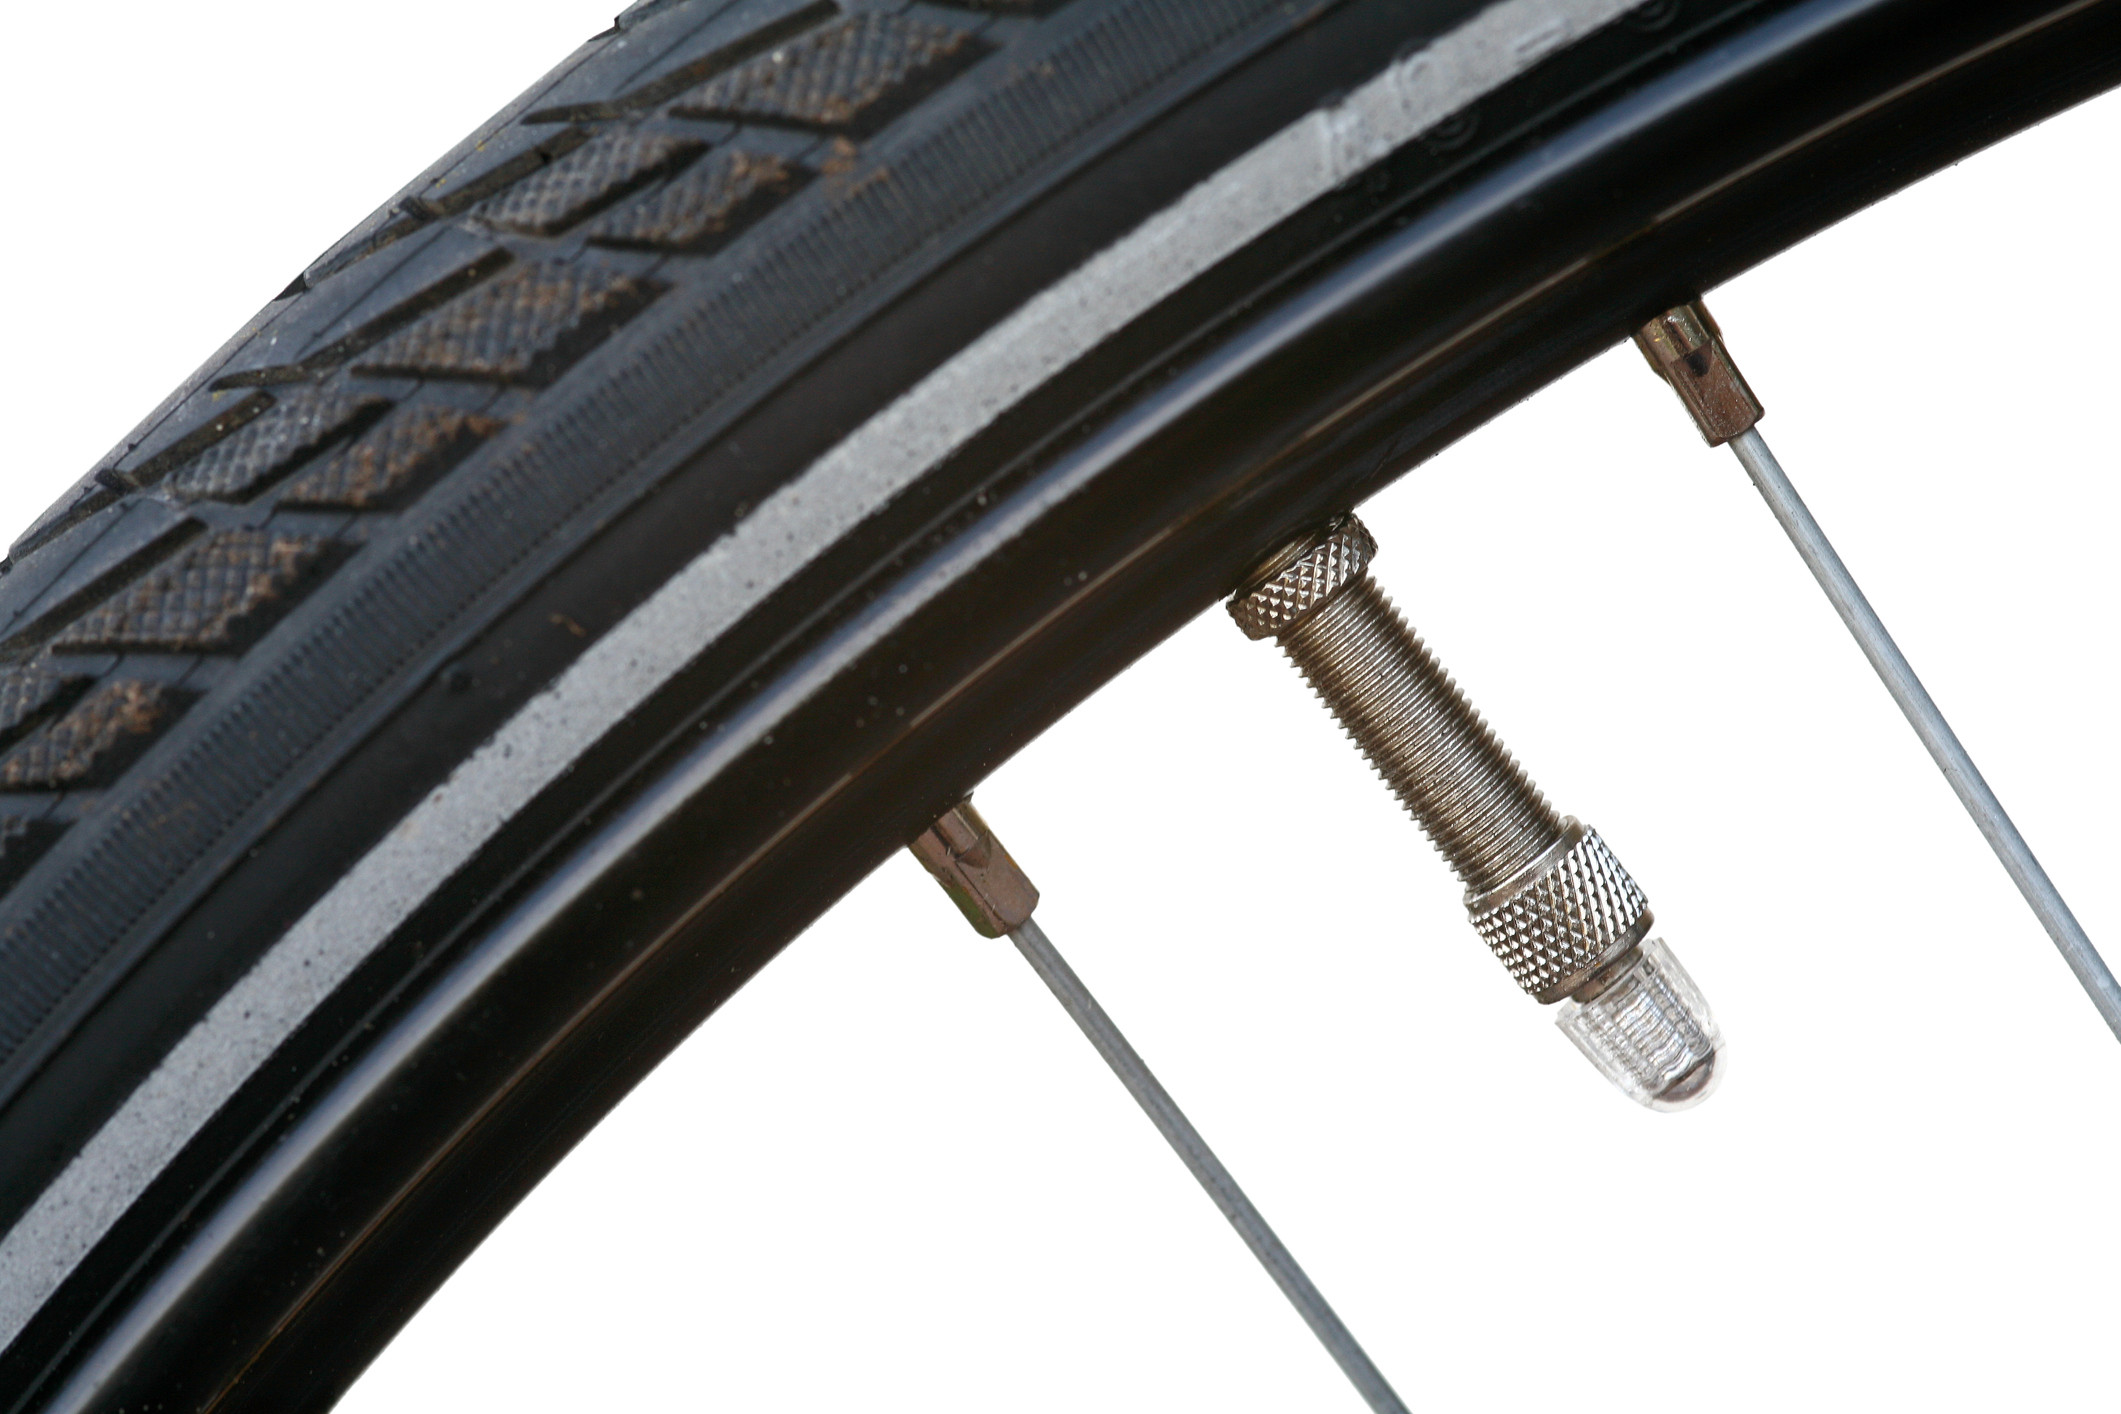
Schrader valves are more robust and are commonly found on entry-level bikes, mountain bikes, and even car tires. Schrader valves are wider and feature a spring-loaded pin in the center.
What makes a Schrader valve unique?
Schrader valves are wider and have a spring-loaded pin in the center. These valves are similar to those found on car tires, making them durable and easy to inflate at any gas station. The Motorcycle Safety Foundation (MSF) recommends Schrader valves for their ease of use and widespread availability.
1.3. Dunlop/Woods Valve
 Dunlop/Woods valves are rare but still around
Dunlop or Woods valves are less common in modern bikes but can still be found on older or Dutch-style bicycles. A Dunlop valve resembles a Presta valve but does not have a threaded lock ring.
Where can you typically find Dunlop/Woods valves?
Dunlop valves are commonly found on Dutch-style bikes. While less prevalent on modern bikes, they share a similar valve core with Presta valves and use a locking nut to prevent deflation.
1.4. Tubeless Valve
 The RX830s come with long tubeless valves
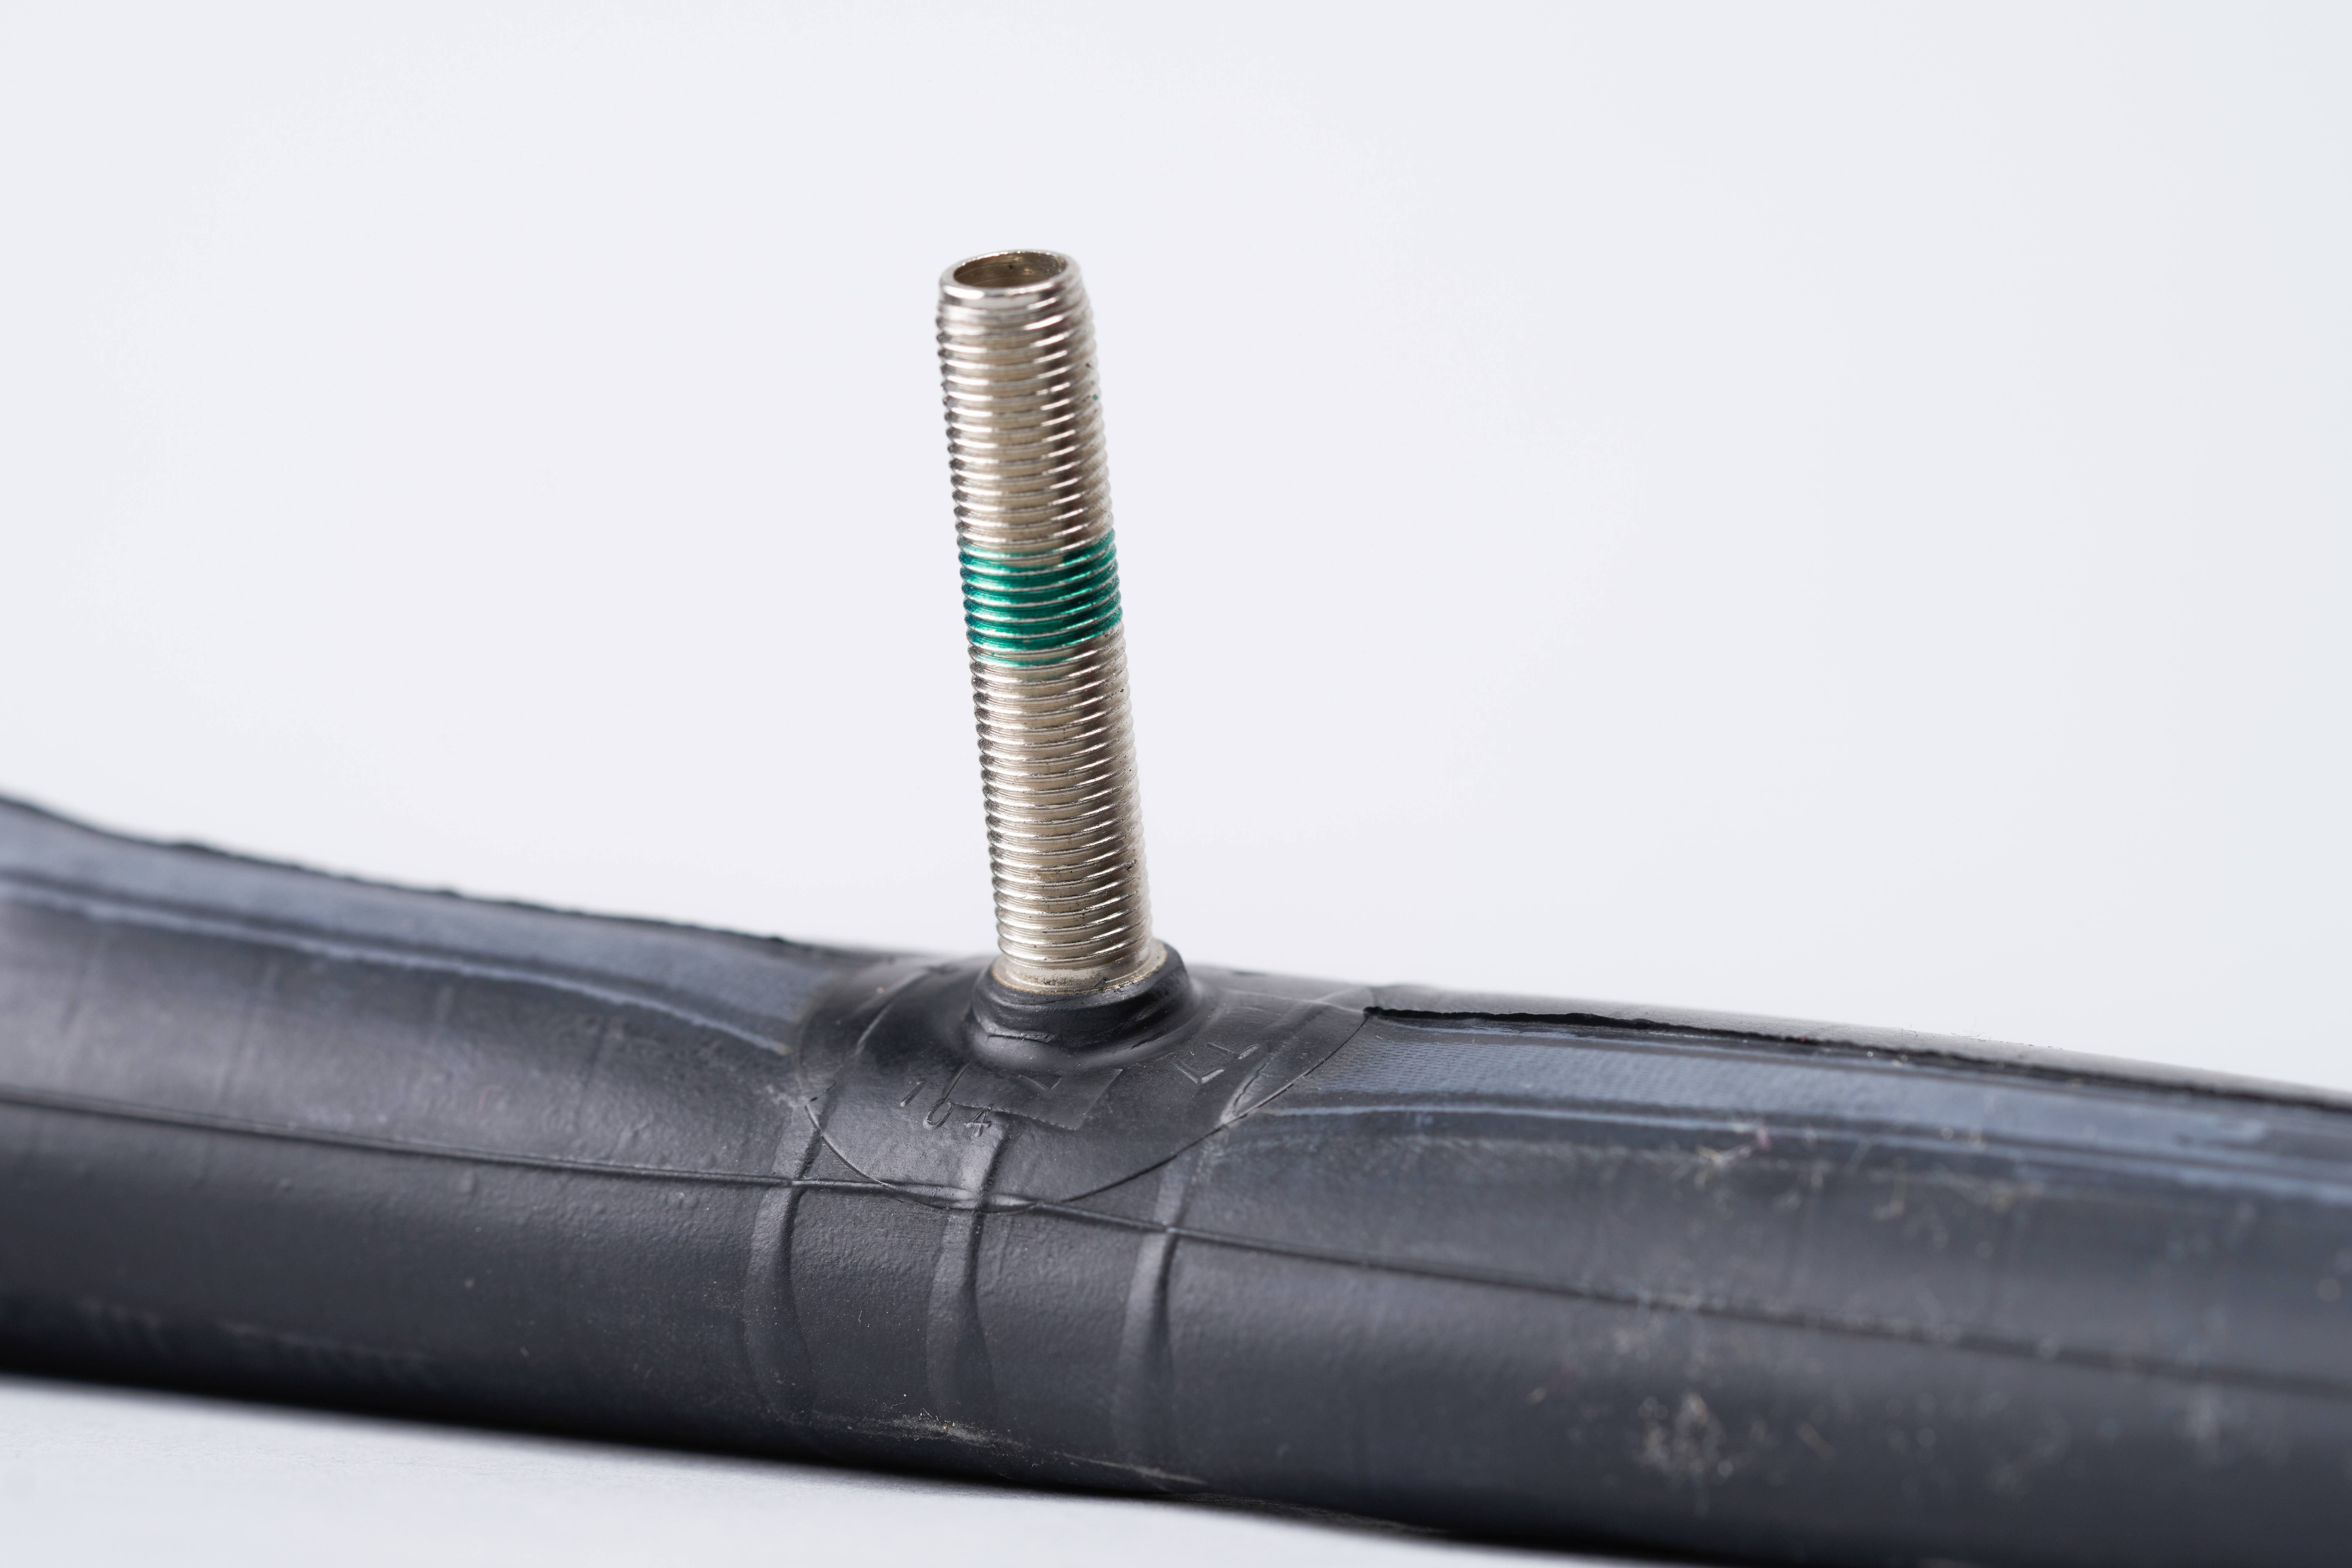
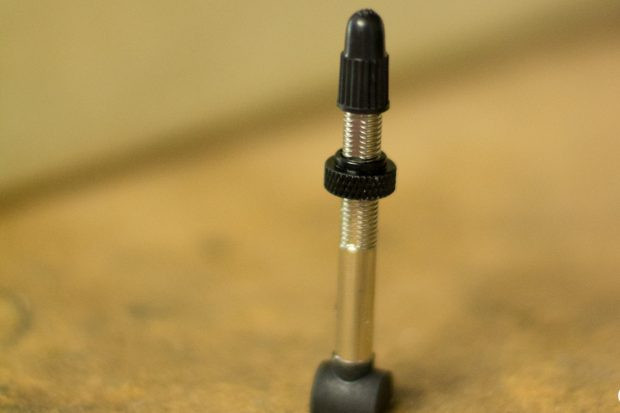
Tubeless valves are specifically designed for tubeless tire setups, where the tire seals directly to the rim without an inner tube. These valves typically come in Presta configurations and attach directly to the rim via a threaded locknut.
What are tubeless valves designed for?
Tubeless valves are designed for tubeless tire setups. They attach directly to the rim using a threaded locknut, creating an airtight seal without needing an inner tube. Tubeless setups are favored for their ability to run at lower pressures and reduce the risk of pinch flats, enhancing comfort and traction on various terrains.
2. Essential Tools for Inflating Your Bike Tires
Having the right tools is essential for maintaining your bike’s tires. It is essential to know how to inflate a bike tire. The tools not only make the job easier but also ensure you achieve the correct pressure for optimal performance and safety. Here are the essential tools every biker should have:
2.1. Track Pump (Floor Pump)
A track pump, also known as a floor pump, is a must-have for home use. It provides a stable base, a long hose, and an accurate pressure gauge. A track pump makes inflating tires quick and easy.
Why is a track pump essential for home use?
A track pump is essential for home use due to its stability, long hose, and accurate pressure gauge. It allows for quick and easy inflation of tires, ensuring they are always at the optimal pressure. According to a review in “Motorcycle Cruiser” magazine, a good track pump can significantly improve the ease of tire maintenance.
2.2. Mini Pump
A mini pump is a compact and lightweight option perfect for carrying on rides. It is designed to be portable. A mini pump can be a lifesaver if you encounter a flat tire while on the road.
What are the benefits of carrying a mini pump on rides?
Carrying a mini pump on rides ensures you can quickly inflate a flat tire and continue your journey. Its compact and lightweight design makes it easy to store in a backpack or attach to your bike frame. The Adventure Cycling Association recommends mini pumps as essential gear for any long-distance ride.
2.3. CO2 Inflator
 LifeLine CNC co2 inflators
CO2 inflators use compressed carbon dioxide cartridges to quickly inflate tires. While they are not a replacement for a pump, they can be incredibly convenient for fast inflation during a ride.
Why might a biker choose a CO2 inflator?
A CO2 inflator offers the fastest way to inflate a tire, making it ideal for quick fixes on the road. However, it’s essential to carry multiple cartridges and practice using the inflator before relying on it during a ride. “Road Bike Action” magazine highlights CO2 inflators for their speed and convenience in emergency situations.
2.4. Tire Pressure Gauge
A tire pressure gauge is a small, handheld device used to accurately measure the pressure inside your tires. Maintaining the correct tire pressure is crucial for performance, safety, and tire longevity.
How does a tire pressure gauge enhance safety and performance?
A tire pressure gauge ensures your tires are inflated to the manufacturer’s recommended pressure, optimizing handling, grip, and braking performance. Regular use of a pressure gauge also helps prevent over- or under-inflation, which can lead to tire damage and reduced safety. The National Highway Traffic Safety Administration (NHTSA) emphasizes the importance of maintaining correct tire pressure for road safety.
2.5. Valve Adaptors
Valve adaptors allow you to use a pump with a different valve type than your tire. These small adaptors can be handy if you have multiple bikes with different valve types or if you need to use a public air pump.
When are valve adaptors most useful?
Valve adaptors are particularly useful when you have bikes with different valve types or need to use a pump that doesn’t match your valve. They ensure you can always inflate your tires, regardless of the pump available. Many biker communities recommend carrying valve adaptors for added convenience and versatility.
3. Step-by-Step Guide on How to Inflate a Bike Tire
Inflating a bike tire might seem straightforward, but knowing the correct steps ensures you do it safely and effectively. Here’s a detailed guide on how to inflate a bike tire using a pump.
3.1. Prepare the Valve
Preparing the valve correctly is essential for a successful inflation. Depending on the valve type, the preparation steps vary slightly.
How do you prepare a Presta valve for inflation?
To prepare a Presta valve, first, remove the valve cap. Then, unscrew the small lock ring at the tip of the valve. Gently push the valve in to ensure it is not stuck. This step is crucial for allowing air to flow freely into the tire.
What steps are involved in preparing a Schrader valve?
Preparing a Schrader valve is simpler. Just remove the valve cap. Ensure there is no debris around the valve that could interfere with the pump’s connection.
3.2. Attach the Pump Head
Attaching the pump head securely to the valve is critical for an airtight connection. A proper connection ensures that air flows into the tire without any leaks.
What is the correct way to attach a pump head to a Presta valve?
Carefully place the pump head onto the Presta valve. Ensure it is snug but not too tight to avoid bending the valve. Flip the locking lever on the pump head to secure it in place. If you hear air escaping, readjust the pump head until the connection is airtight.
How do you attach a pump head to a Schrader valve?
Place the pump head onto the Schrader valve and press firmly until it is securely connected. Some pump heads may have a locking lever. Ensure it is engaged to create an airtight seal.
3.3. Inflate the Tire
With the pump head securely attached, you can begin inflating the tire. Use smooth, consistent strokes to pump air into the tire.
What is the best technique for inflating a tire using a track pump?
When using a track pump, place your feet on the base for stability. Use your body weight to push down on the handle in smooth, full strokes. Watch the pressure gauge to monitor the inflation level.
How should you inflate a tire using a mini pump?
Using a mini pump requires more effort. Place the pump head securely on the valve and use short, quick strokes to inflate the tire. Check the pressure periodically to avoid over- or under-inflation.
3.4. Monitor the Pressure
Keeping an eye on the pressure gauge is crucial for achieving the correct inflation level. Proper tire pressure ensures optimal performance and safety.
Why is it important to monitor the pressure while inflating?
Monitoring the pressure prevents over- or under-inflation, both of which can negatively impact your ride. Over-inflation can lead to a harsh ride and increased risk of blowouts, while under-inflation can cause sluggish handling and pinch flats.
What is the recommended tire pressure for different types of bikes?
The recommended tire pressure varies depending on the type of bike and tire. Road bikes typically require higher pressures (80-130 psi), while mountain bikes use lower pressures (25-35 psi). Always check the tire sidewall for the manufacturer’s recommended pressure range.
3.5. Detach the Pump Head
Once the tire is inflated to the correct pressure, carefully detach the pump head from the valve.
How do you detach a pump head from a Presta valve without losing air?
Flip the locking lever on the pump head to release it. Quickly and smoothly pull the pump head straight off the valve. Some air loss is normal, but minimizing the loss ensures the tire remains properly inflated.
What is the best way to remove a pump head from a Schrader valve?
Simply pull the pump head straight off the Schrader valve. Ensure a smooth motion to minimize air loss.
3.6. Close the Valve
Closing the valve properly after inflation prevents air leakage and keeps your tires properly inflated for longer.
What steps are involved in closing a Presta valve?
After detaching the pump head, screw the lock ring on the Presta valve clockwise until it is snug. Replace the valve cap to protect the valve from dirt and debris.
How do you close a Schrader valve properly?
Simply replace the valve cap on the Schrader valve. The cap helps protect the valve from dirt and debris.
4. Understanding Tire Pressure (PSI)
Maintaining the correct tire pressure, measured in pounds per square inch (PSI), is vital for your bike’s performance, safety, and comfort. Correctly understanding how to inflate a bike tire is also essential. Different types of bikes and riding conditions require different PSI levels.
4.1. Factors Affecting Tire Pressure
Several factors influence the ideal tire pressure for your bike. Consider the following when determining your tire pressure:
How does rider weight impact optimal tire pressure?
Heavier riders need higher tire pressures to prevent pinch flats and ensure proper handling. Lighter riders can use lower pressures for improved comfort and traction.
What role does tire width play in determining tire pressure?
Wider tires can run at lower pressures because they have a larger air volume. Narrower tires require higher pressures to prevent bottoming out.
How do different riding conditions influence tire pressure?
Off-road riding often benefits from lower pressures for better traction and comfort. Paved roads typically require higher pressures for lower rolling resistance and improved speed.
4.2. Recommended Tire Pressure for Different Bikes
Here are general guidelines for tire pressure based on bike type. Always refer to the tire sidewall for the manufacturer’s specific recommendations.
| Bike Type | Recommended PSI Range |
|---|---|
| Road Bike | 80-130 PSI |
| Mountain Bike | 25-35 PSI |
| Hybrid Bike | 40-70 PSI |
| Gravel Bike | 30-50 PSI |
| Touring Bike | 50-80 PSI |
Where can you find the recommended tire pressure for your bike?
The recommended tire pressure is typically printed on the tire sidewall. Look for a range (e.g., “Min 60 PSI – Max 80 PSI”) and stay within those limits.
4.3. Benefits of Correct Tire Pressure
Maintaining the correct tire pressure offers numerous benefits, enhancing your overall riding experience.
How does correct tire pressure improve riding comfort?
Properly inflated tires absorb shocks and vibrations, providing a smoother and more comfortable ride. This is especially important on long rides or rough terrain.
What are the advantages of optimal tire pressure for handling and control?
Correct tire pressure ensures predictable handling and control, allowing you to confidently navigate corners, brake effectively, and maintain stability.
How does tire pressure affect rolling resistance and speed?
Optimized tire pressure reduces rolling resistance, making it easier to maintain speed and conserve energy. Over- or under-inflated tires increase rolling resistance, making your ride less efficient.
What is the relationship between tire pressure and the risk of punctures?
Correct tire pressure reduces the risk of pinch flats (snakebite punctures), which occur when the tire is compressed against the rim, damaging the inner tube. Proper inflation provides adequate cushioning and protection.
5. Types of Bike Pumps
Choosing the right type of bike pump can make tire inflation easier and more efficient. Each type of pump has its own advantages and is suited for different situations.
5.1. Track Pumps (Floor Pumps)
Track pumps are designed for home use and offer high efficiency and accuracy. They feature a large air chamber, a stable base, and a pressure gauge.
What makes a track pump ideal for home use?
Track pumps provide a stable platform, a comfortable handle, and an accurate pressure gauge, making them ideal for inflating tires quickly and easily at home.
What are the key features to look for in a high-quality track pump?
Look for features such as a durable construction, a long hose, a precise pressure gauge, and a pump head that is compatible with both Presta and Schrader valves.
5.2. Mini Pumps
Mini pumps are compact and portable, making them essential for on-the-go inflation. They can be carried in a backpack or mounted on the bike frame.
Why should every biker carry a mini pump?
A mini pump allows you to quickly inflate a flat tire while on a ride, preventing you from being stranded.
What are the important considerations when choosing a mini pump?
Consider factors such as size, weight, pumping efficiency, and compatibility with your bike’s valve type. Some mini pumps also come with built-in pressure gauges.
5.3. CO2 Inflators
CO2 inflators offer the fastest way to inflate a tire using compressed carbon dioxide cartridges. They are lightweight and easy to carry but require replacement cartridges after each use.
In what situations are CO2 inflators most useful?
CO2 inflators are ideal for quick tire inflation during races or when you need to get back on the road as soon as possible.
What are the pros and cons of using a CO2 inflator compared to a mini pump?
CO2 inflators are faster and require less physical effort than mini pumps. However, they rely on disposable cartridges and do not allow for precise pressure adjustments. Mini pumps are reusable and offer more control over tire pressure.
5.4. Electric Pumps
Electric pumps provide a convenient and effortless way to inflate tires. They are powered by batteries and can quickly inflate tires to the desired pressure.
What are the advantages of using an electric pump for bike tires?
Electric pumps eliminate the need for manual pumping, making them ideal for riders with limited strength or those who want a hassle-free inflation experience.
Who might benefit most from using an electric pump?
Electric pumps are particularly useful for riders who have multiple bikes, those with high-volume tires, or anyone who struggles with manual pumping.
6. Common Problems and Solutions
Even with the right tools and knowledge, you may encounter some common problems when inflating bike tires. Here are some solutions to help you troubleshoot.
6.1. Air Leaking Around the Valve
If you hear or feel air leaking around the valve while inflating, there may be a problem with the connection between the pump head and the valve.
What should you do if you hear air leaking when attaching the pump?
First, ensure that the pump head is securely attached to the valve. Readjust the connection and make sure the locking lever (if present) is fully engaged. If the leaking persists, check the valve for damage or debris.
How can you ensure an airtight seal between the pump and the valve?
Use a pump head that is compatible with your valve type and in good condition. Ensure the valve is clean and free from damage. Applying a small amount of lubricant to the valve can also help create a better seal.
6.2. Difficulty Attaching the Pump Head
Sometimes, it can be challenging to attach the pump head to the valve, especially if the valve is recessed or in an awkward position.
What techniques can make it easier to attach the pump head to the valve?
Use a pump with a flexible hose to make it easier to reach the valve. If the valve is recessed, try using a valve extender or adaptor to bring it closer to the pump head.
What tools or adaptors can help with hard-to-reach valves?
Valve extenders, flexible pump hoses, and specialized pump heads can all help with hard-to-reach valves.
6.3. The Tire Won’t Inflate
If the tire won’t inflate despite your best efforts, there may be a more serious issue.
What steps should you take if the tire refuses to inflate?
First, check for punctures or damage to the inner tube. If the tube is damaged, replace it. Also, ensure that the valve core is not blocked or damaged.
How can you check for punctures or damage to the inner tube?
Remove the inner tube and inflate it slightly. Submerge it in water and look for bubbles, which indicate a puncture. Inspect the tube for cuts, abrasions, or other damage.
6.4. The Pressure Gauge Is Inaccurate
An inaccurate pressure gauge can lead to over- or under-inflation, so it’s important to ensure your gauge is working correctly.
How can you verify the accuracy of your pressure gauge?
Compare your gauge’s readings to those of another gauge known to be accurate. If there is a significant difference, your gauge may need to be recalibrated or replaced.
What are the signs of a faulty pressure gauge?
Signs of a faulty pressure gauge include inconsistent readings, a needle that sticks or jumps, or readings that do not match the actual tire pressure.
7. Tips for Maintaining Bike Tires
Proper tire maintenance extends beyond just inflating them. Regular care and attention can prolong the life of your tires and ensure they perform optimally.
7.1. Regularly Check Tire Pressure
Checking your tire pressure before each ride is a simple habit that can make a big difference.
Why is it important to check tire pressure before every ride?
Checking tire pressure ensures that your tires are properly inflated for optimal performance, handling, and safety. It also helps prevent punctures and premature tire wear.
How often should you check tire pressure if you don’t ride frequently?
Even if you don’t ride frequently, check your tire pressure at least once a week, as tires can slowly lose air over time.
7.2. Inspect Tires for Wear and Damage
Regularly inspecting your tires for signs of wear and damage can help you catch problems before they lead to a flat or blowout.
What types of wear and damage should you look for when inspecting your tires?
Look for cuts, abrasions, bulges, and uneven wear patterns. Check the tire sidewalls for cracks or damage.
When should you replace your bike tires?
Replace your tires when they show significant wear, such as worn-down tread, cuts, or sidewall damage. Also, replace tires that are old or have been exposed to excessive sunlight, even if they appear to be in good condition.
7.3. Store Your Bike Properly
Properly storing your bike can help prolong the life of your tires and prevent damage.
How should you store your bike to protect the tires?
Store your bike in a cool, dry place away from direct sunlight and extreme temperatures. Hang the bike or support it so that the tires are not resting on the ground, which can cause flat spots.
What environmental factors can damage bike tires?
Direct sunlight, extreme temperatures, and exposure to chemicals or solvents can damage bike tires.
7.4. Clean Your Tires Regularly
Keeping your tires clean can help prevent damage from debris and ensure they maintain good traction.
What is the best way to clean bike tires?
Use a mild soap and water solution to clean your tires. Rinse them thoroughly and allow them to dry before riding. Avoid using harsh chemicals or solvents, which can damage the rubber.
What types of cleaning products should you avoid using on bike tires?
Avoid using products such as degreasers, bleach, and harsh chemicals, as they can degrade the rubber and reduce the lifespan of your tires.
8. The Role of Usabikers.net in Your Biker Journey
At usabikers.net, we’re dedicated to providing comprehensive resources, expert advice, and a vibrant community for motorcycle enthusiasts across the USA. Whether you’re a new rider or a seasoned biker, we’re here to support your journey.
8.1. Explore Informative Articles and Guides
Discover a wealth of articles and guides covering everything from bike maintenance and safety tips to the latest industry news and gear reviews.
What types of information can you find on usabikers.net?
Usabikers.net offers articles and guides on bike maintenance, safety tips, gear reviews, industry news, and inspiring stories from the biker community.
How can these resources help you enhance your biking skills and knowledge?
These resources provide practical advice, expert insights, and up-to-date information to help you improve your riding skills, stay informed about industry trends, and make informed decisions about your gear and equipment.
8.2. Connect with a Thriving Biker Community
Join our vibrant community of bikers from all walks of life. Share your experiences, ask questions, and connect with like-minded individuals.
How can you join and participate in the usabikers.net community?
You can join the usabikers.net community by creating an account on our website and participating in our forums, discussion boards, and social media groups.
What are the benefits of being part of a biker community?
Being part of a biker community provides a sense of belonging, support, and camaraderie. You can share your experiences, learn from others, and build lasting friendships.
8.3. Stay Updated on Biker Events and Rallies
Stay informed about the latest biker events, rallies, and gatherings happening across the USA. Plan your next adventure and connect with fellow riders.
Where can you find information about upcoming biker events on usabikers.net?
Usabikers.net features a comprehensive calendar of biker events, rallies, and gatherings happening across the USA.
How can attending biker events enhance your passion for riding?
Attending biker events allows you to connect with fellow riders, explore new destinations, and immerse yourself in the biker culture. It’s a great way to fuel your passion for riding and create lasting memories.
8.4. Access Expert Advice and Recommendations
Get expert advice and recommendations from experienced bikers and industry professionals. Make informed decisions about your gear, equipment, and riding techniques.
What types of expert advice can you find on usabikers.net?
Usabikers.net offers expert advice on bike maintenance, gear selection, riding techniques, safety tips, and travel destinations.
How can this advice help you make better choices for your biking journey?
This advice can help you make informed decisions about your gear, equipment, and riding techniques, ensuring a safer, more enjoyable, and fulfilling biking experience.
Address: 801 Sturgis Main St, Sturgis, SD 57785, United States
Phone: +1 (605) 347-2000
Website: usabikers.net
9. FAQ: Common Questions About Inflating Bike Tires
9.1. What is the ideal tire pressure for a road bike?
The ideal tire pressure for a road bike typically ranges from 80 to 130 PSI, but always check the tire sidewall for the manufacturer’s recommended range.
9.2. How often should I inflate my bike tires?
You should check and inflate your bike tires before every ride to ensure optimal performance and safety.
9.3. Can I use a car tire pump to inflate my bike tires?
Yes, you can use a car tire pump if you have a Schrader valve. For Presta valves, you’ll need an adaptor.
9.4. What is the difference between a Presta and Schrader valve?
A Presta valve is narrower and has a lock ring at the tip, while a Schrader valve is wider and has a spring-loaded pin in the center, similar to car tires.
9.5. How do I know if my tire is properly inflated?
Use a tire pressure gauge to measure the PSI and ensure it falls within the manufacturer’s recommended range printed on the tire sidewall.
9.6. What causes a bike tire to lose air?
Bike tires can lose air due to punctures, slow leaks around the valve, or simply because the inner tube is not perfectly airtight.
9.7. Can I over-inflate my bike tires?
Yes, over-inflating your bike tires can lead to a harsh ride and increase the risk of blowouts, so always stay within the recommended PSI range.
9.8. What should I do if I get a flat tire while riding?
Carry a mini pump or CO2 inflator and a spare inner tube. Follow the steps for changing a flat tire and inflating the new tube.
9.9. Is it normal for bike tires to lose some air over time?
Yes, it’s normal for bike tires to lose a small amount of air over time, typically 1-2 PSI per day.
9.10. How do tubeless tires affect tire inflation?
Tubeless tires allow you to run lower pressures without the risk of pinch flats, improving comfort and traction. They require a special sealant to maintain an airtight seal.
Understanding how to inflate a bike tire is a basic skill that ensures every ride is safe and enjoyable. From knowing your valve types to choosing the right pump and maintaining optimal tire pressure, you’re now well-equipped to hit the road with confidence. Remember, usabikers.net is your go-to resource for all things biking. Explore our articles, connect with our community, and stay updated on the latest events.
Ready to take your biking experience to the next level? Visit usabikers.net today and discover a world of information, inspiration, and connection!