
Embarking on a DIY project can be incredibly rewarding, especially when it combines your passions for cycling and the great outdoors. This spring, we took on a fun challenge: constructing a tiny camper trailer designed to be pulled by an e-bike. The goal? A lightweight, versatile Diy Bike Trailer that could open up new possibilities for local adventures and explorations. The final build tipped the scales at around 160 pounds, and we aimed to pull it with a standard 250-watt e-bike. While still a work in progress with improvements on the horizon, here’s how we built our DIY bike trailer and the results of our initial tests. We’re excited to use it for venturing to different spots and seeing what adventures await.
Crafting the Bike Trailer: A How-To Overview
For those interested in seeing the build process in detail, we created a dedicated video.
Watch the DIY Bike Trailer Build Video
This video, featured on our secondary channel, Step 2, offers a closer look at the construction of the bike trailer. The Step 2 channel is a space for more casual projects, behind-the-scenes content, and fun, shorter videos without a rigid upload schedule. Back to the DIY bike trailer itself…
The idea of building a camper trailer towable by a bicycle had been brewing for a long time. If camping has a bucket list, this project was definitely near the top. When it comes to a light, affordable, and DIY bike trailer, there are many approaches, but we opted for coroplast sheets. Coroplast is known for its surprising durability and strength while remaining remarkably lightweight, making it an ideal material for this project.
Overall, we’re extremely pleased with how the DIY bike trailer turned out.
Construction Deep Dive: Details of the DIY Bike Trailer Build
The initial concept for the bike camper was sketched out casually, though the general idea had been forming for quite some time. The key was to create something spacious enough for an adult to comfortably use, yet compact and light enough to be pulled by a bicycle. After settling on the dimensions and layout, material selection began. We chose coroplast sheets along with styrene sheets due to their excellent strength-to-weight ratio and affordability.
We decided on a curved front for the trailer, which not only provides an aerodynamic advantage but also enhances the aesthetics compared to a typical rectangular shape. Plywood was used for the floor to provide a solid and stable base. For the wheels, we repurposed components from a discarded dolly, utilizing a length of ready rod as the axle. We focused on tight construction throughout the build, aiming to minimize any water ingress and ensure weather resistance.
Interestingly, the door hatch was salvaged from an old, unused camper, giving it a new lease on life in this project.
To add durability and a rugged look, we incorporated checker plate along the lower edges of the trailer. We also installed lights to enhance visibility and safety, although the wiring was planned for a later stage. A crucial element for comfort, especially in warmer weather, was the inclusion of a roof vent. Past experience with coroplast structures highlighted the absolute necessity of proper ventilation to prevent overheating inside, especially during summer use.
With the build complete, the DIY bike trailer was ready for its first road test. Initially, it felt a bit heavy and unstable, a sensation you definitely want to avoid when cycling on roads. Adjusting the weight distribution by shifting internal cargo slightly towards the rear significantly improved stability and handling. The initial hitch design, which connected to the bike seat, proved unsuitable. We then modified it to attach directly to the rear bike frame. This adjustment proved to be highly effective, resulting in a much more secure and manageable towing experience.
While largely finished, the DIY bike trailer remains a project of continuous refinement. We appreciate the community feedback and suggestions received on YouTube for further improvements. We plan to share updates as we make significant modifications.
Stay tuned for more updates, and happy building!
Design to Reality: Visualizing the DIY Bike Trailer
Below are design sketches illustrating the initial concept and progression to the finished DIY bike trailer. It was a thoroughly enjoyable and creative process, from the initial planning stages to the final assembly.
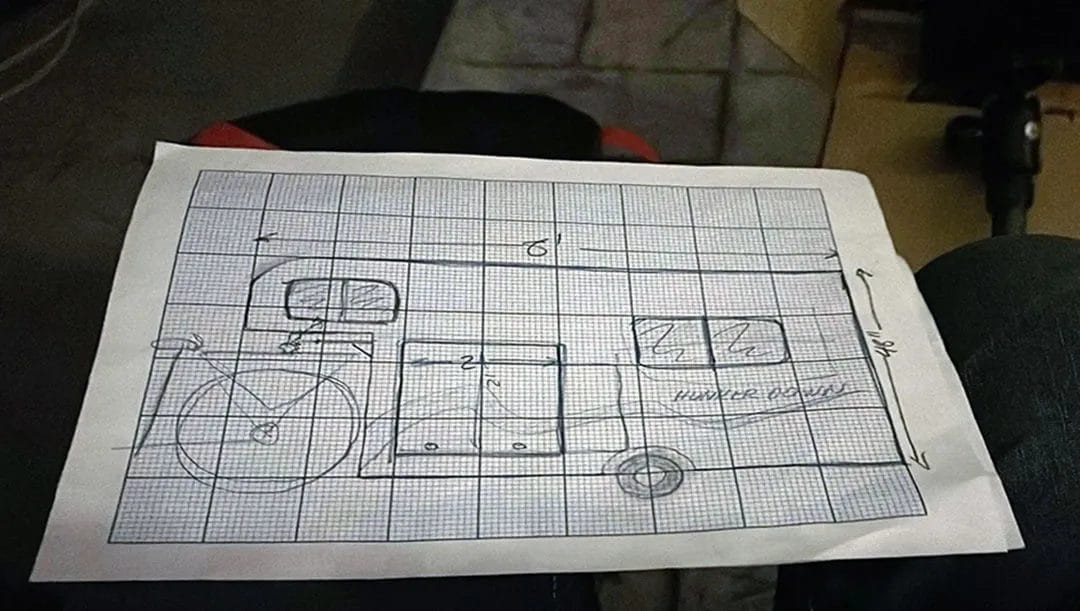 Rough side view sketch of the DIY bike trailer design concept
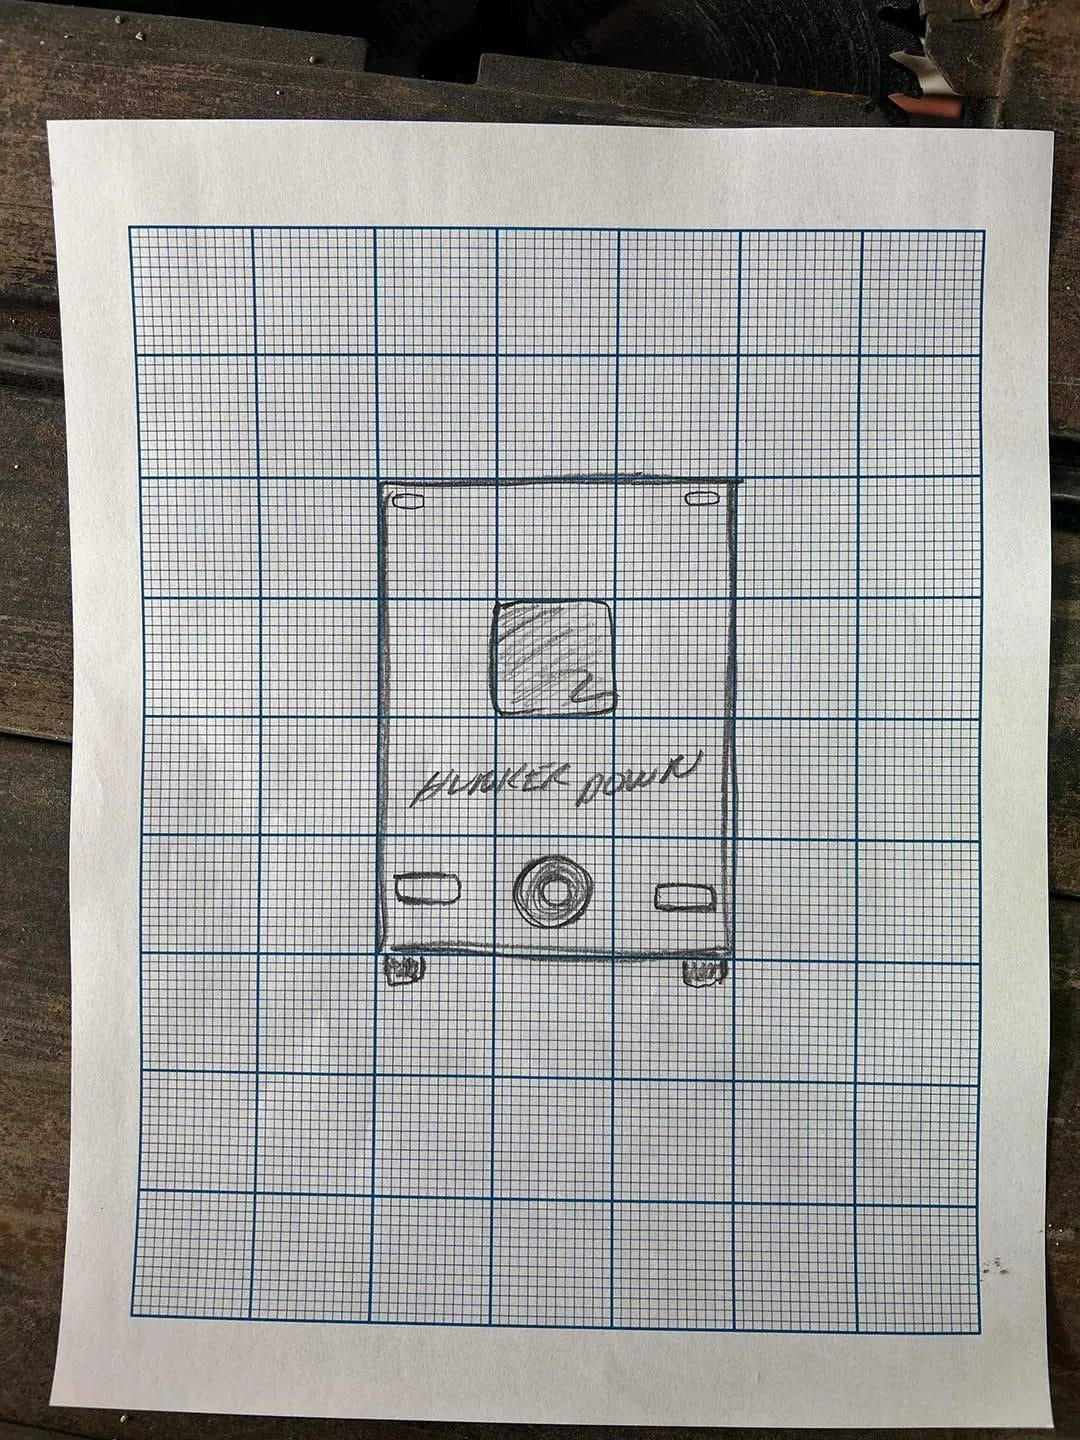 Vertical back view sketch of the DIY bike trailer design concept
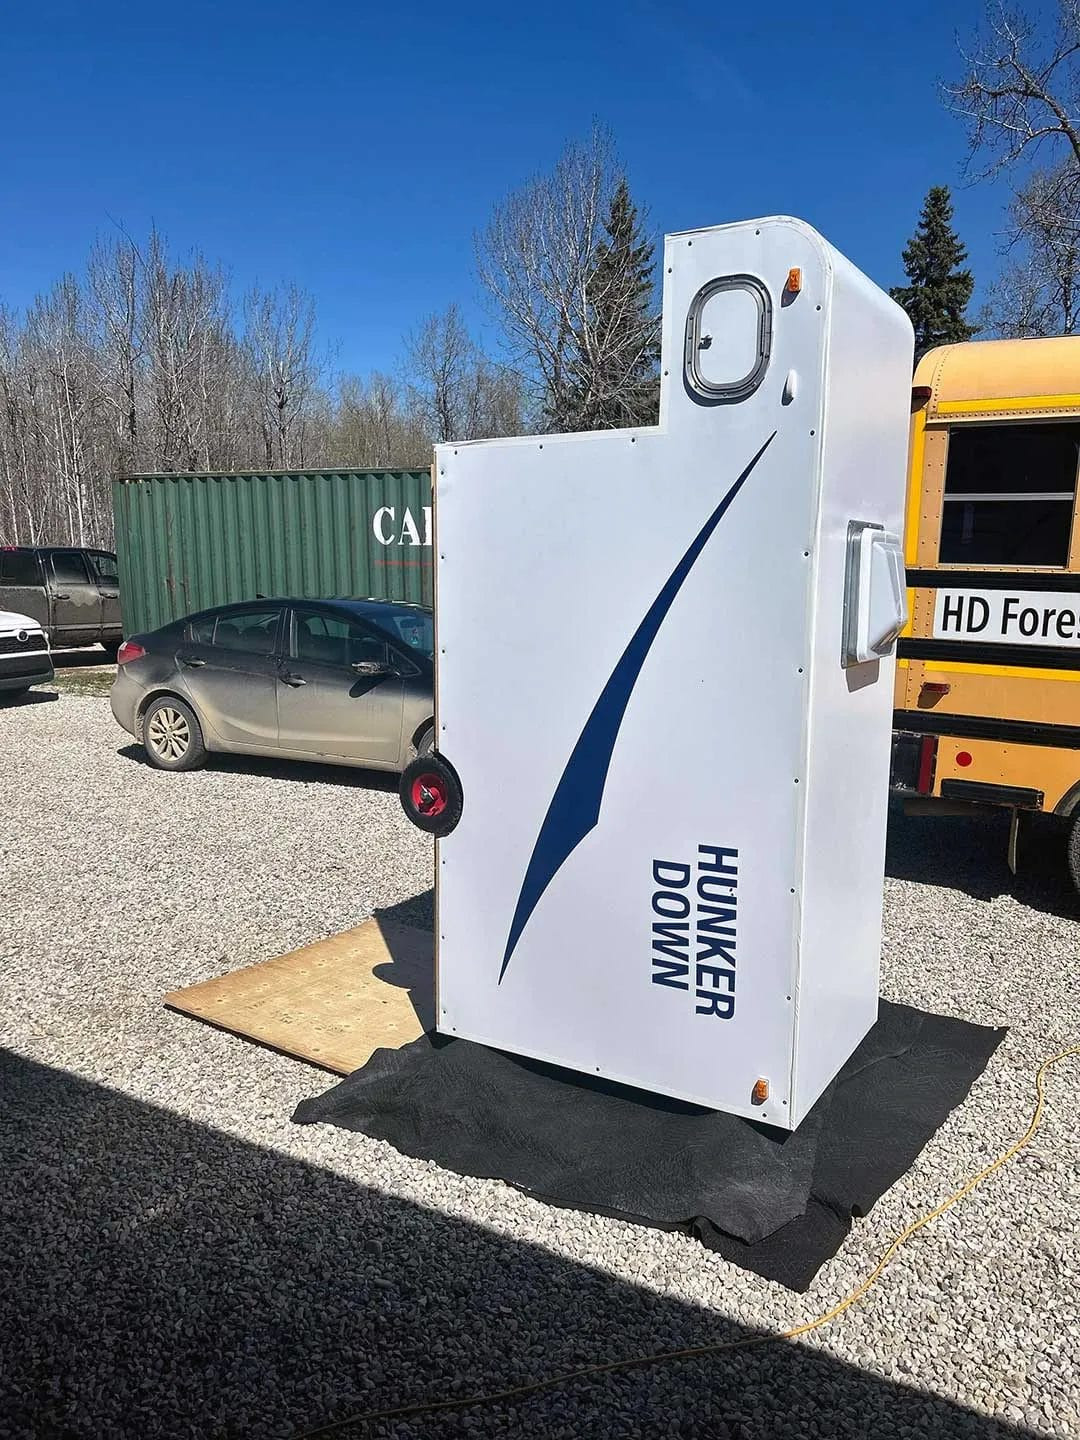
The Finished DIY Bike Trailer: Ready for Adventure
Like many DIY endeavors, this bike trailer camper is likely to be in a state of ongoing evolution. There’s always room for tweaks and enhancements. However, here’s a look at the current iteration of our DIY bike trailer and how it turned out.
No DIY project is complete without a personalized touch! We added a custom decal to give it a unique look.
 DIY bike trailer camper inverted for wheel installation
The wheels, while compact, are constructed from durable hard rubber, ensuring longevity and reliability without the worry of punctures.
Detaching the bike trailer from the bike is quick and easy, offering flexibility for storage or for simply using the bike independently.
Thank you for following along with the build! This DIY bike trailer project has been one of the most satisfying and enjoyable builds we’ve undertaken recently.
Happy trails, and keep exploring!