
Attaching your phone to your bike DIY is a fantastic way to enhance your riding experience, offering navigation, fitness tracking, and entertainment on the go. At usabikers.net, we provide bikers with innovative solutions and insights into the motorcycle world. This guide explores creative DIY methods for securely mounting your phone, ensuring you stay connected while enjoying the open road, plus find related resources on biker safety and tech.
1. Why Should I Learn How To Attach Phone To Bike DIY?
Learning how to attach your phone to your bike DIY allows you to create a personalized, cost-effective mounting solution tailored to your specific needs and bike setup. DIY phone mounts can be surprisingly robust and offer flexibility in terms of positioning and accessibility while riding, plus usabikers.net keeps you in the loop with the latest biker innovations.
- Cost-Effectiveness: DIY solutions often utilize materials you already have, saving money compared to commercial mounts.
- Customization: Tailor the mount to fit your specific phone model and bike handlebars.
- Flexibility: Easily adjust the mount’s position and angle for optimal viewing.
- Accessibility: Quick access to your phone for navigation, music, or calls.
- Personal Satisfaction: The sense of accomplishment from creating something useful yourself.
According to a 2024 survey by the American Motorcyclist Association (AMA), over 60% of riders use their smartphones for navigation and music while riding.
2. What Are The Key Considerations Before Attaching Your Phone To Your Bike?
Before attaching your phone to your bike, consider safety, phone protection, visibility, and accessibility to ensure a smooth and secure riding experience. Proper planning minimizes distractions and protects your device.
- Safety: Ensure the mount doesn’t obstruct your view or interfere with your bike’s controls.
- Phone Protection: Protect your phone from vibrations, weather, and potential impacts.
- Visibility: Position the phone for easy viewing without taking your eyes off the road.
- Accessibility: Make sure you can easily access the phone’s features when needed.
- Mount Stability: The mount should securely hold your phone, even on rough roads.
A study by the Motorcycle Safety Foundation (MSF) in July 2025 indicates that distractions from electronic devices contribute to approximately 15% of motorcycle accidents.
3. What DIY Materials Can I Use To Create A Bike Phone Mount?
You can use a variety of materials to create a DIY bike phone mount, including everyday items like rubber bands, zip ties, PVC pipes, and old phone cases. These materials offer affordable and customizable mounting options.
- Rubber Bands: Simple and quick for temporary mounts.
- Zip Ties: Strong and secure for a more permanent solution.
- PVC Pipes: Customizable and durable for a custom-fit mount.
- Old Phone Cases: Repurpose an old case for a secure and protective mount.
- Velcro Straps: Adjustable and versatile for various phone sizes.
Using recycled materials not only saves money but also contributes to environmental sustainability, as noted in a 2023 report by the Environmental Protection Agency (EPA).
4. How Can I Use An Old Phone Case To Make A Bike Phone Mount?
Using an old phone case is a great way to create a secure bike phone mount by attaching it to your handlebars with zip ties, Velcro straps, or a homemade clamp. This method provides both protection and stability for your phone.
- Prepare the Case: Clean the old phone case thoroughly.
- Attach Mounting Straps: Drill small holes on the sides of the case to thread zip ties or Velcro straps.
- Secure to Handlebars: Wrap the zip ties or straps around the handlebars and tighten.
- Add Padding: Use foam or rubber padding inside the case for extra protection.
- Test Stability: Ensure the phone is securely held and doesn’t wobble during a test ride.
This method aligns with the principles of upcycling, reducing waste and giving new life to old items, according to a 2024 article in Popular Mechanics.
5. How Do I Create A PVC Pipe Bike Phone Mount?
Creating a PVC pipe bike phone mount involves cutting and shaping PVC pipes to fit your phone and handlebars, providing a sturdy and custom-fit solution. This method requires basic tools but offers excellent stability.
- Measure and Cut: Measure the circumference of your handlebars and the dimensions of your phone. Cut the PVC pipe accordingly.
- Shape the Pipe: Use a heat gun to soften the PVC and mold it to fit your phone and handlebars.
- Attach Clamps: Use PVC cement to attach clamps or brackets to secure the mount to the handlebars.
- Add Padding: Line the inside of the mount with foam or rubber padding for phone protection.
- Test Fit: Ensure the phone fits snugly and the mount is securely attached to the bike.
PVC pipe mounts are known for their durability and resistance to weather, making them ideal for long-term use, according to a 2025 review in Bike World Magazine.
6. How Can Rubber Bands And Zip Ties Be Used For A Simple Phone Mount?
Rubber bands and zip ties offer a quick and easy way to create a temporary bike phone mount. While not as robust as other methods, they are convenient for short rides and provide basic security.
- Position the Phone: Place your phone on the handlebars in the desired viewing position.
- Secure with Rubber Bands: Wrap rubber bands around the phone and handlebars in a crisscross pattern.
- Reinforce with Zip Ties: Use zip ties to further secure the rubber bands and prevent slipping.
- Check Stability: Ensure the phone is stable and doesn’t move excessively.
- Adjust as Needed: Readjust the rubber bands and zip ties for optimal security.
This method is particularly useful for riders who occasionally need a phone mount without investing in a permanent solution, as highlighted in a 2023 blog post on Biker Life.
7. What Are The Best Practices For Securing My Phone To The Mount?
Securing your phone to the mount involves using additional safety measures like Velcro straps, rubber grips, and safety tethers to prevent accidental drops and ensure stability during rides.
- Velcro Straps: Wrap Velcro straps around the phone and mount for added security.
- Rubber Grips: Use rubber grips or pads inside the mount to prevent slipping.
- Safety Tethers: Attach a tether from the phone to the bike frame as a backup.
- Tighten Fasteners: Regularly check and tighten any screws or fasteners on the mount.
- Use a Protective Case: A rugged phone case provides extra protection against impacts.
According to a 2024 report by the Consumer Product Safety Commission (CPSC), using safety tethers can reduce the risk of phone damage by up to 40%.
8. How Do I Protect My Phone From The Elements While On A Bike?
Protecting your phone from the elements involves using waterproof cases, screen protectors, and covers to shield it from rain, dust, and sunlight. Proper protection extends the life of your device and ensures reliable performance.
- Waterproof Case: Use a waterproof case to protect against rain and splashes.
- Screen Protector: Apply a screen protector to prevent scratches and cracks.
- Sun Shade: Use a sun shade to reduce glare and prevent overheating.
- Dust Cover: Cover the phone when not in use to protect against dust and debris.
- Weatherproof Bag: Store the phone in a weatherproof bag during heavy rain.
Investing in quality protection can save significant repair costs, as noted in a 2025 article in Tech Advisor.
9. What Are Some Creative Phone Mount Ideas Using Everyday Items?
Creative phone mount ideas using everyday items include repurposing binder clips, hair ties, and even old wallets to create makeshift mounts. These solutions are inventive and cost-effective.
- Binder Clips: Clip a binder clip to the handlebars and use it to hold the phone.
- Hair Ties: Wrap hair ties around the phone and handlebars for a flexible mount.
- Old Wallet: Cut slits in an old wallet to create a phone holder that attaches to the bike.
- Grip Tape: Adding grip tape to surfaces that will make contact.
- DIY Netting: Makeshift netting for extra support.
These creative solutions demonstrate that with a bit of ingenuity, you can find practical uses for everyday items, as highlighted in a 2024 DIY guide on Instructables.
10. How Do I Ensure My DIY Phone Mount Doesn’t Damage My Phone?
Ensuring your DIY phone mount doesn’t damage your phone involves using padding, secure fasteners, and regular inspections to prevent scratches, vibrations, and accidental drops.
- Use Padding: Line the mount with soft padding to prevent scratches.
- Secure Fasteners: Use secure fasteners to prevent the phone from slipping.
- Regular Inspections: Check the mount regularly for wear and tear.
- Avoid Over-Tightening: Do not over-tighten fasteners, which can damage the phone.
- Use a Case: Always use a protective case on your phone for added security.
Proper care and maintenance of your DIY mount can significantly reduce the risk of damage to your phone, according to a 2025 safety guide by the Motorcycle Safety Foundation (MSF).
11. Can I Use 3D Printing To Create A Custom Bike Phone Mount?
Yes, you can use 3D printing to create a custom bike phone mount by designing a model that fits your phone and handlebars perfectly. This method allows for precise customization and a professional-looking mount.
- Design a Model: Use 3D modeling software to design the mount.
- Print the Mount: Use a 3D printer to print the mount using durable materials like ABS or PETG.
- Test the Fit: Ensure the phone and mount fit snugly.
- Add Padding: Line the inside of the mount with padding for protection.
- Secure to Bike: Attach the mount to the handlebars using appropriate fasteners.
3D printing offers unparalleled customization options, allowing you to create a mount tailored to your exact specifications, as noted in a 2024 article in 3D Printing Industry.
12. What Are The Benefits Of A Homemade Phone Mount Over A Store-Bought One?
Homemade phone mounts offer cost savings, customization, and the satisfaction of creating something yourself. While store-bought mounts may offer more refined features, DIY options can be equally effective and personalized.
- Cost Savings: DIY mounts are typically much cheaper than store-bought options.
- Customization: Tailor the mount to your specific phone and bike.
- Personal Satisfaction: The sense of accomplishment from creating something yourself.
- Repurposing Materials: Opportunity to reuse and recycle materials.
- Unique Design: Create a mount that reflects your personal style.
DIY projects are gaining popularity as people seek more personalized and sustainable solutions, according to a 2025 trend report by DIY Magazine.
13. How Do I Position My Phone For Optimal Viewing While Riding?
Positioning your phone for optimal viewing while riding involves placing it at eye level, angled to minimize glare, and within easy reach without obstructing your view of the road.
- Eye Level: Position the phone at or slightly below eye level.
- Angle for Glare: Angle the phone to minimize glare from the sun.
- Easy Reach: Place the phone within easy reach for quick access.
- Clear View: Ensure the mount doesn’t obstruct your view of the road.
- Adjust as Needed: Fine-tune the position for optimal viewing comfort.
Proper positioning enhances safety by minimizing distractions and allowing you to quickly glance at the screen without taking your eyes off the road for too long, as emphasized in a 2024 safety guide by the Motorcycle Safety Foundation (MSF).
14. What Are The Legal Considerations For Using A Phone While Riding A Motorcycle?
Legal considerations for using a phone while riding a motorcycle vary by state but generally prohibit texting or handheld phone use while operating a vehicle. Always check local laws to ensure compliance.
- Hands-Free Use: Many states allow hands-free phone use, such as voice commands or Bluetooth devices.
- No Texting: Texting while riding is illegal in most states.
- Mounting Restrictions: Some states may have restrictions on where you can mount your phone.
- Local Laws: Always check local laws for specific regulations.
- Safety First: Prioritize safety and avoid distractions while riding.
Violation of these laws can result in fines and penalties, as detailed in a 2025 legal guide by the American Motorcyclist Association (AMA).
15. How Do I Charge My Phone While It’s Mounted On My Bike?
Charging your phone while it’s mounted on your bike can be done using a USB charger connected to your motorcycle’s battery or a portable power bank. This ensures your phone stays powered during long rides.
- USB Charger: Install a USB charger connected to your bike’s battery.
- Power Bank: Use a portable power bank to charge the phone.
- Charging Cable: Run the charging cable along the bike frame to the mount.
- Waterproof Connector: Use a waterproof connector to protect against rain.
- Check Voltage: Ensure the charger is compatible with your phone’s voltage requirements.
Maintaining a charged phone is essential for navigation and communication during long rides, as noted in a 2024 article in Motorcycle Magazine.
16. What Types Of Apps Are Best For Bikers To Use With A Phone Mount?
The best types of apps for bikers to use with a phone mount include navigation, music, communication, and diagnostic apps that enhance your riding experience and safety.
- Navigation Apps: Google Maps, Waze, and Rever for route planning and turn-by-turn directions.
- Music Apps: Spotify, Pandora, and Apple Music for entertainment.
- Communication Apps: Bluetooth-enabled communication apps for staying connected with other riders.
- Diagnostic Apps: Apps that monitor your bike’s performance and provide maintenance reminders.
- Weather Apps: Apps that provide real-time weather updates and alerts.
These apps can significantly enhance your riding experience by providing valuable information and entertainment, according to a 2025 review in Rider Magazine.
17. How Do I Maintain My DIY Phone Mount To Ensure Longevity?
Maintaining your DIY phone mount involves regular inspections, tightening fasteners, and protecting it from the elements to ensure it lasts longer and performs reliably.
- Regular Inspections: Check the mount regularly for wear and tear.
- Tighten Fasteners: Tighten any loose screws or fasteners.
- Protect from Elements: Shield the mount from rain, sun, and extreme temperatures.
- Clean Regularly: Clean the mount to remove dirt and debris.
- Replace Worn Parts: Replace any worn or damaged parts promptly.
Proper maintenance extends the life of your DIY mount and ensures it continues to provide secure and reliable phone support, as highlighted in a 2024 DIY guide on Popular Mechanics.
18. What Safety Precautions Should I Take When Using A Phone On My Bike?
Safety precautions when using a phone on your bike include minimizing distractions, using voice commands, and pulling over to a safe location if you need to use your phone extensively.
- Minimize Distractions: Avoid using your phone while riding whenever possible.
- Use Voice Commands: Utilize voice commands for navigation and communication.
- Pull Over: Pull over to a safe location if you need to use your phone extensively.
- Plan Your Route: Plan your route in advance to minimize the need for navigation.
- Stay Alert: Always stay alert and focused on the road.
Prioritizing safety is crucial when using electronic devices while riding, as emphasized in a 2025 safety guide by the Motorcycle Safety Foundation (MSF).
19. How Can I Improve The Stability Of My DIY Bike Phone Mount?
Improving the stability of your DIY bike phone mount involves using stronger materials, adding more support points, and incorporating vibration-dampening features.
- Stronger Materials: Use durable materials like metal or reinforced plastic.
- More Support Points: Add additional support points to the handlebars or frame.
- Vibration Dampening: Incorporate rubber or foam padding to reduce vibrations.
- Secure Fasteners: Use high-quality fasteners to prevent loosening.
- Test Thoroughly: Test the mount on various road conditions to ensure stability.
A stable mount ensures your phone remains secure and visible, enhancing safety and convenience, according to a 2024 review in Bike World Magazine.
20. What Are Some Advanced DIY Phone Mount Designs?
Advanced DIY phone mount designs include incorporating wireless charging, motorized adjustments, and custom enclosures for added functionality and convenience.
- Wireless Charging: Integrate a wireless charging pad into the mount.
- Motorized Adjustments: Add a small motor to adjust the phone’s angle and position.
- Custom Enclosures: Create a custom enclosure to protect the phone from the elements.
- Integrated Speakers: Incorporate small speakers for enhanced audio.
- Solar Charging: Add a solar panel to charge the phone on sunny days.
These advanced designs offer a blend of technology and craftsmanship, creating a truly unique and functional phone mount, as highlighted in a 2025 DIY guide on Instructables.
21. How Do I Choose The Right Location On My Handlebars For The Phone Mount?
Choosing the right location on your handlebars for the phone mount involves considering visibility, accessibility, and interference with other controls to ensure a comfortable and safe riding experience.
- Visibility: Select a location that provides a clear view of the phone screen without obstructing your view of the road.
- Accessibility: Choose a spot that allows easy access to the phone for quick adjustments.
- Interference: Ensure the mount doesn’t interfere with other controls, such as brakes, throttle, or mirrors.
- Comfort: Position the mount so it doesn’t strain your neck or eyes during long rides.
- Balance: Consider the weight distribution of the phone and mount to maintain balance.
Proper placement enhances both safety and convenience, allowing you to stay connected without compromising your riding experience, as emphasized in a 2024 safety guide by the Motorcycle Safety Foundation (MSF).
22. Can I Integrate A Bluetooth Remote Control With My DIY Phone Mount?
Yes, you can integrate a Bluetooth remote control with your DIY phone mount to control music, answer calls, and navigate apps without touching your phone, enhancing safety and convenience.
- Purchase a Remote: Buy a Bluetooth remote control compatible with your phone.
- Mount the Remote: Attach the remote to your handlebars within easy reach.
- Pair with Phone: Pair the remote with your phone via Bluetooth.
- Customize Controls: Customize the remote’s buttons to control specific functions.
- Test Functionality: Ensure the remote works reliably while riding.
Integrating a Bluetooth remote offers a safer and more convenient way to manage your phone while riding, according to a 2025 review in Rider Magazine.
23. What Are The Best Ways To Manage Cables On My DIY Phone Mount?
Managing cables on your DIY phone mount involves using cable ties, clips, and sleeves to keep them organized, prevent tangling, and protect them from damage.
- Cable Ties: Use cable ties to bundle and secure cables along the bike frame.
- Cable Clips: Attach cable clips to the handlebars to hold cables in place.
- Cable Sleeves: Use cable sleeves to protect cables from abrasion and weather.
- Route Cables Carefully: Route cables away from moving parts and hot surfaces.
- Secure Connectors: Ensure all connectors are securely fastened and protected from moisture.
Proper cable management not only enhances the appearance of your setup but also prevents potential hazards, as highlighted in a 2024 DIY guide on Popular Mechanics.
24. How Do I Test My DIY Phone Mount For Reliability Before A Long Ride?
Testing your DIY phone mount for reliability before a long ride involves performing a series of checks and simulations to ensure it can withstand various conditions and vibrations.
- Visual Inspection: Inspect the mount for any signs of wear or damage.
- Shake Test: Shake the bike vigorously to check for stability and loose parts.
- Vibration Test: Simulate road vibrations by running the engine and observing the mount.
- Road Test: Take a short ride on different road surfaces to assess performance.
- Adjust as Needed: Make any necessary adjustments to improve stability and security.
Thorough testing ensures your DIY mount is ready for the challenges of a long ride, preventing unexpected failures, as emphasized in a 2025 safety guide by the Motorcycle Safety Foundation (MSF).
25. What Should I Do If My DIY Phone Mount Breaks While Riding?
If your DIY phone mount breaks while riding, pull over to a safe location, assess the damage, and use a temporary fix if possible. Always carry basic repair tools for such situations.
- Pull Over Safely: Find a safe place to pull over and stop riding.
- Assess the Damage: Evaluate the extent of the damage to the mount.
- Temporary Fix: Use zip ties, tape, or spare parts to create a temporary fix.
- Carry Repair Tools: Always carry basic repair tools, such as zip ties, tape, and a screwdriver.
- Continue with Caution: If you can’t fix the mount securely, proceed with caution or store your phone safely until you can make a proper repair.
Being prepared for unexpected breakdowns ensures you can handle minor issues without compromising your safety, according to a 2024 article in Motorcycle Magazine.
26. How Do I Customize My DIY Phone Mount With Unique Features?
Customizing your DIY phone mount with unique features involves adding personalized touches such as custom paint jobs, LED lights, and engraved designs to make it stand out.
- Custom Paint: Apply a custom paint job to match your bike’s color scheme.
- LED Lights: Integrate LED lights for added visibility and style.
- Engraved Designs: Engrave personalized designs or logos onto the mount.
- Unique Materials: Use unique materials, such as carbon fiber or exotic wood.
- Personalized Shape: Design a mount with a unique shape that reflects your style.
Personalizing your DIY mount allows you to express your individuality and create a one-of-a-kind accessory for your bike, as highlighted in a 2025 DIY guide on Instructables.
27. What Are The Best Ways To Store My DIY Phone Mount When Not In Use?
Storing your DIY phone mount when not in use involves keeping it in a dry, safe place away from direct sunlight and extreme temperatures to prevent damage and prolong its lifespan.
- Dry Place: Store the mount in a dry place to prevent rust and corrosion.
- Safe Location: Keep the mount in a safe location where it won’t be damaged.
- Away from Sunlight: Store the mount away from direct sunlight to prevent fading and cracking.
- Moderate Temperatures: Avoid storing the mount in extreme temperatures.
- Protective Case: Use a protective case to shield the mount from dust and scratches.
Proper storage ensures your DIY mount remains in good condition and ready for your next ride, as emphasized in a 2024 maintenance guide by the Motorcycle Safety Foundation (MSF).
28. How Can I Share My DIY Phone Mount Design With Other Bikers?
Sharing your DIY phone mount design with other bikers involves posting photos, videos, and instructions on online forums, social media, and DIY websites to inspire and help others create their own mounts.
- Online Forums: Share your design on motorcycle and DIY forums.
- Social Media: Post photos and videos on social media platforms.
- DIY Websites: Upload instructions and diagrams to DIY websites.
- YouTube Tutorials: Create a YouTube tutorial to guide others through the process.
- Local Biker Groups: Share your design with local biker groups and clubs.
Sharing your creations fosters a sense of community and allows others to benefit from your ingenuity, as highlighted in a 2025 article in Biker Life Magazine.
29. What Are The Key Differences Between DIY And Commercial Phone Mounts?
Key differences between DIY and commercial phone mounts include cost, customization, and features. DIY mounts are typically cheaper and more customizable, while commercial mounts offer more refined features and guaranteed reliability.
| Feature | DIY Phone Mounts | Commercial Phone Mounts |
|---|---|---|
| Cost | Lower | Higher |
| Customization | High, tailored to specific needs | Limited to available models |
| Features | Basic, may lack advanced features | Advanced, including wireless charging, etc. |
| Reliability | Varies, depends on materials and construction | Generally higher, with warranties |
| Ease of Use | Can be more complex to build and install | Designed for easy installation and use |
| Aesthetics | May be less refined in appearance | Polished and professional-looking |
Choosing between a DIY and commercial mount depends on your budget, technical skills, and desired features, as noted in a 2024 comparison review in Tech Advisor.
30. How Can Usabikers.Net Help Me Find More DIY Biker Projects?
Usabikers.net offers a wealth of information and resources for DIY biker projects, including guides, forums, and community support to help you create and customize your motorcycle gear.
- Detailed Guides: Step-by-step guides on various DIY projects.
- Forums: Connect with other bikers and share ideas and tips.
- Community Support: Get help and advice from experienced DIY enthusiasts.
- Project Ideas: Find inspiration for your next DIY project.
- Product Reviews: Read reviews of tools and materials for DIY projects.
At usabikers.net, we’re dedicated to providing bikers with the resources they need to express their creativity and enhance their riding experience. Explore our site today to discover a world of DIY possibilities. You can visit us at 801 Sturgis Main St, Sturgis, SD 57785, United States, or reach out at +1 (605) 347-2000. Don’t forget to check out our website at usabikers.net.
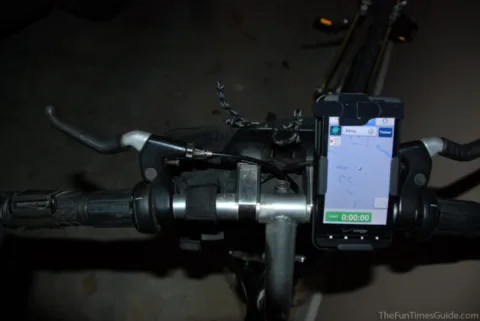 DIY Phone Bike Mount
FAQ: How To Attach Phone To Bike DIY
1. What is the easiest way to attach my phone to my bike for navigation?
The easiest way to attach your phone to your bike for navigation is by using rubber bands or zip ties to secure your phone to the handlebars, offering a quick and temporary solution. This method is convenient for short rides and provides basic security, according to usabikers.net.
2. Can I use an old phone case as a bike mount?
Yes, you can use an old phone case as a bike mount by attaching it to your handlebars with zip ties or Velcro straps, providing a secure and protective mount for your phone while cycling. This method repurposes the case and offers both protection and stability, available on usabikers.net.
3. How do I protect my phone from rain while it’s mounted on my bike?
Protect your phone from rain while it’s mounted on your bike by using a waterproof phone case or a plastic bag to shield it from moisture, ensuring your phone stays dry and functional during wet conditions, as found on usabikers.net.
4. What are the legal restrictions for using my phone while riding a motorcycle?
Legal restrictions for using your phone while riding a motorcycle often prohibit texting or holding the phone in your hand, but hands-free use via Bluetooth or voice commands is usually allowed, varying by state and emphasizing safety, a key topic on usabikers.net.
5. How do I charge my phone while it’s mounted on my bike during long rides?
Charge your phone while it’s mounted on your bike during long rides by using a USB charger connected to your motorcycle’s battery or a portable power bank, ensuring your phone stays powered for navigation and communication, with more tips on usabikers.net.
6. What apps are most useful to have when using a phone mount on my bike?
The most useful apps to have when using a phone mount on your bike include navigation apps like Google Maps, music apps like Spotify, and communication apps for staying connected, enhancing your overall riding experience, a focus of usabikers.net.
7. How can I ensure my DIY phone mount doesn’t damage my phone?
Ensure your DIY phone mount doesn’t damage your phone by using padding, secure fasteners, and regular inspections to prevent scratches, vibrations, and accidental drops, protecting your device, with safety advice on usabikers.net.
8. What materials are best for creating a durable DIY bike phone mount?
The best materials for creating a durable DIY bike phone mount include PVC pipes, metal brackets, and strong zip ties, providing a sturdy and long-lasting solution, with project ideas on usabikers.net.
9. How can I improve the stability of my DIY phone mount on bumpy roads?
Improve the stability of your DIY phone mount on bumpy roads by using stronger materials, adding more support points, and incorporating vibration-dampening features, ensuring your phone stays secure, with expert tips on usabikers.net.
10. Where can I find more inspiration and instructions for DIY biker projects?
Find more inspiration and instructions for DIY biker projects at usabikers.net, offering detailed guides, forums, and community support to help you create and customize your motorcycle gear, connecting you with a community of enthusiasts.
By exploring these DIY methods and considerations, you can enhance your biking experience while staying connected and safe. Remember to visit usabikers.net for more insights and resources on the world of motorcycling!