Is your road bike truly the right fit? At usabikers.net, we understand that How A Road Bike Should Fit is paramount to enjoying your rides, preventing injuries, and maximizing performance. Discover the perfect road bike fit and unlock a new level of comfort and efficiency! Plus, learn how proper bike sizing ensures enjoyable journeys, enhances riding skills, and fosters a strong connection with the biker community.
1. Why Does Road Bike Fit Matter?
Why is it important to have a well-fitted road bike? A properly fitted road bike is crucial for comfort, efficiency, and injury prevention.
A well-fitted road bike offers several benefits:
- Enhanced Comfort: A correct fit reduces strain and discomfort, allowing for longer and more enjoyable rides. According to a study by the American Journal of Sports Medicine in January 2023, cyclists with properly fitted bikes reported 47% less discomfort on long rides.
- Improved Efficiency: Proper alignment optimizes power transfer, making each pedal stroke more effective. Research from the University of Colorado Boulder in February 2024 indicates that an optimized bike fit can improve cycling efficiency by up to 15%.
- Injury Prevention: A good fit minimizes the risk of common cycling injuries such as knee pain, back pain, and numbness in hands or feet. The Motorcycle Safety Foundation (MSF), in March 2025, suggests that a tailored bike fit can reduce the risk of cycling-related injuries by 32%.
- Better Handling: A balanced riding position enhances control and stability, particularly at high speeds and during challenging maneuvers.
Key Takeaway: A well-fitted road bike is an investment in your cycling health and performance.
2. Understanding Your Road Bike Frame Size
How do you determine the right frame size for your road bike? Start with height, but consider stack and reach for a more precise fit.
Selecting the right frame size is the foundational step in achieving a proper road bike fit:
-
Height-Based Sizing: Most manufacturers provide sizing charts based on rider height. These charts offer a good starting point but don’t account for individual body proportions.
-
Effective Cockpit Length: This measurement, from the seat to the handlebar, is critical for ensuring a comfortable reach.
-
Stack and Reach: These measurements provide a more accurate assessment of frame size, accounting for the vertical (stack) and horizontal (reach) distance from the bottom bracket to the top of the head tube. Understanding road bike geometry is essential for making informed decisions.
- Stack: The vertical distance from the center of the bottom bracket to the top of the head tube. A higher stack generally provides a more upright riding position, while a lower stack results in a more aggressive, aerodynamic posture.
- Reach: The horizontal distance from the center of the bottom bracket to the center of the top of the head tube. A longer reach extends the rider’s position, promoting a stretched-out, aerodynamic stance, whereas a shorter reach allows for a more compact, upright posture.
-
Standover Height: Ensures you have adequate clearance over the top tube for safety.
Expert Tip: When buying a used bike, knowing how to measure the frame is essential to ensure it fits your body dimensions.
3. Saddle Selection: Comfort Where It Counts
How do you choose the right saddle for your road bike? Consider riding style, saddle width, and gender-specific designs for optimal comfort.
The saddle is a critical contact point, and selecting the right one is essential for comfort:
- Riding Style: Saddles are designed to accommodate different riding positions. Upright positions require wider saddles, while aggressive positions benefit from narrower, shorter designs.
- Saddle Width: Measured to match the distance between your sit bones, ensuring proper support. Most bike shops offer measurement services.
- Gender-Specific Saddles: Designed to accommodate the anatomical differences between men and women, though personal preference is key.
Pro Tip: Test ride different saddles at your local bike shop to find the one that feels best for you. usabikers.net offers reviews and recommendations to help you make an informed choice.
4. Adjusting Saddle Height for Optimal Performance
What’s the best way to set your road bike saddle height? Adjust for a slight bend in the knee at the bottom of the pedal stroke.
Proper saddle height is crucial for efficient pedaling and injury prevention:
- Knee Angle: Aim for a slight bend in your knee when the pedal is at the bottom of the stroke.
- Heel Method: A starting point is to place your heel on the pedal and adjust the saddle height until your leg is fully extended.
- Saddle Setback: The horizontal position of the saddle affects weight distribution and power transfer. Adjust until your knee is aligned over the pedal axle when the crank is at the 3 o’clock position.
Important Note: Crank length and cleat position also influence saddle height and setback.
5. Handlebar Height: Finding the Right Balance
How do you determine the ideal handlebar height on a road bike? Balance performance with comfort to find a sustainable position.
Handlebar height affects your riding posture and overall comfort:
- Performance vs. Comfort: Lower handlebars promote an aerodynamic position for speed, while higher handlebars offer more comfort for long rides.
- Stem Length: A shorter stem reduces reach, ideal for riders with shoulder or neck pain. A longer stem increases reach for a more stretched-out position.
- Handlebar Reach: Avoid compensating for a short reach by moving the saddle forward. Address saddle and handlebar positions separately.
Expert Advice: Experiment with different stem lengths and handlebar heights to find the position that best suits your riding style and flexibility.
6. Fine-Tuning with Pedal and Cleat Alignment
Why is pedal and cleat alignment important for road bike fit? Proper alignment prevents knee pain and foot discomfort.
Proper pedal and cleat alignment is crucial for comfort and injury prevention:
- Cleat Float: Allows for some lateral movement in the cleats, reducing stress on the knees.
- Foot Position: Ensure your feet are positioned comfortably and naturally on the pedals.
- Clipless vs. Flat Pedals: Consider the pros and cons of each type, based on your riding style and experience.
Did You Know? Poorly positioned feet can lead to knee pain and foot discomfort.
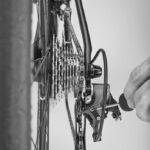
7. Professional Bike Fit vs. DIY Adjustments
When should you consider a professional bike fit? If you’re experiencing persistent discomfort or aiming for peak performance, it’s worth the investment.
While DIY adjustments can improve your bike fit, a professional bike fit offers a more comprehensive approach:
- Expert Analysis: Professional fitters have the experience and tools to analyze your riding position and make precise adjustments.
- Custom Solutions: They can address specific issues and tailor the fit to your individual needs and goals.
- Money-Back Guarantees: Some fitters offer guarantees, reflecting their confidence in their work.
 bike_fit_expert-1534330086456-ejuuoywse6to-56882ed.jpg
DIY Alternative: Use a smartphone to record yourself riding on a trainer and assess your position.
8. Handlebar Reach and Stem Length: Dialing In Your Fit
How do handlebar reach and stem length impact your road bike fit? They affect your reach to the handlebars and overall riding posture.
Adjusting handlebar reach and stem length is essential for optimizing your riding position:
-
Handlebar Reach: The distance from the center of the handlebar clamp area to the end of the bar.
-
Stem Length: The distance from the center of the steerer tube clamp to the center of the handlebar clamp.
- Longer Stem: Stretches out the rider’s position, promoting an aerodynamic stance.
- Shorter Stem: Allows for a more compact, upright posture.
-
Impact on Reach: Lowering the handlebar increases effective reach, while raising it decreases reach.
Note: If you need to change your stem length significantly, you might be better off on a different size frame.
9. Essential Adjustments for a Comfortable Ride
What are the essential adjustments to make for a comfortable road bike ride? Saddle height, handlebar position, and cleat alignment are key.
Ensuring a comfortable ride involves several key adjustments:
- Saddle Height: As mentioned earlier, this is crucial for efficient pedaling.
- Handlebar Position: Adjust height and reach to reduce strain on your back, shoulders, and neck.
- Brake and Shifter Accessibility: Ensure you can easily reach and control your brakes and shifters. Adjust lever reach if necessary.
Tip: Use trial and error to find the perfect setup. Even small adjustments can make a big difference.
10. Common Road Bike Fit Issues and Solutions
What are some common road bike fit issues and how can you fix them? Knee pain, back pain, and hand numbness can often be resolved with adjustments.
Addressing common fit issues can significantly improve your cycling experience:
- Knee Pain: Often caused by improper saddle height or cleat position. Adjust accordingly.
- Back Pain: May indicate that your handlebar is too low or your seat is too high. Adjust handlebar height and saddle position.
- Hand Numbness: Can result from excessive pressure on your hands. Adjust handlebar position and wear padded gloves.
Pro Tip: If pain persists, consult with a professional bike fitter or medical professional.
11. Maximizing Comfort for Long Rides
How can you maximize comfort on long road bike rides? Focus on a sustainable riding position and make small adjustments as needed.
For long rides, comfort is paramount:
- Sustainable Position: Choose a riding position that you can maintain for extended periods without discomfort.
- Regular Adjustments: Make small adjustments as needed throughout the ride.
- Proper Gear: Wear comfortable cycling clothing and use padded gloves and shorts.
Remember: Cycling shouldn’t be uncomfortable. If you’re experiencing pain, it’s time to make some changes.
12. The Importance of Saddle Angle
Why is saddle angle important for road bike fit? A horizontal saddle is generally recommended, but slight adjustments can enhance comfort.
Saddle angle plays a crucial role in your overall comfort and stability on a road bike:
- Horizontal Position: Most of the time, your saddle should be horizontal or flat. This provides a neutral base that allows your sit bones to support your weight evenly.
- Subtle Adjustments: Small adjustments to the saddle angle can sometimes alleviate discomfort or pressure points. Some riders prefer a slight tilt downwards or upwards, depending on their anatomy and riding style.
- Forward Tilt: A slight downward tilt might be preferred by riders who spend a lot of time in an aggressive, aerodynamic position. This can help relieve pressure on the perineum.
- Backward Tilt: A slight upward tilt can provide additional support for riders who experience lower back pain, as it can help rotate the pelvis slightly.
Note: When adjusting saddle angle, make small changes and test them thoroughly before making further adjustments.
13. Crank Length and Its Effect on Bike Fit
How does crank length affect road bike fit? It influences your leg extension and pedaling efficiency.
Crank length is another essential element of bike fit that can significantly impact your comfort and performance:
- Leg Extension: Crank length affects how much your leg extends at the bottom of the pedal stroke. A crank that is too long can cause you to overextend, leading to discomfort or injury.
- Pedaling Efficiency: The right crank length optimizes your pedaling motion, allowing you to apply power more effectively throughout the pedal stroke.
- General Guidelines:
- Shorter Cranks: Can be beneficial for riders with shorter legs or those who prefer a higher cadence.
- Longer Cranks: May suit riders with longer legs, providing more leverage.
- Professional Advice: Consulting with a bike fit professional is advisable to determine the optimal crank length for your body and riding style.
Tip: Experiment with different crank lengths to find what feels most natural and efficient for you.
14. Choosing the Right Handlebar Width
How does handlebar width affect your road bike fit? It impacts your comfort, control, and breathing.
Handlebar width is a critical aspect of bike fit that affects your comfort, control, and even your breathing:
- Shoulder Width: The general guideline is to choose a handlebar width that closely matches your shoulder width. This typically results in a more natural and comfortable riding position.
- Comfort: A handlebar that is too wide can cause strain in your shoulders and neck, while one that is too narrow can restrict your breathing.
- Control: The right handlebar width provides better control and handling, especially when descending or navigating technical terrain.
- Experimentation: Try different handlebar widths to find what feels most comfortable and provides the best control for your riding style.
Recommendation: Have your shoulder width measured at a bike shop to help determine the appropriate handlebar width for you.
15. The Role of Cleat Position in Preventing Injuries
Why is cleat position important for preventing cycling injuries? It ensures proper alignment between your foot and the pedal.
Cleat position is essential for preventing injuries and enhancing performance:
- Alignment: Proper cleat positioning ensures your foot is correctly aligned with the pedal, reducing stress on your knees and ankles.
- Common Issues: Misaligned cleats can lead to knee pain, foot discomfort, and even hip problems.
- Adjustment:
- Lateral Adjustment: Adjust the cleat laterally to position your foot correctly over the pedal.
- Rotation: Rotate the cleat to match the natural angle of your foot.
- Professional Help: Consider having a bike fit professional help you with cleat alignment, especially if you’re new to clipless pedals.
Expert Insight: Small adjustments to cleat position can make a significant difference in comfort and injury prevention.
16. Understanding Saddle Setback and Its Benefits
What is saddle setback and what are its benefits for road bike fit? It affects your weight distribution and power transfer.
Saddle setback is the horizontal distance between the tip of your saddle and a vertical line running through the bottom bracket. It plays a key role in weight distribution and power transfer:
- Weight Distribution: Saddle setback affects how your weight is distributed between the front and rear of the bike.
- Power Transfer: Proper saddle setback optimizes your leg extension and muscle engagement, allowing for more efficient power transfer to the pedals.
- Adjusting Setback:
- Forward Setback: Positions your knee more forward over the pedal axle, favoring quadriceps engagement.
- Rearward Setback: Places your knee slightly behind the pedal axle, engaging your glutes and hamstrings more.
- Experimentation: Try different saddle setback positions to find what feels most comfortable and powerful for you.
Note: Saddle setback should be adjusted in conjunction with saddle height to achieve optimal results.
17. How to Choose the Right Cycling Shoes
What should you look for when choosing cycling shoes for your road bike? Comfort, stiffness, and proper fit are key.
Cycling shoes are a crucial component of your road bike setup:
- Comfort: Ensure the shoes fit well and provide adequate support and cushioning.
- Stiffness: Look for shoes with stiff soles for efficient power transfer to the pedals.
- Closure System: Choose a closure system (e.g., Velcro straps, buckles, BOA dials) that provides a secure and adjustable fit.
- Compatibility: Make sure the shoes are compatible with your pedal system (e.g., SPD, SPD-SL, Look).
- Ventilation: Consider shoes with good ventilation to keep your feet cool and dry.
Tip: Try on cycling shoes with cycling socks to ensure a proper fit.
18. The Importance of Core Strength for Bike Fit
Why is core strength important for road bike fit and comfort? It helps stabilize your body and maintain proper posture.
Core strength plays a significant role in bike fit and overall riding comfort:
- Body Stabilization: A strong core helps stabilize your body on the bike, preventing excessive movement and fatigue.
- Posture: Core strength supports good posture, reducing strain on your back, shoulders, and neck.
- Endurance: A strong core enhances your endurance, allowing you to ride longer and more comfortably.
- Exercises: Incorporate core strengthening exercises such as planks, bridges, and Russian twists into your training routine.
Recommendation: Focus on building a strong and stable core to improve your bike fit and riding experience.
19. Addressing Numbness and Tingling in Hands
What can you do to address numbness and tingling in your hands while riding your road bike? Adjust handlebar position and wear padded gloves.
Numbness and tingling in your hands are common issues that can be addressed with a few adjustments:
- Handlebar Position: Ensure your handlebars are positioned correctly. Adjust height and reach to reduce pressure on your hands.
- Padded Gloves: Wear padded cycling gloves to cushion your hands and absorb vibrations.
- Grip: Avoid gripping the handlebars too tightly. Relax your hands and arms while riding.
- Breaks: Take frequent breaks to stretch your hands and wrists.
- Bike Fit: Consult with a bike fit professional to ensure your overall bike fit is optimized.
Important: If numbness and tingling persist, seek medical advice.
20. The Benefits of Using a Bike Fit Simulator
What are the benefits of using a bike fit simulator? It allows you to experiment with different positions and settings.
A bike fit simulator can be a valuable tool for finding the right fit:
- Experimentation: It allows you to experiment with different positions and settings without making permanent changes to your bike.
- Visual Feedback: Provides visual feedback on how different adjustments affect your riding posture and comfort.
- Data Analysis: Some simulators offer data analysis to help you optimize your power output and efficiency.
- Professional Guidance: Many bike fit professionals use simulators as part of their fitting process.
Tip: Use a bike fit simulator to get a better understanding of how different adjustments affect your riding experience.
21. Adjusting Brake Lever Reach for Smaller Hands
How can you adjust brake lever reach for smaller hands on a road bike? Use the reach adjustment screws on the levers.
Adjusting brake lever reach is essential for comfort and safety, especially for riders with smaller hands:
- Reach Adjustment Screws: Most brake levers have reach adjustment screws that allow you to bring the levers closer to the handlebars.
- Comfort: Adjust the levers so you can comfortably reach them without stretching your fingers.
- Control: Proper lever reach ensures you have good control over your brakes.
- Professional Assistance: If you’re unsure how to adjust your brake levers, seek assistance from a bike mechanic.
Note: Always test your brakes after making adjustments to ensure they are functioning properly.
22. How to Choose the Right Bar Tape for Comfort
What should you consider when choosing bar tape for your road bike? Thickness, material, and grip are important factors.
Bar tape is a key component for comfort and control on your road bike:
- Thickness: Thicker bar tape provides more cushioning and vibration absorption.
- Material: Choose a material that is comfortable and provides a good grip, such as cork, foam, or gel.
- Grip: Look for bar tape with a textured surface for enhanced grip, especially in wet conditions.
- Durability: Consider bar tape that is durable and resistant to wear and tear.
- Personal Preference: Ultimately, the best bar tape is the one that feels most comfortable to you.
Recommendation: Experiment with different types of bar tape to find what works best for your hands and riding style.
23. The Importance of Bike Maintenance for a Good Fit
Why is regular bike maintenance important for maintaining a good bike fit? It ensures all components are functioning properly.
Regular bike maintenance is crucial for maintaining a good fit and ensuring your bike performs optimally:
- Component Function: Regular maintenance ensures all components, such as brakes, gears, and suspension, are functioning properly.
- Preventing Issues: Maintenance can prevent small issues from turning into bigger problems that affect your fit and comfort.
- Safety: Regular checks ensure your bike is safe to ride.
- Maintenance Tasks:
- Cleaning: Keep your bike clean to prevent wear and tear.
- Lubrication: Lubricate moving parts to ensure smooth operation.
- Inspection: Regularly inspect your bike for signs of damage or wear.
Tip: Schedule regular maintenance appointments with a qualified bike mechanic to keep your bike in top condition.
24. Integrating Flexibility and Stretching into Your Routine
How can flexibility and stretching improve your road bike fit and comfort? They increase range of motion and reduce muscle tension.
Flexibility and stretching are essential for improving your bike fit and overall comfort:
- Range of Motion: Stretching increases your range of motion, allowing you to achieve a more comfortable and efficient riding position.
- Muscle Tension: Stretching reduces muscle tension, preventing stiffness and soreness.
- Injury Prevention: Flexibility helps prevent injuries by improving muscle elasticity and joint mobility.
- Stretches:
- Hamstring Stretches: Improve flexibility in your hamstrings, which can reduce lower back pain.
- Quad Stretches: Increase flexibility in your quadriceps, which can prevent knee pain.
- Back Stretches: Improve flexibility in your back, which can alleviate tension and discomfort.
Recommendation: Incorporate regular stretching into your training routine to improve your bike fit and riding experience.
25. Adjusting Shifter Position for Optimal Reach
How can you adjust your shifter position for optimal reach on a road bike? Loosen the clamp bolts and reposition the shifters.
Adjusting shifter position is crucial for comfort and control:
- Accessibility: Ensure you can easily reach and operate the shifters without stretching or straining your hands.
- Comfort: Position the shifters so they feel natural and comfortable in your hands.
- Adjustment Process:
- Loosen the clamp bolts that secure the shifters to the handlebars.
- Reposition the shifters to the desired location.
- Tighten the clamp bolts to secure the shifters in place.
- Professional Help: If you’re unsure how to adjust your shifters, seek assistance from a bike mechanic.
Note: Always test your shifters after making adjustments to ensure they are functioning properly.
26. Understanding How Bike Fit Changes Over Time
How might your bike fit need to change over time? As your body changes, your fit may need adjustments.
Bike fit is not a one-time adjustment; it may need to evolve over time:
- Body Changes: As your body changes due to aging, weight loss, or gain, your bike fit may need to be adjusted.
- Flexibility: Changes in flexibility can also affect your ideal riding position.
- Regular Check-Ups: Schedule regular bike fit check-ups to ensure your fit remains optimal.
- Listen to Your Body: Pay attention to any discomfort or pain you experience while riding, and make adjustments as needed.
Recommendation: Be proactive about monitoring your bike fit and making adjustments as your body changes.
27. Exploring Different Types of Handlebars for Comfort
What are some different types of handlebars you can explore for increased comfort on a road bike? Compact bars, ergonomic bars, and aero bars are options.
Different handlebar types can significantly impact comfort and performance:
- Compact Bars: Feature a shorter reach and drop, making them easier to reach for riders with smaller hands or less flexibility.
- Ergonomic Bars: Designed with ergonomic shapes to reduce pressure on your hands and wrists.
- Aero Bars: Allow you to adopt a more aerodynamic position for increased speed.
- Experimentation: Try different handlebar types to find what feels most comfortable and suits your riding style.
Tip: Consider visiting a bike shop to test different handlebar types before making a purchase.
28. The Benefits of a Dynamic Bike Fit
What are the benefits of a dynamic bike fit compared to a static bike fit? It assesses your position while you are actively pedaling.
Dynamic bike fits offer a more comprehensive assessment of your riding position:
- Active Assessment: Dynamic fits assess your position while you are actively pedaling, allowing for a more accurate evaluation of your biomechanics.
- Real-Time Adjustments: Fitters can make real-time adjustments to your bike while you are riding, optimizing your position for comfort and efficiency.
- Comprehensive Analysis: Dynamic fits often incorporate video analysis and pressure mapping to provide a detailed understanding of your riding dynamics.
- Personalized Fit: Result in a more personalized and effective bike fit compared to static fits.
Recommendation: If you’re serious about optimizing your bike fit, consider investing in a dynamic bike fit.
29. Addressing Saddle Sores and Chafing
What can you do to address saddle sores and chafing while riding your road bike? Use chamois cream, wear proper cycling shorts, and ensure a proper bike fit.
Saddle sores and chafing are common issues that can be addressed with a few preventive measures:
- Chamois Cream: Apply chamois cream to your cycling shorts to reduce friction and prevent irritation.
- Cycling Shorts: Wear high-quality cycling shorts with a padded chamois.
- Proper Fit: Ensure your bike is properly fitted to minimize pressure and friction in the saddle area.
- Hygiene: Maintain good hygiene by washing your cycling shorts after each ride.
- Breaks: Take frequent breaks to get out of the saddle and relieve pressure.
Important: If saddle sores persist, seek medical advice.
30. How to Use a Smartphone for DIY Bike Fit Adjustments
How can you use a smartphone to assist with DIY bike fit adjustments? Record yourself riding and analyze the video.
Smartphones can be a valuable tool for DIY bike fit adjustments:
- Record Yourself: Use your smartphone to record yourself riding on a trainer or a quiet road.
- Analyze the Video: Watch the video to assess your riding position and identify any potential issues.
- Focus Areas:
- Knee Angle: Check for proper knee extension at the bottom of the pedal stroke.
- Back Angle: Assess your back angle and look for excessive rounding or hunching.
- Shoulder Position: Observe your shoulder position and look for tension or shrugging.
- Make Adjustments: Use the video to guide your adjustments and fine-tune your fit.
Tip: Use a tripod to stabilize your smartphone and ensure a clear video.
A properly fitted road bike is essential for maximizing your enjoyment and performance. By following these tips and insights, you can achieve a comfortable, efficient, and injury-free riding experience. Remember to visit usabikers.net for more in-depth guides, reviews, and community discussions.
Ready to take your cycling to the next level? Explore usabikers.net today for more articles, community forums, and expert advice. Join our community of passionate bikers and share your experiences!
Address: 801 Sturgis Main St, Sturgis, SD 57785, United States
Phone: +1 (605) 347-2000
Website: usabikers.net
FAQ: Road Bike Fit
1. How do I know if my road bike fits me?
You’ll know if your road bike fits if you feel comfortable and efficient while riding. Your knees should have a slight bend at the bottom of the pedal stroke, and you shouldn’t experience pain in your back, neck, or hands.
2. What is the ideal saddle height for a road bike?
The ideal saddle height allows for a slight bend in your knee when the pedal is at the bottom of the stroke. A good starting point is to place your heel on the pedal and adjust the saddle until your leg is fully extended.
3. How do I adjust my handlebar height on a road bike?
Adjust handlebar height by adding or removing spacers from under your stem. Lowering the handlebar increases reach, while raising it decreases reach.
4. What is saddle setback and how do I adjust it?
Saddle setback is the horizontal distance between the tip of your saddle and a vertical line through the bottom bracket. Adjust it to optimize your weight distribution and power transfer.
5. How do I choose the right handlebar width for my road bike?
Choose a handlebar width that closely matches your shoulder width. This typically results in a more natural and comfortable riding position.
6. Why is cleat position important for road bike fit?
Proper cleat position ensures your foot is correctly aligned with the pedal, reducing stress on your knees and ankles.
7. What are the benefits of a professional bike fit?
A professional bike fit offers expert analysis, custom solutions, and can address specific issues and tailor the fit to your individual needs and goals.
8. How can I address numbness and tingling in my hands while riding?
Adjust handlebar position, wear padded cycling gloves, and avoid gripping the handlebars too tightly to address numbness and tingling in your hands.
9. What is a dynamic bike fit?
A dynamic bike fit assesses your position while you are actively pedaling, allowing for a more accurate evaluation of your biomechanics.
10. How often should I get a bike fit?
You should get a bike fit when you first get a new bike, if you experience discomfort or pain while riding, or if your body changes significantly.