The frame bag stands out as the most essential and functional piece of luggage for any cyclist. It’s also surprisingly straightforward to create at home, requiring just a basic sewing machine and some DIY spirit. This guide will walk you through the process of planning, designing, and constructing a simple yet effective bike frame bag.
 Author Logan Watts Portrait
By Logan
PUBLISHED Aug 20, 2014
Reflecting on early bike touring experiences, many cyclists, including myself, started with overloaded panniers, quickly realizing the excess baggage. This realization led to shedding unnecessary gear, ditching racks and bulky panniers, and embracing the streamlined approach of off-road bikepacking.
At the heart of a minimalist bikepacking setup lies the frame bag. Its central position within the bike frame makes it perfect for carrying heavier items, thus maintaining a low center of gravity for better bike handling. While some might argue that water bottles in the frame triangle serve a similar purpose, a well-designed frame bag maximizes the use of this valuable space for gear.
Today, the market offers a wide array of excellent and reasonably priced frame bags (explore our comprehensive bikepacking bag guide for detailed recommendations). So, why consider making your own? The primary motivations are threefold: a genuine passion for crafting, a desire for customized features (specific colors, pockets, etc.), or a strict budget.
Numerous resources, tutorials, and articles already exist on DIY frame bags. Instead of simply adding to the noise, this guide aims to consolidate valuable information and resources, pointing you in the right direction with links to essential materials and tutorials to make the process as clear and helpful as possible.
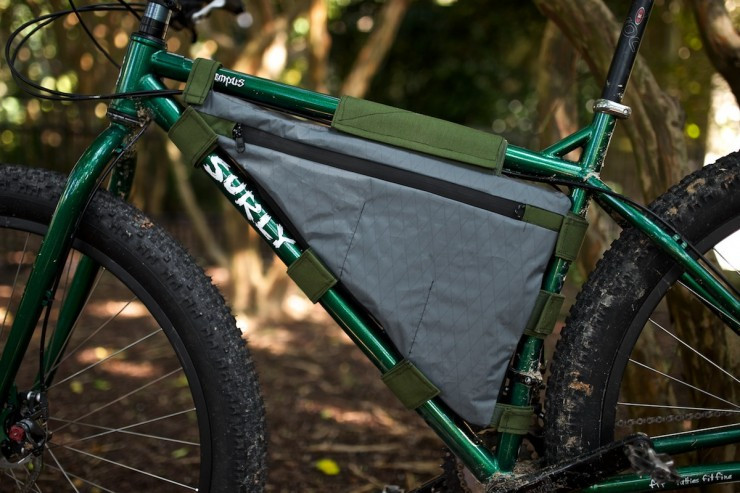 DIY frame bag on a Surly Krampus bike, showcasing its practical design for bikepacking.
DIY Frame Bag Materials List
This material list is based on the minimum order from Rocky Woods, sufficient for creating one frame bag. Ideally, ordering for two bags is more efficient, and this list would still largely suffice, although the 2” sew-on tape might require a slight increase. The total estimated cost for these materials is approximately $60.
Main Panels and Top Section
1 Yard VX21 Terrain X-Pac – Chosen for its durability and weather resistance, ideal for the main body of the frame bag.
Base, Rear, Straps, and Zipper Panel Sides
1 Yard 1000 Denier Coated CORDURA® Nylon Fabric – Provides excellent abrasion resistance for high-wear areas of the bag.
8″ scrap cord (Repurposed from a Big Agnes tent) – For zipper pulls or reinforcement.
1 spool Coats & Clark Extra Strong Upholstery thread (100% Nylon) – Heavy-duty thread to ensure strong and durable seams. Consider One Wrap straps for adjustable options (see process section).
Hardware Components
1 Yard YKK® Water Resistant #8 Coil Zipper – Water-resistant zipper to protect contents from the elements.
2 Yards 2″ Sew-on Tape Fastener Hook – Hook side of Velcro for secure strap closures.
2 Yards 2” Sew-on Tape Fastener Loop – Loop side of Velcro, paired with the hook side for straps.
1 Yard 4” Sew-on Tape Fastener Hook – Wider hook Velcro for additional strap strength if needed.
1 Yard 4″ Sew-on Tape Fastener Loop – Wider loop Velcro, to be used with the 4″ hook Velcro.
2 Water Resistant #8 Coil Zipper Slider – Sliders for the water-resistant zipper, ensuring smooth operation.
Essential Tools and Additional Supplies
- Sewing machine (A robust machine like a vintage Singer 301 is ideal, but any sturdy machine should work)
- Rotary cutting tool – For precise and efficient fabric cutting.
- Quality fabric scissors – Essential for detailed cuts and trimming.
- Cloth measuring tape – For accurate measurements of fabric and frame dimensions.
- Cutting mat – Protects surfaces and aids in precise cutting.
- Clear acrylic ruler – Useful for straight lines and accurate measurements when cutting fabric.
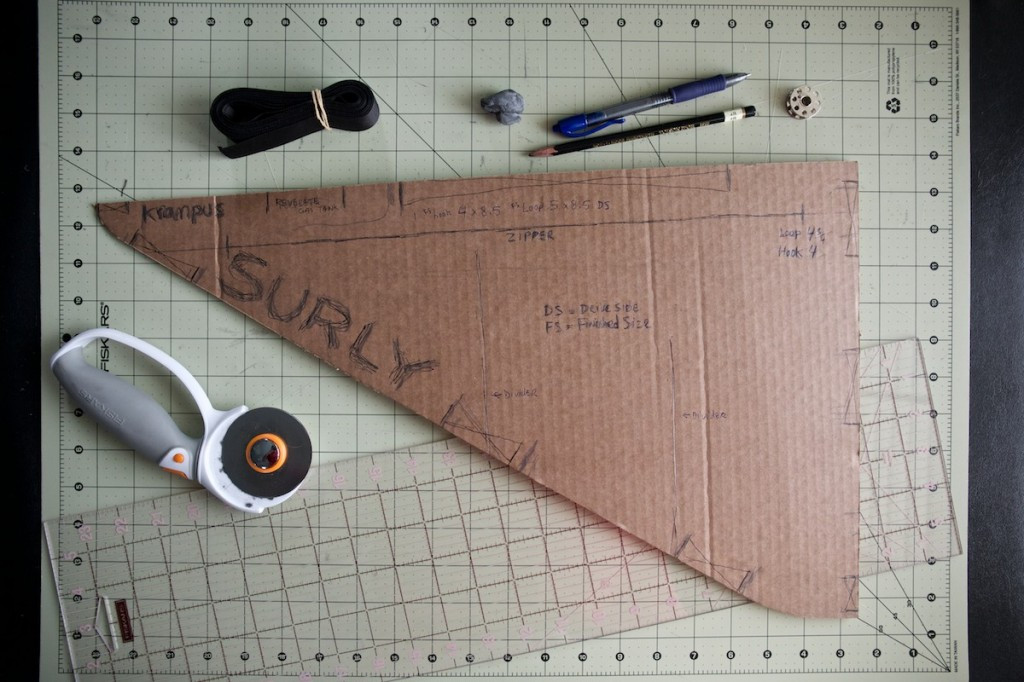 Frame bag template laid out on fabric, ready for cutting, illustrating the initial steps of DIY frame bag creation.
Step-by-Step Frame Bag Construction
Creating a frame bag, while not overly complex, requires patience and attention to detail. Expect to spend around three to four hours on this project. The golden rule is: measure meticulously, cut decisively once. Keep in mind that achieving perfect seams takes practice, and even experienced sewers sometimes work under time constraints, resulting in less-than-perfect stitches.
1. Crafting Your Template
Start by creating a template using cardboard or poster board. Carefully trace the inner triangle of your bike frame, ensuring accuracy. You might want to omit the bottom corner in your tracing if chainrings or derailleurs could potentially interfere with the bag’s fit. Once you have your cardboard cutout, use it to plan strap placements, avoiding any overlap with derailleur mounts or accessory points (like a ‘gas tank’ bag strap). For a visual guide, Scott from Porcelain Rocket offers a helpful video tutorial on template creation.
2. Cutting the Fabric Pieces
Begin cutting the triangle side pieces from the VX-21 X-Pac fabric. Trace your template onto the fabric’s backing, then add approximately 3/8” seam allowance to all sides of the traced outline.
The top panel will also be cut from X-Pac, while the bottom and rear panels are best made from Cordura nylon for enhanced abrasion resistance in these high-wear areas. While X-Pac is durable, Cordura offers superior protection against abrasion. For the side panels’ width, aim for around 3.5″ to achieve a finished width of approximately 2.75″ after sewing.
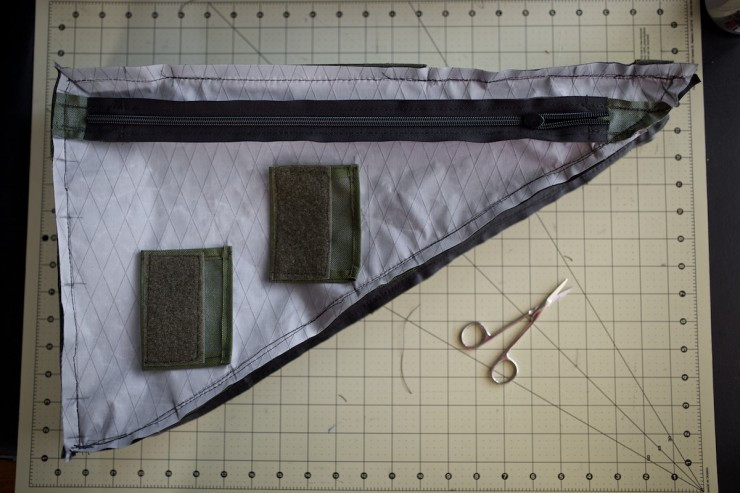
3. Constructing the Zipper Panel
Many DIYers simply cut a zipper opening directly into the frame bag panel. However, a more robust method involves creating a dedicated zipper strip that replaces a section of the panel’s vertical space across its full width. Mounting the zipper on the left side is common practice but ultimately a matter of personal preference.
To make the zipper strip, first determine your desired zipper length and cut the zipper about 1.5″ longer than needed (approximately 3/4″ will be hidden on each end). Next, cut two pieces of Cordura, each matching the zipper’s height. Sew these Cordura pieces to the zipper ends, overlapping the finished edge over the zipper cordage.
Cut the triangle panel in two where the zipper will be positioned. The zipper strip will be 1.5″ tall, with about 3/4″ of the zipper exposed in the finished panel. This means you need to account for 3/4″ (3/8″ from the top triangle piece and 3/8″ from the bottom) of the triangle material to maintain correct dimensions. Instead of cutting this excess fabric away, overlap it to conceal the stitching (refer to the middle image in the original article for visual guidance). The completed triangle with the zipper panel should resemble the third image shown in the original article.
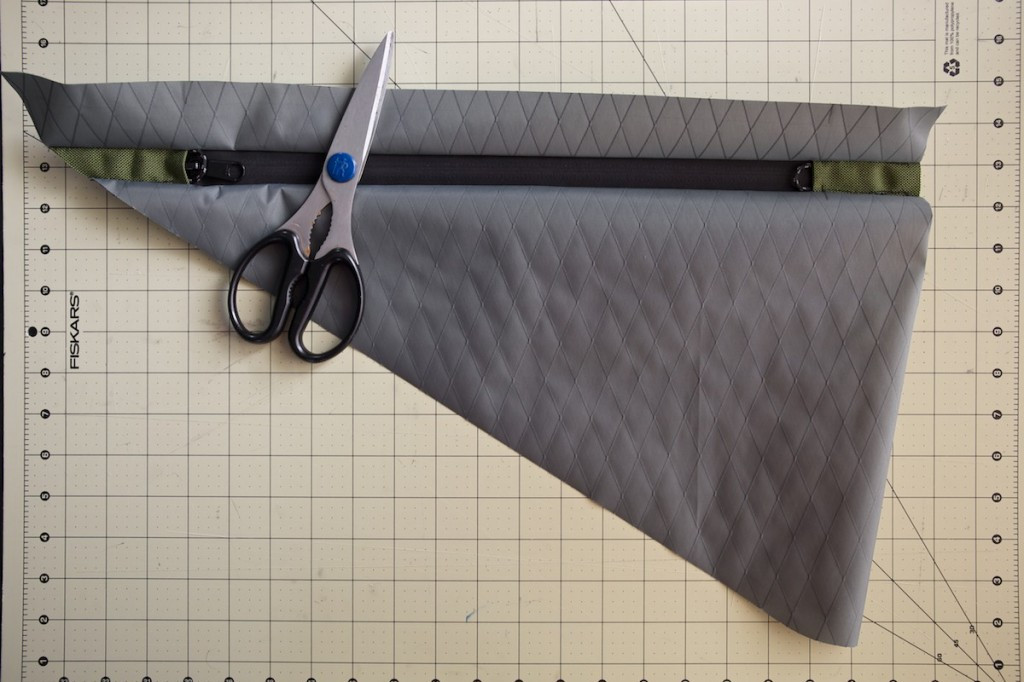 Close-up of the zipper panel construction on a DIY frame bag, showing detailed stitching and material layering.
4. Creating the Straps
For simplified straps, you can use Velcro tape directly without an outer Cordura layer. However, for added color accents and durability, consider sewing the Velcro into a Cordura outer layer. This step is more time-consuming but enhances the straps’ robustness. While not essential, many commercially made frame bags utilize just the tape. Finished strap dimensions are detailed in the captions of the original article’s thumbnails.
Each Cordura outer should be cut about 3/4” wider and 1.25″ longer than the Velcro to allow for proper edge finishing by folding the sides under the Velcro and double-folding the outer end. The inner end of the strap can be left unfinished as it will be sewn into the bag with approximately a 1/2″ seam allowance.
Updated Strap Design (2017): Moveable One Wrap Straps
While the original design uses fixed straps, consider adopting a more versatile approach: daisy chain webbing and Velcro One-Wrap straps. This method, increasingly common in frame bag construction, simplifies sewing and potentially reduces cost. Moveable straps also offer greater compatibility with other accessories like Gas Tank bags.
To implement moveable One Wrap straps, stitch a strip of one-inch nylon webbing to each panel where you want adjustable straps. Recommended panels include the back, bottom, and front half of the top panel, keeping only the large top panel strap fixed. Use a ‘bar tack’ stitch to secure the webbing at 1.25″ intervals if using one-inch One Wrap, or 1.75″ intervals for 1.5″ One Wrap. Both sizes work effectively.
5. Adding Internal Dividers (Optional)
Internal dividers, while not strictly necessary, enhance bag stability and organization. They prevent the bag from bulging when overpacked and help compartmentalize contents. Dividers can separate items like sleeping pads and cooking kits. Attach dividers to the inside panels using Velcro, allowing them to be connected once the bag is turned right-side out.
6. Sewing the Bag Inside Out
A key advantage of frame bag construction is sewing it inside out, revealing the finished product at the end. This can become slightly complex when incorporating straps between panels, so careful planning is crucial. Mark strap positions on the inside of each triangle panel to guide placement during sewing. Update: As suggested by a commenter, pre-sewing Velcro straps in place about .25” from the panel edge simplifies alignment during panel assembly and reinforces strap attachment. Ensure straps are correctly oriented before tacking, as working inside out can be disorienting.
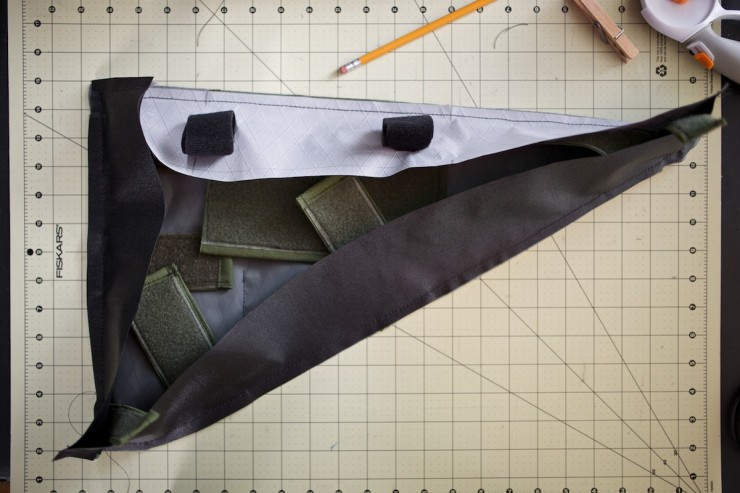 Partially completed DIY frame bag, sewn inside out, showing the strap attachment points and construction process.
Aligning straps correctly and ensuring proper orientation is the trickiest aspect of frame bag construction.
7. The Reveal and Final Touches
After sewing, reinforce all stitches, especially in stress areas, by going over them again or double-stitching to ensure durability. The final, satisfying step is turning the bag right side out, hoping for a successful outcome without major errors. Good luck!
 Completed DIY frame bag, turned right side out, showcasing the final product of the sewing process.
Behold, the finished DIY bike frame bag!
Additional Resources and Inspiration
Explore these helpful links, bookmarked during the creation of my first frame bag. The initial video is particularly comprehensive and may be all you need:
- Comprehensive Video Tutorial: YouTube Video Guide – A detailed visual walkthrough of the frame bag sewing process.
- Ruby Two Birds Tutorial: Ruby Two Birds DIY Guide – A written tutorial with clear instructions and images.
- Bikepacking.net Tutorial: Bikepacking.net DIY Guide – Another helpful tutorial from a reputable bikepacking resource.
- JD Finley’s Tutorial: JD Finley’s Frame Bag Instructions – Detailed step-by-step instructions for frame bag construction.
- MTBR Forum Tutorial: MTBR Frame Bag Sewing Guide – A forum thread with user experiences and tips on sewing frame bags.
 Surly Krampus bike with a custom DIY frame bag, highlighting the personalized and practical outcome of the project.
Recommended Frame Bag Makers
For those who prefer to purchase rather than DIY, consider these reputable frame bag manufacturers. For a more extensive list, refer to our Complete Guide to Bikepacking Bags and Full-Suspension Frame Bag guide. Here are a few top recommendations:
- Revelate Designs: Known for American-made, high-quality bags from Alaska.
- Porcelain Rocket: Based in Alberta, Canada, offering innovative designs.
- Bedrock Bags: Colorado-based bag maker with durable and reliable products.
- Oveja Negra Threadworks: Located in Salida, CO, specializing in bikepacking bags.
- Nuclear Sunrise: El Paso, TX, crafting unique and functional bags.
- Wanderlust Gear: Based in Missoula, MT, providing gear for adventure cyclists.
- Apidura: A UK-based brand renowned for lightweight and performance-oriented bags.