
The popularity of online bike purchases has surged in recent years, offering an extensive selection and competitive prices. However, this convenience often comes with a slight trade-off: the final Bike Assembly falls into your hands once the box arrives. While the prospect might seem daunting to some, assembling your new bike at home is a straightforward process. Compared to the benefits of online buying, such as greater choice and often better value than traditional bike shops, a little DIY is a small price to pay.
While local bike shops offer undeniable advantages, including expert advice, test rides, and professional assembly, the online market and direct-to-consumer brands provide compelling value. If you’ve opted for the online route, this guide will walk you through each step of bike assembly, ensuring a smooth and successful process. We’ll provide clear, easy-to-follow instructions, along with helpful tips to make you feel like a seasoned home mechanic. Let’s get started and transform that box of parts into your dream ride!
1. Unboxing Your New Bike
 Opening the bike box to start the assembly process
The first step in bike assembly is carefully unboxing your new purchase. Begin by standing the box upright, as indicated on the packaging. Locate the top flaps and gently work your hand along the underside of the top flap to open it.
Before you enthusiastically rip open the box, take a moment to check for staples securing the lid. Using a flat-head screwdriver, carefully lift and remove any staples. This simple precaution will prevent accidental injuries to yourself or damage to your new bike during unboxing.
 Carefully removing protective packaging from bike components after unboxing
Inside, you’ll find your bike partially disassembled for shipping. Typically, the front wheel and handlebars will be detached. Carefully lift the bike frame, along with the front wheel and handlebar assembly, out of the box. Remove all protective packaging materials like foam, bubble wrap, and cardboard.
Crucially, retain all the protective packaging. It’s essential to keep these materials in case you need to return the bike for any reason or if you plan to travel with your bike in the future.
Finally, thoroughly check inside the box for the owner’s manual, any accompanying paperwork, and any smaller parts boxes. These might contain pedals, reflectors, or tools specifically included by the manufacturer. Keep these items together in a safe place, as you’ll need them throughout the bike assembly process.
2. Essential Tools for Bike Assembly
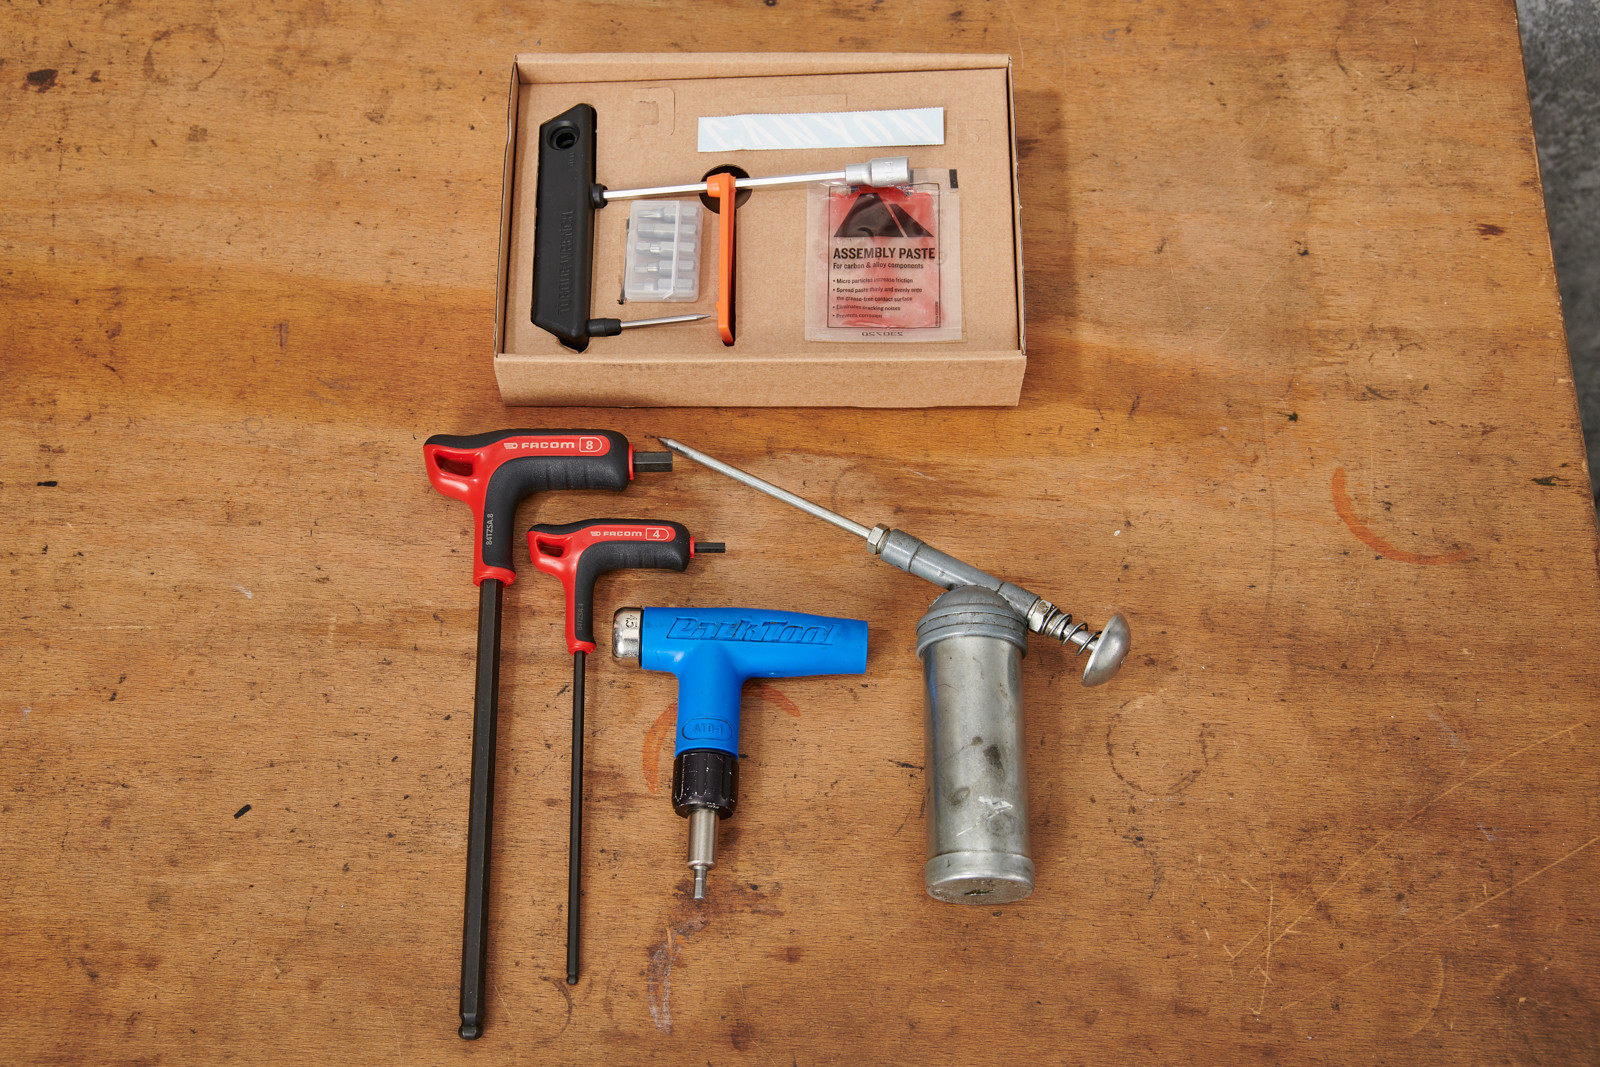
 A selection of Allen keys and a torque wrench, representing necessary bike assembly tools
The tools required for bike assembly can vary slightly depending on the bike model and the extent of pre-assembly done by the manufacturer. However, a basic set of tools will cover most bike assembly scenarios. Generally, you will need the following:
- Allen (Hex) Keys: A set of Allen keys of various sizes is indispensable. These are used for tightening most bolts on a bike.
- Torque Wrench or Torque Key (Optional but Recommended): Especially if your bike has carbon fiber components, a torque wrench or key is highly recommended. These tools ensure you tighten bolts to the correct torque specification, preventing damage to parts, particularly carbon components.
- Bike Grease: Bike grease is essential for lubricating threads on bolts and preventing parts from seizing, especially in areas exposed to moisture.
- Carbon Assembly Paste (If Applicable): If your bike has carbon fiber parts, especially a carbon seatpost or handlebar, carbon assembly paste is crucial. It provides added friction between carbon surfaces, allowing for secure tightening at lower torque values and preventing slippage.
- Bike Pump: A pump is needed to inflate your tires to the correct pressure after assembly.
 Close-up of a torque key and bike grease, highlighting essential tools for proper bike assembly
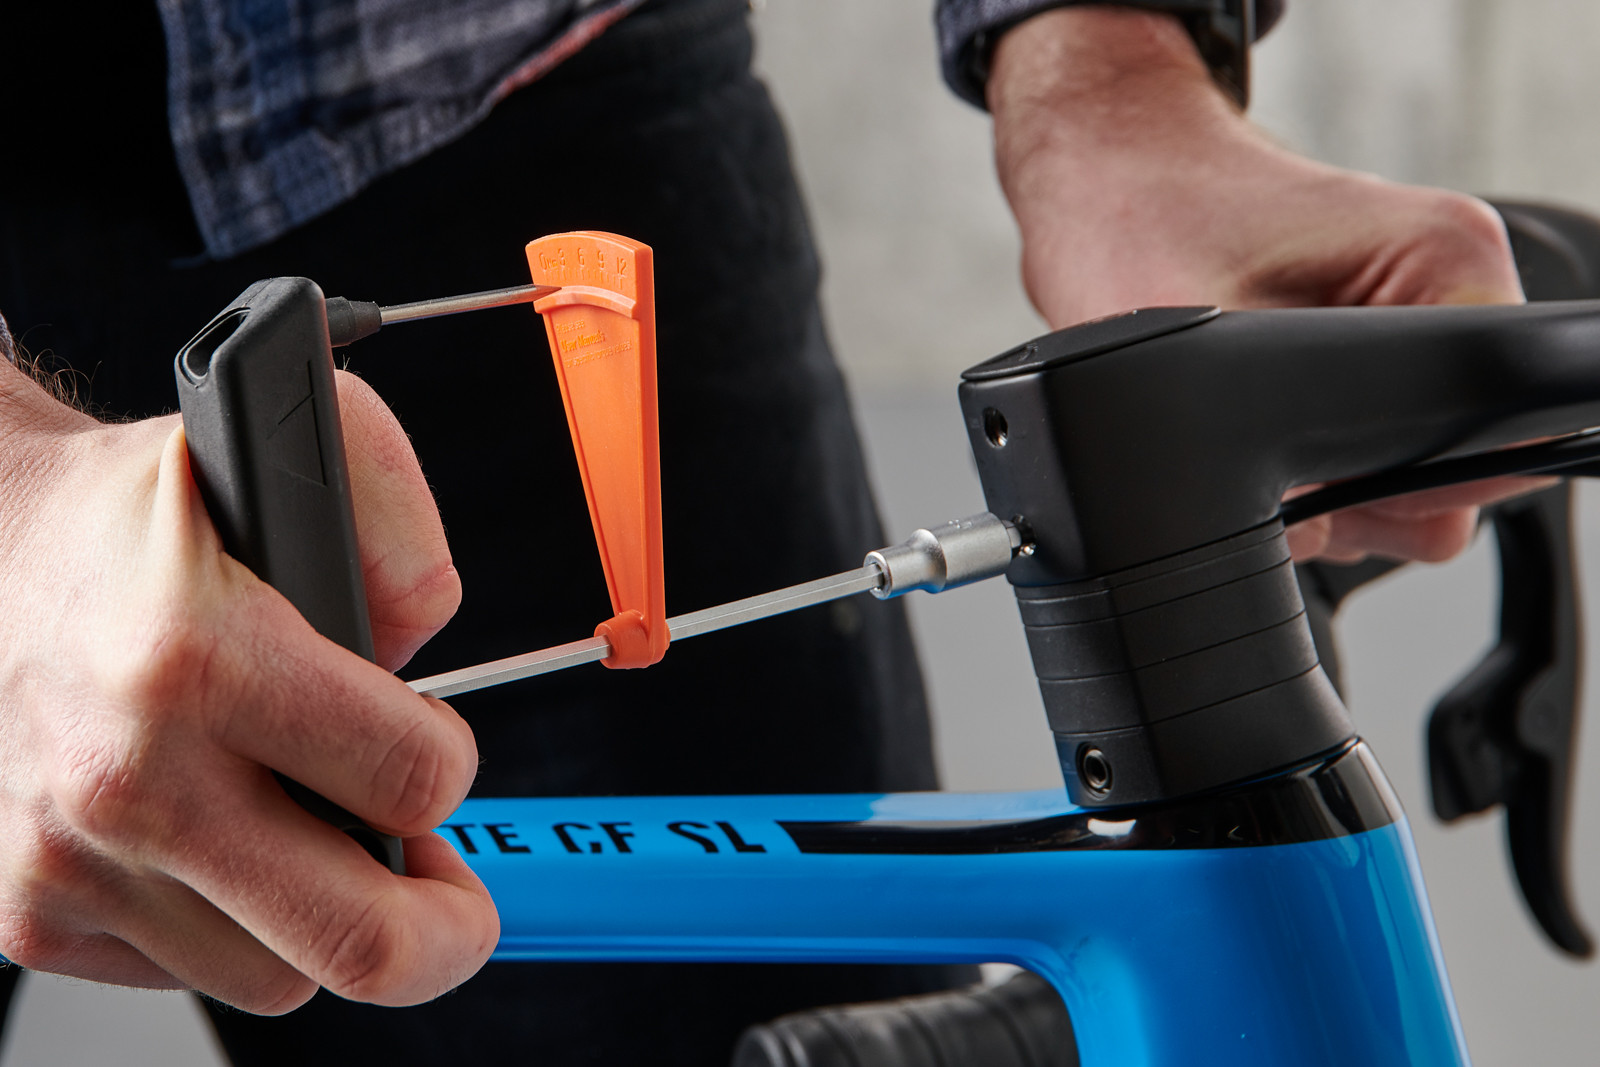
For bikes with carbon components, using a torque wrench or torque key is paramount. Carbon fiber is strong but can be brittle if over-tightened. Components will often have the recommended torque setting (measured in Newton Meters or Nm) printed directly on them. Always adhere to these specifications.
Carbon assembly paste, unlike regular bike grease, has a gritty texture. This texture increases friction between carbon surfaces. It’s primarily used where carbon parts interface, most commonly between a carbon seatpost and the seat tube.
 Using a torque wrench to tighten bolts on a bicycle, ensuring correct torque application
Some bike retailers and brands are thoughtful enough to include basic tools with the bike purchase. The bike featured in this guide, for instance, came with a basic torque wrench, a selection of bits for the torque wrench, and carbon assembly paste. Check your packaging to see if any tools are included; however, it’s always wise to have your own reliable set of Allen keys and a pump.
3. Installing the Seatpost
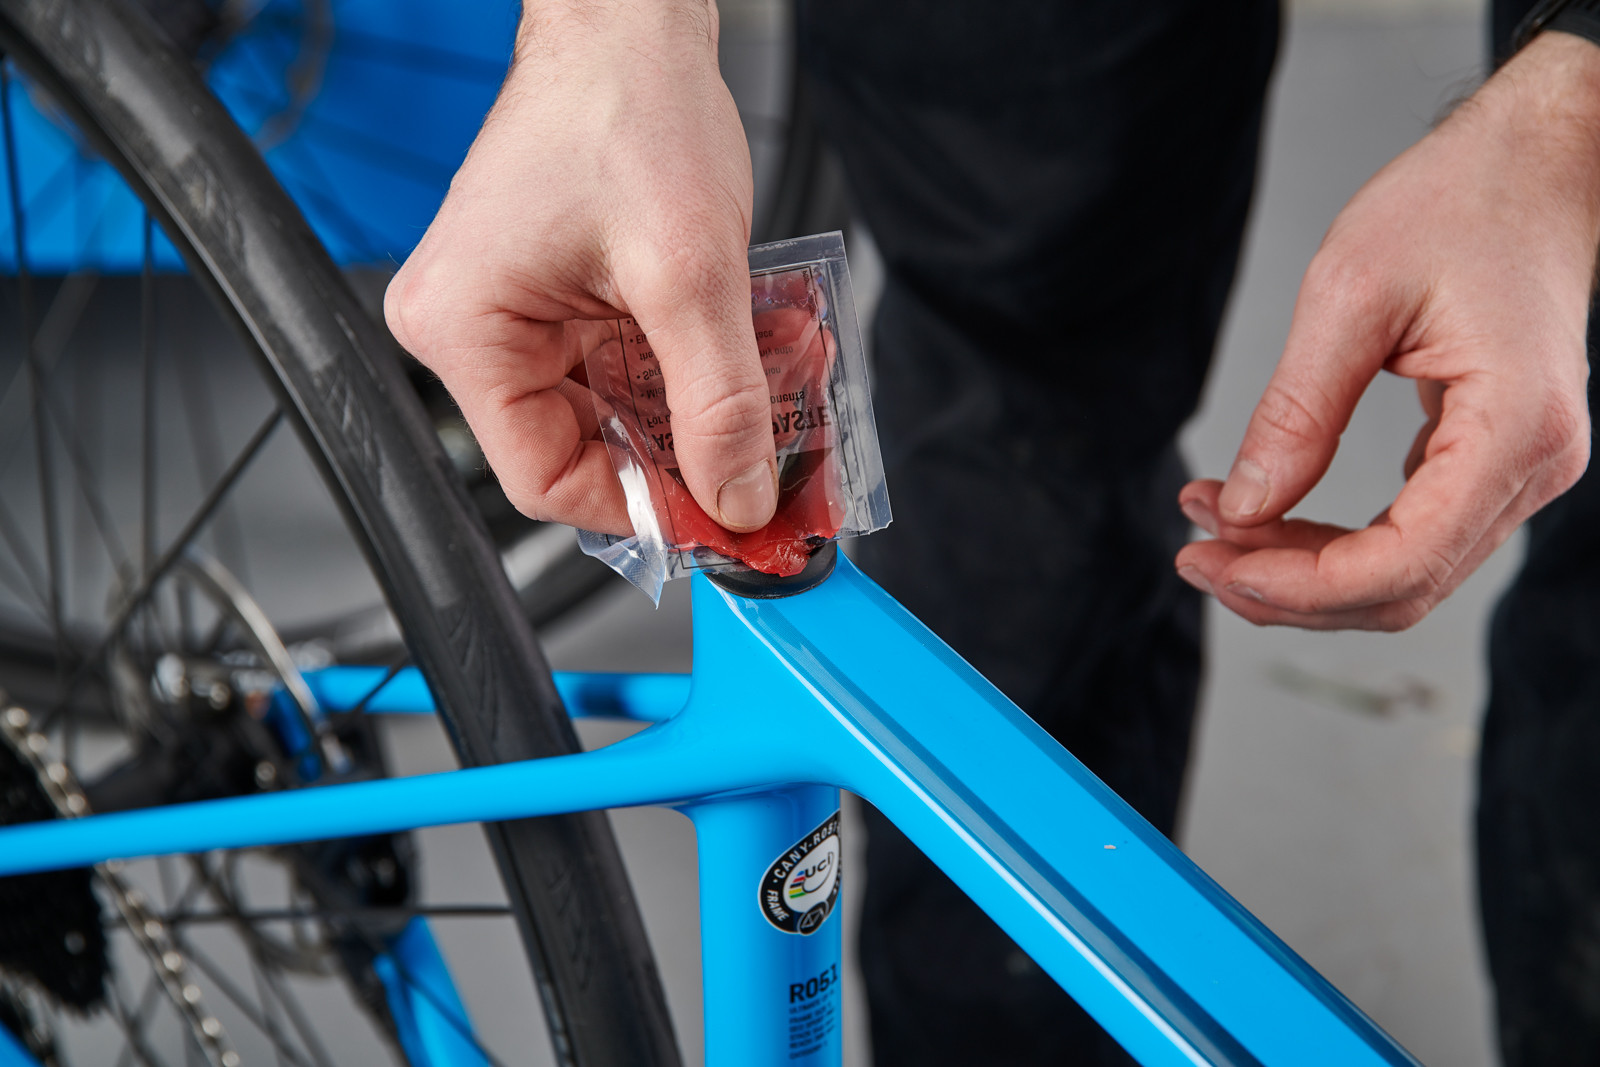 Applying carbon assembly paste to the seat tube before inserting the seatpost
 Inserting the seatpost into the seat tube of the bike frame
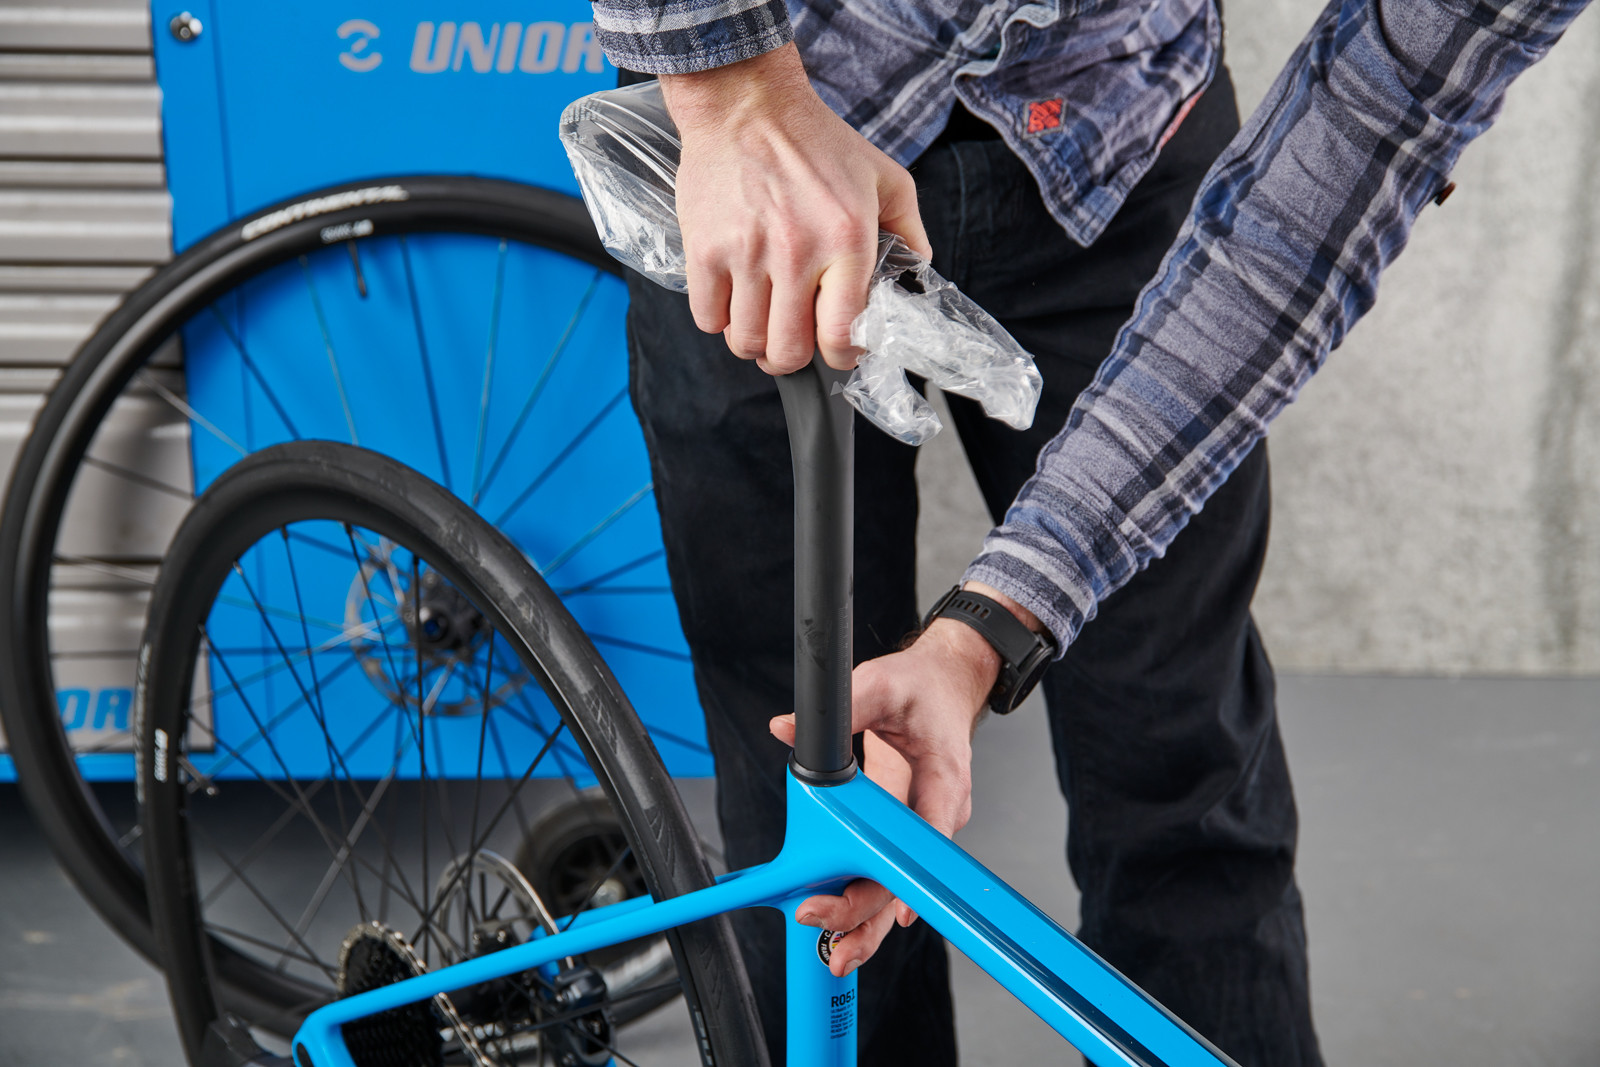
Your seatpost, in most cases, will already have the saddle attached. Unpack the seatpost assembly. Before inserting it into the frame, apply a small amount of carbon assembly paste if your seatpost is made of carbon fiber. If it’s a metal seatpost, use bike grease instead. Apply the paste or grease around the inside diameter of the seat tube – the frame tube where the seatpost will be inserted.
Now, carefully insert the seatpost into the seat tube. Push it in to a reasonable depth, but don’t worry about setting the final saddle height just yet; we’ll adjust that later. Once the seatpost is inserted, lightly tighten the seatpost clamp to hold it in place.
 Nipping up the seatpost clamp to secure the seatpost in the frame
After tightening the clamp, wipe off any excess assembly paste or grease with a clean rag. Locate the seatpost clamp bolt on your bike. It’s often positioned at the rear of the seat tube, sometimes between the seat stays. Consult your bike’s manual or look for markings on the frame or clamp itself to find the correct torque setting for tightening the seatpost clamp. Using a torque wrench, tighten the clamp bolt to the specified torque. For now, just ensure it’s snug enough to hold the seatpost; final adjustment will come later when setting your optimal saddle height.
4. Attaching the Handlebar
 Removing the stem top cap to prepare for handlebar attachment
 Attaching the handlebar assembly to the stem of the bike
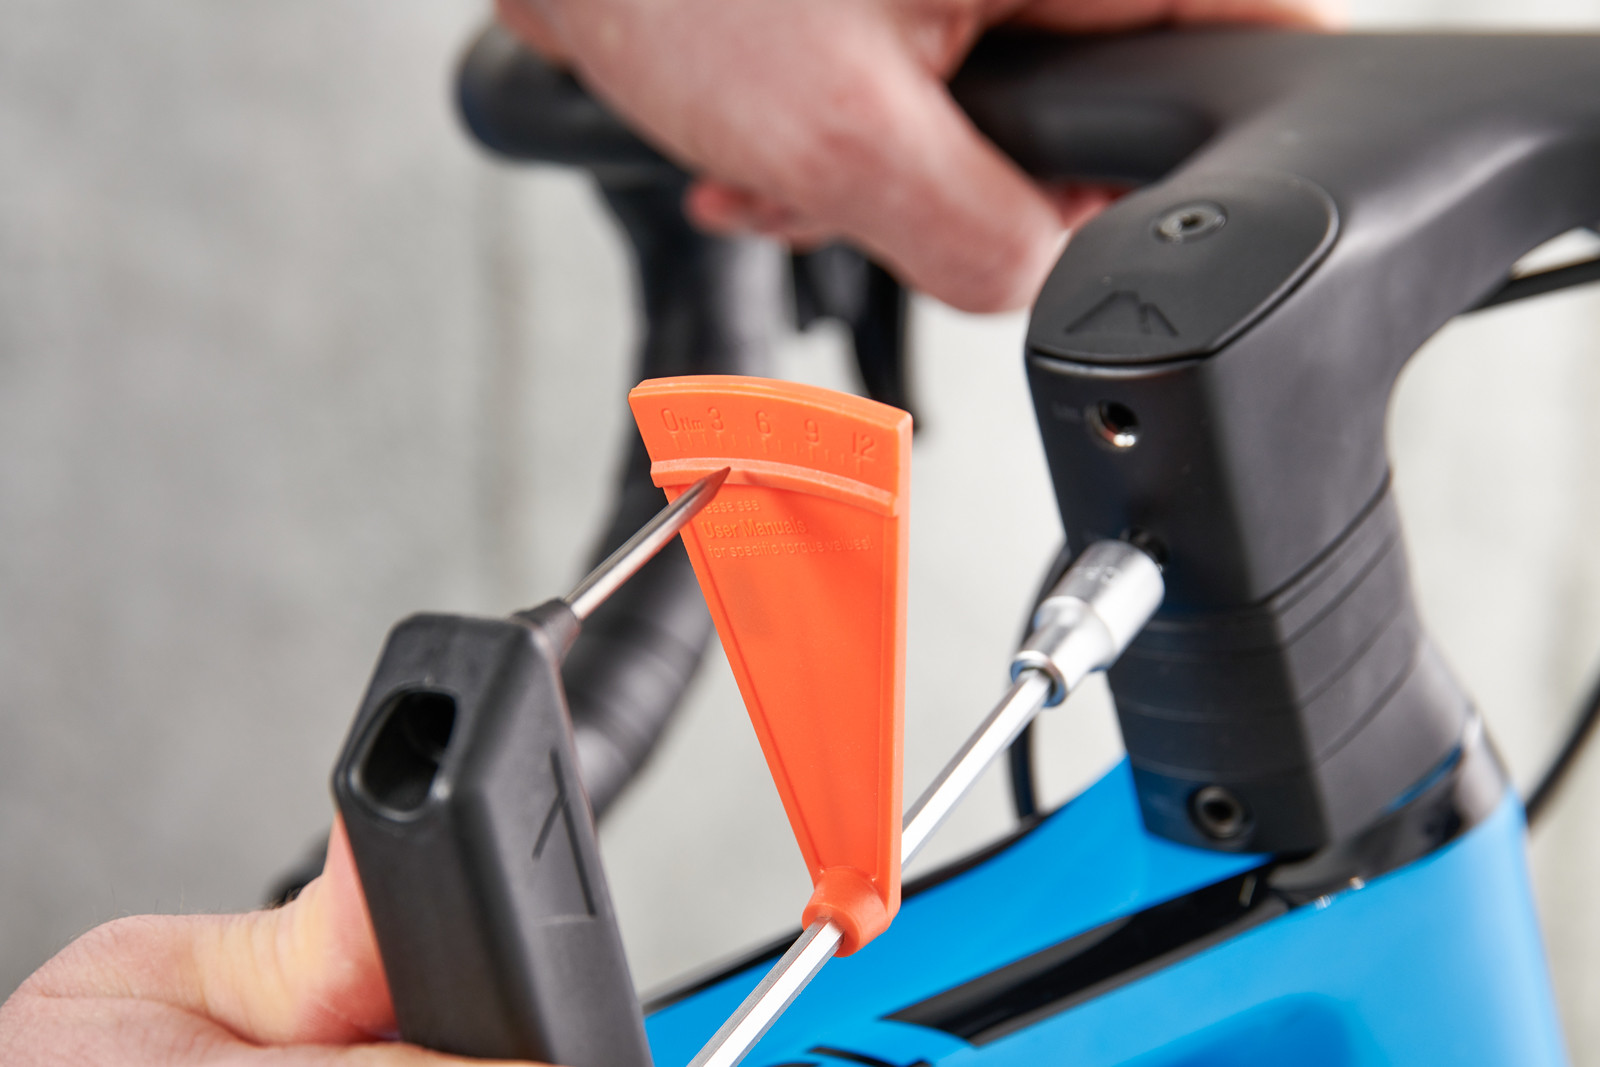
 Tightening the stem/headset top cap during handlebar installation
 Using a torque wrench to tighten stem bolts, ensuring proper handlebar fixation
Now it’s time to attach the handlebar assembly. The process varies slightly depending on whether your bike has an integrated cockpit or a traditional stem and handlebar setup.
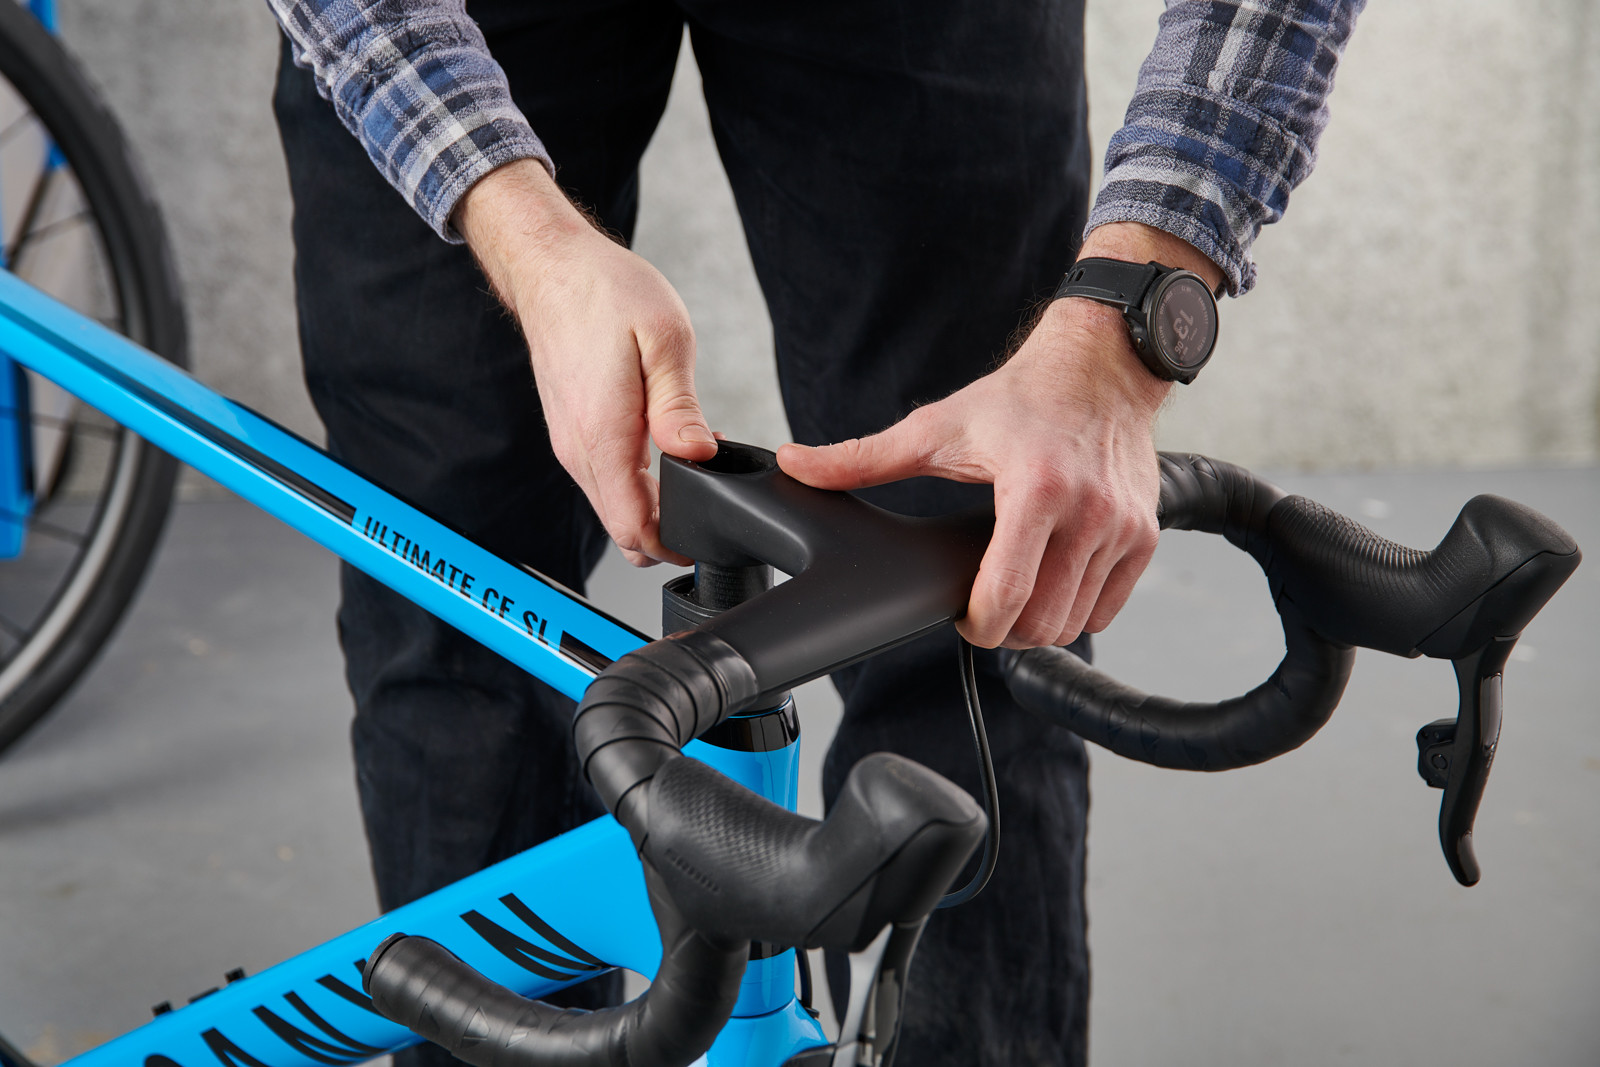
Some modern bikes, especially mid-to-high-end road bikes, feature integrated cockpits where the handlebar and stem are a single, molded piece. If your bike has this type of cockpit, carefully consult your owner’s manual for specific installation instructions. Typically, as seen with the integrated Canyon Aerocockpit in the example bike, the base of the stem simply slots onto the steerer tube of the fork. You then tighten the stem bolts to the manufacturer’s recommended torque specification. Ensure the handlebars are straight and properly aligned before fully tightening these bolts.
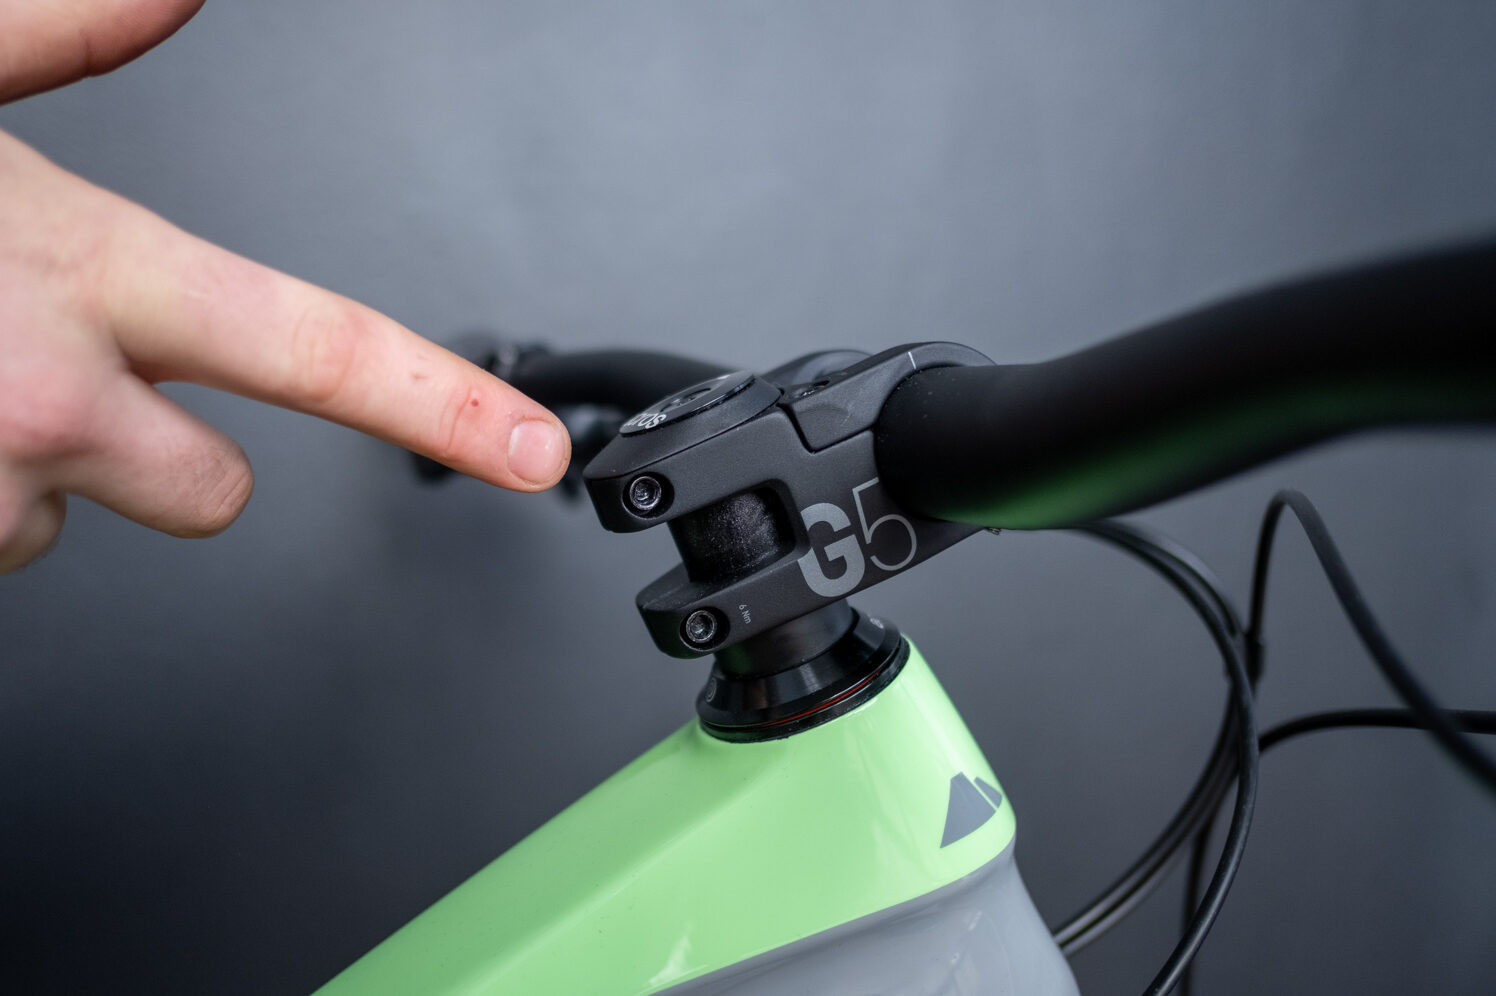 Diagram showing headset preload adjustment, step 1: loosening stem bolts
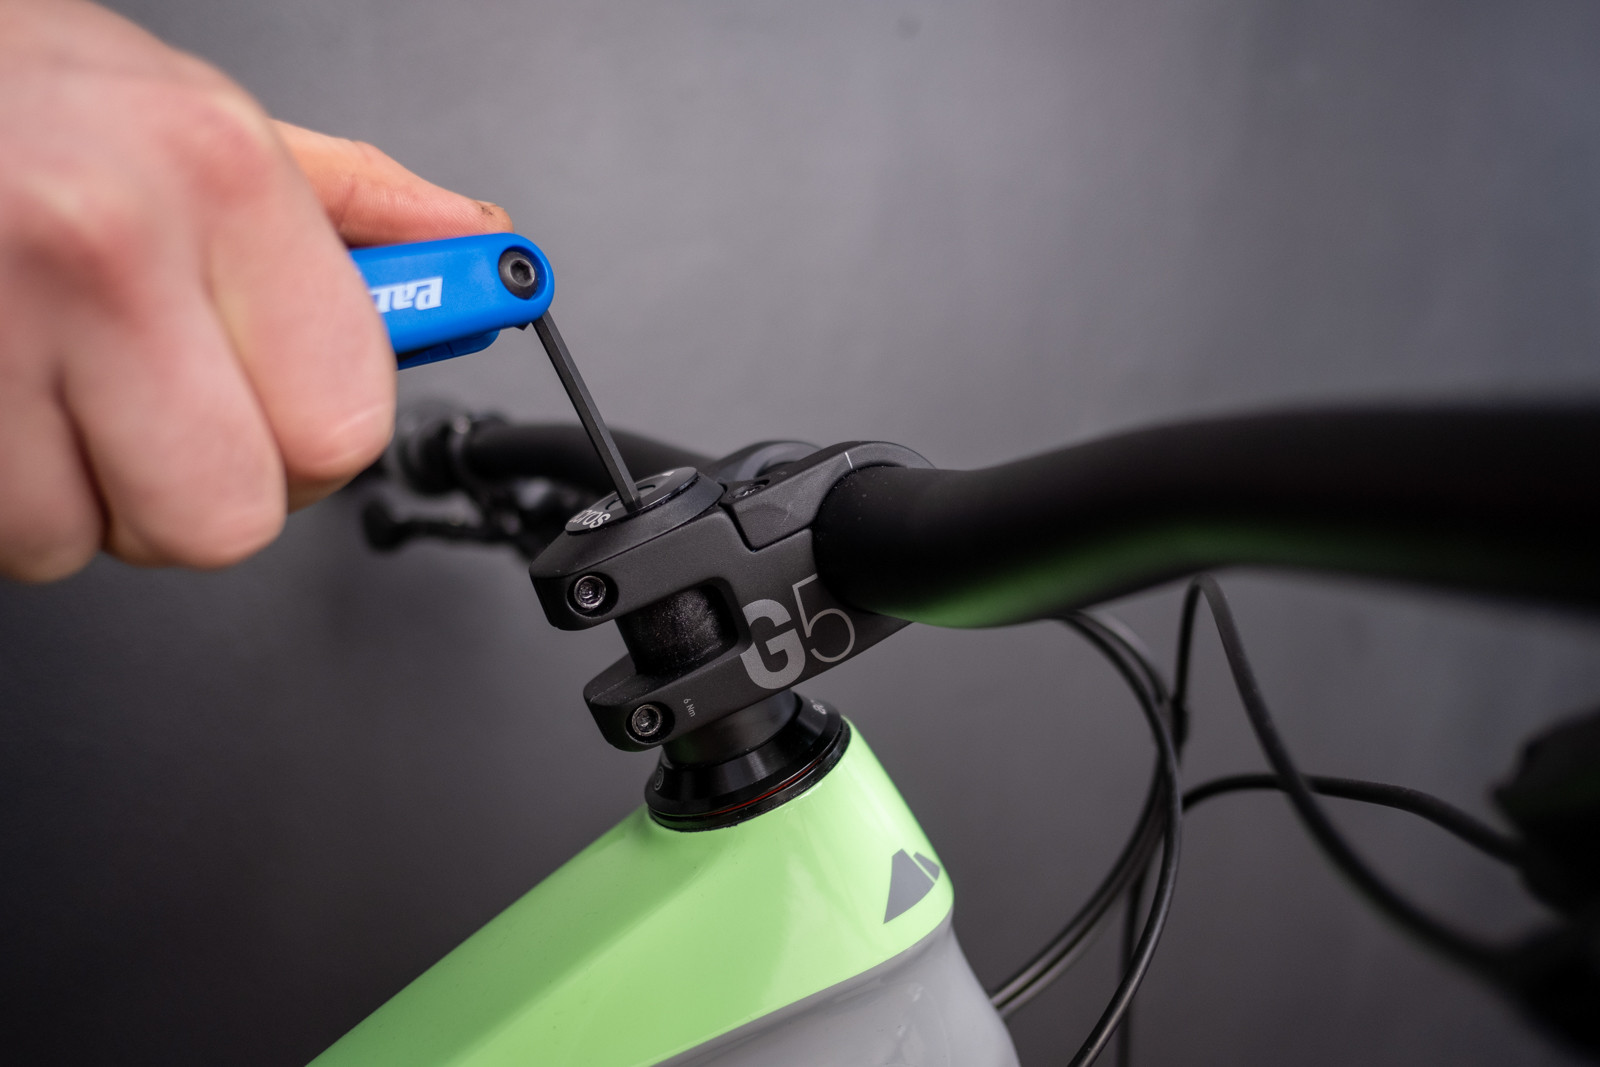 Diagram showing headset preload adjustment, step 2: tightening the top cap bolt
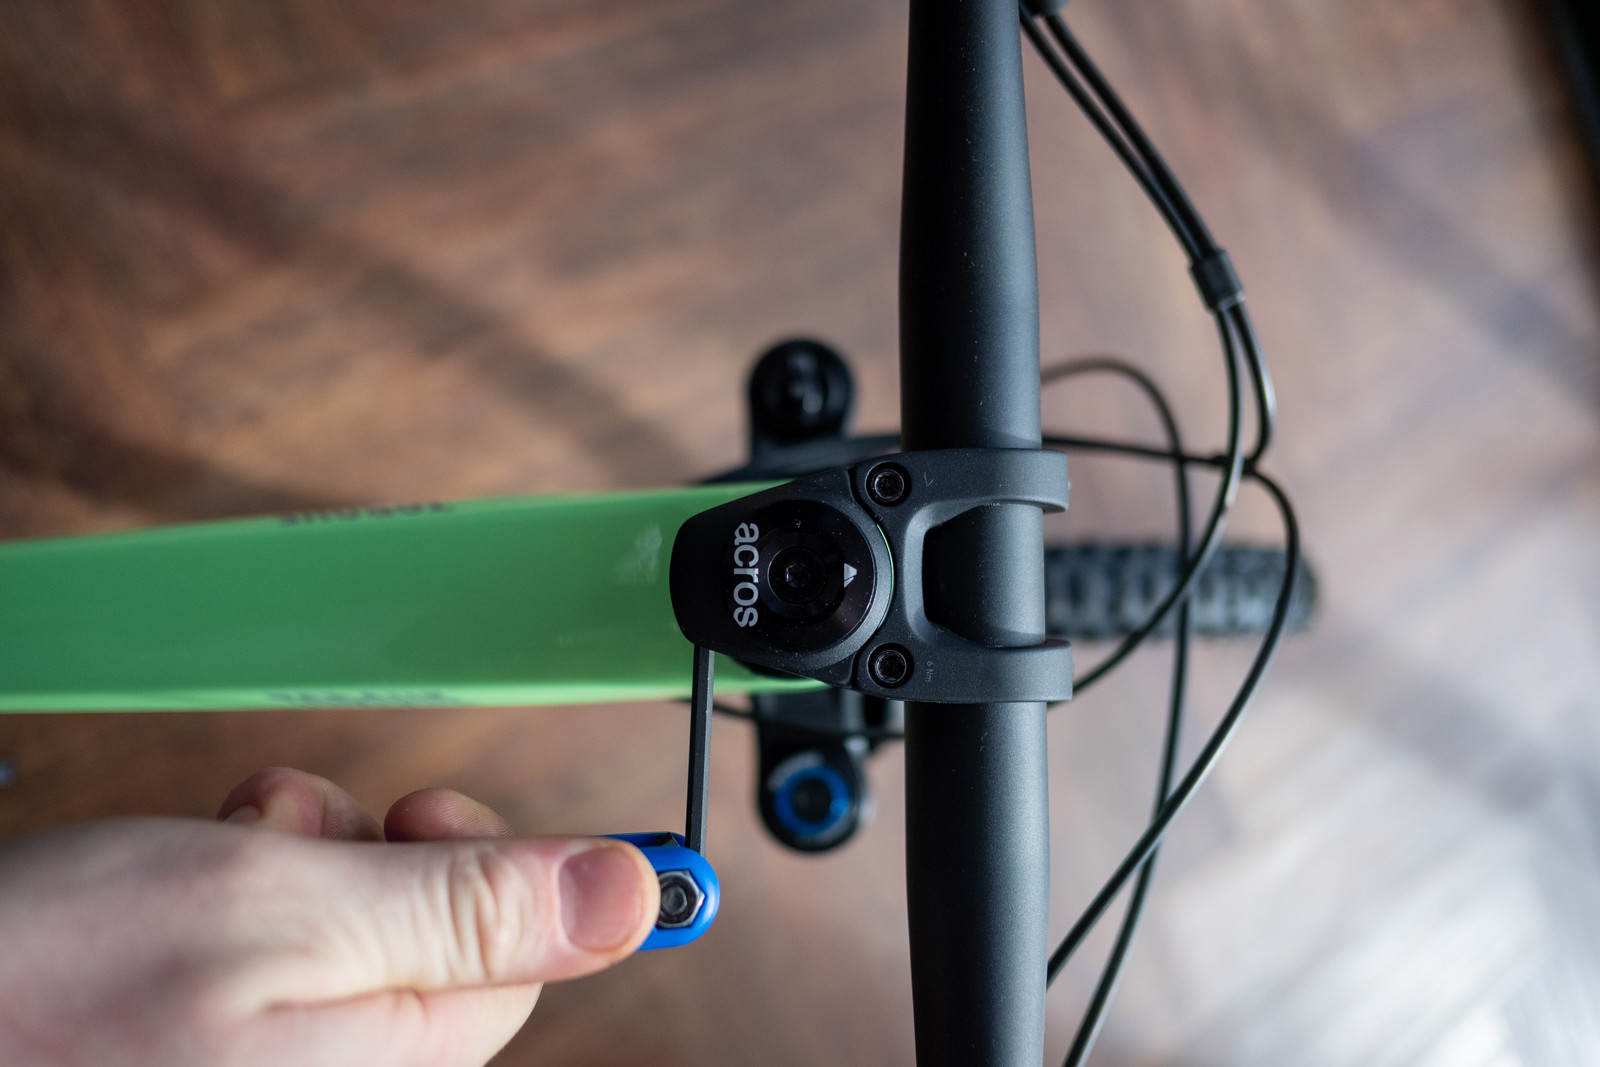 Diagram showing headset preload adjustment, step 3: tightening stem bolts
If your bike uses a traditional two-piece stem and handlebar setup, the process involves a few more steps:
- Remove the Faceplate: Locate the faceplate at the front of the stem. This is the piece that clamps the handlebar to the stem. Remove the bolts holding the faceplate in place and take off the faceplate.
- Insert Handlebar: Position the handlebar in the stem’s cradle and replace the faceplate. Begin tightening the faceplate bolts, but don’t fully tighten them yet. It’s crucial to tighten these bolts evenly. Typically, you should aim for a uniform gap between the faceplate and the stem body as you tighten. Some stems may have specific instructions, so double-check if needed. Tighten to the recommended torque setting.
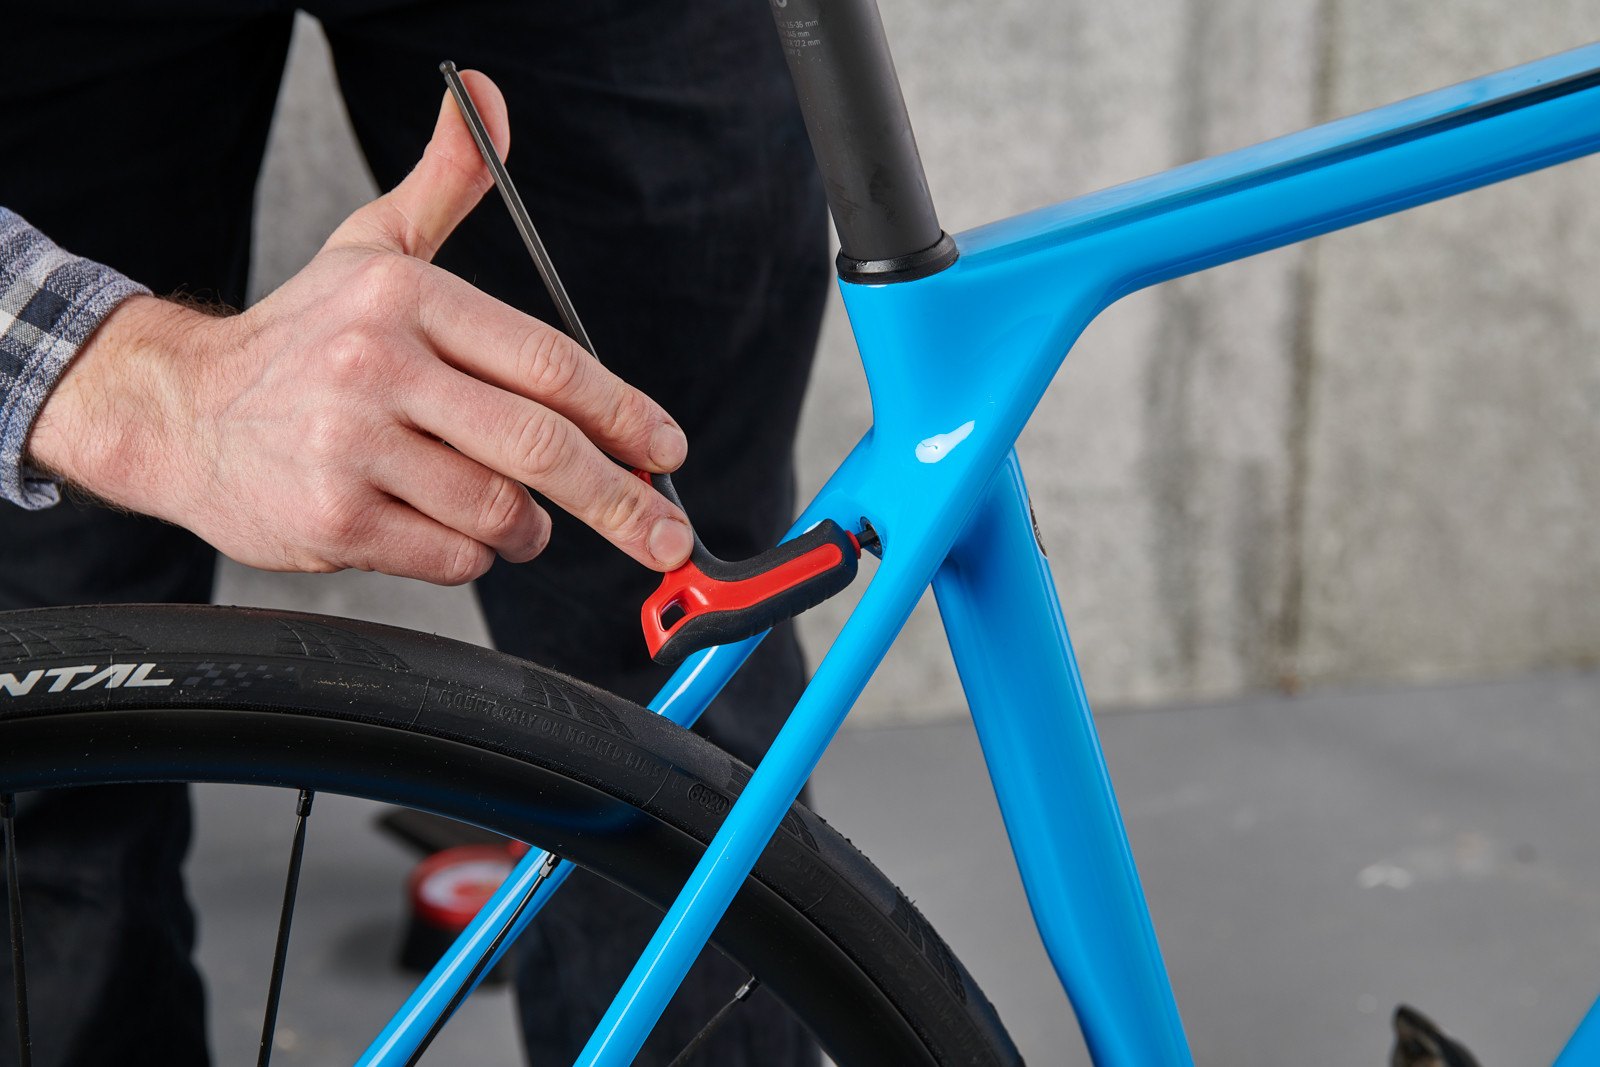
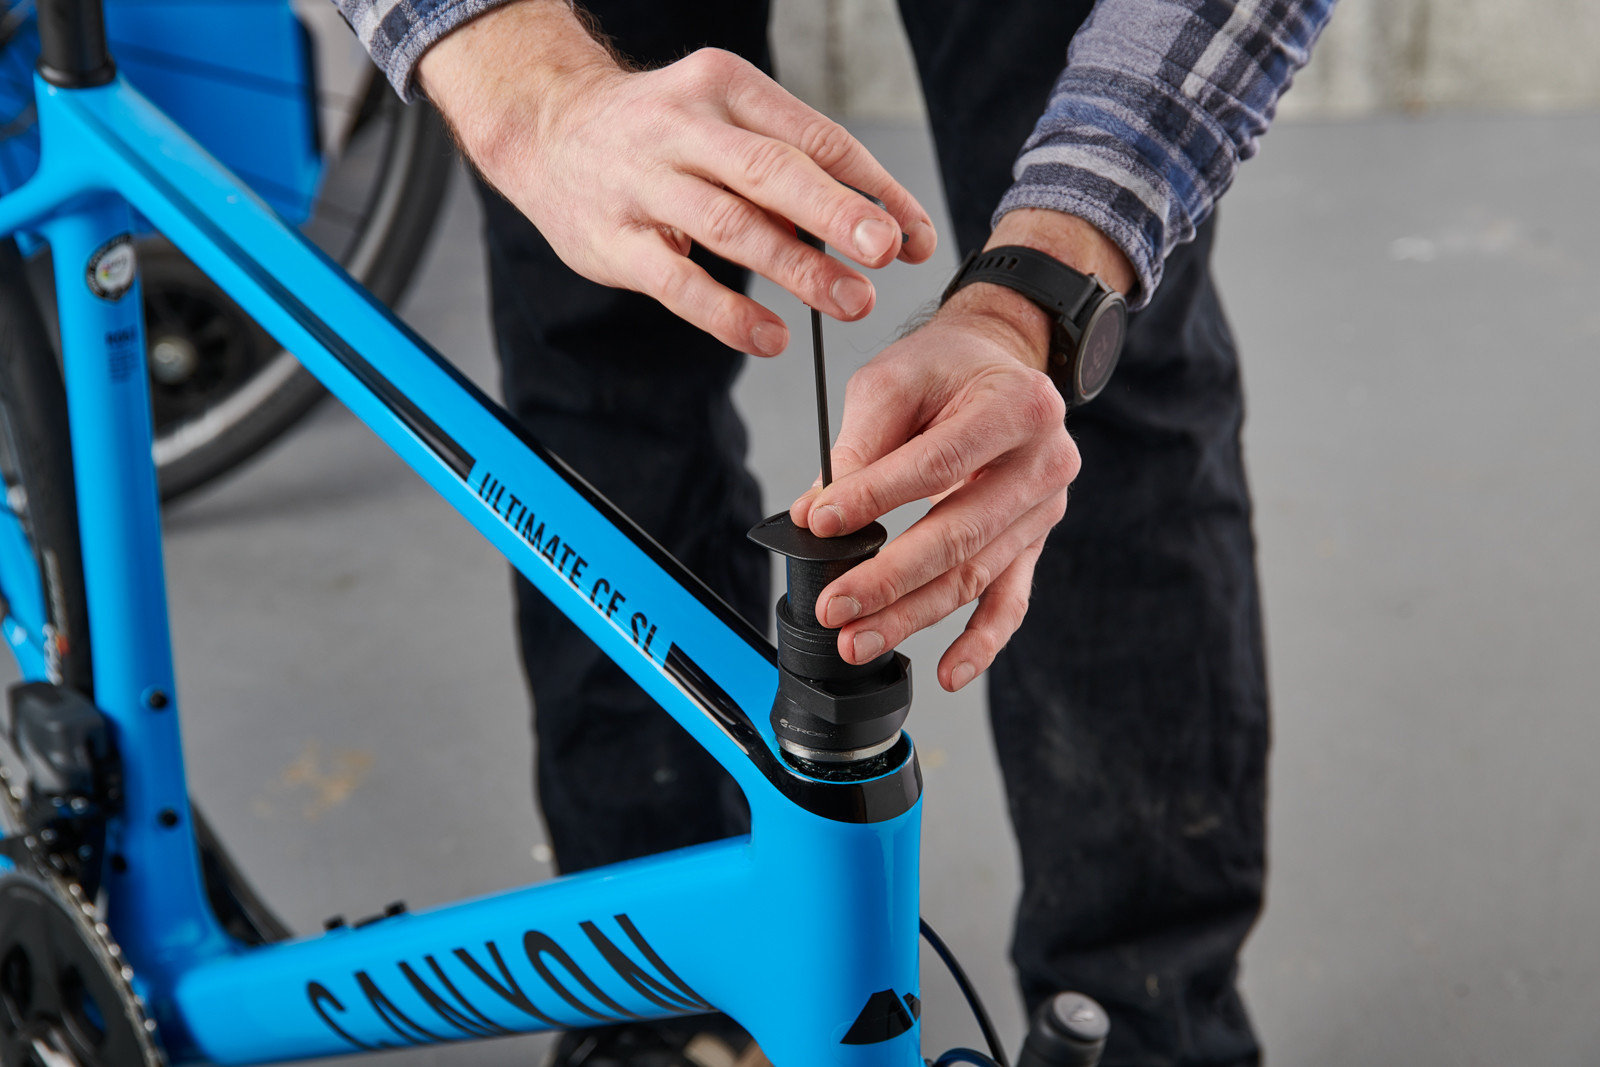
- Headset Preload Adjustment: With the stem bolts at the base of the stem (those clamping it to the steerer tube) loosened, locate the bolt on the very top of the stem (the top cap bolt). Tighten this top cap bolt until you feel some resistance. This bolt preloads the headset bearings. There isn’t a specific torque value for this bolt because it varies between bikes. The goal is to tighten it enough to eliminate any play in the headset (where the fork might move back and forth within the frame) but not so tight that it crushes the headset bearings. Check for play by gently rocking the fork back and forth where it meets the frame and stem spacers.
- Stem Alignment and Final Tightening: Once the headset preload is correctly adjusted, align the stem so it’s perfectly straight with the front tire. Now, evenly tighten the stem bolts at the base of the stem to the manufacturer’s specified torque setting.
This procedure assumes you don’t need to adjust the handlebar height. If you need to fine-tune your handlebar position, consult a guide on adjusting handlebar height for more detailed instructions.
5. Inserting the Front Wheel
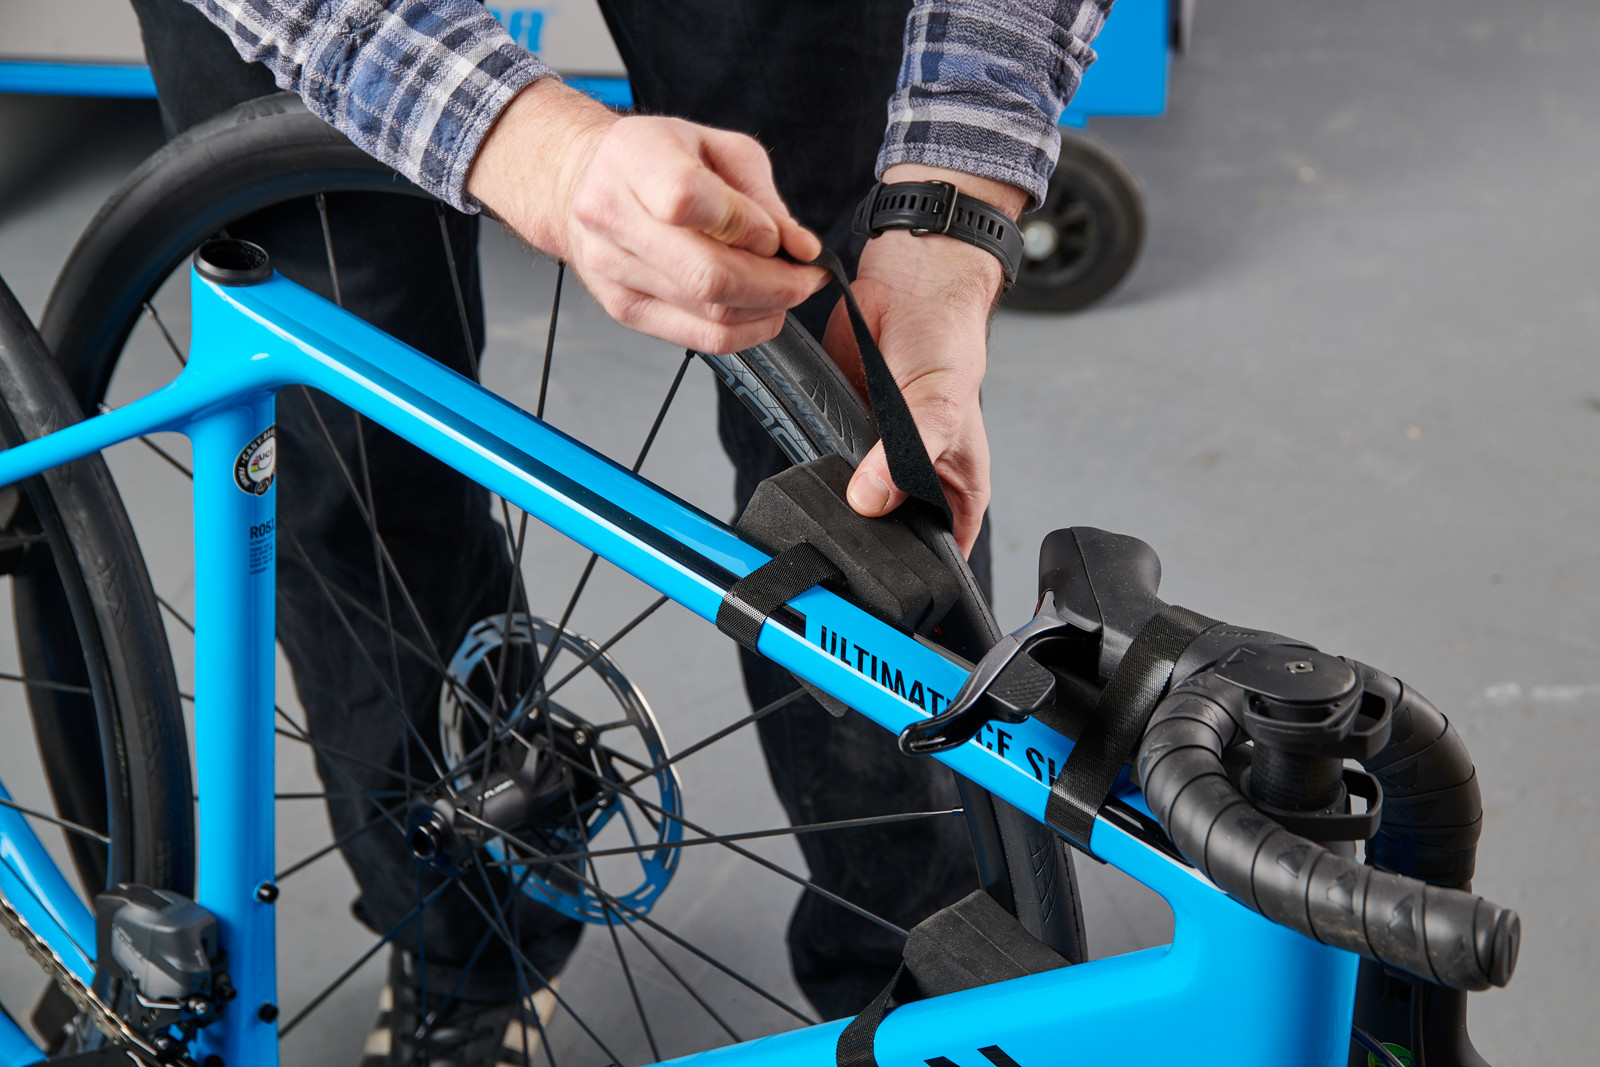
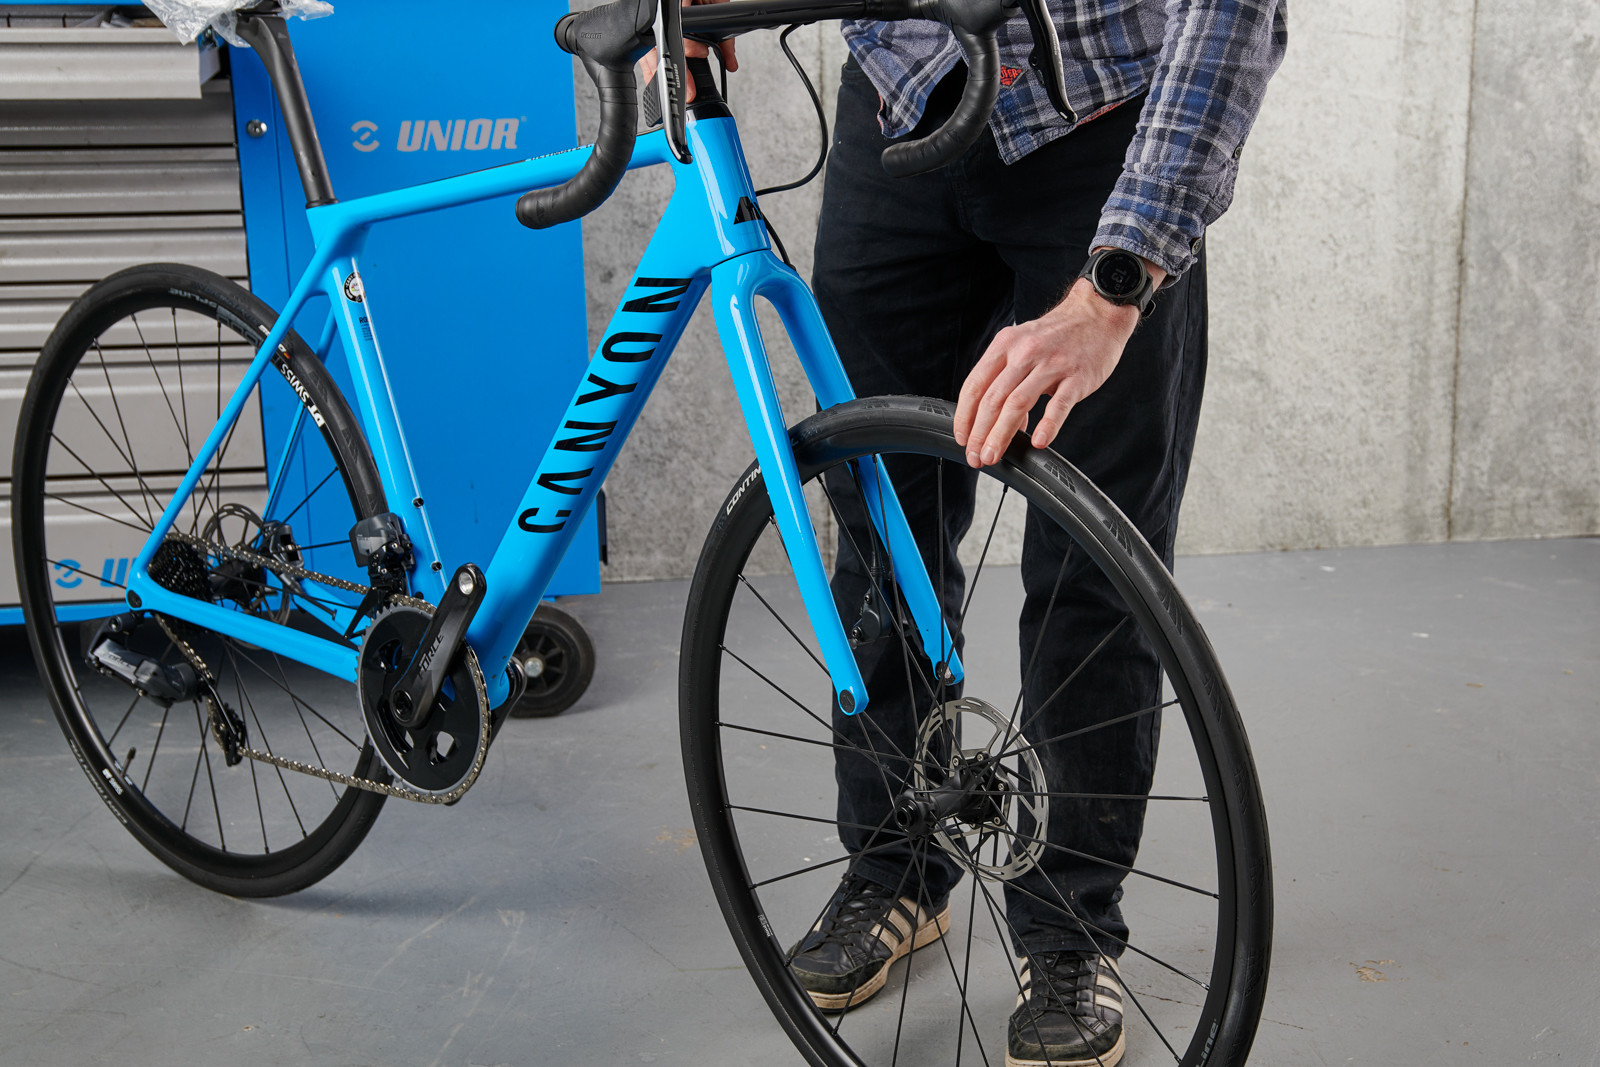 The bike frame taking shape after handlebar and front wheel installation
Now, it’s time to install the front wheel into the fork. Bikes commonly use one of two axle types:
- Thru-Axle: Thru-axles vary in diameter and length depending on the bike type. They bolt the wheel directly into threads located in the fork (and frame for the rear wheel).
- Quick-Release Skewer: Quick-release skewers are narrow rods that pass through the wheel hub. The fork (and rear frame) have open slots called dropouts. The wheel hub axle sits within these dropouts. A quick-release skewer is secured with a nut on one end. After threading the skewer through the nut, a lever is used to create the final clamping force, securing the wheel to the frame/fork. When closing the quick-release lever, it should require enough pressure to leave a slight imprint on your palm. Ensure the wheel is seated straight in the dropouts. Misalignment can cause brake rub, especially with disc brakes.
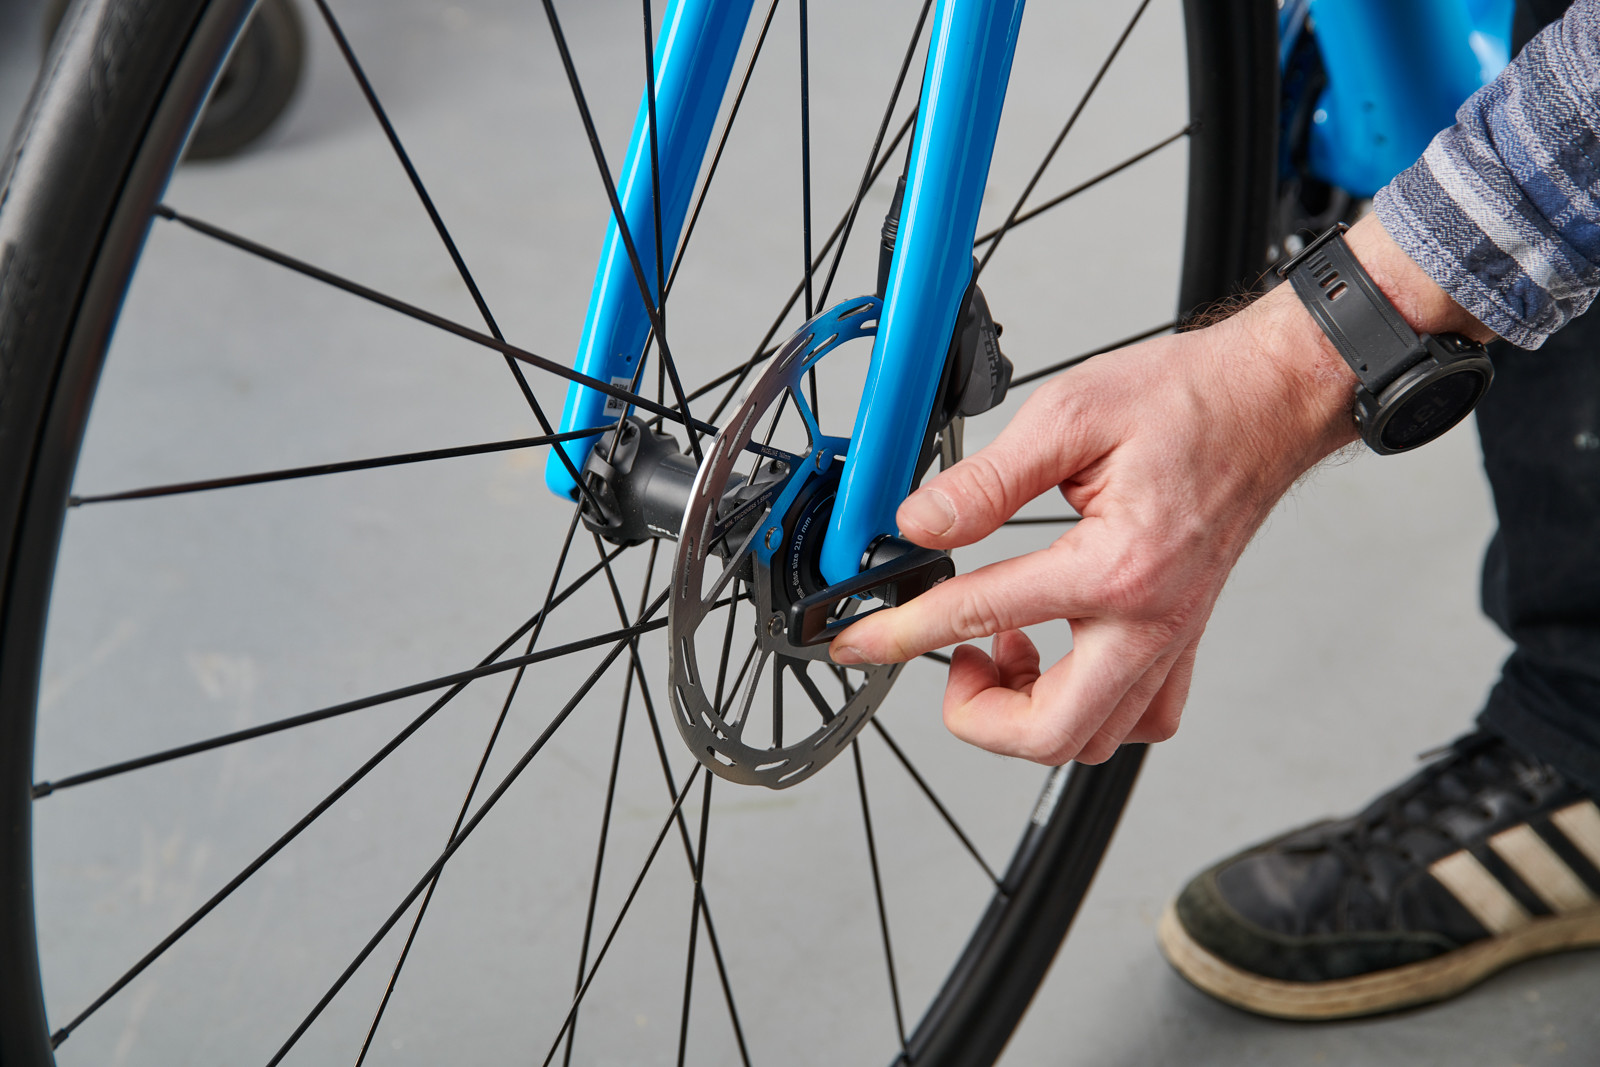 Close-up of a thru-axle on a bike, demonstrating a modern wheel attachment system
If your bike has rim brakes, check the tire sidewall for a rotation direction arrow. Ensure the front wheel is oriented correctly according to this arrow. If your bike has disc brakes, apply a small amount of grease to the thru-axle threads before inserting it through the fork and wheel hub. Securely tighten the thru-axle to the recommended torque, or close the quick-release lever firmly.
For more in-depth information, especially regarding mountain bikes, you can explore resources on mountain bike axle standards.
6. Inflating the Tires
 Inflating bike tires with a pump, a crucial step before riding
With the wheels installed, the next step in bike assembly is inflating the tires. As a starting point, check the tire sidewall for the manufacturer’s recommended pressure range. This range is usually printed as PSI (pounds per square inch) or BAR.
Inflate your tires within this recommended range using a bike pump. Tire pressure is crucial for comfort, rolling efficiency, and preventing punctures. For more detailed information on tire inflation, explore guides on how to pump up a bike tire, understanding inner tube sizes and valve types, setting up tubeless road tires, and mountain bike tire pressure.
7. Installing the Pedals
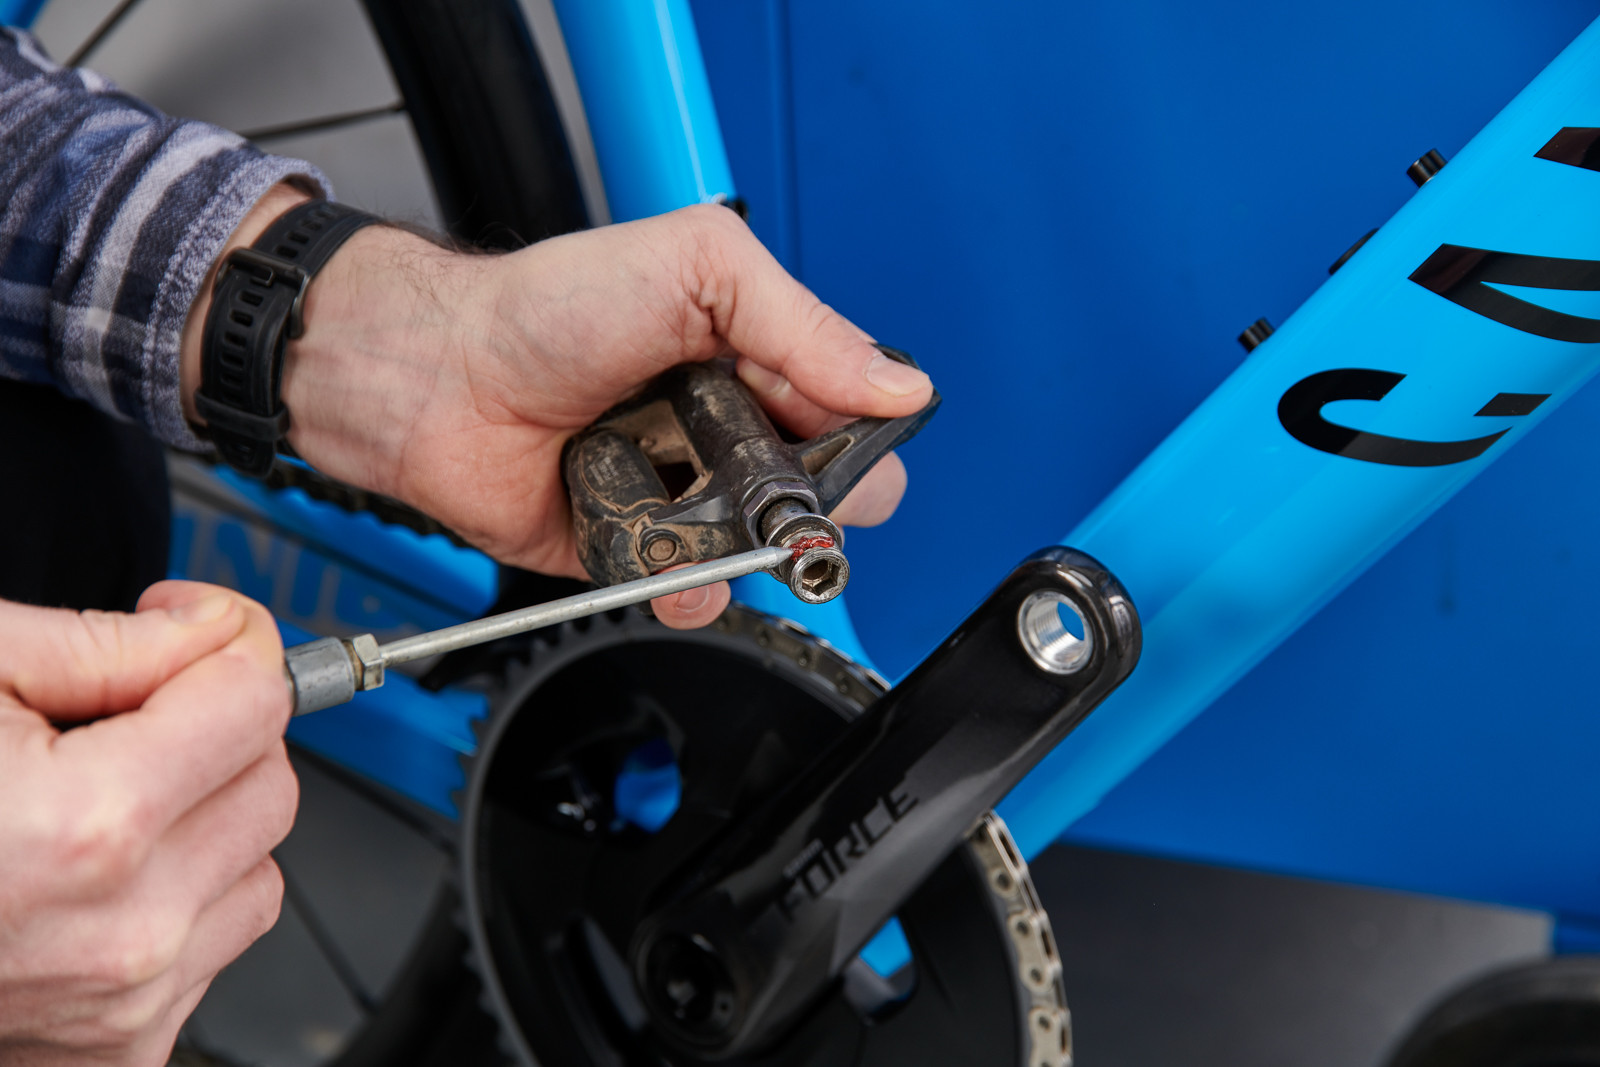 Greasing pedal threads before installation to prevent seizing
While some bikes may come with basic, inexpensive pedals included, many cyclists prefer to install their own pedals, whether they are flat pedals or clipless pedals.
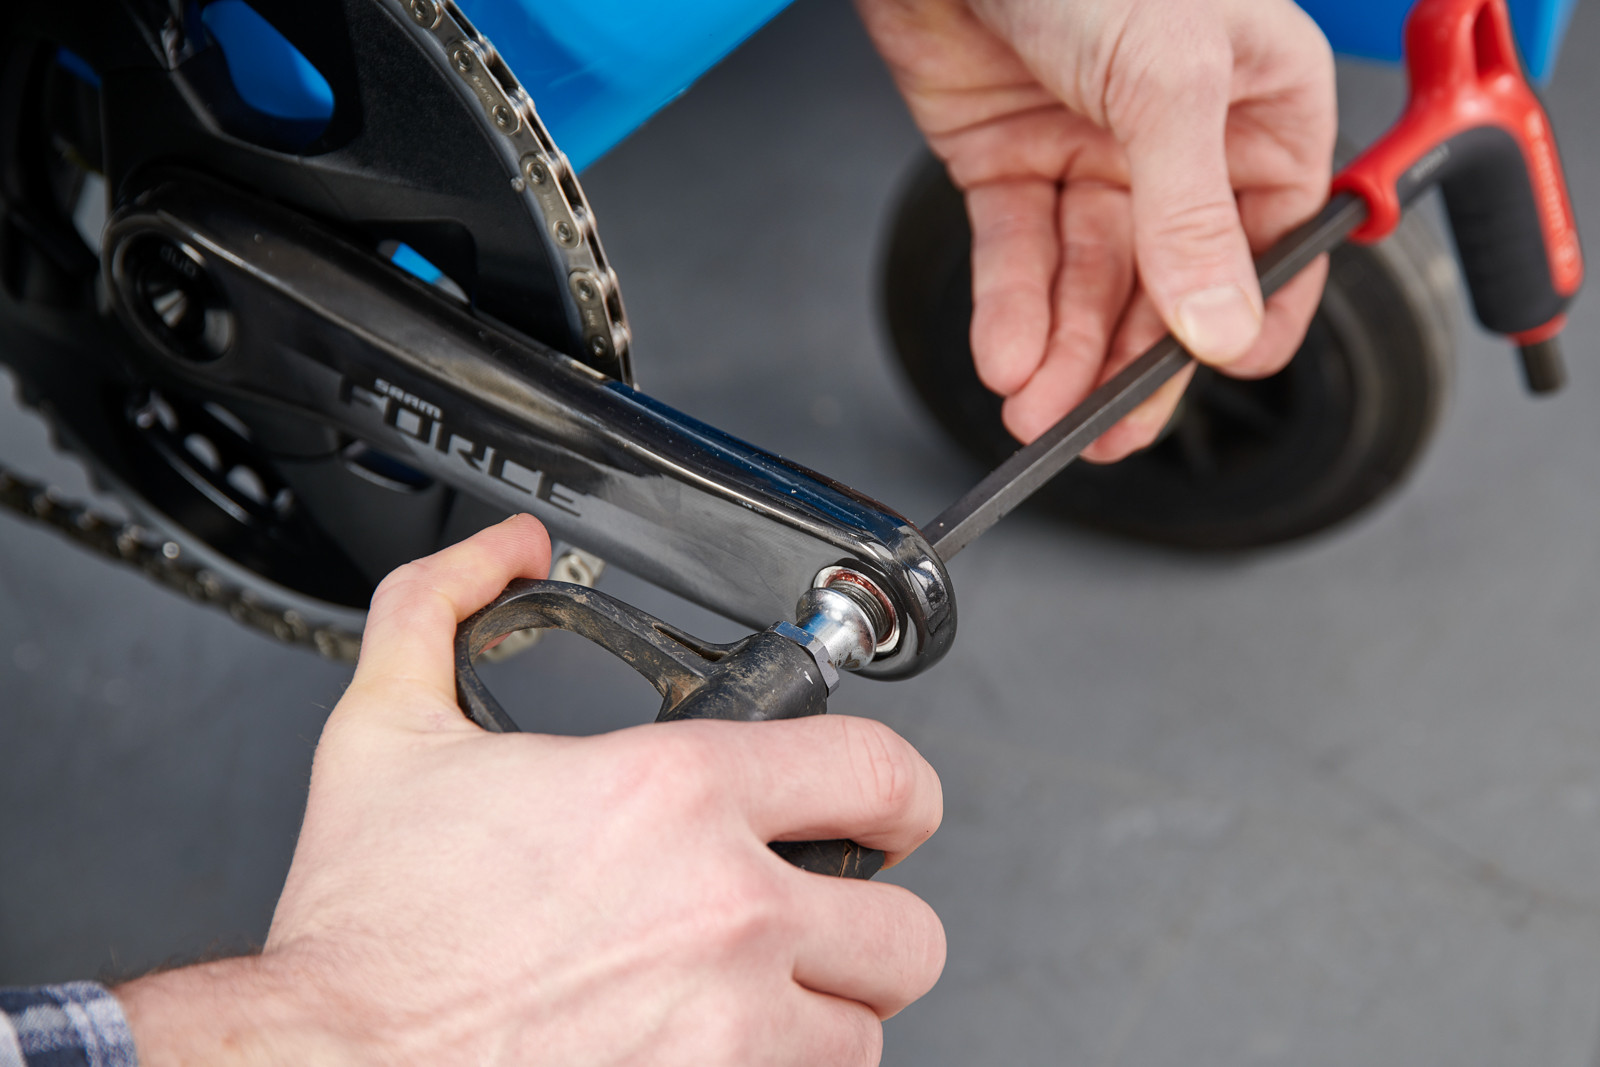 Using a pedal spanner to tighten pedals onto the crank arms
Before installing pedals, apply a small amount of grease to the pedal threads. This prevents them from seizing in the crank arms over time. Pedals are side-specific, meaning there’s a left pedal and a right pedal – they are not interchangeable. They are typically marked with an “L” (left) and “R” (right). It’s crucial to install the correct pedal on the correct side. Both pedals tighten in the forward direction (towards the front wheel). Use a pedal wrench or an Allen key (depending on your pedal type) to tighten them securely to the crank arms.
For further reading on pedals, explore resources on the best road bike pedals and best mountain bike pedals, as well as guides on how to cycle with clipless pedals if you choose to use clipless systems.
8. Setting the Saddle Height
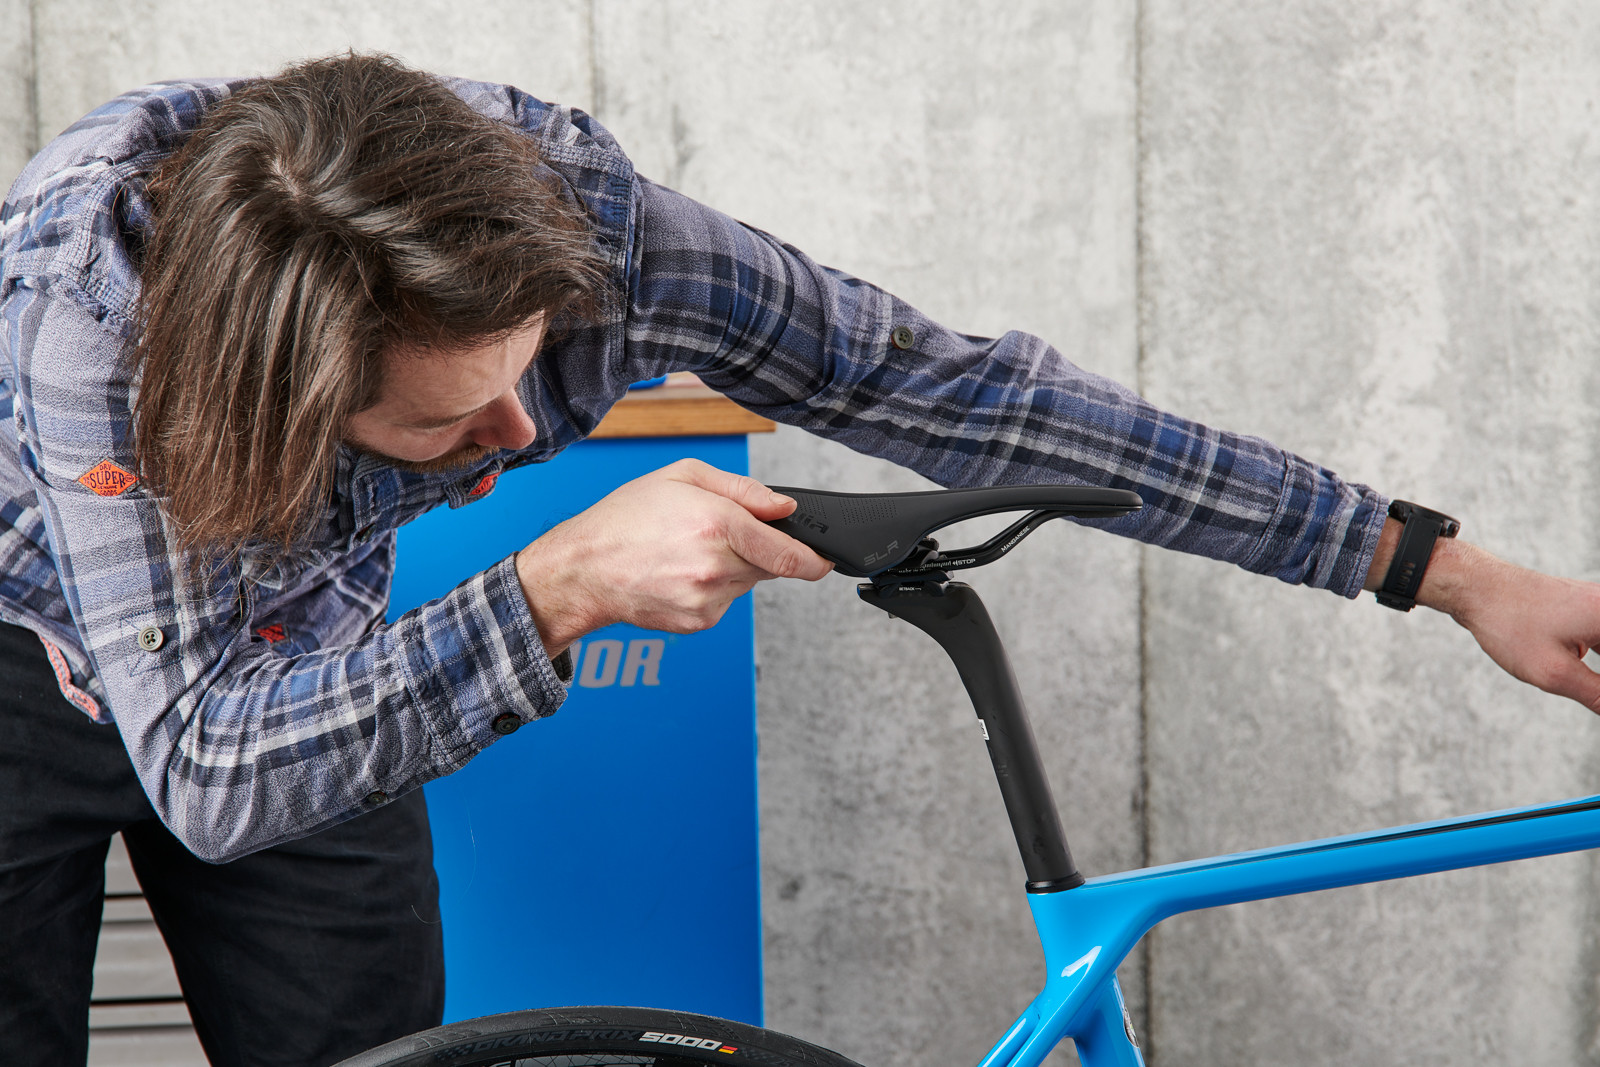 Checking saddle straightness after adjusting saddle height
Now, it’s time to set your saddle height. First, ensure the saddle rail bolts are sufficiently tight and that the saddle is level (horizontally) and straight (aligned with the bike’s centerline). Roughly adjust the saddle height to what you think is appropriate.
Once you have a preliminary saddle height, ensure the seatpost clamp is tightened to the recommended torque value. Fine-tuning saddle height is a crucial aspect of bike fit and comfort. For detailed guidance, refer to resources on how to set saddle height correctly.
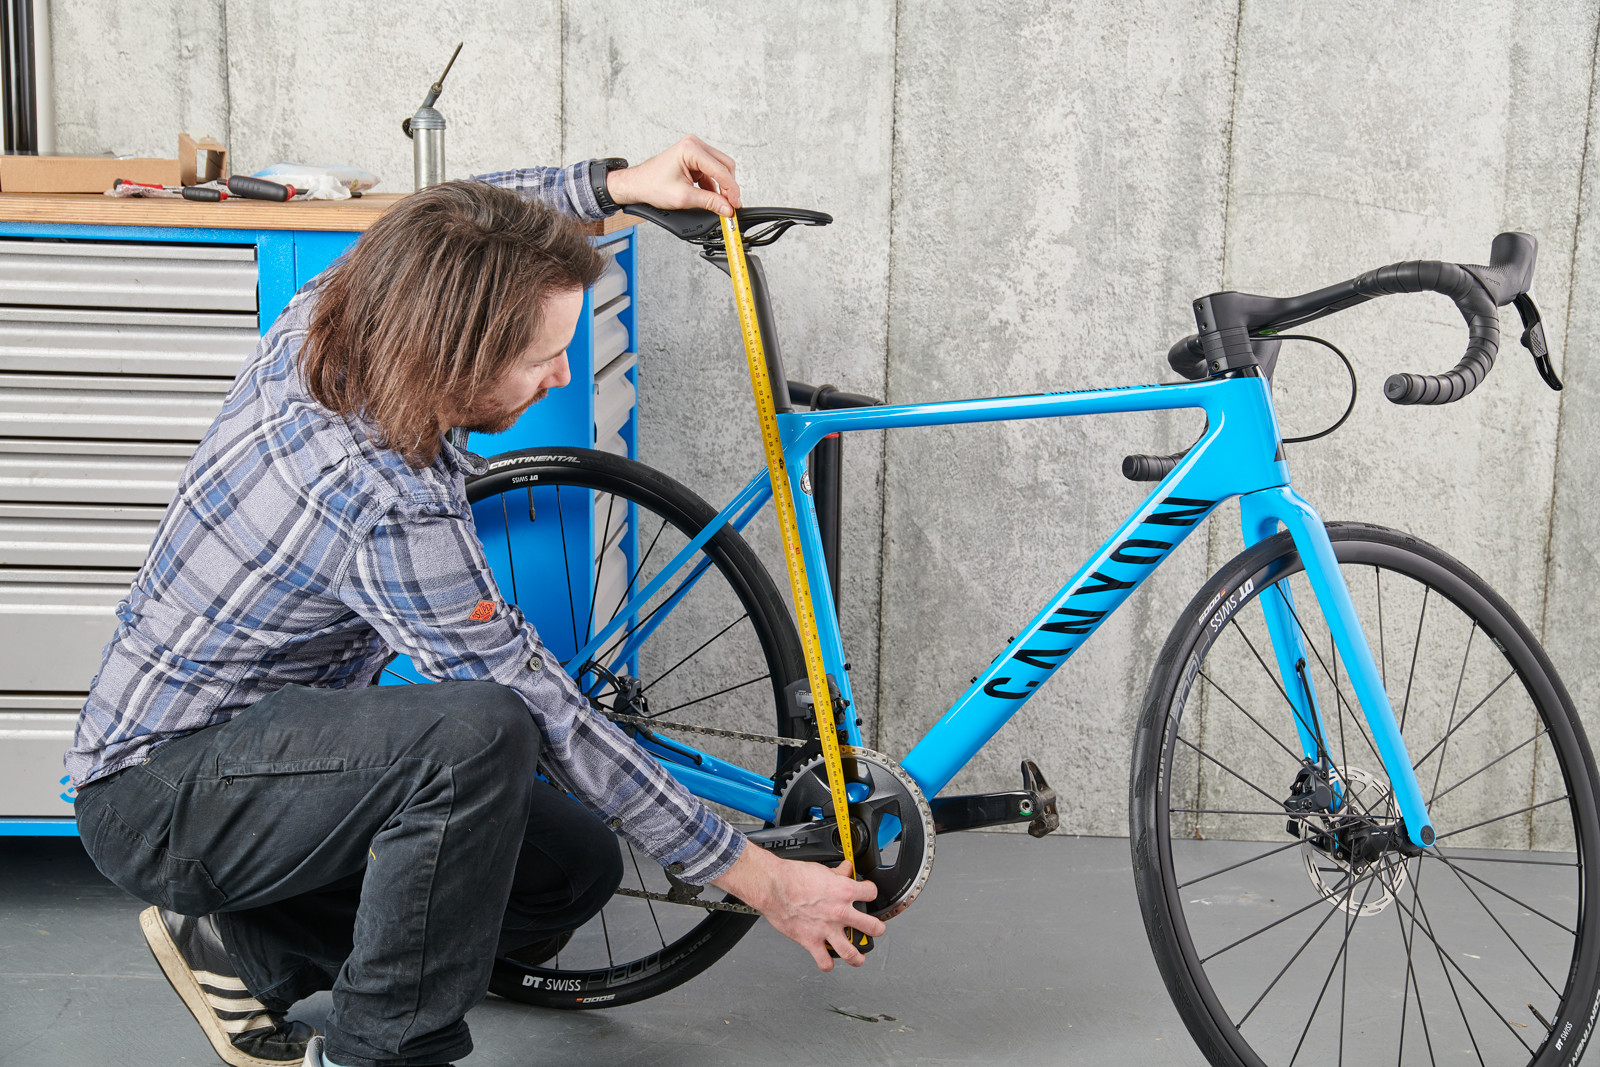 Saddle height adjustment as a key element of bike fit
9. Final Safety Checks
 Performing a final safety check on the assembled bike before riding
While manufacturers and retailers usually pre-adjust brakes and gears before shipping, it’s essential to perform a thorough final safety check before your first ride. This includes checking brake function, ensuring gears shift smoothly and accurately (gear indexing), and verifying all bolts are tightened to their correct torque specifications.
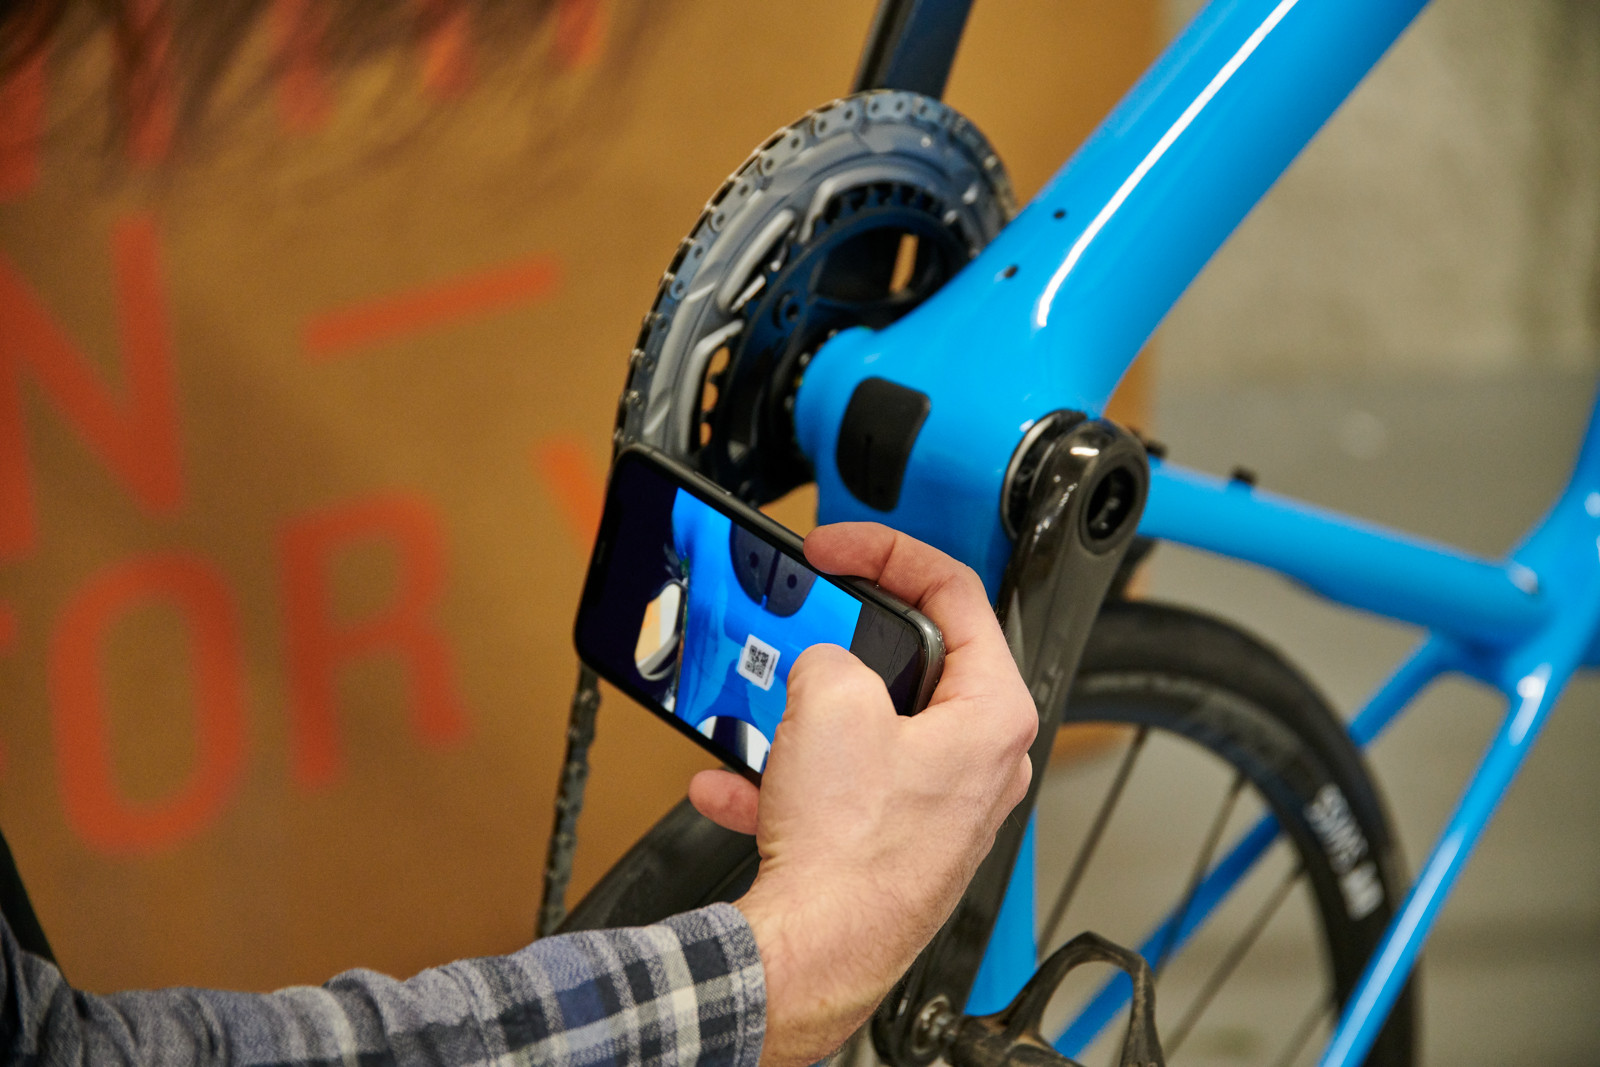
This is also an opportune moment to locate and record your bike frame’s serial number. It’s usually stamped on the underside of the bottom bracket shell. Take a photo or write it down and keep it in a safe place. This serial number is vital for bike insurance claims, warranty issues, or in case of theft.
10. Time to Ride!
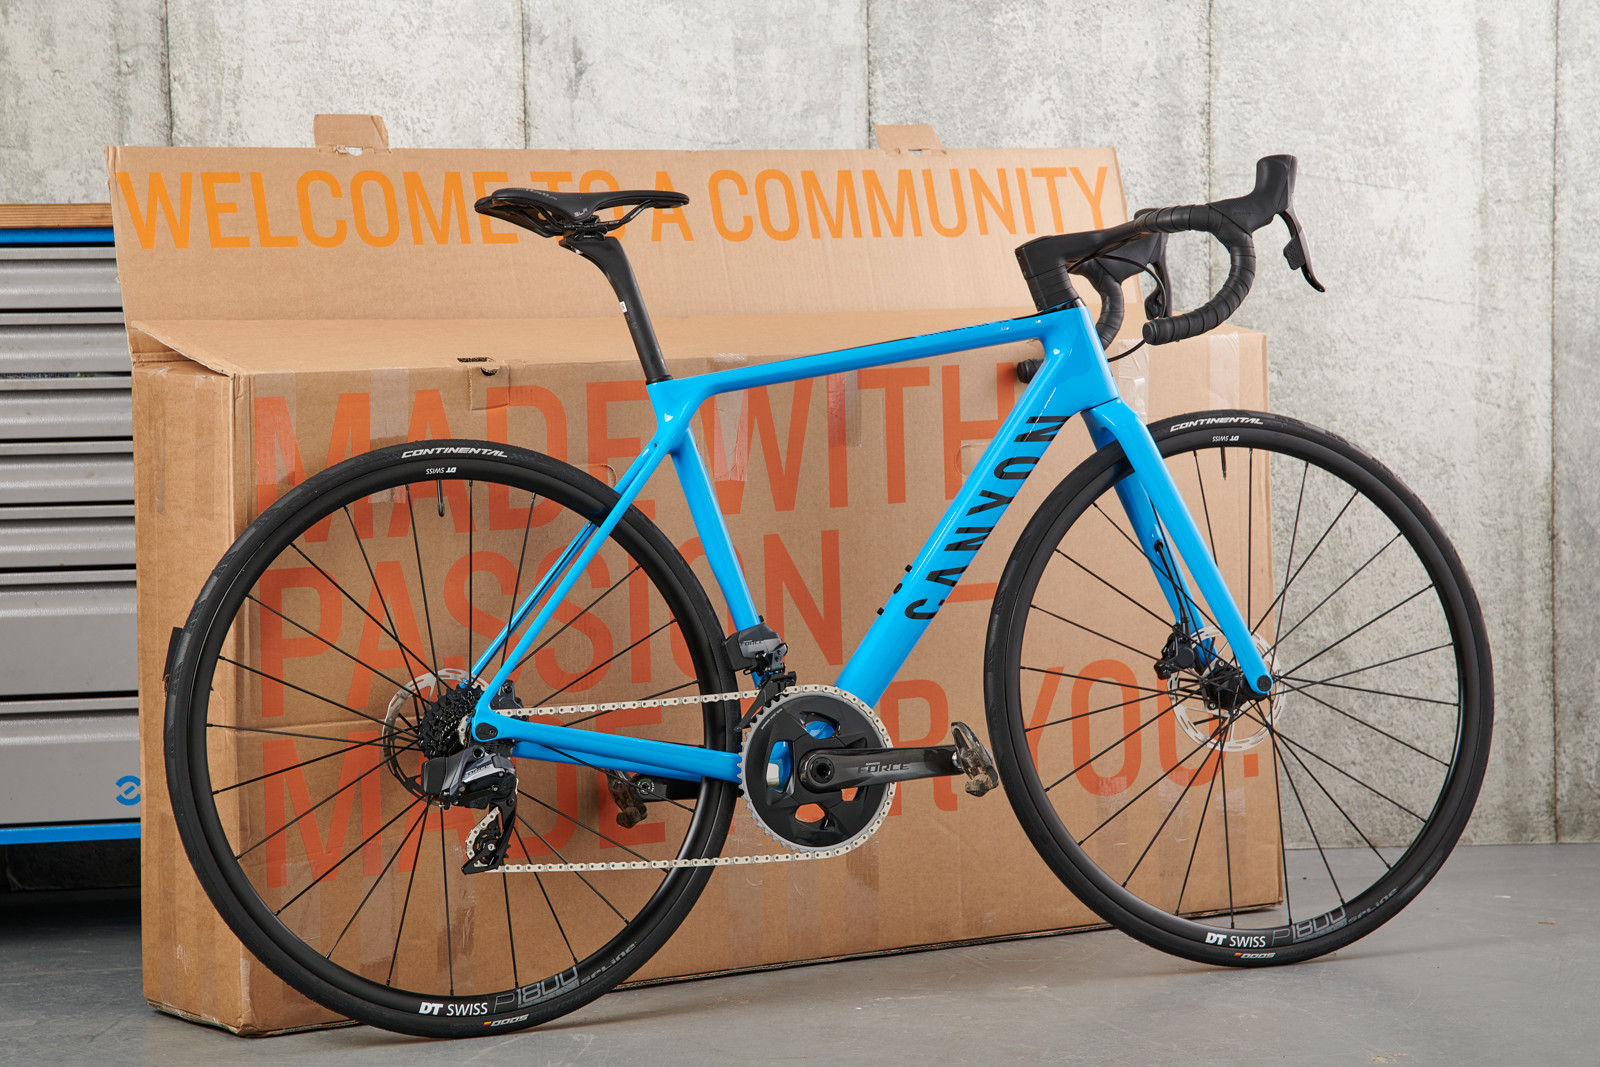 A cyclist ready to ride their newly assembled bike
Congratulations! You’ve successfully completed the bike assembly process. Now, it’s time to enjoy the fruits of your labor. Take your newly assembled bike for a short shake-down ride in a safe area. Pay attention to how the bike feels, check for any unusual noises or niggles, and bed in the brakes by performing a series of controlled stops.
Happy riding and enjoy your new bike!