
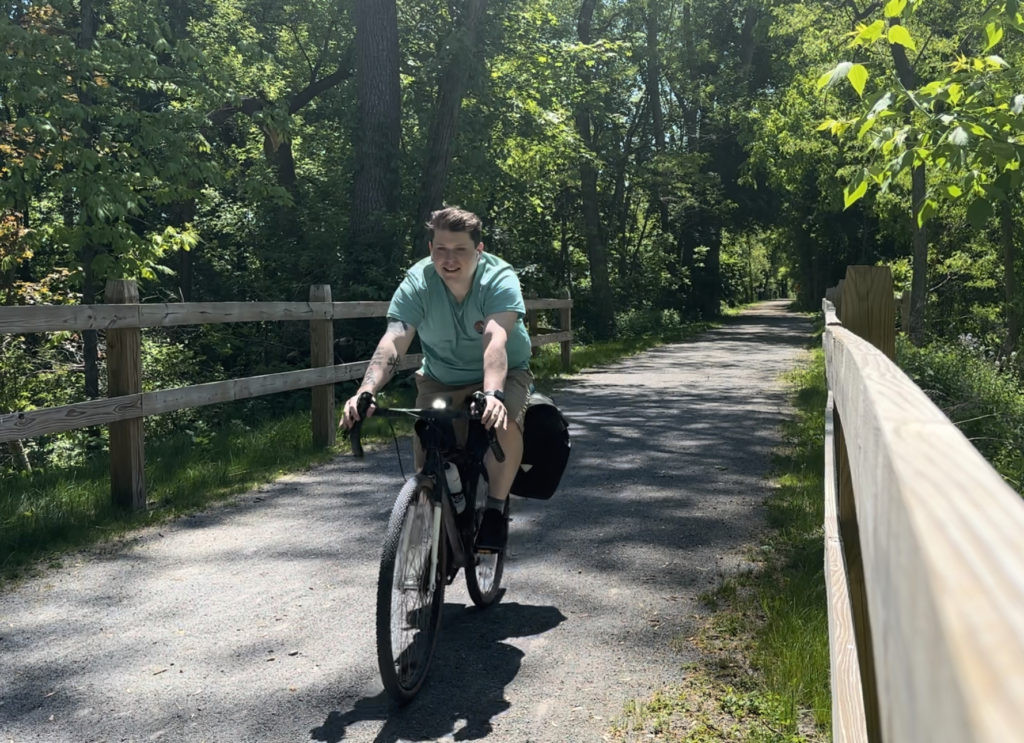
 Man riding a bike on a bicycle trail on his way to bike camp.
Growing up, camping wasn’t a frequent activity for me, but my love for bike riding was always strong. Even now, I wouldn’t quite call myself a hardcore outdoor type. “Nerdy individual who loves a good challenge” is probably a better fit. And that’s exactly where Bike Camping comes in – it’s an exciting and rewarding challenge that I’ve wholeheartedly embraced.
After moving back to the US in 2020, I was itching for an adventure. Camping seemed like the perfect escape, but without a car, I decided to explore on two wheels.
Since that first trip in 2020, I’ve embarked on seven bike camping adventures and loved each one. With three more planned for this summer, I’m convinced bike camping is something many others would enjoy if they just gave it a shot.
This post is all about sharing my passion for bike camping. I’ll break down why I find it so enjoyable, guide you through planning your first trip, and recommend essential gear to get you started.
Bike Camping, Bike Touring, and Bikepacking: What’s the Difference?
 The different kinds of bike camping
Before diving in, it’s helpful to clarify the terms often used interchangeably when discussing camping with your bike. While related, bike camping, bike touring, and bikepacking each offer a distinct experience. Here’s how I differentiate them:
Bike Camping Definition:
Bike camping is best described as an overnight or two-day bicycle trip to a designated campsite. Your journey follows established trails or roads, making it accessible and relatively straightforward.
Bike Touring Definition:
Bike touring involves longer, multi-day cycling adventures, typically lasting a week or more, along a planned route – often roads or designated trails. Accommodation can range from campsites to hotels, hostels, or other conventional lodging.
Bikepacking Definition:
Bikepacking takes a more adventurous approach, navigating routes that include hiking trails and off-road terrain, usually on mountain or gravel bikes. Accommodation is primarily off-grid camping, without typical campsite amenities like electricity or facilities.
Why I’m Hooked on Bicycle Camping
 Bike camping riding bikeway
Living without a car limits my options for reaching campsites, making my bike my go-to solution. While public transport might be an option I’ll explore for novelty, for now, it’s just me and my trusty bicycle.
Perfect for a Car-Free Lifestyle
Firstly, bike camping fits seamlessly into my car-free lifestyle. Having lived without a car since late 2019, I intend to continue this as long as possible. If you’re curious, you can learn more about my car-free lifestyle in my annual cost breakdown articles.
The Thrill of the Challenge
Secondly, I thrive on the challenge bike camping presents. Limited space means careful packing, and unpredictable situations require problem-solving.
There’s a unique satisfaction in working within constraints, especially when those constraints are the size of your bike and panniers. For someone who has always enjoyed puzzles and problem-solving, bike camping offers a continuous stream of engaging challenges.
Savoring Both the Ride and the Destination
Another major draw of bike camping is the enhanced enjoyment of the journey itself. Unlike speeding down a highway in a car, biking allows you to truly experience the surroundings. Every bike ride feels like an adventure.
It’s not just about reaching the campsite; it’s about every mile along the way. Bike camping lets you set your own pace and soak in the scenery, often along beautiful riverways or converted railway paths.
Living in Rochester, NY, is a real bonus for bike camping. Venturing out from here is surprisingly easy, and depending on your direction, you can often enjoy routes with minimal car traffic.
Planning Your First Bike Camping Adventure
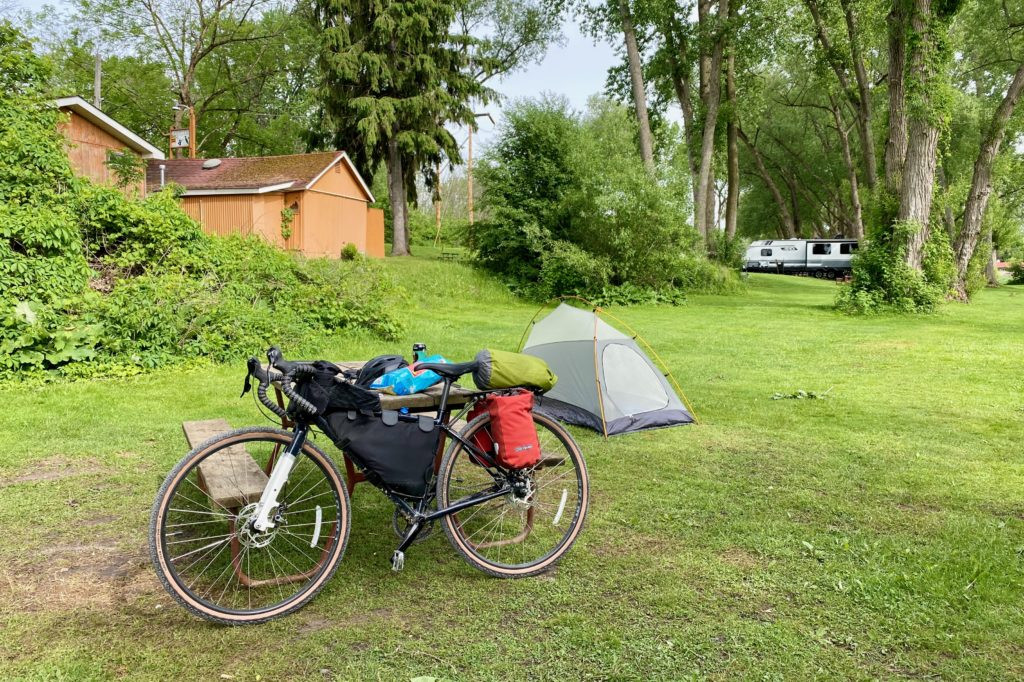
 Planning a bike camping trip
Before you start accumulating gear, take time to plan your bike camping trip. Your destination, the time of year, and the terrain will significantly influence the gear you’ll need.
Choosing Your Ideal Destination
A great starting point for finding a destination is a simple online search for “Lakes near me,” “State parks near me,” or “outdoor places near me.” A scenic and interesting destination adds a rewarding element to your trip. State parks and lakes often have trails or quieter roads leading to them, helping you avoid busy traffic. These locations also typically offer camping facilities within the park or in the vicinity.
Mapping Your Route
For route planning, websites like Komoot or bikemaps.net are invaluable. While Google Maps is functional, it lacks the customization ideal for bike routes. I personally prefer Komoot for its cycling-specific features.
Exploring Rails-to-Trails
Another excellent car-free routing option is utilizing established trails. Rails-to-Trails is a fantastic resource for discovering local trails, often converted from former railway lines, offering extended, safe cycling paths.
Adventure Cycling Association Resources
I learned about the Adventure Cycling Association through the Path Less Pedaled YouTube channel a few years back. Their website hosts an interactive map network covering routes across the entire country.
Discovering Bikepacking.com Routes
Bikepacking.com’s bikepacking routes are a superb resource for pre-planned routes and destinations. Keep in mind these routes tend to be more challenging and lengthy, so consider this before downloading a map and setting off.
Using Google for Trail Discovery
Lastly, try Googling “long cycling trails in X,” replacing “X” with your state or region. This is how I initially found the Empire State Trail in NY, which inspired my first bike tour.
Trip Timing Considerations
For optimal comfort, aim to plan your trip when nighttime temperatures are above 20 degrees Fahrenheit and daytime temperatures are below 80 degrees Fahrenheit. On the East Coast, this generally falls in spring, early summer, or fall. My favorite bike camping periods in New York are May to early June and late September to October. Weather conditions significantly dictate the gear you’ll need.
Finding the Perfect Campsite
Google Maps is a useful starting point for campsite searches. However, I also recommend exploring Hipcamp and Airbnb. Hipcamp often features more primitive camping options, but Airbnb can also surprise you with unique outdoor accommodations.
Essential Gear for Your Bike Camping Setup
If you’re eager to try bike camping but feel overwhelmed by gear choices, here’s a simplified guide. If you’re starting from scratch, including buying a bike, budget around $1500.
However, if you’re open to buying used gear and watching for sales, you could assemble a solid setup for approximately $1000.
While this might seem like a significant initial investment, high-quality gear will last for years.
For example, my current gear has served me well for three years, and I expect it to last at least two more.
Consider a $1000 gear investment. If you take five trips annually, and the gear lasts five years, the gear cost per trip is just $40. Add an average campsite fee of $25 per night for a two-night stay, and your total trip cost is $90. Comparing this to hotel stays, the savings are substantial.
Ultimately, while cost savings are a benefit, bike camping for me is about creating mini-adventures, with saving money as an added bonus.
Choosing the Right Bike
The first necessity for bike camping, and perhaps the most obvious, is a bike. You can spend anywhere from $200 to $5000+, and options vary widely based on your budget and requirements.
 My first e-bike
You don’t need a high-end touring bike to begin. You need a bike capable of carrying gear. Most bikes have mounting points for a rear rack. Adding a rear rack and panniers is a great starting point.
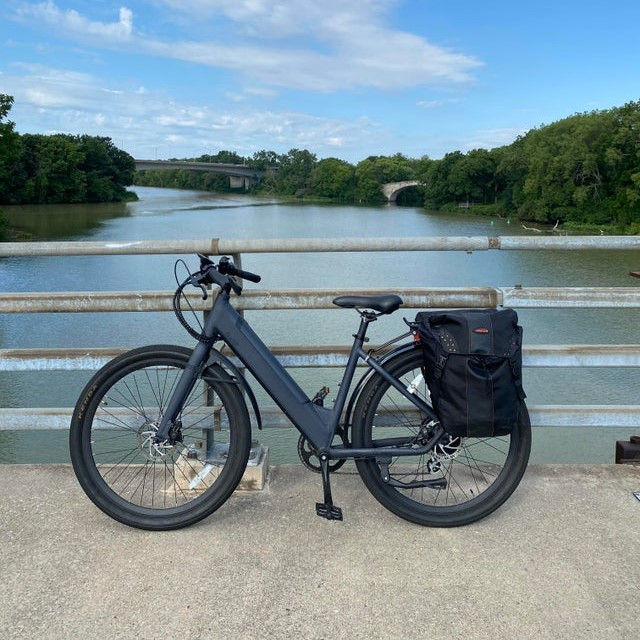
 My current bike camping bike
When starting out, I invested $1700 in a Priority Apollo. However, for beginners unsure of long-term commitment, I recommend looking at bikes in the $700-$1000 range.
Worst case, you can buy a decent bike, try bike camping once or twice, and resell it on platforms like Facebook Marketplace or Craigslist for 50-70% of your initial investment.
Look for a bike with rear rack mounts. A model like the Cannondale CX 4 is a good starting point.
Here are three key features to look for in a bike camping bike:
- Rear Rack Mounts: Essential for carrying panniers and gear.
- Knobby or Gravel Tires: Unless you’re strictly road cycling, these provide better traction on varied terrain.
- Reputable Manufacturer: Investing in quality from a known brand can prevent breakdowns and ensure reliability during your trips. Saving a little upfront might cost you your entire trip if your bike fails.
Selecting Bike Bags for Gear
I recommend starting with simple and affordable bags. Bag prices can escalate quickly with diminishing returns. From personal experience, having spent over $500 on bags, I’ve found cheaper options often work just as well.
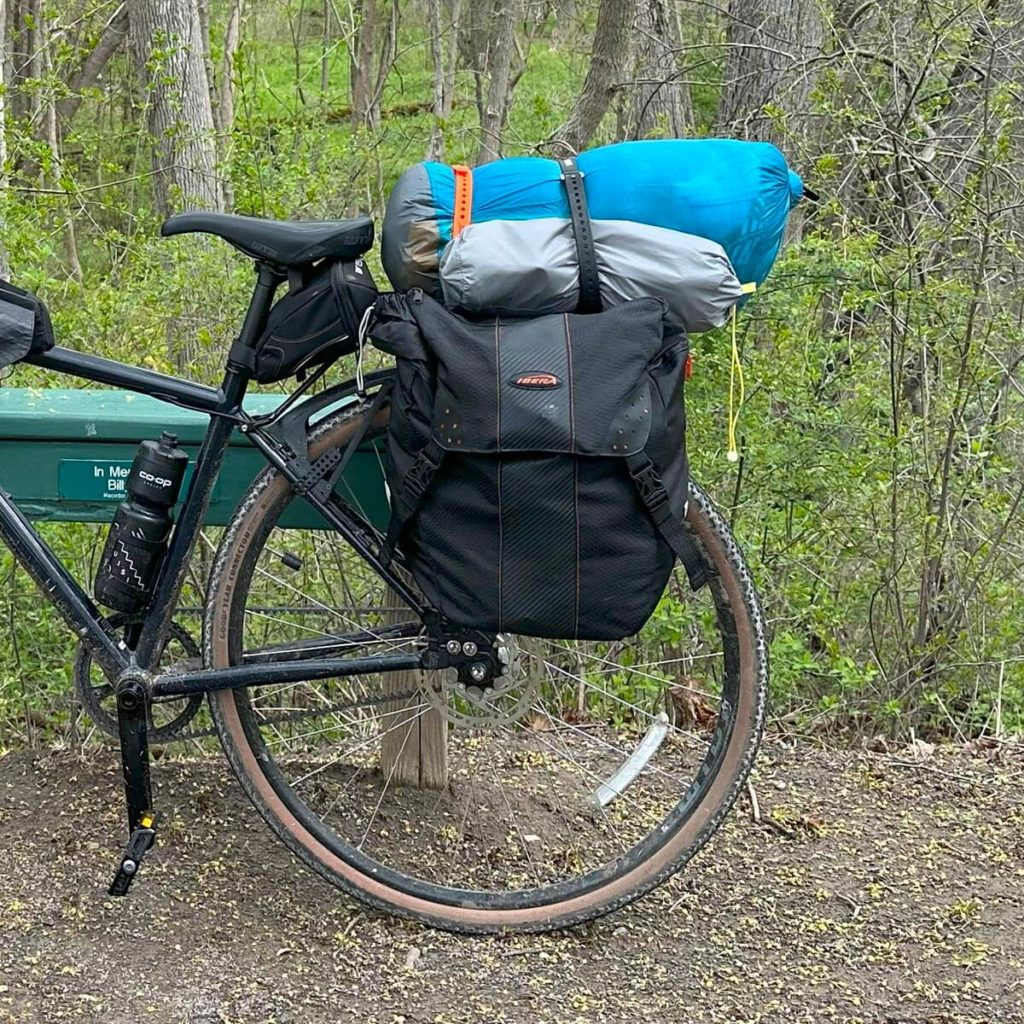 Bike Camping Bags
Here’s a recommended rack and bag setup for beginners:
If you need more space, a large dry bag strapped to the top of your rack with Voile straps is an excellent addition.
Choosing a Shelter for Bike Camping
Initially, I thought ultralight was crucial for bike camping tents. I opted for a bivvy-style tent from Alpkit.
Bivvy tents offer several advantages: 1) lightweight, 2) compact packing for panniers, and 3) discreet for stealth camping.
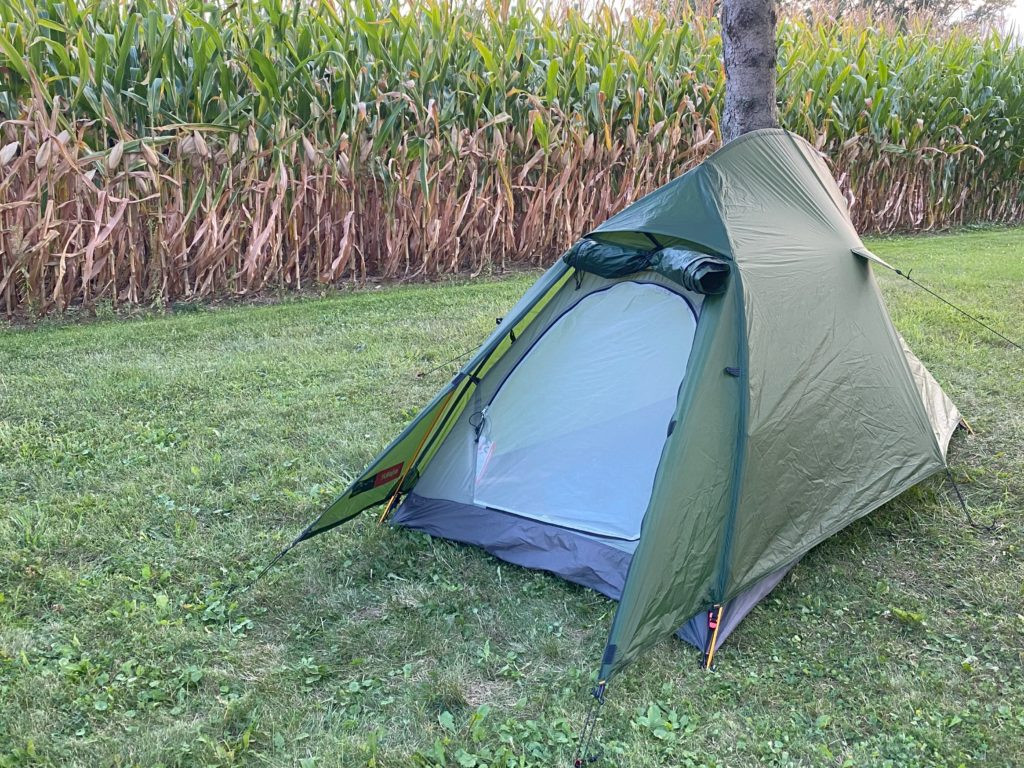 Bivvy-style tent next to a field.
The bivvy tent served me well for the first two seasons, keeping me dry and sheltered. However, after two years, I desired more space.
While excellent for week-long tours, for shorter bike camping trips with campsite stays, a tent with more room for gear and movement enhances the experience. Campsites also eliminate the need for stealth.
Recommended Tent for Bike Camping and Adventure Cycling
 REI Flash Air 2 Tent for Bike Camping
I now recommend the REI Flash Air 2. It balances ultralight packability with more interior space than a bivvy. Purchased on sale, it can be found for under $300.
Ideally, your bike camping tent should meet these three criteria:
- Reasonable Weight: Aim for around 5 lbs or less.
- Compressible: Look for “backpacking tents” designed to pack small.
- Compact Poles: Ensure poles fit into a frame bag or pannier. Again, “backpacking” tents are designed with this in mind.
Generally, lighter tents are more expensive due to higher-quality materials and lighter poles. Choose a tent that aligns with your camping style and budget.
Here are five tents suitable for bike camping that meet these criteria at various price points:
(List of five tents would be added here in a real article, but omitted as per instructions)
Sleeping Gear Essentials
Sleeping gear is an area where skimping isn’t advisable. While you can manage with a cheaper bike and tent, investing at least $250 in quality sleeping gear is recommended. This includes both a sleeping bag and a sleeping pad.
Your sleeping bag provides insulation, while a sleeping pad insulates you from the cold ground, enhancing comfort and warmth by preventing heat loss.
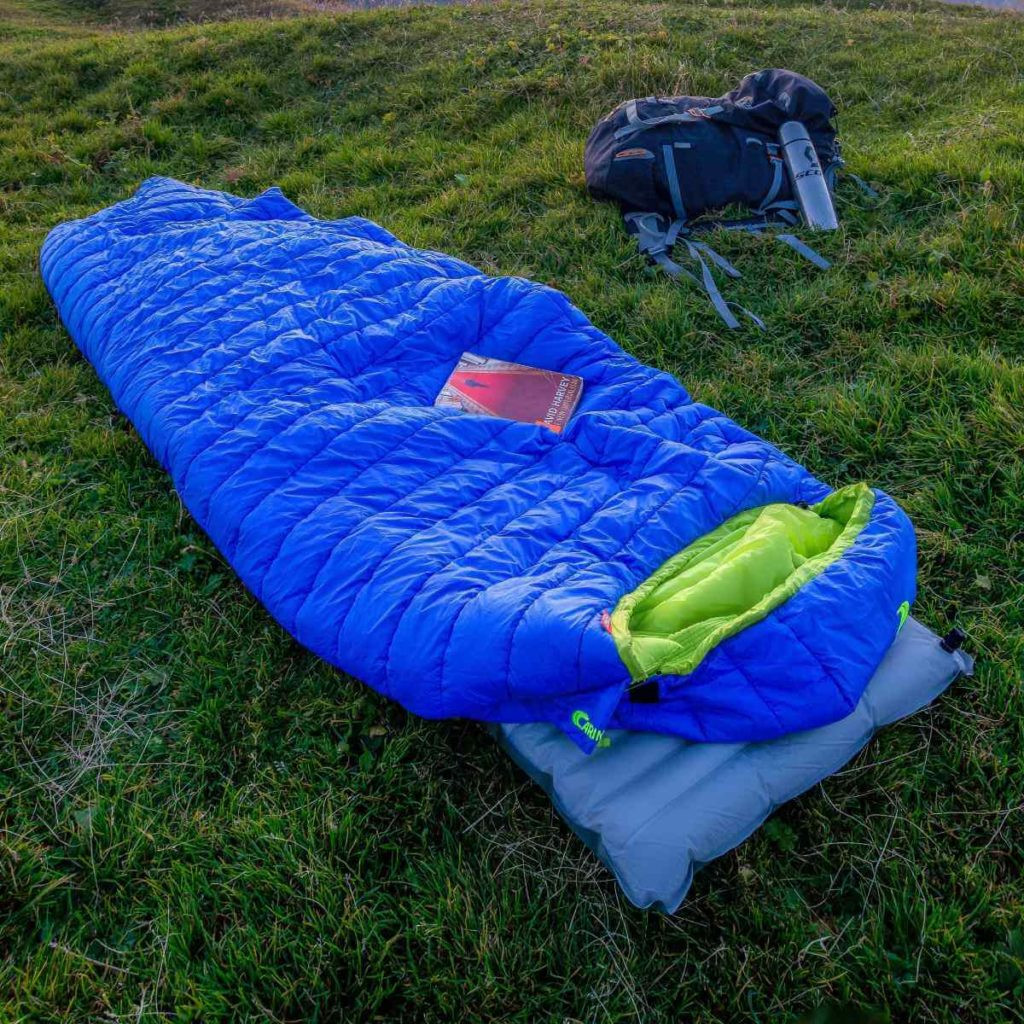 Sleeping bag for bike camping
For bike camping, a sleeping bag should ideally meet these three criteria:
- Three-Season Rating: Suitable for 20 to 39 degrees Fahrenheit (adjust based on your camping season).
- Lightweight: Under 5 lbs.
- Comfortable: Choose a bag that suits your personal comfort preferences.
Recommended Sleeping Bags for Bike Camping
Here are five sleeping bags ideal for bike camping that meet these criteria across different price points:
(List of five sleeping bags would be added here in a real article, but omitted as per instructions)
Similar to tents, lighter sleeping pads usually come at a higher price.
A suitable sleeping pad for bike camping should meet these criteria:
- R-Value of R1 or Higher: Indicates insulation, higher R-value means more warmth.
- Inflatable: For lightness and compact packing.
- Compact Length: 10 inches or less when packed, to fit in panniers or dry bags.
- Shape and Comfort: Choose based on your sleeping style.
- Rectangular Pad: Best for side or stomach sleepers.
- Mummy-Shaped Pad: Suitable for back sleepers or those who can sleep on their back.
Recommended Sleeping Pads for Bike Camping
Here are four sleeping pads suitable for bike camping:
(List of four sleeping pads would be added here in a real article, but omitted as per instructions)
Kitchen Gear for Bike Camping
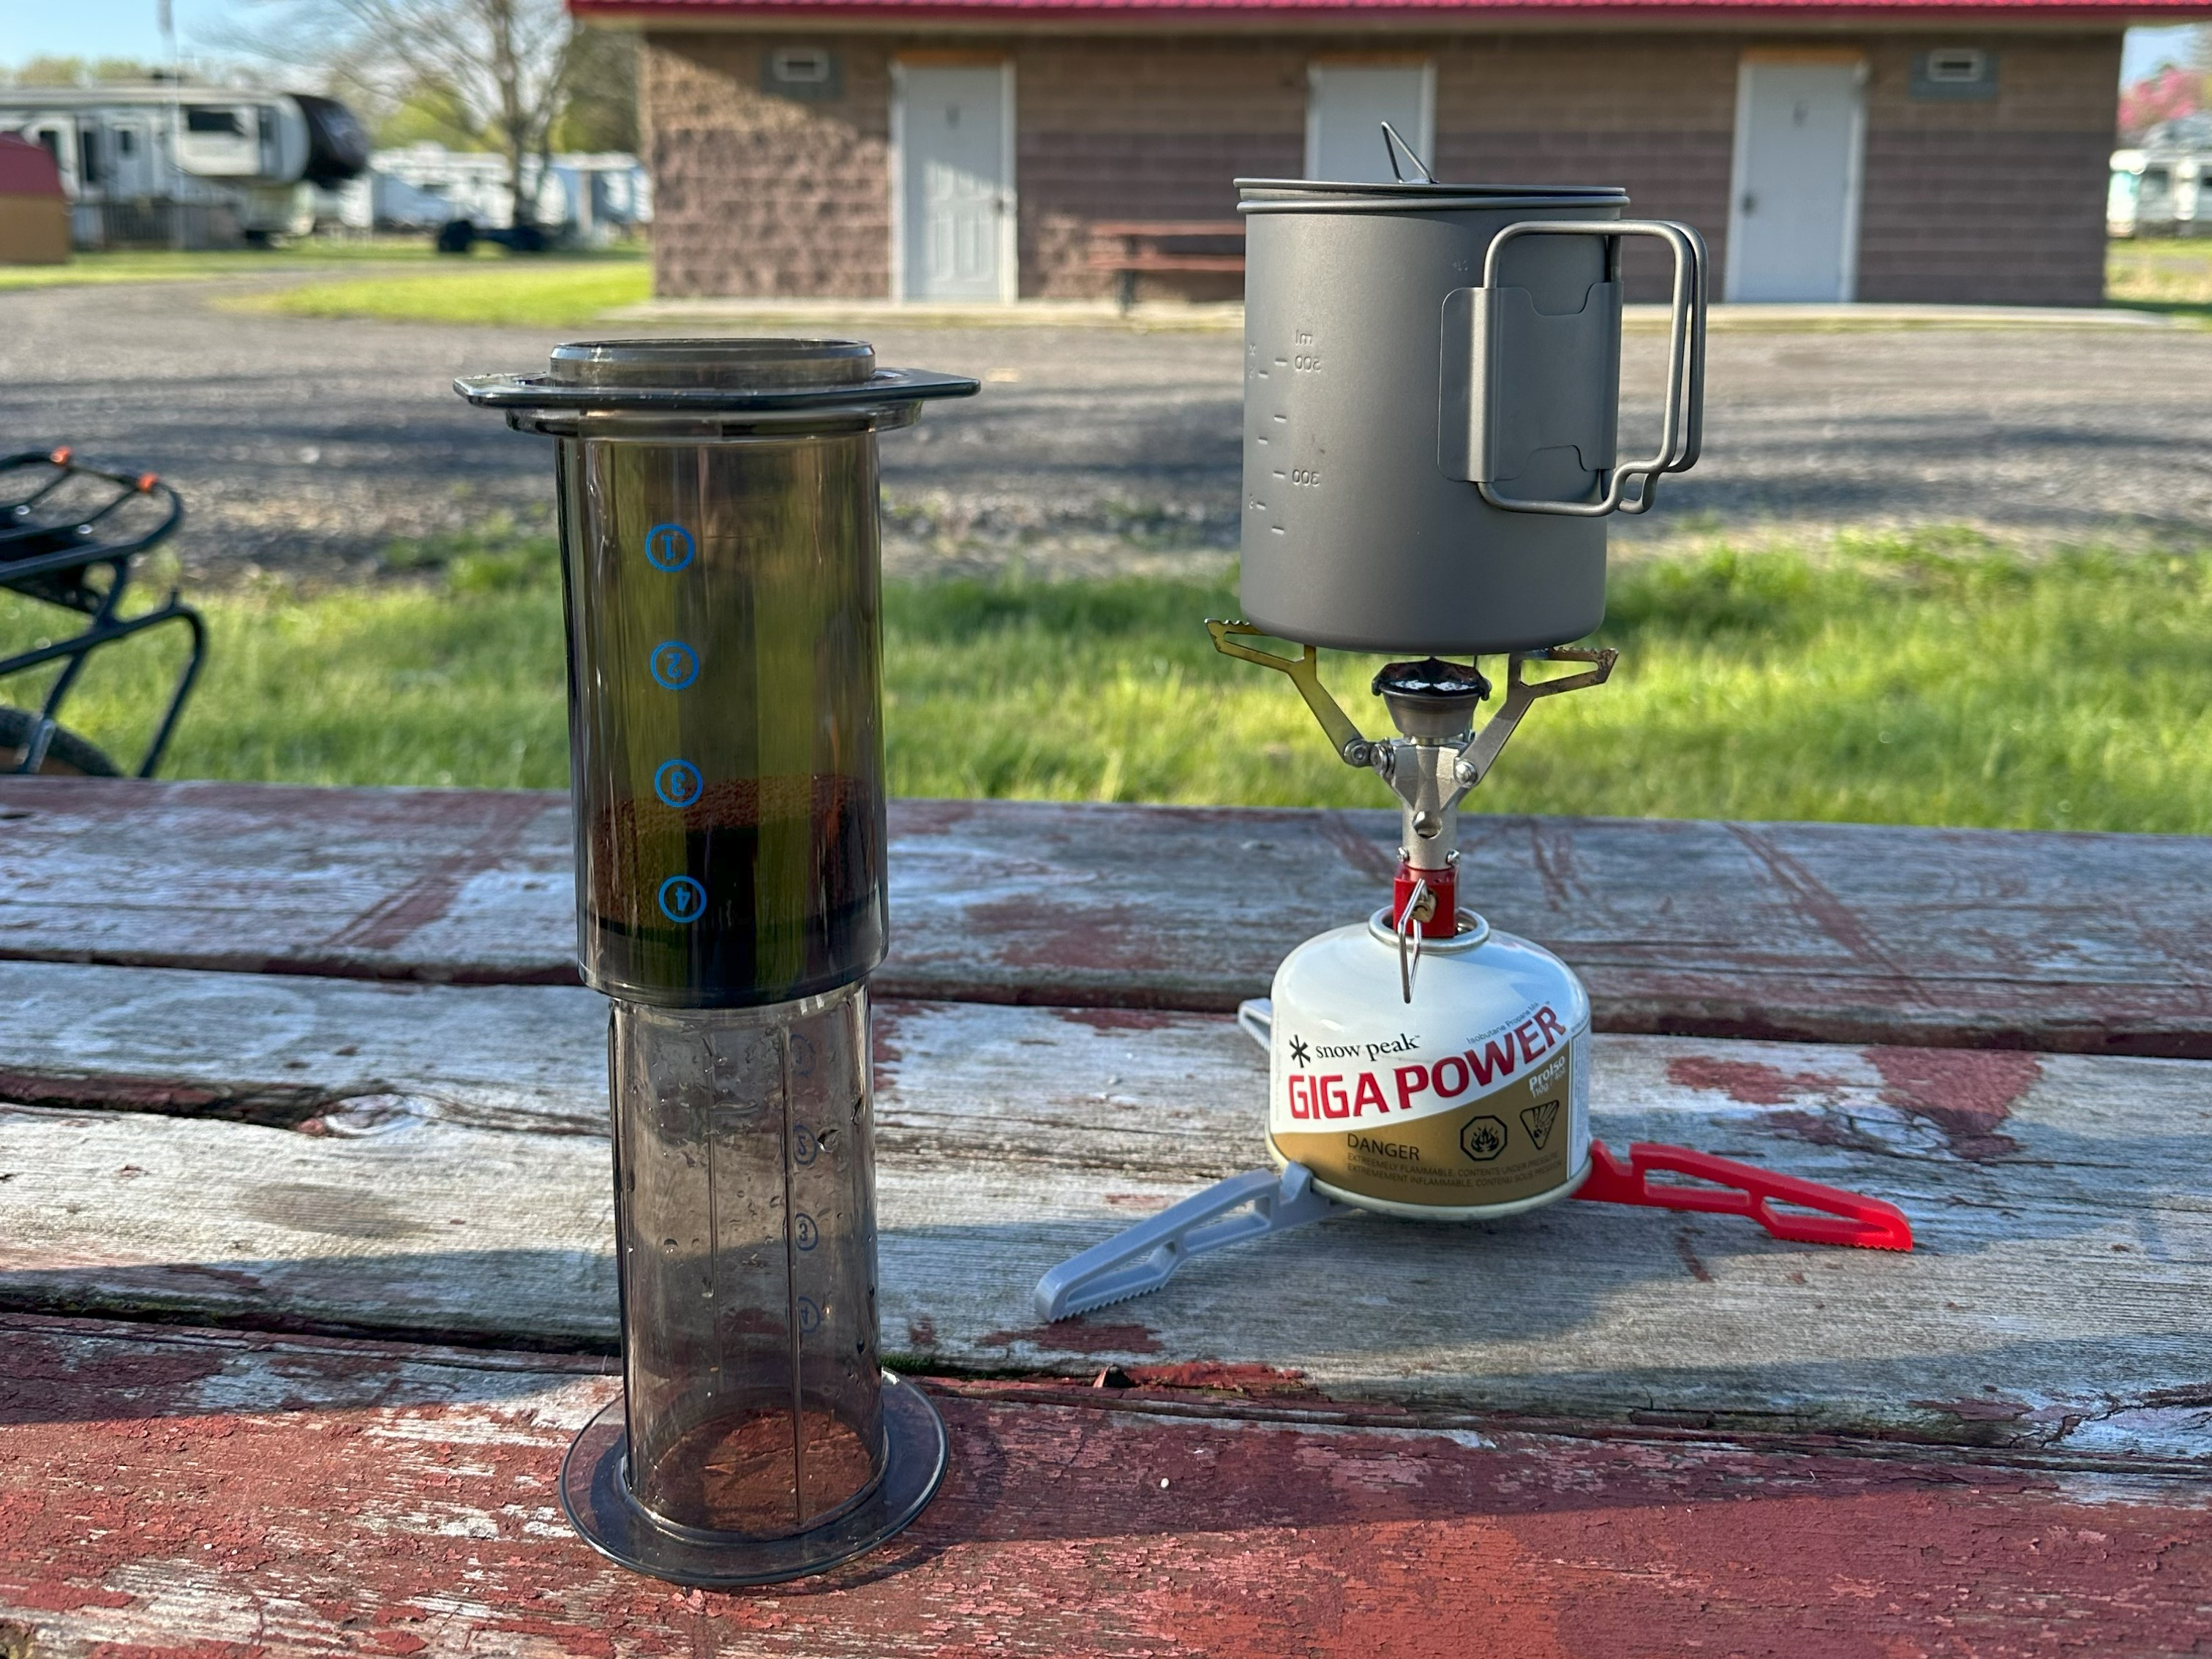 MSR PocketRocket 2 Stove next to an Aeropress
Before investing in kitchen supplies, consider your trip’s location and duration. If you’re within a few miles of a town, consider buying meals or ready-to-eat food like sandwiches along the way.
Camp cooking can be enjoyable, but for a more relaxed trip, purchasing food eliminates cooking and cleanup, saving weight and time. A quick 3-mile bike ride to a grocery store is often faster than camp cooking.
Personally, my primary reason for carrying a camp stove is for morning coffee.
If morning coffee is a must, here’s what I recommend:
For those who prefer simplicity, instant coffee or steeped single-serve coffee are great alternatives to the Aeropress. However, I enjoy the ritual of grinding fresh beans before leaving home and brewing with the Aeropress.
If you plan to cook meals like pasta or hotdogs, consider these additional items:
(List of additional kitchen items would be added here in a real article, but omitted as per instructions)
Quality of Life Enhancements for Bike Camping
Beyond the essentials, these items can significantly improve your bike camping experience.
Camping Chair
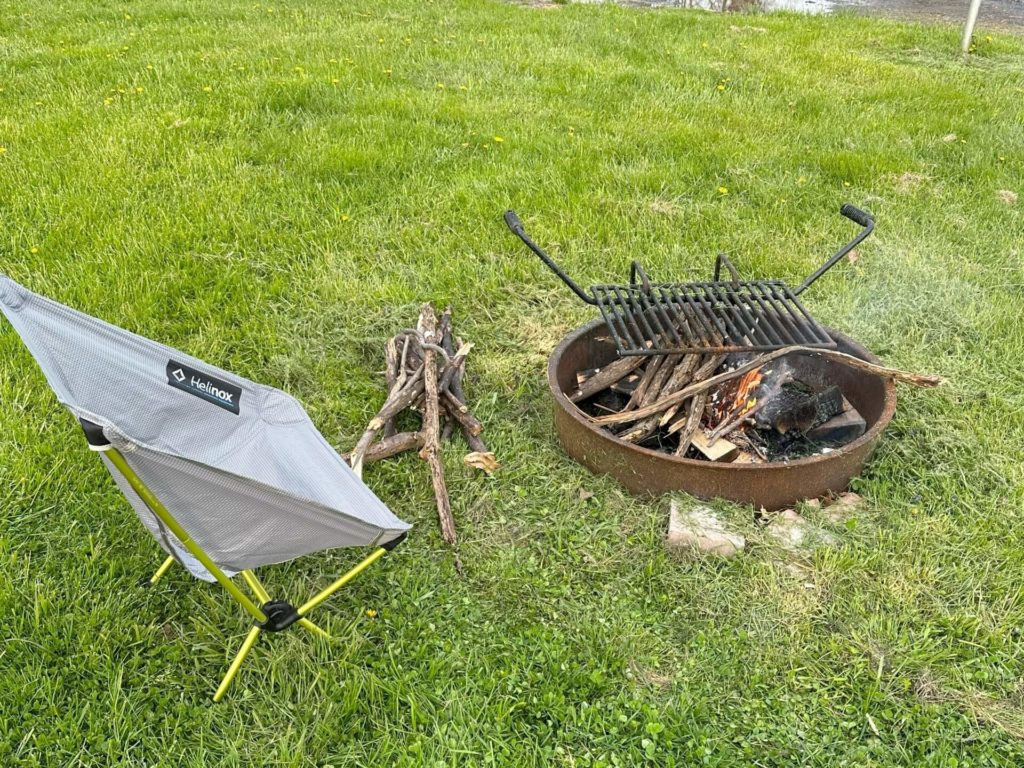 Helinox Chair Zero at a campfire
For my first five trips, I went without a chair, using benches or my jacket as seating. However, before my 2023 trips, I invested in a Helinox Chair Zero. While admittedly pricey, it’s been a game-changer, especially for primitive campsites. I wouldn’t embark on another trip without it.
If you get this chair and have access to a 3D printer, I highly recommend printing these Helinox feet. They prevent the chair from sinking into soft ground.
Inflatable Pillow
A pillow isn’t strictly necessary, but it greatly enhances sleeping comfort, so I consider it a quality-of-life item. I use the Alpkit Drift. The Sea to Summit Aeros is a similar, though pricier, option.
Final Thoughts
 Hammock Bike Camping
Hopefully, this guide provides the knowledge I wish I had before my first bike camping trip. Do you have questions or helpful tips to share? Connect with me on Twitter @ethan_thompson. I’m always happy to connect with fellow bike enthusiasts.
Affiliate Link Disclaimer
This blog post may contain Amazon affiliate links. As an Amazon Associate, I earn from qualifying purchases. This means that if you click on an affiliate link and make a purchase, I may earn a small commission at no extra cost to you. Rest assured, including affiliate links does not influence the content, topics, or products I recommend. I promote products and services I genuinely believe in and have personally used or researched. The commissions earned through these links help support the maintenance and development of this blog. Thank you for your understanding and support!
