Crafting a bicycle frame by welding is an advanced skill within the TIG (Gas Tungsten Arc Welding) process, often seen as the “black diamond trail” of welding. This guide provides an in-depth look at the tools, techniques, and considerations specific to welding Bike Frames, particularly for those with existing TIG welding experience. While not a starting point for absolute beginners, this resource serves as a valuable roadmap for understanding the nuances of thin-wall tubing welding in bicycle construction. We’ll primarily focus on 4130 steel, a common material in bike frames, while acknowledging variations in high-spec tube sets and other materials like mild steel used in components. This guide shares practical insights and preferences to help you achieve welds that are not just structurally sound but also capable of withstanding demanding conditions.
Essential Equipment for Bike Frame Welding
To embark on welding bike frames, selecting the right equipment is crucial. Here’s a breakdown of essential components:
Welding Machine
A DC TIG welding machine with high-frequency start is essential. Foot pedal control is highly recommended for precise amperage adjustments during welding. While it’s possible to weld without a foot pedal, it significantly increases the complexity and difficulty, especially with thin materials.
For home enthusiasts, machines like the Everlast PowerTIG 210EXT (although potentially overkill) offer excellent features. However, more economical models with high-frequency start and foot pedal compatibility are readily available and perfectly adequate for bike frame welding.
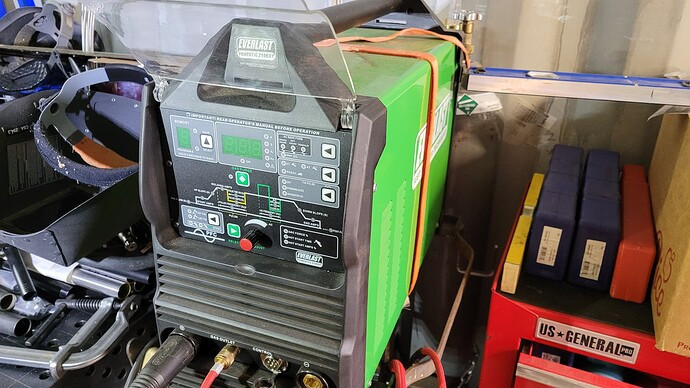 Everlast PowerTIG 210EXT Welding Machine
Image: A high-frequency start DC TIG welding machine, suitable for precision bike frame welding.
TIG Torch
A #9 air-cooled TIG torch is a preferred choice for bike frame welding. Its compact size allows for better access to tight joints, and its 150 amp rating is sufficient for the amperage range needed for bicycle tubing. While a #24 air-cooled torch (80 amp max) could theoretically be used, its lower duty cycle might lead to interruptions for cooling, hindering workflow.
Water-cooled torches, while available, generally aren’t necessary for bike frame welding. The added complexity and cost are not justified for occasional or hobbyist use. For production environments, however, water-cooled torches can offer benefits.
 #9 Air-cooled TIG Torch
Image: A #9 air-cooled TIG torch, ideal for maneuvering in tight spaces when welding bike frames.
A flex-head torch is a valuable upgrade, offering enhanced maneuverability for reaching complex angles in bike frames. The slight increase in cost compared to standard torches is often outweighed by the improved accessibility and ease of welding. Super-flexible torch hoses are also beneficial, though not essential, for increased comfort and movement.
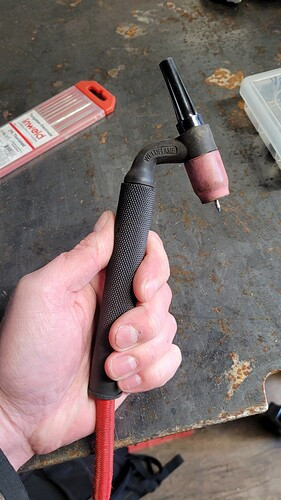 Flex-head TIG Torch
Image: A flex-head TIG torch demonstrating its flexibility, advantageous for complex bike frame geometries.
Cups and Gas Lenses
Standard collet bodies, while functional, are less efficient in gas shielding compared to gas lenses. Gas lenses utilize internal screens to diffuse argon gas, providing a smoother, more consistent flow and superior weld coverage. This is particularly important for achieving clean, porosity-free welds on bike frames.
A combination of a gas lens and a #8 alumina cup is a recommended starting point. This setup is versatile enough for most bike frame welds and is relatively cost-effective. A small back cap is also advisable to minimize tungsten waste. While oversized or Pyrex cups exist, they are not essential for bike frame welding, with Pyrex cups offering primarily aesthetic benefits.
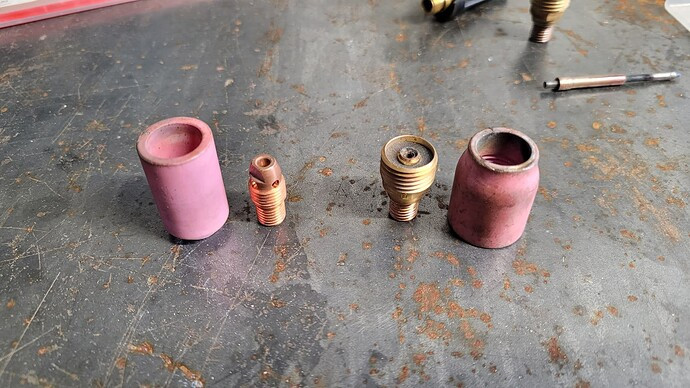 Standard Collet Body vs. Gas Lens Setup
Image: Comparison of a standard collet body and cup versus a gas lens with a #8 alumina cup, highlighting the gas diffusion difference.
Tungsten Electrodes
Selecting the right tungsten electrode is important, but for most bike frame welding, the differences between types are less critical for hobbyists compared to robotic or high-production welding. Contamination and frequent re-grinding often overshadow subtle performance variations.
Historically, 2% Thoriated (Red) tungsten was popular, but due to health concerns associated with thorium dust, 2% Lanthanated (Blue) tungsten is a preferred and safer alternative. Lanthanated tungsten performs well for all typical bike frame welding applications, including aluminum welding on inverter machines.
A 1/16” diameter tungsten is a versatile size for the amperage ranges used in bike frame welding. While 3/32” or 0.040” can also work, 1/16” provides a good balance. 0.040” can sometimes be harder to source.
Filler Metal
For bike frame welding, 0.040” ER70s-2 filler metal is highly recommended. While smaller diameters can be advantageous, they can be less readily available. 1/16” filler can be used but is generally more challenging to work with for achieving aesthetically pleasing welds on thin tubing. A general guideline is to use filler metal that is the same diameter or smaller than the base material thickness.
Understanding filler metal types is essential for optimizing weld properties. When considering “strength” in welds, toughness and ductility are often more critical for bike frames than ultimate yield strength. Ductile welds are preferable as they bend before fracturing, offering better fatigue resistance and impact absorption – crucial for the stresses a bike frame endures. Toughness refers to a material’s ability to absorb energy and deform without breaking, a vital characteristic for frame durability.
While ER70s-2 filler is indeed weaker than 4130 steel, this is acceptable and even beneficial in bike frame construction. The slight under-matching of filler strength increases weld ductility, enhancing crack resistance, especially in welds that may not be perfectly executed. Furthermore, bike frame welds are typically oversized, meaning the weld fillet is larger than the material thickness. This oversizing compensates for the lower tensile strength of the filler, ensuring structural integrity.
ER70s-6 is another viable option, being widely available and mechanically similar to ER70s-2. However, ER70s-2 offers an advantage due to added deoxidizing elements in its composition. These elements promote cleaner welds, especially beneficial when welding without back purging – a technique we’ll discuss later. ER70s-2 was originally developed for open-root welding of carbon steel pipe without purging, highlighting its self-cleaning properties.
For further reading, Miller Electric provides valuable resources on best practices for TIG welding 4130 chrome-moly tubing in motorsports and aerospace applications, offering WPS (Welding Procedure Specifications) as a helpful starting point.
It’s generally not recommended to use ER80s-D2 or Weldmold fillers for most bike frame applications. They are often more expensive and don’t offer significant advantages in typical bicycle construction. Weldmold fillers, in particular, lack publicly available chemical composition data, making them less transparent and potentially less desirable for critical applications.
Welding Stainless Steel to 4130
Joining stainless steel components, like dropouts, to 4130 frames requires special consideration. 309L filler metal is the recommended choice for welding stainless steel to 4130. However, this combination is not ideal and requires careful heat management to minimize carbide precipitation, which can occur if the weld area remains hot for too long. Maintaining a cooler weld is crucial in this scenario.
The increasing use of 3D-printed metal parts, often stainless steel, in bike frames presents new challenges. Welding 4130 to 3D-printed stainless is still an evolving area, with varying experiences reported by frame builders. Caution is advised as the long-term performance and reliability of these joints are still under investigation. Weldmold 880, allegedly similar to 309L, might be considered for this application, but its proprietary nature and lack of published composition data should be taken into account.
Machine Settings and Welding Techniques
Optimizing machine settings and employing proper techniques are paramount for achieving high-quality bike frame welds.
Amperage and Foot Pedal Control
A general amperage guideline is 1 amp per 0.001 inch of material thickness. For 0.035” tubing, this translates to approximately 35 amps. However, bike frame welding often involves joining thin tubing to thicker components. Using a foot pedal provides the necessary control to adjust amperage dynamically during the weld.
A practical approach is to set the machine’s maximum amperage higher than the anticipated welding amperage, around 80 amps for bike frames, and use the foot pedal to control the actual amperage delivered. This “headroom” allows for fine-tuning and prevents accidental over-amperage, which can easily cause burn-through in thin tubing. Most bike frame welding is typically performed in the 50-60 amp range.
Pulsing
While not essential, pulsed TIG welding can offer benefits in certain bike frame welding scenarios. Pulsing can be broadly categorized into low-speed and high-speed.
Low-speed pulsing, around 2 pulses per second (PPS) or less, can create visually appealing, consistent weld ripples (“stack of dimes” appearance). It can also help reduce heat input when used correctly.
High-speed pulsing, above 20 PPS, primarily reduces heat input and improves puddle control. The rapid pulsing action agitates the molten weld puddle, making it easier to control and keep the molten metal precisely where needed. This can be advantageous for very thin tubing but is not always necessary for typical bike frame welding. The benefits of pulsing are often marginal for experienced welders, and a pulse feature is not a critical requirement for a TIG welding machine for bike frames.
Gas Shielding
Adequate gas shielding is crucial for preventing weld contamination and porosity. Insufficient shielding leads to compromised weld quality, while excessive gas flow is wasteful and can even create turbulence, drawing in atmospheric air and causing contamination.
With a #8 gas lens, a flow rate of 15-20 CFH (cubic feet per hour) of argon is generally sufficient. Pre-flow (0.5 seconds) and post-flow (10 seconds) settings are beneficial to ensure proper shielding at the start and end of the weld, allowing the weld to cool under gas coverage.
It’s important to note that weld color is not a reliable indicator of weld quality without additional context. Visual inspection should be supplemented by proper welding techniques and parameters.
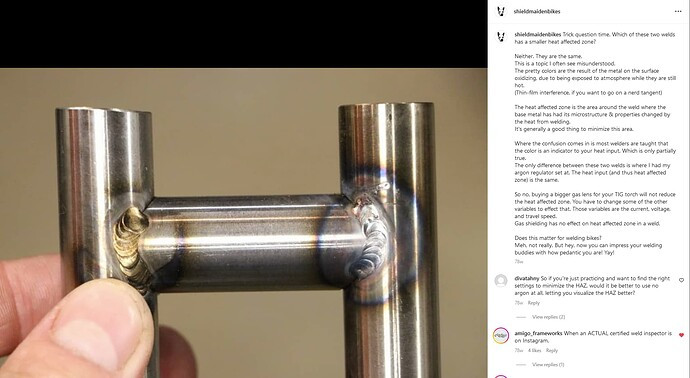 Heat Affected Zone Coloration in Welding
Image: Heat Affected Zone (HAZ) coloration in a weld, illustrating the visual aspect of gas shielding, but emphasizing the need for more than just color assessment.
Back Purging
Back purging involves introducing shielding gas to the inside of the tubes during welding. For 4130 steel bike frames, back purging is generally not necessary unless welding stainless steel or titanium. Titanium welding, however, is beyond the scope of this guide.
While not typically required for 4130, back purging can be beneficial, especially for less experienced welders or when fit-up is less than perfect. In cases of overheating or poor fit-up, oxides from the unshielded backside of the metal can be drawn into the weld puddle, compromising weld integrity. Back purging prevents oxide formation on the backside, mitigating this risk. However, for most 4130 bike frame welding, focusing on proper technique and fit-up negates the need for back purging.
Heat Sinks
Heat sinks, typically made of copper, aluminum, or bronze, can be used to draw heat away from the weld area. This can be advantageous for thin bike tubing to minimize distortion and overheating. However, for bike frame welding, heat sinks are not essential. Proper weld sequencing, patience, and refined welding technique are significantly more impactful in controlling heat and distortion than relying on heat sinks. While experienced frame builders may utilize heat sinks in specific situations, achieving high-quality welds without them is readily possible.
Conclusion
This guide provides a comprehensive overview of TIG welding bike frames, covering essential equipment, materials, settings, and techniques. While mastering bike frame welding requires practice and experience, understanding these fundamental principles is crucial for achieving strong, durable, and aesthetically pleasing welds. By focusing on proper equipment selection, material compatibility, and refined welding techniques, you can confidently approach the rewarding challenge of crafting your own bike frames. Remember, continuous learning and hands-on practice are key to progressing in this specialized welding discipline.