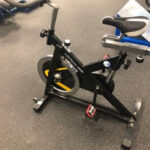
As a seasoned industrial-commercial representative with over 20 years in the paint industry, I’ve seen countless DIY projects, and Bike Painting is a popular one. You might hear that spray paint is a poor choice, but the truth is, the problem usually isn’t the paint itself, but rather how it’s applied. Let’s dive into how to achieve a fantastic bike paint job using readily available spray paints.
Many assume premium automotive paint is essential for a quality finish, but the biggest difference in those high-end jobs comes down to labor and meticulous preparation. While specialized paints certainly have their advantages, the cost of the paint is often a small fraction of the overall expense. The key to a durable and great-looking bike paint finish, even with spray paint, lies in the process.
For robust results, consider Rust-Oleum’s Stops Rust line. Their Professional series is also excellent, though with a color palette geared more towards industrial applications. I’ve personally used both of these extensively for automotive and bike projects with great success. For a top-tier clear coat, especially for wheels or frames, Rust-Oleum’s Automotive Wheel Clear is outstanding. Its gloss, leveling properties, and durability are truly impressive, and it works beautifully over various base coats. The Rust-Oleum 2X line is another great option, particularly for DIYers looking for faster coverage and drying times, perfect when you want to complete your project without lengthy waits.
To get professional-level results at home, focus on technique and patience. Always read the product labels for precise drying and recoating times – this is crucial. Thorough preparation is non-negotiable. Take the time to properly remove old paint. Priming is essential: apply a primer coat, sand it smooth, and repeat for optimal adhesion. When applying color, use multiple thin, “mist” coats, building up coverage gradually. Avoid the temptation to achieve full color in just one or two thick passes, which leads to runs and uneven finishes. Finally, allow ample curing time. Resist the urge to reassemble your bike immediately after painting. Patience during the curing process significantly enhances the paint’s durability and final appearance.
If you have any questions as you embark on your bike painting project, don’t hesitate to reach out. I’m happy to share my expertise and guide you through the process.

