Changing your bike tires might seem like a daunting task, often left to the professionals. However, with the right tools and a bit of know-how, Bike Tire Replacement can be easily accomplished at home, saving you time and money. For years, tackling my own bike maintenance, including tire changes, has been a point of pride and practicality. Initially, armed with just tire irons, I struggled, often pinching tubes and contemplating the cost-effectiveness of DIY versus a shop visit.
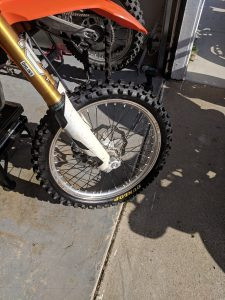
But persistence pays off. Now, bike tire replacement is a quick 20-minute job, allowing for immediate tire swaps upon arrival, adaptation to different riding conditions, and even tire rotation for extended knob life. This guide provides a step-by-step process for bike tire replacement, using my 2014 KTM 450 SXF and a Dunlop Geomax MX32 tire as an example.
Essential Tools for Bike Tire Replacement
Over time, I’ve gathered a collection of tools that simplify the bike tire replacement process significantly. Starting with basic curved tire irons, I progressed to spoon-type irons, learning techniques for easier changes. Frustration led to the discovery of game-changing tools like the Bead Buddy, valve stem puller, specialized tire changing lube, and a dedicated tire stand. Investing in these tools transforms bike tire replacement from a struggle to a straightforward task.
Choosing Your New Tire and Inner Tube
For this bike tire replacement, I’m using Dunlop Geomax MX32 front tires, a set I had with minimal use from a couple of races. I’m also re-using a Bridgestone Ultra Heavy Duty Motorcycle Tube for reliability.
Other helpful items for bike tire replacement include Rim Strip Tape to protect the inner tube, baby powder as a dry lubricant, and tire mounting lube for easier tire manipulation. While dedicated mounting lube is ideal, in a pinch, tire black spray or even window cleaner can work, though the latter may dry out quickly.
Step-by-Step Guide to Bike Tire Replacement
1. Unmounting the Wheel for Tire Change
The first step in bike tire replacement is removing the wheel. For the front wheel, use a bike stand or motorcycle lift to elevate the front end. Start by removing the axle nut, followed by loosening the four axle pinch bolts. To push the axle out, a T-wrench or ratchet extension can be used to gently tap it through the fork lugs.
 Front wheel unmounting for bike tire replacement
2. Deflating the Inner Tube and Disconnecting Rim Lock
With the wheel secured on a tire stand, deflation and disconnection are next. Completely deflate the tire using a valve core tool to remove the valve core – this ensures complete air release for easier manipulation. Remove the valve stem nut and loosen the rim lock nut without fully removing it. Push down on the rim lock to confirm it moves freely within the tire.
3. Breaking the Tire Bead from the Rim
Breaking the bead is crucial for bike tire replacement. The goal is to push the tire bead into the rim’s center channel, creating slack to lift the bead over the rim edge. Focus on the area near the rim lock initially, ensuring the rim lock is depressed to allow bead movement. Tire lube can be applied to assist if the tire is stuck.
4. Lifting the Tire Over the Rim
This is often the most challenging part of bike tire replacement. Generous application of tire lube is key. Work in small sections, starting at the rim lock. Insert tire irons about 4 inches apart, gradually levering the bead over the rim. Getting the initial section over is the hardest, after which the rest typically follows more easily.
5. Removing the Wheel Through the Tire
Once one side is off, flip the wheel and repeat the process for the other bead. With both beads off the rim edge, push the wheel down into the tire cavity. Then, maneuver the wheel through the tire, effectively removing it.
6. Inspecting Inner Tube, Rim Tape, and Rim Lock
After removing the tire, inspect the rim tape for damage, ensuring it’s intact to prevent tube punctures. Debris inside the tire can act like sandpaper. While standard tubes are often replaced with each tire change, heavy-duty tubes like Bridgestone heavy duty inner tubes can last for several tire replacements if in good condition. Inspect the inner tube for wear and tear and check the rim lock for any damage.
7. Preparing the Inner Tube and New Tire
Clean the inner tube and ensure the inside of the new tire is free of debris. A helpful tip for bike tire replacement is to lightly dust the inside of the tire with baby powder. This acts as a dry lubricant, minimizing friction and potential wear on the inner tube. Note the light spot marker (often a yellow circle) on the tire, indicating the lightest part. Align this mark with the valve stem and rim lock during installation.
8. Setting the Inner Tube on the Wheel
Inserting the inner tube might require a valve stem puller, especially for smaller wheels. This tool prevents hand injuries. Once the valve stem is through the rim hole, secure it with the valve stem nut to hold the tube in place. Re-insert the valve stem core afterwards.
9. Setting the Tire on the Wheel
Mounting the new tire for bike tire replacement differs slightly from unmounting. Start by positioning half of the tire onto the wheel, placing the bead in the rim’s drop center between the rim lock and rim. This maximizes slack for easier levering. A tire stand assists with most of the mounting, but the final section is often easier managed on the ground, using your knee for stability. Use the curved end of tire irons to lift the last section of the bead over the rim.
10. Mounting the Remaining Tire Bead
For the final bead section in bike tire replacement, a bead buddy and quality tire irons are invaluable. Starting at the rim lock, push the tire bead into the wheel’s drop center. Use the bead buddy to maintain pressure and keep the tire in this channel. Work around the tire with tire irons in small increments, especially near the end where resistance is highest. Lube generously and persist with small movements.
11. Inflating to Set the Tire Bead
The last steps of bike tire replacement involve proper inflation. Tighten the valve stem nut and inflate the inner tube beyond the recommended pressure to ensure the tire bead “pops” into its seat correctly. Run a finger around the rim to verify complete and even seating. Once seated, deflate to the recommended 12-15 psi and tighten the rim lock.
12. Remounting the Wheel
The final step in bike tire replacement is remounting the wheel onto your bike. This is generally straightforward, but here’s a helpful tip: use a flat-blade screwdriver to slightly spread the brake pads. This creates clearance for the brake rotor, preventing wheel rotation during alignment and axle insertion.
You’re All Set!
Congratulations! You’ve successfully completed your bike tire replacement. With practice and the right tools, this task becomes quick and easy, empowering you to maintain your bike and get back to riding.