Bike brakes are arguably the most crucial safety component on your bicycle. Ensuring they are in optimal working order is not just about performance; it’s about your safety and control on every ride. Whether you’re a seasoned cyclist or just starting out, understanding how to perform a Brake Bike Adjustment is a fundamental skill. From replacing worn pads to eliminating annoying squeaks, knowing how to adjust your brakes can save you money on repairs and, more importantly, keep you safe on the road or trail.
This comprehensive guide will walk you through the essentials of bike brake adjustment, covering cable brakes, V-brakes, and disc brakes. We’ll break down the process into easy-to-follow steps, empowering you to maintain, align, and adjust your brakes like a pro. Let’s dive into the world of brake bike adjustment and ensure your ride is always safe and enjoyable.
Understanding Different Types of Bike Brakes
Before we get into the adjustment process, it’s helpful to understand the different types of bike brakes you might encounter. Each type has its own adjustment nuances, but the underlying principle is the same: to ensure effective and safe stopping power.
- Cable Brakes (Rim Brakes): This is a broad category that includes V-brakes, cantilever brakes, and caliper brakes. They all operate using a cable to transmit force from the brake lever to the brake calipers, which then apply pressure to the rim of your wheel to slow you down. V-brakes are a popular and powerful type of cable brake known for their ease of adjustment and strong stopping power, particularly in dry conditions.
- Mechanical Disc Brakes: Disc brakes, borrowed from automotive technology, offer superior stopping power, especially in wet and muddy conditions. Mechanical disc brakes, like cable rim brakes, use a cable to actuate the caliper. The caliper then squeezes brake pads against a rotor mounted at the wheel hub, rather than the rim.
- Hydraulic Disc Brakes: While we’re focusing on adjustment, it’s worth mentioning hydraulic disc brakes. These systems use fluid in a sealed line to transmit brake lever force to the caliper. They offer even more power and modulation than mechanical disc brakes, and typically require less frequent adjustment, though maintenance can be more complex. This guide will primarily focus on cable-operated brake systems, as these are most commonly adjusted by cyclists at home.
Essential Tools for Brake Adjustment
Having the right tools makes any bike maintenance task, including brake adjustment, significantly easier and more efficient. Here’s a basic toolkit you should have on hand:
- Allen Key Set (Hex Keys): Brake components often use Allen bolts in various sizes. A set of Allen keys is indispensable for loosening and tightening bolts on calipers, brake pads, and levers.
- Cable Cutter: While not always needed for adjustment, a good cable cutter is essential if you need to replace brake cables. Clean cuts prevent fraying and ensure smooth cable operation.
- Pliers: Useful for gripping cables, barrel adjusters, and other small parts.
- Screwdrivers (Phillips and Flathead): Some older brake systems or components may use Phillips or flathead screws.
- Bike Stand (Optional but Recommended): A bike stand makes it much easier to work on your brakes, allowing you to spin the wheels freely and keep your bike stable.
- Rotor Truing Tool (for Disc Brakes): If you have disc brakes and suspect a bent rotor, a truing tool can help you straighten it.
- Clean Rags: For wiping away dirt and grime from brake components.
With your tools ready, let’s start adjusting those brakes!
How to Adjust Cable Brakes (Including V-Brakes and Mechanical Disc Brakes)
Cable brakes, whether rim brakes or mechanical disc brakes, share similar adjustment principles. The goal is to achieve the right cable tension for responsive and effective braking.
Identifying Cable Brake Issues: Assessing Lever Feel
The first step in any brake bike adjustment is to diagnose the problem. The brake lever feel is a key indicator of whether your cables need attention.
- Lever Too Loose (Travels to Handlebar): If you can pull the brake lever all the way to the handlebar without significant resistance, your brake cable is likely too loose. This reduces braking power and can be dangerous.
- Lever Too Tight (Barely Moves): Conversely, if the brake lever is very stiff and barely moves before the brakes engage forcefully, the cable might be too tight. This can cause brake rub and premature pad wear.
- Ideal Lever Feel: Ideally, your brake lever should have about 3-4 cm of travel before you feel significant resistance and the brakes begin to engage. This allows for good modulation and prevents accidental lock-ups.
Fine-Tuning with the Barrel Adjuster
For minor adjustments, the barrel adjuster is your best friend. This small, cylindrical adjuster is usually located where the brake cable enters the brake lever or the brake caliper.
- Locate the Barrel Adjuster: Find the barrel adjuster on your brake lever or caliper.
- Loosen the Lock Ring (if present): Some barrel adjusters have a lock ring that needs to be loosened before you can turn the adjuster.
- Adjust for Cable Tension:
- To Tighten Brakes (Cable Too Loose): Turn the barrel adjuster counter-clockwise (outwards). This effectively lengthens the cable housing, increasing cable tension and tightening the brakes.
- To Loosen Brakes (Cable Too Tight): Turn the barrel adjuster clockwise (inwards). This shortens the cable housing, decreasing cable tension and loosening the brakes.
- Test the Lever Feel: After each adjustment, squeeze the brake lever to check if the feel is improved. Make small adjustments and re-test until you achieve the desired lever travel.
- Tighten the Lock Ring (if present): Once you’re satisfied, tighten the lock ring to secure the barrel adjuster in place.
Barrel adjuster for fine tuning brake cable tension.
Major Adjustments at the Caliper
If the barrel adjuster doesn’t provide enough adjustment, or if you’re installing new brake cables or pads, you’ll need to make adjustments directly at the brake caliper.
- Locate the Caliper Cable Bolt: Find the bolt that clamps the brake cable to the brake caliper. This is usually an Allen bolt.
- Loosen the Caliper Bolt: Use the appropriate Allen key to loosen the caliper bolt. Loosen it enough so that the cable can move freely, but don’t remove it completely.
- Adjust Cable Tension:
- To Tighten Brakes (Cable Too Loose): Pull the brake cable outwards, away from the caliper, to increase tension. While pulling the cable, squeeze the brake pads towards the rim (for V-brakes) or rotor (for disc brakes) to the desired position. For V-brakes, aim for a few millimeters of clearance between the pads and the rim when the lever is released. For disc brakes, ensure the rotor is centered between the pads.
- To Loosen Brakes (Cable Too Tight): Allow the brake cable to retract slightly inwards through the caliper to decrease tension.
- Tighten the Caliper Bolt: While holding the brake pads in the desired position and maintaining cable tension (if tightening), tighten the caliper bolt securely. Don’t overtighten, but ensure it’s firm enough to hold the cable in place.
- Test the Lever Feel and Brake Function: Squeeze the brake lever to check the lever feel and ensure the brakes engage properly and release cleanly without rubbing.
- Fine-Tune with Barrel Adjuster (if needed): Use the barrel adjuster for any final fine-tuning to achieve perfect brake feel.
How to Adjust V-Brake Pads
V-brake pads require occasional adjustment to ensure they contact the rim squarely and effectively. Misaligned pads can cause squealing, reduced braking power, and uneven wear.
Inspecting V-Brake Pads for Wear and Alignment
Regularly inspect your V-brake pads for wear and alignment.
- Check for Wear: Most brake pads have wear indicator lines. If the pad material is worn down to or below these lines, it’s time to replace them. Uneven wear can also indicate an alignment issue.
- Assess Alignment: Pull the brake lever and observe how the pads contact the rim. They should hit the rim squarely and simultaneously. Check for the following misalignment issues:
- Pads Hit Tire: Pads too low and contacting the tire sidewall.
- Pads Overhang Rim Edge: Pads extending over the top edge of the rim.
- Uneven Pad Contact: One pad hitting the rim before the other, or pads not making full contact.
- Squealing Noises: Squealing often indicates vibration due to misalignment or contaminated pads.
Aligning V-Brake Pads for Optimal Performance
- Loosen the Brake Pad Bolts: Locate the bolts that secure the brake pads to the brake arms. Use an Allen key to slightly loosen these bolts. Just enough to allow pad movement, not so much that the pads become completely loose.
- Position the Brake Pads: Manually adjust the position of the brake pads.
- Vertical Alignment: Position the pads so they are vertically centered on the braking surface of the rim, not touching the tire or overhanging the rim edge.
- Toe-In (Recommended): Slightly angle the front of the brake pad closer to the rim than the rear. This “toe-in” helps to reduce squealing and improve braking modulation. You can use your fingers to feel for a slight gap at the rear of the pad when the front is touching the rim.
- Symmetrical Alignment: Ensure both pads are positioned symmetrically on either side of the rim for even braking force.
- Tighten the Brake Pad Bolts: Once you are happy with the pad position, tighten the brake pad bolts securely, but be careful not to overtighten and strip the threads.
- Test Brake Alignment: Pull the brake lever and check if the pads now contact the rim squarely and simultaneously. Spin the wheel and listen for any rubbing. Make minor adjustments as needed until the pads are perfectly aligned.
Adjusting V-brake pads for optimal rim contact and alignment.
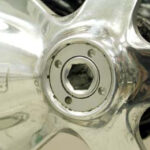
How to Adjust Disc Brake Pads (Mechanical)
Adjusting mechanical disc brakes focuses on caliper alignment and ensuring the rotor runs freely between the pads when the brakes are not applied.
Preparing for Disc Brake Adjustment
- Bike Stand or Upside Down Bike: Place your bike in a bike stand or carefully flip it upside down, resting on the handlebars and saddle. This allows you to spin the wheel freely.
- Inspect Rotors and Pads: Examine the brake rotor for any bends or damage. Spin the wheel and check if the rotor wobbles laterally. Inspect the disc brake pads for wear. Disc brake pads wear more slowly than rim brake pads, but they still need replacement eventually.
Checking Rotor Alignment and Trueness
- Visual Rotor Inspection: Look down at the brake caliper and rotor. The rotor should be centered in the caliper gap between the brake pads. If it appears closer to one pad than the other, caliper adjustment is needed.
- Spin the Wheel and Listen: Spin the wheel and listen for any rubbing sounds from the rotor contacting the brake pads. Some slight intermittent rubbing is normal, but constant or loud rubbing indicates misalignment or a bent rotor.
- Rotor Trueness Check: If you suspect a bent rotor, spin the wheel slowly and watch the rotor as it passes through the caliper. If it wiggles from side to side, it’s likely bent and may need truing or replacement. Minor bends can sometimes be straightened with a rotor truing tool.
Caliper Adjustment for Disc Brakes
- Loosen Caliper Mounting Bolts: Locate the two bolts that mount the disc brake caliper to the frame or fork. Use an Allen key to slightly loosen these bolts. Just enough to allow the caliper to move side to side.
- Center the Caliper:
- Method 1 (Brake Lever Squeeze): Spin the wheel, then firmly squeeze and hold the brake lever. While holding the lever, tighten the caliper mounting bolts alternately and gradually. Releasing the lever should now leave the rotor centered.
- Method 2 (Visual Alignment): Visually center the caliper over the rotor so that the gap between the rotor and each pad appears equal. Then tighten the caliper mounting bolts alternately and gradually.
- Test and Fine-Tune: Spin the wheel and check for rotor rub. If rubbing persists, slightly loosen the caliper bolts again and make minor adjustments to the caliper position until the rotor spins freely without significant rubbing. Re-tighten the bolts. You may need to repeat this process a few times to get perfect alignment.
Adjusting disc brake caliper to ensure proper rotor alignment within the caliper.
Troubleshooting Common Brake Adjustment Problems
Even with careful adjustment, you might encounter some common brake issues. Here’s how to troubleshoot them:
- Squealing Brakes:
- Contaminated Pads or Rotors: Oil, grease, or dirt on pads or rotors can cause squealing. Clean rotors with isopropyl alcohol and consider replacing contaminated pads.
- Pad Material: Some brake pad compounds are more prone to squealing. Try different brake pads. Organic pads tend to be quieter than metallic pads, but wear faster.
- Misalignment: Ensure pads are properly aligned (toe-in for V-brakes, caliper centering for disc brakes).
- Vibrations: Frame or fork vibrations can amplify brake noise. Ensure all bolts are tight.
- Rubbing Brakes:
- Caliper Misalignment (Disc Brakes): Re-center the caliper as described above.
- Bent Rotor (Disc Brakes): True or replace the rotor.
- Wheel Misalignment: Ensure your wheel is properly seated in the dropouts and is spinning straight.
- Loose Wheel Bearings: Worn wheel bearings can cause wheel wobble and brake rub.
- Spongy Brake Lever Feel:
- Air in Hydraulic Lines (Hydraulic Disc Brakes – not covered in detail in this guide): Bleeding the brakes is necessary to remove air.
- Cable Stretch (Cable Brakes): New brake cables can stretch initially. Re-adjust cable tension after a few rides.
- Cable and Housing Friction: Dirty or unlubricated cables and housings can cause friction and a spongy feel. Lubricate cables or replace cables and housings.
Stay Safe and Enjoy Smooth Rides
Mastering brake bike adjustment is a crucial skill for any cyclist. Regular maintenance and proper adjustment not only enhance your braking performance but also significantly contribute to your safety on the road or trail. By understanding the principles outlined in this guide and practicing these adjustments, you’ll be well-equipped to keep your brakes in top condition and enjoy countless miles of safe and smooth cycling. Remember to always test your brakes thoroughly after any adjustment before heading out for a ride.