Mountain biking descents are often the highlight of any ride, a thrilling reward after a tough climb. However, the fun can quickly screech to a halt – literally – if your brakes aren’t performing. I remember one ride when a friend’s bike started emitting an ear-splitting shriek from the brakes, turning our exhilarating descent into an impromptu repair stop.
Brake noise is rarely a good sign, often indicating underlying issues. In my friend’s case, we discovered his brake pads were completely worn down, leading to dangerous metal-on-metal contact. He desperately needed new brake pads.
While the thought of bike repairs can be daunting, replacing brake pads is surprisingly straightforward and quick. With just a few basic tools and about 15 minutes, you can easily swap them out yourself. This guide will walk you through the process of changing your brake pads, ensuring your bike is ready for safe and enjoyable rides.
Understanding Bike Brake Components
Before we dive in, let’s familiarize ourselves with some common bike brake parts and terminology:
- Wheel Skewer or Thru-Axle: The mechanism that secures the wheel to the bike frame. Skewers often use a quick-release lever, while thru-axles are threaded rods.
- Dropouts: The slots on the frame and fork where the wheel attaches.
- Brake Block (Pad Spacer): A small plastic shim used to keep disc brake pads separated when the wheel is removed, preventing accidental lever pulls from pushing the pistons out too far.
- Pistons: Cylindrical components within a disc brake caliper that push the brake pads against the rotor when you apply the brakes.
- Brake Caliper: The housing that holds the pistons and brake pads, mounted to the bike frame or fork.
- Disc Rotor: A metal disc attached to the wheel hub, serving as the braking surface for disc brakes.
- Brake Track: The area on the disc rotor or rim (for rim brakes) where the brake pads make contact.
- Brake Shoe: The holder that contains the brake pad (primarily for rim brakes, and some older disc brake systems).
- Rotor Bolts or Centerlock Ring: Fasteners that attach the disc rotor to the hub.
- Barrel Adjusters: Small adjusters on cable-activated brakes used to fine-tune cable tension.
- Lever Throw: The distance the brake lever travels before the brake pads engage.
Step-by-Step Guide to Changing Bike Brake Pads
Whether you have disc brakes or rim brakes, the process of changing brake pads is manageable at home. Follow these steps for a smooth replacement.
Step 1: Wheel Removal
Tools: None
To begin, you need to remove the wheel to access the brake pads. The method varies slightly depending on your brake type.
 Removing the front wheel of a bike with disc brakes using a thru-axle.
For Disc Brakes:
- Thru-Axle or Quick Release: If your wheel uses a thru-axle, unthread and remove it completely. For quick-release skewers, open the lever and unthread the nut on the opposite side just enough to loosen the wheel.
- Lower the Wheel: Carefully lower the wheel out of the dropouts.
- Brake Lever Caution: Crucially, never pull the hydraulic disc brake lever when the rotor is removed or without a brake block inserted. This can cause the pistons to extend too far, potentially popping out of their seals and requiring a more complex brake service.
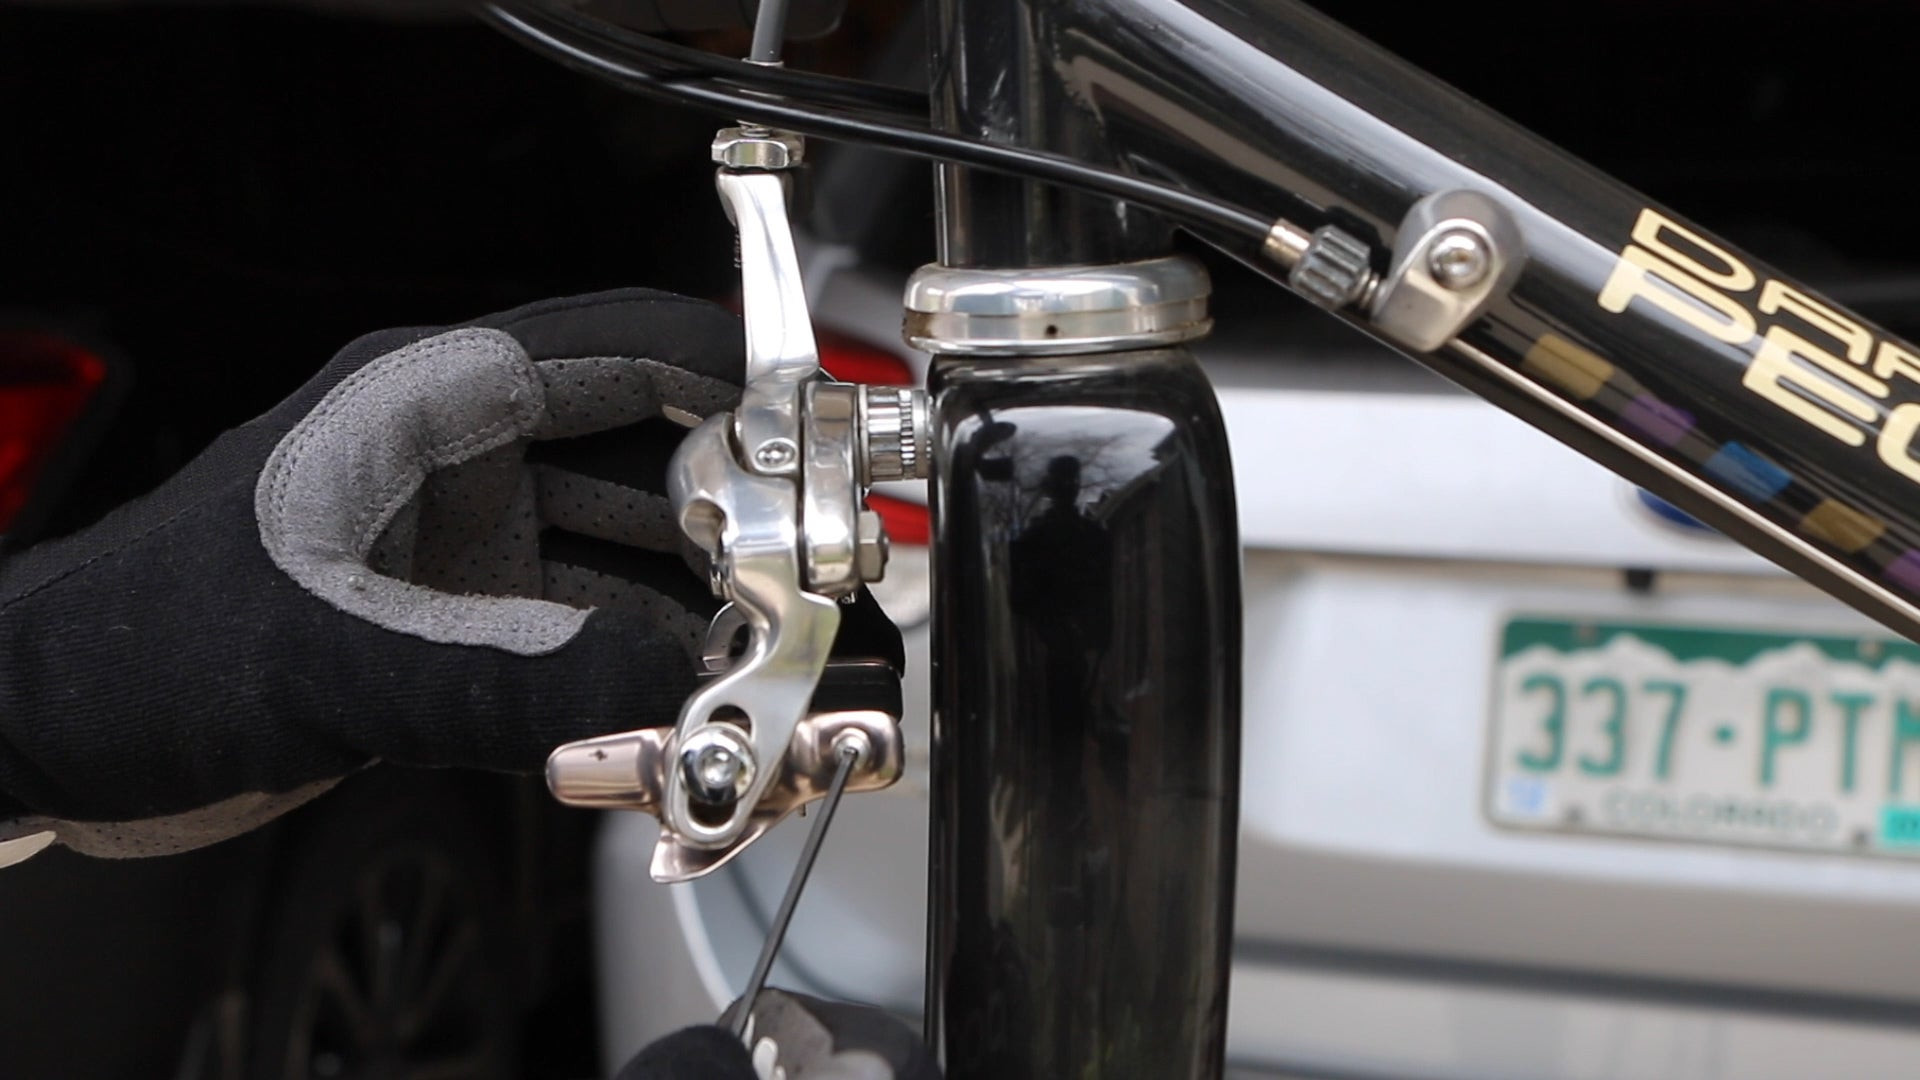
 Removing the front wheel of a bike with rim brakes using a quick-release skewer.
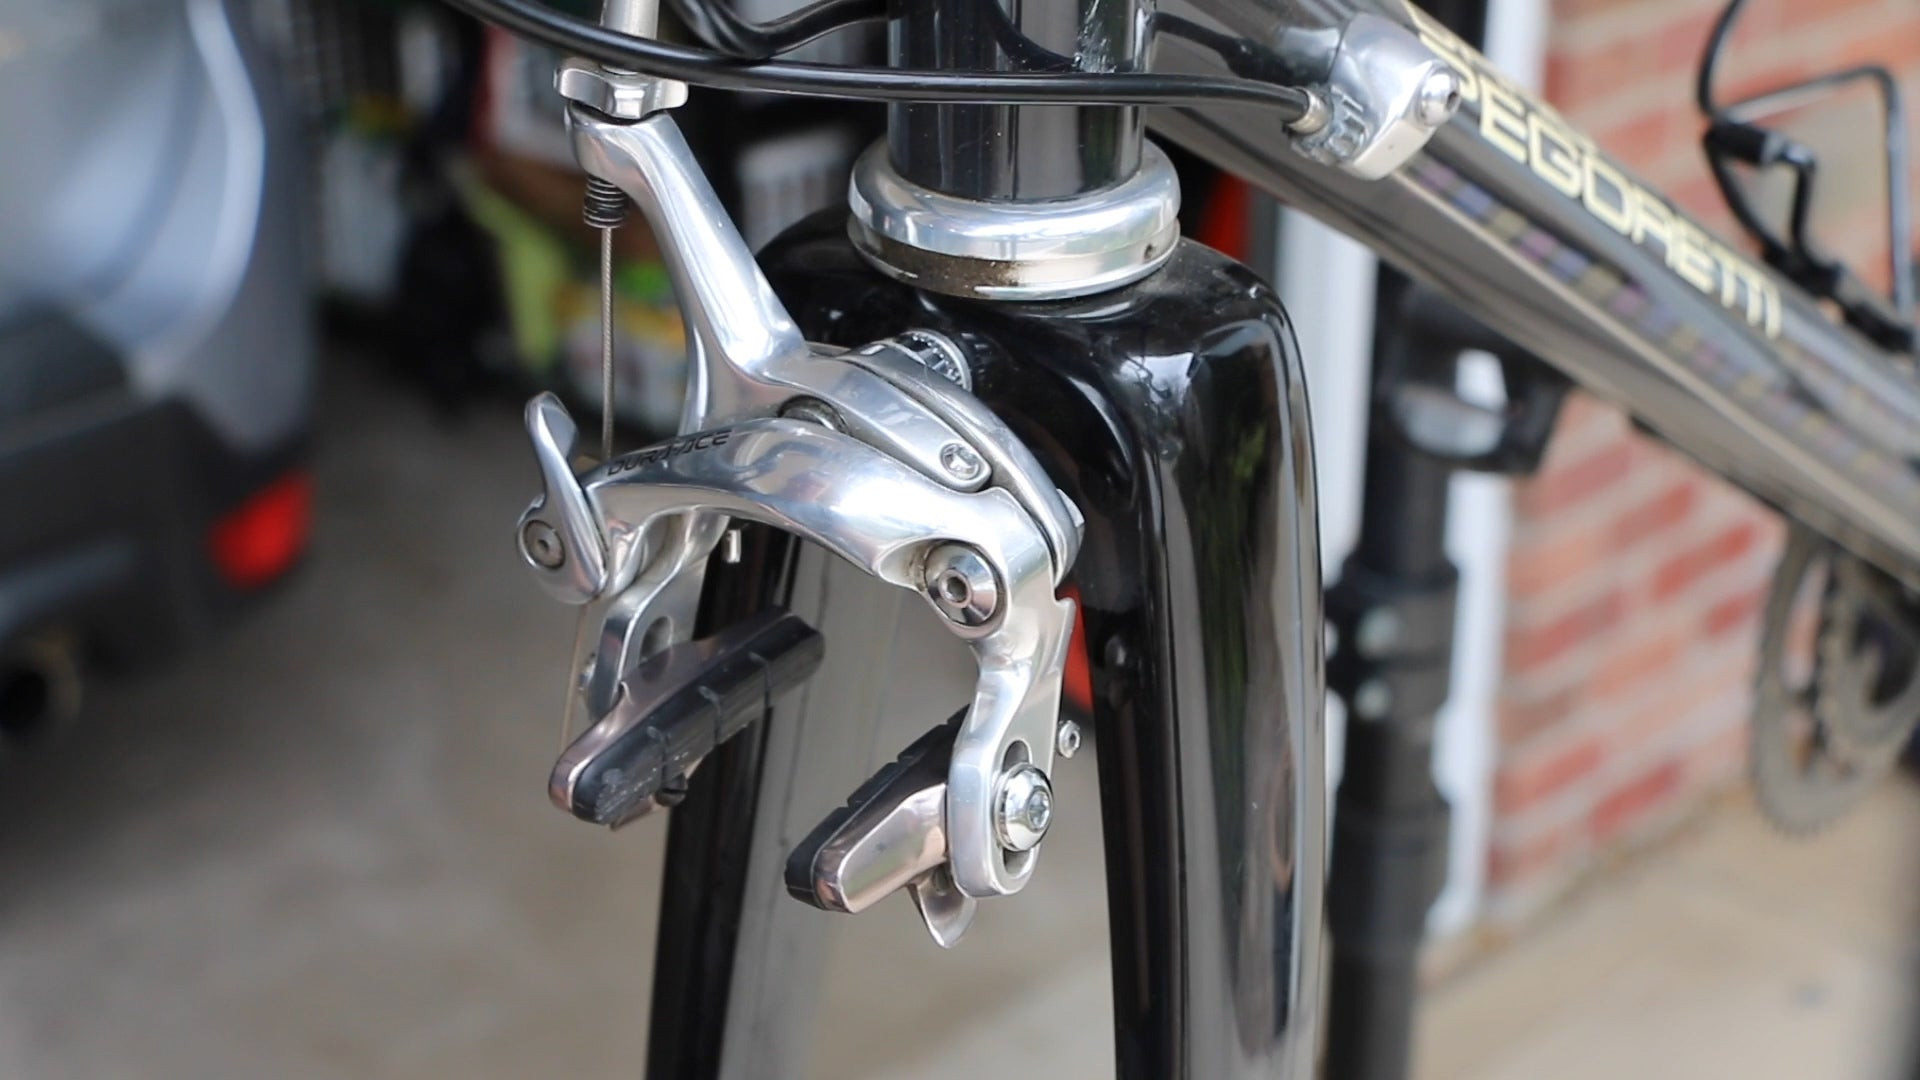
For Rim Brakes:
- Rear Wheel Gear Shift: If working on the rear wheel, shift the gears to the smallest cog. This provides extra clearance for the wheel to pass the rear derailleur.
- Open Quick Release: Open the quick-release lever on the wheel skewer.
- Release Caliper (If Needed): Some rim brake calipers (especially on front wheels) may need to be opened to provide enough clearance. Look for a small lever (Shimano/SRAM) or button (Campagnolo) on the caliper to release it.
- Remove Wheel: The wheel should now drop out. You might need to gently wiggle it to clear the brake pads and dropouts.
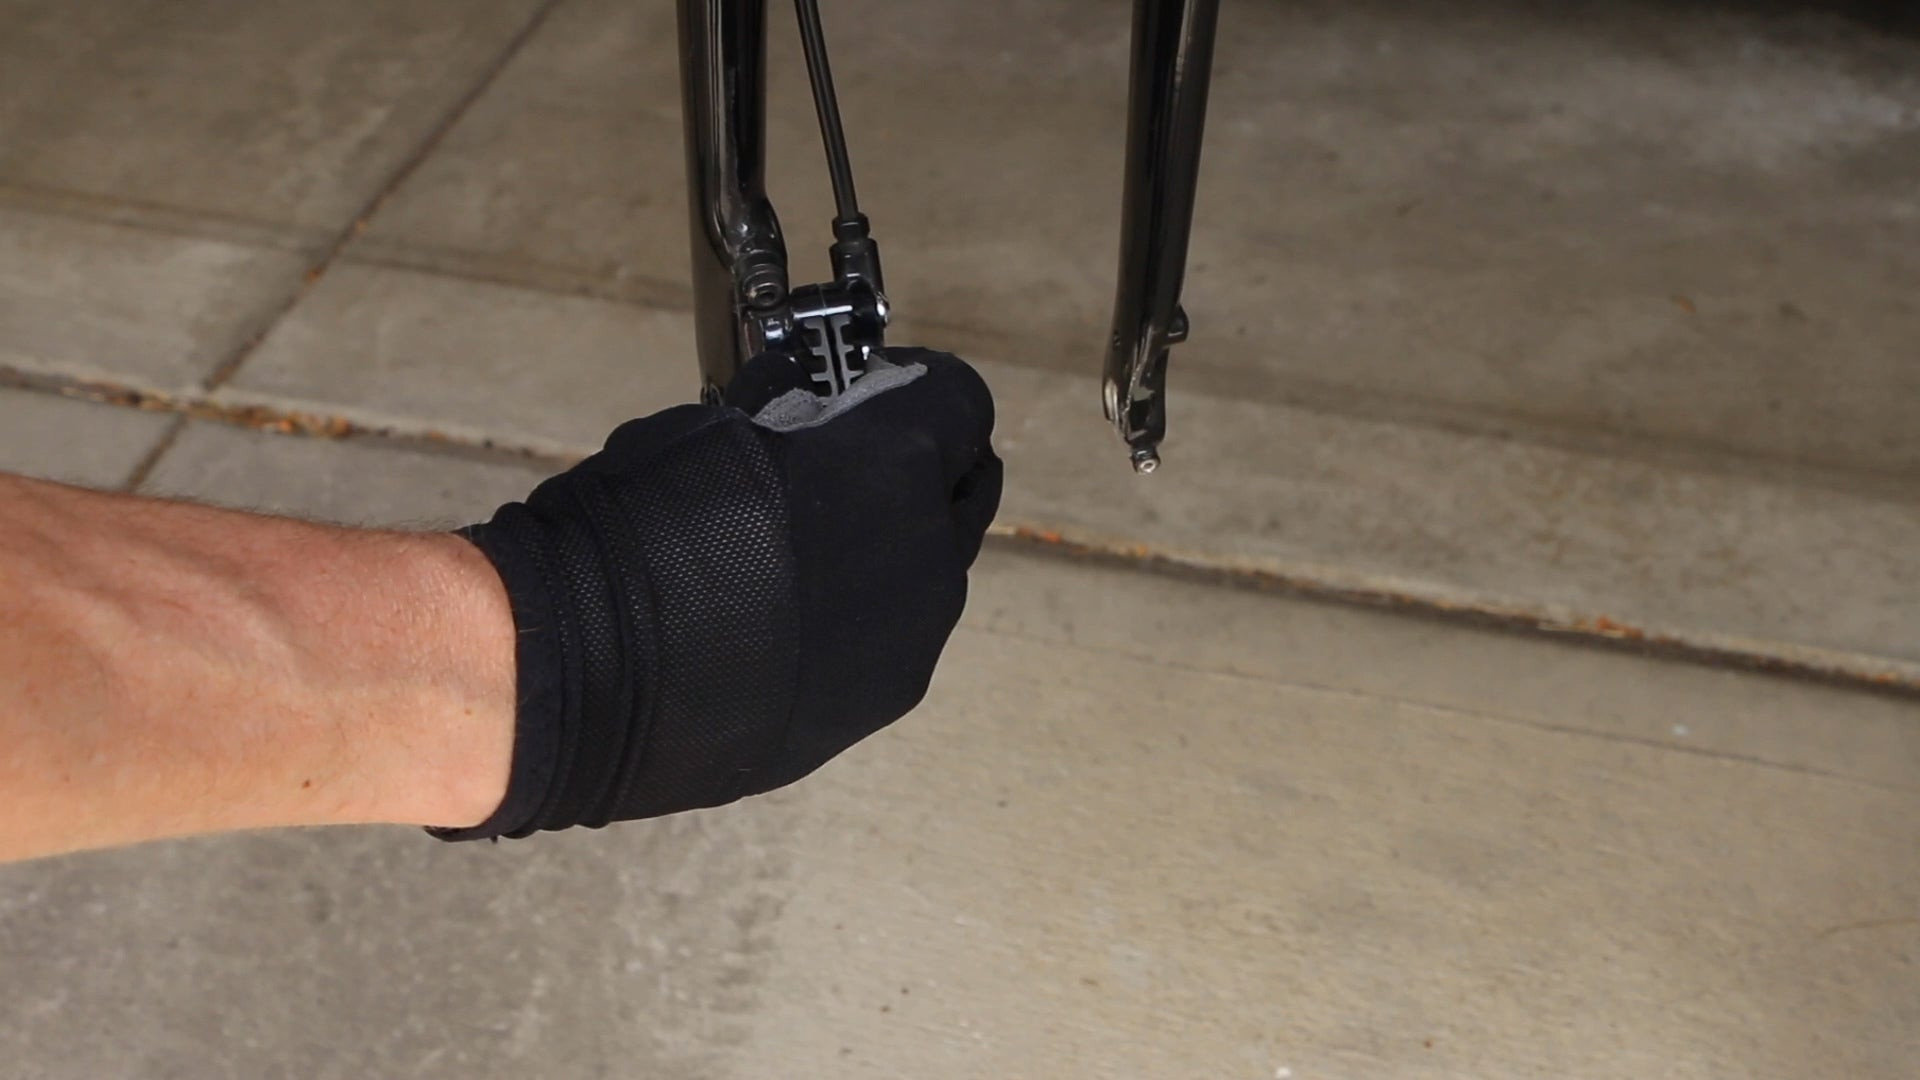
Step 2: Brake System Inspection
Tools: Flashlight, Vernier calipers (for disc rotor measurement – optional)
Regular inspection of your brake system is crucial for safety and performance. Aim to check your brake pads every few weeks.
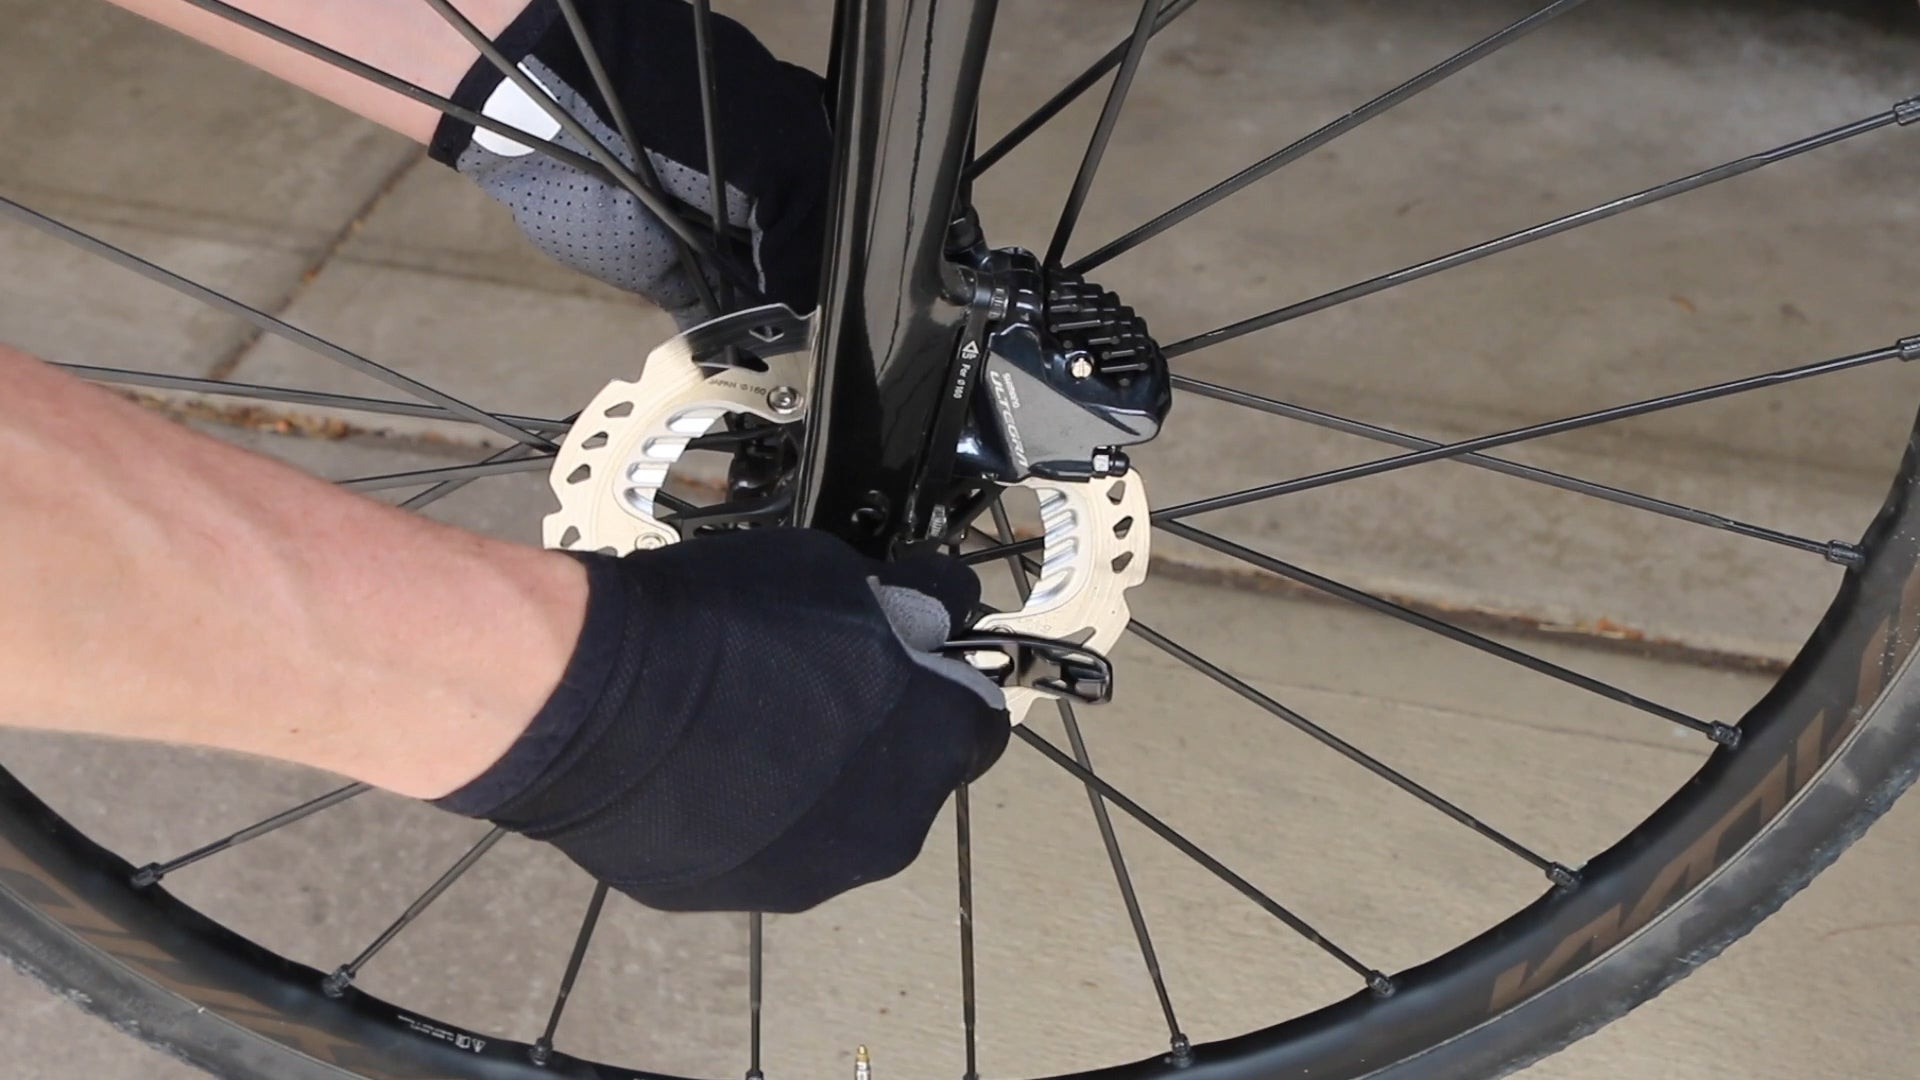
 Inspecting disc brake pads for wear using a flashlight.
Disc Brakes:
- Pad Material Check: Use a flashlight to inspect the brake pads within the caliper. If the remaining brake pad material is one millimeter or less, it’s time for replacement.
- Rotor and Pad Condition: Look for signs of damage such as scoring or deep grooves on the disc rotor or brake pads. These can indicate debris embedded in the pads or that the pads are worn down to the metal backing plate.
- Rotor Thickness: Disc rotors also wear down over time. Use Vernier calipers to measure the rotor thickness at the brake track. Replace rotors if they are less than 1.5mm thick or if you notice significant damage or warping.
Rim Brakes:
- Wear Indicators: Most rim brake pads have directional indicators at the top and vertical slotted lines on the braking surface. These serve as wear indicators.
- Indicator Visibility: If the directional indicator is no longer visible or the slots have disappeared from the braking surface, the pads need replacing.
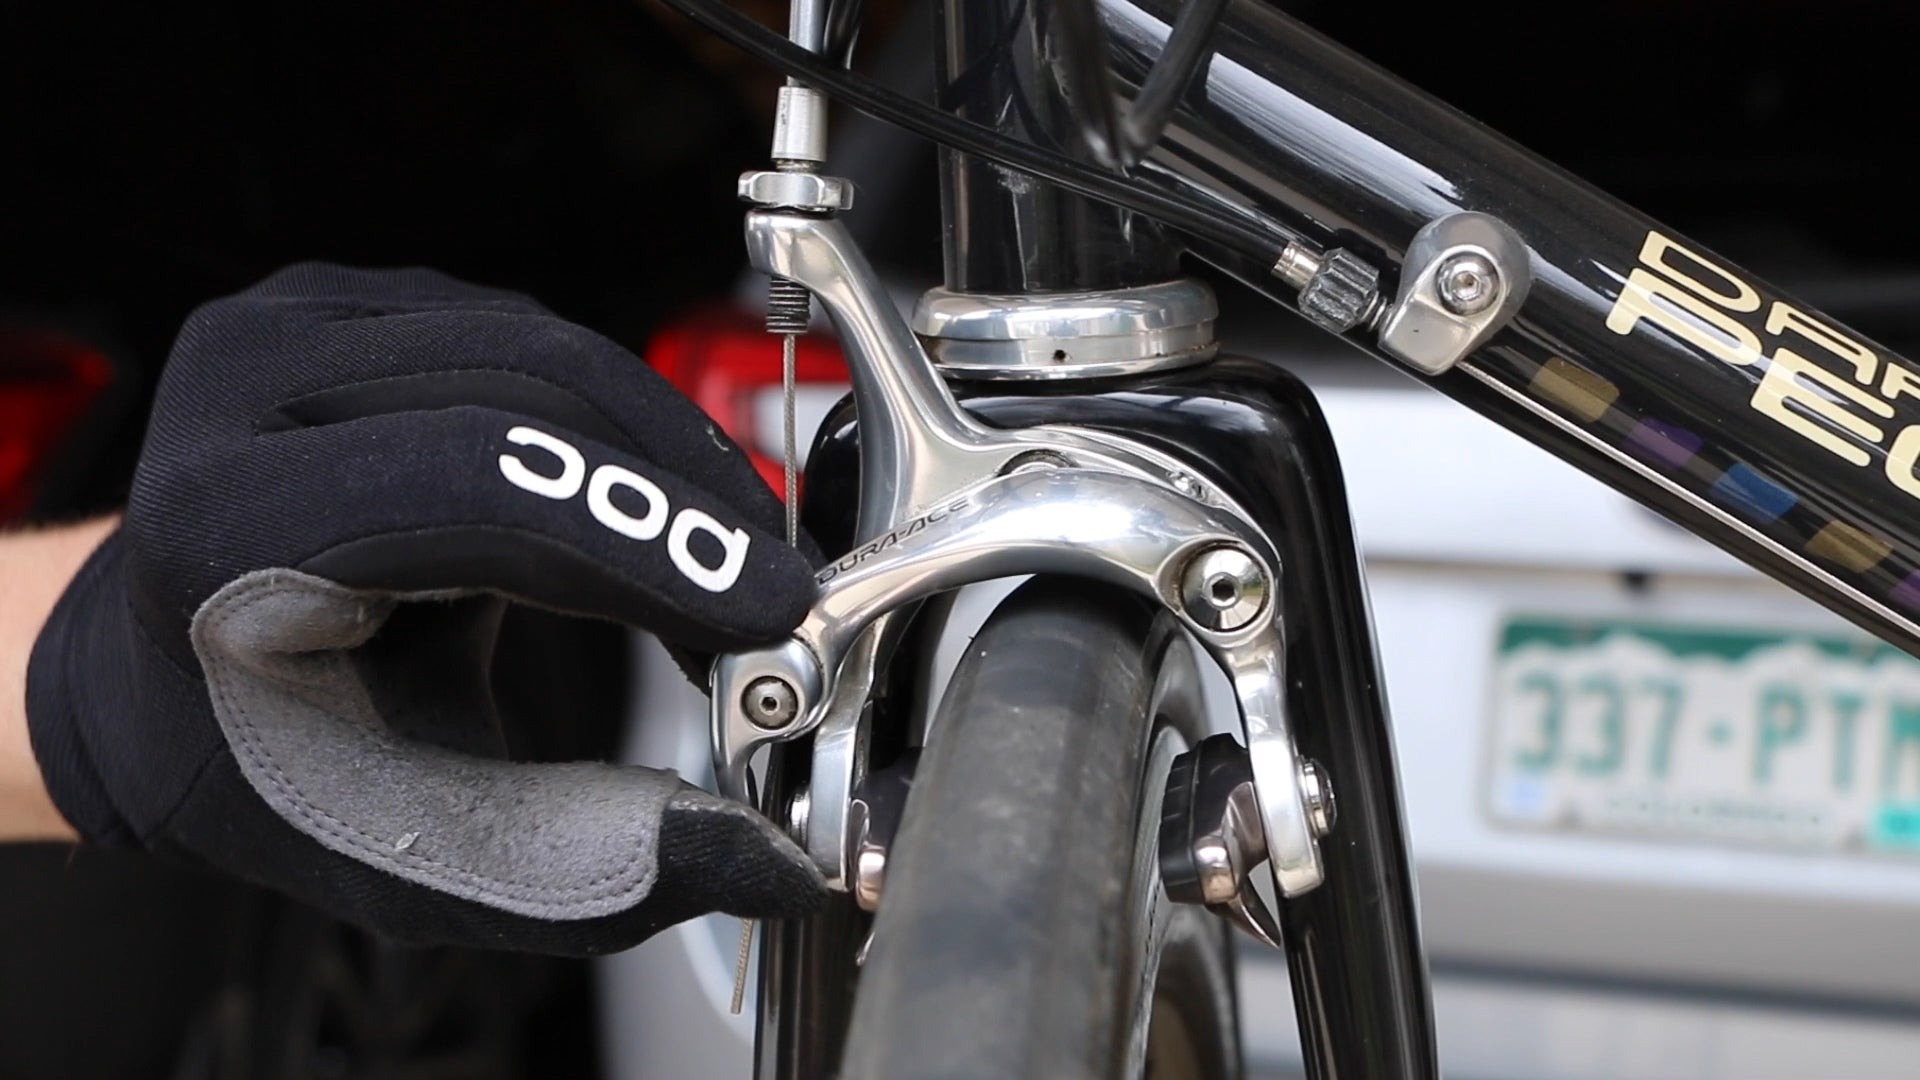
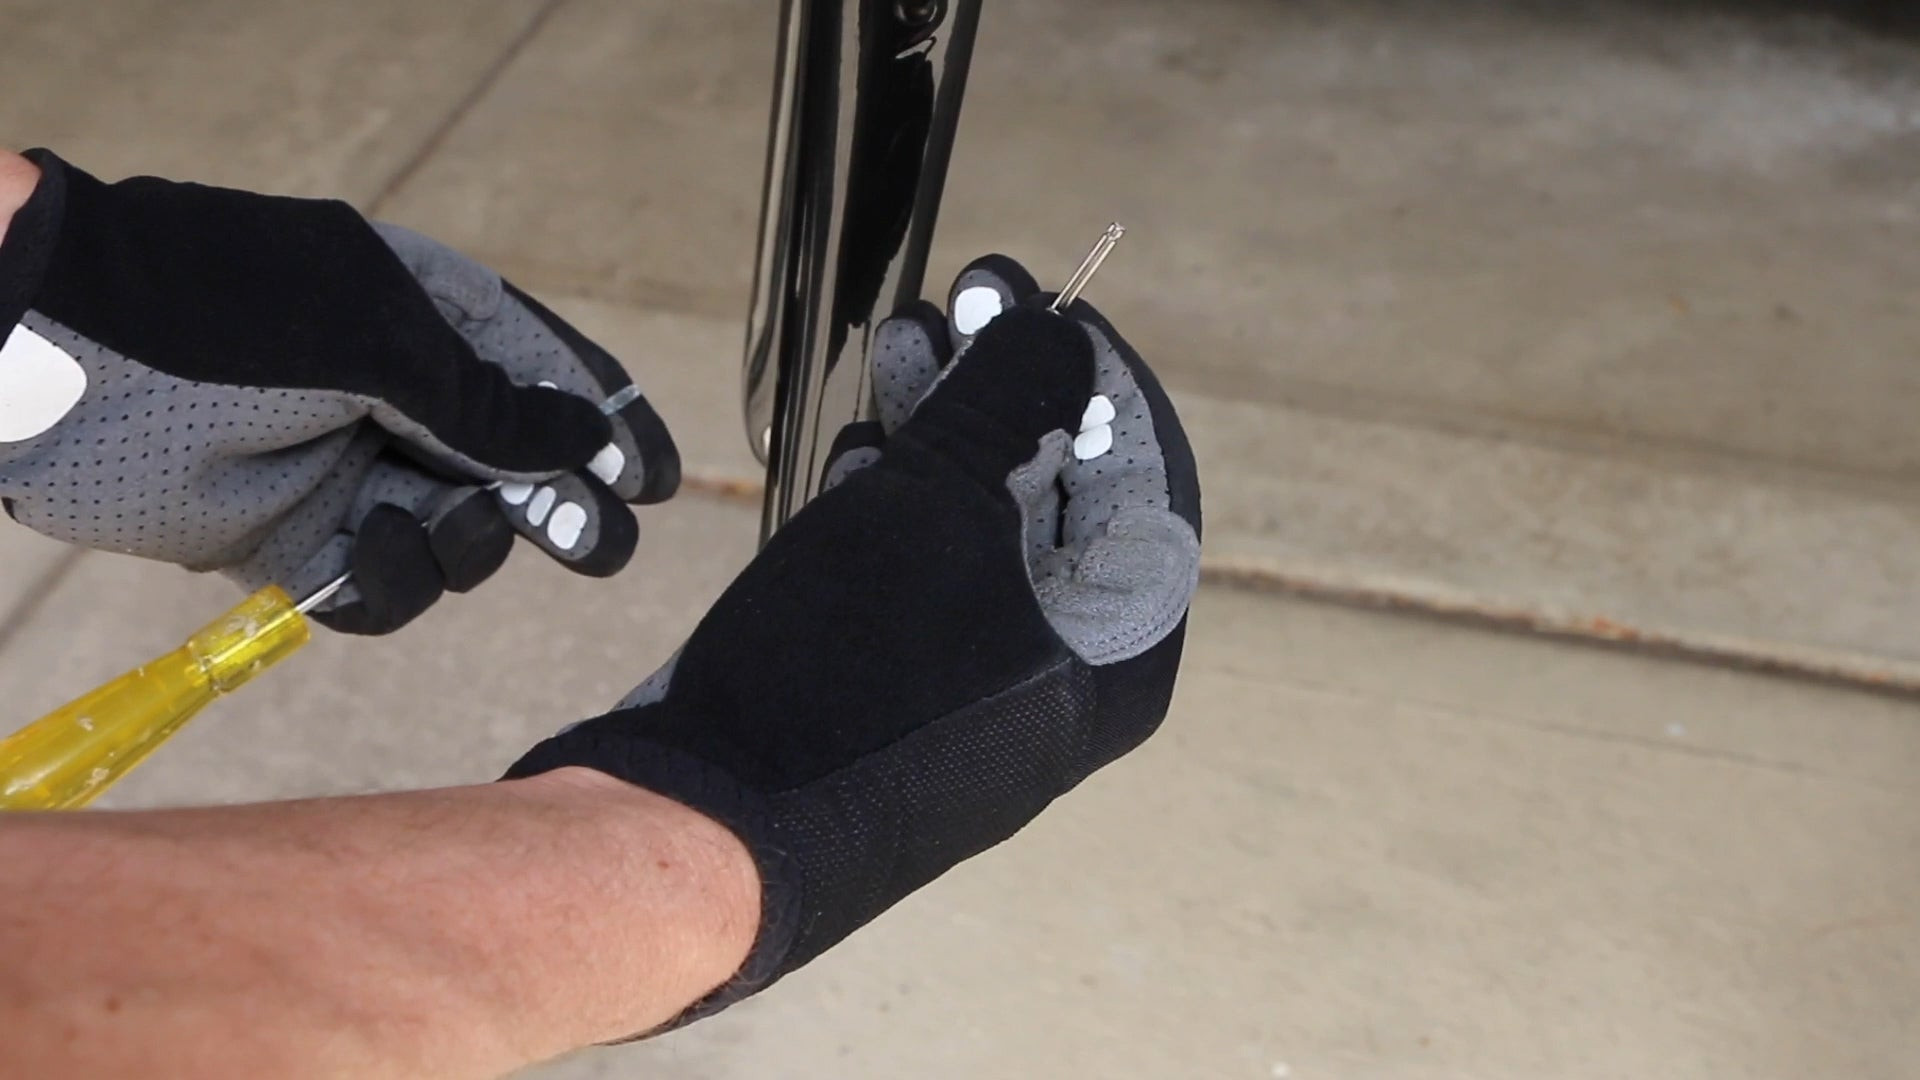
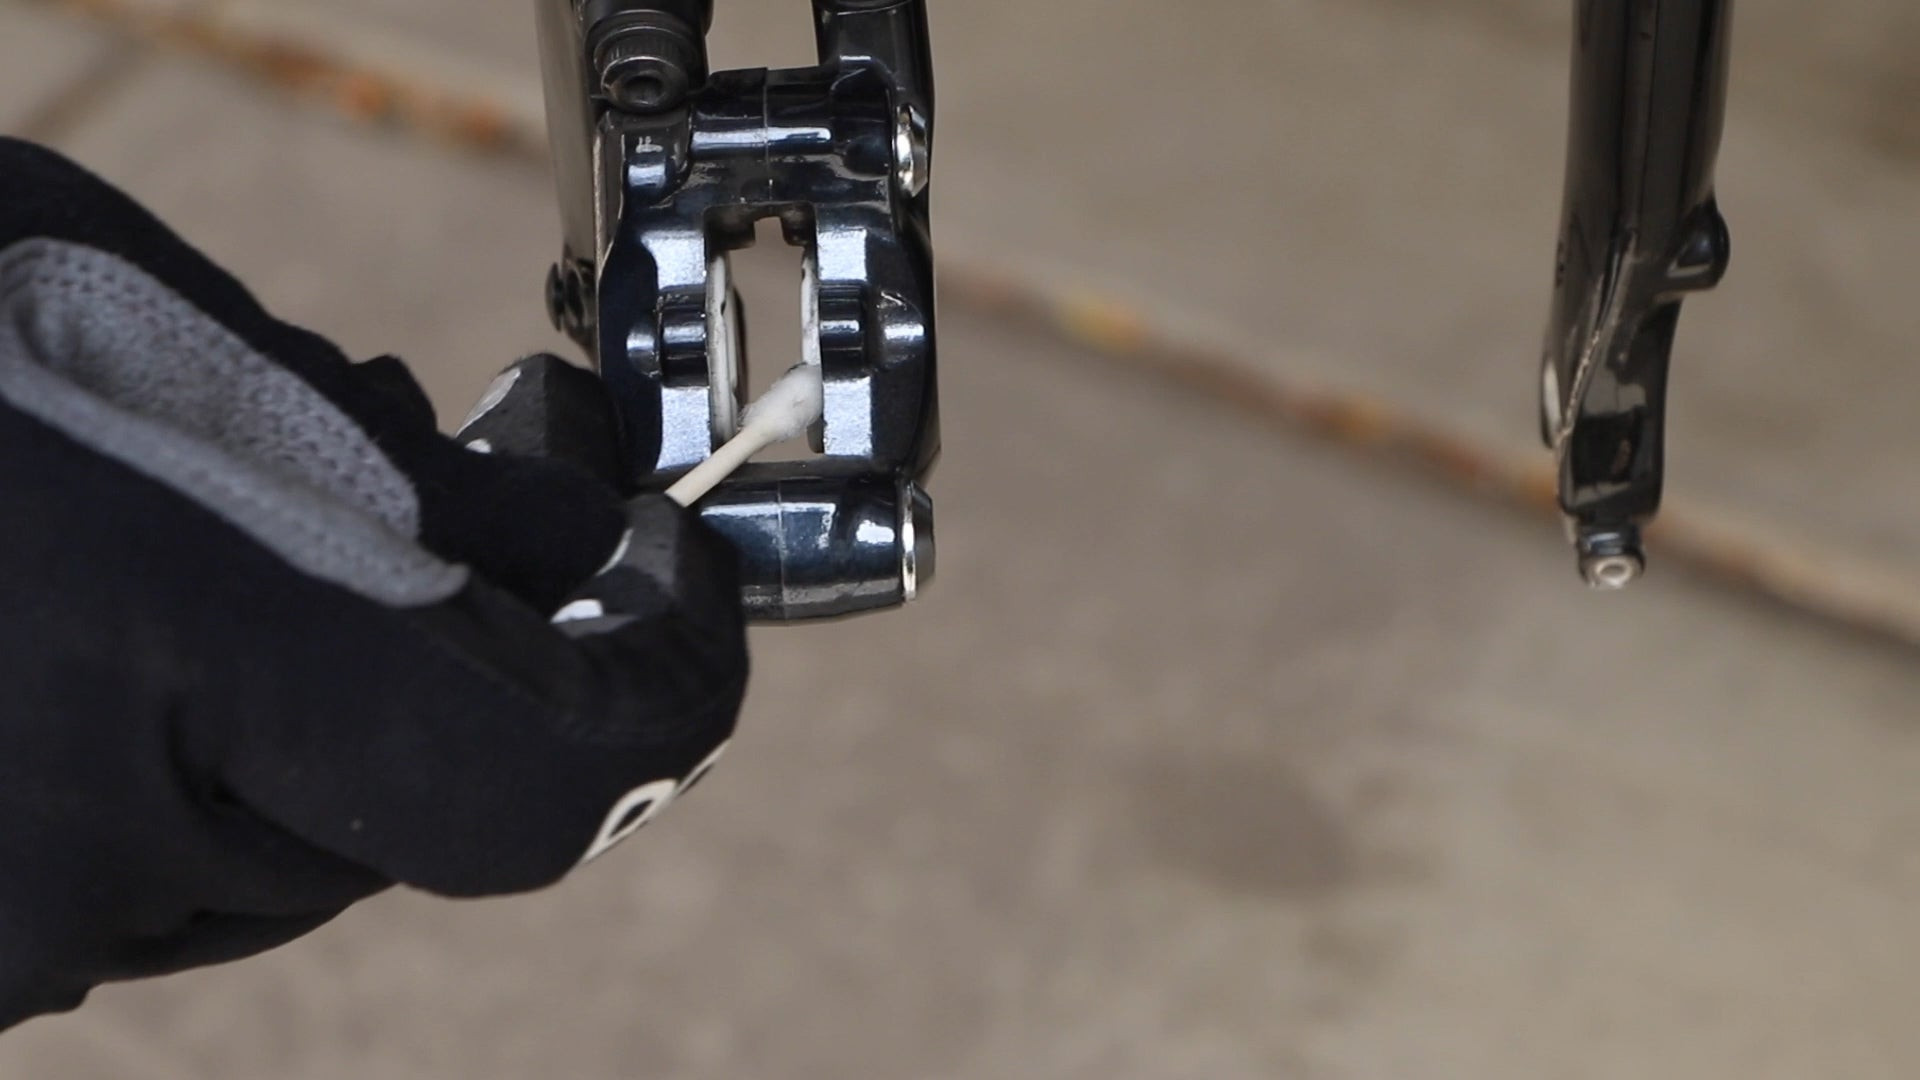
Step 3: Pad Retention Screw/Bolt Removal
Tools: Needle-nose pliers, flat-head screwdriver, or hex wrench (usually 3mm)
The method for removing the pad retention mechanism differs between disc and rim brakes.
 Removing the pad retention screw on a disc brake caliper using pliers.
Disc Brakes:
- Locate Retention Mechanism: Identify the screw or bolt that secures the brake pads within the caliper. Some systems use a horizontal screw or bolt, while others might use magnets or a combination of a screw and a fixing pin or circlip.
- Remove Fixing Pin/Circlip (If Present): If a fixing pin or circlip is present, carefully use needle-nose pliers to remove it.
- Unthread Screw/Bolt: Use the appropriate tool (screwdriver or hex wrench) to unthread the screw or slide out the bolt. Set the screw and any small parts aside in a safe place.
 Removing the set screw on a rim brake shoe with a screwdriver.
Rim Brakes:
- Locate Set Screw: Look for a small set screw on the side of the brake shoe.
- Loosen Set Screw: Use a screwdriver or hex key to loosen the set screw. You don’t need to remove it completely, just loosen it enough to allow the pad to wiggle and slide out.
- Older Systems: Older rim brake systems might use a pin instead of a set screw, which needs to be pulled out. In some cases, the pad simply slides out without any retention mechanism.
- Note on Brake Shoe/Pad Types: These rim brake instructions are for systems with replaceable pads within a separate brake shoe. Some budget-friendly brakes use one-piece shoe/pad units that require unbolting the entire assembly.
Step 4: Used Pad Removal
Tools: Pliers (optional)
With the retention mechanism removed, you can now take out the old brake pads.
 Removing disc brake pads from the caliper using pliers to grip the tabs.
Disc Brakes:
- Locate Pad Tabs: Disc brake pads usually have small tabs on the back for easy removal.
- Remove Pads: Using your fingers or pliers, grasp the tabs, pinch them together (if necessary), and gently but firmly pull the pads out of the caliper. Be mindful of any springs or spacers that might come out with the pads and keep them organized for reinstallation. Magnet-style pads may not have tabs or frames, simply pull them out.
 Removing rim brake pads from the brake shoe by pushing from the front.
Rim Brakes:
- Push Pads Out: Once the set screw is sufficiently loosened, gently push the brake pad out of the brake shoe from the front (towards the rear of the bike).
Step 5: Brake Cleaning and Inspection
Tools: Clean rag, rubbing alcohol, flashlight, piston press or flat tool (for disc brakes)
Cleaning and inspecting the brake components ensures optimal performance with the new pads.
 Cleaning disc brake pistons with a rag and rubbing alcohol.
Disc Brakes:
- Caliper Inspection: Use a flashlight to inspect inside the caliper. Locate the pistons – usually two or four flat cylinders.
- Piston Reset: Disc brakes are self-adjusting for pad wear, so the pistons may be extended. To make space for new pads, you may need to reset them. Use a piston press or a broad, flat tool like a tire lever (carefully!) to gently push each piston back into the caliper body. If the pistons are very dirty or sticky, they might resist resetting, indicating a need for a brake bleed and piston cleaning, which is best handled by a bike shop.
- Rotor Cleaning: Clean the brake track of the disc rotor with a clean rag and rubbing alcohol. Avoid touching the rotor’s braking surface with bare hands, as skin oils can contaminate the pads and reduce braking performance.
- Rotor Bolt Check: While cleaning, check the rotor bolts or Centerlock ring to ensure they are tight.
Rim Brakes:
- Rim Brake Track Inspection: Inspect the brake track on the wheel rim for grooves or embedded debris. These indicate foreign material in the old pads.
- Rim Cleaning: Wipe down the rim brake track with a clean rag and rubbing alcohol.
- Carbon Rim Inspection: If you have carbon fiber wheels, carefully examine the rim for damage like split fibers, deep gouges, or other signs of structural issues. If concerned, take the wheel to a bike shop for inspection.
- Metal Rim Cleaning (Optional): For metal rims, you can use fine-grit sandpaper or a brake cleaning block to gently remove rubber and dirt buildup from the rim. Clean with alcohol afterward. This can improve braking power.
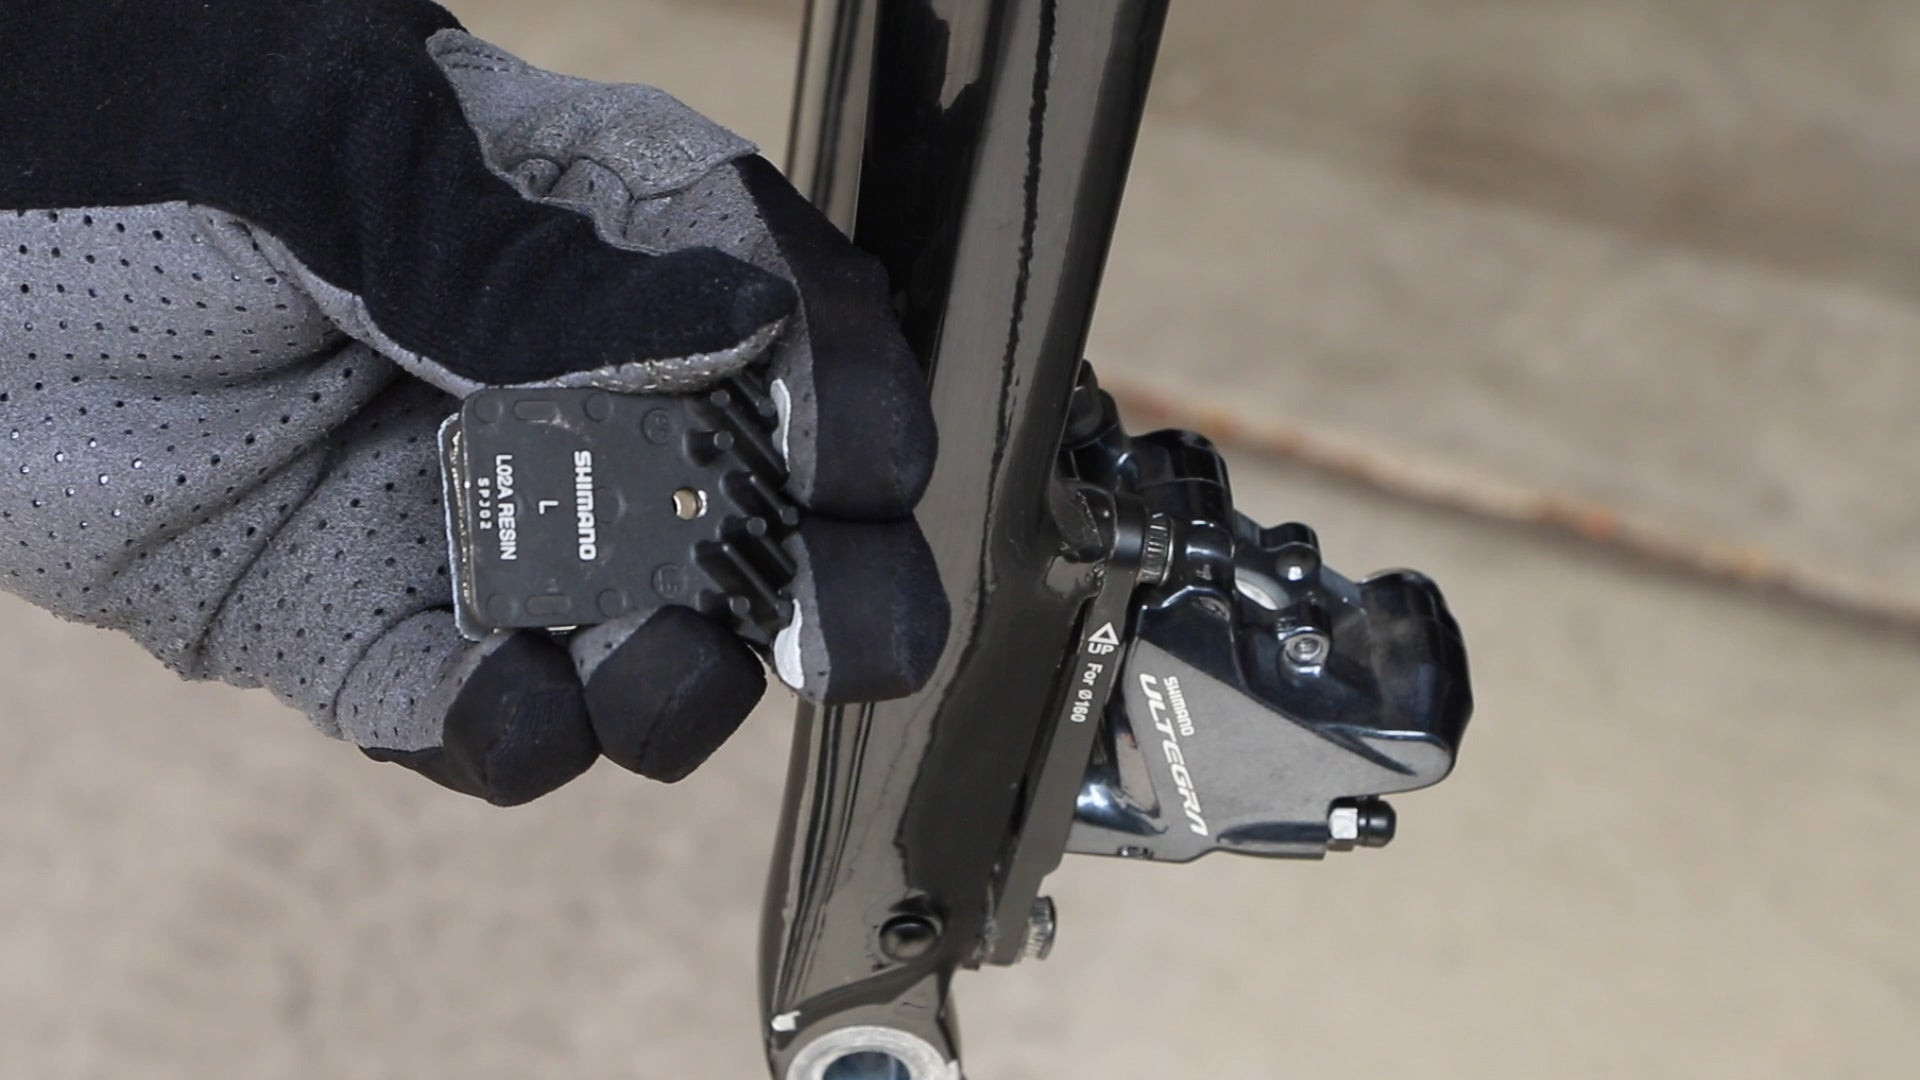
Step 6: New Pad Installation
Tools: Pliers, latex or clean gloves
Handling new brake pads with clean gloves is important, especially for disc brakes, to prevent contamination.
 Installing new disc brake pads into the caliper, wearing gloves.
Disc Brakes:
- Wear Gloves: Put on clean gloves to avoid contaminating the new brake pads with skin oils.
- Unpack New Pads: Take the new brake pads and any accompanying springs or spacers out of their packaging.
- Install Pads and Spring: Slide the new pads and spring (if applicable) into the caliper in the correct orientation. They should seat firmly, although you might not hear a distinct click.
- Reinstall Retention Mechanism: Replace the horizontal retention screw or bolt and, if used, the fixing pin or circlip. Tighten the screw or bolt to the manufacturer’s recommended torque, if known, or just snug enough to secure the pads.
Choosing the Right Disc Brake Pads:
Disc brake pads come in two primary materials:
- Resin/Organic Pads: Often the factory-installed option, made from a mix of materials like rubber, Kevlar, and carbon fibers. They are generally quieter, offer better modulation (finer control), but tend to wear faster, especially in wet conditions, and can experience power fade during prolonged braking.
- Metallic/Sintered Pads: Made from metallic compounds, these pads offer better sustained braking power, especially in wet or muddy conditions, and are more durable. However, they can be noisier, may lack the initial bite of resin pads, and can be harder on rotors over time.
If you were satisfied with your previous brake performance, stick with the same pad material. If you experience brake fade on long descents or ride frequently in wet conditions, consider switching to metallic pads.
 Installing new rim brake pads into the brake shoe, noting the direction indicator.
Rim Brakes:
- Directional Pads: Check the top of the new rim brake pads for a direction indicator (they are often specific to the left or right side).
- Install Pads: Slide the new pad into the brake shoe. You may need to apply a bit more force as it seats fully within the shoe.
- Tighten Set Screw: Reinstall and tighten the set screw to secure the pad in place.
Step 7: Wheel Reinstallation and Rotor Bedding-In
Tools: Tire lever or flat-blade screwdriver (optional for disc brakes)
The final steps involve putting the wheel back on and ensuring your new brake pads are properly bedded-in for optimal performance.
Disc Brakes:
- Wheel Reinstallation: Reinstall the wheel in the dropouts and secure it with the thru-axle or quick-release skewer.
- Piston Adjustment (If Needed): Sometimes, even after resetting the pistons, the new pads can be tight against the rotor. Try squeezing the brake lever a few times to see if the pistons retract slightly. Spin the wheel to check for rubbing.
- Further Piston Reset (If Rubbing): If the pads are still rubbing and there’s minimal lever throw, remove the wheel again. Insert a tire lever or flat-blade screwdriver between the pads within the caliper and gently push each pad back further into the caliper to reset the pistons more completely.
- Bedding-In New Pads: Bedding-in new brake pads is crucial for optimal braking performance, noise reduction, and preventing vibration. On a safe, flat surface:
- Pedal to a moderate speed (around 10 mph).
- Apply one brake lever gradually, increasing pressure, but do not come to a complete stop.
- Repeat this 5-10 times for each brake (front and rear).
- Increase speed to 15-20 mph and repeat the process another 5-10 times per brake.
- You should notice the brake power increasing with each repetition as pad material transfers to the rotor.
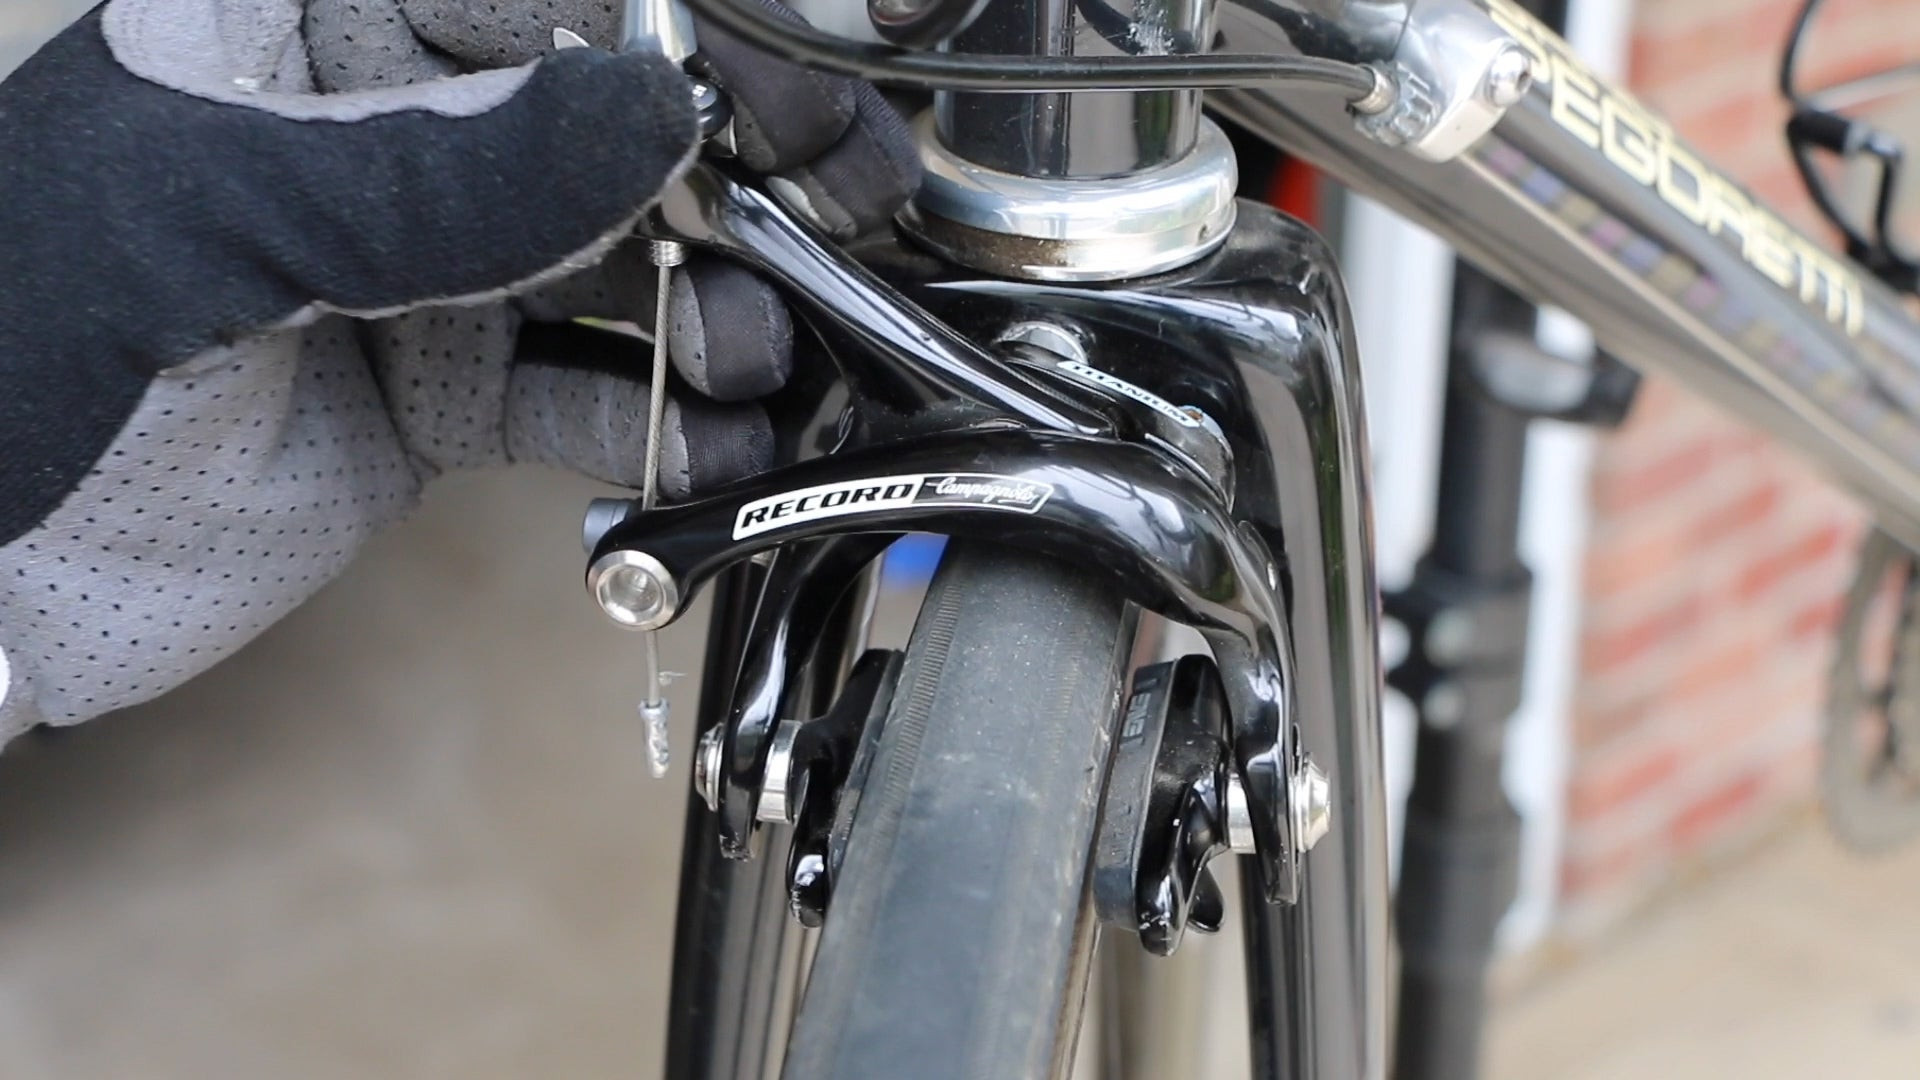 Adjusting rim brake pad alignment on the rim.
Rim Brakes:
- Wheel Reinstallation: Reinstall the wheel and secure the quick-release skewer.
- Caliper Quick Release: If you opened the brake caliper quick release for wheel removal, remember to close it now to bring the pads closer to the rim.
- Brake Pad Alignment: Check the brake pad alignment. The pad should contact the rim brake track fully and evenly, without hitting the tire or extending below the brake track. It’s ideal to have a slight “toe-in,” where the front edge of the pad contacts the rim slightly before the rear. This helps reduce noise and shuddering.
- Barrel Adjuster Adjustment: If the brakes are dragging or feel too tight with the new pads, check the barrel adjusters located above the caliper. Rotate them counter-clockwise in small increments (two full rotations at a time), checking the brake lever throw and wheel spin after each adjustment until the pads no longer drag and the lever throw feels right.
- Cable Tension Adjustment (If Needed): If the barrel adjuster is fully backed out and the brakes are still too tight, you might need to adjust the brake cable tension at the cable fixing bolt on the caliper. This is a more involved adjustment and might be best left to a bike mechanic if you are not comfortable with it.
By following these steps, you’ve successfully replaced the brake pads on your bike! Remember to regularly inspect your brake pads and system to ensure safe and reliable braking for every ride.