Are you thinking about switching up your bike’s handlebars for a new riding experience? At usabikers.net, we understand the desire to customize your ride. This comprehensive guide explores the possibilities, challenges, and alternatives of changing your bike’s handlebars. Whether you’re aiming for enhanced comfort, improved aerodynamics, or a fresh aesthetic, we’ll provide the knowledge you need with handlebar grips, stem length, and ergonomic considerations.
1. Why Change Your Bike Handlebars?
Changing bike handlebars can significantly impact your riding experience. But is it really worth the effort?
Answer: Yes, changing bike handlebars can enhance comfort, improve handling, and customize your bike’s fit. Handlebar swaps are a popular modification, allowing riders to tailor their bikes to their specific needs and preferences. The American Motorcyclist Association (AMA) emphasizes the importance of proper bike fit for rider safety and comfort.
Expanding on this, let’s consider several reasons why bikers opt for handlebar changes:
- Comfort: Stock handlebars may not suit every rider’s body type or riding style. Different handlebar shapes and widths can alleviate wrist, back, and shoulder pain.
- Handling: Handlebars influence steering responsiveness and control. A wider bar can provide more leverage for off-road riding, while a narrower bar can improve aerodynamics on the road.
- Aesthetics: Changing handlebars can dramatically alter your bike’s appearance, allowing you to create a unique and personalized look.
- Performance: Some handlebars are designed for specific riding disciplines, such as road racing, touring, or mountain biking, offering performance advantages in those areas.
According to a study by the Motorcycle Safety Foundation (MSF), proper handlebar adjustment is crucial for maintaining balance and control, especially during low-speed maneuvers.
2. What Are the Different Types of Bike Handlebars?
Choosing the right handlebars is crucial for comfort and performance. But with so many options, how do you decide?
Answer: There are several types of bike handlebars, each designed for specific riding styles and preferences. These include flat bars, riser bars, drop bars, and more specialized options. Understanding the characteristics of each type is essential for making the right choice.
Here’s a breakdown of common handlebar types:
- Flat Bars: Straight and simple, flat bars are common on mountain bikes and hybrid bikes. They offer a direct and responsive feel, ideal for off-road riding and quick handling.
- Riser Bars: Similar to flat bars, but with a slight rise and backsweep. Riser bars provide a more upright riding position, enhancing comfort and control, especially on technical terrain.
- Drop Bars: Characterized by their distinctive “drop” shape, these are commonly found on road bikes. Drop bars offer multiple hand positions, allowing riders to optimize aerodynamics and comfort for long distances.
- Aero Bars: Designed for time trials and triathlons, aero bars promote an aerodynamic riding position by allowing the rider to tuck their torso and minimize wind resistance.
- Cruiser Bars: Wide and swept-back, cruiser bars offer a relaxed and upright riding posture, perfect for leisurely rides and vintage-style bikes.
- BMX Bars: Typically made of steel and reinforced for durability, BMX bars are designed to withstand the rigors of BMX riding, including jumps and tricks.
- Touring Bars: These bars prioritize comfort over long distances, offering multiple hand positions and ergonomic features to reduce fatigue.
- Mustache Bars: These bars, shaped like a handlebar mustache, combine multiple hand positions and a stylish look.
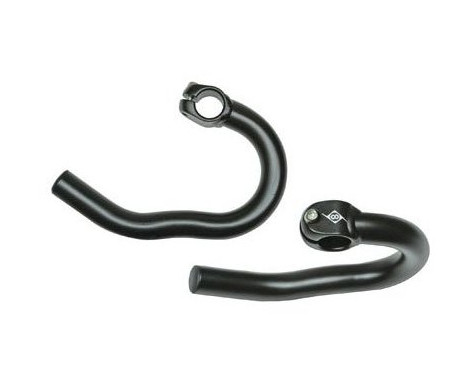
Each type of handlebar offers a unique blend of comfort, control, and performance. Choosing the right one depends on your individual needs and the type of riding you plan to do.
Different types of bike handlebars to consider for your riding needs.
3. What Tools Will I Need to Change Bike Handlebars?
Having the right tools makes the job easier and safer. But what exactly do you need?
Answer: To change bike handlebars, you’ll need basic tools like Allen wrenches, a torque wrench, and possibly a cable cutter and housing cutter. Having the right tools ensures a safe and proper installation.
Here’s a more detailed list of tools you’ll likely need:
- Allen Wrench Set: Handlebar clamps and controls are typically secured with Allen bolts. A set of Allen wrenches in various sizes is essential.
- Torque Wrench: Over-tightening bolts can damage handlebars or stems. A torque wrench helps you tighten bolts to the manufacturer’s recommended specifications.
- Cable Cutter: If you need to disconnect and re-route brake or shifter cables, a cable cutter will provide clean and precise cuts.
- Housing Cutter: Similarly, a housing cutter is used to trim brake and shifter cable housing to the correct length.
- Screwdrivers: Depending on the type of controls and accessories on your handlebars, you may need Phillips or flathead screwdrivers.
- Tape Measure: To ensure proper alignment and positioning of your new handlebars, a tape measure is a useful tool.
- Grease or Anti-Seize Compound: Applying grease or anti-seize compound to bolts and threads can prevent corrosion and make future adjustments easier.
- Work Stand (Optional): A work stand can make the job easier by holding your bike securely in place.
- Gloves: Wearing gloves can protect your hands and provide a better grip on tools.
Remember to consult your bike and handlebar manufacturer’s instructions for specific tool recommendations and torque specifications.
4. How Do I Remove the Old Handlebars?
Removing the old handlebars carefully is the first step. But how do you do it without causing damage?
Answer: To remove old handlebars, start by disconnecting any cables or controls attached to them, then loosen the stem bolts and carefully slide the handlebars out. Take note of the cable routing for easier reinstallation.
Here’s a step-by-step guide:
- Disconnect Cables and Controls:
- If your brake or shifter cables run internally through the handlebars, you may need to disconnect them at the brake calipers or derailleurs.
- Loosen any bolts or screws securing brake levers, shifters, or other accessories to the handlebars.
- Carefully slide these components off the handlebars.
- Loosen Stem Bolts:
- Locate the bolts that clamp the handlebars to the stem.
- Using the appropriate Allen wrench, loosen these bolts. It’s usually best to loosen them gradually in an alternating pattern to avoid uneven pressure.
- Slide Out the Handlebars:
- Once the stem bolts are sufficiently loose, you should be able to slide the handlebars out of the stem.
- If the handlebars are stuck, try gently twisting or rocking them back and forth while pulling.
- Note Cable Routing:
- Before completely removing the handlebars, take a moment to observe how the cables are routed.
- You may want to take a photo or make a sketch to help you remember the correct routing when you reinstall the cables.
Be careful not to scratch or damage your bike’s frame or components during this process.
5. How Do I Install the New Handlebars?
Installing the new handlebars correctly is critical for safety and performance. But what’s the best way to do it?
Answer: To install new handlebars, slide them into the stem, center them, tighten the stem bolts to the manufacturer’s specified torque, and then reattach any controls or cables. Proper alignment and torque are essential.
Here’s a more detailed guide:
- Slide Handlebars into Stem:
- Carefully slide the new handlebars into the stem.
- Make sure the handlebars are inserted to the correct depth, as indicated by markings on the handlebars or stem.
- Center the Handlebars:
- Use a tape measure or your eye to ensure that the handlebars are centered in the stem.
- The center of the handlebars should align with the center of the stem.
- Tighten Stem Bolts:
- Using a torque wrench, tighten the stem bolts to the manufacturer’s specified torque.
- Tighten the bolts gradually in an alternating pattern to ensure even pressure.
- Reattach Controls and Cables:
- Slide brake levers, shifters, and other accessories onto the handlebars in their original positions.
- Tighten any bolts or screws securing these components to the handlebars.
- Reattach brake and shifter cables, following the cable routing you noted earlier.
- Adjust and Test:
- Adjust the position of the brake levers and shifters to your preference.
- Test the brakes and shifters to ensure they are functioning properly.
- Check for any cable interference or binding.
After installation, it’s always a good idea to take your bike for a test ride to ensure that the new handlebars feel comfortable and perform as expected.
6. What is the Correct Handlebar Width for Me?
Handlebar width affects comfort and control. But how do you determine the right size for your body?
Answer: The correct handlebar width depends on your shoulder width and riding style. A general guideline is to choose handlebars that are approximately the same width as your shoulders.
Here’s a more detailed explanation:
- Shoulder Width: The most common method for determining handlebar width is to measure the distance between the bony protrusions on your shoulders (acromion processes). This measurement will give you a good starting point for selecting handlebar width.
- Riding Style: Your riding style can also influence your choice of handlebar width. For example, mountain bikers who ride technical trails may prefer wider handlebars for increased leverage and control. Road cyclists who prioritize aerodynamics may opt for narrower handlebars to reduce wind resistance.
- Personal Preference: Ultimately, the best handlebar width is the one that feels most comfortable and provides the best control for you. It’s always a good idea to try out different widths to see what works best.
Keep in mind that handlebar width is just one factor to consider when choosing handlebars. Other factors, such as handlebar shape, rise, and backsweep, can also affect comfort and performance.
7. How Does Stem Length Affect Handling?
Stem length is closely related to handlebar position and affects steering. How does it impact your ride?
Answer: Stem length affects your reach to the handlebars, influencing your riding posture and weight distribution. A shorter stem results in quicker steering, while a longer stem provides more stability.
Here’s a more detailed explanation:
- Reach: Stem length directly affects your reach to the handlebars. A longer stem increases your reach, stretching you out over the bike. A shorter stem decreases your reach, bringing you closer to the handlebars.
- Riding Posture: Stem length influences your riding posture. A longer stem can create a more aggressive, aerodynamic riding position, while a shorter stem can promote a more upright, comfortable posture.
- Weight Distribution: Stem length affects weight distribution on the bike. A longer stem shifts more weight forward, which can improve traction on the front wheel. A shorter stem shifts more weight rearward, which can enhance stability and control on steep descents.
- Steering: Stem length influences steering responsiveness. A shorter stem results in quicker, more responsive steering, while a longer stem provides slower, more stable steering.
Choosing the right stem length is crucial for achieving a comfortable and efficient riding position. It’s often necessary to experiment with different stem lengths to find the optimal fit.
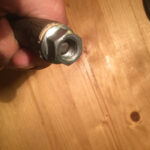
 Stem Length
Adjusting stem length for optimal bike handling.
8. Can I Install Drop Bars on a Mountain Bike?
Drop bars can add versatility to a mountain bike. But is it a feasible modification?
Answer: Yes, you can install drop bars on a mountain bike, but it requires careful consideration of frame geometry, component compatibility, and brake/shifter integration. It’s not always a straightforward swap.
Here’s what you need to consider:
- Frame Geometry: Mountain bike frames are typically longer than road bike frames to accommodate flat bars. Installing drop bars may require a shorter stem to maintain a comfortable reach.
- Component Compatibility: Mountain bike brake and shifter levers are designed for flat bars. You’ll need to replace them with drop bar-compatible levers or use adapters.
- Brake and Shifter Integration: Integrating brake and shifter cables with drop bars can be challenging, especially if your mountain bike frame is not designed for internal cable routing.
- Hand Position: Drop bars offer multiple hand positions, which can be beneficial for long rides. However, they may not be ideal for technical mountain biking, where quick access to the brakes is essential.
- Bike Handling: Installing drop bars on a mountain bike will alter its handling characteristics. The bike may feel less stable on technical terrain and more responsive on paved roads.
If you’re considering this conversion, it’s best to consult with a knowledgeable bike mechanic to ensure proper component selection and installation.
9. What Are Some Alternatives to Changing Handlebars?
Sometimes, a full handlebar swap isn’t necessary. What are some simpler options?
Answer: Alternatives to changing handlebars include adding bar ends, adjusting handlebar position, or using ergonomic grips. These options can provide enhanced comfort and control without the complexity of a full handlebar replacement.
Here are some popular alternatives:
- Bar Ends: Bar ends attach to the ends of your handlebars, providing additional hand positions and leverage. They can be especially useful for climbing hills or riding long distances.
- Handlebar Position Adjustment: Simply adjusting the angle or position of your handlebars can significantly improve comfort and control. Experiment with different positions to find what works best for you.
- Ergonomic Grips: Ergonomic grips are designed to distribute pressure evenly across your hands, reducing fatigue and numbness. They come in a variety of shapes and sizes to suit different hand sizes and riding styles.
- Grip Tape: Adding grip tape to your handlebars can improve grip and comfort, especially in wet or slippery conditions.
- Handlebar Risers: Handlebar risers can raise the height of your handlebars, providing a more upright riding position.
These alternatives offer simpler and more affordable ways to customize your bike’s fit and feel.
10. How Can I Find the Best Handlebars for My Riding Style?
Matching handlebars to your riding style ensures optimal performance. What factors should you consider?
Answer: To find the best handlebars for your riding style, consider the type of riding you do most often, your desired riding position, and your personal preferences. Experimentation and research are key.
Here’s a breakdown of how to choose the right handlebars for different riding styles:
- Road Cycling: Drop bars are the standard choice for road cycling, offering multiple hand positions and aerodynamic benefits. Consider handlebar width, drop, and reach to find the best fit.
- Mountain Biking: Flat bars or riser bars are common on mountain bikes, providing control and responsiveness on technical terrain. Choose handlebar width, rise, and backsweep based on your riding style and the type of trails you ride.
- Touring: Touring handlebars prioritize comfort and versatility. Look for handlebars with multiple hand positions and ergonomic features.
- Commuting: Flat bars or riser bars are often used for commuting, providing a comfortable and upright riding position. Consider adding bar ends or ergonomic grips for added comfort.
- BMX: BMX bars are designed for durability and strength. Choose handlebars based on your height, riding style, and personal preferences.
- Cruising: Cruiser bars offer a relaxed and upright riding posture, perfect for leisurely rides.
Don’t be afraid to experiment with different handlebar types and sizes to find what works best for you.
11. What Safety Precautions Should I Take When Changing Handlebars?
Safety is paramount when modifying your bike. What steps should you take to ensure a safe handlebar swap?
Answer: When changing handlebars, ensure your bike is stable, use a torque wrench to tighten bolts to the correct specifications, and double-check all connections before riding. Safety should always be your top priority.
Here are some essential safety precautions to follow:
- Secure Your Bike: Use a work stand or prop your bike up securely to prevent it from falling over during the handlebar change.
- Read Instructions: Carefully read the instructions provided by the handlebar and stem manufacturers.
- Use a Torque Wrench: Always use a torque wrench to tighten bolts to the manufacturer’s specified torque. Overtightening can damage components, while undertightening can lead to loosening and failure.
- Check Cable Routing: Ensure that brake and shifter cables are routed properly and do not interfere with steering or other components.
- Test Brakes and Shifters: After installation, test the brakes and shifters to ensure they are functioning properly.
- Inspect Regularly: Regularly inspect your handlebars and stem for any signs of damage or wear.
- Wear Safety Gear: Wear gloves and eye protection to protect yourself from injury.
- Consult a Professional: If you’re not comfortable changing handlebars yourself, consult a qualified bike mechanic.
By following these safety precautions, you can minimize the risk of accidents and injuries.
12. How Much Does It Cost to Change Bike Handlebars?
Budget is always a consideration. What’s the typical cost range for a handlebar swap?
Answer: The cost to change bike handlebars varies depending on the type of handlebars, the complexity of the installation, and whether you do it yourself or hire a professional. Expect to spend anywhere from $30 to $200 or more.
Here’s a breakdown of the costs:
- Handlebars: The cost of handlebars can range from $20 for basic flat bars to $150 or more for high-end carbon fiber drop bars.
- Components: If you need to replace brake levers, shifters, or other components, this will add to the cost.
- Tools: If you don’t already have the necessary tools, you’ll need to purchase them. A basic set of Allen wrenches and a torque wrench can cost around $50.
- Professional Installation: If you hire a bike mechanic to install the handlebars, labor costs can range from $30 to $100 or more, depending on the complexity of the job.
Doing the job yourself can save you money on labor costs, but it’s important to have the necessary skills and tools.
13. How Often Should I Replace My Bike Handlebars?
Handlebars have a lifespan. How do you know when it’s time for a replacement?
Answer: You should replace your bike handlebars if they are damaged, bent, corroded, or showing signs of fatigue. Regular inspection is crucial to ensure your safety.
Here are some signs that it’s time to replace your handlebars:
- Damage: Cracks, dents, or deep scratches can compromise the integrity of the handlebars.
- Bending: If your handlebars are bent, they are more likely to fail under stress.
- Corrosion: Rust or corrosion can weaken the handlebars, making them more susceptible to breakage.
- Fatigue: Over time, handlebars can develop fatigue cracks, especially in high-stress areas.
- Age: If your handlebars are several years old, it’s a good idea to replace them, even if they don’t show any visible signs of damage.
The lifespan of handlebars depends on the material they are made of, the type of riding you do, and how well you maintain them. Carbon fiber handlebars, for example, may need to be replaced more frequently than aluminum handlebars.
14. Can Changing Handlebars Affect My Bike’s Warranty?
Modifications can sometimes void warranties. Will changing handlebars impact yours?
Answer: Yes, changing handlebars can affect your bike’s warranty, depending on the manufacturer’s policies and whether the modification caused any damage. It’s best to check with the manufacturer beforehand.
Here’s what you need to know:
- Manufacturer’s Policies: Some bike manufacturers have specific policies regarding modifications and warranties. Check your warranty documentation or contact the manufacturer for clarification.
- Cause of Damage: If changing handlebars causes damage to your bike, the warranty may be voided. For example, if you overtighten stem bolts and damage the stem, the manufacturer may not cover the repair.
- Aftermarket Parts: Using aftermarket handlebars may void the warranty on related components, such as the stem or headset.
- Professional Installation: Having a professional bike mechanic install the handlebars may help protect your warranty.
To avoid warranty issues, it’s always best to consult with the bike manufacturer or a qualified bike mechanic before making any modifications.
15. What Are Some Popular Handlebar Brands for Bikers?
Choosing a reputable brand ensures quality and reliability. Which brands are trusted by bikers?
Answer: Some popular handlebar brands for bikers include Renthal, ProTaper, ODI, and Easton. These brands are known for their quality, durability, and performance.
Here are some other notable handlebar brands:
- Thomson: Known for their high-end aluminum and carbon fiber handlebars.
- Race Face: A popular choice for mountain bikers, offering a wide range of handlebar styles and materials.
- Specialized: A well-known bike manufacturer that also produces high-quality handlebars.
- Enve: Specializes in carbon fiber handlebars and other components.
- SRAM: Offers a range of handlebars under its various brands, including Zipp and Truvativ.
When choosing a handlebar brand, consider your budget, riding style, and personal preferences. Read reviews and compare different models to find the best option for you.
16. Are There Any Handlebars Designed Specifically for Comfort?
Comfort is a priority for many riders. Are there handlebars designed with ergonomics in mind?
Answer: Yes, there are handlebars designed specifically for comfort, often featuring ergonomic shapes, vibration damping, and multiple hand positions. These handlebars can significantly reduce fatigue and improve the riding experience.
Here are some examples of comfort-oriented handlebars:
- Ergon Grips: Ergon grips are designed to distribute pressure evenly across your hands, reducing numbness and fatigue.
- SQlab Handlebars: SQlab handlebars are designed with a focus on ergonomics and biomechanics.
- Jones H-Bar: The Jones H-Bar is a unique handlebar with multiple hand positions and a comfortable, natural feel.
- Butterfly Handlebars: Also known as trekking bars, butterfly handlebars offer a wide range of hand positions and are popular for touring.
When choosing comfort handlebars, consider your hand size, riding style, and any specific issues you’re trying to address, such as wrist pain or numbness.
17. How Do I Maintain My Bike Handlebars to Ensure Longevity?
Proper maintenance extends the life of your handlebars. What steps should you take?
Answer: To maintain your bike handlebars, regularly clean them, inspect them for damage, and ensure that all bolts are properly tightened. Proper care can prevent premature wear and failure.
Here are some specific maintenance tips:
- Clean Regularly: Clean your handlebars regularly with soap and water to remove dirt, sweat, and grime.
- Inspect for Damage: Regularly inspect your handlebars for cracks, dents, or corrosion.
- Tighten Bolts: Check the torque of the stem bolts and other handlebar-mounted components regularly.
- Apply Grease or Anti-Seize: Apply grease or anti-seize compound to bolts and threads to prevent corrosion.
- Replace Grip Tape: Replace worn or damaged grip tape to maintain a secure grip.
- Store Properly: Store your bike in a dry place to prevent corrosion.
By following these maintenance tips, you can extend the life of your bike handlebars and ensure your safety.
18. Can I Customize My Handlebars with Different Grips and Accessories?
Personalization is key for many bikers. How can you accessorize your handlebars?
Answer: Yes, you can customize your handlebars with different grips, bar ends, lights, computers, and other accessories to enhance comfort, functionality, and style. The possibilities are endless.
Here are some popular handlebar accessories:
- Grips: Choose from a wide variety of grips, including ergonomic grips, foam grips, and gel grips.
- Bar Ends: Add bar ends for additional hand positions and leverage.
- Lights: Mount lights to your handlebars for increased visibility and safety.
- Computers: Install a bike computer to track your speed, distance, and other data.
- Bells: Add a bell to alert pedestrians and other cyclists.
- Mirrors: Mount a mirror to your handlebars for increased awareness of your surroundings.
- Phone Mounts: Use a phone mount to keep your phone within easy reach.
- Bags and Baskets: Attach bags or baskets to your handlebars for carrying groceries or other items.
When choosing handlebar accessories, consider your riding style, personal preferences, and budget.
19. What Are the Benefits of Using Carbon Fiber Handlebars?
Carbon fiber is a popular material in the biking world. What advantages do carbon fiber handlebars offer?
Answer: Carbon fiber handlebars offer several benefits, including reduced weight, increased vibration damping, and enhanced stiffness. However, they are also more expensive and potentially more susceptible to damage than aluminum handlebars.
Here’s a more detailed look at the benefits of carbon fiber handlebars:
- Weight: Carbon fiber is significantly lighter than aluminum, which can improve your bike’s overall weight and performance.
- Vibration Damping: Carbon fiber has excellent vibration damping properties, which can reduce fatigue and improve comfort on long rides.
- Stiffness: Carbon fiber can be engineered to be very stiff, which can improve your bike’s handling and responsiveness.
- Strength: Carbon fiber is very strong for its weight, but it can be more susceptible to damage from impacts than aluminum.
When considering carbon fiber handlebars, weigh the benefits against the cost and potential risks.
20. How Do I Choose Handlebars for a Vintage or Classic Bike?
Vintage bikes have unique needs. What handlebars complement a classic ride?
Answer: When choosing handlebars for a vintage or classic bike, consider the bike’s original style, your desired riding position, and the availability of compatible components. Classic-style handlebars often enhance the bike’s aesthetic.
Here are some popular handlebar options for vintage bikes:
- North Road Bars: North Road bars are a classic handlebar style with a comfortable, upright riding position.
- Porteur Bars: Porteur bars are wide and flat, providing a stable platform for carrying cargo.
- Drop Bars: Drop bars were common on many vintage road bikes, offering multiple hand positions and aerodynamic benefits.
- Mustache Bars: Mustache bars combine multiple hand positions with a stylish look.
When choosing handlebars for a vintage bike, be sure to consider the stem clamp diameter and brake lever compatibility.
21. How Does Handlebar Material Affect Performance and Comfort?
The material matters. How do different handlebar materials influence your ride?
Answer: Handlebar material affects weight, stiffness, vibration damping, and durability. Aluminum is a common and affordable option, while carbon fiber offers weight savings and enhanced vibration damping, and steel provides durability for BMX riding.
Here’s a comparison of common handlebar materials:
| Material | Weight | Stiffness | Vibration Damping | Durability | Cost |
|---|---|---|---|---|---|
| Aluminum | Medium | Medium | Medium | High | Low |
| Carbon Fiber | Low | High | High | Medium | High |
| Steel | High | Low | Low | Very High | Low |
Choosing the right handlebar material depends on your priorities and budget.
22. What Are the Legal Requirements for Handlebars in the USA?
Regulations vary. What are the legal guidelines for handlebars in the United States?
Answer: Legal requirements for handlebars in the USA vary by state and local jurisdiction. Generally, handlebars must be securely mounted, not obstruct the rider’s view, and comply with height restrictions.
Here are some general guidelines:
- Height Restrictions: Some states have laws that restrict the height of handlebars. These laws are intended to prevent riders from raising their hands too high, which can impair control.
- Secure Mounting: Handlebars must be securely mounted and properly tightened to prevent them from coming loose while riding.
- Obstruction of View: Handlebars and any accessories mounted on them must not obstruct the rider’s view of the road.
- Federal Motor Vehicle Safety Standards (FMVSS): Handlebars must comply with FMVSS regulations, which set minimum standards for safety-related components.
Check with your local Department of Motor Vehicles (DMV) or other relevant authorities for specific regulations in your area.
23. How Can I Prevent Hand Numbness While Riding?
Hand numbness is a common issue for bikers. How can you minimize this discomfort?
Answer: To prevent hand numbness while riding, use ergonomic grips, wear padded gloves, adjust your handlebar position, and take frequent breaks to stretch your hands. These measures can improve circulation and reduce pressure on nerves.
Here are some additional tips:
- Ergonomic Grips: Ergonomic grips are designed to distribute pressure evenly across your hands, reducing numbness and fatigue.
- Padded Gloves: Padded gloves can cushion your hands and absorb vibrations.
- Handlebar Position: Adjust your handlebar position to ensure that your wrists are in a neutral position.
- Frequent Breaks: Take frequent breaks to stretch your hands and wrists.
- Vary Hand Positions: Vary your hand positions while riding to prevent pressure from building up in one area.
- Proper Bike Fit: Ensure that your bike is properly fitted to your body.
If hand numbness persists, consult a doctor or physical therapist.
24. What Role Does Handlebar Tape Play in Comfort and Performance?
Handlebar tape is more than just decoration. How does it contribute to your ride?
Answer: Handlebar tape provides cushioning, grip, and insulation, enhancing comfort and control, especially on long rides. Different materials and thicknesses offer varying levels of comfort and durability.
Here are some benefits of handlebar tape:
- Cushioning: Handlebar tape provides cushioning, reducing vibrations and fatigue.
- Grip: Handlebar tape provides a secure grip, even in wet or sweaty conditions.
- Insulation: Handlebar tape provides insulation, keeping your hands warm in cold weather.
- Aesthetics: Handlebar tape can add a touch of style to your bike.
When choosing handlebar tape, consider the material, thickness, texture, and color.
25. How Do I Adjust Handlebar Angle for Optimal Comfort?
Fine-tuning the handlebar angle can make a big difference. How do you achieve the perfect position?
Answer: To adjust handlebar angle, loosen the stem bolts, rotate the handlebars to the desired position, and then retighten the bolts to the manufacturer’s specified torque. Experiment to find the most comfortable angle for your wrists and shoulders.
Here are some tips for adjusting handlebar angle:
- Start with Small Adjustments: Make small adjustments and test the position before making further changes.
- Consider Wrist Angle: Aim for a neutral wrist angle to prevent strain and numbness.
- Check Brake and Shifter Position: Ensure that your brake levers and shifters are easily accessible and comfortable to use.
- Use a Torque Wrench: Always use a torque wrench to tighten the stem bolts to the correct specifications.
Remember to prioritize safety and comfort when adjusting your handlebar angle.
Changing your bike’s handlebars can be a rewarding upgrade, allowing you to tailor your ride to your specific needs and preferences. By understanding the different types of handlebars, the tools required for installation, and the safety precautions to take, you can confidently tackle this project and enjoy a more comfortable and enjoyable riding experience. Visit usabikers.net for more in-depth guides, reviews, and community discussions on all things biking.
Ready to transform your ride? Head over to usabikers.net now to explore our extensive collection of articles, join our vibrant forum, and discover the perfect handlebars for your next adventure. Connect with fellow bikers, share your experiences, and unlock a world of knowledge and inspiration!
Address: 801 Sturgis Main St, Sturgis, SD 57785, United States.
Phone: +1 (605) 347-2000
Website: usabikers.net
FAQ: Changing Bike Handlebars
1. Can I change my bike handlebars myself?
Yes, with the right tools and knowledge, you can change your bike handlebars yourself. However, if you’re not comfortable, seek professional help.
2. What’s the best handlebar width for road cycling?
The best handlebar width for road cycling is generally the same as your shoulder width.
3. How does stem length affect bike handling?
Shorter stems make steering quicker, while longer stems provide more stability.
4. Can I put drop bars on a mountain bike?
Yes, but it requires careful consideration of compatibility and geometry.
5. What tools do I need to change handlebars?
You’ll need Allen wrenches, a torque wrench, and possibly cable cutters.
6. How do I prevent hand numbness while riding?
Use ergonomic grips, padded gloves, and adjust your handlebar position.
7. Are carbon fiber handlebars worth the cost?
They offer weight savings and vibration damping, but are more expensive.
8. How often should I replace my bike handlebars?
Replace them if damaged, bent, or corroded.
9. Will changing handlebars void my warranty?
It depends on the manufacturer’s policies; check beforehand.
10. What are the legal requirements for handlebars in the USA?
Requirements vary by state, but generally, they must be secure and not obstruct the view.