Can You Patch A Tubeless Mountain Bike Tire? Yes, you absolutely can patch a tubeless mountain bike tire, both on the trail and at home, using a tubeless plug kit, tire patches, or even a spare tube as a last resort, and usabikers.net is here to guide you through every step. With the right tools and techniques, you can quickly seal punctures and get back to enjoying your ride. Regular maintenance, like refreshing your sealant every six months, can significantly reduce the likelihood of punctures. Let’s dive into the world of tire maintenance, exploring sealant options, plug kits, and essential biking gear for a smooth ride.
1. What Tools Do I Need to Fix a Tubeless Tire on the Trail?
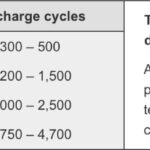
To fix a tubeless tire on the trail, you’ll need a mini-pump, a tubeless tire plug set, and a spare tube for emergencies. These tools are essential for addressing common punctures and ensuring you can continue your ride without major delays. Having the right gear can make the difference between a minor setback and a long walk home.
-
Mini-Pump or CO2 Inflator: A reliable mini-pump or CO2 cartridge and inflator are crucial for re-inflating your tire after fixing a puncture.
-
Tubeless Tire Plug Set: A tubeless tire plug set allows you to quickly seal small to medium-sized punctures with specialized plugs.
-
Tire Patch: A tire patch can be used for more significant damage or as a temporary fix before applying a more permanent solution at home.
-
Spare Tube: In worst-case scenarios, such as large sidewall cuts or significant rim damage, a spare tube will allow you to continue riding.
 Tubeless repair kit with tire plugs and insertion tool
These tools can easily fit into a hip pack or be mounted on your bike, ensuring they are always accessible. Remember to familiarize yourself with how to use each tool before heading out on the trail.
2. What Are Common Causes of Tubeless Punctures and How Can I Fix Them?
Common causes of tubeless punctures include small punctures in the tire tread or sidewall, burping (air loss due to tire roll), cuts in the sidewall, spoke punctures through the rim tape, rim damage, and valve defects. Each issue requires a specific approach for effective repair. Knowing how to address these problems will keep you rolling smoothly on any trail.
2.1. Puncture in Tire Tread or Sidewall
A puncture in the tire tread or sidewall, often caused by thorns, sharp rocks, or nails, is a common issue that can usually be fixed on the trail in 1-5 minutes.
- Fixable on the Trail? Yes
- Time Needed for Repair: 1-5 minutes
In many cases, the tubeless sealant inside your tire will immediately seal small punctures. However, if the hole is too large for the sealant to handle, you’ll need a tubeless plug kit.
-
Locate the Puncture: Find the hole and wipe away any surrounding dirt.
-
Use a Plug Kit: Thread the tire plug through the plug installer.
-
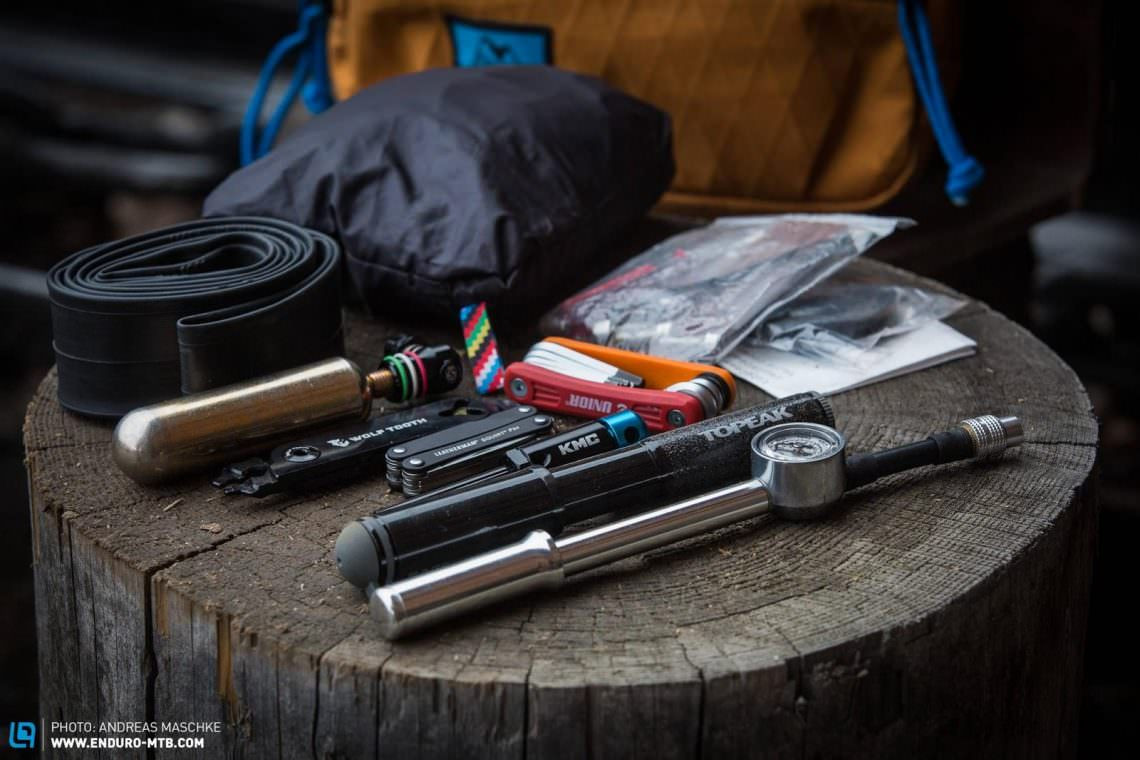
Insert the Plug: Push the plug into the hole. For smaller punctures, insert the plug fully. For larger punctures, insert it just over halfway, leaving a “V” shape.
-
Remove the Installer: Carefully pull the installer out, leaving the plug in place.
-
Re-Inflate: Spin the wheel to let the sealant coat the tire and re-inflate as needed.
-
Trim Excess Plug: Trim any exposed plug to prevent it from being ripped out during riding.
 Close-up of a tubeless tire being plugged on the trail
Installed correctly, a tubeless plug can last the lifetime of the tire.
2.2. Burping
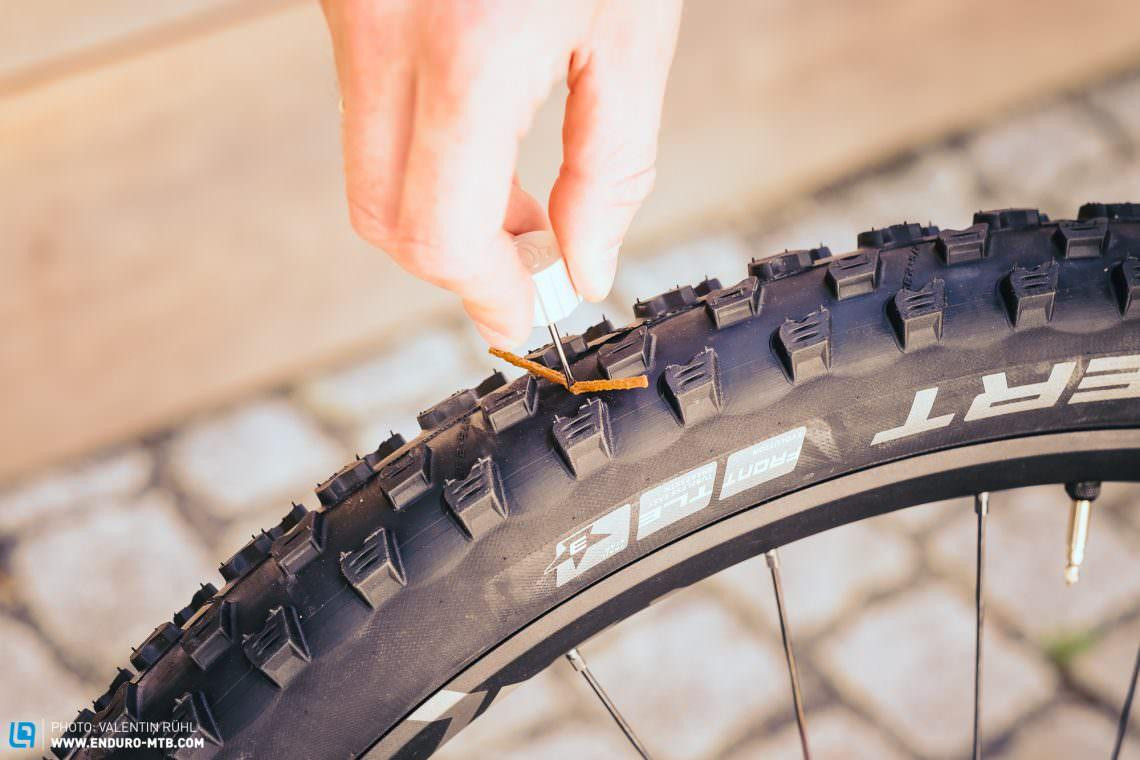
Burping occurs when the tire bead pulls away from the rim, causing a sudden loss of air, usually when cornering aggressively or running low tire pressure.
- Fixable on the Trail? Yes
- Time Needed for Repair: 1-5 minutes
Burping can often be attributed to low tire pressure. To prevent burping:
-
Re-Inflate: Simply re-inflate the tire.
-
Check Tire Pressure: Ensure your tire pressure is adequate for the terrain and your riding style. Refer to a tire pressure guide to find the perfect pressure.
-
Top Up Sealant: Add more sealant before your next ride, as some is typically lost during the burp.
 Mountain biker leaning hard into a berm, potentially causing a tire burp
If burping occurs frequently even with proper tire pressure, you may need a tire that better matches your rim width.
2.3. Cut in the Sidewall
A cut in the sidewall, typically caused by sharp rocks, is usually too large for plugs and sealant to fix on the trail.
- Fixable on the Trail? No, install a tube and fix at home
To handle a sidewall cut:
- Install a Tube: Insert a spare tube into the tire.
- Protect the Tube: If the cut is large, use tape or plastic between the tire and the tube to prevent further damage.
At home, you can attempt to repair the tire by:
- Cleaning the Tire: Thoroughly clean the tire inside and out.
- Roughening the Surface: Use sandpaper to roughen the inside of the tire.
- Applying a Patch: Apply a tire patch with vulcanizing glue.
If the damage is too severe, the tire may need to be replaced.
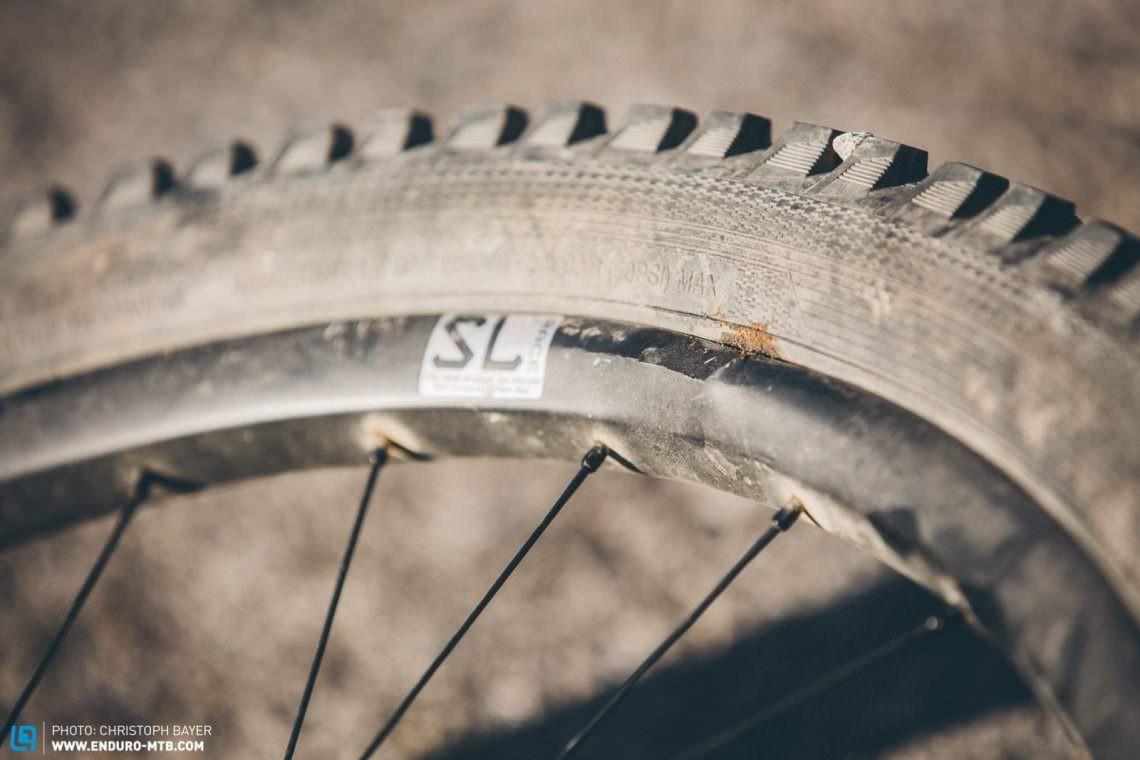
2.4. Spoke Runs Through the Tape
If a spoke punctures the tubeless rim tape, air will leak through the spoke holes, requiring immediate attention.
- Fixable on the Trail? No, install a tube and fix at home
- Time Needed for Repair: 20+ minutes
To address this issue on the trail:
- Install a Tube: Insert a spare tube to prevent further air loss.
At home, follow these steps:
-
Remove Tire and Tape: Take off the tire and the rim tape.
-
Clean the Rim: Clean the rim thoroughly.
-
Replace Spoke (If Needed): If a spoke is broken, replace it.
-
Check Spoke Tension: Ensure even spoke tension and verify the rim is true.
-
Re-Tape the Rim: Apply new tubeless rim tape.
-
Set Up Tubeless: Reinstall the tire and set it up tubeless again.
 Close-up of rim tape being punctured by a spoke
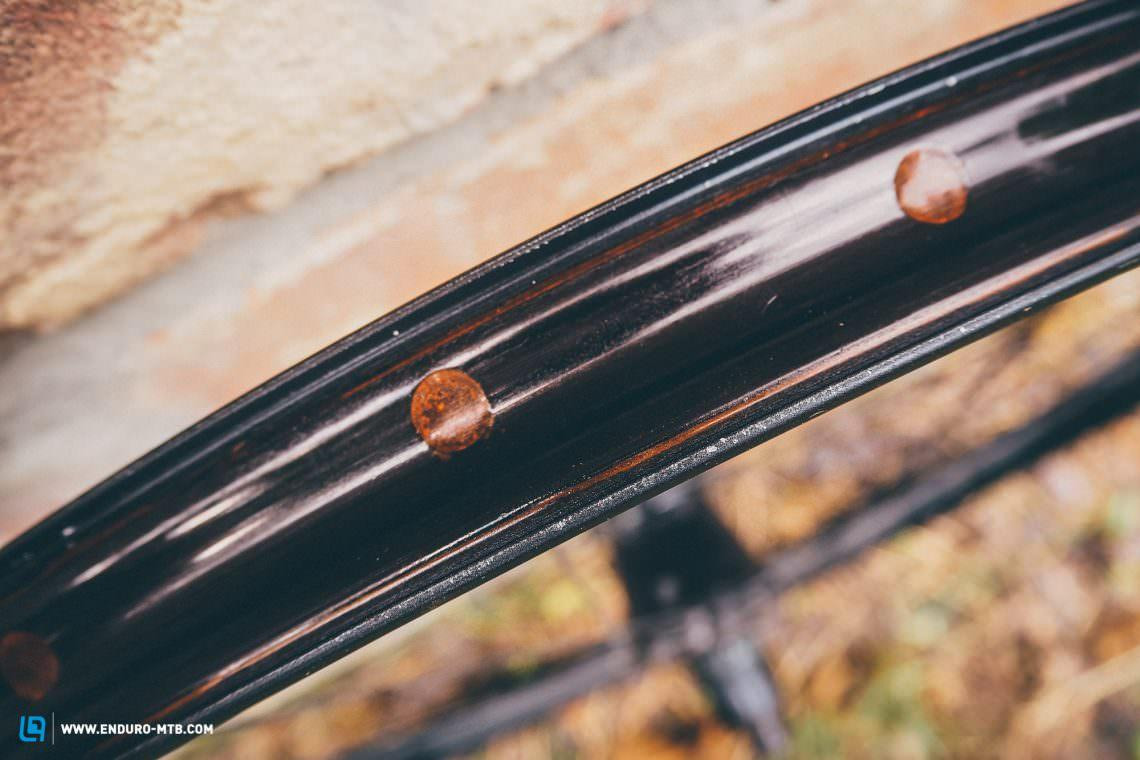
2.5. Serious Rim Damage
Serious rim damage, such as dents causing air leaks, necessitates immediate action to ensure rider safety.
- Fixable on the Trail? No
If your rim is damaged:
-
Install a Tube: Insert a tube and carefully ride home.
-
Inspect the Rim: Thoroughly inspect the rim before riding; if the damage is too severe, walk back.
 Damaged mountain bike rim showing a significant dent
2.6. Defect Valve
A leaky valve can often be fixed on the trail by addressing loose lock-nuts or bent valve stems.
- Fixable on the Trail? Likely
- Time Needed for Repair: 5-10 minutes
To fix a defect valve:
-
Tighten Lock-Nut: Try tightening the lock-nut that holds the valve in place.
-
Replace Valve Core: If the valve core is broken, remove it and replace it with a spare from your tube.
-
Re-Inflate: Pump the tire back up.
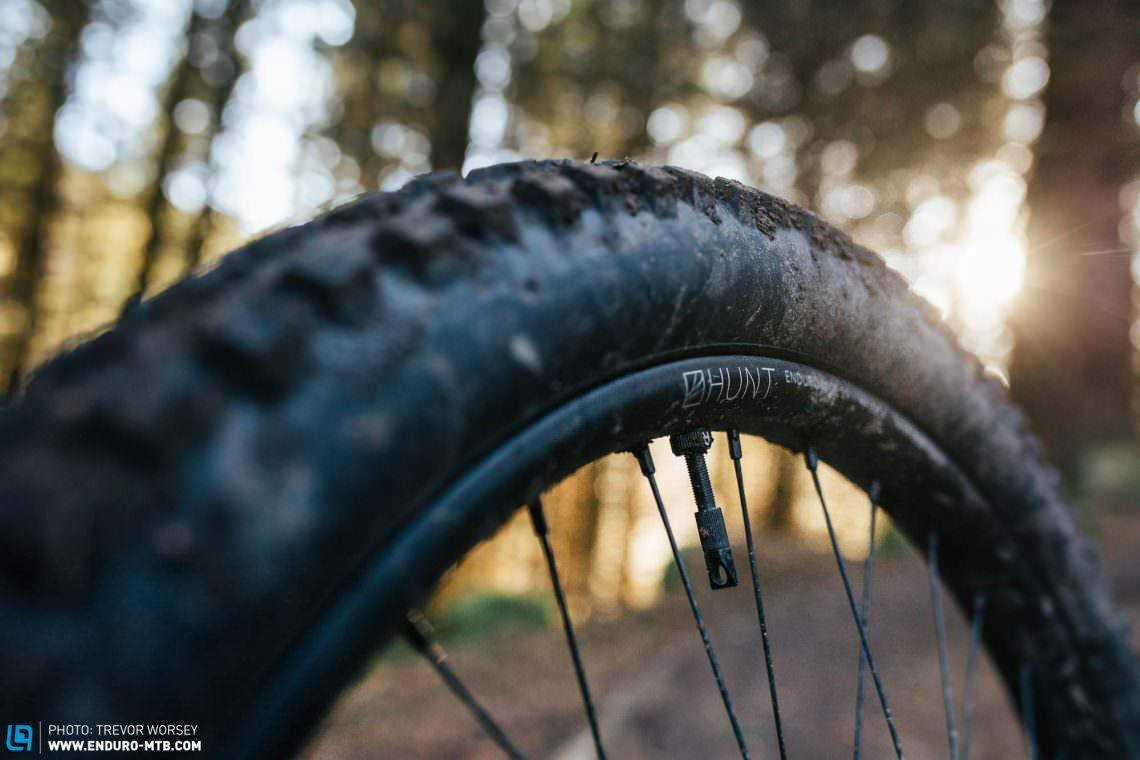 Close-up of a mountain bike tire valve showing a loose lock-nut
3. What Are the Benefits of Tubeless Tires for Mountain Bikes?
Tubeless tires offer several benefits for mountain bikes, including reduced punctures, lower rolling resistance, and the ability to run lower tire pressures for better traction. These advantages can significantly enhance your riding experience. With usabikers.net, discover how to maximize these benefits for optimal performance.
3.1. Reduced Punctures
One of the primary benefits of tubeless tires is their ability to reduce punctures. Because there is no tube to pinch between the tire and rim, the risk of pinch flats is eliminated. Additionally, the sealant inside tubeless tires can automatically seal small punctures, preventing air loss.
3.2. Lower Rolling Resistance
Tubeless tires often have lower rolling resistance compared to traditional tube-type tires. This is because there is no friction between the tire and the tube, allowing for a smoother and faster ride.
3.3. Ability to Run Lower Tire Pressures
With tubeless tires, you can run lower tire pressures without the risk of pinch flats. This results in better traction and improved control, especially on technical terrain.
3.4. Enhanced Comfort
Lower tire pressures also contribute to a more comfortable ride by absorbing small bumps and vibrations, reducing rider fatigue.
3.5. Improved Grip
The ability to run lower tire pressures enhances the tire’s contact patch with the ground, providing better grip and control on various surfaces.
4. How Do I Choose the Right Tubeless Tire for My Mountain Bike?
Choosing the right tubeless tire for your mountain bike depends on several factors, including your riding style, the type of terrain you typically ride on, and your budget. Consider tire tread, sidewall protection, and tire width to optimize your ride. With usabikers.net, find expert recommendations tailored to your specific needs.
4.1. Tire Tread
The tire tread pattern significantly affects traction and rolling resistance. Aggressive tread patterns provide excellent grip on loose or muddy terrain, while smoother tread patterns offer lower rolling resistance on hardpack surfaces.
4.2. Sidewall Protection
Sidewall protection is crucial for preventing cuts and abrasions, especially on rocky trails. Look for tires with reinforced sidewalls for added durability.
4.3. Tire Width
Tire width affects traction, rolling resistance, and comfort. Wider tires provide better traction and comfort but may have higher rolling resistance. Narrower tires offer lower rolling resistance but may sacrifice some traction and comfort.
4.4. Tire Compound
The tire compound affects grip and durability. Softer compounds offer better grip but may wear out faster, while harder compounds are more durable but may have less grip.
4.5. Weight
Tire weight affects acceleration and overall bike handling. Lighter tires accelerate faster and make the bike feel more nimble, but they may be less durable.
5. How Often Should I Replace My Tubeless Tire Sealant?
You should replace your tubeless tire sealant every 3-6 months, or more frequently if you notice it drying out or losing its effectiveness. Regular sealant replacement ensures optimal puncture protection. For more tips and maintenance schedules, visit usabikers.net.
5.1. Factors Affecting Sealant Longevity
Several factors can affect how long your sealant lasts, including:
- Climate: Hot, dry climates can cause sealant to dry out faster.
- Riding Frequency: Frequent riding can deplete sealant more quickly.
- Sealant Type: Different sealants have different lifespans.
5.2. Signs It’s Time to Replace Sealant
Look for these signs to determine if it’s time to replace your sealant:
- Dryness: If the sealant appears dry or clumpy.
- Loss of Effectiveness: If you experience more frequent punctures.
- Visible Residue: If you see a lot of sealant residue on the tire.
5.3. How to Replace Sealant
- Remove Old Sealant: Deflate the tire and remove the old sealant.
- Clean the Tire: Clean the inside of the tire.
- Add New Sealant: Pour in the recommended amount of new sealant.
- Re-Inflate: Re-inflate the tire and spin the wheel to distribute the sealant.
6. What Tire Pressure Should I Use for My Tubeless Mountain Bike Tires?
The ideal tire pressure for your tubeless mountain bike tires depends on factors like your weight, riding style, tire width, and the terrain you’re riding on. Experiment to find the pressure that provides the best balance of traction, comfort, and rolling resistance. Usabikers.net offers resources to help you dial in the perfect pressure for any condition.
6.1. Factors Affecting Tire Pressure
- Rider Weight: Heavier riders need higher tire pressures.
- Tire Width: Wider tires can be run at lower pressures.
- Terrain: Rougher terrain requires higher pressures to avoid pinch flats.
- Riding Style: Aggressive riders may prefer higher pressures for better support.
6.2. Starting Points
As a starting point, consider these general guidelines:
- Cross-Country: 25-35 PSI
- Trail: 22-32 PSI
- Enduro/Downhill: 20-30 PSI
6.3. Fine-Tuning Tire Pressure
- Start with a Baseline: Begin with the recommended pressure for your setup.
- Adjust for Traction: Lower the pressure slightly for better traction.
- Adjust for Rolling Resistance: Increase the pressure slightly for lower rolling resistance.
- Avoid Bottoming Out: Ensure the tire doesn’t bottom out on hard impacts.
7. Can I Use Regular Tire Patches on Tubeless Tires?
While you can use regular tire patches on tubeless tires as a temporary fix, it is generally recommended to use tubeless-specific patches for a more reliable and durable repair. Tubeless patches are designed to bond effectively with the tire’s inner surface, ensuring a long-lasting seal. Usabikers.net provides detailed information on the best patching methods for tubeless tires.
7.1. Why Tubeless-Specific Patches Are Better
- Stronger Bond: Tubeless patches use specialized adhesives that create a stronger bond with the tire.
- Flexible Material: Tubeless patches are made from flexible materials that conform to the tire’s shape.
- Longer Lasting: Tubeless patches are designed to withstand the stresses of tubeless systems.
7.2. How to Apply a Tubeless Patch
- Clean the Area: Thoroughly clean the inside of the tire where the patch will be applied.
- Roughen the Surface: Use sandpaper to roughen the surface for better adhesion.
- Apply Adhesive: Apply a thin layer of vulcanizing glue to the area.
- Apply the Patch: Press the patch firmly onto the glued area.
- Allow to Dry: Allow the glue to dry completely before re-inflating the tire.
8. What Are the Best Practices for Maintaining Tubeless Mountain Bike Tires?
Best practices for maintaining tubeless mountain bike tires include regularly checking tire pressure, inspecting the tires for cuts and abrasions, replacing sealant as needed, and storing your bike properly. Consistent maintenance will prolong the life of your tires and ensure optimal performance. Visit usabikers.net for comprehensive maintenance guides.
8.1. Regular Inspections
- Check Tire Pressure: Ensure tires are properly inflated before each ride.
- Inspect for Damage: Look for cuts, abrasions, and embedded objects.
- Check Rim Tape: Ensure rim tape is intact and properly sealed.
8.2. Proper Storage
- Store Indoors: Keep your bike indoors to protect tires from UV damage.
- Avoid Extreme Temperatures: Avoid storing your bike in extreme heat or cold.
- Hang or Inflate Tires: If storing for an extended period, hang the bike or inflate tires to the maximum recommended pressure.
8.3. Sealant Maintenance
- Replace Regularly: Replace sealant every 3-6 months.
- Check Sealant Level: Ensure there is enough sealant in the tires.
- Use Quality Sealant: Choose a reputable sealant brand.
9. How Do I Convert My Mountain Bike Wheels to Tubeless?
Converting your mountain bike wheels to tubeless involves removing the existing tubes and rim strips, installing tubeless rim tape, mounting tubeless-ready tires, adding sealant, and inflating the tires. Proper installation is crucial for a reliable tubeless setup. Usabikers.net offers step-by-step guides and expert tips for a successful conversion.
9.1. Required Materials
- Tubeless-Ready Wheels: Ensure your wheels are tubeless-ready.
- Tubeless-Ready Tires: Choose tubeless-ready tires.
- Tubeless Rim Tape: Use high-quality tubeless rim tape.
- Tubeless Valves: Install tubeless valves.
- Sealant: Purchase tubeless tire sealant.
- Valve Core Removal Tool: A tool for removing the valve core.
- Pump or Compressor: A pump or compressor to inflate the tires.
9.2. Conversion Steps
- Remove Existing Components: Remove the tubes and rim strips from your wheels.
- Clean the Rims: Clean the rims thoroughly.
- Apply Rim Tape: Apply tubeless rim tape, ensuring a tight seal.
- Install Valves: Install tubeless valves.
- Mount Tires: Mount the tubeless-ready tires.
- Add Sealant: Add sealant through the valve core.
- Inflate Tires: Inflate the tires using a pump or compressor.
- Shake and Spin: Shake and spin the wheels to distribute the sealant.
- Check for Leaks: Check for any leaks and re-inflate as needed.
10. What Are Some Common Mistakes to Avoid When Using Tubeless Tires?
Common mistakes to avoid when using tubeless tires include using non-tubeless-ready tires, improper rim tape installation, using the wrong sealant, over-inflating or under-inflating tires, and neglecting regular maintenance. Avoiding these mistakes will ensure a safe and enjoyable riding experience. Rely on usabikers.net for expert advice and troubleshooting tips.
10.1. Using Non-Tubeless-Ready Tires
- Problem: Non-tubeless-ready tires may not seal properly and can be prone to burping.
- Solution: Always use tubeless-ready tires for a reliable tubeless setup.
10.2. Improper Rim Tape Installation
- Problem: Poorly installed rim tape can cause air leaks and flats.
- Solution: Ensure the rim tape is properly applied, creating a tight seal over the spoke holes.
10.3. Using the Wrong Sealant
- Problem: Using the wrong sealant can result in poor puncture protection and damage to the tires.
- Solution: Use a high-quality sealant specifically designed for tubeless tires.
10.4. Over-Inflating or Under-Inflating Tires
- Problem: Over-inflating tires can reduce traction, while under-inflating tires can lead to pinch flats and rim damage.
- Solution: Use the recommended tire pressure for your weight, riding style, and terrain.
10.5. Neglecting Regular Maintenance
- Problem: Neglecting regular maintenance can lead to tire damage, sealant drying out, and other issues.
- Solution: Regularly check tire pressure, inspect for damage, and replace sealant as needed.
Navigating the world of tubeless mountain bike tires doesn’t have to be daunting. With the right knowledge and tools, you can confidently tackle any trail. Remember, regular maintenance and informed decisions are key to maximizing the benefits of tubeless tires.
Ready to explore more about mountain biking and connect with fellow enthusiasts? Visit usabikers.net today. Dive into our articles, engage in discussions, and discover everything you need to enhance your biking experience. Whether you’re looking for gear recommendations, maintenance tips, or community connections, usabikers.net is your ultimate resource. Join us now and take your passion for mountain biking to the next level.
FAQ: Patching Tubeless Mountain Bike Tires
1. Can I use a regular tube patch on a tubeless tire?
While possible as a temporary fix, it’s best to use tubeless-specific patches for a durable repair.
2. How long does tubeless sealant last?
Tubeless sealant typically lasts 3-6 months, depending on climate and riding frequency.
3. What tire pressure should I use for tubeless tires?
Ideal tire pressure depends on weight, riding style, and terrain; experiment to find the best balance.
4. What tools do I need to fix a tubeless puncture on the trail?
Essential tools include a mini-pump, tubeless plug kit, and a spare tube.
5. Can a cut sidewall be repaired on the trail?
No, install a tube and repair the tire at home with a patch or replacement.
6. What causes a tire to burp?
Burping is usually caused by low tire pressure or aggressive cornering, leading to air loss.
7. How do I prevent punctures with tubeless tires?
Use proper tire pressure, high-quality sealant, and inspect tires regularly.
8. What is the benefit of tubeless tires?
Benefits include reduced punctures, lower rolling resistance, and improved traction.
9. How often should I replace tubeless rim tape?
Replace rim tape every 1-2 years or when changing tires to ensure a tight seal.
10. Can I mix different brands of tubeless sealant?
It’s not recommended; stick to one brand to avoid potential compatibility issues.