Are you looking to fine-tune your riding experience for optimal comfort and control? Can You Raise Handlebars On A Bike? Yes, adjusting your handlebar height is a simple yet effective way to personalize your bike fit and enhance your overall enjoyment, and at usabikers.net, we’re dedicated to helping you achieve the perfect setup. By understanding the different stem types and adjustment methods, you can achieve a more comfortable and efficient riding posture. We are here to provide the ultimate guide, so stick around and discover how raising handlebars can significantly improve your cycling experience.
1. Why Adjusting Handlebar Height Matters
Why is adjusting handlebar height so critical? It is because your handlebar height significantly influences your comfort, control, and overall riding experience. Understanding how different handlebar positions affect your ride can help you optimize your bike for various riding conditions and personal preferences. Whether you are aiming for a more upright position for leisurely rides or a more aerodynamic stance for competitive cycling, adjusting your handlebars can make a world of difference.
1.1 Comfort and Ergonomics
Achieving the correct handlebar height is paramount for comfort, especially on long rides. An improperly positioned handlebar can lead to discomfort in your back, neck, shoulders, and wrists. By adjusting the handlebar height, you can alleviate pressure points and maintain a more natural posture.
- Upright Position: Raising the handlebars allows for a more upright riding position, reducing strain on your lower back and neck. This is particularly beneficial for casual riders and those with back issues.
- Aerodynamic Position: Lowering the handlebars can enhance aerodynamics, reducing wind resistance and increasing speed. This position is often preferred by racers and cyclists focused on performance.
1.2 Enhanced Bike Handling
Handlebar height also affects how you control your bike. A lower handlebar position shifts your weight forward, improving traction and control, particularly when climbing or navigating challenging terrains.
- Improved Traction: A lower handlebar can increase the weight distribution on the front wheel, providing better grip and control, especially on loose or slippery surfaces.
- Better Control: A balanced handlebar height allows for smoother steering and better maneuverability, making it easier to handle the bike in various conditions.
1.3 Different Riding Styles
The ideal handlebar height varies depending on your riding style. Road cyclists, mountain bikers, and recreational riders each benefit from different handlebar positions.
- Road Cycling: Road cyclists often prefer a lower handlebar position for aerodynamic efficiency.
- Mountain Biking: Mountain bikers might opt for a higher handlebar to improve control and comfort on rugged trails.
- Recreational Riding: Recreational riders typically benefit from a more upright position for enhanced comfort and visibility.
2. Understanding Different Stem Types
Before you can adjust your handlebar height, it’s essential to understand the different types of stems used on bikes. The stem connects the handlebars to the fork steerer tube, and the type of stem determines the adjustment method. The two primary types of stems are threadless stems and quill stems.
2.1 Threadless Stems
Threadless stems are the standard on modern bikes. They clamp onto the outside of the fork’s steerer tube and are secured with bolts. Adjusting the height with a threadless stem involves moving headset spacers and/or flipping the stem.
2.1.1 Adjusting with Headset Spacers
Headset spacers sit on the steerer tube and help preload the headset bearings. By moving these spacers above or below the stem, you can adjust the handlebar height.
- Raising Handlebars: Move spacers from above the stem to below it to raise the handlebars.
- Lowering Handlebars: Move spacers from below the stem to above it to lower the handlebars.
2.1.2 Flipping the Stem
Most stems are installed with a positive rise, creating an upward angle. Flipping the stem reverses this angle, effectively lowering the handlebars.
- Positive Rise: The stem angles upwards, providing a higher handlebar position.
- Negative Rise: Flipping the stem results in a downward angle, lowering the handlebar position.
2.2 Quill Stems
Quill stems were common before threadless stems. They slide into the steerer tube and are secured with an expanding wedge or bung. Adjusting a quill stem is simpler than a threadless stem, as it only involves loosening a bolt and sliding the stem up or down.
2.2.1 Simple Height Adjustment
Quill stems offer a straightforward way to adjust handlebar height. By loosening the bolt on top of the stem, you can slide the stem up or down to your desired position.
- Loosen the Bolt: Use a hex key or wrench to loosen the bolt on top of the stem.
- Adjust the Height: Slide the stem up or down to the desired height.
- Re-tighten the Bolt: Once the stem is in the correct position, re-tighten the bolt to secure it.
3. Step-by-Step Guide to Adjusting Handlebar Height on a Threadless Headset
Adjusting handlebar height on a bike with a threadless headset requires a systematic approach. Follow these steps to safely and effectively adjust your handlebars using headset spacers and stem flipping.
3.1 Adjusting with Headset Spacers
-
Loosen the Stem Bolts: Equally loosen the clamp bolts on the back of the stem until the stem is free to move.
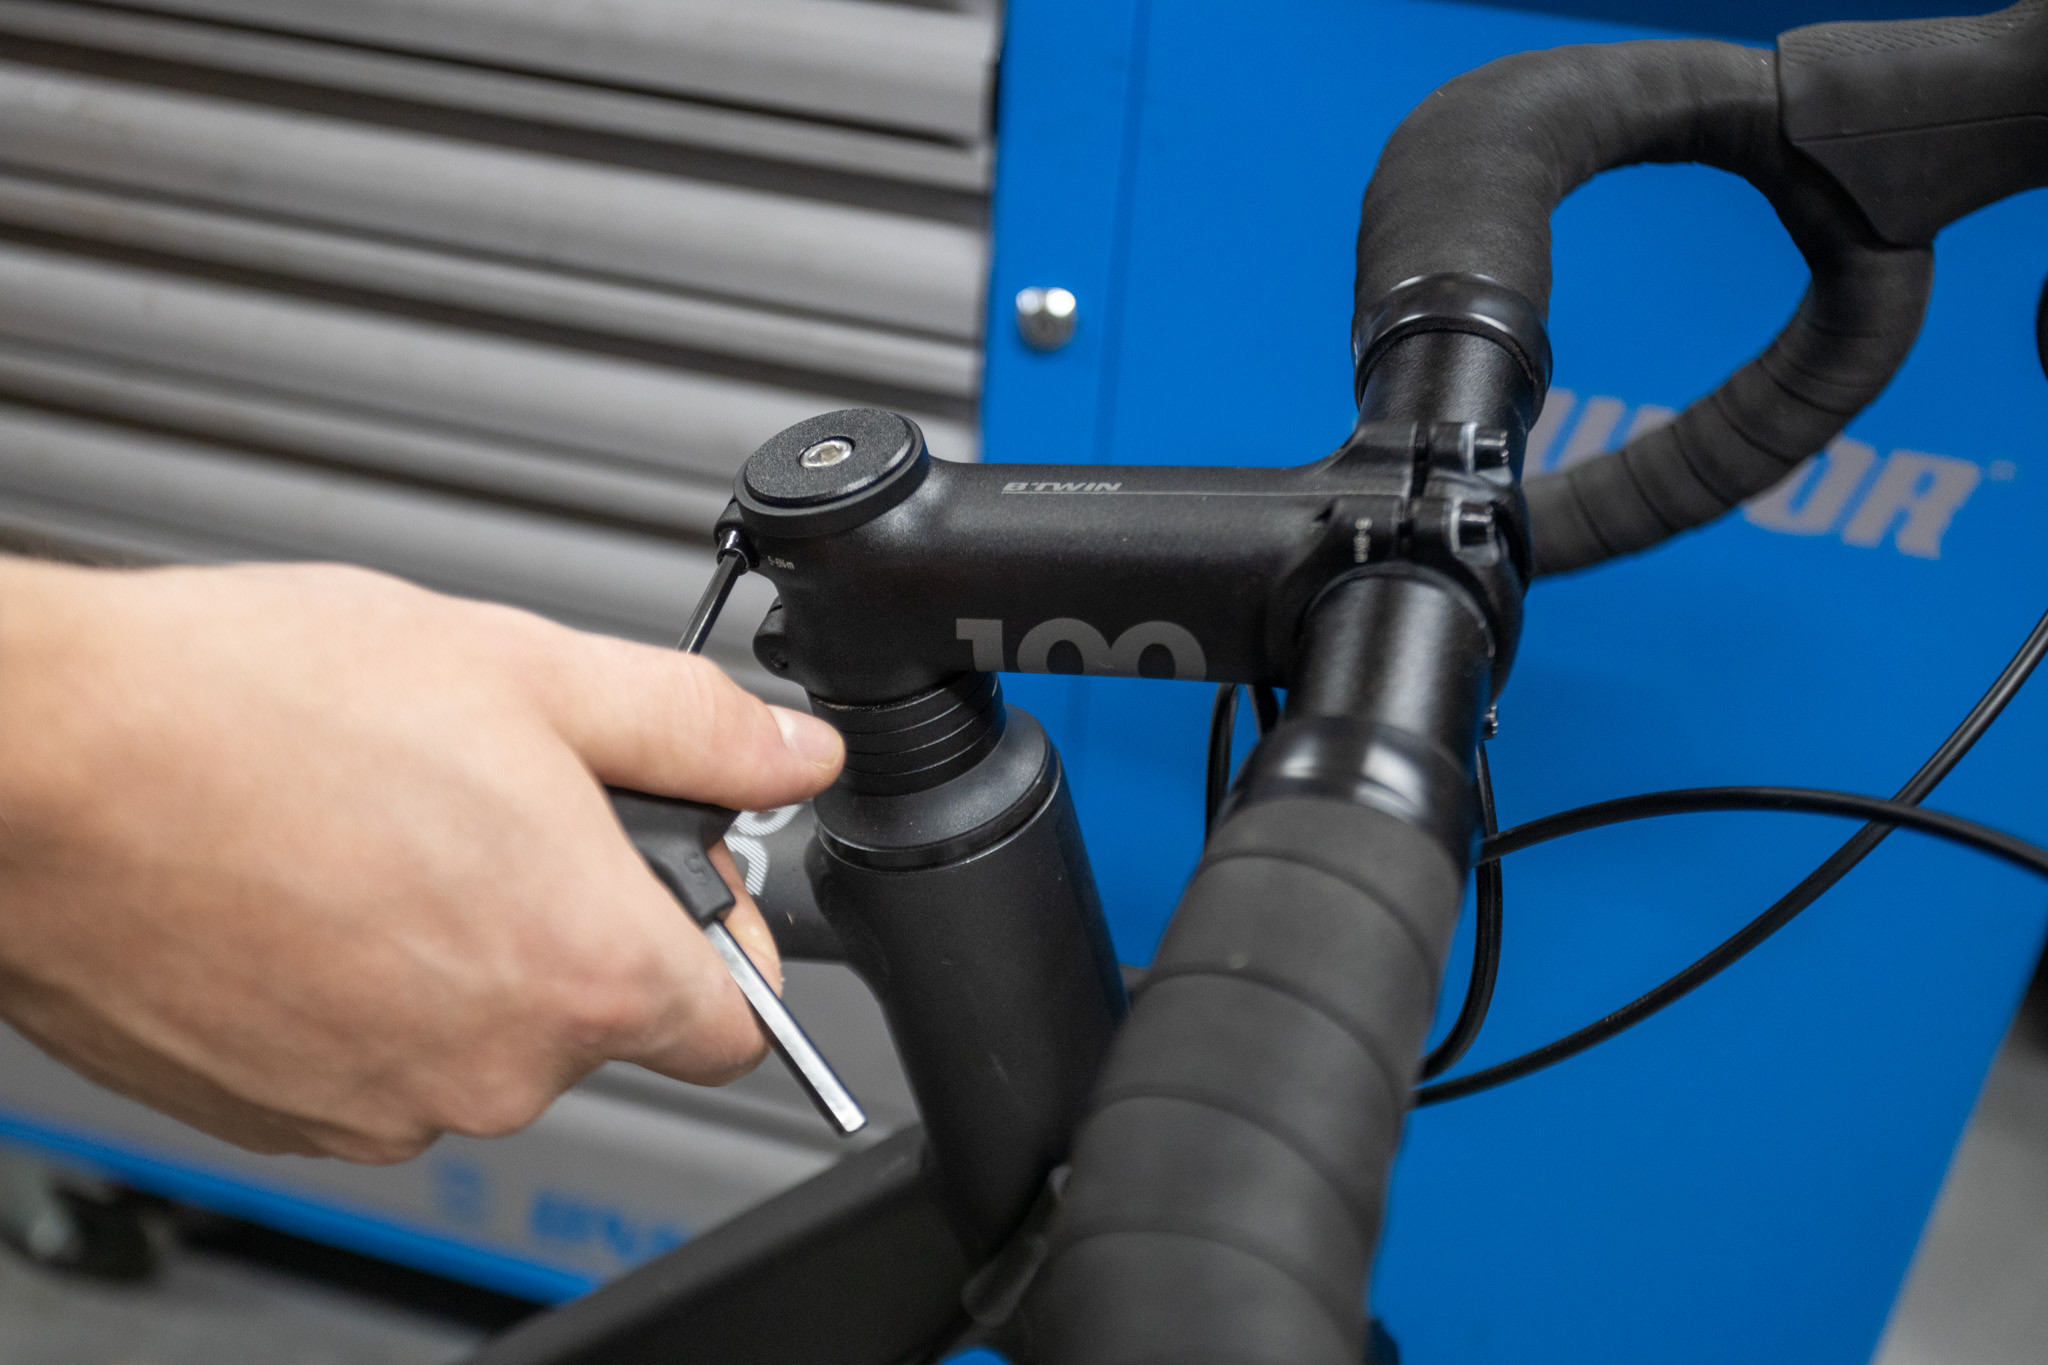 Loosening stem bolts for handlebar adjustment
 -
Remove the Top Cap: Remove the top cap that sits on top of the stem. Adding a little fresh grease to the top-cap bolt can prevent it from seizing.
 Removing top cap for handlebar adjustment
 -
Slide Off the Stem: Slide the stem off the steerer tube. This exposes the headset spacers.
 Sliding off the stem for handlebar adjustment
 -
Move the Spacers: Decide how much you want to raise or lower your bars and move the appropriate number of spacers. Remember, even small changes can make a big difference.
 Moving spacers for handlebar adjustment
 -
Replace the Stem: Slide the stem back onto the steerer tube, ensuring there is a 3 to 5mm gap between the steerer tube and the top of the stem/spacer.
 Replacing stem for handlebar adjustment
 -
Pre-load the Headset Bearings: Replace the top cap and bolt, tightening until you feel some resistance. This pre-loads the headset bearings.
 Pre-loading headset bearings for handlebar adjustment
 -
Align the Stem: Align the stem with the front wheel, ensuring the bar is at a right angle to the wheel.
 Aligning stem for handlebar adjustment
 -
Torque the Stem Bolts: Torque the stem-clamp bolts evenly to the manufacturer’s recommended value, typically around 5 to 8Nm. Use a torque wrench to avoid over-tightening.
 Torquing stem bolts for handlebar adjustment
 -
Check Headset Adjustment: Check your headset adjustment by holding the front brake and rocking the bars back and forth. If you feel any movement, re-tighten the top-cap bolt and stem-clamp bolts.
 Checking headset adjustment for handlebar adjustment
3.2 Flipping the Stem
-
Note Handlebar and Brake Lever Angles: Before starting, make a mental note of the handlebar angle and brake lever angle. Using masking tape can help you get the angle spot on when refitting.
 Noting handlebar angle for stem flipping
 -
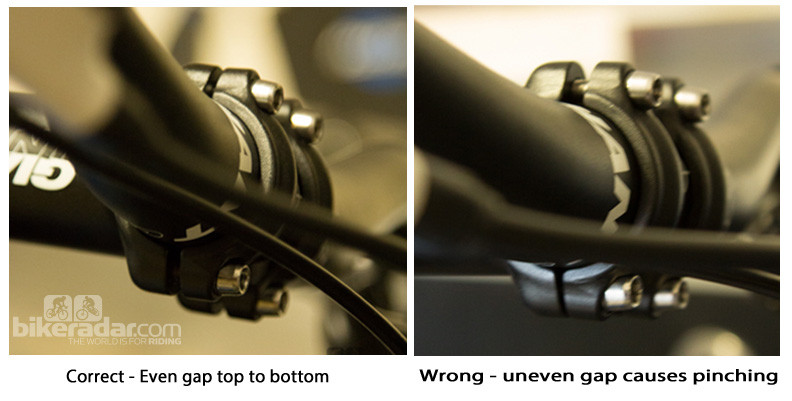
Loosen Handlebar Bolts: Evenly undo the bolts that hold the handlebar to the front of the stem. Remove the stem’s faceplate and store it safely.
Noting handlebar angle for stem flipping -
Follow Spacer Adjustment: Let the handlebar gently droop to the side and follow the procedure for swapping spacers, as outlined in the previous section (steps 1 to 4).
 Following spacer adjustment for stem flipping
 -
Flip the Stem: While the stem is off the bike, flip it over and then slide it back onto the steerer tube.
 Flipping the stem
 -
Reinstall the Handlebar: Reinstall the handlebar, replicating the previous brake lever and handlebar angle. Tighten the faceplate to the manufacturer’s recommended torque (generally between 4 and 8Nm).
 Reinstalling handlebar after stem flipping
 -
Pre-load the Headset and Tighten the Stem: Proceed with the steps to pre-load the headset and tighten the stem, as outlined in the previous section (steps 6 to 9).
4. Step-by-Step Guide to Adjusting a Quill Stem
Adjusting the height of a quill stem is a straightforward process. Here’s how to do it:
-
Loosen the Bolt: Begin by loosening the bolt on the top of the stem. Most use a hex head bolt, but some use an external bolt.
 Loosening the bolt on a quill stem
 -
Tap the Bolt (If Necessary): If the stem hasn’t been adjusted in some time, you may need to gently tap the bolt with a hammer to free the wedge or bung.
 Tapping the bolt on a quill stem
 -
Adjust the Height: The stem can now be adjusted to your desired height. Be sure to check for any minimum and maximum insertion marks on the stem and adhere to these.
 Adjusting the height of a quill stem
 -
Re-tighten the Bolt: Once you have set the height of your stem and lined it up with your front wheel, you can re-tighten the wedge bolt to spec.
 Re-tightening the bolt on a quill stem
5. Alternative Solutions for Handlebar Adjustment
If adjusting spacers and flipping the stem aren’t enough, consider these alternative solutions to achieve your desired handlebar height. You can replace your stem with one that has a greater degree of rise, or install a stem riser.
5.1 Replacing the Stem
You can replace your stem with one that has a greater degree of rise (the angle of the stem relative to the steerer tube). Bicycle stems come in different amounts of rise, typically between six and twenty degrees.
- Choosing the Right Stem: Select a stem with a rise that matches your desired handlebar height.
- Installation: Follow the steps for removing and installing a threadless stem, ensuring the new stem is properly aligned and torqued.
5.2 Installing a Stem Riser
A stem riser is an attachment that fits to the fork steerer, effectively lengthening it and allowing you to have the stem and handlebar higher.
- Benefits: Stem risers are useful for riders who need a significant increase in handlebar height.
- Considerations: Stem risers can put greater strain on a fork steerer, particularly if it’s carbon. Ensure the riser is compatible with your bike and follow the manufacturer’s instructions for installation.
6. Integrated Front Ends: What to Consider
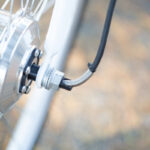
Many modern bikes feature integrated front ends, with cables and hoses running through the handlebar and stem into the frame. These designs can complicate handlebar height adjustments.
6.1 Lowering Handlebars
Lowering your handlebar on these bikes is generally straightforward. Many brands have introduced split headset spacers, which can be removed without entirely removing the stem.
6.2 Raising Handlebars
Raising your handlebar can be trickier. You’ll want to ensure there is sufficient slack in the cables and hydraulic hoses. If they are too short, they will need to be replaced to introduce the required length.
7. Why Experiment with Bar Height
Experimenting with bar height allows you to fine-tune your bike’s fit and handling to suit your preferences and riding style. Different bar heights can significantly affect your comfort, control, and efficiency.
7.1 Finding the Right Position
Adjusting bar height is a personal process. What works for one rider may not work for another. Experimenting with different heights allows you to find the optimal position for your body and riding style.
7.2 Trial and Error
Don’t be afraid to make small adjustments and test them out on the road or trail. Keep track of the changes you make and how they affect your ride. Over time, you’ll develop a sense of what works best for you.
8. The Role of Saddle Height
Bar height is also known as saddle drop, which is the measurement of how far the top of the saddle sits above (or below) the bar.
8.1 Aerodynamic Benefits
On the road, elite riders normally have a significant drop, where their bar sits below the saddle. This is typically done to provide a more aerodynamic position.
8.2 Comfortable Riding
Recreational riders are usually best served by a handlebar that’s in line with the saddle or above it. This usually gives a very comfortable position and is a good starting point for experimentation.
9. Proper Tools for Handlebar Adjustment
Having the right tools is essential for safely and effectively adjusting your handlebar height. Here are some of the tools you’ll need:
- Allen Wrenches: A set of Allen wrenches in various sizes is necessary for loosening and tightening bolts on stems, handlebars, and seatposts.
- Torque Wrench: A torque wrench ensures that bolts are tightened to the manufacturer’s recommended torque, preventing over-tightening and potential damage.
- Grease: Applying grease to bolts and threads helps prevent corrosion and ensures smooth adjustments.
- Tape Measure: A tape measure is useful for measuring handlebar height and ensuring that the stem is properly aligned.
10. Safety Considerations
Safety should always be your top priority when adjusting handlebar height. Here are some important safety considerations:
- Follow Manufacturer’s Instructions: Always follow the manufacturer’s instructions for adjusting handlebar height.
- Use a Torque Wrench: Use a torque wrench to ensure that bolts are tightened to the correct torque.
- Check for Loose Bolts: Regularly check for loose bolts and tighten them as needed.
- Inspect for Damage: Inspect your stem, handlebars, and headset for any signs of damage or wear.
FAQ: Raising Handlebars on a Bike
1. Can you raise the handlebars on a mountain bike?
Yes, you can raise the handlebars on a mountain bike using several methods, including adjusting headset spacers, flipping the stem, or installing a stem riser. The best method depends on the type of stem and the amount of height adjustment needed.
2. What is the ideal handlebar height for comfort?
The ideal handlebar height for comfort typically positions the handlebars in line with or slightly above the saddle. This allows for a more upright riding position, reducing strain on the back and neck.
3. How do I adjust the height of a quill stem?
To adjust the height of a quill stem, loosen the bolt on top of the stem, tap the bolt to free the wedge if necessary, adjust the stem to the desired height, and then re-tighten the bolt.
4. What tools do I need to adjust handlebar height?
You will need a set of Allen wrenches, a torque wrench, and grease. A tape measure can also be helpful for ensuring proper alignment.
5. How do headset spacers affect handlebar height?
Headset spacers sit on the fork’s steerer tube and help preload the headset bearings. Moving these spacers above or below the stem adjusts the handlebar height. Moving spacers below the stem raises the handlebars, while moving them above lowers the handlebars.
6. Is it safe to use a stem riser on a carbon fork?
Stem risers can put greater strain on a fork steerer, particularly if it’s carbon. Ensure the riser is compatible with your bike and follow the manufacturer’s instructions for installation. Regularly inspect the fork for any signs of stress or damage.
7. What is stem rise, and how does it affect handlebar height?
Stem rise is the angle of the stem relative to the steerer tube. Stems with a greater degree of rise will position the handlebars higher. Replacing your stem with one that has a greater rise can significantly increase handlebar height.
8. How do I know if my cables are long enough when raising handlebars?
When raising handlebars, ensure there is sufficient slack in the cables and hydraulic hoses. If they are too short, they will need to be replaced to introduce the required length. Insufficient cable length can affect braking and shifting performance.
9. What should I do if my headset feels loose after adjusting handlebar height?
If your headset feels loose after adjusting handlebar height, loosen the stem-clamp bolts and tighten the top-cap bolt another quarter-turn, then re-torque the stem-clamp bolts. Repeat until all signs of bearing movement have disappeared and the handlebars still turn smoothly.
10. How often should I check my handlebar height adjustment?
You should check your handlebar height adjustment regularly, especially after making changes or riding in rough conditions. Ensure all bolts are properly tightened and that the headset is correctly adjusted.
Adjusting your handlebar height is an essential step in optimizing your bike for comfort, control, and performance. Whether you’re a seasoned cyclist or a casual rider, taking the time to fine-tune your handlebar position can significantly enhance your riding experience. Remember to follow safety guidelines and use the proper tools to ensure a safe and effective adjustment.
Ready to take your cycling experience to the next level? Visit usabikers.net for more expert tips, guides, and community support. Explore our comprehensive resources, join our forums, and discover the perfect setup for your bike.