Can You Ride A Mountain Bike With A Broken Spoke? Absolutely, but with caution. A broken spoke compromises your wheel’s integrity, but usabikers.net is here to guide you through getting back home safely. With the right knowledge and a few simple steps, you can manage the situation and minimize further damage, ensuring a safer ride. We’ll explore practical solutions and essential tips for handling broken spokes, promoting biker safety and responsible riding.
1. Understanding the Broken Spoke Scenario
A broken spoke on a mountain bike can be a frustrating experience, but knowing how to handle it can make a significant difference in getting you back home safely; in this section, we explore the root causes of broken spokes and strategies to minimize damage.
1.1. Common Causes of Broken Spokes
Broken spokes can occur due to several reasons, each impacting the wheel’s integrity differently. Factors include metal fatigue, catastrophic failures, and external impacts.
| Cause | Description | Impact on Wheel |
|---|---|---|
| Metal Fatigue | Regular wear and tear weakens the spoke over time, leading to eventual breakage. | Gradual loss of wheel trueness. |
| Catastrophic Failure | Sudden breakage due to an external force, such as a stick or rock hitting the wheel. | Immediate and significant wheel damage. |
| Impact Damage | Accidents or crashes that subject the wheel to excessive force, causing spokes to snap. | Potential for rim and hub damage. |
| Poor Maintenance | Inadequate spoke tension or neglect can accelerate wear and increase the likelihood of breakage. | Increased stress on other spokes. |
1.2. Assessing the Damage
Before attempting any repairs, it is crucial to evaluate the extent of the damage. Check for additional broken spokes, rim damage, or any signs of instability in the wheel. A thorough inspection will help determine the best course of action.
1.3. Immediate Actions
When you discover a broken spoke, take immediate steps to prevent further damage. Stop riding, carefully inspect the wheel, and prepare to make necessary adjustments. If possible, remove the broken spoke from the wheel to prevent it from causing additional harm.
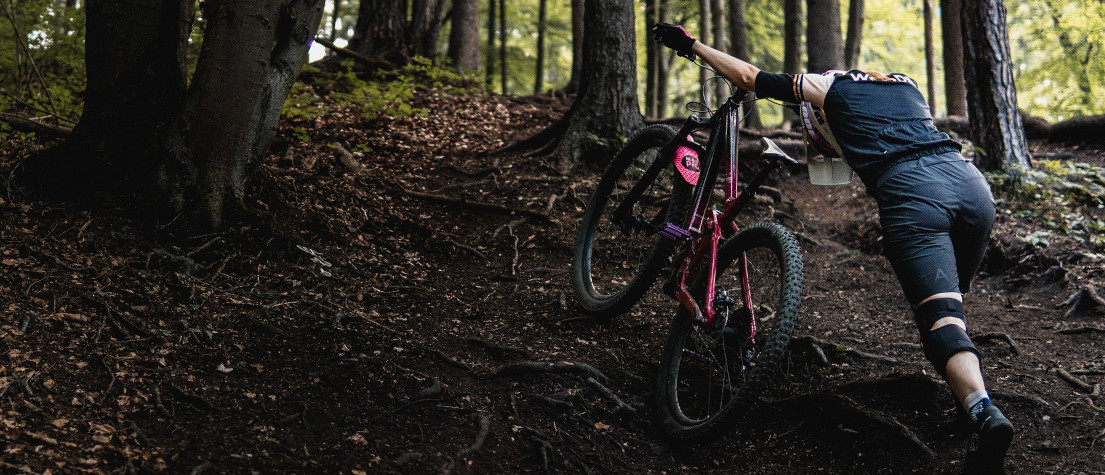 Mountain biker checking spokes on wheel after noticing damage
2. Essential Tools for Trailside Repairs
Having the right tools on hand can turn a potentially ride-ending mechanical issue into a manageable situation. Here are essential tools for dealing with broken spokes on the trail.
2.1. The Indispensable Spoke Key
A spoke key is a small but mighty tool that allows you to adjust spoke tension. It’s lightweight and easily fits into your saddlebag or toolkit, making it an essential item for any mountain biker. Knowing how to use a spoke key can help you temporarily stabilize your wheel and get you home safely.
2.2. Multi-Tool with Spoke Wrench
Many multi-tools come equipped with a built-in spoke wrench, offering a convenient solution for on-the-go adjustments. These tools typically include other useful items, such as Allen wrenches, screwdrivers, and chain tools, making them versatile for various trailside repairs.
2.3. Tire Levers
While not directly related to spoke repair, tire levers are essential for removing the tire if you need to access the spoke nipples or inspect the rim. Choose durable levers that won’t break easily under pressure.
2.4. Optional but Helpful: Gloves and Pliers
Gloves can protect your hands from dirt and grime while working on your bike. Pliers can be useful for bending or cutting a broken spoke if necessary, ensuring it doesn’t interfere with your wheel’s rotation.
3. Step-by-Step Guide to Riding with a Broken Spoke
Knowing how to ride with a broken spoke involves a series of strategic steps to stabilize your wheel and minimize further damage. In this section, we break down the process into manageable actions, ensuring you can get back home safely.
3.1. Initial Assessment and Preparation
Before attempting any repairs, assess the severity of the damage and gather your tools. Ensure the bike is stable by turning it upside down or leaning it against a tree. This allows you to work more efficiently and safely.
3.2. Loosening Adjacent Spokes
Use the spoke key to loosen the spokes on either side of the broken one. A turn or two should suffice. This helps redistribute the tension in the wheel, reducing stress on the remaining spokes and preventing further damage.
3.3. Straightening the Wheel (If Necessary)
After loosening the spokes, you might notice a wobble or “egg” in the wheel. This is due to the uneven tension. If the wheel is severely misaligned, try to straighten it by hand. Gently push the rim in the opposite direction of the wobble. The goal is to make the wheel straight enough to spin without rubbing against the frame, fork, or brake pads.
3.4. Securing the Broken Spoke
If the broken spoke is flapping around, carefully wrap it around an adjacent spoke. This prevents it from causing further damage or making annoying sounds as you ride. Ensure it is securely fastened and won’t interfere with the wheel’s rotation.
3.5. Re-Check and Ride Carefully
Before setting off, double-check that all adjustments are secure. Ride slowly and cautiously, avoiding any aggressive maneuvers or rough terrain. Monitor the wheel for any signs of instability. If the wheel worsens, stop and reassess.
 Mountain biker fixing spokes on his wheel, taking a break on a log
4. Dealing with Multiple Broken Spokes
Multiple broken spokes present a more challenging situation. However, with the right approach, it’s still possible to ride your mountain bike home safely; this section provides detailed steps for assessing the damage, making necessary adjustments, and riding cautiously.
4.1. Assessing the Damage
Multiple broken spokes often indicate a more significant issue, such as a severe impact or widespread metal fatigue. Carefully inspect the wheel for additional broken spokes, rim damage, and hub issues. If the damage is extensive, consider whether it’s safe to attempt a repair.
4.2. Loosening Spokes Strategically
Loosen the spokes surrounding each broken spoke to redistribute tension. This can help prevent further spokes from breaking. Use the spoke key to turn each spoke nipple one or two turns.
4.3. Straightening the Wheel (Advanced Technique)
If the wheel is severely warped, more aggressive straightening techniques may be required. Remove the wheel from the bike and use your hands to gently bend the rim back into shape. Be cautious not to apply too much force, as this could cause further damage.
4.4. Securing Broken Spokes
Securely wrap the broken spokes around adjacent spokes to prevent them from interfering with the wheel’s rotation. If there are too many broken spokes to wrap, consider removing them entirely if possible.
4.5. Riding with Extreme Caution
If you have multiple broken spokes, it’s essential to ride with extreme caution. Avoid any rough terrain or sudden movements. Keep your speed low and constantly monitor the wheel for signs of instability. If the wheel starts to fail, stop immediately and reassess your options.
5. When to Call for Help
While trailside repairs can often get you back on the road, there are situations where calling for help is the safest option. This section outlines these scenarios.
5.1. Extensive Wheel Damage
If the wheel has multiple broken spokes, significant rim damage, or a severely compromised hub, attempting to ride it could be dangerous. In such cases, it’s best to call for a ride or seek professional assistance.
5.2. Lack of Proper Tools
Without the necessary tools, such as a spoke key or tire levers, attempting even basic repairs can be challenging. If you find yourself ill-equipped, it’s wiser to call for help than risk causing further damage.
5.3. Remote Location
If you’re far from civilization and unsure of your ability to make it back safely, don’t hesitate to call for assistance. Being stranded in a remote location can be hazardous, so prioritize your safety.
5.4. Physical Limitations
If you’re injured, fatigued, or otherwise physically unable to perform the necessary repairs, calling for help is the responsible choice. Your health and well-being are paramount.
6. Preventing Spoke Breakage
Prevention is always better than cure. This section provides practical tips for preventing spoke breakage and ensuring your wheels remain in top condition.
6.1. Regular Maintenance
Regular maintenance is key to preventing spoke breakage. Check spoke tension regularly and ensure that all spokes are properly tightened. A well-maintained wheel is less likely to suffer from spoke failure.
6.2. Proper Spoke Tension
Ensure that your spokes have the correct tension. Spokes that are too loose or too tight can be prone to breakage. Use a spoke tension meter to measure tension accurately.
6.3. Wheel Truing
Keep your wheels true. A wobbly or out-of-true wheel puts extra stress on the spokes, increasing the likelihood of breakage. Have your wheels trued by a professional mechanic regularly.
6.4. Avoiding Impacts
Be mindful of the terrain and avoid hitting obstacles that could damage your wheels. Smooth riding techniques can help prolong the life of your spokes and rims.
6.5. Quality Components
Invest in high-quality wheels and spokes. Cheaper components are often more prone to failure. Upgrading to durable wheels and spokes can be a worthwhile investment for serious mountain bikers.
 Man looking frustrated next to his bike after spoke breakage
7. Advanced Techniques for Wheel Straightening
For those who find themselves in a challenging situation, mastering advanced wheel straightening techniques can be a lifesaver. This section provides detailed instructions for bending a bent rim, even without specialized tools.
7.1. Removing the Wheel and Tire
Start by removing the wheel from the bike and deflating the tire. This will give you better access to the rim and allow you to work more effectively.
7.2. Identifying High and Low Spots
Spin the wheel and carefully observe the rim. Identify the high spots (areas where the rim is bent outward) and low spots (areas where the rim is bent inward). High spots are usually directly opposite each other.
7.3. Using Leverage
Find a sturdy object, such as a tree stump or large rock, to use as leverage. Place the low spot of the wheel against the object and apply pressure to the high spot. Gently bend the rim back into shape.
7.4. Incremental Adjustments
Make small, incremental adjustments rather than applying excessive force. This will help prevent further damage to the rim. Check your progress frequently by spinning the wheel and re-assessing the high and low spots.
7.5. Re-Tensioning Spokes
Once the rim is relatively straight, re-tension the spokes to stabilize the wheel. Use the spoke key to tighten the spokes on the side opposite the bend. This will help pull the rim back into alignment.
8. Spoke Repair FAQs
Navigating spoke repairs can often bring up a number of questions. In this section, we provide answers to some frequently asked questions.
8.1. Do I Need to Remove the Tire to Straighten the Wheel?
Removing the tire is preferable as it allows better access to the rim and spoke nipples. However, if you’re running tubeless tires and lack spare sealant or a way to reseat the tire, you may need to leave it on.
8.2. Can I Straighten a Carbon Rim?
No, do not attempt to straighten a carbon rim. Carbon fiber is brittle and can crack or shatter under stress. If you have a damaged carbon rim, consult a professional.
8.3. Are Broken Spokes Covered Under Warranty?
It depends on the manufacturer’s warranty policy. If the wheel is still within the warranty period and the breakage is due to a manufacturing defect, it may be covered. However, damage from impacts or accidents is typically not covered.
8.4. How Many Spokes Can Be Broken Before the Wheel Is Unridable?
The number of spokes that can break before a wheel becomes unridable depends on various factors, including wheel design, spoke pattern, and riding conditions. Generally, if you have more than two or three broken spokes, it’s best to avoid riding the bike.
8.5. Can I Replace a Spoke on the Trail?
Replacing a spoke on the trail is possible, but it requires carrying spare spokes and a spoke key. You’ll also need to remove the tire, tube, and rim tape to access the spoke nipple. It’s a complex repair best left to experienced riders.
8.6. What Is the Best Spoke Tension?
The ideal spoke tension varies depending on the wheel and spoke type. Consult the wheel manufacturer’s specifications for recommended tension values. Use a spoke tension meter for accurate measurements.
8.7. Can I Use Any Spoke Key?
No, spoke keys come in different sizes to match the spoke nipple. Using the wrong size can damage the nipple. Ensure you have the correct size for your spokes.
8.8. Should I Loosen All the Spokes Before Straightening a Wheel?
Loosening all the spokes can help relieve stress on the rim, making it easier to straighten. However, it’s essential to re-tension the spokes properly afterward to ensure wheel strength and stability.
8.9. How Often Should I Check My Spoke Tension?
Check your spoke tension regularly, especially if you ride frequently or on rough terrain. A monthly check is a good practice.
8.10. What Are the Signs of a Broken Spoke About to Fail?
Signs of an impending spoke failure include creaking noises from the wheel, difficulty keeping the wheel true, and visible bends or kinks in the spoke.
9. Victory Celebrations and Post-Ride Actions
After successfully navigating a trailside repair and getting back home, it’s time to celebrate your self-reliance and take the necessary steps to ensure your bike is in top condition for future rides.
9.1. Acknowledge Your Achievement
Take a moment to acknowledge your accomplishment. You successfully handled a challenging situation and demonstrated valuable problem-solving skills. Give yourself a pat on the back.
9.2. Book a Professional Inspection
Schedule a professional inspection of your wheel and bike. A qualified mechanic can identify any hidden damage or potential issues that may have arisen during the ride.
9.3. Replace Damaged Components
Replace any damaged spokes, rims, or other components as soon as possible. Riding with damaged parts can compromise safety and lead to further damage.
9.4. Perform a Thorough Cleaning
Clean your bike thoroughly to remove any dirt, grime, or debris that may have accumulated during the ride. This will help prolong the life of your components.
9.5. Share Your Experience
Share your experience with other riders. Your knowledge and insights could help someone else overcome a similar challenge in the future.
 Man celebrates after repairing broken spoke, lifting bike
10. Connecting with the Biker Community on Usabikers.Net
Usabikers.net is more than just a website; it’s a community of passionate riders sharing experiences, knowledge, and a love for all things biking.
10.1. Explore Articles and Guides
Dive into a wealth of articles and guides covering various topics, from bike maintenance to trail reviews. Enhance your knowledge and skills with expert advice.
10.2. Join the Forums
Connect with fellow bikers in the usabikers.net forums. Share your experiences, ask questions, and participate in discussions on a wide range of topics.
10.3. Share Your Adventures
Showcase your biking adventures by sharing photos and stories on usabikers.net. Inspire others with your experiences and connect with like-minded individuals.
10.4. Stay Updated
Stay informed about the latest biking news, events, and product releases. Usabikers.net keeps you in the loop with timely and relevant information.
10.5. Contribute Your Expertise
Contribute your expertise by writing articles or guides for usabikers.net. Share your knowledge and help others enhance their biking experience.
Address: 801 Sturgis Main St, Sturgis, SD 57785, United States
Phone: +1 (605) 347-2000
Website: usabikers.net
Ready to elevate your biking experience? Visit usabikers.net now to explore a wealth of resources, connect with a thriving community, and discover everything you need to fuel your passion for riding. Don’t miss out—join us and take your biking journey to the next level!