Disc brakes on bikes offer superior stopping power, especially in wet or muddy conditions. However, like all brake systems, the pads wear down over time and need replacing. Knowing how to perform a Disc Brake Replacement Bike at home is a valuable skill for any cyclist, saving you time and money at the bike shop. This guide will walk you through the process of replacing your bike disc brake pads on modern SRAM and Shimano hydraulic systems, ensuring your brakes are performing optimally and safely.
When Should You Consider a Bike Disc Brake Replacement?
Knowing when to replace your disc brake pads is crucial for maintaining braking performance and safety. Brake pad manufacturers provide guidelines on minimum pad thickness. SRAM recommends replacement when the combined thickness of the backing plate and pad material is less than 3mm. Shimano suggests replacement when the pad material alone is less than 0.5mm thick.
However, relying solely on measurements can be cumbersome. A practical approach is to visually inspect your pads regularly. If your bike disc brake pads appear to be around 50% worn, it’s a good time to consider a replacement. Another indicator is increased brake lever travel. As pads wear, the pistons extend further, leading to a longer pull on the brake lever before the brakes engage firmly. Replacing pads proactively, before they are completely worn, ensures consistent brake feel and performance on your rides.
Shop Brakes | Shop Bikes
Step-by-Step Guide: Bike Disc Brake Replacement
Before starting your bike disc brake replacement, gather the necessary tools and prepare your workspace. Ideally, using a bike repair stand makes the process easier by allowing you to rotate the wheels freely. If you don’t have a stand, you can carefully turn your bike upside down, ensuring it’s stable and won’t get damaged.
[product-block handle=”feedback-sports-recreational-repair-stand”/]
Step 1: Removing the Old Disc Brake Pads
The first step in replacing your bike disc brake pads is to remove the old ones from the caliper. Start by locating and removing the retaining pin. This pin secures the pads within the caliper body. It may have a small retaining clip at the end for added security.
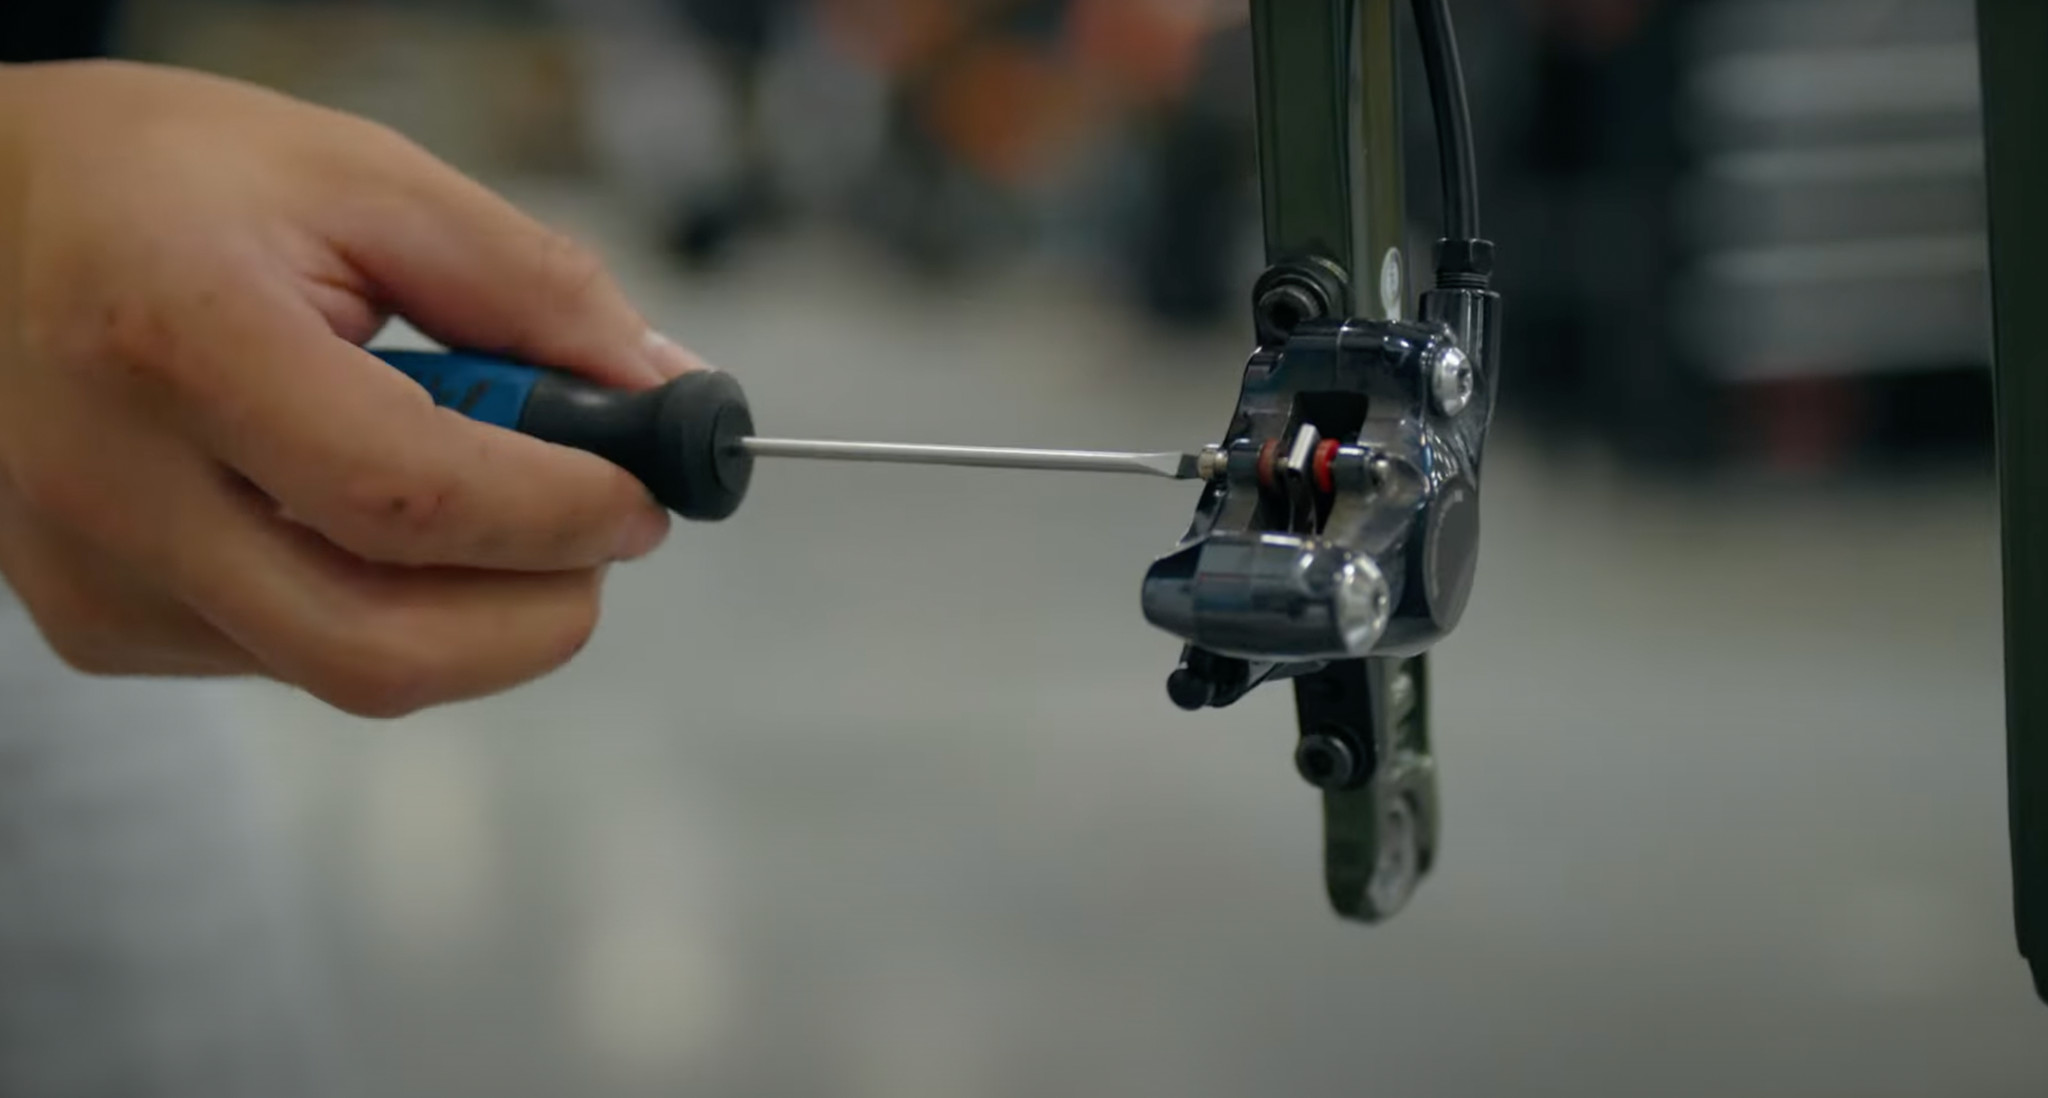 Removing the retaining pin from bike disc brake caliper to replace brake pads.
If a retaining clip is present, use needle-nose pliers to gently pull it off. Next, unscrew the retaining pin. The tool required depends on your brake brand:
- SRAM brakes typically use a 2.5mm hex wrench for the retaining pin.
- Shimano brakes may use a 3mm hex wrench or a small flathead screwdriver, depending on the specific model.
[product-block handle=”bondhus-ball-end-l-hex-wrench-set-1″/]
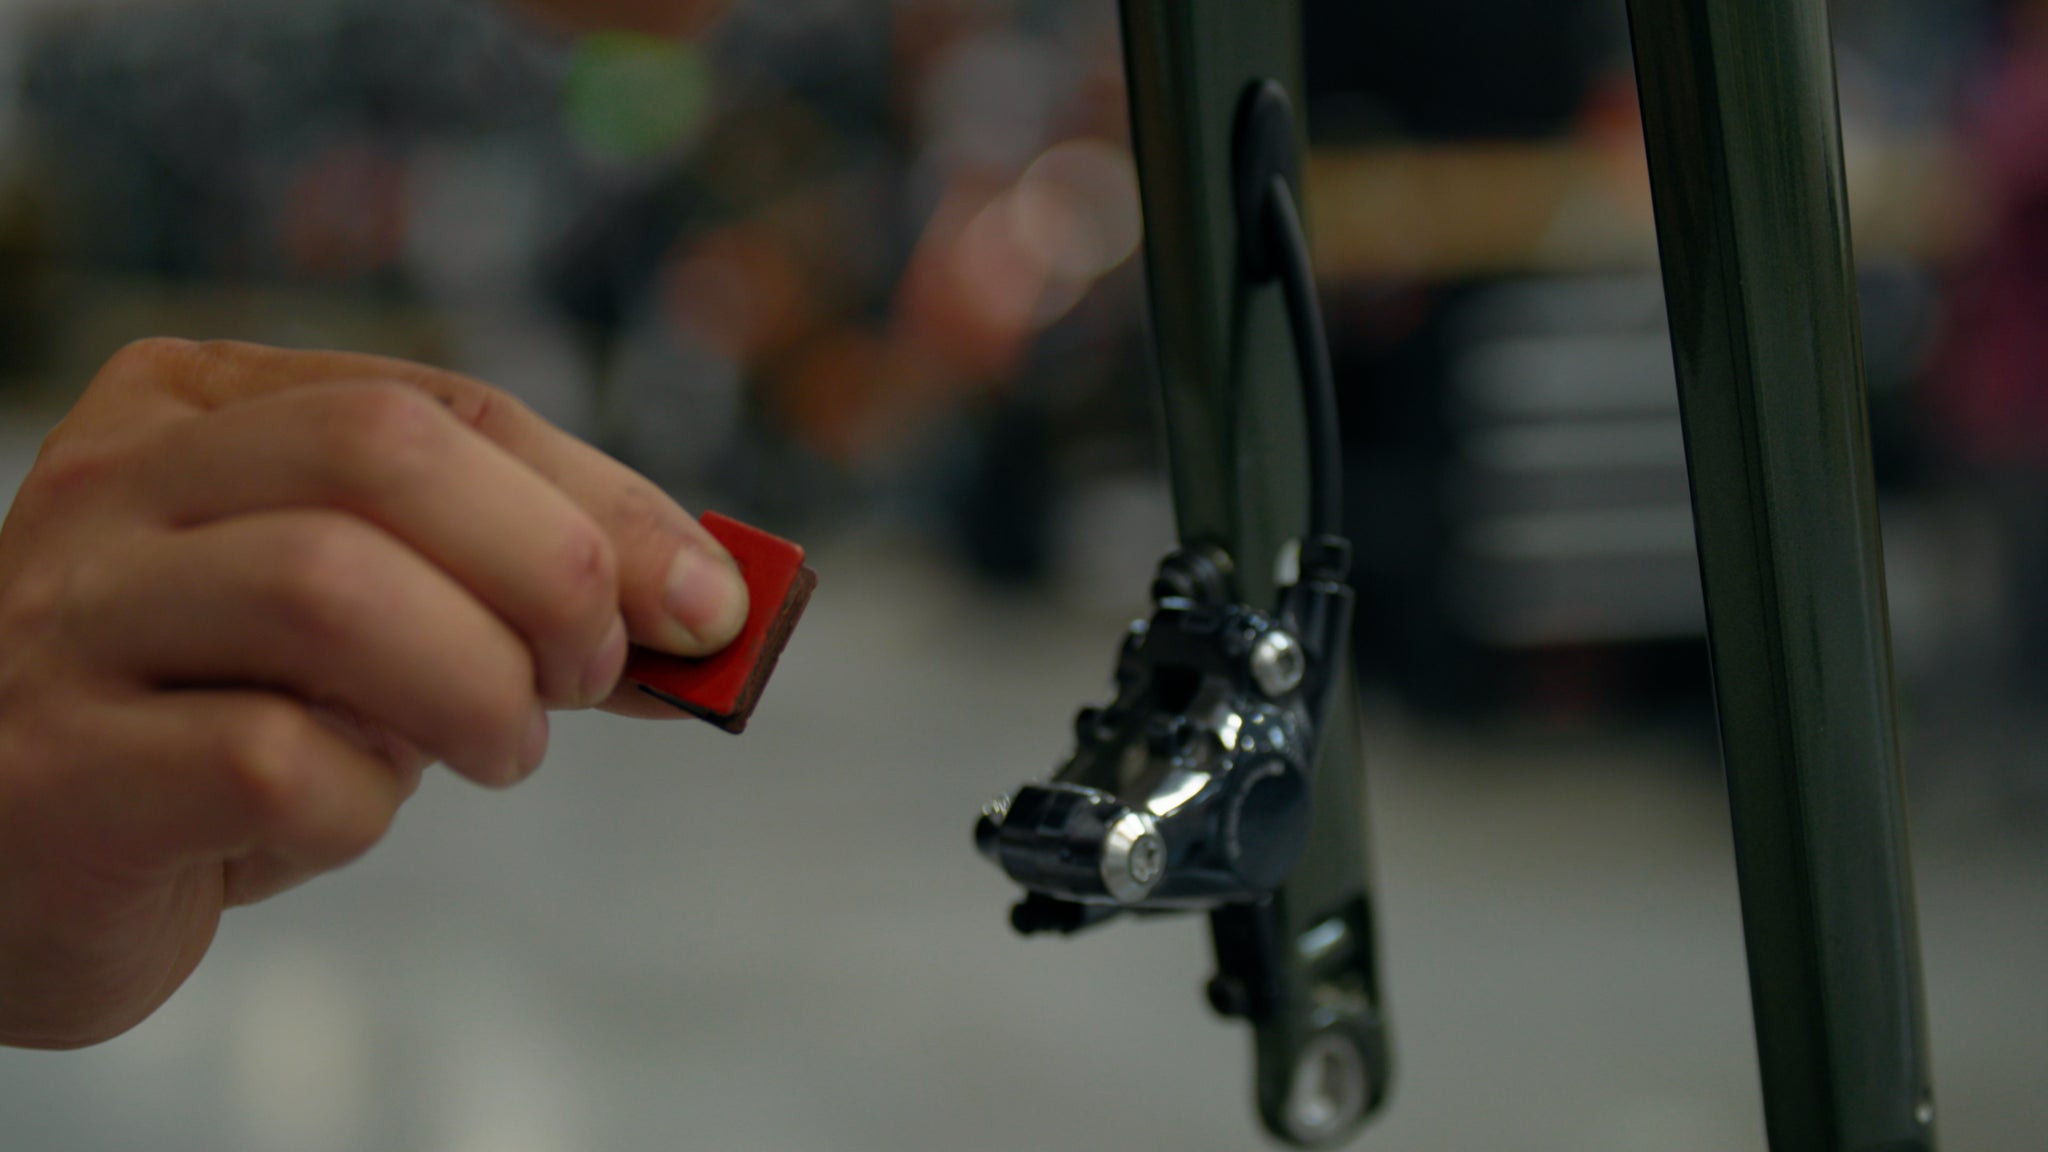 Pulling out worn bike disc brake pads and spring from the caliper for replacement.
Once the retaining pin is removed, you can pull out the old disc brake pads along with the spring from the top of the caliper. They should slide out easily.
Step 2: Resetting the Brake Caliper Pistons
Before installing new bike disc brake pads, it’s essential to reset the caliper pistons. Pistons are responsible for pushing the brake pads against the rotor to create friction and stop the bike. As the pads wear thinner, these pistons extend outwards to maintain consistent braking. New pads are thicker, so you need to push the pistons back into the caliper to create enough space.
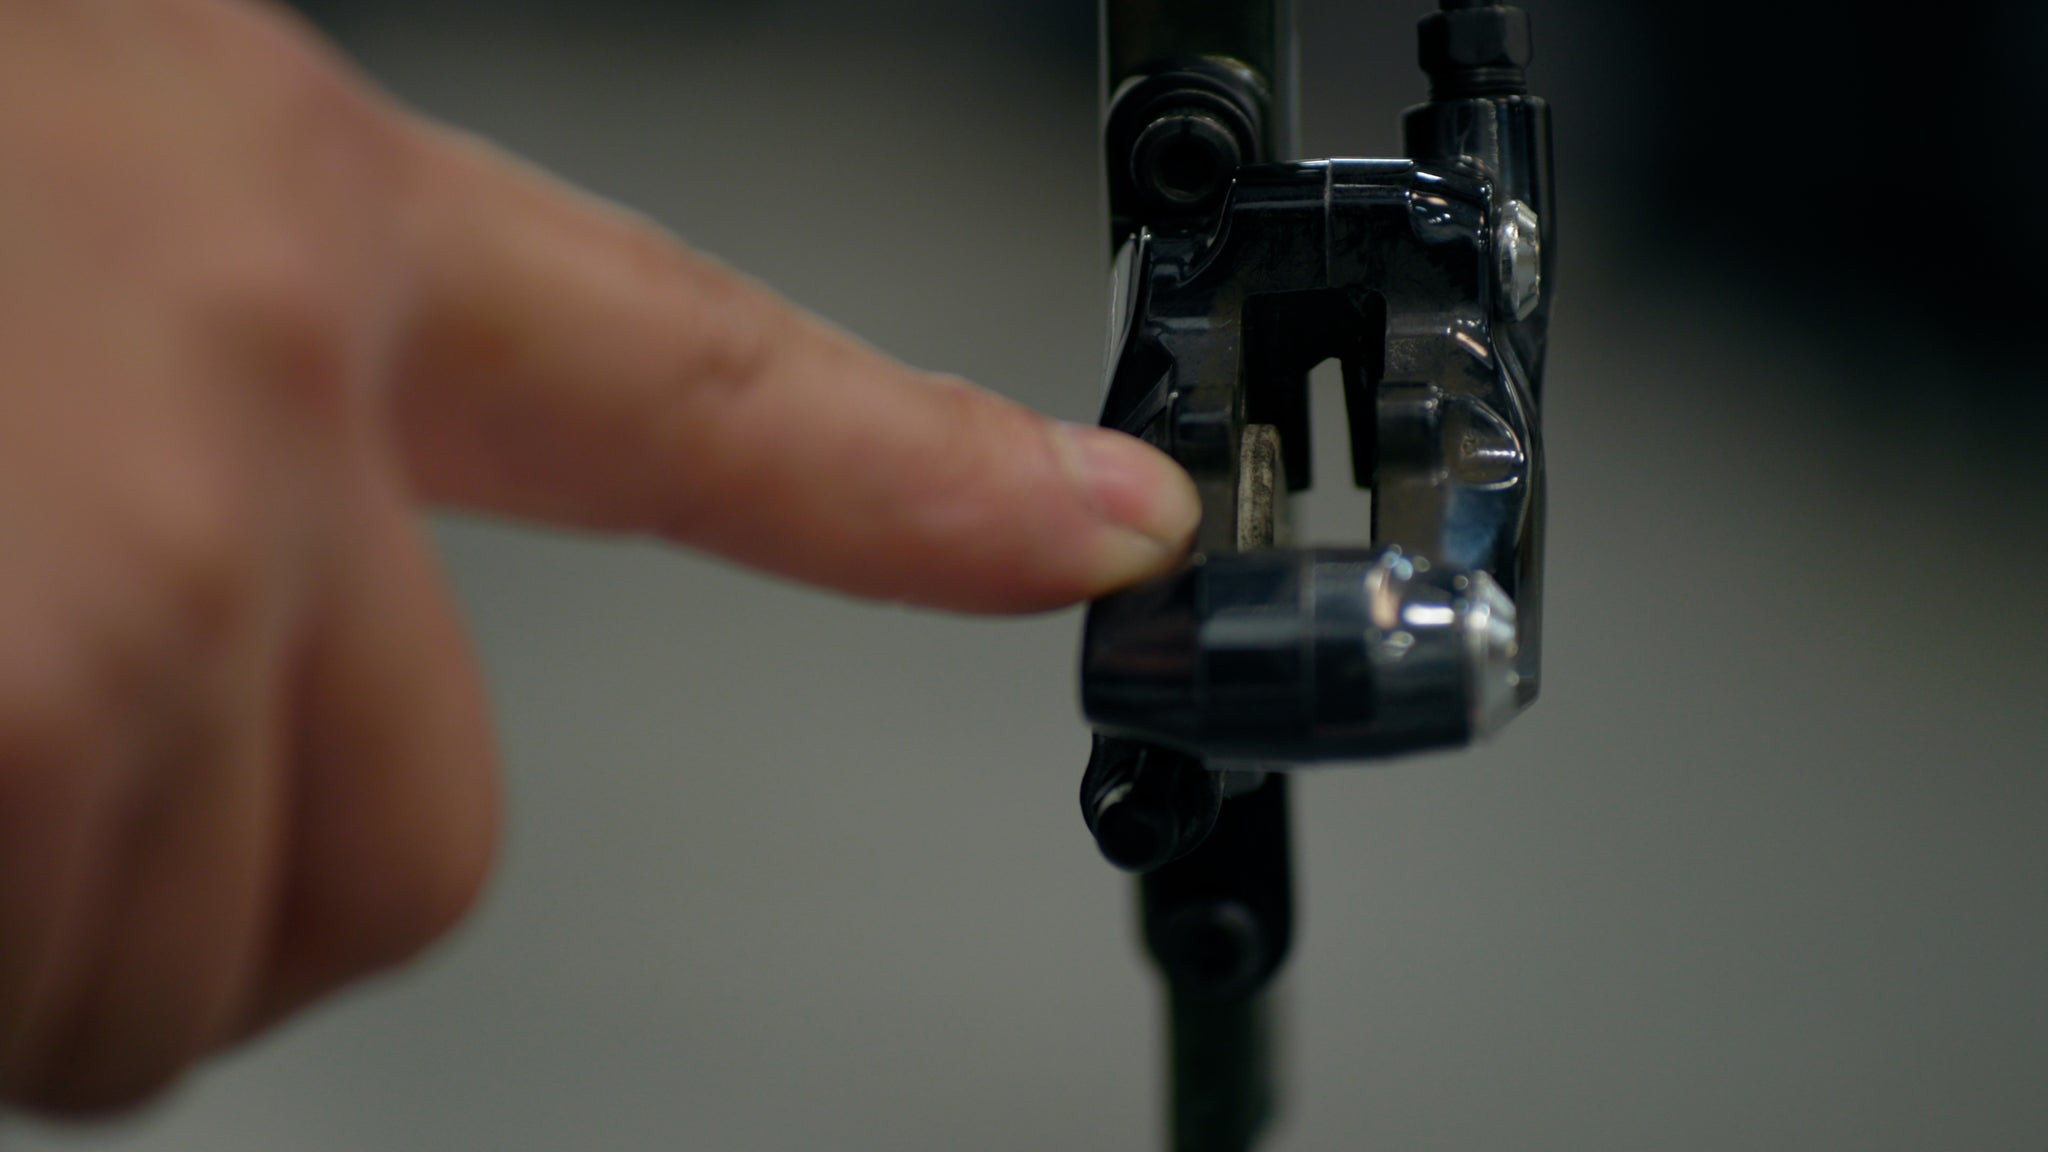 Resetting bike disc brake caliper pistons using a tire lever to make space for new pads.
Pro Tip: This piston reset procedure is also useful if you accidentally squeeze your brake lever when the wheel is removed.
While professional mechanics often use specialized tools like the Park Tool PP-1.2 Hydraulic Brake Piston Press, a simple plastic tire lever works effectively for home mechanics. A tire lever is a common tool in any cyclist’s kit, and its plastic construction prevents damage to the caliper. Alternatives include any clean, soft, and flat tool that can fit inside the caliper, such as a rubber-coated cone wrench handle. Avoid using metal tools that could scratch or damage the pistons or caliper.
[product-block handle=”pedros-tire-lever-pair-yellow-1″/]
 Using a tire lever for leverage to push back bike disc brake caliper pistons during pad replacement.
Using your chosen tool, apply firm, even pressure against the pistons. Push them back into the caliper until they are flush with the inner edge. Apply pressure as directly as possible to the pistons. You can also use the caliper body for leverage if needed, being careful not to damage any components.
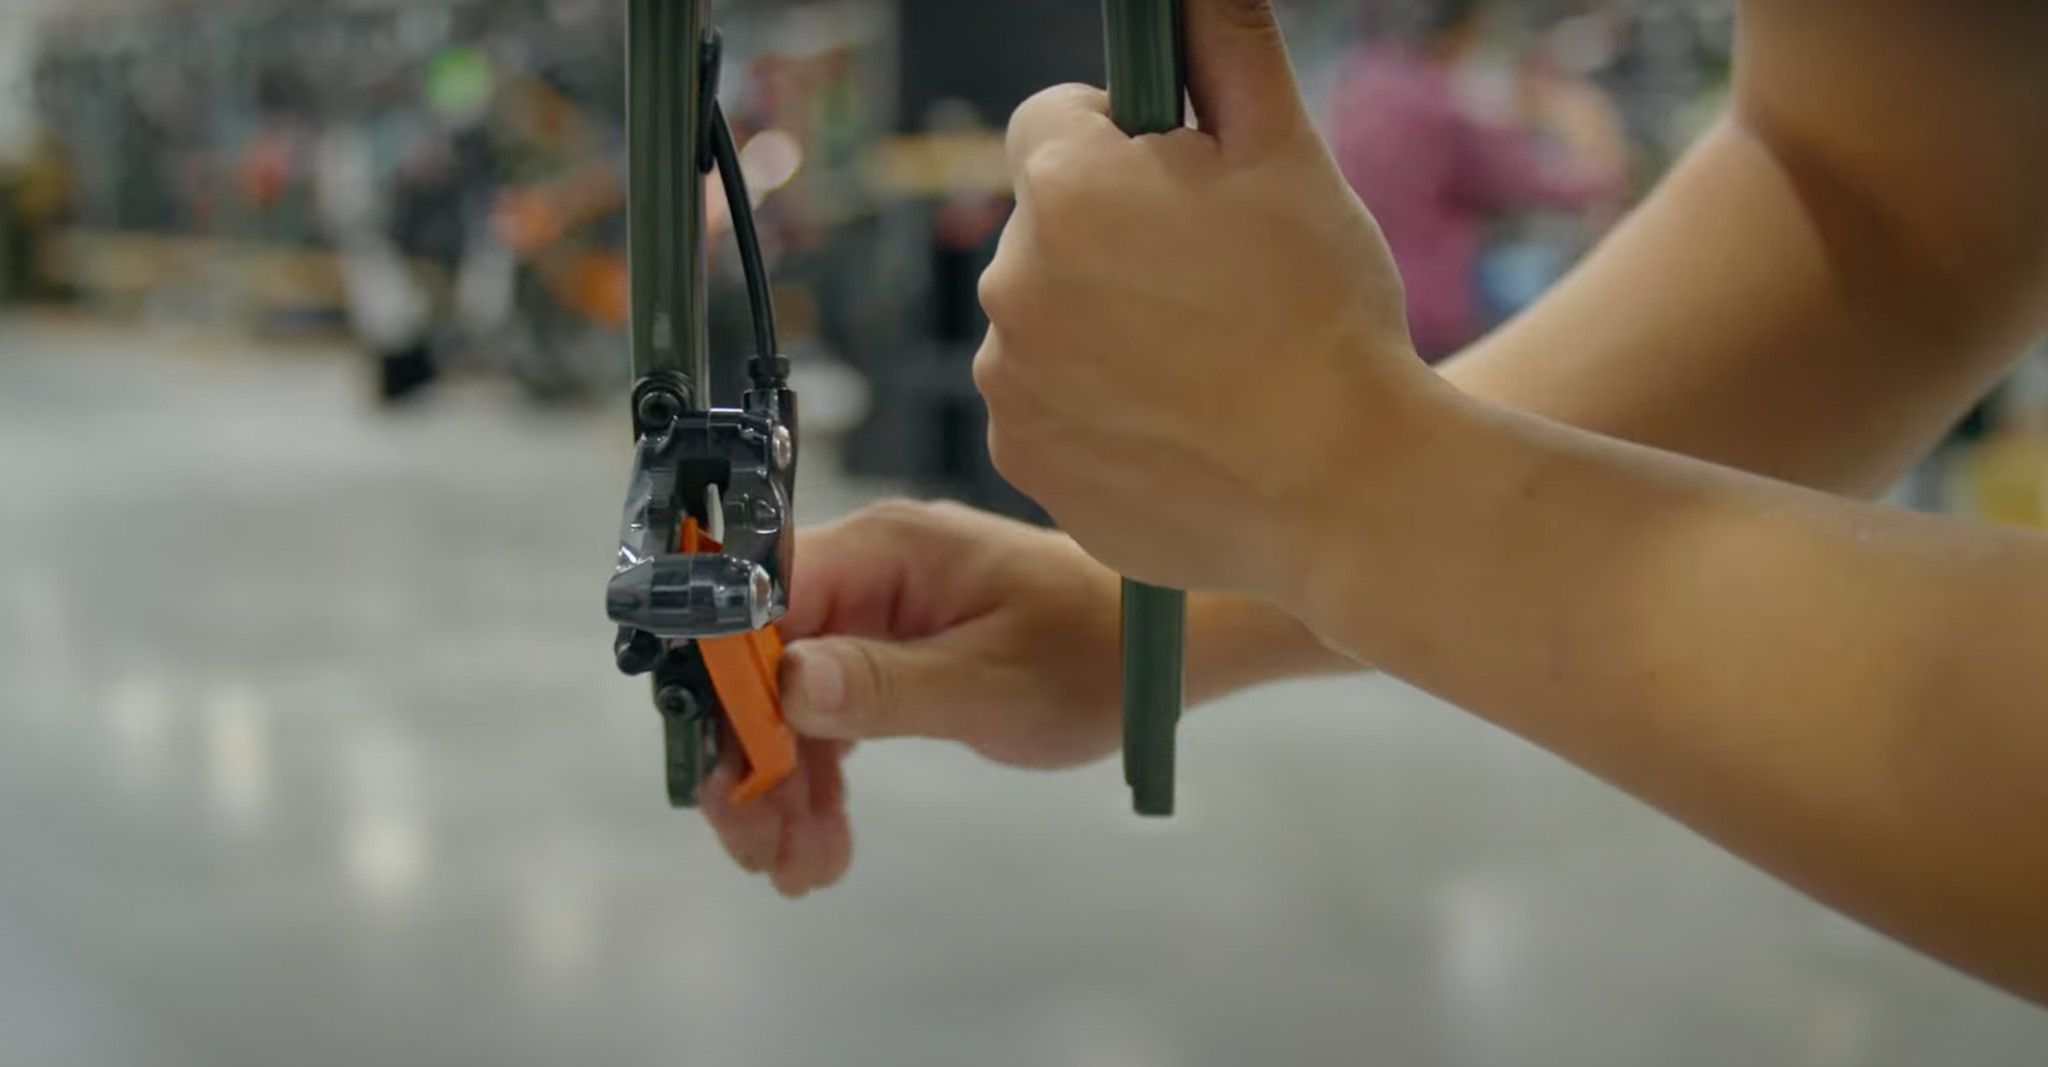
Step 3: Installing New Disc Brake Pads
With the pistons reset, you are ready to install your new disc brake pads. New pads often come with a new spring and retaining clip. If these are not included, carefully reuse the old spring and clip.
 Installing new bike disc brake pads and spring into the caliper, aligning for retaining pin insertion.
When handling the new bike disc brake pads, avoid touching the pad material itself with your fingers. Skin oils can contaminate the pads and reduce braking performance. Place the new pads into the spring, ensuring they are correctly oriented. If unsure, refer to the orientation of the pads you just removed or check the other brake caliper for reference. Slide the pads and spring assembly into the caliper from the top. Align the holes in the pads and caliper so that you can re-insert the retaining pin. Push the retaining pin clip back into place if your system uses one.
Once the new pads are installed and secured, reinstall your wheel. Pump the brake lever several times until the pads make contact with the rotor. Spin the wheel and check for brake rub. If the wheel spins freely without noise, your disc brake replacement bike is complete and properly aligned. If you hear rubbing, consult our guide on how to fix disc brake rub for troubleshooting steps.
Shop Brakes | Shop Bikes
By following these steps, you can confidently perform a disc brake replacement bike at home, ensuring your brakes are ready for your next ride. Regular maintenance and timely pad replacement are key to safe and enjoyable cycling.