Tired of tripping over bikes in your garage? Are your family’s bicycles creating chaos and potential damage by leaning haphazardly against walls or, worse, each other? If you’re nodding along, you’re likely in need of a bike parking solution that’s both effective and budget-friendly. Inspired by the need to organize a chaotic garage and protect our bikes from unnecessary bumps and scratches, this guide will walk you through building your very own Diy Bike Parking Rack. This project is not only a fantastic way to reclaim your garage space, but it’s also a rewarding do-it-yourself endeavor that saves you money compared to store-bought options.
Why Build a DIY Bike Parking Rack?
Commercial bike racks can be expensive and often lack the customization needed for diverse bike collections and garage layouts. Choosing a diy bike rack route offers significant advantages. Firstly, the cost savings are considerable. For a fraction of the price of a metal rack, you can construct a sturdy and functional wooden bike rack. Secondly, a DIY approach allows for complete customization. You can tailor the rack’s size, spacing, and even aesthetics to perfectly fit your specific bikes – whether they are mountain bikes, road bikes, or kids’ bikes – and your garage space. Finally, there’s a genuine sense of accomplishment in building something useful with your own hands. This bike rack DIY project is straightforward enough for beginners, making it a satisfying weekend project.
Materials and Tools for Your DIY Bike Rack
To get started on your diy bike parking rack, you’ll need a few readily available materials and common tools. For a rack designed to hold six bikes with a comfortable 16-inch spacing, gather the following:
Materials:
- Two 8-foot 2×4 boards
- Three 8-foot 2×6 boards
- One pound box of 3-inch deck screws
- Sandpaper (medium grit)
Tools:
- Circular saw (a hand saw can be substituted with extra effort)
- Cordless drill (a screwdriver can be used, but drilling is recommended for ease and stability)
- Tape measure
- Straight edge or ruler
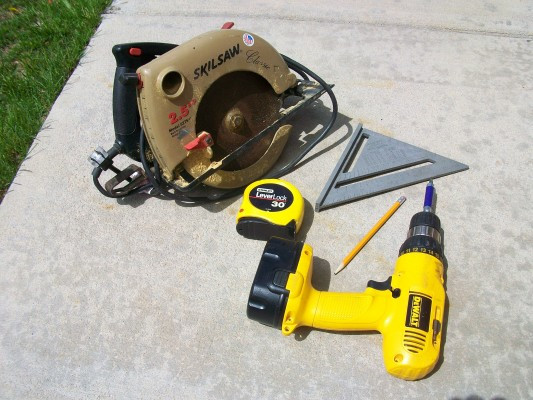 Materials needed to build a diy bike parking rack including lumber, screws, and tools.
These materials are easily sourced from any local hardware store, making this project accessible and convenient.
Step-by-Step Instructions for Building Your Wooden Bike Rack
Building your diy bike parking rack is a simple process, even for those new to woodworking. Follow these steps to create a functional and sturdy storage solution:
-
Cut the 2×6 boards for the base and top: Cut two of the 2×6 boards into 72-inch lengths for the base and top horizontal supports of the rack.
-
Cut the 2×4 boards for the vertical supports: Cut the two 2×4 boards into twelve 15-inch lengths. These will form the vertical dividers that hold the bikes.
-
Cut the remaining 2×6 board for wheel slots: Cut the last 2×6 board into six 16-inch lengths. These will be used to create the slots that secure the bike wheels.
-
Sand all the cut pieces: Use sandpaper to smooth down any rough edges on all the wooden pieces. This step is important for safety and aesthetics.
-
Assemble the base: Lay the two 72-inch 2×6 base pieces parallel to each other, approximately 15 inches apart. Position the 15-inch 2×4 vertical supports perpendicular to the base pieces, spacing them 16 inches apart center-to-center. Secure each vertical support to the base pieces using deck screws. Use at least two screws per joint for strength.
-
Attach the top support: Place the remaining 72-inch 2×6 board on top of the vertical supports, aligning it with the base pieces. Screw it down onto each vertical support, again using at least two screws per joint.
-
Create wheel slots: Take the 16-inch 2×6 pieces and position them vertically between each pair of vertical supports, flush with the top support. These create the slots where the bike wheels will sit. Secure each piece with screws from the top and bottom supports.
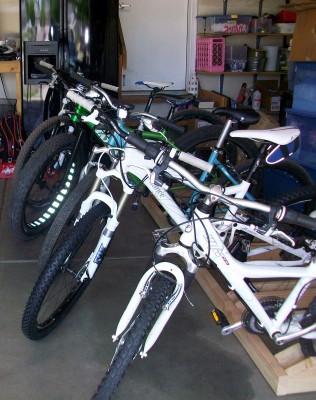 Partially assembled diy bike parking rack showing the base, vertical supports, and top support.
- Finishing touches (optional): You can leave the rack as is for a rustic look, or you can paint, stain, or add stickers to personalize your diy bike parking rack. A sealant can also be applied for added protection, especially if the rack will be exposed to moisture.
Customization Options for Your DIY Bike Rack
One of the great advantages of a diy bike parking rack is the ability to customize it to your specific needs. Consider these modifications:
-
Adjusting Spacing: The 16-inch spacing is suitable for most bikes. However, if you primarily store road bikes or cyclocross bikes, you can reduce the spacing. For wider mountain bikes, especially fat bikes, consider increasing the spacing. For fat bikes, you might even want to create a wider slot, as the original creator did, adding a 4-inch wide slot for a fat bike tire.
-
Rack Size: Easily adjust the rack size by altering the lengths of the base and top supports, and the number of vertical supports and wheel slot pieces. For a smaller three-bike rack, halve the materials. For a larger nine-bike rack, use 12-foot 2x4s and 2x6s and adjust the number of vertical supports and wheel slots accordingly.
-
Finishing: Make your rack match your garage décor by painting it, staining it, or adding personalized touches.
Bike Fit and Practical Considerations
This diy bike parking rack design is versatile and accommodates a range of bike sizes. While a kid’s bike with 24-inch wheels might be slightly loose, it will still stand securely. Larger 29er mountain bike tires will fit snugly within the standard 2.5-inch slots. All bikes should fit interchangeably in the slots. When placing bikes in the rack, turning the front wheels slightly helps to minimize the space occupied and keeps them neatly organized.
Regarding rear derailleur clearance, most bikes will have ample space. Only bikes with long-cage derailleurs and smaller 26-inch wheels might present a minimal clearance issue when in the small chainring, but even then, it’s unlikely to be a significant problem.
Affordable and Effective Bike Storage
The total cost for this diy bike parking rack is remarkably low, typically around $30, making it an incredibly cheap bike rack solution. By investing a few hours and minimal expense, you can dramatically improve your garage organization and protect your bikes.
Your Turn! Now it’s time to build your own diy bike parking rack and reclaim your garage space! Share your own DIY bike storage solutions and experiences in the comments below!