Getting a bike assembled can range in price, but understanding the factors involved is key, and usabikers.net is here to guide you through it. Whether you’ve purchased a new motorcycle online or from a retailer without assembly services, knowing the costs can help you decide if professional assembly is the right choice. By understanding what’s involved in motorcycle setup costs and professional motorcycle builds, you can make an informed decision.
1. Understanding the Cost of Bike Assembly
How Much Does It Cost To Get A Bike Assembled? The cost to assemble a bike professionally typically ranges from $50 to $350, depending on the bike’s complexity and the shop’s rates. Several factors influence the total cost, including the type of motorcycle, the complexity of the assembly, and the bike shop’s location. Bike assembly ensures your motorcycle is safe to ride and performs optimally.
Several aspects influence the cost of motorcycle assembly:
- Type of Motorcycle: The cost to assemble a basic motorcycle is different than an electric one. Basic motorcycles are less expensive to assemble compared to complex models like electric bikes or those with advanced features.
- Complexity of Assembly: The more intricate the motorcycle, the higher the assembly cost. The addition of accessories increases overall professional motorcycle builds.
- Bike Shop Rates: Different bike shops have varying labor rates, impacting the total assembly cost. For example, shops in larger metropolitan areas may charge more due to higher overhead costs.
2. What’s Included in Professional Bike Assembly?
What services are included when a bike shop assembles a bike? Professional bike assembly includes unpacking, assembling the frame, installing components, adjusting brakes and gears, and performing a safety check. These steps ensure the motorcycle is safe and ready for the road, covering more than just basic setup.
Here’s a detailed breakdown of what bike assembly typically includes:
- Unpacking the Motorcycle: The mechanic carefully unpacks the motorcycle, making sure not to damage any parts.
- Frame Assembly: The frame is assembled and all parts are checked for proper alignment.
- Component Installation: This involves attaching the wheels, handlebars, seat, pedals, and other components, ensuring everything is correctly fitted and tightened to the manufacturer’s specifications.
- Brakes and Gears Adjustment: The brakes and gears are tuned for optimal performance and safety. This includes adjusting cable tension and ensuring smooth shifting.
- Safety Check: A comprehensive safety check is performed to ensure all systems are functioning correctly.
- Additional Adjustments: Many shops offer additional adjustments to customize the bike’s fit to the rider, such as adjusting seat height and handlebar angle.
3. Factors Affecting Bike Assembly Costs
What factors most significantly affect bike assembly costs? The complexity of the bike, the shop’s location, and additional services requested will affect the cost. Custom builds or e-bikes often have higher assembly fees due to their intricate components.
Here’s how these factors impact the cost:
- Bike Complexity: The more complex the motorcycle, the more time and expertise required for assembly. High-end motorcycles with advanced features often require specialized knowledge.
- Shop Location: Bike shops in metropolitan areas typically have higher labor rates compared to shops in smaller towns.
- Additional Services: Services such as custom fitting, installing extra accessories, or upgrading components will increase the total cost.
- Motorcycle Type: Electric motorcycles and custom builds require more specialized knowledge, which adds to the cost.
4. Cost Comparison: DIY vs. Professional Assembly
Is it more cost-effective to assemble a bike myself or hire a professional? Assembling a bike yourself can save money, but requires the right tools and expertise, while professional assembly ensures safety and precision. If you have no experience, hiring a pro might be best.
Consider these points when comparing DIY and professional assembly:
- DIY Assembly:
- Pros: Cost savings on labor, learning experience, and personal satisfaction.
- Cons: Requires specific tools, time investment, potential for errors, and safety risks if not done correctly.
- Professional Assembly:
- Pros: Ensured safety, precision, warranty on work, and time savings.
- Cons: Higher upfront cost, reliance on the shop’s schedule.
5. The Value of Professional Assembly: Ensuring Safety
Why is professional bike assembly important for safety? Professional assembly ensures all components are correctly installed and adjusted, reducing the risk of accidents caused by faulty assembly. Safety checks guarantee proper brake function and overall reliability.
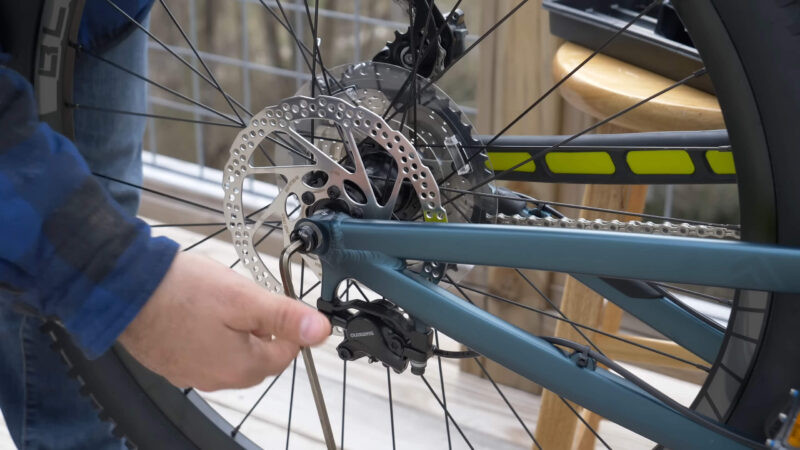
 Mechanic checking brakes on a motorcycle
Mechanic meticulously inspects brake levers, ensuring they are properly installed and adjusted for optimal safety and performance.
Here’s how professional assembly enhances safety:
- Proper Installation: Ensures all components are installed according to the manufacturer’s specifications.
- Brake and Gear Tuning: Guarantees that brakes and gears function smoothly and reliably.
- Torque Specifications: Mechanics use torque wrenches to tighten bolts to the correct specifications, preventing loosening or damage.
- Safety Checks: Comprehensive inspections identify and correct any potential safety issues before you ride.
6. Essential Tools for DIY Bike Assembly
What tools are essential for assembling a bike at home? Essential tools include a torque wrench, Allen key set, cable cutters, screwdrivers, and a pedal wrench. Having the right tools ensures proper assembly and prevents damage.
Here’s a list of necessary tools:
- Torque Wrench: Ensures bolts are tightened to the correct specifications, preventing damage to components.
- Allen Key Set: Used for tightening various bolts on the bike.
- Cable Cutters: Needed for trimming brake and gear cables.
- Screwdrivers: Both Phillips head and flat head screwdrivers are necessary.
- Pedal Wrench: Specifically designed for installing and removing pedals.
- Bike Stand: Helps stabilize the bike during assembly and adjustments.
7. Finding Reputable Bike Shops
How can I find a reputable bike shop for assembly services? Look for shops with experienced mechanics, positive reviews, and clear pricing. Recommendations from other bikers and online reviews can help identify trustworthy shops.
Consider these factors when choosing a bike shop:
- Experience of Mechanics: Check the qualifications and experience of the mechanics.
- Customer Reviews: Read online reviews and ask for recommendations from other riders.
- Pricing Transparency: Ensure the shop provides a clear and detailed estimate of the assembly cost.
- Warranty and Guarantees: Inquire about the shop’s warranty on their assembly work.
- Certifications: Look for shops with certified mechanics and affiliations with reputable organizations.
8. Budgeting for Bike Assembly: What to Expect
What should I budget for bike assembly, including potential additional costs? Budget between $50 and $350 for standard assembly, plus extra for accessories or custom adjustments. Always get a detailed quote to avoid unexpected expenses, remembering to account for motorcycle setup costs.
Here’s a budgeting guideline:
- Basic Assembly: $50 – $150 for standard motorcycles.
- Complex Builds: $150 – $350 for electric bikes, custom builds, or motorcycles with advanced features.
- Additional Services: $20 – $50 per accessory for installation.
- Contingency Fund: Set aside 10-15% of the total budget for unexpected expenses.
9. DIY Assembly: Step-by-Step Guide
What are the basic steps for assembling a bike myself? The basic steps include unpacking, attaching the fork, installing the wheels, fitting the handlebars and seat, connecting the brakes and gears, and adjusting components. Follow a detailed guide to ensure each step is done correctly.
Here’s a simplified guide to DIY bike assembly:
- Unpack the Motorcycle: Carefully unpack all components and lay them out for easy access.
- Attach the Fork: Install the front fork into the frame.
- Install the Wheels: Attach both the front and rear wheels, ensuring they are properly aligned.
- Fit the Handlebars and Seat: Install the handlebars and seat, adjusting them to the desired height and angle.
- Connect Brakes and Gears: Connect the brake and gear cables, adjusting them for smooth operation.
- Adjust Components: Fine-tune all components, ensuring everything is properly tightened and functioning correctly.
- Final Safety Check: Perform a comprehensive safety check before riding.
10. Maintaining Your Assembled Bike
How should I maintain my bike after assembly? Regular maintenance includes checking tire pressure, lubricating chains, inspecting brakes, and tightening bolts. Routine care keeps your bike in top condition and prevents costly repairs.
Here are essential maintenance tasks:
- Check Tire Pressure: Maintain the correct tire pressure for optimal performance and safety.
- Lubricate Chains: Keep the chain clean and lubricated to ensure smooth gear shifting.
- Inspect Brakes: Regularly inspect brake pads and cables for wear and tear.
- Tighten Bolts: Periodically check and tighten all bolts to prevent loosening.
- Professional Tune-Ups: Schedule regular professional tune-ups to catch potential issues early.
11. Understanding Bike Shop Assembly Packages
What types of assembly packages do bike shops typically offer? Bike shops offer basic, standard, and premium assembly packages. Basic packages cover essential assembly, while premium packages include additional services like custom fitting and accessory installation.
Here’s a breakdown of typical assembly packages:
- Basic Package: Includes essential assembly, such as frame setup, wheel installation, and brake adjustment.
- Standard Package: Includes everything in the basic package, plus gear tuning and a basic safety check.
- Premium Package: Includes all standard services, plus custom fitting, accessory installation, and a comprehensive safety inspection.
12. The Importance of Proper Torqueing
Why is proper torqueing crucial during bike assembly? Proper torqueing prevents damage to components and ensures safety. Over-tightening can strip threads, while under-tightening can cause parts to loosen during rides.
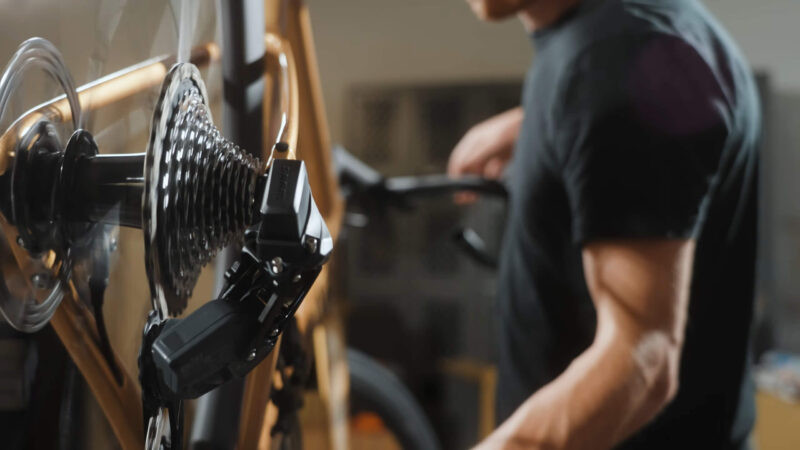
 Close-up of a torque wrench
Using a torque wrench ensures that each bolt is tightened to the manufacturer’s specification, protecting the bike’s components from damage.
Here’s why proper torqueing matters:
- Prevents Damage: Prevents stripping threads and damaging delicate components.
- Ensures Safety: Ensures that all parts are securely fastened, reducing the risk of accidents.
- Maintains Performance: Keeps components functioning correctly, preventing premature wear and tear.
- Manufacturer Specifications: Adhering to torque specifications ensures the bike performs as intended by the manufacturer.
13. Dealing with Electronic Components in E-Bike Assembly
How does assembling an electric bike differ from a standard bike? Assembling an e-bike involves additional steps for connecting the battery, motor, and control systems. Professional e-bike assembly ensures these components are correctly installed and functioning safely.
Here are the key differences in e-bike assembly:
- Battery Installation: Correctly mounting and connecting the battery.
- Motor Connection: Ensuring the motor is properly connected to the drivetrain.
- Control System Setup: Configuring the display, throttle, and other control components.
- Wiring Management: Managing and securing all wiring to prevent damage.
- Software Configuration: Some e-bikes require software configuration for optimal performance.
14. Bike Assembly for Different Motorcycle Types
Does the assembly process vary for different types of bikes, such as mountain bikes versus road bikes? Yes, the assembly process varies depending on the bike type. Mountain bikes require specific suspension and brake adjustments, while road bikes need precise gear and handlebar setups.
Here’s how assembly differs for various bike types:
- Mountain Bikes: Focus on suspension setup, brake adjustments, and proper tire inflation for off-road conditions.
- Road Bikes: Emphasis on precise gear tuning, handlebar positioning for aerodynamics, and ensuring smooth rolling resistance.
- Hybrid Bikes: Balanced approach, ensuring comfort and efficiency for both road and light trail use.
- Electric Bikes: Additional steps for electrical component installation and configuration.
15. Common Mistakes to Avoid During DIY Assembly
What are common mistakes to avoid when assembling a bike yourself? Common mistakes include improper torqueing, incorrect cable routing, misaligned components, and skipping safety checks. Avoiding these mistakes ensures a safe and functional bike.
Here’s a list of common mistakes:
- Improper Torqueing: Over-tightening or under-tightening bolts.
- Incorrect Cable Routing: Routing cables incorrectly, causing them to rub or interfere with components.
- Misaligned Components: Not aligning wheels, handlebars, or the seat properly.
- Skipping Safety Checks: Failing to perform a final safety check before riding.
- Ignoring Instructions: Not following the manufacturer’s instructions.
16. The Role of Bike Fitting in Assembly
Why is bike fitting important during or after assembly? Bike fitting optimizes comfort, efficiency, and injury prevention. Adjusting the seat height, handlebar position, and cleat alignment ensures a proper fit for the rider’s body.
Here’s how bike fitting benefits riders:
- Enhanced Comfort: Reduces strain and discomfort during long rides.
- Improved Efficiency: Optimizes power output and reduces energy waste.
- Injury Prevention: Minimizes the risk of overuse injuries.
- Proper Alignment: Ensures correct alignment of joints and muscles.
- Customization: Tailors the bike to the rider’s specific needs and preferences.
17. Accessorizing Your Newly Assembled Bike
What accessories should I consider adding to my bike after assembly? Essential accessories include a helmet, lights, a lock, a water bottle cage, and a repair kit. These accessories enhance safety, convenience, and preparedness.
Here’s a list of recommended accessories:
- Helmet: Essential for safety and head protection.
- Lights: Front and rear lights for visibility, especially during low-light conditions.
- Lock: To secure your bike and prevent theft.
- Water Bottle Cage: To stay hydrated during rides.
- Repair Kit: Includes essential tools and supplies for roadside repairs.
- Fenders: To protect you from water and mud.
- Bike Computer: To track your speed, distance, and other metrics.
18. Assembly Considerations for Vintage Bikes
How does bike assembly differ for vintage or classic bikes? Vintage bike assembly requires specialized knowledge and care due to older components and unique designs. Preserving originality and ensuring compatibility are key considerations.
Here are the key differences in vintage bike assembly:
- Component Compatibility: Ensuring new components are compatible with vintage parts.
- Originality Preservation: Maintaining the bike’s original appearance and functionality.
- Specialized Tools: Often requires specialized tools for older components.
- Corrosion and Wear: Addressing issues related to corrosion and wear on vintage parts.
- Historical Accuracy: Maintaining historical accuracy for restoration projects.
19. Troubleshooting Common Assembly Issues
What are some common issues encountered during bike assembly and how can they be resolved? Common issues include difficulty installing components, misaligned brakes, and gear shifting problems. Consulting online resources and seeking professional help can resolve these issues.
Here are some troubleshooting tips:
- Difficulty Installing Components: Ensure you have the right tools and are following the manufacturer’s instructions.
- Misaligned Brakes: Adjust brake cable tension and caliper position for proper alignment.
- Gear Shifting Problems: Adjust cable tension and derailleur alignment for smooth shifting.
- Loose Bolts: Check and tighten all bolts to the correct torque specifications.
- Consult Resources: Utilize online resources, videos, and forums for guidance.
20. Safety Gear and Legal Requirements After Assembly
What safety gear is essential after bike assembly, and what legal requirements should I be aware of? Essential safety gear includes a helmet, reflective clothing, and lights. Legal requirements vary by location, but often include mandatory lights and reflectors.
Here’s a breakdown of safety gear and legal requirements:
- Helmet: Mandatory in many jurisdictions and essential for head protection.
- Reflective Clothing: Enhances visibility, especially during low-light conditions.
- Lights: Required in many areas for riding at night.
- Reflectors: Often legally required for visibility.
- Local Laws: Be aware of local laws regarding bike operation, such as hand signals and lane positioning.
21. Benefits of Joining a Biker Community After Assembly
What are the benefits of joining a biker community after assembling my bike? Joining a biker community provides support, knowledge sharing, group rides, and social connections with fellow enthusiasts. These communities enhance the biking experience and provide valuable resources.
Here are the advantages of joining a community:
- Support and Advice: Access to experienced riders who can offer advice and assistance.
- Knowledge Sharing: Learning about maintenance, riding techniques, and local routes.
- Group Rides: Participating in organized rides and events.
- Social Connections: Building friendships and connections with fellow enthusiasts.
- Safety in Numbers: Riding with a group can enhance safety on the road.
22. Cost of Bike Repair vs. Professional Assembly
How does the cost of bike repair compare to the cost of professional assembly? Professional assembly often costs more upfront but reduces the likelihood of future repairs due to improper setup. Regular maintenance and proper assembly can save money in the long run.
Here’s a comparison:
- Professional Assembly: Higher upfront cost but reduces the risk of errors and future repairs.
- DIY Assembly: Lower upfront cost but potential for costly repairs if not done correctly.
- Regular Maintenance: Routine maintenance can prevent minor issues from becoming major repairs.
- Cost of Repairs: Can vary widely depending on the complexity of the issue and the shop’s labor rates.
23. The Future of Bike Assembly: Trends and Innovations
What are the emerging trends and innovations in bike assembly? Emerging trends include modular bike designs, automated assembly processes, and virtual reality training for mechanics. These innovations aim to improve efficiency, precision, and customization.
Here are some key trends:
- Modular Designs: Bikes designed for easier and faster assembly.
- Automated Assembly: Robotic systems that automate parts of the assembly process.
- VR Training: Virtual reality training for mechanics to improve skills and efficiency.
- Customization: Increased focus on personalized bike fitting and component selection.
- Sustainability: Emphasis on eco-friendly assembly processes and materials.
24. Eco-Friendly Bike Assembly Practices
What eco-friendly practices can be implemented during bike assembly? Eco-friendly practices include using sustainable materials, minimizing waste, recycling components, and opting for non-toxic lubricants and cleaners. These practices reduce the environmental impact of bike assembly.
Here are some eco-friendly practices:
- Sustainable Materials: Using frames, tires, and other components made from recycled or sustainable materials.
- Waste Reduction: Minimizing packaging and waste during assembly.
- Recycling Components: Recycling old parts and components whenever possible.
- Non-Toxic Lubricants: Using non-toxic lubricants and cleaners for maintenance.
- Energy Efficiency: Implementing energy-efficient practices in the assembly shop.
25. Finding Discounts and Deals on Bike Assembly
Where can I find discounts or deals on professional bike assembly services? Look for discounts at local bike shops, online coupons, and seasonal promotions. Membership in biking organizations can also provide access to exclusive deals.
Here are some ways to find discounts:
- Local Bike Shops: Check for discounts and promotions at local shops.
- Online Coupons: Search for online coupons and deals.
- Seasonal Promotions: Take advantage of seasonal sales and promotions.
- Biking Organizations: Join biking organizations for access to exclusive deals.
- Package Deals: Look for package deals that include assembly and accessories.
26. Legal Aspects of Buying and Assembling a Bike
What legal aspects should I consider when buying and assembling a bike? Legal aspects include ensuring the bike meets safety standards, complying with local traffic laws, and having proper documentation. Understanding these legal aspects ensures a safe and compliant riding experience.
Here are some legal considerations:
- Safety Standards: Ensure the bike meets all relevant safety standards and regulations.
- Traffic Laws: Comply with all local traffic laws and regulations for bikes.
- Documentation: Keep all purchase documentation and warranty information.
- Insurance: Consider purchasing bike insurance for liability and theft protection.
- Registration: Check if bike registration is required in your area.
27. Importance of Test Rides After Bike Assembly
Why is it important to conduct a test ride after bike assembly? A test ride allows you to identify any issues with the assembly, such as misaligned brakes or gear shifting problems, before they become dangerous. It also helps ensure the bike fits comfortably and performs as expected.
Here’s why test rides are essential:
- Identify Issues: Uncover any problems with the assembly before they become dangerous.
- Ensure Comfort: Confirm the bike fits comfortably and is properly adjusted.
- Verify Performance: Ensure the bike performs as expected, with smooth shifting and reliable braking.
- Safety Check: Conduct a final safety check before embarking on longer rides.
- Adjustments: Make any necessary adjustments based on the test ride.
28. What to Do if a Bike Shop Damages Your Bike During Assembly
What steps should I take if a bike shop damages my bike during assembly? Document the damage, discuss it with the shop manager, and request a repair or replacement. If necessary, consult with a legal professional to protect your rights.
Here are the steps to take:
- Document the Damage: Take photos and notes of the damage.
- Discuss with Manager: Talk to the shop manager and explain the issue.
- Request Repair or Replacement: Ask for a repair or replacement of the damaged components.
- Consult Legal Professional: If the shop is uncooperative, consult with a legal professional.
- Review Shop Policies: Check the shop’s policies on damaged goods and liability.
29. How Bike Assembly Affects Your Bike’s Warranty
How does professional or DIY assembly affect my bike’s warranty? Professional assembly by an authorized dealer typically preserves the warranty, while DIY assembly might void it if done incorrectly. Always check the warranty terms to ensure compliance.
Here’s how assembly affects warranty:
- Professional Assembly: Usually preserves the warranty if done by an authorized dealer.
- DIY Assembly: Might void the warranty if done incorrectly or without proper documentation.
- Warranty Terms: Always check the warranty terms and conditions to understand the requirements.
- Documentation: Keep records of all assembly and maintenance work performed.
- Authorized Service: Using authorized service centers for assembly and repairs ensures warranty compliance.
30. Factors That Determine the Lifespan of Your Assembled Bike
What factors determine the lifespan of my assembled bike? The lifespan of your assembled bike depends on factors like build quality, materials, riding conditions, and maintenance practices. Proper care and maintenance can significantly extend the bike’s lifespan.
Here are the key factors:
- Build Quality: Higher quality bikes tend to last longer.
- Materials: Bikes made from durable materials like carbon fiber or high-grade aluminum are more resilient.
- Riding Conditions: Harsh conditions can accelerate wear and tear.
- Maintenance Practices: Regular maintenance can significantly extend the bike’s lifespan.
- Storage Conditions: Storing the bike in a dry, protected environment prevents corrosion and damage.
FAQs
How much does it cost to get a bike assembled at Walmart? Walmart typically charges between $30 and $60 for bike assembly, depending on the model. Prices vary, but it’s generally less expensive than specialized bike shops.
What is the average cost to assemble a mountain bike? The average cost to assemble a mountain bike ranges from $60 to $180, depending on the bike’s complexity and the shop’s labor rates. More advanced models may incur higher fees.
Is it cheaper to buy a bike online and have it assembled? Buying a bike online can be cheaper, but factor in the additional assembly cost, which typically ranges from $50 to $200. Comparing total costs ensures you get the best deal.
How long does it take a bike shop to assemble a bike? Most bike shops can assemble a bike within one to two days, depending on their workload and the bike’s complexity. Scheduling an appointment can expedite the process.
Will assembling a bike myself void the warranty? Assembling a bike yourself might void the warranty if not done correctly. Always check the warranty terms to ensure compliance and consider professional assembly to preserve it.
What’s the best way to transport a bike after assembly? The best way to transport a bike after assembly is by using a bike rack for your car or carefully loading it into a vehicle with padding to prevent damage. Proper transportation ensures the bike remains in perfect condition.
What are the risks of riding a poorly assembled bike? The risks of riding a poorly assembled bike include brake failure, gear shifting problems, and component malfunctions, all of which can lead to accidents and injuries. Proper assembly is crucial for safety.
Do bike shops offer assembly classes or workshops? Some bike shops offer assembly classes or workshops to teach you how to assemble and maintain your bike. These classes provide valuable hands-on experience and knowledge.
How often should I get my assembled bike tuned up? You should get your assembled bike tuned up at least once a year, or more frequently if you ride regularly or in harsh conditions. Regular tune-ups ensure optimal performance and safety.
What should I do if my bike makes noise after assembly? If your bike makes noise after assembly, check for loose bolts, misaligned components, or cable friction. Consulting a bike shop can help diagnose and resolve the issue.
These insights from usabikers.net aim to empower you with the knowledge needed for your biking journey. Whether you choose professional help or tackle the task yourself, remember that the road ahead is full of adventure and camaraderie.
Ready to explore more? Visit usabikers.net today and discover a wealth of articles, reviews, and a thriving biker community waiting to welcome you. Share your experiences, learn from fellow enthusiasts, and gear up for your next unforgettable ride. Join us now and be part of the ultimate biker resource!
(Address: 801 Sturgis Main St, Sturgis, SD 57785, United States. Phone: +1 (605) 347-2000. Website: usabikers.net.)