Adjusting your bike shocks is crucial for optimal performance, comfort, and control on any terrain, and usabikers.net is here to guide you. Optimizing your suspension tuning enhances your riding experience, ensures safety, and allows you to tackle trails with confidence. Discover how to fine-tune your mountain bike shocks for the perfect ride, enhancing your safety and control on the road, plus access insider tips on suspension settings.
1. Why Is Adjusting Bike Shocks Important?
Adjusting your bike shocks is essential because it optimizes performance, enhances comfort, and improves control. A well-tuned suspension system absorbs impacts, maintains traction, and provides a smoother, safer ride. Properly adjusted shocks adapt to varying terrains and riding styles, ensuring the bike responds predictably and efficiently.
1.1 Enhanced Performance
Well-adjusted shocks improve the bike’s ability to handle different terrains. When shocks are properly tuned, they absorb bumps and vibrations, allowing the rider to maintain speed and momentum. According to research from the Motorcycle Safety Foundation (MSF), correctly tuned suspension can improve handling by up to 30%.
1.2 Improved Comfort
Properly adjusted shocks greatly improve ride comfort. By absorbing impacts and vibrations, the suspension system reduces fatigue and stress on the rider’s body. This is particularly important for long rides where comfort can significantly affect endurance and enjoyment.
1.3 Better Control
Adjusting bike shocks ensures the tires maintain contact with the ground, providing better traction and control. The American Motorcyclist Association (AMA) emphasizes that proper suspension setup is crucial for maintaining stability and preventing loss of control, especially on uneven surfaces.
1.4 Preventing Damage
Regular adjustments prevent premature wear and tear on the bike’s frame and components. Properly tuned suspension absorbs impact energy, reducing stress on the frame, wheels, and other parts, which can extend the lifespan of the bike.
2. Understanding Different Types of Bike Shocks
Understanding the different types of bike shocks is vital for effective adjustment and maintenance. The two primary types are coil shocks and air shocks, each with distinct characteristics and applications.
2.1 Coil Shocks
Coil shocks use a metal spring to absorb impacts. They are known for their linear spring rate, providing consistent performance throughout the travel.
-
Pros:
- Highly sensitive to small bumps, offering excellent traction.
- Consistent performance in varying temperatures.
- Durable and require less frequent maintenance.
-
Cons:
- Heavier than air shocks.
- Less adjustable; spring rate is fixed unless the coil is replaced.
- Can be too linear for some riders and terrains.
2.2 Air Shocks
Air shocks use compressed air as the spring. They are lighter and offer more adjustability compared to coil shocks.
-
Pros:
- Lighter weight improves agility and handling.
- Highly adjustable; air pressure can be easily changed to suit rider weight and terrain.
- Progressive spring rate can be tuned using volume spacers.
-
Cons:
- Less sensitive to small bumps compared to coil shocks.
- Performance can be affected by temperature changes.
- Require more frequent maintenance to ensure proper air seal.
**2.3 Key Differences
| Feature | Coil Shocks | Air Shocks |
|---|---|---|
| Weight | Heavier | Lighter |
| Adjustability | Limited | High |
| Sensitivity | High | Lower |
| Maintenance | Less frequent | More frequent |
| Performance | Consistent | Temperature-sensitive |
3. Essential Tools for Adjusting Bike Shocks
Having the right tools is essential for effectively adjusting bike shocks. These tools ensure you can make precise adjustments and properly maintain your suspension system.
3.1 Shock Pump
A shock pump is crucial for adjusting air shocks. It allows you to accurately adjust the air pressure to achieve the desired sag and spring rate.
-
Features:
- High-pressure gauge for precise readings.
- No-loss connector to prevent air loss during attachment and detachment.
- Durable construction for long-lasting use.
3.2 Measuring Device
A ruler or tape measure is needed to measure sag and travel. Accurate measurements are vital for setting up your suspension correctly.
-
Types:
- Digital calipers for precise measurements.
- Flexible tape measures for ease of use.
- Rulers with millimeter markings for accuracy.
3.3 Volume Spacers
Volume spacers (also known as volume reducers or tokens) are used to adjust the progressivity of air shocks. They reduce the air volume in the shock, making the spring rate more progressive towards the end of the stroke.
-
Sizes:
- Available in various sizes to fine-tune suspension performance.
- Typically made of plastic or rubber.
3.4 Allen Wrenches
Allen wrenches are needed to adjust compression and rebound damping settings on most shocks. Having a set of various sizes ensures you can adjust any type of shock.
-
Types:
- Standard Allen wrench sets.
- Torque wrenches with Allen key attachments for precise adjustments.
3.5 Suspension Fluid
Suspension fluid is essential for servicing and maintaining shocks. Regular fluid changes keep the shocks performing optimally and prevent wear.
-
Viscosity:
- Available in different viscosities to suit various shocks and riding conditions.
- Use manufacturer-recommended fluid for best performance.
3.6 Cleaning Supplies
Keeping your shocks clean is vital for maintaining their performance. Use a soft brush and mild detergent to remove dirt and grime.
-
Items:
- Soft brush
- Mild detergent
- Clean cloths
4. Understanding Sag and Its Importance
Understanding sag is fundamental to setting up your bike’s suspension correctly. Sag refers to the amount the suspension compresses under your weight when you are in a riding position.
4.1 What is Sag?
Sag is the amount your suspension compresses when you sit on your bike in your normal riding position. It is a crucial measurement for setting up your suspension because it determines how much travel is available for absorbing impacts and maintaining traction.
4.2 Why is Sag Important?
- Optimal Traction: Proper sag ensures your wheels stay in contact with the ground, maximizing traction and control.
- Absorption: Correct sag allows the suspension to absorb bumps and vibrations effectively.
- Comfort: Sag contributes to a smoother, more comfortable ride by reducing harshness and fatigue.
4.3 Recommended Sag Values
Suggested sag settings generally fall within specific ranges. These depend on the type of bike and riding style:
- Cross-Country (XC): 15-20% sag
- Trail: 20-25% sag
- Enduro: 25-30% sag
- Downhill (DH): 30-35% sag
4.4 How to Measure Sag
-
Prepare Your Bike: Ensure your bike is in good working order and the tires are properly inflated.
-
Set the O-Ring: Push the O-ring (or rubber band) on the shock stanchion and fork leg up against the seal.
-
Mount the Bike: Have a friend hold the bike steady while you sit on it in your normal riding position.
-
Let the Bike Settle: Allow the suspension to settle for a few seconds.
-
Dismount Carefully: Without bouncing, carefully dismount the bike without disturbing the O-ring.
-
Measure the Distance: Measure the distance between the O-ring and the seal. This is your sag measurement.
-
Calculate Percentage: Divide the sag measurement by the total travel and multiply by 100 to get the percentage.
- Example: If your shock has 50mm of travel and the sag measures 15mm, the sag percentage is (15mm / 50mm) x 100 = 30%.
4.5 Adjusting Sag
-
Air Shocks:
- To decrease sag (make the suspension firmer), add air pressure using a shock pump.
- To increase sag (make the suspension softer), release air pressure using the shock pump.
-
Coil Shocks:
- To adjust sag on a coil shock, you need to change the coil spring to one with a different spring rate.
- A stiffer spring will decrease sag, while a softer spring will increase sag.
 Measuring mountain bike sag
5. Step-by-Step Guide to Adjusting Bike Shocks
This comprehensive guide provides a step-by-step approach to adjusting your bike shocks for optimal performance.
5.1 Setting Rear Shock Sag
- Prepare Your Bike: Ensure your rear shock is in ‘fully open’ mode. If it has a low-speed compression adjuster, wind it fully in the [-] direction.
- Mount the Bike: Have an assistant support the bike on level ground as you climb on.
- Bounce and Settle: Bounce firmly up and down to charge the negative spring and free up the travel. Assume your normal seated position and allow the bike to settle for at least 5 seconds.
- Set the O-Ring: Have your assistant push the rubber O-ring on the shock stanchion up (or down) to the rubber wiper seal.
- Dismount and Measure: Carefully rock your weight forward and dismount from the bike without disturbing the O-ring. Measure the distance the O-ring has been pushed up from the wiper seal in mm.
- Calculate Sag Percentage: Divide this number by the total shock stroke and then multiply by 100 to get the percentage sag. For example, (15 mm / 50 mm) x 100 = 30%.
- Adjust Air Pressure: To achieve the correct sag, add or remove air from the air-spring as needed and repeat the process. Many manufacturers will have a suggested sag setting, but if not, we recommend a base setting of 30%. If you require less sag, add air to the shock; if you require more sag, lower the air pressure. Add air in 10 psi increments, repeating the process until you reach the required sag.
5.2 Setting Fork Sag
- Prepare Your Fork: Make sure your suspension damping is fully open and adjust the air-spring pressure to the manufacturer’s recommendation.
- Mount the Bike: Have your assistant support the bike as you climb on.
- Bounce and Settle: Bounce firmly up and down to charge the negative spring and free up the seals. Assume your normal standing attack position, then allow the bike to settle for at least 5 seconds.
- Set the O-Ring: Have your assistant slide the rubber O-ring on the fork stanchion down to the rubber wiper seal.
- Dismount and Measure: Carefully rock your weight back and dismount from the bike without disturbing the O-ring. Measure the distance the O-ring has been pushed up from the wiper seal in mm.
- Calculate Sag Percentage: Divide this number by the total travel (e.g., 160 mm) and then multiply by 100 to get the percentage sag.
- Adjust Air Pressure: To achieve the correct sag, add or remove air from the air-spring as needed and repeat. Start with the manufacturer’s recommendation, or if there are none, we would suggest 20%. If you require less sag, simply add air to the fork; if you require more sag, let some air out. Add air in 10 psi increments and each time repeat the process until you reach the required sag.
5.3 Optimizing Air-Spring Rate
-
Ride a Familiar Trail: Choose a short section of local trail that includes features that you regularly ride. Rocks, drops, jumps, berms, and G-outs—the more features, the better. Choose a trail with at least one section where you would expect to use full travel and one that you are comfortable with where you can hit the same lines again and again.
-
Set Baseline Adjustments: Before you start tuning, be sure all external rebound and compression adjustments are set to the manufacturer’s recommended specifications. This will put all settings in a good base range for your weight.
-
Evaluate Suspension Performance: After a few runs to get comfortable, push the fork and shock O-rings down to their wiper seal and ride the trail, concentrating on how big impacts and drops feel. Is your bike bottoming out harshly? Does it feel harsh on small bumps? Are you getting full travel where you expect to?
-
Adjust Rear Shock:
- If the rear of your bike feels wallowy and stuck to the ground, bottoming out easily, your shock spring rate is too low. Add pressure to the rear shock, 10 psi at a time, and repeat the trail. Stop adding air when the bike feels good, while still giving full travel when required. Make a note of the optimized pressure.
- If the rear of your bike feels harsh over small bumps and does not give you full travel where you desire, your shock spring rate is too high. Remove pressure from the rear shock 10 psi at a time and repeat the trail. Stop when the bike feels good over small bumps and maintains traction. Make a note of the optimized pressure.
-
Adjust Suspension Fork:
- If your suspension fork dives when you brake or ride very steep trails, your fork air spring rate is too low. Add pressure to the suspension fork 5 psi at a time and repeat the trail. Stop when the fork dives less and gives good support. Make a note of the optimized pressure.
- If the suspension fork feels harsh over small bumps and lacks grip, your fork air spring rate is too high. Remove pressure from the fork 5 psi at a time and repeat the trail. Stop when the fork feels sensitive over small bumps but still has good support. Make a note of the optimized pressure.
5.4 Adjusting Spring Rate Progression
-
Evaluate Bottoming Out: If you’re a strong rider and feel like the rear suspension is frequently bottoming out, or your fork is running low in its travel under hard braking and fast corners even though the bike does not feel soft in general riding, you may need to adjust the spring rate progressivity.
-
Add Volume Spacers:
- If you feel that you are bottoming out your suspension too frequently, despite running the correct air-spring pressure, reduce the volume of air in the fork or shock air-spring chamber with the addition of 1-2 volume reducers.
- If you feel that you struggle to achieve full travel where you expect to, increase the volume of air in the fork or shock air spring chamber by removing 1-2 volume reducers.
5.5 Setting Rebound Damping
-
Understand Rebound Damping: Rebound damping controls the speed at which compressed suspension extends after an impact. If rebound damping is too low (-), the suspension will extend too fast and feel bouncy and out of control. If the rebound damping is too high (+), the suspension will not recover fast enough after repeated impacts and ‘pack down’, sinking ever lower into its travel and performing poorly.
-
Setting Rebound Damping on Your Shock:
- Start by adding full rebound damping (+) to the shock.
- Choose a small drop to ride off slowly and focus on how the rear suspension springs back after impact.
- Repeat the test, each time reduce rebound damping by one click (-) and see how the shock starts to recover faster.
- Stop when the rear shock recovers so fast it overshoots a tiny amount. This is a good base setting. Now repeat a full section of trail at this setting. Experiment twice more with two clicks either side and see which feels the most controlled with good grip.
-
Setting Rebound Damping on Your Fork:
- To set a base fork rebound, start with the rebound fully closed (+). Stand next to your bike and compress the fork with your body weight. Quickly release the fork and let it bounce back.
- Adjust the rebound until the fork rebounds as fast as possible without causing the front wheel to ‘jump’ off the ground.
- Once the base setting has been set, repeat a full section of trail at this setting. Now repeat a full section of trail at this setting. Experiment twice more with two clicks either side and see which feels the most controlled with good grip.
5.6 Adjusting Low-Speed Compression Damping
-
Understand Low-Speed Compression Damping: Low-speed compression damping influences your suspension characteristics at low shaft speeds (not bike speeds), predominantly influencing the mid-portion of the suspension travel.
-
Adjust Compression Damping:
- Starting with no low-speed compression damping added on the shock, ride the test trail, each time increasing the low-speed compression two clicks (+).
- Focus on how the bike feels under big weight shifts, braking, corners and jump faces. Stop when the bike feels supportive in the mid-part of its travel.
- Repeat for the fork.
5.7 Adjusting High-Speed Compression Damping
-
Understand High-Speed Compression Damping: The most expensive forks and rear shocks have a high-speed compression damping adjustment (HSC), controlling the damping when the suspension compresses at high shaft speeds (big, fast impacts).
-
Adjust Compression Damping:
- Starting with no high-speed compression damping added on the shock, ride the test trail, each time increasing it by one or two (if there is a lot of range) clicks.
- Focus on how the bike feels under high-speed impacts, like landing jumps or big obstacles at high speed. Stop when the bike feels supportive at the end of its travel.
- Repeat for the fork.
 Optimizing bike suspension
6. Advanced Tuning Techniques
For those seeking to fine-tune their suspension even further, these advanced techniques can help optimize performance for specific riding styles and terrains.
6.1 Volume Spacers: Fine-Tuning Progression
Volume spacers, or tokens, are small inserts that reduce the air volume inside the air spring of your fork or shock. Adjusting the number of volume spacers allows you to fine-tune the progression of your suspension.
-
Adding Volume Spacers:
- Increases the spring rate at the end of the travel.
- Reduces bottoming out on big hits.
- Ideal for aggressive riders or those riding steep, technical terrain.
-
Removing Volume Spacers:
- Decreases the spring rate at the end of the travel.
- Allows for easier use of full travel.
- Suitable for lighter riders or those riding less aggressive terrain.
6.2 Pressure Tuning: Finding the Sweet Spot
While sag is a good starting point, fine-tuning air pressure based on trail feedback can significantly improve performance.
-
Increasing Pressure:
- Provides more support in berms and corners.
- Reduces brake dive.
- May decrease small bump sensitivity.
-
Decreasing Pressure:
- Increases small bump sensitivity and traction.
- Improves comfort on rough terrain.
- May increase bottoming out on big hits.
6.3 Balancing Front and Rear Suspension
Achieving a balanced suspension setup is crucial for predictable handling. An unbalanced setup can lead to poor cornering, loss of traction, and instability.
-
Rebound Balance:
- Ensure the front and rear rebound speeds are similar.
- If one end feels bouncy or uncontrolled, adjust the rebound damping accordingly.
-
Compression Balance:
- Adjust compression damping to maintain a balanced feel during weight shifts.
- If one end feels too stiff or too soft, adjust the compression damping to match the other end.
6.4 Using a Data Acquisition System
For serious riders, a data acquisition system can provide valuable insights into suspension performance. These systems record suspension travel, velocity, and other parameters, allowing you to analyze your suspension’s behavior on the trail.
-
Benefits:
- Provides objective data to guide tuning decisions.
- Helps identify areas for improvement.
- Allows for precise comparisons between different settings.
7. Maintenance Tips for Bike Shocks
Proper maintenance is essential for ensuring your bike shocks perform optimally and last longer. Regular servicing and care can prevent costly repairs and maintain consistent performance.
7.1 Regular Cleaning
Keeping your shocks clean is the most basic but crucial maintenance task. Dirt and grime can damage seals and reduce performance.
-
Frequency: After every ride, especially in muddy or dusty conditions.
-
How to Clean:
- Use a soft brush and mild soap to gently clean the shocks.
- Rinse with clean water and dry with a soft cloth.
- Avoid using high-pressure washers, as they can force water into the seals.
7.2 Inspecting Seals and Stanchions
Regularly inspect the seals and stanchions for any signs of wear or damage.
-
Frequency: At least once a month.
-
What to Look For:
- Cracks or tears in the seals.
- Scratches or wear on the stanchions.
- Oil leaks.
-
Action: Replace damaged seals immediately to prevent further damage. For stanchion damage, consult a professional suspension technician.
7.3 Lubrication
Proper lubrication keeps the shocks moving smoothly and reduces friction.
-
Frequency: After cleaning and as needed.
-
How to Lubricate:
- Apply a small amount of suspension-specific lubricant to the seals and stanchions.
- Cycle the suspension a few times to distribute the lubricant.
- Wipe off any excess lubricant.
7.4 Air Pressure Checks
For air shocks, regularly check and adjust the air pressure to maintain proper sag.
-
Frequency: Before every ride.
-
How to Check:
- Use a shock pump to check the air pressure.
- Adjust the pressure as needed to achieve the correct sag.
7.5 Full Service
A full service involves disassembling the shocks, cleaning all parts, replacing worn components, and refilling with fresh oil.
-
Frequency: Every 50-100 hours of riding, or at least once a year.
-
Why It’s Important:
- Maintains optimal performance.
- Extends the life of the shocks.
- Prevents costly repairs.
-
Recommendation: It is best to have a professional suspension technician perform a full service.
7.6 Storing Your Bike
Proper storage can prevent damage and extend the life of your shocks.
-
Tips:
- Store your bike in a dry, cool place.
- Avoid storing your bike upside down, as this can cause oil to leak into the wrong chambers.
- Periodically cycle the suspension to keep the seals lubricated.
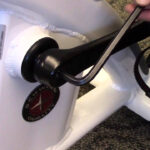
 Adjusting mountain bike shock
8. Common Mistakes to Avoid When Adjusting Bike Shocks
Avoiding common mistakes can prevent damage to your bike and ensure your suspension performs optimally.
8.1 Overlooking Sag
Failing to set the correct sag is a common mistake that can significantly impact your bike’s handling and comfort.
- Solution: Always set the sag before making any other adjustments.
8.2 Ignoring Manufacturer Recommendations
Ignoring the manufacturer’s recommendations for air pressure, rebound, and compression settings can lead to poor performance and potential damage.
- Solution: Start with the manufacturer’s recommended settings and adjust from there.
8.3 Making Too Many Adjustments at Once
Making multiple adjustments simultaneously can make it difficult to determine which changes are improving or worsening performance.
- Solution: Make one adjustment at a time and test the bike before making further changes.
8.4 Using the Wrong Tools
Using the wrong tools can damage your shocks and make adjustments more difficult.
- Solution: Use the correct tools, such as a shock pump with a precise gauge, and Allen wrenches of the appropriate size.
8.5 Neglecting Maintenance
Neglecting regular maintenance can lead to premature wear and costly repairs.
- Solution: Clean your shocks regularly, inspect seals and stanchions, and perform full services as recommended.
8.6 Over-Tightening Bolts
Over-tightening bolts can damage the threads and compromise the integrity of your suspension components.
- Solution: Use a torque wrench to tighten bolts to the manufacturer’s specified torque.
9. Troubleshooting Common Bike Shock Issues
Identifying and addressing common bike shock issues can help maintain optimal performance and prevent further damage.
9.1 Shock Bottoms Out Too Easily
If your shock bottoms out too easily, even on small impacts, it may indicate a problem with the air pressure, volume spacers, or compression damping.
-
Possible Causes:
- Air pressure too low.
- Too few volume spacers.
- Compression damping set too low.
-
Solutions:
- Increase air pressure.
- Add volume spacers.
- Increase compression damping.
9.2 Shock Feels Harsh on Small Bumps
If your shock feels harsh on small bumps, it may indicate that the air pressure is too high or the rebound damping is set too high.
-
Possible Causes:
- Air pressure too high.
- Rebound damping set too high.
-
Solutions:
- Decrease air pressure.
- Decrease rebound damping.
9.3 Shock Makes Noise
Unusual noises, such as squeaking or knocking, can indicate a problem with the shock’s internal components.
-
Possible Causes:
- Dry seals.
- Worn bushings.
- Loose components.
-
Solutions:
- Lubricate seals.
- Replace worn bushings.
- Tighten loose components.
9.4 Oil Leaks
Oil leaks are a serious issue that can significantly impact your shock’s performance and lifespan.
-
Possible Causes:
- Damaged seals.
- Cracked housing.
-
Solutions:
- Replace damaged seals.
- Consult a professional for housing repairs or replacement.
9.5 Reduced Travel
If your shock is not achieving its full travel, it may indicate a problem with the air pressure, volume spacers, or internal components.
-
Possible Causes:
- Air pressure too high.
- Too many volume spacers.
- Internal damage.
-
Solutions:
- Decrease air pressure.
- Remove volume spacers.
- Consult a professional for internal repairs.
10. Real-World Examples of Optimal Shock Adjustment
Exploring real-world examples highlights the impact of precise shock adjustments on riding experiences.
10.1 Example 1: Cross-Country Rider
-
Rider Profile: A cross-country rider who enjoys fast, flowy trails with occasional technical sections.
-
Initial Setup: The rider’s bike felt harsh on small bumps and lacked traction on loose climbs.
-
Adjustments Made:
- Reduced air pressure by 5 psi to increase sag to 20%.
- Decreased rebound damping by two clicks to improve small bump sensitivity.
-
Outcome: The rider reported improved traction on climbs, a smoother ride, and increased confidence in technical sections.
10.2 Example 2: Enduro Racer
-
Rider Profile: An enduro racer who tackles steep, technical descents with large jumps and drops.
-
Initial Setup: The rider’s bike was bottoming out frequently on big hits and felt unstable at high speeds.
-
Adjustments Made:
- Increased air pressure by 10 psi to reduce sag to 25%.
- Added one volume spacer to increase end-stroke progression.
- Increased compression damping by two clicks to improve support on steep descents.
-
Outcome: The rider experienced fewer bottom-outs, improved stability at high speeds, and increased confidence on challenging terrain.
10.3 Example 3: Trail Rider
-
Rider Profile: A trail rider who enjoys a mix of climbing, descending, and technical features.
-
Initial Setup: The rider’s bike felt unbalanced, with the front end diving under braking and the rear end feeling harsh on small bumps.
-
Adjustments Made:
- Increased air pressure in the fork by 5 psi to reduce brake dive.
- Decreased air pressure in the shock by 5 psi to improve small bump sensitivity.
- Adjusted rebound damping to match the front and rear suspension speeds.
-
Outcome: The rider reported improved balance, reduced brake dive, and a smoother, more controlled ride.
FAQ: Adjusting Bike Shocks
1. How often should I adjust my bike shocks?
You should check and adjust your bike shocks before every ride to ensure optimal performance and safety. Pay close attention to air pressure, sag, and any signs of wear or damage.
2. What is the best way to clean my bike shocks?
Use a soft brush and mild soap to gently clean the shocks. Rinse with clean water and dry with a soft cloth. Avoid using high-pressure washers, as they can damage the seals.
3. How do I know if my bike shocks need to be serviced?
Signs that your bike shocks need servicing include reduced travel, oil leaks, unusual noises, and poor performance. It is recommended to have your shocks fully serviced every 50-100 hours of riding, or at least once a year.
4. Can I adjust my bike shocks myself, or should I take it to a professional?
Basic adjustments, such as setting sag and adjusting air pressure, can be done yourself with the right tools and knowledge. However, more complex services, such as full rebuilds and internal repairs, should be performed by a professional suspension technician.
5. What tools do I need to adjust my bike shocks?
Essential tools include a shock pump, measuring device (ruler or tape measure), volume spacers, Allen wrenches, suspension fluid, and cleaning supplies.
6. How do I adjust the rebound damping on my bike shocks?
To adjust rebound damping, locate the rebound adjuster knob on your shock or fork. Turn the knob clockwise to increase rebound damping (slower rebound) and counter-clockwise to decrease rebound damping (faster rebound).
7. What are volume spacers, and how do they affect my suspension?
Volume spacers are small inserts that reduce the air volume inside the air spring of your fork or shock. Adding volume spacers increases the spring rate at the end of the travel, reducing bottoming out on big hits. Removing volume spacers decreases the spring rate at the end of the travel, allowing for easier use of full travel.
8. How do I know if I need to add or remove volume spacers?
If you are bottoming out too frequently, despite running the correct air pressure, you may need to add volume spacers. If you are struggling to achieve full travel, you may need to remove volume spacers.
9. What is sag, and why is it important?
Sag is the amount your suspension compresses when you sit on your bike in your normal riding position. It is crucial for ensuring your wheels stay in contact with the ground, maximizing traction and control.
10. Where can I find more information about adjusting my specific bike shocks?
Refer to your bike and suspension manufacturer’s manuals for specific instructions and recommendations. Additionally, websites like usabikers.net offer detailed guides and resources for adjusting bike shocks.
Conclusion
Mastering How To Adjust Bike Shocks can dramatically improve your riding experience. By understanding the different types of shocks, essential tools, and step-by-step adjustment processes, you can fine-tune your suspension for optimal performance and comfort. Remember to follow maintenance tips, avoid common mistakes, and troubleshoot any issues promptly.
Ready to take your ride to the next level? Explore usabikers.net for more in-depth articles, expert reviews, and a vibrant community of fellow motorcycle and mountain bike enthusiasts. Whether you’re looking for the latest gear recommendations, maintenance guides, or thrilling stories from the road, usabikers.net has you covered. Join us today and elevate your biking adventures!
Address: 801 Sturgis Main St, Sturgis, SD 57785, United States
Phone: +1 (605) 347-2000
Website: usabikers.net