Is your bike’s suspension feeling off? Learn How To Adjust Suspension On Bike for optimal performance and comfort with this comprehensive guide from usabikers.net. This guide will walk you through each step, ensuring a smoother, more controlled ride.
1. Why Bother Adjusting Your Bike’s Suspension?
Correctly tuned suspension can dramatically improve your riding experience. Adjusting your bike’s suspension allows you to optimize its performance for your specific riding style and the trails you frequent. A well-tuned suspension absorbs shocks efficiently, improves handling, and provides better control, making every ride more enjoyable. According to the Motorcycle Safety Foundation (MSF), proper suspension setup can reduce rider fatigue and improve overall safety. Ignoring suspension setup can lead to discomfort, poor handling, and even potential accidents. Understanding how to adjust your suspension is an investment in your riding pleasure and safety.
 MTB Suspension Setup Guide
2. Understanding Suspension Adjustment is Personal
Suspension setup is not one-size-fits-all. The ideal suspension setting depends on various factors, including your weight, riding style, and the type of terrain you typically encounter. Copying a friend’s setup or a pro’s might not yield the best results for you. While manufacturer guidelines offer a solid starting point, personalizing your setup will provide the most significant benefits. The key is to understand the principles of suspension adjustment and how each setting affects your bike’s performance. Remember, your goal is to achieve a suspension setup that complements your unique riding style and enhances your control on the road.
 Suspension Adjustment Variables
3. Recognizing the Compromise in Suspension Tuning
Perfect suspension is a myth. Suspension tuning is a balancing act; optimizing for one aspect often affects another. For example, prioritizing big-hit support may reduce sensitivity to small bumps. The goal is to find a compromise that provides the best overall performance for your riding needs. Understanding this trade-off allows you to make informed decisions about your suspension settings. Think about the types of terrain you ride most often and prioritize the suspension characteristics that will benefit you the most. Whether it’s soaking up rough terrain or maintaining stability on smooth roads, finding the right balance is key.
4. Pre-Adjustment Checklist for Bike Suspension
Before diving into adjustments, ensure your suspension components are in good condition. Servicing your suspension regularly is crucial for optimal performance. Suspension manufacturers typically recommend an oil service every 50 hours of riding and a full damper service every 100-200 hours. A well-maintained suspension system will respond more predictably and provide a more consistent ride. If your bike has seen a lot of action, consider having your suspension units serviced by a professional. Start with a solid foundation before making any adjustments.
To follow this guide effectively, gather the following:
- Your usual riding gear (helmet, clothes, backpack)
- A familiar section of technical trail
- A shock pump
- A measuring device (ruler or tape)
- A calculator
- A friend to assist
5. How To Set Sag on Your Bike Suspension
Sag is the amount your suspension compresses under your weight. Setting sag correctly is the foundation for proper suspension setup. Sag allows your suspension to respond to both compressions and extensions, maintaining traction and control. Too little sag reduces grip, while too much can cause the bike to wallow and perform poorly on repeated impacts. Aim for the manufacturer’s recommended sag settings as a starting point. Sag is defined as the amount the suspension compresses into its travel when you sit on the bike, and it significantly influences the way your bike rides.
5.1. Adjusting Rear Shock Sag
Follow these steps to set the sag on your rear shock:
- Ensure your rear shock is in ‘fully open’ mode. If equipped with a low-speed compression adjuster, wind it fully in the [-] direction.
- Have an assistant support the bike on level ground as you climb on.
- Bounce firmly to charge the negative spring and free up the travel.
- Assume your normal seated position and wait for the bike to settle for at least 5 seconds. Have your assistant push the rubber O-ring on the shock stanchion up (or down) to the rubber wiper seal.
- Carefully dismount without disturbing the O-ring.
- Measure the distance the O-ring has been pushed from the wiper seal in mm.
- Divide this number by the total shock stroke (check your bike manual) and multiply by 100 to get the percentage sag. Example: (15 mm / 50 mm) x 100 = 30%.
- Add or remove air from the air-spring as needed and repeat until you achieve the correct sag.
Many manufacturers suggest a base setting, but 30% is a reliable starting point if no recommendation is available. Add air to the shock if you need less sag or lower the air pressure for more sag. Adjust air in 10 psi increments and repeat the process until you reach the desired sag.
 Setting Rear Shock Sag
5.2. Setting Fork Sag for Bike Suspension
Once the rear shock is dialed in, proceed to set up your suspension fork:
- Ensure your suspension damping is fully open and adjust the air-spring pressure to the manufacturer’s recommendation.
- Have your assistant support the bike as you climb on.
- Bounce firmly to charge the negative spring and free up the seals.
- Assume your normal standing attack position, and after allowing the bike to settle for at least 5 seconds, have your assistant slide the rubber O-ring on the fork stanchion down to the rubber wiper seal.
- Carefully dismount without disturbing the O-ring.
- Measure the distance the O-ring has been pushed up from the wiper seal in mm. Divide this number by the total travel (e.g., 160 mm) and then multiply by 100 to get the percentage sag.
- To achieve the correct sag, add or remove air from the air-spring as needed and repeat.
Start with the manufacturer’s recommendation or 20% if none is available. Add air to the fork for less sag, or release air for more sag. Adjust air in 10 psi increments, repeating the process until you reach the required sag.
Setting Rear Shock Sag
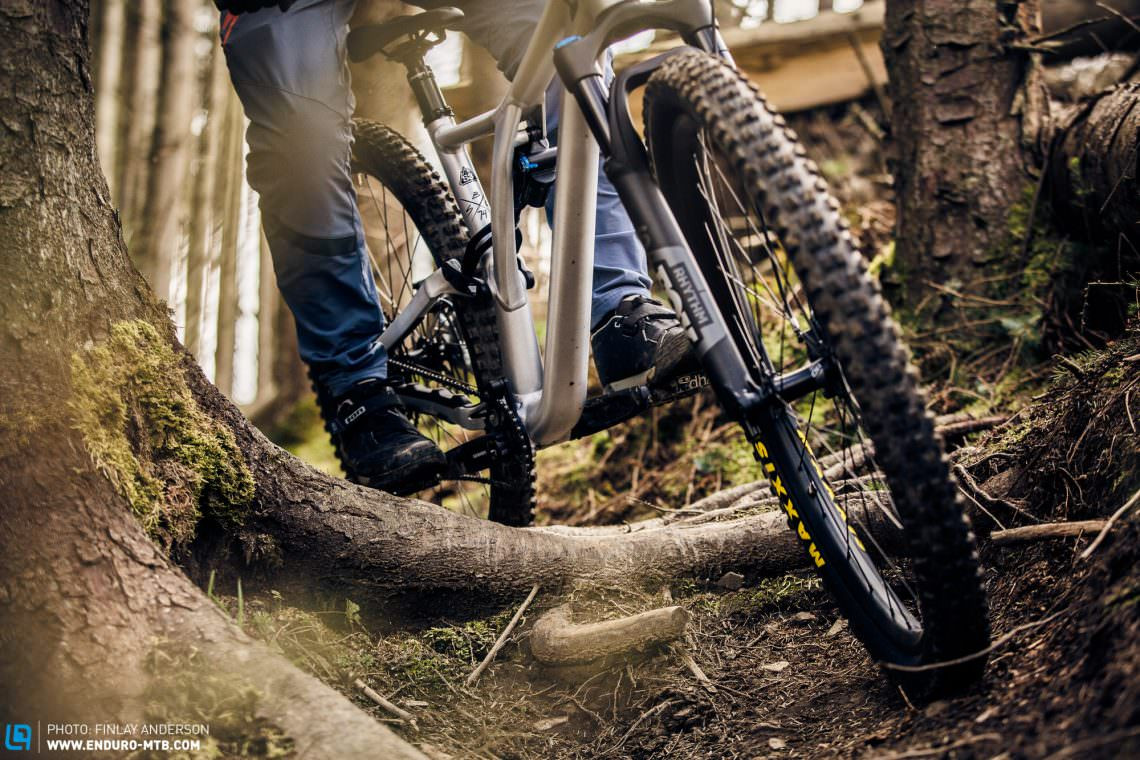
5.3. Advanced Sag Tuning
Now, fine-tune your base setting. Choosing a familiar trail with various features is crucial for advanced tuning. This could include rocks, drops, jumps, berms, and G-outs. A trail with a section where you expect to use full travel is ideal. Before tuning, ensure all external rebound and compression adjustments are set to the manufacturer’s recommended specifications. This places all settings in a good base range for your weight.
Mark Fitzsimmons, FOX Suspension Program Manager, suggests, “If a rider has a trail they ride weekly and know very well, they should be using all of their travel on occasions. What often happens is a rider will go to a new trail or one that they don’t know as well and won’t achieve full travel. This is OK as they won’t be riding as fast as they would on familiar trails.”
 Trail for Advanced Tuning
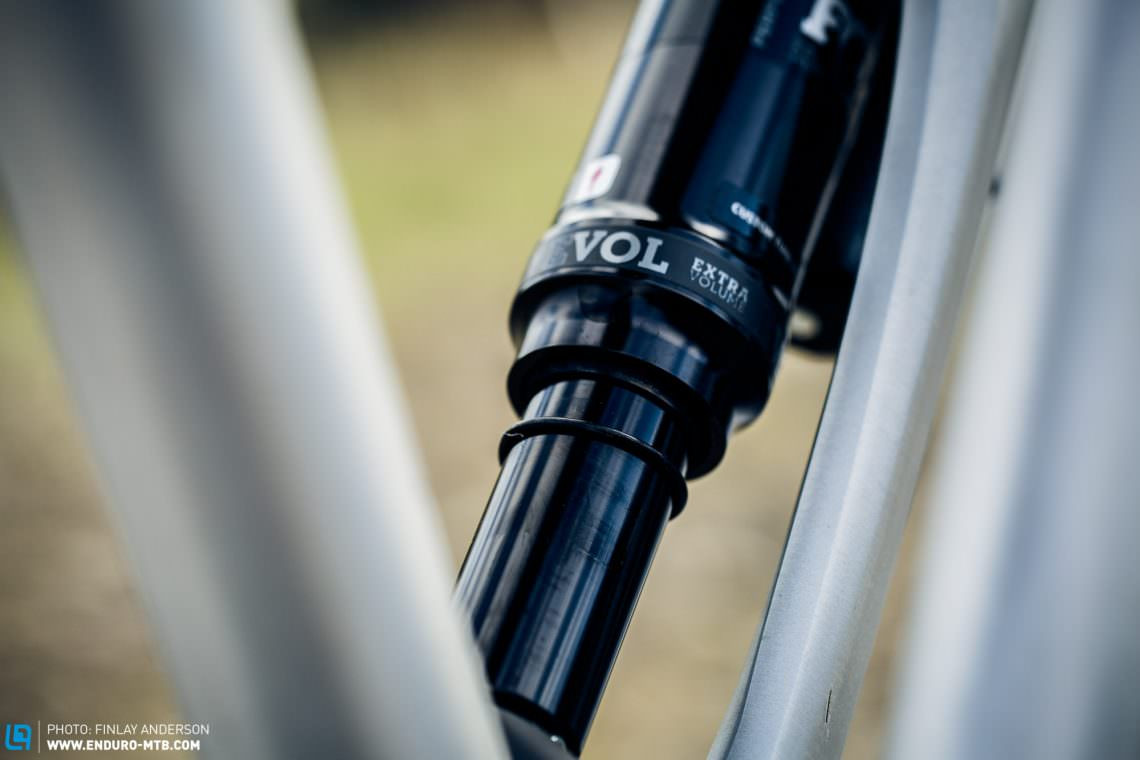
6. Air-Spring Rate Optimization on Your Bike
While 20% sag in the fork and 30% in the shock is a good starting point, it might not be the best for your riding style or the bike’s suspension design. Spring rate is a balance between big-hit support and small-bump sensitivity. Your ideal settings will depend on your riding style and the trails you ride.
After several runs to get comfortable, push the fork and shock O-rings down to their wiper seal and ride the trail. Focus on how big impacts and drops feel. Ask yourself:
- Is your bike bottoming out harshly?
- Does it feel harsh on small bumps?
- Are you getting full travel where you expect to?
If the rear of your bike feels wallowy, stuck to the ground, and bottoms out easily: Your shock spring rate is too low. Add pressure to the rear shock, 10 psi at a time, and repeat the trail. Stop adding air when the bike feels good while still giving full travel when required. Note the optimized pressure.
If the rear of your bike feels harsh over small bumps and does not give you full travel where you desire: Your shock spring rate is too high. Remove pressure from the rear shock 10 psi at a time and repeat the trail. Stop when the bike feels good over small bumps and maintains traction. Note the optimized pressure.
If your suspension fork dives when you brake or ride very steep trails: Your fork air spring rate is too low. Add pressure to the suspension fork 5 psi at a time and repeat the trail. Stop when the fork dives less and gives good support. Note the optimized pressure.
If the suspension fork feels harsh over small bumps and lacks grip: Your fork air spring rate is too high. Remove pressure from the fork 5 psi at a time and repeat the trail. Stop when the fork feels sensitive over small bumps but still has good support. Note the optimized pressure.
If you frequently bottom out your suspension fork or shock, and the only way to prevent it is to use a high spring pressure that feels harsh over small impacts, consider increasing your spring rate progression (see Step 7).
 Optimizing Air-Spring Rate
7. Adjusting Spring Rate Progression
Consider your riding style and the challenges of your trails. Adjusting spring rate progressivity is crucial for riders who frequently bottom out or don’t use enough travel. If you’re a strong rider and often bottom out the rear suspension, or your fork runs low in its travel under hard braking and fast corners, even though the bike doesn’t feel soft in general riding, adjust the spring rate progressivity. For a more progressive spring rate, add volume spacers (or remove if you aren’t using enough travel). Adding volume spacers firms up the final part of the suspension stroke, requiring more force to bottom out.
If you frequently bottom out your suspension, despite running the correct air-spring pressure: Reduce the volume of air in the fork or shock air-spring chamber by adding 1-2 volume reducers.
If you struggle to achieve full travel where you expect to: Increase the volume of air in the fork or shock air spring chamber by removing 1-2 volume reducers.
If you make significant changes to the setup of your fork, such as a firmer spring rate or more volume tokens, re-tune the spring rate and progressivity of the rear shock to match. Improved front-end confidence may lead you to ride more powerfully and require you to reconfigure the shock. Return to the track and start again.
 Spring Rate Progression
8. Setting Rebound Damping
Rebound damping controls the speed at which compressed suspension extends after an impact.
Too little rebound damping (-) results in suspension extending too fast, feeling bouncy and out of control. Too much rebound damping (+) means the suspension won’t recover fast enough after repeated impacts, ‘packing down’, sinking lower into its travel, and performing poorly.
8.1. How To Set Rebound Damping on Your Shock
- Start by adding full rebound damping (+) to the shock.
- Choose a small drop to ride off slowly and focus on how the rear suspension springs back after impact.
- Repeat the test, each time reducing rebound damping by one click (-) and see how the shock starts to recover faster.
- Stop when the rear shock recovers so fast it overshoots a tiny amount. This is a good base setting. Now repeat a full section of trail at this setting. Experiment twice more with two clicks either side and see which feels the most controlled with good grip.
 Setting Rebound Damping on Shock
8.2. Adjusting Rebound Damping on Your Fork
- To set a base fork rebound, start with the rebound fully closed (+). Stand next to your bike and compress the fork with your body weight. Quickly release the fork and let it bounce back.
- Adjust the rebound until the fork rebounds as fast as possible without causing the front wheel to ‘jump’ off the ground.
- Once the base setting has been set, repeat a full section of trail at this setting. Experiment twice more with two clicks either side and see which feels the most controlled with good grip.
Most suspension forks and shocks have a single rebound adjuster, effectively a low-speed rebound adjuster. High-end suspension units may also have a high-speed rebound adjuster, controlling rebound speed at high-shaft speeds. However, there is significant crossover between high- and low-speed rebound, with any adjustment of one directly influencing the other. If you have a high-speed rebound adjuster, set it to the manufacturer’s recommendation and then set rebound as described above using the low-speed rebound adjuster.
If you ride frequently on easy terrain or slowly, a slower rebound may feel more comfortable initially. However, moving to faster terrain, for example, on a holiday in the Alps, will leave you with sore arms and legs as your bike cannot recover fast enough from the hits. Run as fast a rebound setting as is comfortable for maximum performance.
 Adjusting Rebound Damping on Fork
9. Low-Speed Compression Damping Explained
Low-speed compression damping influences your suspension characteristics at low shaft speeds (not bike speeds), predominantly influencing the mid-portion of the suspension travel.
If you’ve achieved a good spring rate with good small bump performance and bottom-out control, but the bike lacks mid-stroke support, sinking deep into its travel when braking hard, riding steep trails, or pushing the bike into corners and jump faces, you need to add more low-speed compression damping. Adding low-speed compression damping reduces suspension sensitivity, so only add the minimum level to achieve enough support. Start with it fully open (no additional damping added).
If your bike moves through the middle of its stroke too quickly:
- Starting with no low-speed compression damping added on the shock, ride the test trail, each time increasing the low-speed compression two clicks (+).
- Focus on how the bike feels under big weight shifts, braking, corners, and jump faces. Stop when the bike feels supportive in the mid-part of its travel.
- Repeat for the fork.
Try to keep your low-speed compression damping settings balanced. For example, if you run very high low-speed compression on the fork and none on the rear shock, the bike will tend to shift more weight to the rear wheel during riding, and vice versa. A balanced setup is key.
 Low-Speed Compression Damping
 Low-Speed Compression Damping Adjustment
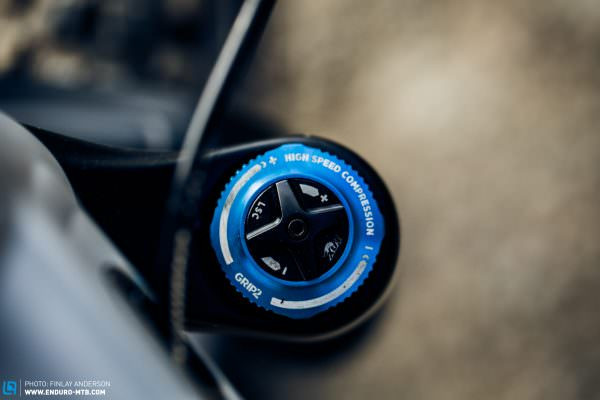
10. High-Speed Compression Damping: Fine-Tuning for Big Hits
The most advanced forks and rear shocks include a high-speed compression damping adjustment (HSC), controlling the damping when the suspension compresses at high shaft speeds (big, fast impacts).
If your fork or shock still bottoms out too easily, and you have a high-end shock and fork with the option, adjust your high-speed compression damping. Adding more high-speed compression damping reduces the amount of travel the fork uses in high-speed impacts (shaft speed, not bike speed). Low levels of high-speed compression result in digressive damping, which allows full travel easily in response to big, fast hits, whereas high levels result in progressive damping, reducing the amount of travel available in response to big, fast hits.
If your bike needs more support at the end of the stroke during high-speed hits:
- Starting with no high-speed compression damping added on the shock, ride the test trail, each time increasing it by one or two (if there is a lot of range) clicks.
- Focus on how the bike feels under high-speed impacts, like landing jumps or big obstacles at high speed. Stop when the bike feels supportive at the end of its travel.
- Repeat for the fork.
 High-Speed Compression Damping
11. The Importance of Suspension Balance
Balanced suspension is essential for optimal performance in nearly all cases when it comes to rebound and damping.
As a final check, find some level ground and ride slowly across it on your bike. From the attack position, pump repeatedly up and down as hard as you can. The bike should feel supportive, and the rebound speed should feel balanced for both the front and rear. If the bike feels unbalanced, identify the source of the imbalance and make corresponding adjustments.
Mark Fitzsimmons, FOX Fahrwerksprogramm-Manager, states, “A balanced suspension setup is very important. Traction not only comes from the tires and terrain surface, but the amount of force the rider is placing on the front and rear tire. A balanced setup is important to this element of traction.”
Following this guide will help you find a suspension setting optimized for your riding style and terrain and give you a deeper understanding of how each property of your suspension functions and interacts. Good suspension performance is a balance, a compromise even, between many different factors. If you make any significant changes to one setting of your suspension, you need to balance the other settings to match.
 Checking for Suspension Balance
12. FAQ: Adjusting Your Bike Suspension
1. What is sag, and why is it important?
Sag is the amount your suspension compresses under your weight, and it’s crucial because it allows your suspension to respond to both compressions and extensions, maintaining traction and control.
2. How often should I service my bike’s suspension?
Most manufacturers recommend an oil service every 50 hours of riding and a full damper service every 100-200 hours for optimal performance.
3. What tools do I need to adjust my bike’s suspension?
You’ll need your usual riding gear, a familiar technical trail, a shock pump, a measuring device (ruler or tape), a calculator, and a friend to assist.
4. What is rebound damping, and how does it affect my ride?
Rebound damping controls the speed at which compressed suspension extends after an impact. Too little rebound damping makes the suspension feel bouncy, while too much causes it to “pack down.”
5. What are volume spacers, and when should I use them?
Volume spacers reduce the volume of air in the air-spring chamber, making the suspension more progressive and preventing bottoming out on big hits.
6. How do I adjust low-speed compression damping?
Adjust low-speed compression damping by turning the adjuster clockwise to increase damping or counterclockwise to decrease it. Start with small adjustments and test on a familiar trail.
7. What does high-speed compression damping control?
High-speed compression damping controls the damping when the suspension compresses at high shaft speeds, such as during big, fast impacts.
8. How do I know if my suspension is balanced?
Find some level ground, pump up and down on your bike, and ensure the rebound speed feels balanced for both the front and rear.
9. Can I use someone else’s suspension settings on my bike?
While you can use them as a starting point, the ideal suspension setting depends on your weight, riding style, and the terrain you ride, so personalizing your setup is key.
10. Where can I find more information about bike suspension and maintenance?
Usabikers.net offers a wealth of articles, reviews, and community forums where you can learn more about bike suspension and maintenance.
Ready to dive deeper into the world of bike suspension and connect with fellow enthusiasts? Visit usabikers.net today to explore more articles, participate in our forums, and discover the best resources for optimizing your ride. Join our community and take your biking experience to the next level. For any inquiries, feel free to contact us at 801 Sturgis Main St, Sturgis, SD 57785, United States. Phone: +1 (605) 347-2000 or visit our website usabikers.net.