
Adjusting your bike seat to the right height is key for comfort, pedaling efficiency, preventing injury, and overall riding enjoyment, and usabikers.net is here to guide you. Finding the perfect saddle height, along with a suitable bike saddle, ensures longer, more comfortable rides, increased power output, and reduced risk of pain or injury. Understanding saddle adjustments empowers riders for optimal performance.
1. Why Is Correct Bike Seat Height Important?
Correct bike seat height is crucial for a comfortable, efficient, and injury-free riding experience. A properly adjusted seat ensures optimal leg extension, maximizing power output while minimizing strain on your joints.
- Enhances Comfort: A seat at the right height reduces pressure points and discomfort during long rides.
- Improves Pedaling Efficiency: Optimal leg extension allows for a smoother and more powerful pedal stroke.
- Prevents Injuries: Correct seat height minimizes stress on knees, hips, and back, reducing the risk of overuse injuries.
- Boosts Performance: Efficient pedaling translates to increased speed and endurance on the road or trail.
1.1. Understanding the Impact on Your Body
Incorrect seat height can lead to various physical issues, impacting your overall riding experience.
- Too High: Can cause rocking of the hips, leading to lower back pain and potential knee problems. You might also experience reaching for the pedals at the bottom of the stroke.
- Too Low: Results in excessive knee flexion, causing knee pain and reduced power output due to inefficient leg extension.
- Just Right: Promotes a stable pelvis, smooth pedal stroke, and balanced muscle engagement, minimizing discomfort and maximizing performance.
1.2. Addressing Common Cycling Discomforts
Many cyclists experience discomfort due to improper bike fit, with seat height being a primary culprit.
- Knee Pain: Often a result of a seat that is either too high or too low, stressing the knee joint.
- Lower Back Pain: Can be caused by excessive rocking of the hips due to an overly high seat.
- Saddle Sores: Improper seat height can contribute to increased pressure and friction, leading to saddle sores.
- Neck and Shoulder Pain: While not directly related to seat height, an incorrect riding posture due to improper fit can cause these issues.
2. Key Factors Influencing Bike Seat Height
Several factors beyond simple measurements influence the ideal bike seat height. Accounting for these variables ensures a personalized and optimized fit.
- Riding Style: Different riding styles, such as road cycling, mountain biking, or recreational riding, may require slight variations in seat height.
- Flexibility: Your flexibility affects the range of motion in your hips and knees, influencing the optimal seat height for comfort and efficiency.
- Crank Length: Longer cranks require a slightly lower seat height to maintain the same knee angle at the bottom of the pedal stroke.
- Pedal Type: The stack height of your pedals (the distance from the pedal axle to the sole of your shoe) can affect the effective seat height.
2.1. Riding Style and Its Impact
Your preferred riding style significantly impacts the ideal seat height.
- Road Cycling: Typically requires a higher seat position for maximum power transfer and aerodynamic efficiency.
- Mountain Biking: Often involves a slightly lower seat position for increased maneuverability and control on technical terrain.
- Touring: A more moderate seat height is generally preferred for long-distance comfort and sustained pedaling efficiency.
- Recreational Riding: Focuses on comfort and ease of use, with a seat height that allows for easy foot placement on the ground when stopped.
2.2. The Role of Flexibility
Flexibility plays a crucial role in determining the most comfortable and efficient seat height.
- Limited Hamstring Flexibility: May require a slightly lower seat height to avoid excessive strain on the hamstrings.
- Good Flexibility: Allows for a higher seat position, maximizing leg extension and power output without discomfort.
- Stretching and Flexibility Exercises: Regular stretching can improve flexibility, allowing for gradual adjustments to a more optimal seat height over time.
2.3. How Crank Length Affects Seat Height
Crank length influences the distance your foot travels during each pedal stroke, affecting the ideal seat height.
- Longer Cranks: Increase the distance your foot travels, requiring a slightly lower seat height to maintain a comfortable knee angle.
- Shorter Cranks: Decrease the distance your foot travels, potentially allowing for a slightly higher seat height.
- Finding the Right Balance: Experimenting with different crank lengths and seat heights can optimize your pedaling efficiency and comfort.
2.4. Pedal Type Considerations
The type of pedals you use can impact the effective distance between your foot and the pedal axle, influencing the optimal seat height.
- Clipless Pedals: Often have a lower stack height than flat pedals, potentially requiring a slight adjustment to your seat height.
- Flat Pedals: Generally have a higher stack height, which may necessitate lowering your seat slightly.
- Adjusting for Pedal Stack Height: Consider the stack height of your pedals when making seat height adjustments to maintain proper leg extension.
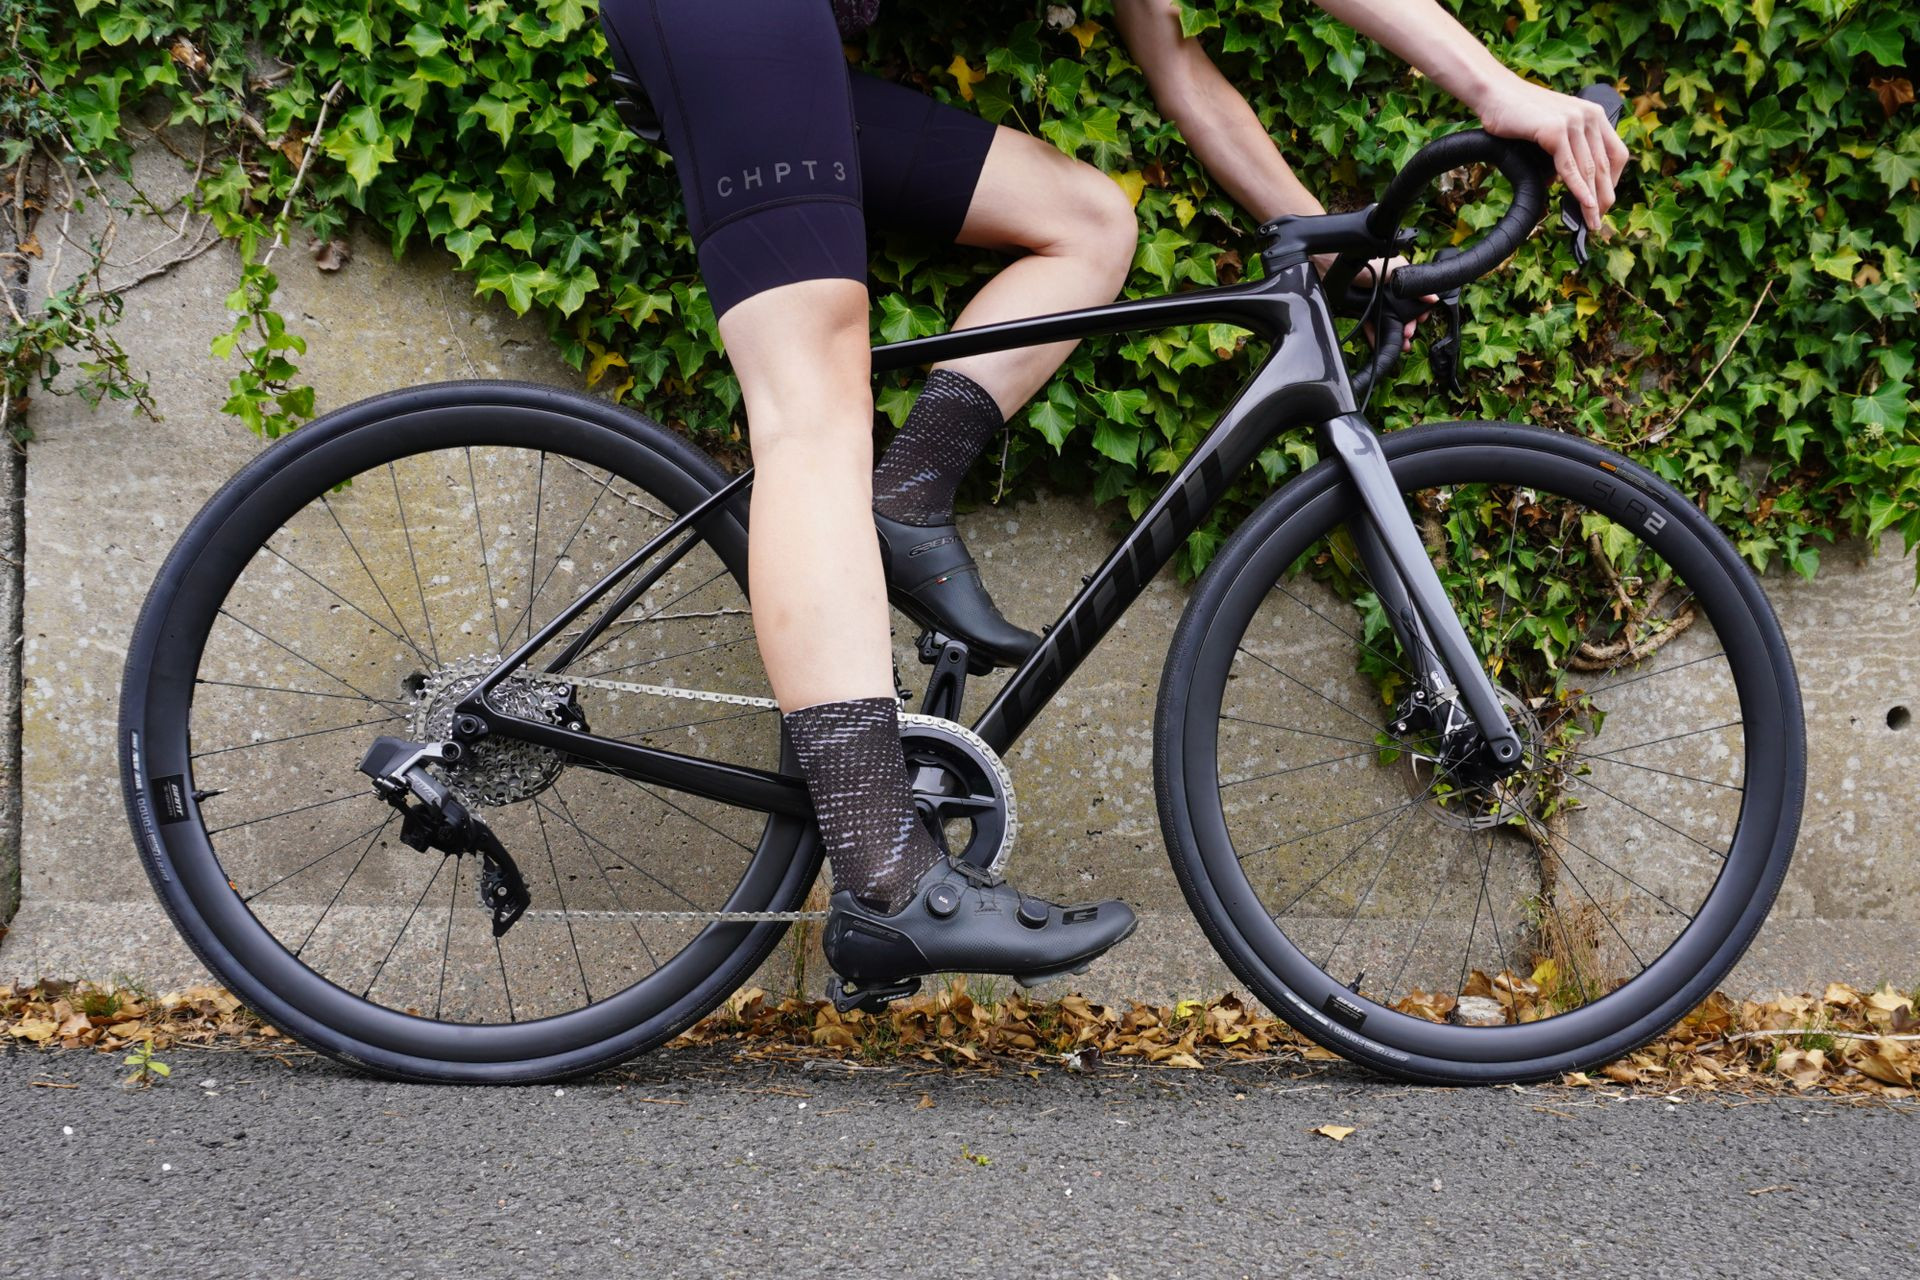 Cyclist Using Heel Method
Alt text: Female cyclist using the heel method to adjust her bike saddle height demonstrates leg extension and proper foot placement.
3. Proven Methods to Determine Bike Seat Height
Several methods can help you find a good starting point for your bike seat height. Remember to fine-tune based on personal comfort and riding experience.
- Heel Method: A simple technique involving placing your heel on the pedal at the bottom of the stroke to achieve a nearly straight leg.
- Lemond Method: A calculation based on inseam length, providing a numerical starting point for seat height.
- Hamley Method: Another inseam-based calculation, factoring in crank length for a more precise measurement.
- Holmes Method: A method using knee angle measurements to determine optimal seat height based on joint biomechanics.
3.1. The Heel Method Explained
The heel method is a practical, equipment-free way to approximate your initial seat height.
- Sit on Your Bike: Position yourself on the saddle with your bike stationary.
- Place Heel on Pedal: Put your heel on the pedal at the bottom of the pedal stroke.
- Adjust Seat Height: Adjust the seat until your leg is nearly straight when your heel is on the pedal.
- Check Foot Position: When you ride and place the ball of your foot over the pedal axle, your knee should have a slight bend at the bottom of the stroke.
3.2. Understanding the Lemond Method
The Lemond method offers a calculated approach to determining seat height based on your inseam measurement.
- Measure Inseam: Stand against a wall and measure the distance from the floor to your crotch.
- Multiply by 0.883: Multiply your inseam measurement (in centimeters) by 0.883.
- Set Seat Height: Adjust your seat height so that the distance from the center of the bottom bracket to the top of the saddle equals the calculated value.
- Fine-Tune: Use this measurement as a starting point and adjust based on your comfort and riding experience.
3.3. The Hamley Method for Precision
The Hamley method provides a more precise calculation by incorporating crank length into the equation.
- Measure Inseam: Measure your inseam as described in the Lemond method.
- Multiply by 1.09: Multiply your inseam measurement (in centimeters) by 1.09.
- Set Seat Height: Adjust your seat height so that the distance from the pedal surface to the top of the saddle equals the calculated value.
- Account for Crank Length: This method automatically accounts for crank length, providing a more accurate starting point.
3.4. Exploring the Holmes Method
The Holmes method uses knee angle measurements to optimize seat height based on biomechanical principles.
- Set Up on a Trainer: Mount your bike on a stationary trainer.
- Pedal and Stop: Pedal until you feel comfortable, then stop with one leg at the bottom of the pedal stroke.
- Measure Knee Angle: Have an assistant measure the angle of your knee using a goniometer, with the ideal angle between 25 and 35 degrees.
- Adjust Accordingly: Adjust your seat height to achieve the optimal knee angle, promoting efficient and comfortable pedaling.
4. Practical Steps to Adjust Your Bike Seat Height
Adjusting your bike seat height is a straightforward process that can significantly improve your riding experience.
- Loosen the Seatpost Clamp: Use an Allen wrench to loosen the clamp that secures the seatpost to the frame.
- Adjust Seat Height: Raise or lower the seatpost to the desired height, using the markings on the post as a guide.
- Tighten the Clamp: Securely tighten the seatpost clamp, ensuring the seatpost is firmly in place.
- Test Ride: Take a short test ride to assess the new seat height and make further adjustments as needed.
4.1. Tools You’ll Need
Having the right tools on hand makes the adjustment process easier and more efficient.
- Allen Wrench Set: Essential for loosening and tightening the seatpost clamp.
- Tape Measure: Useful for measuring inseam and seat height.
- Level: Helps ensure the saddle is level and properly aligned.
- Torque Wrench: Recommended for tightening the seatpost clamp to the manufacturer’s specified torque.
4.2. Step-by-Step Adjustment Guide
Follow these steps to adjust your bike seat height accurately and safely.
- Park Your Bike: Place your bike on a level surface or in a bike stand for stability.
- Locate the Seatpost Clamp: Find the clamp that secures the seatpost to the frame.
- Loosen the Clamp: Use an Allen wrench to loosen the clamp, turning it counterclockwise.
- Adjust the Seatpost: Raise or lower the seatpost to the desired height, using the markings on the post as a guide.
- Ensure Straight Alignment: Make sure the seatpost is aligned straight with the frame before tightening the clamp.
- Tighten the Clamp: Securely tighten the clamp, turning it clockwise. Use a torque wrench to tighten to the manufacturer’s specified torque.
- Test and Fine-Tune: Take a short test ride and make further adjustments as needed until you achieve the optimal seat height.
4.3. Ensuring Correct Seatpost Alignment
Proper seatpost alignment is crucial for comfort and preventing damage to your bike.
- Straight Alignment: Ensure the seatpost is aligned straight with the frame before tightening the clamp.
- Using Markings as a Guide: Use the markings on the seatpost as a guide to maintain consistent alignment.
- Checking with a Level: Use a level to ensure the saddle is level and properly aligned.
- Avoiding Over-Tightening: Over-tightening the seatpost clamp can damage the frame or seatpost, so use a torque wrench to tighten to the specified torque.
4.4. The Importance of a Test Ride
A test ride is essential for assessing the effectiveness of your seat height adjustment.
- Short Ride: Take a short ride to evaluate the new seat height and identify any discomfort or inefficiency.
- Evaluate Knee Angle: Pay attention to your knee angle at the bottom of the pedal stroke; it should have a slight bend.
- Check for Hip Rocking: Ensure your hips are not rocking excessively from side to side, which can indicate the seat is too high.
- Assess Pedal Stroke: Evaluate the smoothness of your pedal stroke, ensuring there are no dead spots or excessive strain.
- Make Further Adjustments: Based on your test ride, make further adjustments as needed until you achieve the optimal seat height.
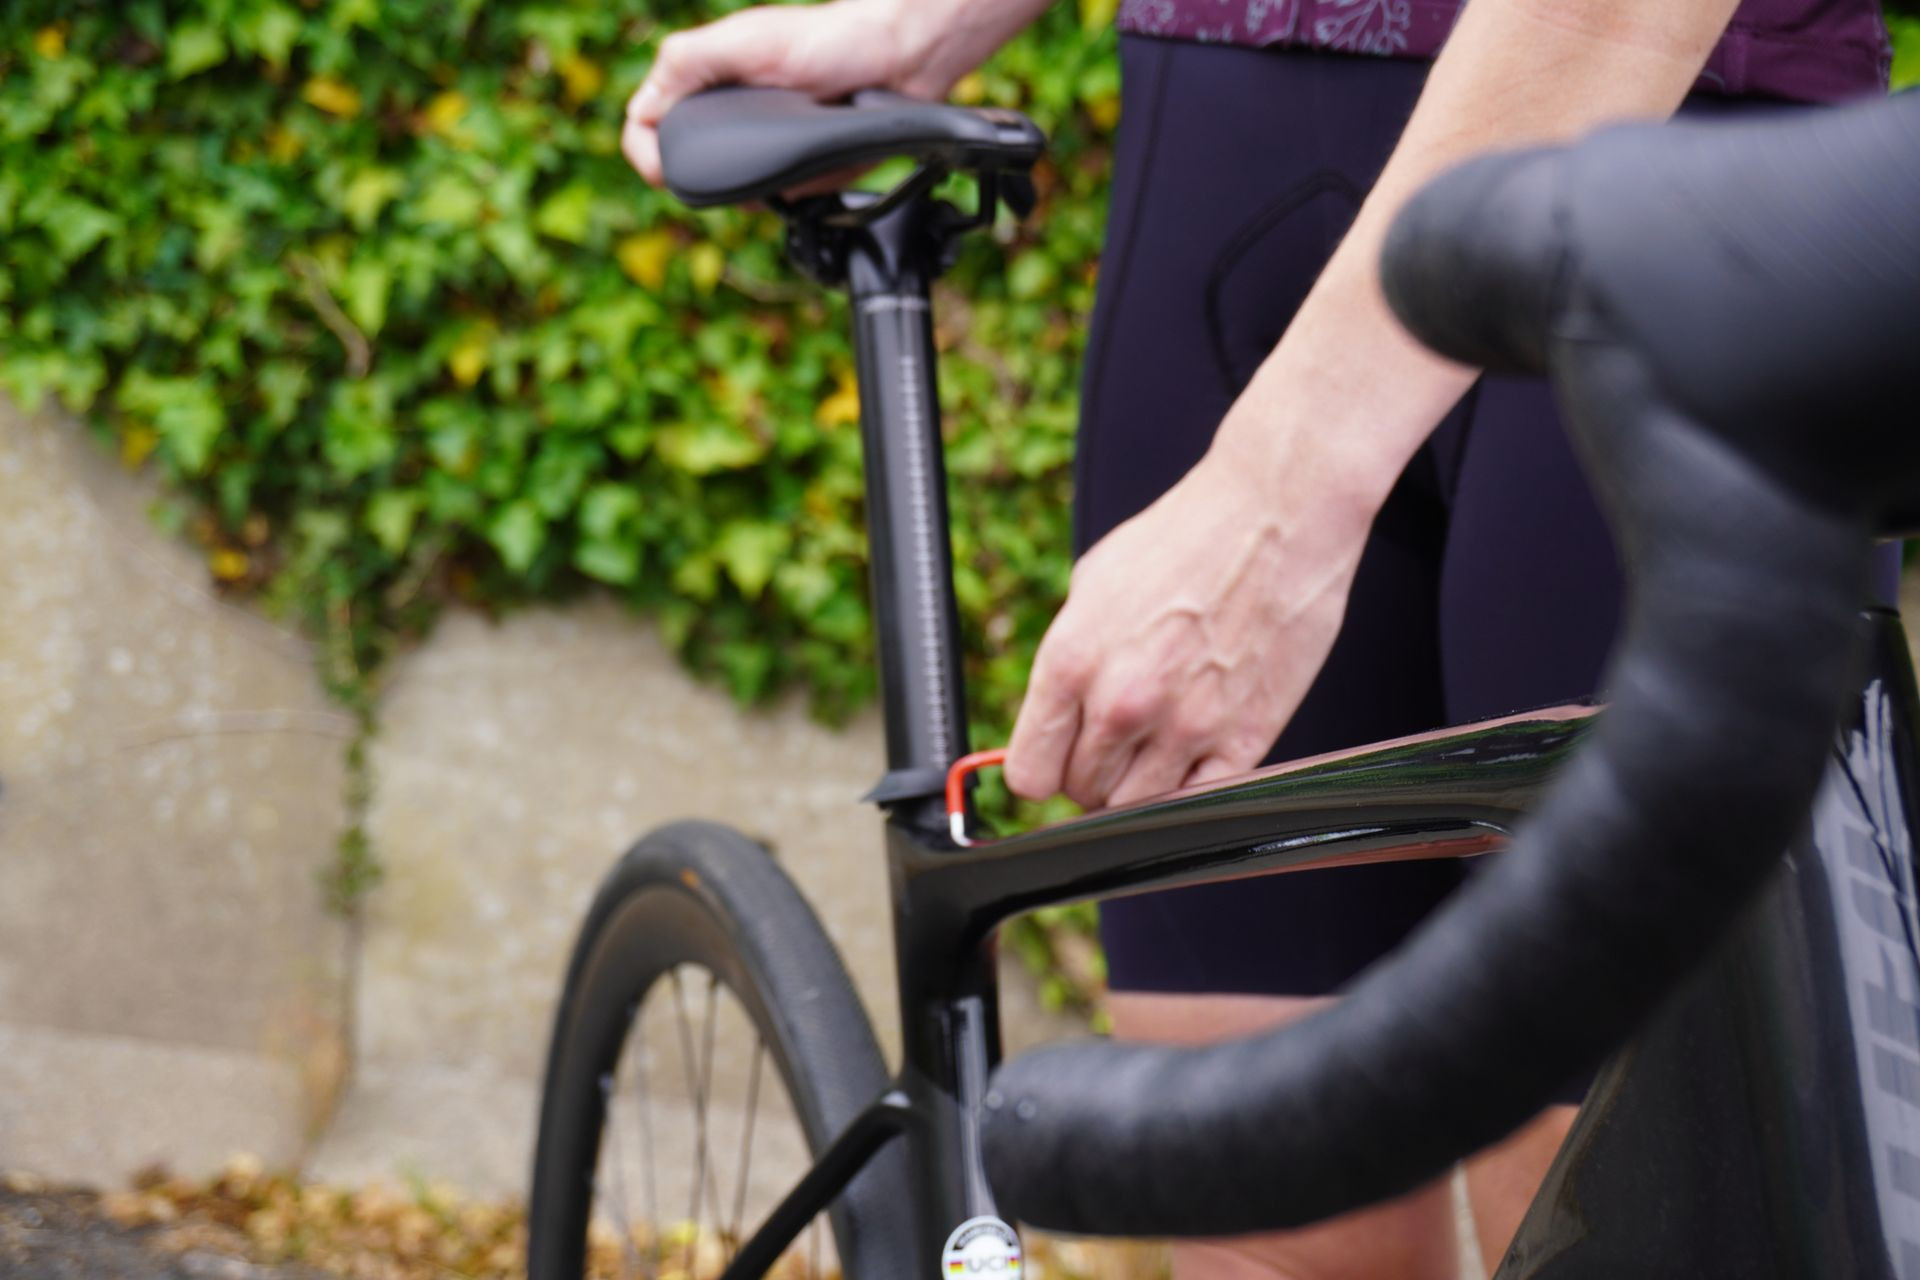 Adjusting Bike Seat Height
Alt text: Female cyclist adjusts the height of her bike saddle demonstrating proper technique and hand placement on seat.
5. Recognizing Signs of Incorrect Bike Seat Height
Knowing the signs of incorrect bike seat height helps you identify and correct issues before they lead to discomfort or injury.
- Knee Pain: Pain in the front, back, or sides of the knee can indicate improper seat height.
- Hip Pain: Pain or impingement in the hip can be caused by excessive seat height.
- Lower Back Pain: Rocking of the hips due to an overly high seat can lead to lower back pain.
- Saddle Sores: Increased pressure and friction from improper seat height can contribute to saddle sores.
- Numbness: Numbness in the hands or feet can be caused by an incorrect riding posture due to improper fit.
5.1. Knee Pain Indicators
Knee pain is a common symptom of incorrect seat height, with different types of pain indicating specific issues.
- Front of Knee Pain: Often indicates the seat is too low, causing excessive knee flexion.
- Back of Knee Pain: Can indicate the seat is too high, causing overextension of the knee.
- Side of Knee Pain: May be caused by improper cleat alignment or lateral instability due to incorrect seat height.
5.2. Addressing Hip Discomfort
Hip pain or discomfort can be a sign of an improperly adjusted seat, affecting your pedaling efficiency.
- Hip Pain: Often caused by an overly high seat, leading to excessive stretching of the hip muscles.
- Hip Impingement: Can occur when the hip joint is compressed due to improper seat height, limiting range of motion.
- Adjusting for Hip Comfort: Lowering the seat slightly can alleviate hip pain and improve comfort.
5.3. Lower Back Pain and Seat Height
Lower back pain is frequently linked to seat height, particularly when the seat is too high.
- Rocking of the Hips: An overly high seat can cause your hips to rock from side to side, stressing the lower back.
- Muscle Fatigue: Incorrect seat height can lead to uneven muscle recruitment, causing fatigue and pain in the lower back.
- Maintaining a Stable Pelvis: Adjusting the seat height to allow for a stable pelvis can reduce lower back pain.
5.4. Saddle Sores and Seat Positioning
Saddle sores are a common issue for cyclists, often exacerbated by improper seat height and positioning.
- Increased Pressure: Incorrect seat height can increase pressure on specific areas of the saddle, leading to saddle sores.
- Friction: Improper seat height can cause increased friction between your body and the saddle, contributing to saddle sores.
- Choosing the Right Saddle: Selecting a saddle that fits your anatomy and riding style can help prevent saddle sores.
- Adjusting Seat Position: Experimenting with fore-aft and tilt adjustments can also alleviate pressure and reduce the risk of saddle sores.
6. Optimizing Saddle Position Beyond Height
Beyond height, other aspects of saddle position significantly impact comfort, efficiency, and injury prevention.
- Fore-Aft Position: Adjusting the saddle forward or backward to optimize knee position over the pedal axle.
- Saddle Tilt: Adjusting the angle of the saddle to relieve pressure and improve comfort.
- Saddle Choice: Selecting a saddle that fits your anatomy and riding style.
- Cleat Position: Fine-tuning cleat position on your shoes to optimize foot alignment and pedaling efficiency.
6.1. Understanding Fore-Aft Saddle Adjustment
The fore-aft position of the saddle affects knee alignment and power transfer during pedaling.
- KOPS Principle: The Knee Over Pedal Spindle (KOPS) principle suggests that the front of your knee should be aligned over the pedal axle when the crank arm is horizontal.
- Adjusting for KOPS: Adjust the saddle fore-aft position to achieve proper knee alignment, optimizing power transfer and reducing strain on the knee.
- Experimentation: Experiment with slight adjustments to find the most comfortable and efficient position for your riding style.
6.2. Fine-Tuning Saddle Tilt
Saddle tilt influences pressure distribution and comfort, with slight adjustments making a significant difference.
- Level Saddle: A level saddle is generally recommended as a starting point, providing a neutral position for most riders.
- Slight Nose-Up Tilt: Can relieve pressure on the perineum for some riders, improving comfort.
- Slight Nose-Down Tilt: May be preferred by riders who experience pressure on the sit bones.
- Small Adjustments: Make small adjustments to saddle tilt and evaluate the impact on your comfort and pressure distribution.
6.3. Selecting the Right Saddle
Choosing the right saddle is crucial for comfort and preventing saddle sores, with various options available to suit different anatomies and riding styles.
- Width: Select a saddle width that matches the distance between your sit bones for optimal support.
- Shape: Experiment with different saddle shapes to find one that fits your anatomy and riding style.
- Padding: Choose a level of padding that provides adequate cushioning without being too soft or bulky.
- Cutout: Consider a saddle with a cutout to relieve pressure on the perineum and improve blood flow.
- Test Ride: If possible, test ride different saddles before making a purchase to ensure a comfortable fit.
6.4. Optimizing Cleat Position
Cleat position on your shoes affects foot alignment and pedaling efficiency, with precise adjustments enhancing comfort and performance.
- Foot Alignment: Position your cleats to align your foot properly over the pedal axle, preventing strain on your knees and ankles.
- Float: Adjust the amount of float (the degree of rotational movement allowed by the cleats) to match your natural pedaling motion.
- Professional Assistance: Consider seeking assistance from a bike fitter to optimize your cleat position for maximum comfort and efficiency.
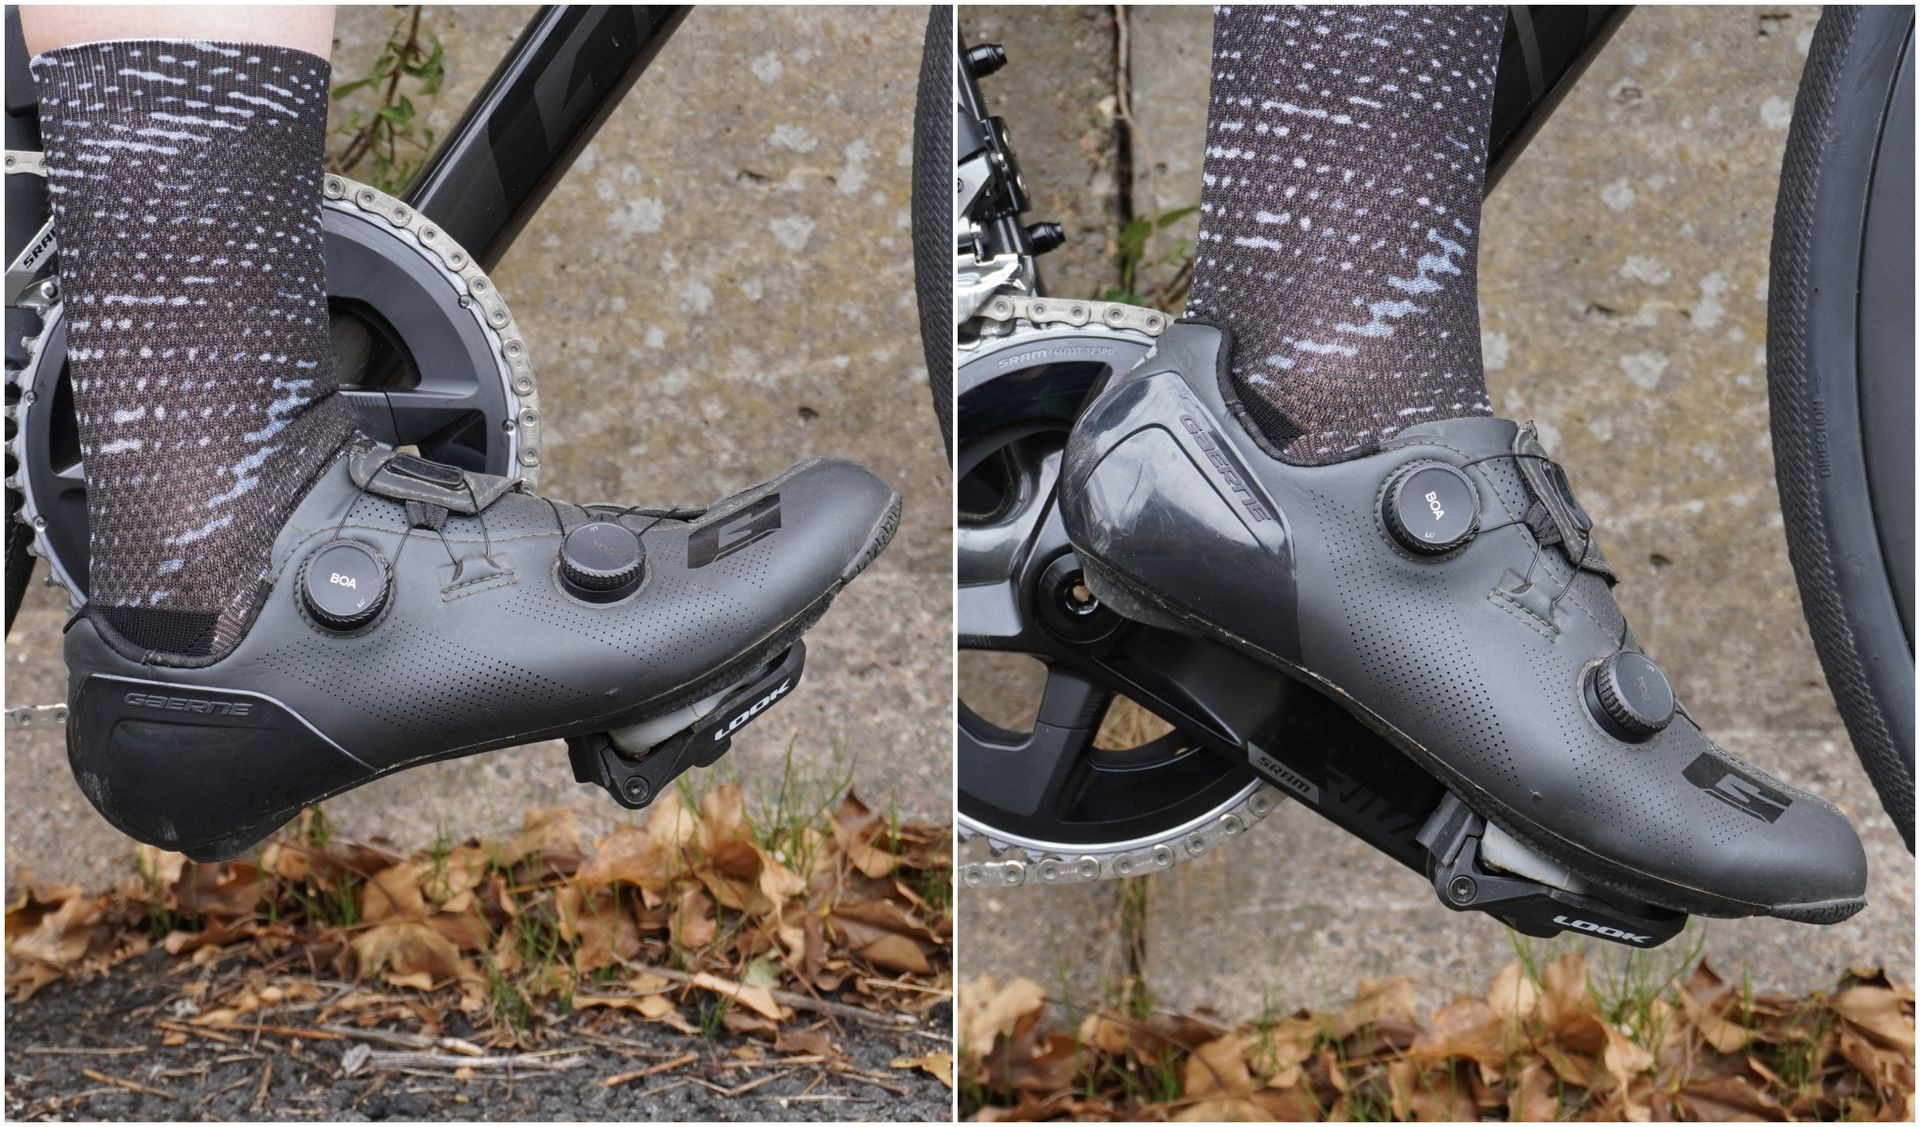 Ankle Positions
Alt text: Different ankle positions illustrate how foot placement and angle can influence overall body position and balance.
7. Advanced Techniques and Professional Bike Fitting
For serious cyclists or those experiencing persistent discomfort, advanced techniques and professional bike fitting can provide a more precise and personalized fit.
- Motion Capture Analysis: Using video or motion capture technology to analyze your pedaling dynamics and identify areas for improvement.
- Pressure Mapping: Assessing pressure distribution on the saddle to optimize saddle choice and position.
- Professional Bike Fitters: Experienced professionals who use their knowledge and tools to optimize your bike fit for comfort, efficiency, and injury prevention.
7.1. The Benefits of Motion Capture Analysis
Motion capture analysis provides detailed insights into your pedaling dynamics, allowing for precise adjustments to your bike fit.
- Detailed Analysis: Captures and analyzes your movements during pedaling, identifying inefficiencies and asymmetries.
- Optimizing Joint Angles: Measures joint angles at various points in the pedal stroke, allowing for precise adjustments to seat height and position.
- Improving Efficiency: By optimizing your pedaling dynamics, motion capture analysis can improve your efficiency and power output.
- Preventing Injuries: Identifying and correcting improper movement patterns can help prevent overuse injuries.
7.2. Understanding Pressure Mapping
Pressure mapping assesses pressure distribution on the saddle, helping you choose the right saddle and optimize its position.
- Identifying Pressure Points: Reveals areas of high pressure on the saddle, indicating potential discomfort or saddle sore issues.
- Optimizing Saddle Choice: Helps you choose a saddle that distributes pressure evenly, improving comfort and preventing saddle sores.
- Fine-Tuning Saddle Position: Allows you to adjust the saddle position to minimize pressure on sensitive areas and improve overall comfort.
7.3. When to Seek a Professional Bike Fitter
Consulting a professional bike fitter can be beneficial for cyclists who are serious about performance or experiencing persistent discomfort.
- Persistent Discomfort: If you are experiencing persistent pain or discomfort despite making adjustments to your bike fit, a professional can help identify and address underlying issues.
- Serious Training: If you are training for races or long-distance events, a professional bike fit can optimize your efficiency and prevent injuries.
- New Bike Purchase: Getting a professional bike fit when purchasing a new bike can ensure that it is properly sized and adjusted to your body.
- Complex Issues: If you have complex biomechanical issues or injuries, a professional bike fitter can provide personalized solutions.
8. Common Mistakes to Avoid When Adjusting Bike Seat Height
Avoiding common mistakes ensures that your seat height adjustments are effective and prevent potential issues.
- Ignoring Gradual Adjustments: Making large adjustments to seat height can lead to discomfort and injury; make small, gradual changes instead.
- Over-Tightening Seatpost Clamp: Over-tightening the seatpost clamp can damage the frame or seatpost; use a torque wrench to tighten to the specified torque.
- Ignoring Other Fit Factors: Focusing solely on seat height while neglecting other fit factors like fore-aft position and saddle tilt can lead to incomplete optimization.
- Not Seeking Professional Help: Hesitating to seek professional help when experiencing persistent discomfort or complex issues can prolong problems and hinder progress.
8.1. The Importance of Gradual Adjustments
Making gradual adjustments to seat height allows your body to adapt and prevents potential injuries.
- Small Increments: Adjust your seat height in small increments (2-3mm at a time) to avoid sudden changes in biomechanics.
- Test Ride After Each Adjustment: Take a short test ride after each adjustment to evaluate the impact on your comfort and pedaling efficiency.
- Listen to Your Body: Pay attention to any pain or discomfort and adjust accordingly; if you experience pain, revert to the previous setting and seek professional advice.
8.2. Preventing Damage by Avoiding Over-Tightening
Over-tightening the seatpost clamp can damage the frame or seatpost, compromising safety and performance.
- Using a Torque Wrench: Use a torque wrench to tighten the seatpost clamp to the manufacturer’s specified torque; this ensures proper clamping force without over-tightening.
- Checking Torque Specifications: Consult your bike’s manual or the manufacturer’s website for the recommended torque specifications.
- Avoiding Excessive Force: Do not use excessive force when tightening the seatpost clamp; if you cannot achieve the specified torque without excessive force, inspect the clamp and seatpost for damage or wear.
8.3. Considering All Aspects of Bike Fit
Focusing solely on seat height while neglecting other fit factors can lead to incomplete optimization and persistent discomfort.
- Fore-Aft Position: Adjust the saddle fore-aft position to optimize knee alignment and power transfer; the KOPS principle can be a helpful guideline.
- Saddle Tilt: Fine-tune the saddle tilt to relieve pressure on sensitive areas and improve overall comfort; start with a level saddle and make small adjustments as needed.
- Handlebar Position: Adjust the handlebar height and reach to achieve a comfortable and efficient riding posture; consider consulting a bike fitter for optimal handlebar positioning.
- Cleat Position: Optimize your cleat position to align your foot properly over the pedal axle, preventing strain on your knees and ankles; seek professional assistance if needed.
8.4. Knowing When to Ask for Help
Hesitating to seek professional help when experiencing persistent discomfort or complex issues can prolong problems and hinder progress.
- Persistent Pain: If you are experiencing persistent pain or discomfort despite making adjustments to your bike fit, consult a professional bike fitter or healthcare provider.
- Complex Issues: If you have complex biomechanical issues or injuries, a professional bike fitter can provide personalized solutions and address underlying problems.
- New Bike Purchase: Getting a professional bike fit when purchasing a new bike can ensure that it is properly sized and adjusted to your body, preventing future problems.
9. Staying Updated on New Bike Technologies
Keeping up with the latest advancements in bike technology can help you optimize your bike fit and performance.
- Adjustable Seatposts: Allowing on-the-fly seat height adjustments for varying terrain.
- Smart Bikes: Integrating sensors and data analysis to provide real-time feedback on your riding dynamics.
- Advanced Bike Fitting Systems: Utilizing sophisticated tools and techniques to provide precise and personalized bike fits.
9.1. Exploring Adjustable Seatposts
Adjustable seatposts offer the convenience of on-the-fly seat height adjustments, enhancing versatility and comfort.
- Dropper Posts: Commonly used in mountain biking, allowing riders to quickly lower the seat for increased maneuverability on technical terrain.
- Adjustable Height Seatposts: Available for road bikes and hybrids, providing convenient seat height adjustments for varying terrain or riding conditions.
- Remote Controls: Often feature remote controls mounted on the handlebars, allowing for easy seat height adjustments without interrupting your ride.
9.2. Leveraging Smart Bike Technology
Smart bikes integrate sensors and data analysis to provide real-time feedback on your riding dynamics, helping you optimize your performance.
- Power Meters: Measure your power output, providing valuable data for training and performance analysis.
- Cadence Sensors: Track your pedaling cadence, helping you optimize your pedaling efficiency.
- Heart Rate Monitors: Monitor your heart rate, providing insights into your cardiovascular fitness and training intensity.
- Data Integration: Integrate data from various sensors to gain a comprehensive understanding of your riding dynamics and identify areas for improvement.
9.3. Utilizing Advanced Bike Fitting Systems
Advanced bike fitting systems utilize sophisticated tools and techniques to provide precise and personalized bike fits, maximizing comfort, efficiency, and injury prevention.
- 3D Motion Capture: Captures and analyzes your movements in three dimensions, providing detailed insights into your pedaling dynamics.
- Pressure Mapping: Assesses pressure distribution on the saddle, helping you choose the right saddle and optimize its position.
- Dynamic Analysis: Evaluates your biomechanics while you are actively pedaling, providing a more accurate assessment of your bike fit needs.
- Personalized Recommendations: Provides personalized recommendations for seat height, fore-aft position, saddle tilt, handlebar position, and cleat position, based on your individual needs and riding style.
10. FAQ: Adjusting Your Bike Seat Height
Here are some frequently asked questions about adjusting your bike seat height, providing quick answers to common concerns.
10.1. How Often Should I Adjust My Bike Seat Height?
Adjust as needed based on comfort, changes in flexibility, or new equipment.
10.2. Can Incorrect Seat Height Cause Knee Problems?
Yes, it can lead to knee pain and injuries.
10.3. What Is the Best Way to Measure My Inseam?
Stand against a wall with a book between your legs and measure to the top of the book.
10.4. Should My Leg Be Fully Extended at the Bottom of the Pedal Stroke?
No, a slight bend in your knee is ideal.
10.5. What If I Experience Numbness While Riding?
Adjust seat height and angle or consider a different saddle.
10.6. Is the Heel Method Accurate for Everyone?
It provides a starting point but may need fine-tuning.
10.7. Can Cleat Position Affect Seat Height?
Yes, cleat position influences effective leg length.
10.8. Should I Consult a Professional for Bike Fit?
Consider it for persistent discomfort or serious training.
10.9. What Is the KOPS Method?
It aligns the knee over the pedal spindle for efficient pedaling.
10.10. How Does Saddle Tilt Affect Comfort?
It influences pressure distribution and can relieve discomfort.
Finding the right bike seat height is a journey that combines proven methods with personal feedback. By understanding the factors that influence optimal seat height, using reliable techniques, and recognizing the signs of incorrect adjustment, you can unlock a more comfortable, efficient, and enjoyable riding experience. Don’t hesitate to explore advanced techniques and seek professional help when needed to fine-tune your fit. For more information and community support, visit usabikers.net today and elevate your biking journey!
Address: 801 Sturgis Main St, Sturgis, SD 57785, United States
Phone: +1 (605) 347-2000
Website: usabikers.net