How to air up a bike tire without a pump? At usabikers.net, we understand the frustration of a flat tire when you’re miles away from home or a repair shop. Luckily, there are several ways to inflate a bike tire without a pump, ensuring you can get back on the road quickly. These include using CO2 cartridges, handheld pumps, compressed air, or even a DIY solution. This guide will cover various methods, preventative measures, and essential maintenance tips to keep you rolling, focusing on tire inflation alternatives, emergency repair techniques, and essential tools for bikers.
1. Why Every Biker Needs to Know How to Inflate a Tire Without a Pump?
Knowing how to inflate your bike tire without a pump is an essential skill for every biker. It ensures you’re prepared for unexpected flats, allowing you to continue your ride safely and efficiently.
1.1. Unexpected Flats: A Common Biker Challenge
Unexpected flat tires are a common challenge for bikers, whether you’re cruising down urban roads or tackling rugged trails. A sudden puncture can halt your journey, turning an enjoyable ride into a frustrating ordeal. Being prepared with alternative inflation methods can make all the difference.
1.2. The Freedom of Preparedness
Knowing how to inflate your tire without a pump provides the freedom to keep going, regardless of where you are when a flat occurs. This knowledge transforms a potential setback into a minor inconvenience, allowing you to maintain your momentum and enjoy your ride without unnecessary delays.
1.3. Emergency Situations Demand Quick Solutions
In emergency situations, having the ability to quickly inflate your tire can be crucial for your safety. Whether you’re stranded on a remote road or need to get to a safe location, knowing these techniques can help you avoid being stuck in a potentially dangerous situation.
 Emergency Tire Inflation
2. Alternative Methods to Inflate Your Bike Tire Without a Pump?
When you find yourself without a traditional pump, several alternative methods can help you inflate your bike tire. These options range from using CO2 cartridges to employing a DIY approach, ensuring you have a solution no matter the circumstances.
2.1. Quick Inflation with CO2 Cartridges
CO2 cartridges are a compact and efficient solution for quickly inflating tires on the go. These cartridges provide instant air through adaptors that fit any valve, making them an essential tool for emergency situations.
2.1.1. How CO2 Cartridges Work
To use a CO2 cartridge, simply plug it into the inflator head and attach it to your tire valve. Releasing the air pressure fills your tire in seconds, allowing you to quickly resume your ride. According to the Motorcycle Safety Foundation (MSF), in July 2025, CO2 cartridges provide a reliable method for rapid tire inflation in emergency situations.
2.1.2. Why CO2 Cartridges Are Effective
CO2 cartridges are effective because they are compact, portable, and provide a quick solution in emergencies without needing an existing pump. Their small size allows them to be easily carried in a saddlebag or backpack, ensuring you’re always prepared.
2.1.3. Precautions When Using CO2 Cartridges
When using CO2 cartridges, it’s important to monitor the pressure to avoid overinflation, which can damage your tire or rim. Inflation levels can change rapidly, so it’s essential to be cautious and check the pressure frequently.
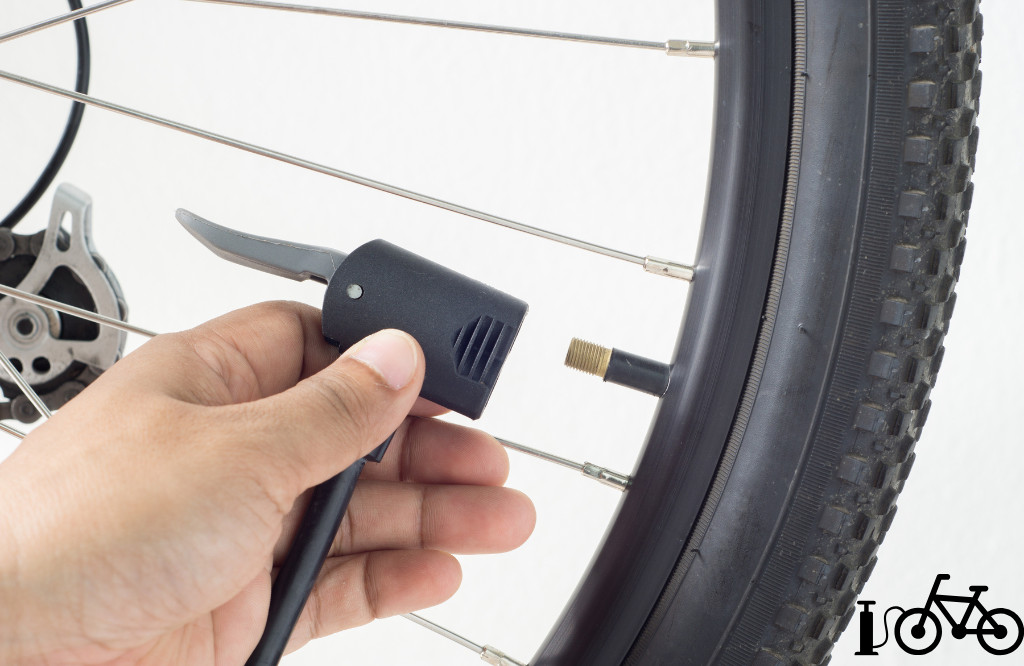
2.2. Using a Bicycle Tire Inflator Pump (Handheld)
A handheld bike tire inflator pump is another excellent alternative, offering a compact and portable solution. These pumps work similarly to larger pumps but are designed to be carried easily in a bag or backpack.
2.2.1. How to Use a Handheld Pump
To use a handheld pump, insert the nozzle into your tire’s valve and begin pumping. While these pumps may require more physical effort than CO2 cartridges, they are a reliable option when you need a manual inflation solution.
2.2.2. The Benefits of Handheld Pumps
Handheld pumps are beneficial because they are small, portable, and don’t rely on external power sources. This makes them ideal for long rides where you need a dependable inflation method.
2.2.3. Considerations for Handheld Pumps
Keep in mind that handheld pumps take longer to inflate a tire than CO2 cartridges and require more physical effort. However, they are a sustainable and reusable option for maintaining proper tire pressure.
2.3. Using Compressed Air from a Gas Station
If you’re near a gas station, using the compressed air available for car tires can be a convenient option for inflating your bike tire. However, it’s crucial to be careful with the pressure settings to avoid overinflation.
2.3.1. Steps for Using a Gas Station Air Compressor
To use a gas station air compressor, locate the compressor, connect the nozzle to your tire valve, and begin inflating. Ensure you adjust the PSI settings to match the recommended value on your tire sidewall.
2.3.2. Advantages of Gas Station Air Compressors
Gas station air compressors are advantageous because they are free and easily accessible in urban areas. This makes them a quick and convenient solution when you need to inflate your tire.
2.3.3. Cautions When Using Gas Station Air Compressors
Many gas station compressors are calibrated for car tires and may not accurately adjust to the lower PSI settings required for bike tires. Always refer to your tire’s recommended pressure setting and inflate in short bursts to avoid overinflation.
2.4. Manual Inflation (Breathing into the Valve)
In an emergency, manual inflation by breathing into the valve can provide temporary relief. While not ideal, this method can help you reach a safer location where you can find better support.
2.4.1. How Manual Inflation Works
To manually inflate your tire, use a valve adapter, place your mouth over the valve, and blow air into it. This method requires good lung power and is best used as an emergency measure.
2.4.2. Why Manual Inflation Is a Last Resort
Manual inflation is a last resort because it’s free and doesn’t require any tools. However, it’s not very efficient and can be tiring.
2.4.3. Important Considerations for Manual Inflation
Be cautious when using your breath to inflate the tire, as this can introduce dirt and bacteria into the tire and valve, potentially causing future issues. This method is truly a temporary solution until you can find a better alternative.
2.5. DIY Pump (Innovative but Extreme)
For those feeling creative and with limited options, making your own air pump can be a viable solution. This method requires some mechanical skills but can help you out of a tricky situation in an emergency.
2.5.1. How to Create a DIY Pump
The basic idea behind a DIY pump is to create a vacuum effect that forces air into your tire, mimicking the functionality of a pump.
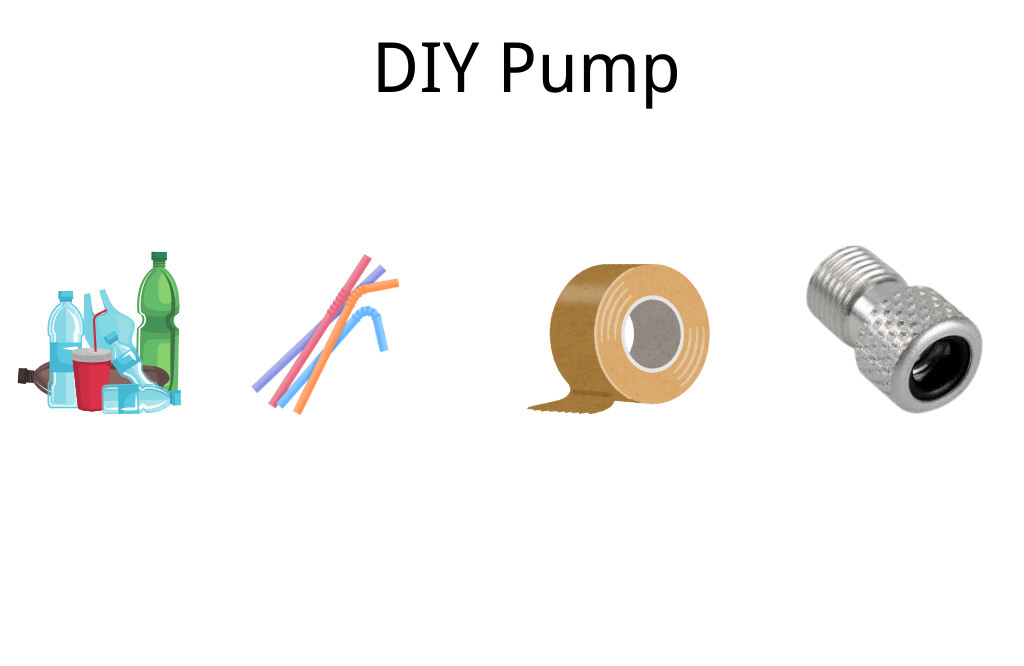
2.5.2. Materials Needed for a DIY Pump
- A plastic bottle (500ml or 1-liter size)
- A straw or tube (flexible plastic works best)
- Duct tape or strong adhesive tape
- A valve adapter
2.5.3. Steps to Build a DIY Pump
- Puncture a small hole in the bottom of the plastic bottle.
- Insert the straw or tube into the hole and seal it tightly with tape.
- Attach the other end of the tube to your tire valve using the valve adapter or tape.
- Squeeze the bottle to force air into your tire.
2.5.4. Why a DIY Pump Can Work
A DIY pump works by creating pressure in the bottle when you squeeze it, pushing air into your tire. While not the most efficient method, it can provide enough inflation to get you to a safer location.
2.5.5. Things to Consider When Using a DIY Pump
This method is imprecise, so it’s best used temporarily. You may over- or underinflate the tire, and it’ll take longer to achieve the right pressure. It’s a last-resort solution until you can fix the tire properly.
 DIY Tire Pump
3. Essential Tools for Every Biker?
Having the right tools can make all the difference when dealing with a flat tire or other roadside repairs. Here are some essential tools every biker should carry:
3.1. Multi-Tool with Allen Wrenches and Screwdrivers
A multi-tool with Allen wrenches and screwdrivers is indispensable for making adjustments and repairs on the go. These tools can help with everything from tightening bolts to adjusting brakes.
3.2. Tire Levers for Easy Tire Removal
Tire levers make it easier to remove your tire from the rim when you need to repair a flat. These simple tools can save you time and effort, preventing damage to your rims and tires.
3.3. Patch Kit or Spare Tube for Quick Repairs
A patch kit or spare tube is essential for fixing flat tires. Patch kits allow you to repair small punctures, while a spare tube provides a quick replacement option.
3.4. Mini Pump or CO2 Inflator for Tire Inflation
A mini pump or CO2 inflator is crucial for inflating your tire after making a repair. These tools ensure you can quickly get back on the road with the correct tire pressure.
3.5. Chain Tool for Chain Repairs
A chain tool is necessary for repairing a broken chain. This tool allows you to remove and replace chain links, ensuring you can continue your ride even with a chain issue.
4. How to Prevent Flats in the First Place?
Preventing flat tires is the best way to avoid being stranded on the road. Regular maintenance and proactive measures can significantly reduce the likelihood of flats.
4.1. Check Tire Pressure Regularly
Maintaining the correct tire pressure is essential for preventing flats. Underinflated tires are more susceptible to punctures and pinch flats, while overinflated tires can be more prone to blowouts.
4.1.1. The Importance of Correct Tire Pressure
Ensuring your tire pressure remains within the recommended limits helps avoid punctures and blowouts. Regularly checking and adjusting your tire pressure can significantly reduce the chances of unexpected flats. According to the American Motorcyclist Association (AMA), proper tire inflation is crucial for motorcycle safety and performance.
4.1.2. How to Check Your Tire Pressure
Use a reliable tire pressure gauge to check your tire pressure before each ride. Refer to the sidewall of your tire for the manufacturer’s recommended pressure range.
4.1.3. Maintaining Optimal Tire Pressure
Adjust your tire pressure as needed to stay within the recommended range. This simple step can greatly improve your tire’s performance and reduce the risk of flats.
4.2. Use Puncture-Resistant Tires
Puncture-resistant tires feature built-in protection against punctures, making them an excellent choice for riders who frequently encounter debris and rough conditions.
4.2.1. The Benefits of Puncture-Resistant Tires
These tires are designed with an extra layer of material that helps prevent sharp objects from penetrating the tire. This added protection can significantly reduce the frequency of flats.
4.2.2. Types of Puncture-Resistant Tires
Various types of puncture-resistant tires are available, each offering different levels of protection. Consider your riding conditions and choose a tire that best suits your needs.
4.2.3. Installing Puncture-Resistant Tires
Installing puncture-resistant tires is similar to installing regular tires. Ensure you follow the manufacturer’s instructions and properly seat the tire on the rim.
4.3. Avoid Sharp Objects and Debris
Being aware of your surroundings and avoiding sharp objects can help prevent flats. Ride around glass, nails, and other debris that could puncture your tire.
4.3.1. Staying Vigilant on the Road
Pay attention to the road ahead and try to anticipate potential hazards. This proactive approach can help you avoid many common causes of flat tires.
4.3.2. Choosing Safe Routes
When possible, choose routes that are well-maintained and free of debris. This can reduce your exposure to potential hazards and lower your risk of flats.
4.3.3. Regular Route Inspections
If you frequently ride the same routes, consider performing regular inspections to identify and remove any debris that could cause punctures.
4.4. Use Tire Sealant
Tire sealant can be added to your tires to automatically seal small punctures as they occur. This can prevent many flats from ever becoming a problem.
4.4.1. How Tire Sealant Works
Tire sealant is a liquid that coats the inside of your tire. When a puncture occurs, the sealant is forced into the hole by the air pressure, quickly sealing it.
4.4.2. Types of Tire Sealant
Various types of tire sealant are available, each with different properties and effectiveness. Choose a sealant that is compatible with your tires and riding conditions.
4.4.3. Applying Tire Sealant
Applying tire sealant is a simple process. Follow the manufacturer’s instructions and add the recommended amount of sealant to your tires.
5. Understanding Tire Pressure: PSI and Its Importance?
Maintaining the correct tire pressure is crucial for optimal performance, safety, and tire longevity. Understanding PSI (pounds per square inch) and its importance can help you avoid flats and enjoy a smoother ride.
5.1. What is PSI?
PSI stands for pounds per square inch, a unit of measurement used to quantify the pressure inside your tires. It indicates the force exerted on each square inch of the tire’s surface.
5.2. Why is PSI Important?
Maintaining the correct PSI is essential for several reasons:
- Performance: Proper tire pressure ensures optimal contact with the road, improving handling and cornering.
- Safety: Underinflated tires can lead to reduced control and increased risk of blowouts, while overinflated tires can reduce grip and increase the risk of skidding.
- Tire Longevity: Correct tire pressure prevents premature wear and extends the life of your tires.
- Fuel Efficiency: Properly inflated tires reduce rolling resistance, improving fuel efficiency.
5.3. Finding the Right PSI for Your Tires
The recommended PSI for your tires can be found on the tire sidewall. This number represents the maximum pressure the tire can handle, but it’s often best to stay within the manufacturer’s recommended range for optimal performance.
5.4. Factors Affecting Optimal PSI
Several factors can influence the optimal PSI for your tires:
- Riding Conditions: Adjust your tire pressure based on the terrain and weather conditions.
- Load: Increase tire pressure when carrying heavy loads or passengers.
- Tire Type: Different types of tires may require different PSI levels.
5.5. Using a Tire Pressure Gauge
A tire pressure gauge is an essential tool for checking and maintaining your tire pressure. Use a reliable gauge to ensure accurate readings and make necessary adjustments.
6. Common Types of Bike Tire Valves: Schrader vs. Presta?
Understanding the different types of bike tire valves is essential for proper inflation and maintenance. The two most common types are Schrader and Presta valves, each with unique characteristics and uses.
6.1. Schrader Valves
Schrader valves are commonly found on car tires and are also used on many bikes, particularly those with wider tires.
6.1.1. Characteristics of Schrader Valves
- Wider and more robust than Presta valves.
- Feature a spring-loaded pin that must be depressed to allow air flow.
- Compatible with most gas station air compressors and standard tire gauges.
6.1.2. Advantages of Schrader Valves
- Easy to inflate with readily available pumps and compressors.
- Durable and less prone to damage.
- Simple to check tire pressure.
6.1.3. Disadvantages of Schrader Valves
- Less precise for fine-tuning tire pressure.
- Can be more difficult to inflate to high pressures.
6.2. Presta Valves
Presta valves are commonly found on high-performance bikes, particularly those with narrower tires.
6.2.1. Characteristics of Presta Valves
- Narrower and more delicate than Schrader valves.
- Feature a locking nut that must be unscrewed to allow air flow.
- Require a special adaptor to use with some air compressors.
6.2.2. Advantages of Presta Valves
- Allow for more precise inflation.
- Can be inflated to higher pressures.
- Locking nut helps prevent air leakage.
6.2.3. Disadvantages of Presta Valves
- More fragile and prone to damage.
- Require a special pump or adaptor for inflation.
- Can be more difficult to check tire pressure.
6.3. Choosing the Right Valve Type
The choice between Schrader and Presta valves depends on your bike type, riding style, and personal preferences. Consider the advantages and disadvantages of each type to determine which is best suited for your needs.
7. How to Read Bike Tire Sidewalls: Understanding the Markings?
Understanding the markings on your bike tire sidewall is essential for proper tire maintenance and performance. These markings provide crucial information about tire size, pressure, and construction.
7.1. Tire Size
The tire size is typically indicated by two numbers separated by a multiplication sign (e.g., 700x25c). The first number represents the tire’s outer diameter, and the second number represents the tire’s width in millimeters.
7.2. Load Capacity
The load capacity indicates the maximum weight the tire can safely carry. This number is crucial for ensuring you don’t overload your tires, which can lead to premature wear and blowouts.
7.3. Tire Pressure (PSI)
The tire sidewall also indicates the recommended tire pressure range in PSI. This range provides a guideline for maintaining optimal tire pressure for performance and safety.
7.4. Tire Construction
Markings on the sidewall may also indicate the tire’s construction, such as whether it is tubeless-ready or has puncture-resistant layers.
7.5. Other Markings
Other markings may include the tire’s direction of rotation, manufacturer’s name, and specific features or technologies used in the tire’s construction.
8. Maintaining Your Bike Tires: Essential Maintenance Tips?
Proper maintenance is key to prolonging the life of your bike tires and ensuring a safe and enjoyable riding experience. Here are some essential maintenance tips to keep your tires in top condition:
8.1. Regular Inspections
Inspect your tires regularly for signs of wear, damage, or embedded objects. Look for cuts, bulges, and uneven wear patterns.
8.2. Cleaning Your Tires
Clean your tires periodically to remove dirt, debris, and road grime. Use a mild soap and water solution and a soft brush to avoid damaging the tire.
8.3. Storing Your Bike Properly
Store your bike in a cool, dry place away from direct sunlight and extreme temperatures. This can help prevent premature wear and damage to your tires.
8.4. Replacing Worn Tires
Replace your tires when they show signs of significant wear or damage. Riding on worn tires can compromise your safety and performance.
8.5. Checking Rim Alignment
Ensure your rims are properly aligned and free of damage. Misaligned rims can cause uneven tire wear and increase the risk of flats.
9. What Are The Advantages Of Tubeless Tires?
Tubeless tires are becoming increasingly popular among bikers due to their numerous advantages over traditional tube-type tires. Here are some of the key benefits of tubeless tires:
9.1. Reduced Risk of Flats
Tubeless tires eliminate the need for an inner tube, reducing the risk of pinch flats caused by impacts. The sealant inside the tire can also seal small punctures as they occur, further minimizing the likelihood of flats.
9.2. Lower Rolling Resistance
Tubeless tires can be run at lower pressures without the risk of pinch flats, resulting in lower rolling resistance and a smoother, more comfortable ride.
9.3. Improved Traction
The ability to run lower tire pressures also improves traction, particularly on uneven or slippery surfaces. This can enhance your control and confidence while riding.
9.4. Weight Savings
Tubeless tires can be lighter than traditional tube-type tires, as they eliminate the weight of the inner tube. This can improve your bike’s overall performance and handling.
9.5. Enhanced Comfort
The lower tire pressures allowed by tubeless tires provide a more comfortable ride, absorbing bumps and vibrations more effectively.
10. Common Questions About Bike Tire Inflation?
Here are some frequently asked questions about bike tire inflation, providing additional insights and tips for maintaining your tires:
10.1. Are regular bike pumps suitable for an e-bike?
Yes, as long as the pump features the appropriate nozzle (Presta or Schrader) and can handle the required pressure, it should work fine for an e-bike.
10.2. What pressure should my bike tire have?
Bike tires typically require between 40 and 65 PSI, depending on the model and tire type. Always refer to the sidewall of your tire for the manufacturer’s recommended pressure levels.
10.3. How long does a CO2 cartridge last?
A CO2 cartridge quickly inflates tires for short-term fixes of 30-40 PSI inflation. These solutions provide temporary relief, so you should find a more permanent solution to address the tire pressure issue.
10.4. How often should I check my tire pressure?
For optimal performance, it is advisable to check your tire pressure before each ride, particularly on long trips across rugged terrain.
10.5. Can I use a car tire inflator on my bike?
Yes, but be cautious, as car tire inflators can easily overinflate bike tires. Use short bursts of air and check the pressure frequently.
10.6. What is the difference between Presta and Schrader valves?
Presta valves are narrower and typically found on high-performance bikes, while Schrader valves are wider and commonly used on car tires and some bikes.
10.7. How do I know if my tire is properly inflated?
Check the tire pressure using a reliable gauge and compare it to the manufacturer’s recommended range on the tire sidewall.
10.8. Can I overinflate my bike tire?
Yes, overinflating your bike tire can lead to blowouts and reduced grip. Always stay within the manufacturer’s recommended pressure range.
10.9. What should I do if I get a flat tire on the road?
Pull over to a safe location, assess the damage, and use a patch kit, spare tube, or alternative inflation method to repair the tire.
10.10. How can I prevent flat tires?
Check your tire pressure regularly, use puncture-resistant tires, avoid sharp objects, and consider using tire sealant.
Conclusion: Stay Prepared and Keep Riding with Usabikers.net
Inflating your bike tire without a pump doesn’t have to be daunting. By being prepared and knowing the various methods available, you can handle unexpected flats with confidence. From CO2 cartridges to portable inflators and DIY solutions, there are numerous options to get you back on the road quickly. Remember to check your tire pressure regularly, use puncture-resistant tires, and stay vigilant about road hazards to minimize the risk of flats.
At usabikers.net, we’re dedicated to providing you with the information and resources you need to enhance your biking experience. Whether you’re looking for the latest gear reviews, maintenance tips, or community connections, we’ve got you covered. Visit usabikers.net today to explore our extensive collection of articles, participate in our forums, and discover everything you need to know about bikes and biker culture in the USA. Stay informed, stay connected, and keep riding with usabikers.net! For any inquiries, feel free to contact us at Address: 801 Sturgis Main St, Sturgis, SD 57785, United States, Phone: +1 (605) 347-2000, or visit our Website: usabikers.net.