Assembling a Huffy bike involves connecting various parts like the frame, wheels, handlebars, and pedals, ensuring a smooth and enjoyable ride; usabikers.net can guide you. Let’s explore the process step by step. This guide covers everything from unpacking to final adjustments, providing valuable insights for beginners and experienced riders alike, helping you get your new Huffy ready for the road with confidence. Learn how to assemble your new bike properly with these step-by-step guides, ensuring a safe and fulfilling biking experience.
1. Why Is Knowing How To Assemble A Huffy Bike Important?
Knowing How To Assemble A Huffy Bike is important because it ensures your bike is safe, reliable, and customized to your preferences. According to the Bicycle Product Suppliers Association (BPSA), proper assembly directly impacts the rider’s safety and the bike’s lifespan.
- Safety Assurance: Proper assembly ensures all components are correctly installed and functioning as intended, reducing the risk of accidents.
- Cost Savings: Assembling your bike can save you money on professional assembly fees, which can range from $50 to $150.
- Customization: Assembling the bike yourself allows you to adjust components like handlebars and seat height to your specific comfort needs.
- Skill Development: It enhances your mechanical skills and understanding of how a bike works, making you a more informed and capable cyclist.
- Warranty Compliance: Following the manufacturer’s assembly instructions ensures you comply with warranty requirements, protecting your investment.
2. What Tools Are Needed To Assemble A Huffy Bike?
To assemble a Huffy bike, gather essential tools such as Allen wrenches, a Phillips head screwdriver, an adjustable wrench, and a bike pump, ensuring you can safely and effectively put your new ride together. Having these tools will make the assembly process smooth and efficient.
- Allen Wrench Set: Essential for tightening bolts on components like the handlebars, seat post, and brakes. Sizes typically range from 2mm to 8mm.
- Phillips Head Screwdriver: Used for attaching accessories like reflectors and the bell. A medium-sized screwdriver is generally sufficient.
- Adjustable Wrench: Necessary for tightening nuts on the wheels and pedals. An 8-inch wrench is a versatile choice.
- Bike Pump: To inflate the tires to the recommended pressure, ensuring a smooth and safe ride. A pump with a pressure gauge is ideal.
- Cable Cutters: Useful for trimming excess cable length after adjusting brakes and gears.
- Grease: Applying grease to threaded parts like pedals and seat posts prevents corrosion and makes future adjustments easier.
- Torque Wrench: Recommended for ensuring bolts are tightened to the manufacturer’s specifications, preventing damage and ensuring safety.
- Work Stand: A bike work stand can make the assembly process easier by holding the bike securely in place.
3. What Are The Initial Steps For Unboxing And Preparing To Assemble A Huffy Bike?
The initial steps for unboxing and preparing to assemble a Huffy bike involve carefully removing all components from the box, checking against the parts list, and laying out all items in an organized manner. This ensures you have everything you need and can proceed efficiently.
- Carefully Open the Box: Use a box cutter or knife to open the box, being careful not to damage the bike or its components.
- Remove All Components: Take out all parts, including the frame, wheels, handlebars, seat, pedals, and any accessories.
- Check Against Parts List: Verify that all listed parts are present. The parts list is usually included in the owner’s manual.
- Inspect for Damage: Examine each component for any signs of damage incurred during shipping. Contact Huffy or the retailer immediately if you find any issues.
- Lay Out Components: Arrange all the parts in an organized manner on a clean surface. This will make it easier to locate and access them as you proceed with the assembly.
- Keep Packaging Material: Retain the box and packaging material in case you need to return the bike or any components.
- Read the Manual: Familiarize yourself with the owner’s manual, which provides detailed instructions and diagrams for the assembly process.
4. How Do You Install The Front Wheel On A Huffy Bike?
Installing the front wheel on a Huffy bike involves inserting the wheel into the front fork, aligning the dropouts, and securing it with either quick-release levers or axle nuts. Ensuring the wheel is properly aligned and secured is essential for safe riding.
- Position the Fork: Locate the front fork and ensure it is facing forward. The fork is the part of the frame that holds the front wheel.
- Align the Wheel: Position the front wheel between the fork blades, aligning the axle with the dropouts (the slots on the fork ends).
- Insert the Axle: Insert the axle into the dropouts. If your bike has a quick-release lever, ensure it is in the open position. If it has axle nuts, make sure they are easily accessible.
- Secure the Wheel:
- Quick-Release Lever: Close the quick-release lever. It should require a firm push to close, providing sufficient tension to hold the wheel securely.
- Axle Nuts: Tighten the axle nuts using an adjustable wrench. Ensure they are snug but not overly tight to avoid damaging the fork or axle.
- Check Alignment: Make sure the wheel is centered between the fork blades. Spin the wheel to ensure it rotates freely without rubbing against the fork.
- Final Check: Double-check that the quick-release lever is properly closed or the axle nuts are securely tightened before riding.
- Adjust Brakes: After installing the wheel, check and adjust the front brakes to ensure they are properly aligned with the wheel rim or rotor.
5. What Is The Process For Attaching The Handlebars To A Huffy Bike?
Attaching the handlebars to a Huffy bike involves inserting the handlebar stem into the head tube, aligning the handlebars to your preference, and tightening the stem bolt to secure them. Proper alignment and secure tightening are crucial for steering control.
- Loosen the Stem Bolt: If necessary, loosen the stem bolt on top of the steerer tube (the part of the fork that extends through the frame). This allows you to insert the handlebar stem.
- Insert the Stem: Slide the handlebar stem into the head tube of the frame. Ensure it goes in deep enough to provide stability but not so deep that it interferes with the headset bearings.
- Align the Handlebars: Position the handlebars at the desired angle. Most riders prefer a slight backward sweep for a comfortable grip.
- Tighten the Stem Bolt: Use an Allen wrench to tighten the stem bolt. Tighten it gradually, alternating between the bolts if there are two, to ensure even pressure. Refer to the manufacturer’s specifications for the correct torque.
- Check Alignment: Ensure the handlebars are aligned with the front wheel. Stand in front of the bike and visually confirm that the handlebars are straight.
- Secure the Handlebar Clamp: If your handlebars have a separate clamp, tighten the clamp bolts to secure the handlebars to the stem. Again, use the correct torque to avoid damaging the components.
- Test Stability: Before riding, test the stability of the handlebars by applying gentle pressure. There should be no slippage or movement.
6. How Do You Install The Seat And Seat Post On A Huffy Bike?
Installing the seat and seat post on a Huffy bike involves inserting the seat post into the seat tube, adjusting the seat height to your comfort, and tightening the seat post clamp to secure it. A properly adjusted seat is vital for comfortable and efficient riding.
- Insert the Seat Post: Slide the seat post into the seat tube of the frame. Be sure to apply a thin layer of grease to the seat post to prevent corrosion and ensure smooth insertion.
- Adjust the Height: Adjust the seat height to the desired level. When seated, your leg should be almost fully extended at the bottom of the pedal stroke.
- Tighten the Clamp: Tighten the seat post clamp to secure the seat post in place. Use an Allen wrench or quick-release lever, depending on the type of clamp. Ensure it is tight enough to prevent slippage but not so tight that it damages the frame.
- Check Alignment: Make sure the seat is aligned straight with the frame. You can use the top tube as a reference.
- Test Stability: Before riding, test the stability of the seat by applying gentle pressure. There should be no movement or slippage.
- Fine-Tune Adjustment: After your first ride, you may need to fine-tune the seat height and angle for optimal comfort.
- Consider a Professional Fit: If you experience discomfort or pain while riding, consider getting a professional bike fit to ensure your seat is properly adjusted.
7. What Is The Correct Way To Attach The Pedals To A Huffy Bike?
Attaching the pedals to a Huffy bike involves identifying the left and right pedals, applying grease to the threads, and screwing them into the crank arms in the correct direction. Installing pedals correctly prevents damage and ensures efficient pedaling.
- Identify Left and Right Pedals: The pedals are marked with “L” for left and “R” for right. The left pedal has a reverse thread.
- Apply Grease: Apply a small amount of grease to the threads of each pedal to prevent corrosion and ensure smooth installation.
- Start by Hand: Begin threading the pedals into the crank arms by hand to avoid cross-threading.
- Tighten with a Wrench: Use an adjustable wrench to tighten the pedals. The right pedal tightens clockwise, and the left pedal tightens counterclockwise.
- Ensure Secure Fit: Tighten the pedals securely but avoid over-tightening, which can damage the crank arms.
- Double-Check: Before riding, double-check that both pedals are securely attached.
- Regular Maintenance: Periodically check the pedals for tightness and re-grease the threads as needed to maintain smooth operation.
- Consider Pedal Straps or Clipless Pedals: For enhanced performance, you might consider upgrading to pedal straps or clipless pedals, which require compatible shoes.
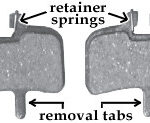
8. How Do You Adjust The Brakes On A Huffy Bike?
Adjusting the brakes on a Huffy bike involves checking the brake lever travel, adjusting cable tension, and aligning the brake pads with the wheel rim or rotor to ensure effective and safe braking. Correct brake adjustment is crucial for rider safety.
- Check Brake Lever Travel: Ensure the brake levers have sufficient travel but do not bottom out against the handlebars.
- Adjust Cable Tension:
- Too Loose: If the brake levers feel too loose, tighten the cable tension by turning the barrel adjuster on the brake lever or caliper clockwise.
- Too Tight: If the brakes are rubbing against the rim or rotor, loosen the cable tension by turning the barrel adjuster counterclockwise.
- Align Brake Pads:
- Rim Brakes: Ensure the brake pads are aligned with the wheel rim and are not rubbing against the tire. Adjust the pad position using an Allen wrench.
- Disc Brakes: Check that the brake caliper is aligned with the rotor. Loosen the caliper bolts and adjust its position until the rotor runs freely without rubbing.
- Test Brakes: After adjusting the brakes, test them to ensure they provide sufficient stopping power. Squeeze the brake levers firmly and check that the bike slows down smoothly and quickly.
- Inspect Brake Pads: Regularly inspect the brake pads for wear. Replace them if they are worn down to the wear indicators or if they are contaminated with oil or grease.
9. What Are The Steps For Inflating The Tires On A Huffy Bike?
Inflating the tires on a Huffy bike involves removing the valve cap, attaching the pump head to the valve, and pumping air to the recommended pressure indicated on the tire sidewall. Proper tire inflation is essential for optimal performance and safety.
- Remove Valve Cap: Unscrew the valve cap from the tire valve. Store it in a safe place to prevent losing it.
- Attach Pump Head:
- Presta Valve: If your bike has Presta valves (narrow valves with a locking nut), loosen the nut before attaching the pump head.
- Schrader Valve: If your bike has Schrader valves (standard car-type valves), simply attach the pump head.
- Secure the Pump Head: Ensure the pump head is securely attached to the valve. Some pumps have a lever to lock the head in place.
- Inflate the Tire: Pump air into the tire until it reaches the recommended pressure. The pressure is usually indicated on the tire sidewall in PSI (pounds per square inch).
- Check Pressure: Use a pressure gauge to verify the tire pressure. Adjust as needed.
- Remove Pump Head: Carefully remove the pump head from the valve.
- Tighten Valve Nut (Presta): If you have Presta valves, tighten the valve nut.
- Replace Valve Cap: Screw the valve cap back onto the valve to protect it from dirt and debris.
- Regular Checks: Check the tire pressure regularly, as tires can lose air over time. Inflate as needed to maintain optimal performance.
10. How Do You Adjust The Gears (Derailleurs) On A Huffy Bike?
Adjusting the gears (derailleurs) on a Huffy bike involves setting the limit screws, adjusting cable tension, and ensuring the chain shifts smoothly between gears. Properly adjusted gears are essential for efficient and comfortable riding.
- Check the Derailleurs: Inspect both the front and rear derailleurs to ensure they are clean and properly aligned.
- Set the Limit Screws:
- High Limit Screw (H): Adjust this screw to prevent the chain from falling off the smallest cog on the rear cassette or the largest chainring in the front.
- Low Limit Screw (L): Adjust this screw to prevent the chain from falling off the largest cog on the rear cassette or the smallest chainring in the front.
- Adjust Cable Tension:
- Rear Derailleur: If the chain is slow to shift to larger cogs, increase cable tension by turning the barrel adjuster on the derailleur or shifter counterclockwise. If the chain is slow to shift to smaller cogs, decrease cable tension by turning the barrel adjuster clockwise.
- Front Derailleur: Adjust the cable tension to ensure the chain shifts smoothly between the chainrings.
- Test Shifting: Shift through all the gears to ensure smooth and accurate transitions. Make small adjustments to the cable tension as needed.
- Lubricate the Chain: Apply a thin layer of chain lubricant to keep the chain running smoothly and prevent wear.
- Professional Adjustment: If you are unable to adjust the gears properly, consider taking your bike to a professional mechanic for a tune-up.
11. What Safety Checks Should You Perform After Assembling A Huffy Bike?
After assembling a Huffy bike, perform critical safety checks including verifying brake function, ensuring all bolts are tightened, and checking tire pressure to guarantee a safe riding experience. Neglecting these checks can lead to accidents.
- Brake Function: Ensure both front and rear brakes are functioning properly. Squeeze the brake levers and check that the brakes engage smoothly and provide sufficient stopping power.
- Bolt Tightness: Check that all bolts are tightened to the manufacturer’s specifications. Pay particular attention to the bolts on the handlebars, stem, seat post, wheels, and brakes.
- Tire Pressure: Verify that the tires are inflated to the recommended pressure indicated on the tire sidewall. Use a pressure gauge to ensure accurate inflation.
- Wheel Alignment: Check that the wheels are properly aligned in the frame and fork. Spin the wheels to ensure they rotate freely without rubbing against the brakes or frame.
- Handlebar and Seat Stability: Ensure the handlebars and seat are securely tightened and do not move when pressure is applied.
- Chain and Gears: Check that the chain is properly lubricated and the gears shift smoothly. Adjust the derailleurs if necessary.
- Quick-Release Levers: If your bike has quick-release levers on the wheels or seat post, ensure they are properly closed and provide sufficient tension.
- Test Ride: Take the bike for a short test ride in a safe area to check all components and make any necessary adjustments.
- Helmet and Safety Gear: Always wear a helmet and other appropriate safety gear, such as gloves and eye protection, when riding your bike.
12. How Do You Maintain A Huffy Bike After Assembly?
Maintaining a Huffy bike after assembly involves regular cleaning, lubrication, and inspection of components to ensure optimal performance and longevity. Consistent maintenance prevents costly repairs.
- Regular Cleaning: Clean your bike regularly with a mild soap and water solution. Pay particular attention to the frame, wheels, and drivetrain.
- Lubrication: Lubricate the chain, derailleurs, and brake levers with appropriate lubricants. Avoid using excessive lubricant, which can attract dirt and grime.
- Tire Pressure: Check and maintain the correct tire pressure before each ride.
- Brake Inspection: Regularly inspect the brake pads and cables for wear. Replace them as needed.
- Gear Adjustment: Check the gear shifting and adjust the derailleurs as necessary to ensure smooth transitions.
- Bolt Tightness: Periodically check the tightness of all bolts and fasteners. Tighten them to the manufacturer’s specifications.
- Cable Inspection: Inspect the brake and gear cables for fraying or damage. Replace them if necessary.
- Storage: Store your bike in a dry and protected location to prevent corrosion and damage.
- Professional Tune-Ups: Consider taking your bike to a professional mechanic for a tune-up at least once a year.
13. What Are Common Issues Encountered While Assembling A Huffy Bike?
Common issues encountered while assembling a Huffy bike include misaligned brakes, difficulty adjusting gears, and improperly tightened bolts, all of which can be resolved with careful attention and the right tools. Addressing these issues ensures a safe and enjoyable ride.
- Misaligned Brakes: Brakes that rub against the rim or rotor can be caused by improper alignment. Adjust the brake calipers or pads to ensure they are centered and do not rub.
- Difficulty Adjusting Gears: Gears that do not shift smoothly can be due to incorrect cable tension or limit screw settings. Adjust the cable tension and limit screws to ensure proper shifting.
- Improperly Tightened Bolts: Bolts that are not tightened to the correct torque can lead to component failure or instability. Use a torque wrench to ensure all bolts are tightened to the manufacturer’s specifications.
- Wheel Alignment Issues: Wheels that are not properly aligned can cause rubbing or instability. Ensure the wheels are centered in the frame and fork and that the quick-release levers or axle nuts are securely tightened.
- Pedal Installation Problems: Incorrectly installed pedals can damage the crank arms. Ensure the pedals are installed on the correct sides and tightened securely.
- Handlebar and Seat Slippage: Handlebars or seats that slip during riding can be caused by insufficient tightening of the clamps. Tighten the clamps to the manufacturer’s specifications to prevent slippage.
- Missing Parts: Occasionally, parts may be missing from the box. Contact Huffy or the retailer immediately to request replacement parts.
14. How Can You Customize Your Huffy Bike After Assembly?
After assembling your Huffy bike, you can customize it with accessories like lights, fenders, racks, and upgraded components to enhance comfort, safety, and functionality. Personalizing your bike makes it uniquely yours.
- Lights: Install front and rear lights for increased visibility and safety, especially when riding at night or in low-light conditions.
- Fenders: Add fenders to protect yourself from water and mud when riding in wet conditions.
- Racks: Install racks to carry cargo, such as groceries, books, or camping gear.
- Baskets: Add a basket to the handlebars or rear rack for carrying small items.
- Upgraded Seat: Replace the stock seat with a more comfortable or ergonomic seat.
- Handlebar Grips: Upgrade the handlebar grips for improved comfort and control.
- Pedals: Replace the stock pedals with clipless pedals or pedals with better grip.
- Tires: Upgrade the tires for improved performance, durability, or puncture resistance.
- Bike Computer: Install a bike computer to track your speed, distance, and other metrics.
- Bell or Horn: Add a bell or horn to alert pedestrians and other cyclists of your presence.
15. What Are The Warranty Terms For A Huffy Bike And How Do You Make A Claim?
The warranty terms for a Huffy bike typically cover manufacturing defects in materials and workmanship, with the duration varying by component. To make a claim, you generally need proof of purchase and must contact Huffy’s customer service.
- Warranty Coverage: Huffy typically offers a limited warranty that covers defects in materials and workmanship. The duration of the warranty can vary depending on the component, with frames often having longer coverage periods than other parts.
- Warranty Exclusions: The warranty typically does not cover normal wear and tear, damage caused by accidents, misuse, neglect, improper assembly, or unauthorized modifications.
- Proof of Purchase: To make a warranty claim, you will typically need to provide proof of purchase, such as a sales receipt or order confirmation.
- Contact Customer Service: Contact Huffy’s customer service department to initiate a warranty claim. You may be required to provide details about the issue, along with photos or videos.
- Inspection and Repair: Huffy may request that you return the bike or component for inspection. If the issue is covered under warranty, Huffy will either repair or replace the defective part.
- Registration: Registering your Huffy bike online can help streamline the warranty claim process and ensure you receive updates and notifications.
- Review Warranty Document: Review the warranty document included with your bike for specific terms, conditions, and limitations.
16. Where Can You Find Replacement Parts For A Huffy Bike?
You can find replacement parts for a Huffy bike at various online retailers, local bike shops, and directly from Huffy’s website, ensuring you can maintain and repair your bike as needed. Keeping your bike in good condition is essential for safety and enjoyment.
- Huffy Website: The official Huffy website is a primary source for replacement parts. You can often find parts specific to your model.
- Online Retailers: Websites like Amazon, eBay, and specialized bike parts retailers often carry a wide selection of Huffy replacement parts.
- Local Bike Shops: Your local bike shop can be a valuable resource for replacement parts. They can also provide advice and assistance with installation.
- Huffy Customer Service: Contacting Huffy’s customer service department can help you locate specific parts and ensure compatibility.
- Used Parts: Consider purchasing used parts from online marketplaces or local bike co-ops. This can be a more affordable option.
- Part Compatibility: When purchasing replacement parts, ensure they are compatible with your specific Huffy model and components.
17. What Are Some Common Upgrades For A Huffy Bike To Enhance Performance?
Common upgrades for a Huffy bike to enhance performance include better tires, improved brakes, upgraded gears, and a more comfortable seat, all contributing to a smoother and more enjoyable riding experience. Enhancing your bike can greatly improve its functionality.
- Tires: Upgrading to higher-quality tires can improve traction, reduce rolling resistance, and enhance overall ride quality.
- Brakes: Upgrading to better brakes, such as hydraulic disc brakes, can provide more reliable stopping power, especially in wet conditions.
- Gears: Upgrading the gears can provide a wider range of ratios and smoother shifting.
- Seat: Replacing the stock seat with a more comfortable or ergonomic seat can make longer rides more enjoyable.
- Handlebar Grips: Upgrading the handlebar grips can improve comfort and control.
- Pedals: Upgrading to clipless pedals or pedals with better grip can enhance pedaling efficiency.
- Suspension Fork: Adding a suspension fork to a rigid Huffy mountain bike can improve comfort and control on rough terrain.
- Wheels: Upgrading to lighter and stronger wheels can improve acceleration and handling.
18. How Do You Store A Huffy Bike Properly To Prevent Damage?
To store a Huffy bike properly and prevent damage, clean it thoroughly, lubricate moving parts, and store it in a dry, sheltered location, ideally using a bike stand or hanging it to avoid tire deformation. Proper storage extends the life of your bike.
- Clean the Bike: Before storing your bike, clean it thoroughly with a mild soap and water solution. Remove any dirt, mud, or grime.
- Lubricate Moving Parts: Lubricate the chain, derailleurs, and brake levers with appropriate lubricants.
- Inflate Tires: Inflate the tires to the recommended pressure to prevent flat spots.
- Store Indoors: Store your bike indoors in a dry and sheltered location, such as a garage, shed, or basement.
- Use a Bike Stand: Use a bike stand to keep the bike upright and prevent it from falling over.
- Hang the Bike: Consider hanging the bike from the ceiling or wall to save space and prevent tire deformation.
- Cover the Bike: Cover the bike with a dust cover to protect it from dust and debris.
- Avoid Direct Sunlight: Avoid storing the bike in direct sunlight, which can fade the paint and damage the tires.
- Check Periodically: Check the bike periodically to ensure it is still in good condition. Inflate the tires as needed and re-lubricate moving parts.
19. What Are Some Safety Tips For Riding A Huffy Bike After Assembling It?
Safety tips for riding a Huffy bike after assembling it include wearing a helmet, checking brakes before each ride, being visible to traffic, and following all traffic laws to ensure a safe riding experience. Safety should always be a top priority.
- Wear a Helmet: Always wear a helmet when riding your bike. A helmet can protect your head in the event of a fall or collision. According to the Insurance Institute for Highway Safety (IIHS), helmets reduce the risk of head injury by up to 85%.
- Check Brakes: Check the brakes before each ride to ensure they are functioning properly.
- Be Visible: Wear bright clothing and use lights, especially when riding at night or in low-light conditions.
- Follow Traffic Laws: Obey all traffic laws, including stop signs, traffic lights, and lane markings.
- Use Hand Signals: Use hand signals to indicate your intentions to turn or stop.
- Ride Defensively: Be aware of your surroundings and anticipate potential hazards.
- Maintain Your Bike: Regularly maintain your bike to ensure it is in good working condition.
- Avoid Distractions: Avoid using cell phones or other electronic devices while riding.
- Ride with Others: Consider riding with others, especially on longer rides.
- Stay Hydrated: Bring water with you on rides and drink regularly to stay hydrated.
20. How Can Usabikers.net Help You With Your Huffy Bike?
Usabikers.net offers detailed guides, community forums, and expert advice to assist you with assembling, maintaining, and customizing your Huffy bike, ensuring a fulfilling biking experience. Join our community to share your passion.
- Detailed Guides: Usabikers.net provides step-by-step guides for assembling, maintaining, and repairing Huffy bikes.
- Community Forums: Our community forums allow you to connect with other Huffy bike owners, share tips and advice, and ask questions.
- Expert Advice: Our team of experienced cyclists and mechanics can provide expert advice on all aspects of Huffy bike ownership.
- Product Reviews: We offer reviews of Huffy bikes and accessories to help you make informed purchasing decisions.
- Maintenance Tips: Usabikers.net provides tips on how to keep your Huffy bike in top condition, including cleaning, lubrication, and inspection.
- Customization Ideas: We offer ideas and inspiration for customizing your Huffy bike to suit your individual needs and preferences.
- Event Listings: Stay informed about local bike events, races, and group rides.
- Contact Information: For more information, visit our website at usabikers.net or contact us at 801 Sturgis Main St, Sturgis, SD 57785, United States, or call +1 (605) 347-2000.
By following these tips and utilizing the resources available on usabikers.net, you can enjoy a safe and fulfilling experience with your Huffy bike. Happy riding!
FAQ: How to Assemble a Huffy Bike
1. Is it difficult to assemble a Huffy bike?
No, assembling a Huffy bike is not too difficult, as Huffy bikes are designed for straightforward assembly with included instructions and basic tools. Most models can be assembled at home with common tools like Allen wrenches and screwdrivers.
2. How long does it take to assemble a Huffy bike?
It typically takes about 30 minutes to an hour to assemble a Huffy bike, depending on the model and your experience level.
3. What tools are needed to assemble a Huffy bike?
You’ll generally need Allen wrenches, a Phillips head screwdriver, an adjustable wrench, and a bike pump to assemble a Huffy bike.
4. Can I assemble a Huffy bike without the manual?
While it’s best to have the manual, you can often find assembly instructions and videos online, or contact Huffy customer service for assistance.
5. What should I do if a part is missing from my Huffy bike assembly kit?
If a part is missing from your Huffy bike assembly kit, contact Huffy customer service immediately to request a replacement part.
6. How do I adjust the brakes on my Huffy bike after assembly?
Adjust the brakes on your Huffy bike by loosening or tightening the brake cable tension and aligning the brake pads with the wheel rim or rotor, ensuring they engage properly without rubbing.
7. How do I adjust the gears on my Huffy bike after assembly?
Adjust the gears on your Huffy bike by adjusting the limit screws on the derailleurs and fine-tuning the cable tension to ensure smooth and accurate shifting.
8. What is the correct tire pressure for my Huffy bike?
The correct tire pressure for your Huffy bike is usually indicated on the tire sidewall. Use a bike pump with a pressure gauge to inflate the tires to the recommended PSI.
9. How do I know if the handlebars are properly aligned on my Huffy bike?
Check that the handlebars are properly aligned by ensuring they are centered with the front wheel and tightened securely, preventing any slippage during riding.
10. Where can I find help if I’m having trouble assembling my Huffy bike?
If you’re having trouble assembling your Huffy bike, visit usabikers.net for detailed guides, community forums, and expert advice, or contact Huffy customer service for additional assistance.