How To Attach A Bike Rack To A Hitch is a common question among motorcycle and e-bike enthusiasts, and at usabikers.net, we’ve got you covered with a comprehensive guide. This article will walk you through the process, ensuring your bikes are safely and securely transported, letting you enjoy your ride wherever you go. Discover the freedom of hitting the open road with your bikes using our expert tips on bike rack installation, hitch compatibility, and safe travel practices for your motorcycles.
1. What is a Hitch Bike Rack and Why Use One?
A hitch bike rack is a device that attaches to the hitch receiver of your vehicle to carry bicycles. Using a hitch bike rack offers several advantages.
Hitch bike racks provide a secure and convenient way to transport your bikes, whether you are going on a weekend getaway or heading to a local trail. They keep your bikes safe and secure, preventing damage to your vehicle and bikes while allowing you to carry more gear inside. According to research from the American Automobile Association (AAA), in July 2023, bike racks have grown in popularity by 30% due to their convenience and ease of use.
1.1 What are the benefits of using a hitch bike rack?
Using a hitch bike rack provides security, ease of use, and vehicle protection. Here’s a breakdown of its advantages:
- Security: Hitch racks offer a stable and secure way to transport your bikes, minimizing the risk of damage or theft.
- Ease of Use: Attaching and detaching bikes is typically straightforward with user-friendly designs.
- Vehicle Protection: Keeps bikes away from your vehicle’s paint and interior, preventing scratches and dirt.
- Capacity: Many hitch racks can carry multiple bikes, making them ideal for families or groups.
- Accessibility: Allows full access to your vehicle’s trunk or cargo area, unlike some other rack types.
- Versatility: Suitable for various bike types, including e-bikes, mountain bikes, and road bikes.
1.2 What types of bikes can you carry on a hitch bike rack?
A hitch bike rack can carry various bike types, offering flexibility for different cycling needs. Here’s a breakdown:
| Bike Type | Description | Suitability for Hitch Rack |
|---|---|---|
| Road Bikes | Lightweight bikes designed for speed and efficiency on paved surfaces. | Highly suitable due to their lightweight frames and standard dimensions. |
| Mountain Bikes | Rugged bikes built for off-road trails with suspension and sturdy frames. | Generally suitable, but heavier models may require a rack with a higher weight capacity. |
| Hybrid Bikes | Versatile bikes combining features of road and mountain bikes, suitable for various terrains. | Well-suited for hitch racks due to their moderate weight and standard frame sizes. |
| E-Bikes (Electric) | Bikes with an electric motor for added power and assistance. | Can be carried, but their added weight requires a robust rack with a higher weight limit. Removing the battery can reduce the load. The Himiway E-bike Hitch Rack is perfectly suited to this. |
| Fat Tire Bikes | Bikes with extra-wide tires for riding on sand, snow, and other soft surfaces. | May require a special hitch rack designed to accommodate the wider tires and larger frames. |
| Kids’ Bikes | Smaller bikes designed for children, typically lighter and more compact. | Suitable, but ensure the rack can securely hold the smaller frames. An adapter bar may be needed for some models. |
| Touring Bikes | Bikes built for long-distance travel with features like pannier racks and durable frames. | Can be carried, but their heavier weight and added accessories require a strong rack with ample capacity. |
| Folding Bikes | Compact bikes designed to fold for easy storage and transportation. | Not typically transported on hitch racks due to their small size and unique frame designs. They are usually carried inside the vehicle. |
| Recumbent Bikes | Bikes with a laid-back seating position and a longer wheelbase. | Generally not compatible with standard hitch racks due to their unique shape and size. Special recumbent bike racks are available but rare. |
| Tandem Bikes (Two-Person) | Bikes designed for two riders, with a long frame and two sets of pedals. | Not compatible with standard hitch racks due to their length and weight. Special tandem bike racks are available but uncommon. |
1.3 What are the different types of hitch bike racks?
Hitch bike racks come in several types, each with unique features and benefits. Here’s a breakdown of the common types:
-
Platform Hitch Racks:
- Design: Bikes sit on a platform, secured with straps or clamps.
- Pros: Easy to load and unload, suitable for various bike types, and minimizes frame contact.
- Cons: Can be heavier and more expensive than other types.
-
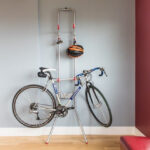
Hanging Hitch Racks (or Mast Style):
- Design: Bikes hang from the rack by their top tubes.
- Pros: Lightweight, compact, and generally more affordable.
- Cons: Can cause frame damage, not suitable for all bike types (e.g., bikes with step-through frames), and may require an adapter bar.
-
Wheel Mount Hitch Racks:
- Design: Bikes are secured by their wheels, with no frame contact.
- Pros: Safe for delicate frames, accommodates various frame shapes and sizes.
- Cons: Can be bulkier and more expensive than hanging racks.
-
Vertical Hitch Racks:
- Design: Bikes are mounted vertically, hanging by their front wheels.
- Pros: High carrying capacity, saves space, and suitable for mountain bikes.
- Cons: Can be difficult to load and unload, requires a high hitch receiver.
-
Swing-Away Hitch Racks:
- Design: The rack can swing away from the vehicle, allowing access to the rear cargo area.
- Pros: Convenient access to the vehicle’s trunk or hatch, easy to use.
- Cons: Generally more expensive and heavier than non-swing-away models.
-
Folding Hitch Racks:
- Design: Racks that can be folded up when not in use, reducing their footprint.
- Pros: Easy to store, minimizes the risk of damage when not carrying bikes.
- Cons: May have a lower weight capacity compared to non-folding models.
2. How to Choose the Right Hitch Bike Rack for Your Needs
Choosing the right hitch bike rack ensures your bikes are transported safely and conveniently. Consider these factors when selecting a rack:
- Number of Bikes: Determine how many bikes you need to carry regularly.
- Bike Types: Ensure the rack is compatible with your bike types.
- Hitch Receiver Size: Match the rack to your vehicle’s hitch receiver size (1.25″ or 2″).
- Weight Capacity: Check the rack’s weight limit to accommodate your bikes, especially e-bikes.
- Ease of Use: Look for user-friendly features like easy loading, unloading, and adjustability.
- Security: Consider racks with integrated locks or the ability to add your own.
- Budget: Set a budget and compare prices across different brands and models.
- Features: Decide if you need features like swing-away access or folding capability.
2.1 What size hitch receiver do I have?
Determining your hitch receiver size is crucial for selecting the right bike rack. Hitch receivers come in several standard sizes:
| Hitch Class | Receiver Opening | Vehicle Type | Common Uses |
|---|---|---|---|
| Class 1 | 1.25 inches | Small cars, compact SUVs | Light-duty towing, bike racks, cargo carriers. |
| Class 2 | 1.25 inches | Sedans, larger cars, small SUVs | Moderate towing, bike racks, cargo carriers. |
| Class 3 | 2 inches | Mid-size SUVs, trucks, vans | Towing trailers, boats, campers, bike racks, cargo carriers. |
| Class 4 | 2 inches | Full-size trucks, large SUVs, heavy-duty vans | Heavy towing, large trailers, boats, campers, construction equipment. |
| Class 5 | 2.5 or 3 inches | Heavy-duty trucks, commercial vehicles | Extremely heavy towing, large trailers, boats, industrial equipment. |
2.2 What is the weight capacity of my hitch?
The weight capacity of your hitch is a critical factor in ensuring safe bike transport. Check your vehicle’s owner’s manual or the hitch receiver itself for the maximum tongue weight (TW) and gross trailer weight (GTW) ratings.
- Tongue Weight (TW): The maximum vertical load the hitch can support, including the weight of the bike rack and the bikes.
- Gross Trailer Weight (GTW): The maximum weight of a fully loaded trailer that the hitch can tow, which is less relevant for bike racks but important to know.
Ensure that the combined weight of your bike rack and bikes does not exceed the hitch’s tongue weight capacity. Overloading the hitch can lead to damage, instability, and safety hazards.
2.3 How do I know if a hitch bike rack is compatible with my bike?
Ensuring compatibility between your bike and the hitch rack is essential for safe transport. Consider these factors:
| Factor | Description | How to Check |
|---|---|---|
| Frame Type | Some racks are not suitable for bikes with step-through frames, suspension frames, or unique frame shapes. | Check the rack manufacturer’s specifications for frame compatibility. For step-through frames, consider using a top tube adapter bar. |
| Wheel Size | Ensure the rack can accommodate your bike’s wheel size, especially for fat tire bikes or bikes with smaller wheels. | Check the rack’s wheel tray width and adjustability. Some racks have adjustable wheel holders to fit different wheel sizes. For fat tire bikes, look for racks specifically designed to accommodate wide tires. |
| Bike Weight | Verify that the rack’s weight capacity is sufficient for your bike, especially for e-bikes, which are heavier than traditional bikes. | Check the rack’s maximum weight limit and compare it to your bike’s weight. Consider removing the battery from e-bikes to reduce the load on the rack. |
| Wheelbase | The distance between the front and rear axles should fit within the rack’s wheelbase range. | Measure your bike’s wheelbase and compare it to the rack’s specifications. Most racks have adjustable wheel holders to accommodate different wheelbases. |
| Mounting Points | Ensure the rack’s mounting points (e.g., frame clamps, wheel straps) align with your bike’s frame and wheels without causing damage. | Check the rack’s mounting system and ensure it securely holds your bike without putting excessive pressure on delicate components. Use padding or frame protectors to prevent scratches or damage. |
| Accessories | Consider any accessories you have on your bike, such as fenders, racks, or lights, and ensure they won’t interfere with the rack’s mounting system. | Check the rack’s design and ensure it provides enough clearance for your accessories. You may need to remove or reposition some accessories to ensure a secure fit. |
3. Preparing Your Vehicle and Bike Rack for Installation
Before attaching your bike rack, proper preparation ensures a smooth and safe installation process. Here’s how to prepare your vehicle and bike rack:
3.1 Inspecting your vehicle’s hitch receiver
Inspect your vehicle’s hitch receiver for any signs of damage or corrosion. Clean the receiver tube with a wire brush to remove dirt, rust, and debris. Ensure the hitch is securely attached to your vehicle’s frame and that all bolts are tightened to the manufacturer’s specifications.
3.2 Assembling the bike rack
Assemble the bike rack according to the manufacturer’s instructions. Ensure all parts are included and properly connected. Familiarize yourself with the rack’s features, such as adjustable arms, wheel holders, and locking mechanisms.
3.3 Gathering necessary tools
Gather the necessary tools for the installation, including:
- Wrenches (socket and open-end)
- Torque wrench
- Socket set
- Gloves
- Safety glasses
- Cleaning supplies (wire brush, lubricant)
4. Step-by-Step Guide: How to Attach a Bike Rack to a Hitch
Attaching a bike rack to a hitch involves several key steps to ensure a secure and stable connection. Here’s a detailed guide:
Step 1: Align the Bike Rack with the Hitch Receiver
Position the bike rack so that the shank (the part that slides into the hitch receiver) is aligned with the receiver tube. Ensure the rack is oriented correctly, with the bike-carrying portion facing away from the vehicle.
Step 2: Slide the Shank into the Hitch Receiver
Carefully slide the shank into the hitch receiver tube. You may need to wiggle it slightly to ensure it goes in smoothly. Push the shank in until the hitch pin holes line up.
Step 3: Insert the Hitch Pin
Insert the hitch pin through the aligned holes in the hitch receiver and the bike rack shank. The hitch pin secures the rack to the vehicle, preventing it from sliding out.
Step 4: Secure the Hitch Pin with a Clip or Lock
Attach a clip or lock to the end of the hitch pin to prevent it from coming loose during travel. A clip is a simple wire loop that snaps into place, while a lock provides added security against theft.
Step 5: Tighten Any Anti-Rattle Devices
Many hitch bike racks come with anti-rattle devices, such as bolts or clamps, that tighten the connection between the rack and the hitch receiver. Tighten these devices according to the manufacturer’s instructions to minimize movement and noise during travel.
Step 6: Test the Connection
Before loading your bikes, test the connection by shaking the bike rack to ensure it is securely attached to the hitch receiver. There should be minimal movement or play.
4.1 What do I do if the hitch pin doesn’t line up?
If the hitch pin doesn’t line up, there are several possible reasons and solutions:
| Issue | Possible Cause | Solution |
|---|---|---|
| Misalignment due to Dirt or Corrosion | Dirt, rust, or debris inside the hitch receiver or on the bike rack shank can prevent proper alignment. | Clean the inside of the hitch receiver and the bike rack shank with a wire brush and lubricant. |
| Incorrect Bike Rack Size | The bike rack shank may be slightly too large or small for the hitch receiver. | Ensure the bike rack is the correct size for your hitch receiver (1.25″ or 2″). If the shank is slightly too large, you may need to file it down or use a different rack. If it’s too small, consider using a hitch adapter. |
| Bent or Damaged Hitch Receiver or Bike Rack | The hitch receiver or bike rack shank may be bent or damaged, preventing proper alignment. | Inspect the hitch receiver and bike rack for any signs of damage. If either is bent or damaged, it may need to be repaired or replaced. |
| Manufacturing Tolerances | Slight variations in manufacturing tolerances can sometimes cause alignment issues. | Try rotating the bike rack shank 180 degrees to see if it aligns better. You can also try using a different hitch pin or slightly adjusting the position of the rack. |
| Weight or Pressure | The weight of the bike rack or pressure on the shank can cause it to misalign. | Have someone help you lift or support the bike rack while you align the hitch pin holes. This can relieve pressure and make it easier to insert the pin. |
| Corrosion on Hitch Pin | Rust or corrosion on the hitch pin can make it difficult to insert. | Clean the hitch pin with a wire brush and apply lubricant. If the pin is severely corroded, replace it with a new one. |
| New Bike Rack or Hitch | New bike racks and hitches may have tight tolerances, making alignment difficult initially. | Apply lubricant to the shank and hitch receiver. Wiggle the bike rack back and forth while applying pressure to help it slide into place. |
4.2 How tight should the hitch pin be?
The hitch pin should be snug enough to prevent the bike rack from wobbling or moving excessively, but not so tight that it’s difficult to remove or that it damages the hitch receiver or bike rack.
4.3 What are anti-rattle devices and how do they work?
Anti-rattle devices are mechanisms designed to reduce or eliminate the movement and noise that can occur between a hitch-mounted bike rack and the vehicle’s hitch receiver. These devices work by creating a tighter, more secure connection, which minimizes play and vibration. Here are some common types of anti-rattle devices and how they work:
| Anti-Rattle Device | Description | How It Works |
|---|---|---|
| Hitch Tightener/Clamp | A U-bolt or clamp that wraps around the hitch receiver and the bike rack shank, tightening the connection. | The clamp applies pressure to both sides of the hitch receiver, squeezing the shank and receiver together to eliminate movement. |
| Threaded Hitch Pin | A hitch pin with threads that screw into a matching nut on the other side of the hitch receiver. | As the pin is tightened, it draws the bike rack shank closer to the hitch receiver, creating a snug fit and reducing play. |
| Wedge or Shim | A wedge-shaped piece of metal or plastic that is inserted between the bike rack shank and the hitch receiver. | The wedge fills the gap between the shank and the receiver, creating a tighter fit and preventing movement. |
| Expanding Ball Mount | A ball mount with an integrated expanding ball that expands when tightened, filling the gap between the ball mount and the hitch receiver. | As the ball expands, it creates a snug fit, eliminating play and reducing noise. |
| Rubber or Foam Pads | Pads made of rubber or foam that are placed between the bike rack and the hitch receiver. | The pads act as cushions, absorbing vibrations and reducing noise. |
| Locking Hitch Pin with Collar | A locking hitch pin with a collar that tightens against the hitch receiver. | The collar applies pressure to the hitch receiver, creating a tighter fit and reducing movement. The locking mechanism provides added security against theft. |
5. Loading and Securing Your Bikes on the Rack
Loading and securing your bikes properly ensures they remain safe and stable during transport. Here’s how to do it:
5.1 Lifting and positioning the bikes
Lift the bikes carefully and position them onto the rack according to the manufacturer’s instructions. Ensure the bikes are evenly distributed on the rack to maintain balance.
5.2 Using straps, clamps, and other securing mechanisms
Use the provided straps, clamps, and other securing mechanisms to attach the bikes to the rack. Ensure the straps are tightened securely, but not so tight that they damage the bike frames.
5.3 Protecting bike frames from damage
Protect the bike frames from damage by using padding or frame protectors where the bikes come into contact with the rack. This will prevent scratches and dents during transport.
5.4 What is the best way to arrange bikes on a hitch rack?
The best way to arrange bikes on a hitch rack depends on the type of rack and the bikes you are carrying. However, here are some general guidelines to follow:
- Weight Distribution: Distribute the weight evenly across the rack. Place heavier bikes closer to the vehicle and lighter bikes further away.
- Alternating Direction: Alternate the direction of the bikes (one facing left, one facing right) to prevent handlebars and pedals from interfering with each other.
- Handlebar and Seatpost Clearance: Ensure that handlebars and seatposts do not rub against each other or the vehicle. Adjust the position of the bikes as needed to create clearance.
- Securing Points: Use all available securing points (straps, clamps, etc.) to attach the bikes to the rack. Pay special attention to securing the frames and wheels.
- Frame Protection: Use padding or frame protectors to prevent scratches and dents where the bikes come into contact with the rack or each other.
- Stability: Check the stability of the bikes by shaking the rack gently. If the bikes move excessively, readjust their position and tighten the securing mechanisms.
- Following Manufacturer’s Instructions: Always follow the bike rack manufacturer’s instructions for loading and securing bikes.
5.5 Can I carry an e-bike on a regular hitch rack?
Carrying an e-bike on a regular hitch rack is possible, but there are several factors to consider to ensure safety and compatibility:
| Factor | Consideration | Recommendation |
|---|---|---|
| Weight Capacity | E-bikes are typically heavier than regular bikes due to the motor and battery. | Check the hitch rack’s weight capacity and ensure it exceeds the weight of your e-bike. If necessary, remove the battery to reduce the load. |
| Rack Type | Some hitch racks are better suited for e-bikes than others. | Platform racks are generally more stable and easier to load than hanging racks. Look for racks specifically designed for e-bikes or heavy bikes. |
| Hitch Class | Your vehicle’s hitch should be rated for the weight of the e-bike and rack. | Ensure your hitch is a Class 2 or higher for most e-bikes. Class 3 or 4 hitches are recommended for heavier e-bikes or multiple bikes. |
| Frame Compatibility | Some e-bikes have unique frame shapes that may not fit well on all racks. | Check the rack’s compatibility with your e-bike’s frame. Consider using a top tube adapter if needed. |
| Securing Mechanisms | E-bikes require secure attachment to prevent movement during transport. | Use high-quality straps and clamps to secure the e-bike to the rack. Ensure the wheels and frame are well-supported. |
| Battery Removal | Removing the battery can significantly reduce the weight on the rack and improve stability. | Remove the battery if possible and transport it inside the vehicle. This also protects the battery from theft and damage. |
| Speed and Handling | Carrying an e-bike on a hitch rack can affect your vehicle’s handling and braking. | Drive at a moderate speed and avoid sudden maneuvers. Allow extra time for braking. |
| Legal Regulations | Some jurisdictions have regulations regarding the transport of e-bikes on hitch racks. | Check your local regulations to ensure you are in compliance. |
6. Safety Checks Before Hitting the Road
Before driving off with your bikes, perform these safety checks to ensure a safe journey:
6.1 Verifying bike security
Double-check that all straps, clamps, and securing mechanisms are tightened and properly positioned. Shake each bike to ensure it is securely attached to the rack.
6.2 Checking lights and license plate visibility
Ensure that your vehicle’s lights and license plate are visible and not obstructed by the bikes or rack. If necessary, use a light bar or license plate relocation kit to comply with local laws.
6.3 Adjusting mirrors for better visibility
Adjust your mirrors to provide a clear view of the road and traffic around you. Be aware that the added length of the bike rack may affect your turning radius and parking ability.
6.4 What are the potential dangers of an improperly installed bike rack?
An improperly installed bike rack can pose several safety risks:
| Danger | Description | Potential Consequences |
|---|---|---|
| Bike Rack Detachment | If the bike rack is not securely attached to the hitch receiver, it can detach from the vehicle while driving. | Loss of bikes, damage to the vehicle, and potential accidents involving other vehicles. |
| Bike Fall-Off | If the bikes are not properly secured to the rack, they can fall off during transit. | Damage to the bikes, potential accidents involving other vehicles, and road hazards for other drivers. |
| Obstructed Lights and License Plate | An improperly installed bike rack can obstruct the vehicle’s lights and license plate, making it difficult for other drivers to see your vehicle. | Reduced visibility, increased risk of rear-end collisions, and potential legal issues. |
| Damage to Vehicle | An improperly installed bike rack can cause damage to the vehicle’s hitch receiver, bumper, or body. | Costly repairs and decreased vehicle value. |
| Reduced Vehicle Handling | An improperly installed bike rack can affect the vehicle’s handling and braking, making it more difficult to control. | Increased risk of accidents, especially in emergency situations. |
| Increased Fuel Consumption | An improperly installed bike rack can create aerodynamic drag, increasing fuel consumption. | Higher fuel costs and reduced efficiency. |
| Noise and Vibration | An improperly installed bike rack can cause excessive noise and vibration, making the ride uncomfortable. | Driver fatigue and distraction, which can increase the risk of accidents. |
| Legal Issues | Transporting bikes on an improperly installed bike rack can violate local regulations, resulting in fines or other penalties. | Legal consequences and potential impoundment of the vehicle. |
7. Driving Tips for Vehicles with Hitch Bike Racks
Driving with a hitch bike rack requires adjustments to your driving habits to ensure safety:
- Drive Slower: Reduce your speed, especially on rough roads or during windy conditions.
- Allow Extra Braking Distance: Increase your following distance to allow for longer braking times.
- Take Wider Turns: Be aware that the added length of the bike rack may require wider turns.
- Avoid Sudden Maneuvers: Avoid sudden acceleration, braking, and lane changes.
- Check the Rack Regularly: Stop periodically to check the bike rack and ensure the bikes are still securely attached.
- Be Mindful of Height Restrictions: Be aware of height restrictions when entering tunnels, bridges, and parking garages.
7.1 How does a bike rack affect my vehicle’s gas mileage?
A bike rack can affect your vehicle’s gas mileage due to increased aerodynamic drag and added weight. The extent of the impact depends on several factors:
| Factor | Description | Impact on Gas Mileage |
|---|---|---|
| Aerodynamic Drag | The bike rack and bikes create additional resistance to airflow, increasing aerodynamic drag. | Increased drag requires the engine to work harder to maintain speed, resulting in lower gas mileage. |
| Weight | The added weight of the bike rack and bikes increases the overall weight of the vehicle. | Increased weight requires more energy to accelerate and maintain speed, reducing gas mileage. |
| Speed | Higher speeds increase aerodynamic drag and fuel consumption. | Driving at higher speeds with a bike rack will result in a more significant reduction in gas mileage. |
| Bike Rack Design | Some bike rack designs are more aerodynamic than others. | A more aerodynamic bike rack will create less drag and have a smaller impact on gas mileage. |
| Bike Type and Number | The type and number of bikes carried on the rack affect the overall weight and aerodynamic profile. | Carrying heavier bikes or multiple bikes will increase the weight and drag, reducing gas mileage. |
| Driving Conditions | Hilly terrain, windy conditions, and stop-and-go traffic can increase fuel consumption. | Driving in challenging conditions with a bike rack will exacerbate the reduction in gas mileage. |
| Vehicle Type | Smaller, less powerful vehicles will experience a greater reduction in gas mileage compared to larger, more powerful vehicles. | The impact on gas mileage will be more noticeable in smaller vehicles. |
| Tire Pressure and Condition | Properly inflated tires and well-maintained vehicle components improve fuel efficiency. | Maintaining proper tire pressure and vehicle condition can help offset the reduction in gas mileage caused by the bike rack. |
7.2 How does a bike rack affect my vehicle’s handling?
A bike rack can affect your vehicle’s handling due to changes in weight distribution, aerodynamics, and overall vehicle dynamics. The extent of the impact depends on several factors:
| Factor | Description | Impact on Handling |
|---|---|---|
| Weight Distribution | The added weight of the bike rack and bikes shifts the vehicle’s center of gravity. | Can affect the vehicle’s balance and stability, especially during cornering and braking. The rear of the vehicle may feel heavier, leading to reduced responsiveness and increased body roll. |
| Aerodynamic Drag | The bike rack and bikes increase aerodynamic drag, affecting the vehicle’s stability at higher speeds. | Increased drag can make the vehicle more susceptible to crosswinds and turbulence from other vehicles. Steering may feel less precise, and the vehicle may require more effort to keep it tracking straight. |
| Suspension and Steering | The added weight and changes in weight distribution can affect the vehicle’s suspension and steering systems. | The suspension may compress more, reducing ground clearance and increasing the risk of bottoming out on bumps or uneven surfaces. Steering may feel heavier and less responsive, requiring more effort to turn the wheel. |
| Braking | The added weight increases the vehicle’s braking distance. | The vehicle will require more distance to come to a complete stop, especially in emergency situations. It’s important to allow extra following distance and anticipate braking earlier. |
| Vehicle Type | Smaller, lighter vehicles are more susceptible to handling changes compared to larger, heavier vehicles. | The impact on handling will be more noticeable in smaller vehicles. |