
Changing bike brake pads is essential for safety and performance; let usabikers.net show you how. This guide provides a step-by-step process for replacing both disc and rim brake pads, ensuring your motorcycle stops reliably and safely. We cover everything from inspection to bedding in your new pads, giving you the knowledge to maintain your brakes effectively.
1. Understanding Your Brakes: Disc vs. Rim
Before diving into the replacement process, it’s crucial to understand the two main types of motorcycle brake systems: disc brakes and rim brakes. Knowing which system your bike uses will help you follow the correct steps and use the appropriate tools.
- Disc Brakes: These systems use a rotor attached to the wheel hub and a caliper that squeezes the brake pads against the rotor. Disc brakes offer superior stopping power, especially in wet conditions, and are common on modern motorcycles.
- Rim Brakes: Found on older motorcycles, rim brakes use pads that clamp directly onto the wheel rim to create friction and slow the bike. While simpler in design, they are less effective in wet conditions and can wear down the rims over time.
2. Identifying the 5 Key Reasons for Bike Brake Pad Replacement
Knowing when to change your brake pads is crucial for safety and optimal braking performance. Here are the top five reasons why you should consider replacing your motorcycle brake pads:
- Worn Down Pads: Visually inspect your brake pads regularly. If the friction material is worn down to 1 millimeter or less, it’s time for a replacement. Riding with worn pads can damage the rotors and reduce braking efficiency.
- Squealing Noises: A high-pitched squealing sound when braking often indicates that the pads are worn or contaminated. The noise is usually caused by the wear indicator rubbing against the rotor.
- Reduced Braking Performance: If you notice that it takes longer to stop or that your brake lever feels spongy, your brake pads may be worn or glazed. New pads will restore your bike’s stopping power.
- Scoring on Rotors: Inspect your brake rotors for deep grooves or scoring. These can be caused by worn pads or debris caught between the pad and rotor. Replacing the pads and possibly the rotors will ensure smooth and effective braking.
- Vibrations When Braking: Vibrations or pulsations when applying the brakes can indicate warped rotors or uneven pad wear. Addressing this issue promptly will improve your bike’s handling and safety.
3. Essential Tools and Materials for Brake Pad Replacement
Gathering the right tools and materials is essential for a smooth and efficient brake pad replacement. Here’s a list of what you’ll need:
| Tool/Material | Purpose |
|---|---|
| New Brake Pads | Replacement pads suitable for your bike model |
| Allen Wrench Set | For removing caliper bolts and pad retention bolts |
| Pliers | To remove any retaining clips or pins |
| Screwdrivers | Flathead and Phillips head screwdrivers for various screws and adjustments |
| Brake Cleaner | To clean rotors and calipers |
| Clean Rags | For wiping down components |
| Torque Wrench | To tighten bolts to the manufacturer’s specified torque |
| Brake Pad Spreader | To push back the caliper pistons |
| Gloves | To protect your hands from brake dust and chemicals |
| Safety Glasses | To protect your eyes from debris |
| Vernier Calipers | Measuring rotor width to ensure within specified limits (disc brakes only) |
| Service Manual | Referencing specific torque settings and procedures for your bike model |
| Brake Fluid (optional) | If brake fluid needs topping off |
4. Step-by-Step Guide: How To Change Bike Brake Pads
Here’s a detailed guide on how to replace your motorcycle brake pads, covering both disc and rim brake systems.
4.1. Preparing Your Motorcycle
- Park on a Level Surface: Ensure your motorcycle is parked on a flat, stable surface to prevent it from moving during the process.
- Gather Your Tools: Have all your tools and materials within easy reach.
- Protect Your Work Area: Use a clean cloth or mat to protect the ground from any spilled brake fluid or contaminants.
4.2. Removing the Wheel
-
Loosen Caliper Bolts (Disc Brakes): Before removing the wheel, slightly loosen the caliper bolts. This makes it easier to remove the caliper later.
-
Loosen Axle Nut: Use the appropriate wrench to loosen the axle nut on the wheel you’re working on.
-
Lift the Motorcycle: Use a motorcycle jack or stand to lift the wheel off the ground. Ensure the bike is stable and secure.
-
Remove the Axle: Fully remove the axle nut and slide the axle out of the hub.
-
Remove the Wheel: Carefully remove the wheel from the forks or swingarm.
 Removing Front Motorcycle Wheel
Alt Text: Mechanic safely removes the front wheel of a motorcycle by carefully sliding the axle out of the hub on a well-maintained bike.
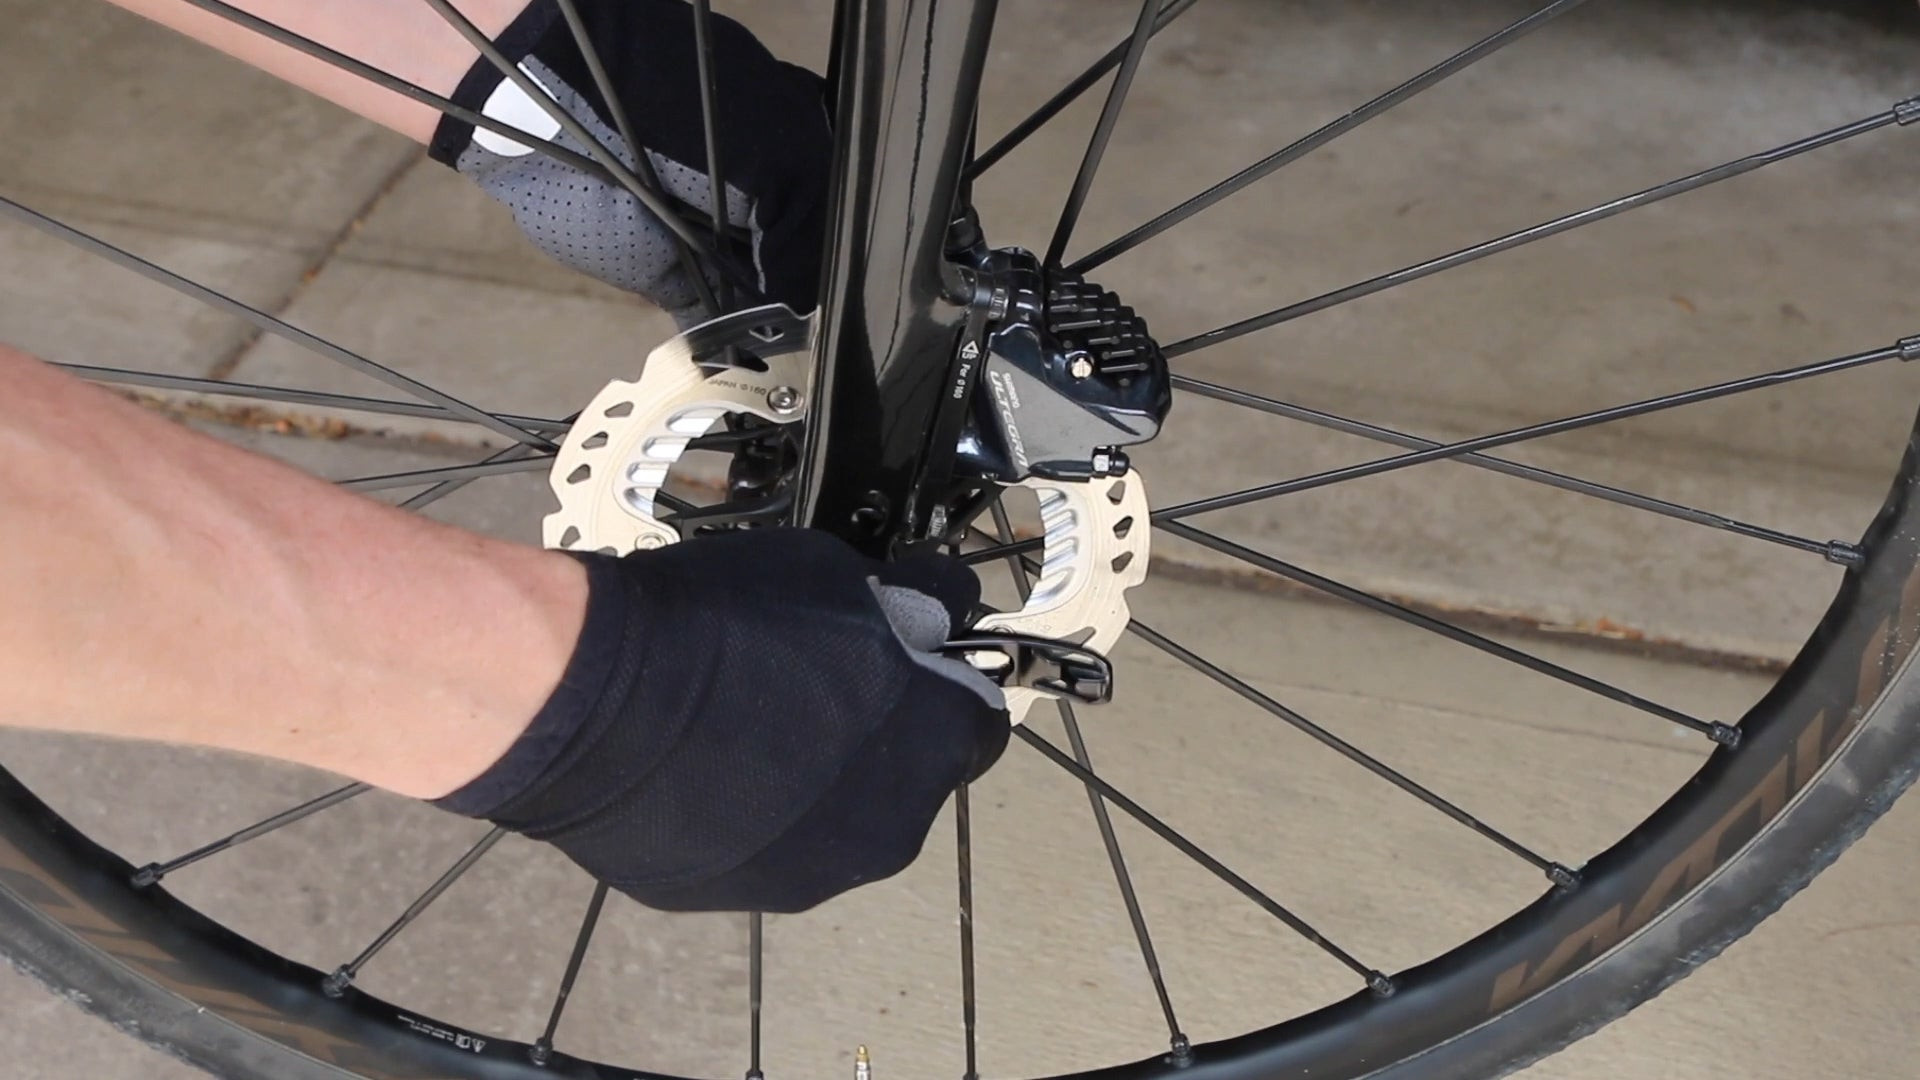
4.3. Inspecting the Brake System
-
Check Brake Pads: Examine the brake pads for wear. If the friction material is thin (1mm or less), it’s time to replace them. Also, look for uneven wear, which can indicate a problem with the caliper or rotor.
-
Inspect the Rotor (Disc Brakes): Check the rotor for any signs of damage, such as deep grooves, cracks, or warping. Use Vernier calipers to measure the rotor thickness. If it’s below the manufacturer’s minimum specification, replace it.
-
Examine the Caliper: Look for any leaks, damage, or corrosion on the caliper. Ensure the pistons move freely.
-
Check Brake Lines: Inspect the brake lines for any cracks, leaks, or swelling. Replace any damaged brake lines immediately.
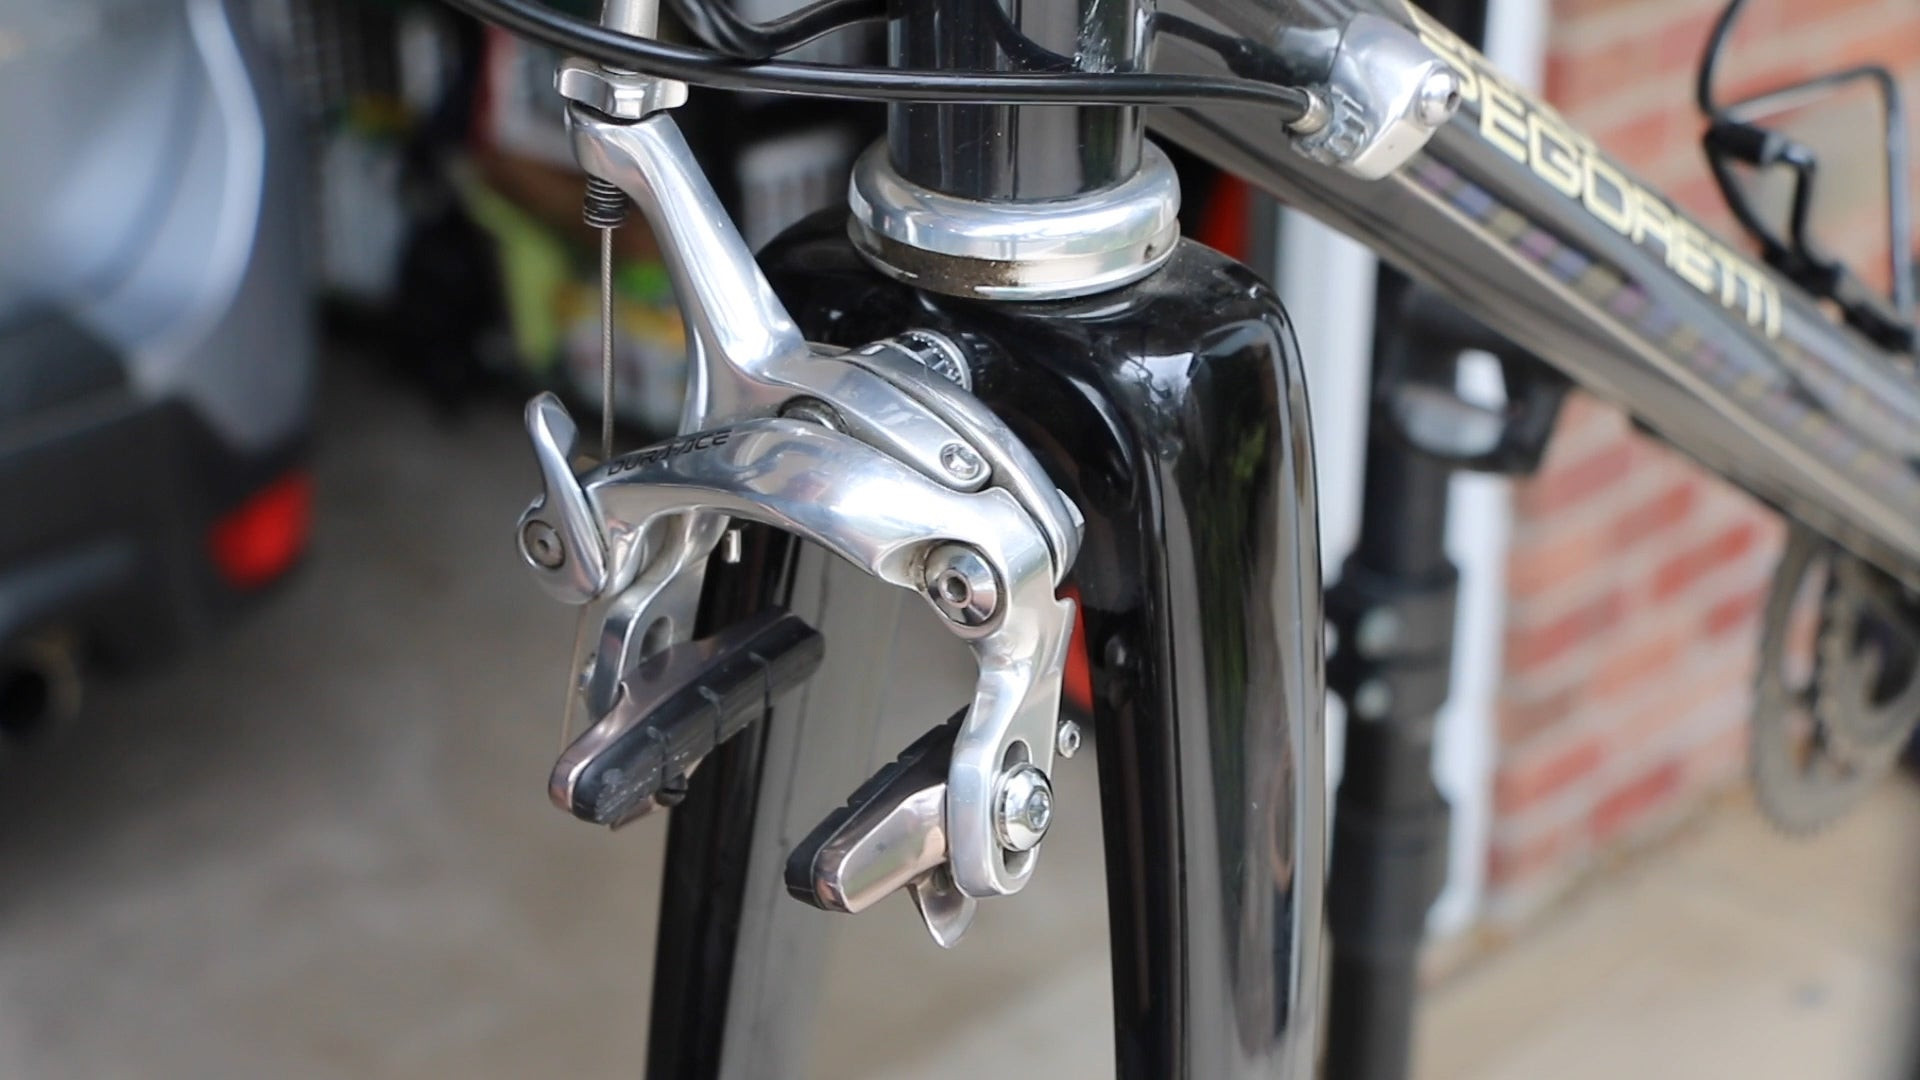
 Inspecting Motorcycle Brake System
Alt Text: Close-up inspection of a motorcycle’s disc brake system reveals the importance of checking the brake pads, rotor condition, and overall system integrity for safe riding.
4.4. Removing the Old Brake Pads (Disc Brakes)
-
Remove Caliper Bolts: Fully remove the caliper bolts and carefully detach the caliper from the fork or swingarm. Be careful not to damage the brake lines.
-
Remove Pad Retaining Pin or Clip: Depending on your bike model, you may need to remove a retaining pin, clip, or bolt that holds the brake pads in place. Use pliers or an Allen wrench to remove it.
-
Slide Out Old Pads: Slide the old brake pads out of the caliper. Note the orientation of the pads and any shims or springs so you can reinstall the new pads correctly.
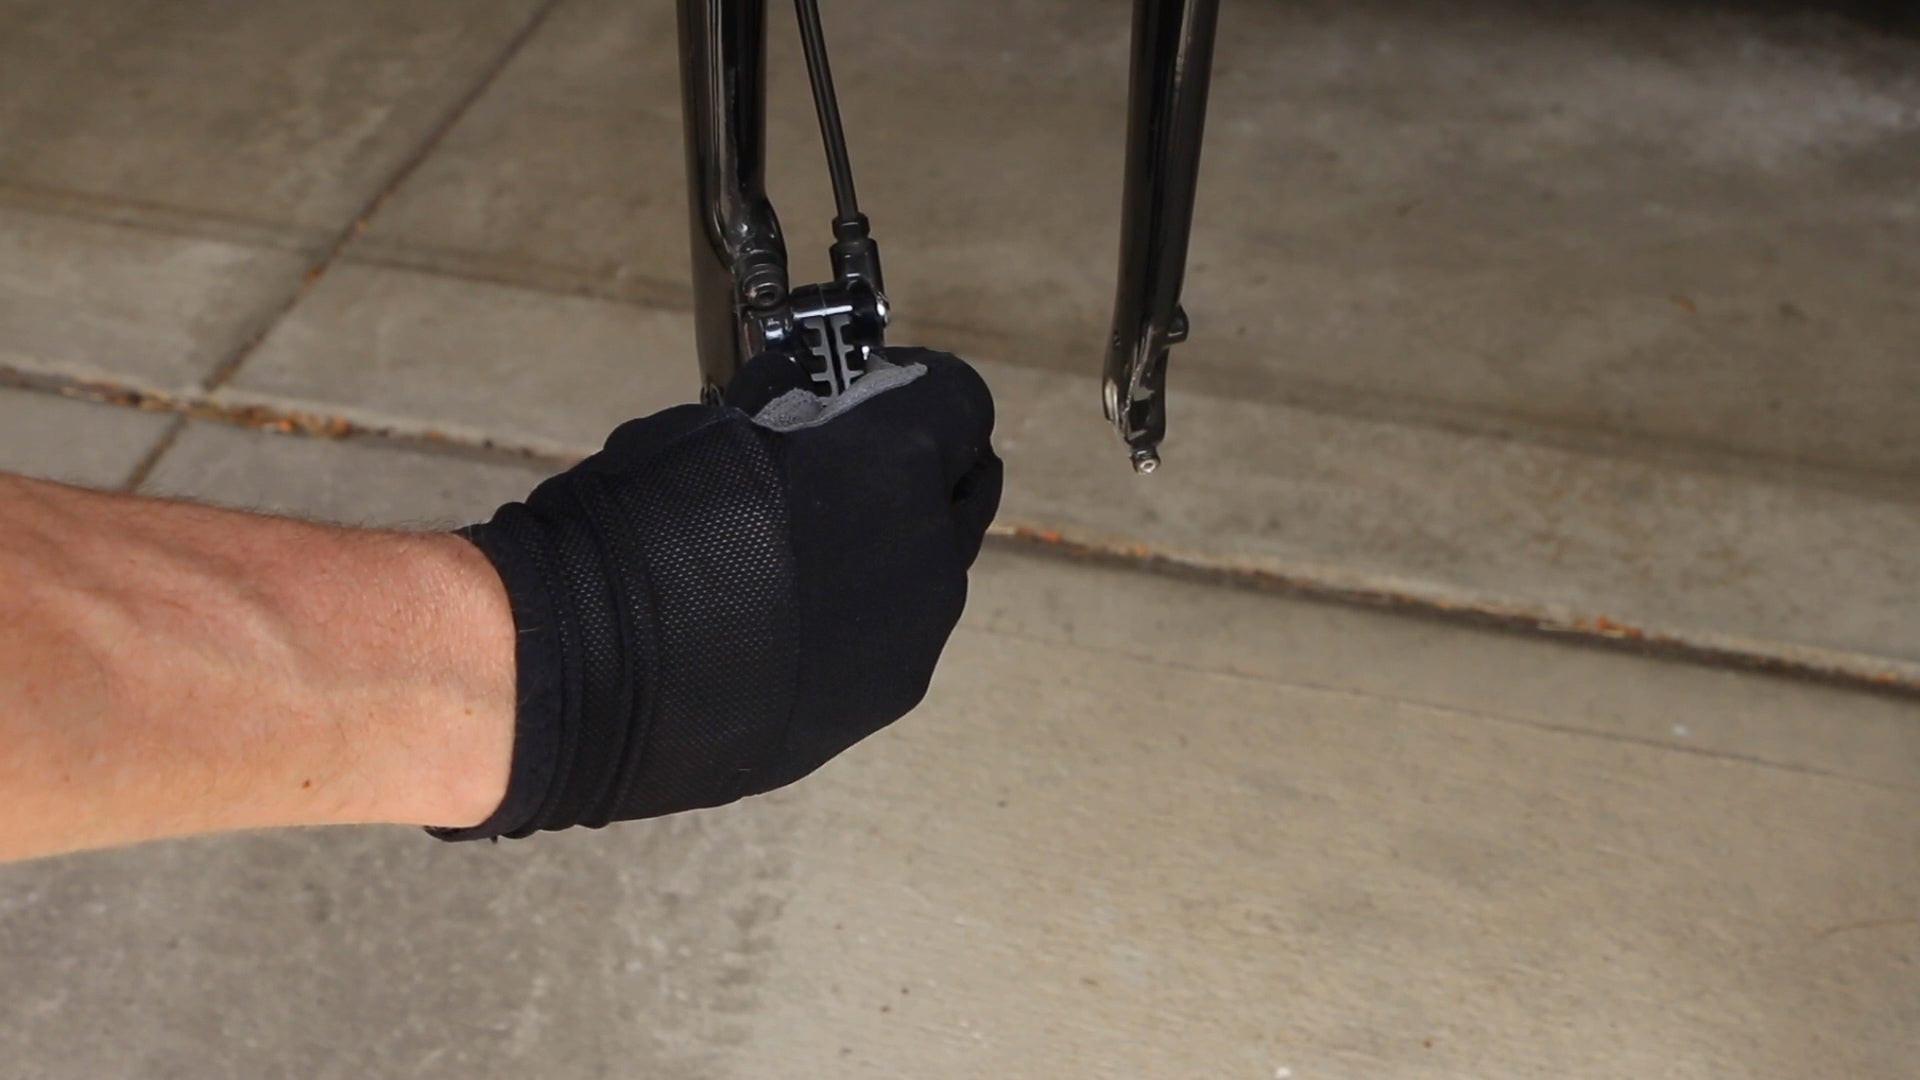 Removing Motorcycle Brake Pads
Alt Text: Motorcycle mechanic carefully removes worn brake pads from the caliper assembly, preparing to install new pads for improved braking performance.
4.5. Cleaning the Caliper
-
Clean Caliper Body: Use brake cleaner and a clean rag to thoroughly clean the caliper body. Remove any dirt, grime, or brake dust.
-
Clean Caliper Pistons: Gently clean the caliper pistons with brake cleaner and a soft brush. Be careful not to damage the piston seals.
-
Lubricate Pistons (Optional): Apply a small amount of brake caliper grease to the pistons. This will help them move smoothly.
 Cleaning Motorcycle Caliper
Alt Text: Close-up of a motorcycle mechanic cleaning the brake caliper pistons with a soft brush and brake cleaner, ensuring smooth movement for optimal braking performance.
4.6. Retracting the Caliper Pistons
- Use a Brake Pad Spreader: Insert a brake pad spreader between the pistons and gently push them back into the caliper body.
- Monitor Brake Fluid Level: As you retract the pistons, the brake fluid level in the reservoir may rise. Be prepared to remove any excess fluid with a syringe to prevent overflow.
4.7. Installing the New Brake Pads (Disc Brakes)
-
Install Shims and Springs: If your old pads had shims or springs, reinstall them on the new pads in the same orientation.
-
Slide in New Pads: Carefully slide the new brake pads into the caliper. Ensure they are seated correctly.
-
Replace Retaining Pin or Clip: Reinstall the retaining pin, clip, or bolt that holds the brake pads in place. Tighten it to the manufacturer’s specified torque.
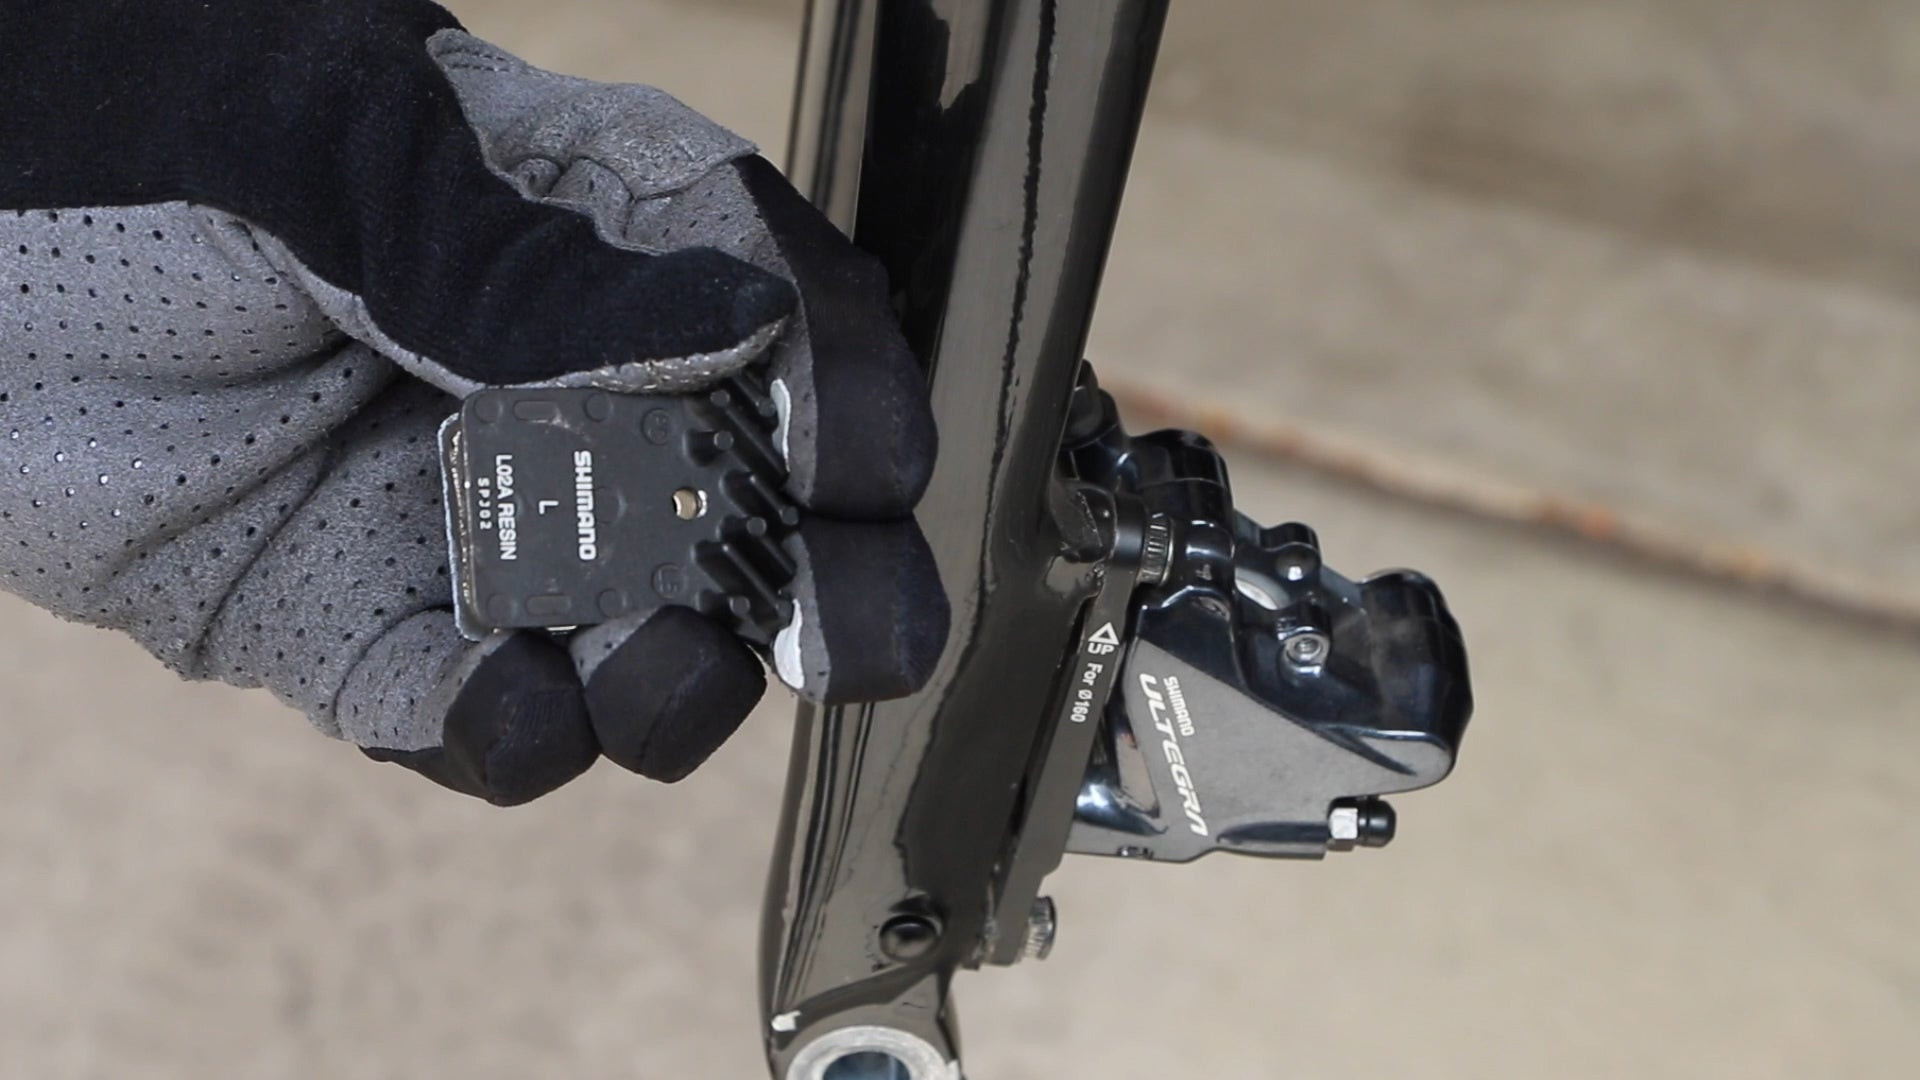 Installing Motorcycle Brake Pads
Alt Text: Mechanic skillfully installing new brake pads into the motorcycle caliper, ensuring proper alignment and secure placement for reliable braking performance.
4.8. Reattaching the Caliper
- Position the Caliper: Carefully position the caliper over the rotor.
- Reinstall Caliper Bolts: Reinstall the caliper bolts and tighten them to the manufacturer’s specified torque.
- Verify Clearance: Ensure that the brake pads have sufficient clearance and that the wheel spins freely without any rubbing.
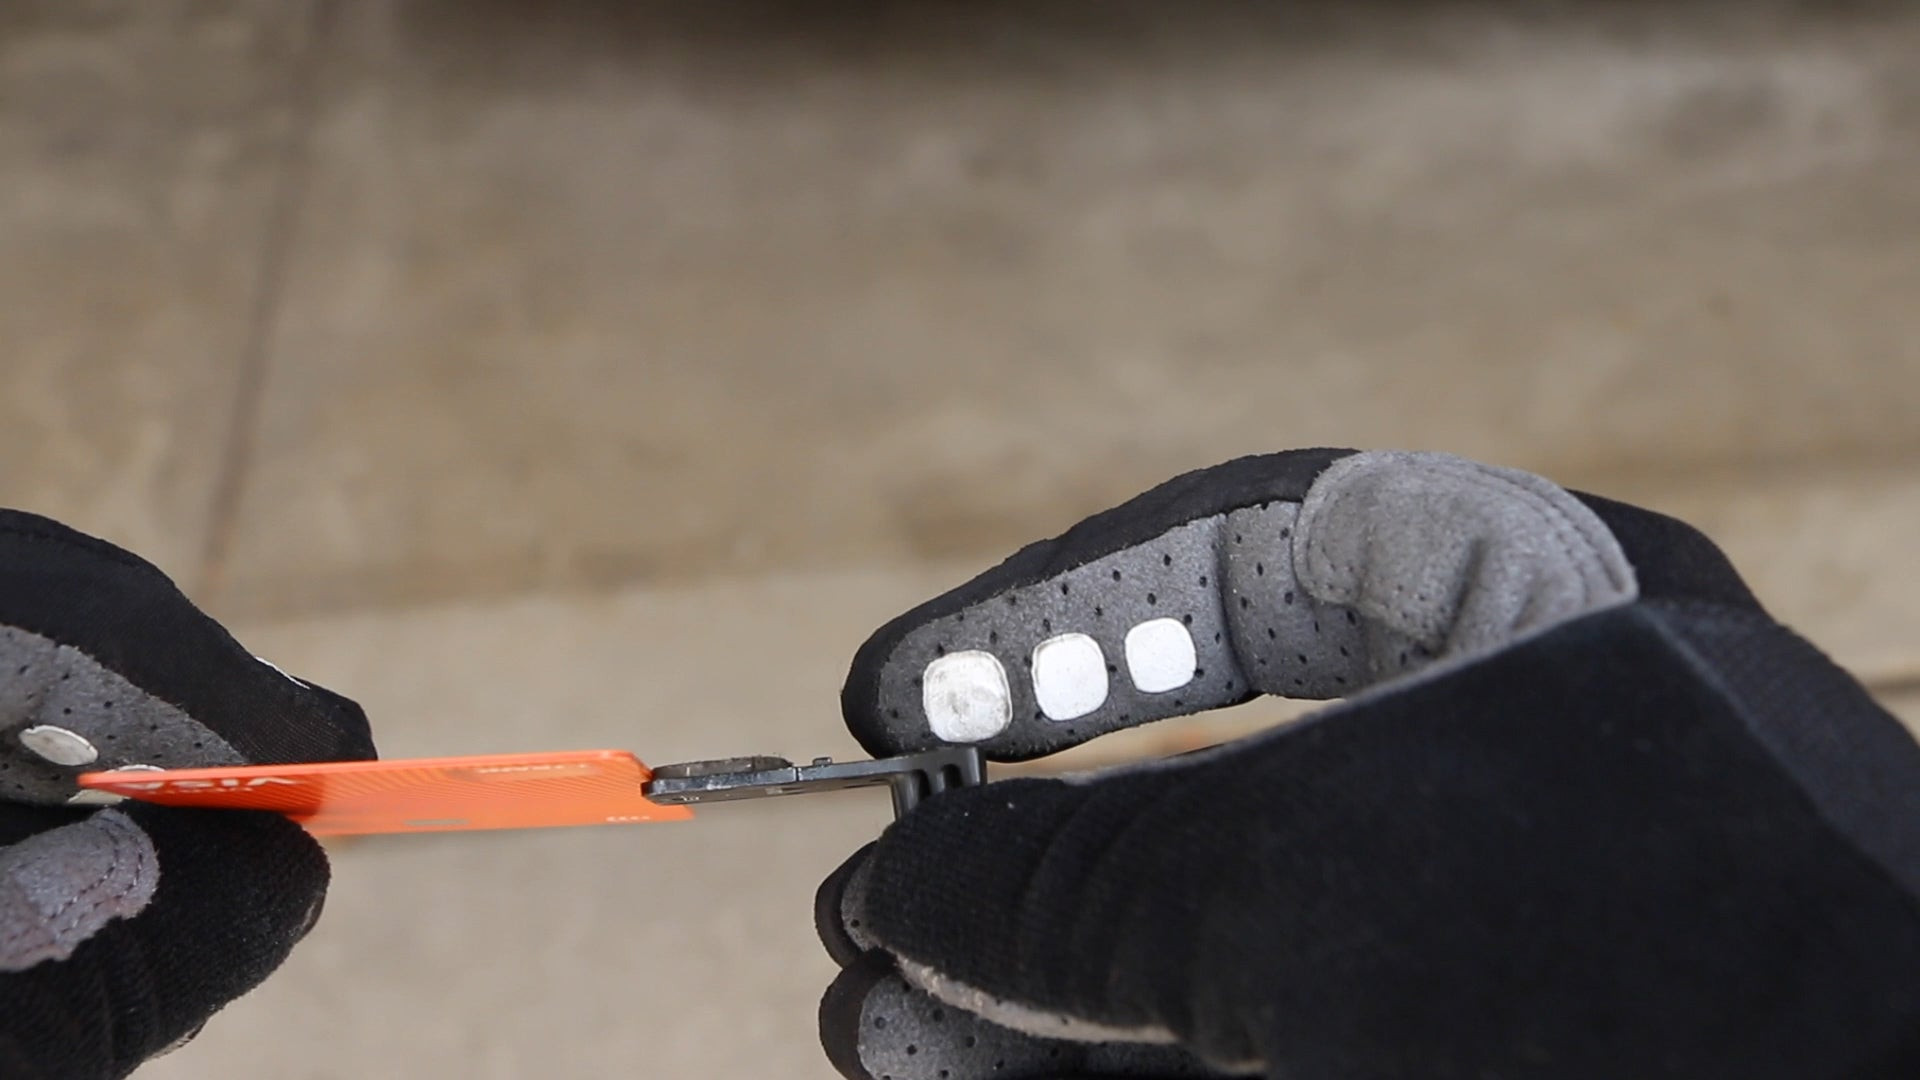
4.9. Rim Brake Pad Replacement
-
Loosen the Set Screw: Using an Allen wrench, loosen the set screw that holds the brake pad in place. Do not remove it completely.
 Loosening Rim Brake Set Screw
Alt Text: Mechanic uses an Allen wrench to carefully loosen the set screw on a rim brake pad, preparing to remove the worn pad for replacement.
-
Slide out the Old Pad: Push the old brake pad out of the brake shoe towards the rear of the bike.
-
Inspect the Brake Shoe: Examine the brake shoe for any signs of damage or wear. Clean it with a clean rag.
-
Install the New Pad: Slide the new brake pad into the brake shoe, ensuring it is correctly oriented (left or right).
-
Tighten the Set Screw: Tighten the set screw to secure the new brake pad in place. Ensure the pad is firmly seated in the shoe.
 Installing Rim Brake Pad
Alt Text: New rim brake pad is carefully slid into the brake shoe by a mechanic, ensuring correct alignment and secure placement for optimal braking performance.
4.10. Reinstalling the Wheel
- Position the Wheel: Carefully position the wheel between the forks or swingarm.
- Reinstall the Axle: Slide the axle through the hub and tighten the axle nut to the manufacturer’s specified torque.
- Tighten Caliper Bolts: If you loosened the caliper bolts earlier, retighten them to the manufacturer’s specified torque.
- Lower the Motorcycle: Lower the motorcycle from the jack or stand.
4.11. Adjusting the Brakes (Rim Brakes)
-
Check Pad Alignment: Ensure that the brake pads are properly aligned with the rim. They should contact the rim evenly and not touch the tire.
-
Adjust Cable Tension: If necessary, adjust the brake cable tension to ensure proper brake lever travel. Use the barrel adjuster on the brake lever or caliper.
-
Toe-In Adjustment: Ideally, the front of the brake pad should contact the rim slightly before the rear. This helps prevent shuddering and noise. Adjust the pad position as needed.
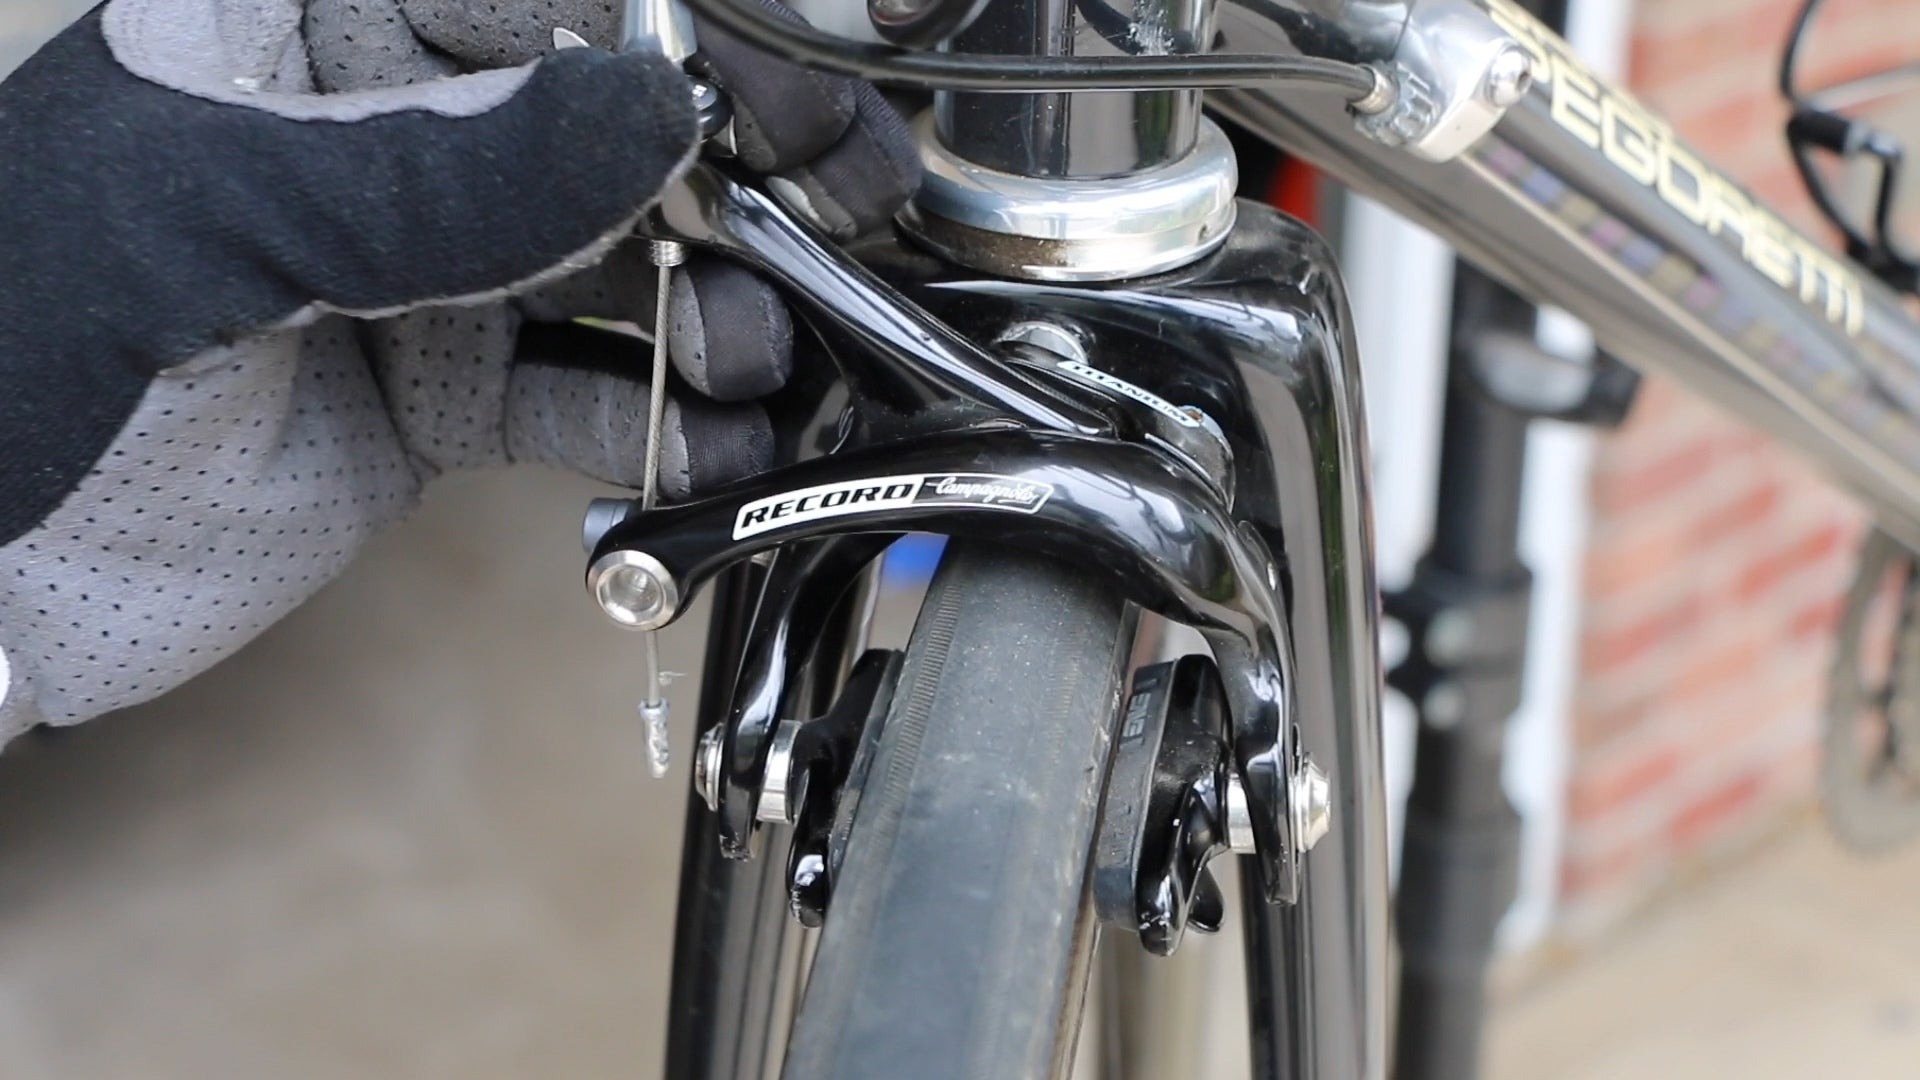 Adjusting Rim Brakes
Alt Text: A close-up view of a mechanic meticulously adjusting the rim brakes on a motorcycle, ensuring the brake pads align perfectly with the rim for optimal stopping power and safety.
4.12. Bedding in the New Brake Pads
- Pump the Brakes: Pump the brake lever several times to ensure the pads are properly seated against the rotor or rim.
- Test Ride: Take the motorcycle for a short test ride in a safe area. Gradually apply the brakes to bed in the new pads. Avoid hard braking during the initial test ride.
- Check for Proper Function: Ensure that the brakes are functioning properly and that there are no unusual noises or vibrations.
- Re-inspect: Re-inspect the brake system after the test ride to ensure everything is in order.
5. Choosing the Right Brake Pads: Organic vs. Sintered
Selecting the correct brake pads for your motorcycle depends on your riding style and conditions. Here’s a comparison of organic and sintered brake pads:
| Feature | Organic Brake Pads | Sintered Brake Pads |
|---|---|---|
| Material | Made from organic materials like rubber, Kevlar, and carbon fibers | Made from metallic compounds, compressed and heated to form a solid |
| Performance | Quieter operation, better modulation, good initial bite | Excellent stopping power, durable in wet conditions, high resistance to brake fade |
| Durability | Wear faster, especially in wet conditions | More durable, longer lifespan |
| Rotor Wear | Less abrasive, reduces rotor wear | More abrasive, can cause increased rotor wear |
| Best Use | Everyday riding, light to moderate braking, quieter operation is preferred | Aggressive riding, heavy braking, wet or muddy conditions, longer lifespan is desired |
| Noise | Generally quieter | Can be noisy |
Ultimately, the choice between organic and sintered brake pads depends on your specific needs and preferences. Consider your riding style, conditions, and desired performance characteristics when making your decision.
6. Maintaining Your Brakes for Optimal Performance
Regular maintenance is key to ensuring your motorcycle brakes perform optimally and last longer. Here are some essential maintenance tips:
- Regular Inspections: Inspect your brake pads and rotors regularly for wear and damage. Check the brake fluid level and condition.
- Cleanliness: Keep the brake system clean by removing dirt, grime, and brake dust. Use brake cleaner and a clean rag.
- Brake Fluid Changes: Change the brake fluid every one to two years, or as recommended by the manufacturer. Old brake fluid can absorb moisture and reduce braking performance.
- Lubrication: Lubricate the caliper pistons and brake levers periodically to ensure smooth operation.
- Professional Service: Have your brakes professionally serviced at least once a year. A qualified mechanic can identify and address any potential problems before they become serious.
By following these maintenance tips, you can keep your motorcycle brakes in top condition and ensure safe and reliable braking performance.
7. The Consequences of Neglecting Brake Maintenance
Neglecting your motorcycle’s brake maintenance can lead to serious consequences, compromising your safety and potentially causing accidents. Here are some of the risks associated with poor brake maintenance:
- Reduced Braking Performance: Worn brake pads, contaminated brake fluid, and damaged rotors can significantly reduce your bike’s stopping power.
- Increased Stopping Distance: Poorly maintained brakes can increase the distance it takes to stop your motorcycle, especially in emergency situations.
- Brake Fade: Overheating of the brake system due to worn pads or contaminated fluid can cause brake fade, where the brakes lose their effectiveness.
- Rotor Damage: Riding with worn brake pads can damage the rotors, requiring costly replacements.
- Caliper Damage: Neglecting to clean and lubricate the calipers can cause the pistons to seize, leading to uneven brake pad wear and reduced performance.
- Accident Risk: Ultimately, poorly maintained brakes can increase the risk of accidents, potentially causing injury or death.
Therefore, prioritizing regular brake maintenance is crucial for ensuring your safety and the safety of others on the road.
8. Upgrading Your Brakes for Enhanced Performance
If you’re looking to improve your motorcycle’s braking performance, consider upgrading your brake components. Here are some popular upgrade options:
- Performance Brake Pads: Upgrade to high-performance brake pads for improved stopping power and heat resistance. Options include sintered, carbon-ceramic, and other advanced materials.
- Stainless Steel Brake Lines: Replace the stock rubber brake lines with stainless steel lines for improved brake feel and reduced expansion under pressure.
- Brake Rotors: Upgrade to higher-quality brake rotors, such as drilled or slotted rotors, for improved heat dissipation and braking performance.
- Master Cylinders: Upgrading the master cylinder can improve brake feel and modulation.
- Calipers: High-performance calipers can provide better clamping force and heat dissipation.
Before making any brake upgrades, consult with a qualified mechanic to ensure compatibility and proper installation.
9. Safety Tips and Precautions
Working on your motorcycle brakes requires attention to detail and adherence to safety precautions. Here are some important tips to keep in mind:
- Work in a Clean Area: Ensure your work area is clean and well-lit.
- Use Proper Tools: Use the correct tools for the job to avoid damaging the brake components.
- Wear Safety Gear: Wear safety glasses and gloves to protect your eyes and hands.
- Avoid Contamination: Keep brake fluid and other contaminants away from the brake pads and rotors.
- Follow Torque Specifications: Tighten all bolts to the manufacturer’s specified torque.
- Test Your Brakes: After completing the brake work, test your brakes in a safe area to ensure they are functioning properly.
- Consult a Professional: If you’re not comfortable working on your brakes, consult a qualified mechanic.
10. FAQ: Addressing Common Concerns About Bike Brake Pads
Here are some frequently asked questions about motorcycle brake pads:
- How often should I replace my motorcycle brake pads?
- You should replace your motorcycle brake pads when the friction material is worn down to 1 millimeter or less, or if you notice reduced braking performance or unusual noises.
- Can I mix different types of brake pads on my motorcycle?
- No, it’s not recommended to mix different types of brake pads. Always use the same type of brake pads on both sides of the same axle.
- What is brake fade and how can I prevent it?
- Brake fade is the loss of braking effectiveness due to overheating of the brake system. You can prevent brake fade by using high-performance brake pads, upgrading to stainless steel brake lines, and ensuring your brake fluid is in good condition.
- How do I know if my brake rotors need to be replaced?
- You should replace your brake rotors if they are warped, cracked, or worn below the manufacturer’s minimum thickness specification.
- What is the difference between organic and sintered brake pads?
- Organic brake pads are made from organic materials like rubber, Kevlar, and carbon fibers, while sintered brake pads are made from metallic compounds. Organic pads are quieter and have better modulation, while sintered pads offer better stopping power and durability.
- How do I bed in new brake pads?
- To bed in new brake pads, perform several stops from moderate speeds (30-40 mph) with gradually increasing force. Avoid hard braking during the initial bedding-in process.
- Can I use car brake cleaner on my motorcycle brakes?
- No, it’s not recommended to use car brake cleaner on motorcycle brakes. Use a brake cleaner specifically designed for motorcycles.
- How do I check the brake fluid level on my motorcycle?
- Check the brake fluid level in the reservoir on the master cylinder. The fluid level should be between the minimum and maximum marks.
- What should I do if my brake lever feels spongy?
- A spongy brake lever can indicate air in the brake lines. Bleed the brakes to remove the air and restore proper brake feel.
- Is it safe to ride with worn brake pads?
- No, it’s not safe to ride with worn brake pads. Worn brake pads can reduce your braking performance and increase the risk of accidents.
By addressing these common concerns, you can ensure that your motorcycle’s brakes are functioning properly and that you’re riding safely.
For more in-depth information and to connect with a community of motorcycle enthusiasts, visit usabikers.net. Explore our forums, read expert reviews, and find local events to fuel your passion for riding.
Address: 801 Sturgis Main St, Sturgis, SD 57785, United States
Phone: +1 (605) 347-2000
Website: usabikers.net