Getting a flat tire is an inevitable part of cycling. Whether you’re a seasoned cyclist or a weekend rider, knowing how to change a tyre on your bike is a crucial skill. The thought of fixing a flat might seem daunting at first, but with a little know-how and the right approach, it’s a straightforward process you can master quickly. This guide will walk you through each step, ensuring you can confidently replace your bike tire and get back on the road or trail in no time.
Upgrading to the best road bike tires or the most durable mountain bike tires can significantly enhance your ride, offering improved grip, speed, and comfort. However, these benefits are only realized once they are properly installed on your wheels. Let’s break down the easiest method to remove any size tire and fit a new one, empowering you to handle this essential bike maintenance task yourself.
For more essential cycling maintenance tips, usabikers.net is dedicated to providing comprehensive guides to help you become proficient in bike care. Explore our other articles to expand your DIY bike maintenance skills.
 How To Change a Bike Tyre
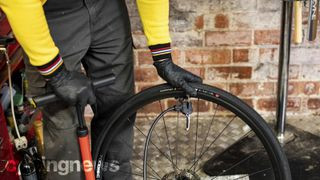
(Image credit: Mick Kirkmann) – Alt text: Cyclist demonstrating how to change a bike tire, emphasizing the simplicity of the process.
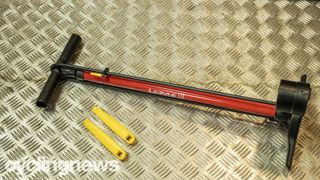
Essential Tools for Changing a Bike Tire
Before you start, gather these essential tools to make the process smooth and efficient:
- Tyre Levers: Invest in a set of good quality tyre levers. While they might look similar, quality makes a difference. Strong levers prevent snapping or bending, especially with stubborn tires. Avoid metal levers, as they can damage your rims.
- Pump (Track or Hand Pump): Ensure your pump is compatible with your bike’s valve type (Presta or Schrader). Many pumps have reversible heads to fit both. A track pump is quicker for inflation, but a hand pump is perfectly adequate, especially for roadside repairs.
Step-by-Step Guide to Removing a Bike Tire
 How To Change a Bike Tyre
(Image credit: Mick Kirkmann) – Alt text: Deflating a bike tire completely before removal, a crucial step in the tire changing process.
1. Deflate the Tyre Completely
Begin by removing the wheel from your bike. If your tire isn’t already flat, you’ll need to deflate the inner tube completely.
- Presta Valves (Pointy Valves): Locate the small barrel at the valve tip and loosen it slightly. Press the valve core down to release air. Once deflated, unscrew and remove the valve collar that secures it to the rim.
- Schrader Valves (Car-Type Valves): For kids’ bikes or mountain bikes with Schrader valves, simply press the pin in the center of the valve to let the air out.
2. Unseat the Tyre from the Rim
 How To Change a Bike Tyre
(Image credit: Mick Kirkmann) – Alt text: Unseating the bike tire bead from the rim edge to create necessary slack for removal.
Once the tyre is fully deflated, work your way around the entire circumference of the tyre, pushing it inwards. This action pushes the tyre bead (edge) into the rim’s central channel, creating slack. Repeat this process on both sides of the tyre. This step is crucial for making tyre removal easier.
3. Remove the Tyre by Hand (If Possible)
 How To Change a Bike Tyre
(Image credit: Mick Kirkmann) – Alt text: Using thumbs to push the bike tire over the rim edge, a hand-removal technique for looser tires.
If you’re fortunate and your tyre has a looser fit, you might be able to remove it by hand. Hold the wheel and shake it to gather all the tyre slack at one point. Alternatively, rotate the wheel so the valve is at the top, and start pushing the tyre down and around the rim in both directions. The aim is to accumulate as much slack as possible as you work your hands towards the bottom of the wheel.
With maximum slack gathered at the top, flip the wheel so the loose section is now at the top. Try using your thumbs to push the tyre bead off the rim edge. Hand removal minimizes the risk of pinching the inner tube with tyre levers, which can cause punctures.
4. Using Tyre Levers for Tight Tyres
If your tyre is too tight to remove by hand, tyre levers are your best friend.
- First Lever: Insert the spoon end of the first tyre lever under the tyre bead, catching it securely. Lever downwards to lift the tyre bead over the rim edge. Sometimes, sliding the lever around the rim is enough to peel the tyre off.
- Second Lever (If Needed): If the tyre is still tight, use a second lever. Hook the first lever onto a spoke to keep it in place. Insert the second lever about 2 inches (5cm) away from the first, under the tyre bead, and lever it over the rim, similar to the first lever.
- Stubborn Tyres: For extremely tight tyres, getting the second lever in might be challenging with the first lever hooked. If so, push the tyre bead back onto the rim momentarily. Then, use both levers simultaneously, positioning them close together, to pry the tyre bead over the rim. This might require some force and knee work to stabilize the wheel. Be cautious as levers can slip, so ensure you’re working in a safe area, away from valuables.
5. Inspect the Tyre and Rim
 How To Change a Bike Tyre
(Image credit: Mick Kirkmann) – Alt text: Inspecting a removed bike tire for damage like cuts and embedded objects, crucial for preventing future flats.
Whether you’re reusing the old tyre or installing a new one, take this opportunity to inspect it thoroughly. Check for cuts, embedded objects like glass or thorns, and any signs of wear. Carefully run your fingers along the inside of the tyre to feel for anything protruding that could cause a puncture. Also, inspect the rim for any damage such as cracks, dents, or sharp edges that could damage the tyre or tube.
Step-by-Step Guide to Fitting a Bike Tyre
 How To Change a Bike Tyre
(Image credit: Mick Kirkmann) – Alt text: Checking bike inner tube size and valve length compatibility before installation, ensuring proper fit.
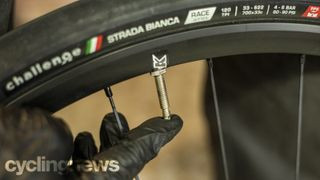
1. Check Your Inner Tube Size and Valve Length
Before fitting the new tyre, ensure you have the correct inner tube size. The size range is printed on the tube’s packaging or directly on the tube. Using the wrong size can lead to problems:
- Too Small: Overstretching a smaller tube to fit a larger tyre can make it dangerously thin and prone to failure.
- Too Large: A tube that’s too big will be difficult to fit inside the tyre, making installation harder, and it can result in a sluggish ride.
Also, verify that the valve length is appropriate for your rim depth. The valve needs to protrude sufficiently from the rim for easy pump attachment. A valve that’s too short, especially with deep rims, can make inflation very difficult. For instance, a 60mm valve on a 50mm deep rim leaves only 10mm exposed, which might be too short for a secure pump head seal.
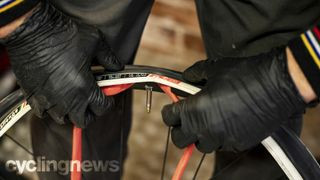
2. Fit One Side of the Tyre onto the Rim
 How To Change a Bike Tyre
(Image credit: Mick Kirkmann) – Alt text: Mounting one bead of the bike tire onto the rim, aligning the tire logo with the valve hole for reference.
Begin by mounting one bead of the tyre onto the rim. Many cyclists prefer to align the tyre’s logo or name with the valve hole. This alignment serves two purposes: it makes locating the valve quicker for future inflation, and it provides a reference point to correlate with the tyre and inner tube in case you’re troubleshooting a puncture later.
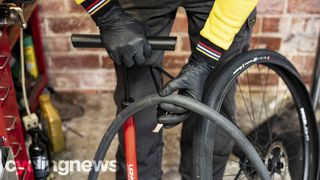
3. Insert and Slightly Inflate the Inner Tube
 How To Change a Bike Tyre
(Image credit: Mick Kirkmann) – Alt text: Adding a small amount of air to the bike inner tube to prevent pinching during tire installation.
Inflate the inner tube just enough to give it some shape – not fully inflated, but not completely flat either. This slight inflation reduces the chance of pinching the tube between the tyre and rim during installation. Insert the valve through the valve hole in the rim. Remember to remove the valve collar beforehand, and don’t reattach it yet. Tuck the inner tube up into the tyre cavity, ensuring it’s evenly distributed and not bulging over the rim edge. If you’ve added too much air, release a little.
4. Fit the Second Side of the Tyre by Hand (If Possible)
 How To Change a Bike Tyre
(Image credit: Mick Kirkmann) – Alt text: Using hands to push the second bike tire bead onto the rim, maximizing hand strength before using levers.
Now, start fitting the second tyre bead onto the rim. Use your thumbs, being extremely careful not to pinch the inner tube. Work around the rim circumference, squeezing and pushing the tyre bead inwards to create slack, similar to the removal process. This slack will make fitting the last section much easier. Try to get as much of the tyre onto the rim by hand as possible. Hand fitting eliminates the risk of inner tube punctures from tyre levers. Some tyres can be fully installed by hand, while others, or certain tyre-rim combinations, can be very tight.
5. Using Tyre Levers for Tight Tyre Fitting
 How To Change a Bike Tyre
(Image credit: Mick Kirkmann) – Alt text: Employing tire levers to fit the last section of a tight bike tire onto the rim, ensuring careful lever use.
When you reach a point where hand fitting becomes impossible, it’s time for tyre levers. Insert the levers under the tyre bead at opposite ends of the unfitted section. Push the inner tube further up into the tyre to keep it clear of the rim edge. Hook the spoon end of the lever over the rim. Carefully lever the tyre bead over the rim, using each lever sequentially and moving towards the center of the remaining unfitted section. As the tyre gets tighter, the risk of pinching the inner tube increases. Ensure the tube remains clear of the levers each time you reposition them. Take your time and work the tyre on gradually. Rushing can lead to pinched tubes and frustration.
6. Inflate the Tyre Carefully and Inspect
 How To Change a Bike Tyre
(Image credit: Mick Kirkmann) – Alt text: Carefully inflating a bike tire while checking for proper seating and tube pinching, avoiding bulges.
With the tyre fully seated on the rim, perform a thorough inspection. Check both sides of the tyre, all the way around, for any signs of a trapped inner tube or uneven tyre seating. Look for bulges or areas where the tyre isn’t sitting correctly in the rim. These issues can lead to sudden blowouts when inflating to full pressure. If everything looks good, attach your pump and begin inflating slowly. Continue to monitor the tyre as it inflates, watching for any bulges or uneven lift that indicates a trapped tube. You might hear snapping or popping sounds as the tyre beads seat into the rim – this is normal, even on carbon wheels, but listen carefully to ensure it sounds like the tyre seating and not damage.
Once inflated to your desired pressure, detach the pump and secure the valve to the rim with the valve collar (if using Presta valves). For Presta valves, remember to close the valve tip. Finally, spin the wheel to check for symmetrical tyre seating, ensuring there are no wobbles, hops, or inner tube protrusions. If everything looks and feels right, congratulations! You’ve successfully changed your bike tyre and are ready to remount the wheel and enjoy your ride.
Individuals following these instructions do so at their own risk and should use their own judgement. Safety risks exist if these instructions are not followed correctly with appropriate equipment, skill, and care. Consulting a qualified bike mechanic is advisable if you are unsure. Future Publishing Limited provides this information in good faith but makes no guarantees about its completeness or accuracy. To the extent permitted by law, Future Publishing Limited, its suppliers, employees, agents, and subcontractors are not liable for any losses or damages resulting from the use of this information, except for cases of personal injury or death caused by negligence or matters that cannot be legally limited or excluded.