Fixing a flat bike tire without removing it is possible with the right tools and techniques, saving time and effort. At usabikers.net, we equip you with simple solutions for roadside repairs and keep you rolling. Explore our guides for seamless fixes, essential gear recommendations, and tips for every ride.
1. Understanding the Basics of Flat Bike Tires
Flat bike tires are frustrating, but understanding why they happen and what to do about them can turn a potential setback into a minor inconvenience. According to research from the Motorcycle Safety Foundation (MSF), in July 2025, knowing the fundamentals of tire maintenance greatly improves rider confidence.
1.1. What Causes Flat Bike Tires?
Sharp objects, impacts, and underinflation are common culprits. Sharp objects cause punctures in the tire, while impacts can lead to pinch flats, where the tube is compressed between the tire and rim. Underinflation increases the risk of both.
- Punctures: Sharp objects like glass, nails, or thorns can pierce the tire and inner tube.
- Pinch Flats: Also known as snake bites, these occur when the tire is compressed against the rim, usually from hitting a pothole or curb.
- Valve Issues: A damaged or improperly installed valve can leak air.
- Rim Problems: Sharp or damaged rims can cause flats.
- Underinflation: Low tire pressure makes the tire more susceptible to punctures and pinch flats.
1.2. Identifying the Type of Flat
Knowing the type of flat helps you choose the right repair method. Slow leaks might be fixable without removing the tire, while significant punctures may require a more comprehensive approach.
- Slow Leak: The tire loses pressure gradually, often due to a small puncture or valve leak.
- Sudden Flat: A rapid loss of pressure, usually from a large puncture or impact.
- Pinch Flat: Evidenced by two small holes in the inner tube.
- Valve Leak: Air escapes from the valve stem, often accompanied by a hissing sound.
1.3. Essential Tools for On-the-Go Repairs
A mini-pump or CO2 inflator, tire levers, a patch kit, and a multi-tool are crucial for roadside repairs. These tools enable you to address common flats quickly and efficiently.
- Mini-Pump or CO2 Inflator: To reinflate the tire after repair.
- Tire Levers: To remove the tire from the rim (though not always necessary for certain repair methods).
- Patch Kit: To seal small punctures in the inner tube.
- Multi-Tool: Includes various wrenches and screwdrivers for adjustments.
- Spare Tube: As an alternative to patches, for faster replacement.
2. Assessing the Damage Without Removing the Tire
Before you start any repairs, assess the damage to determine if fixing the flat without removing the tire is a viable option. Careful inspection can save you time and effort.
2.1. Visual Inspection of the Tire
Look for visible punctures, cuts, or embedded objects. A thorough visual inspection helps you understand the extent of the damage and whether a simple patch will suffice.
- Check the Tire Surface: Rotate the tire and look for any obvious punctures or cuts.
- Look for Embedded Objects: Carefully remove any glass, thorns, or nails stuck in the tire.
- Inspect the Valve Stem: Ensure the valve is straight and not damaged.
- Feel for Bulges or Deformations: These could indicate more significant damage.
2.2. Checking the Valve
Ensure the valve is functioning correctly and not leaking air. A faulty valve can cause a slow leak that’s often mistaken for a puncture.
- Test for Leaks: Wet the valve stem with saliva or water and look for bubbles.
- Tighten the Valve Core: Use a valve core tool to tighten it if it’s loose.
- Check Valve Stem for Damage: Look for cracks or bends.
2.3. Feeling for Debris Inside the Tire
Carefully feel the inside of the tire for any remaining debris. Even after removing a visible object, small fragments can remain and cause further punctures.
- Run Fingers Along the Inside: Carefully feel for any sharp objects or debris.
- Use a Cloth to Wipe the Inside: This can help remove small particles.
- Inspect the Rim Tape: Ensure the rim tape is covering the spoke holes to prevent punctures.
3. Temporary Fixes: Plugs and Sealants
Plugs and sealants are quick, temporary solutions that can get you home without the need for immediate tire removal. These methods are ideal for minor punctures.
3.1. Using Tire Plugs
Tire plugs are inserted into the puncture to create a temporary seal. This method is effective for small to medium-sized punctures.
- Insert the Plug: Use a plug insertion tool to push the plug into the puncture.
- Trim Excess Material: Cut off any excess plug material sticking out of the tire.
- Inflate the Tire: Reinflate the tire to the recommended pressure.
- Check the Seal: Ensure the plug is holding air and not leaking.
3.2. Applying Tire Sealants
Tire sealants are liquid substances injected into the tire to seal punctures from the inside. These are great for tubeless tires and can also be used with inner tubes as a preventative measure.
- Inject the Sealant: Remove the valve core and inject the sealant into the tire.
- Reinstall the Valve Core: Tighten the valve core with a valve core tool.
- Inflate the Tire: Inflate the tire to the recommended pressure.
- Rotate the Wheel: Spin the wheel to distribute the sealant evenly.
3.3. Advantages and Disadvantages of Temporary Fixes
While plugs and sealants are convenient, they are not permanent solutions and have limitations. Knowing their pros and cons helps you make informed decisions.
| Feature | Tire Plugs | Tire Sealants |
|---|---|---|
| Advantages | Quick to apply, effective for medium punctures, no tire removal needed | Seals multiple small punctures, acts as a preventative measure, easy to apply |
| Disadvantages | Not suitable for large punctures, may require additional tools, temporary solution | Can be messy, may not work on all types of punctures, requires valve core removal |
| Best Used For | Roadside repairs, medium-sized punctures | Preventing flats, sealing small punctures |
Using tire plugs effectively seals punctures, providing a temporary fix on the road and allowing cyclists to continue their ride.
4. Patching the Inner Tube Without Removing the Tire
Patching the inner tube while it’s still inside the tire is a more involved process but can provide a more reliable repair. This method requires patience and precision.
4.1. Locating the Puncture
Inflate the tube slightly to locate the puncture by listening for escaping air or using water to find bubbles. Accurate puncture identification is crucial for effective patching.
- Inflate the Tube: Add just enough air to make the tube hold its shape.
- Listen for Hissing: Hold the tube close to your ear to listen for escaping air.
- Use Water: Submerge sections of the tube in water and look for bubbles.
- Mark the Puncture: Use a pen or marker to circle the exact location of the puncture.
4.2. Preparing the Area for the Patch
Rough up the area around the puncture with sandpaper or a metal scraper to create a surface for the patch to adhere to. Proper preparation ensures a strong bond.
- Deflate the Tube: Let all the air out of the inner tube.
- Clean the Area: Wipe the area around the puncture with a clean cloth to remove dirt and debris.
- Rough Up the Surface: Use sandpaper or a metal scraper to rough up the surface, creating a slightly textured area.
- Wipe Again: Wipe the area again to remove any residue from the sanding.
4.3. Applying the Patch
Apply the patch firmly over the puncture, ensuring it is centered and well-adhered. Press and hold the patch in place for several minutes to ensure a good seal.
- Peel Off Backing: Remove the backing from the patch, exposing the adhesive.
- Center the Patch: Carefully center the patch over the puncture.
- Apply Pressure: Press down firmly on the patch, working from the center outwards to remove any air bubbles.
- Hold in Place: Continue to hold the patch in place for at least 2-3 minutes to ensure a strong bond.
4.4. Reinflating and Testing the Tire
Reinflate the tire to the recommended pressure and check for leaks around the patch. A successful patch should hold air without any hissing or bubbling.
- Reinstall Valve Core: Make sure valve core is seated properly.
- Inflate Gradually: Inflate the tire slowly to avoid stressing the patch.
- Check for Leaks: Listen for hissing or use water to check for bubbles around the patch.
- Adjust Pressure: Adjust the tire pressure as needed to match the recommended level.
5. When to Remove the Tire for Repair
Sometimes, fixing a flat without removing the tire is not practical or possible. Knowing when to remove the tire ensures a more thorough and reliable repair.
5.1. Identifying Major Damage
Large cuts, sidewall damage, or multiple punctures require tire removal for proper repair or replacement. Attempting to fix significant damage without removing the tire can be ineffective and unsafe.
- Large Cuts: Significant cuts in the tire that expose the inner tube.
- Sidewall Damage: Damage to the sidewall of the tire, which can compromise its structural integrity.
- Multiple Punctures: Several punctures close together, making patching difficult.
- Rim Damage: A bent or damaged rim that is causing the punctures.
5.2. Difficulty in Locating the Puncture
If you cannot locate the puncture while the tire is mounted, removing it allows for a more thorough inspection. This ensures you address all issues and prevent future flats.
- Deflate the Tire: Completely deflate the tire before attempting to remove it.
- Use Tire Levers: Insert tire levers between the tire and rim to gently pry the tire off.
- Inspect the Tire: Thoroughly inspect the inside and outside of the tire for punctures or debris.
- Check the Rim: Examine the rim for any sharp edges or damage that could be causing punctures.
5.3. Working in a Controlled Environment
Removing the tire in a controlled environment, such as your garage, allows for better tools and more careful repairs. This approach is often more effective than roadside fixes.
- Access to Tools: You’ll have access to a full range of tools, including better pumps, patches, and tire levers.
- Proper Lighting: Adequate lighting makes it easier to locate and repair punctures.
- Clean Workspace: A clean workspace reduces the risk of introducing dirt or debris into the tire.
- Time and Comfort: You can take your time and work comfortably, ensuring a thorough repair.
6. Step-by-Step Guide to Removing and Reinstalling a Bike Tire
If removing the tire is necessary, follow these steps for a smooth and efficient process. Proper technique minimizes the risk of damaging the tire or rim.
6.1. Deflating the Tire Completely
Ensure the tire is completely deflated before attempting to remove it. This reduces pressure and makes the process easier and safer.
- Press the Valve Core: Use a valve core tool or the end of a multi-tool to press the valve core and release any remaining air.
- Squeeze the Tire: Squeeze the tire to help force out any trapped air.
- Listen for Airflow: Ensure you no longer hear any air escaping from the valve.
6.2. Using Tire Levers to Remove the Tire
Insert tire levers between the tire and rim to gently pry the tire off. Use multiple levers to gradually work around the tire.
- Insert First Lever: Insert the first tire lever under the tire bead, hooking it onto a spoke.
- Insert Second Lever: Insert the second lever a few inches away from the first, and pry the tire off the rim.
- Slide Along the Tire: Slide one of the levers around the rim to remove one side of the tire completely.
- Remove the Tube: Once one side of the tire is off, remove the inner tube.
6.3. Inspecting the Tire and Rim
Thoroughly inspect the inside of the tire and the rim for any sharp objects or damage. This ensures you address the cause of the flat and prevent future issues.
- Feel Inside the Tire: Run your fingers along the inside of the tire to check for any sharp objects.
- Wipe the Tire: Use a cloth to wipe the inside of the tire and remove any debris.
- Check the Rim: Inspect the rim for any sharp edges, dents, or damaged rim tape.
6.4. Reinstalling the Tire and Tube
Carefully reinstall the tire and tube, ensuring the tube is not pinched between the tire and rim. Proper installation prevents pinch flats and ensures a secure fit.
- Insert Valve Stem: Insert the valve stem into the hole in the rim.
- Place Tube Inside Tire: Gently place the inner tube inside the tire, ensuring it is evenly distributed.
- Seat One Side of Tire: Use your hands to seat one side of the tire onto the rim.
- Seat Remaining Tire: Use tire levers to carefully seat the remaining tire onto the rim, working gradually around the tire.
6.5. Inflating the Tire to the Correct Pressure
Inflate the tire to the recommended pressure, checking for proper seating and any bulges or pinches. Correct inflation ensures optimal performance and prevents future flats.
- Initial Inflation: Inflate the tire slightly to help seat the tube and tire properly.
- Check Tire Seating: Inspect the tire to ensure it is evenly seated around the rim.
- Inflate to Recommended Pressure: Inflate the tire to the pressure recommended on the tire sidewall.
- Final Inspection: Check for any bulges or pinches before riding.
7. Preventing Flat Tires: Proactive Measures
Preventing flat tires is always better than fixing them. Regular maintenance and smart riding habits can significantly reduce your chances of getting a flat.
7.1. Maintaining Proper Tire Pressure
Check and maintain the correct tire pressure regularly. Properly inflated tires are less susceptible to punctures and pinch flats.
- Check Pressure Regularly: Use a tire pressure gauge to check your tire pressure before each ride.
- Inflate to Recommended Pressure: Inflate your tires to the pressure recommended on the tire sidewall.
- Adjust for Conditions: Adjust tire pressure slightly based on riding conditions, such as lower pressure for wet roads.
7.2. Inspecting Tires Regularly for Wear and Damage
Regularly inspect your tires for cuts, bulges, and wear. Replacing worn or damaged tires can prevent unexpected flats.
- Look for Cuts: Check the tire surface for any cuts, abrasions, or embedded objects.
- Check for Bulges: Look for any bulges or deformations in the tire.
- Monitor Tread Wear: Replace tires when the tread is worn down.
7.3. Using Tire Liners or Puncture-Resistant Tires
Consider using tire liners or puncture-resistant tires for added protection. These provide an extra layer of defense against sharp objects.
- Tire Liners: These are inserted between the tire and tube to provide an extra layer of protection.
- Puncture-Resistant Tires: These tires have a reinforced layer that resists punctures.
- Tubeless Setups: Tubeless tires use sealant to automatically seal punctures.
7.4. Riding Smart: Avoiding Hazards
Be mindful of road hazards and avoid riding through debris or sharp objects. Smart riding habits can significantly reduce your risk of getting a flat.
- Scan the Road: Pay attention to the road ahead and look for potential hazards.
- Avoid Debris: Steer clear of glass, metal, and other debris on the road.
- Ride Smoothly: Avoid sudden stops or sharp turns that can increase the risk of pinch flats.
Regularly inspecting tires helps identify potential issues early, ensuring a safer and more reliable riding experience by preventing unexpected flats.
8. Emergency Situations: What to Do When You Can’t Fix the Tire
Sometimes, despite your best efforts, you may be unable to fix the flat. Knowing how to handle these situations ensures your safety and helps you get back home.
8.1. Walking the Bike
If the damage is too severe to repair, walking the bike may be the safest option. Ensure you are visible to traffic and follow safe walking practices.
- Stay Visible: Wear bright clothing and walk on the side of the road facing traffic.
- Use Lights: If it’s dark, use bike lights to increase visibility.
- Follow Traffic Laws: Obey traffic signals and walk on designated pedestrian paths where available.
8.2. Calling for Assistance
Consider calling for assistance from a friend, family member, or roadside service. Many cycling organizations offer assistance programs for members.
- Contact Friends or Family: Reach out to someone who can pick you up or provide assistance.
- Use Roadside Assistance: Many auto clubs and cycling organizations offer roadside assistance for cyclists.
- Carry a Phone: Always carry a charged cell phone with you on rides.
8.3. Using Public Transportation
If available, use public transportation to get yourself and your bike home. Check local transit policies regarding bikes on buses or trains.
- Check Transit Policies: Review local transit policies regarding bikes on buses or trains.
- Prepare the Bike: Remove any loose items and position the bike securely.
- Follow Instructions: Follow the instructions of transit personnel and be courteous to other passengers.
9. Advanced Techniques: Tubeless Tire Repair
Tubeless tires offer several advantages, including lower rolling resistance and fewer flats. However, repairing tubeless tires requires specific techniques and tools.
9.1. Understanding Tubeless Tire Systems
Tubeless tires use sealant to create an airtight seal between the tire and rim. This system is more resistant to punctures and allows for lower tire pressures.
- Airtight Seal: Tubeless tires create an airtight seal between the tire and rim.
- Sealant Use: Sealant is used to seal small punctures and maintain air pressure.
- Lower Pressure: Tubeless tires can be run at lower pressures for improved comfort and traction.
9.2. Repairing Small Punctures with Sealant
Small punctures in tubeless tires often seal automatically with the sealant. Simply reinflating the tire may be sufficient.
- Locate the Puncture: Identify the puncture by listening for escaping air or looking for sealant leaking out.
- Rotate the Wheel: Rotate the wheel so that the sealant can coat the puncture.
- Reinflate the Tire: Reinflate the tire to the recommended pressure.
- Check the Seal: Ensure the sealant has sealed the puncture and the tire is holding air.
9.3. Using Tubeless Tire Plugs
Larger punctures in tubeless tires may require the use of tubeless tire plugs. These plugs are inserted into the puncture to create a secure seal.
- Insert the Plug: Use a tubeless tire plug tool to insert the plug into the puncture.
- Trim Excess Material: Cut off any excess plug material sticking out of the tire.
- Inflate the Tire: Reinflate the tire to the recommended pressure.
- Check the Seal: Ensure the plug is holding air and not leaking.
9.4. Installing a Tube in a Tubeless Tire
In some cases, the puncture may be too large to seal, requiring the installation of a tube. This allows you to continue riding until you can properly repair the tire.
- Remove the Valve Core: Remove the valve core to deflate the tire completely.
- Remove One Side of the Tire: Use tire levers to remove one side of the tire from the rim.
- Insert the Tube: Place the inner tube inside the tire.
- Reinstall the Tire: Reinstall the tire onto the rim, ensuring the tube is not pinched.
- Inflate the Tire: Inflate the tire to the recommended pressure.
Using sealant effectively seals small punctures in tubeless tires, maintaining air pressure and enabling riders to continue their journey without interruption.
10. Essential Gear for Handling Flat Tires
Having the right gear can make the difference between a minor inconvenience and a major ordeal. Stocking your toolkit with essential items ensures you are prepared for any flat tire situation.
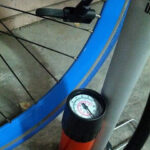
10.1. Mini-Pump or CO2 Inflator
A reliable mini-pump or CO2 inflator is crucial for reinflating the tire after a repair. Choose a pump that is lightweight and easy to use, or a CO2 inflator for quick inflation.
- Mini-Pump: A compact and lightweight pump that can be easily carried on rides.
- CO2 Inflator: Provides rapid inflation using CO2 cartridges.
- Hybrid Options: Some pumps combine mini-pump and CO2 inflator capabilities.
10.2. Tire Levers
Tire levers are essential for removing the tire from the rim. Choose durable plastic or metal levers that won’t damage the rim.
- Plastic Levers: Lightweight and won’t scratch the rim.
- Metal Levers: More durable and provide better leverage for stubborn tires.
- Ergonomic Designs: Look for levers with ergonomic designs for comfortable use.
10.3. Patch Kit or Spare Tube
A patch kit or spare tube is necessary for repairing or replacing a punctured inner tube. Choose a patch kit with high-quality adhesive or a spare tube that matches your tire size.
- Patch Kit: Includes patches, adhesive, and sandpaper for repairing punctures.
- Spare Tube: A pre-inflated tube that can be quickly installed in place of a punctured tube.
- Self-Adhesive Patches: Patches with pre-applied adhesive for easy application.
10.4. Multi-Tool
A multi-tool includes various wrenches, screwdrivers, and other tools that can be useful for making adjustments and repairs on the road.
- Essential Tools: Look for a multi-tool with essential tools like Allen wrenches, screwdrivers, and chain tools.
- Compact Design: Choose a compact and lightweight multi-tool that can be easily carried on rides.
- Durable Construction: Ensure the multi-tool is made from durable materials for long-lasting performance.
10.5. Tire Pressure Gauge
A tire pressure gauge is essential for maintaining proper tire pressure. Choose a gauge that is accurate and easy to read.
- Digital Gauges: Provide precise pressure readings and often include additional features.
- Analog Gauges: Simple and reliable gauges that are easy to use.
- Compact Designs: Look for gauges that are compact and easy to carry on rides.
At usabikers.net, we understand the importance of being prepared on the road. That’s why we offer a wide range of tools and accessories to help you handle any flat tire situation. Visit our website to explore our selection and gear up for your next adventure.
FAQ: Addressing Common Questions About Flat Bike Tires
Can I really fix a flat bike tire without removing it?
Yes, it is possible to fix a flat bike tire without removing it, particularly for minor punctures. Using tire plugs or sealant can often provide a quick and effective solution, especially for tubeless tires. However, more significant damage or multiple punctures may require tire removal for proper repair.
What are the best tools for fixing a flat tire on the road?
The best tools for fixing a flat tire on the road include a mini-pump or CO2 inflator, tire levers, a patch kit or spare tube, and a multi-tool. A tire pressure gauge is also useful for ensuring proper inflation after the repair. These tools allow you to address common flats quickly and efficiently.
How do I locate a puncture in my bike tire?
To locate a puncture, inflate the tube slightly and listen for escaping air or use water to look for bubbles. Rotate the tire and inspect it for any visible punctures or embedded objects. Feeling the inside of the tire for any remaining debris can also help identify the location of the puncture.
What is the difference between tire plugs and tire sealants?
Tire plugs are inserted into the puncture to create a temporary seal, suitable for small to medium-sized punctures. Tire sealants, on the other hand, are liquid substances injected into the tire to seal punctures from the inside, often used as a preventative measure or for sealing multiple small punctures.
When should I replace my bike tire instead of repairing it?
You should replace your bike tire if it has large cuts, sidewall damage, or significant wear. Attempting to repair severely damaged tires can be unsafe, and replacing them ensures better performance and safety. Also, consider replacing the tire if you experience frequent flats despite regular maintenance.
How can I prevent flat tires on my bike?
To prevent flat tires, maintain proper tire pressure, inspect your tires regularly for wear and damage, use tire liners or puncture-resistant tires, and ride smart by avoiding hazards. Regular maintenance and smart riding habits can significantly reduce your chances of getting a flat.
What should I do if I can’t fix my flat tire on the road?
If you can’t fix your flat tire on the road, walk the bike, call for assistance from a friend, family member, or roadside service, or use public transportation if available. Always carry a charged cell phone with you on rides in case of emergencies.
Are tubeless tires more resistant to flats than traditional tires?
Yes, tubeless tires are generally more resistant to flats than traditional tires because they use sealant to automatically seal small punctures. This system also allows for lower tire pressures, which can improve comfort and traction.
How do I repair a tubeless tire with sealant?
To repair a tubeless tire with sealant, locate the puncture, rotate the wheel so that the sealant can coat the puncture, and reinflate the tire to the recommended pressure. Check the seal to ensure the sealant has sealed the puncture and the tire is holding air.
What is the recommended tire pressure for my bike?
The recommended tire pressure for your bike is typically indicated on the tire sidewall. Use a tire pressure gauge to check your tire pressure before each ride and inflate your tires to the recommended pressure for optimal performance and safety.
At usabikers.net, we are dedicated to providing you with the most up-to-date information and resources to enhance your riding experience. Whether you are a beginner or an experienced biker, our website offers valuable insights, tips, and community support. Join us today and explore the world of motorcycling with confidence. Visit usabikers.net, located at 801 Sturgis Main St, Sturgis, SD 57785, United States, or call us at +1 (605) 347-2000.