
Inflating your bike tires is a fundamental skill for every motorcycle enthusiast, and at usabikers.net, we’re here to guide you through the process. Correct tire inflation is essential for a smooth ride, optimal grip, and puncture prevention. This guide will provide a detailed, step-by-step approach to inflating your tires, covering different valve types, pump options, and ideal tire pressures. Dive in to master the art of bike tire inflation, and explore the world of motorcycle maintenance and community at usabikers.net, where we cover everything from motorcycle tires to biker safety.
1. Understanding Your Bike’s Valves
Before you start inflating your bike tires, it’s crucial to identify the type of valve your bike uses. Knowing the valve type ensures you use the correct pump or adapter. What are the different types of bike valves?
There are primarily three types of valves you’ll encounter: Presta, Schrader, and Dunlop/Woods. Presta valves are typically found on higher-end bikes, Schrader valves are common on entry-level bikes and car tires, and Dunlop/Woods valves are rarer, mainly seen on older or Dutch-style bikes.
1.1. Presta Valve
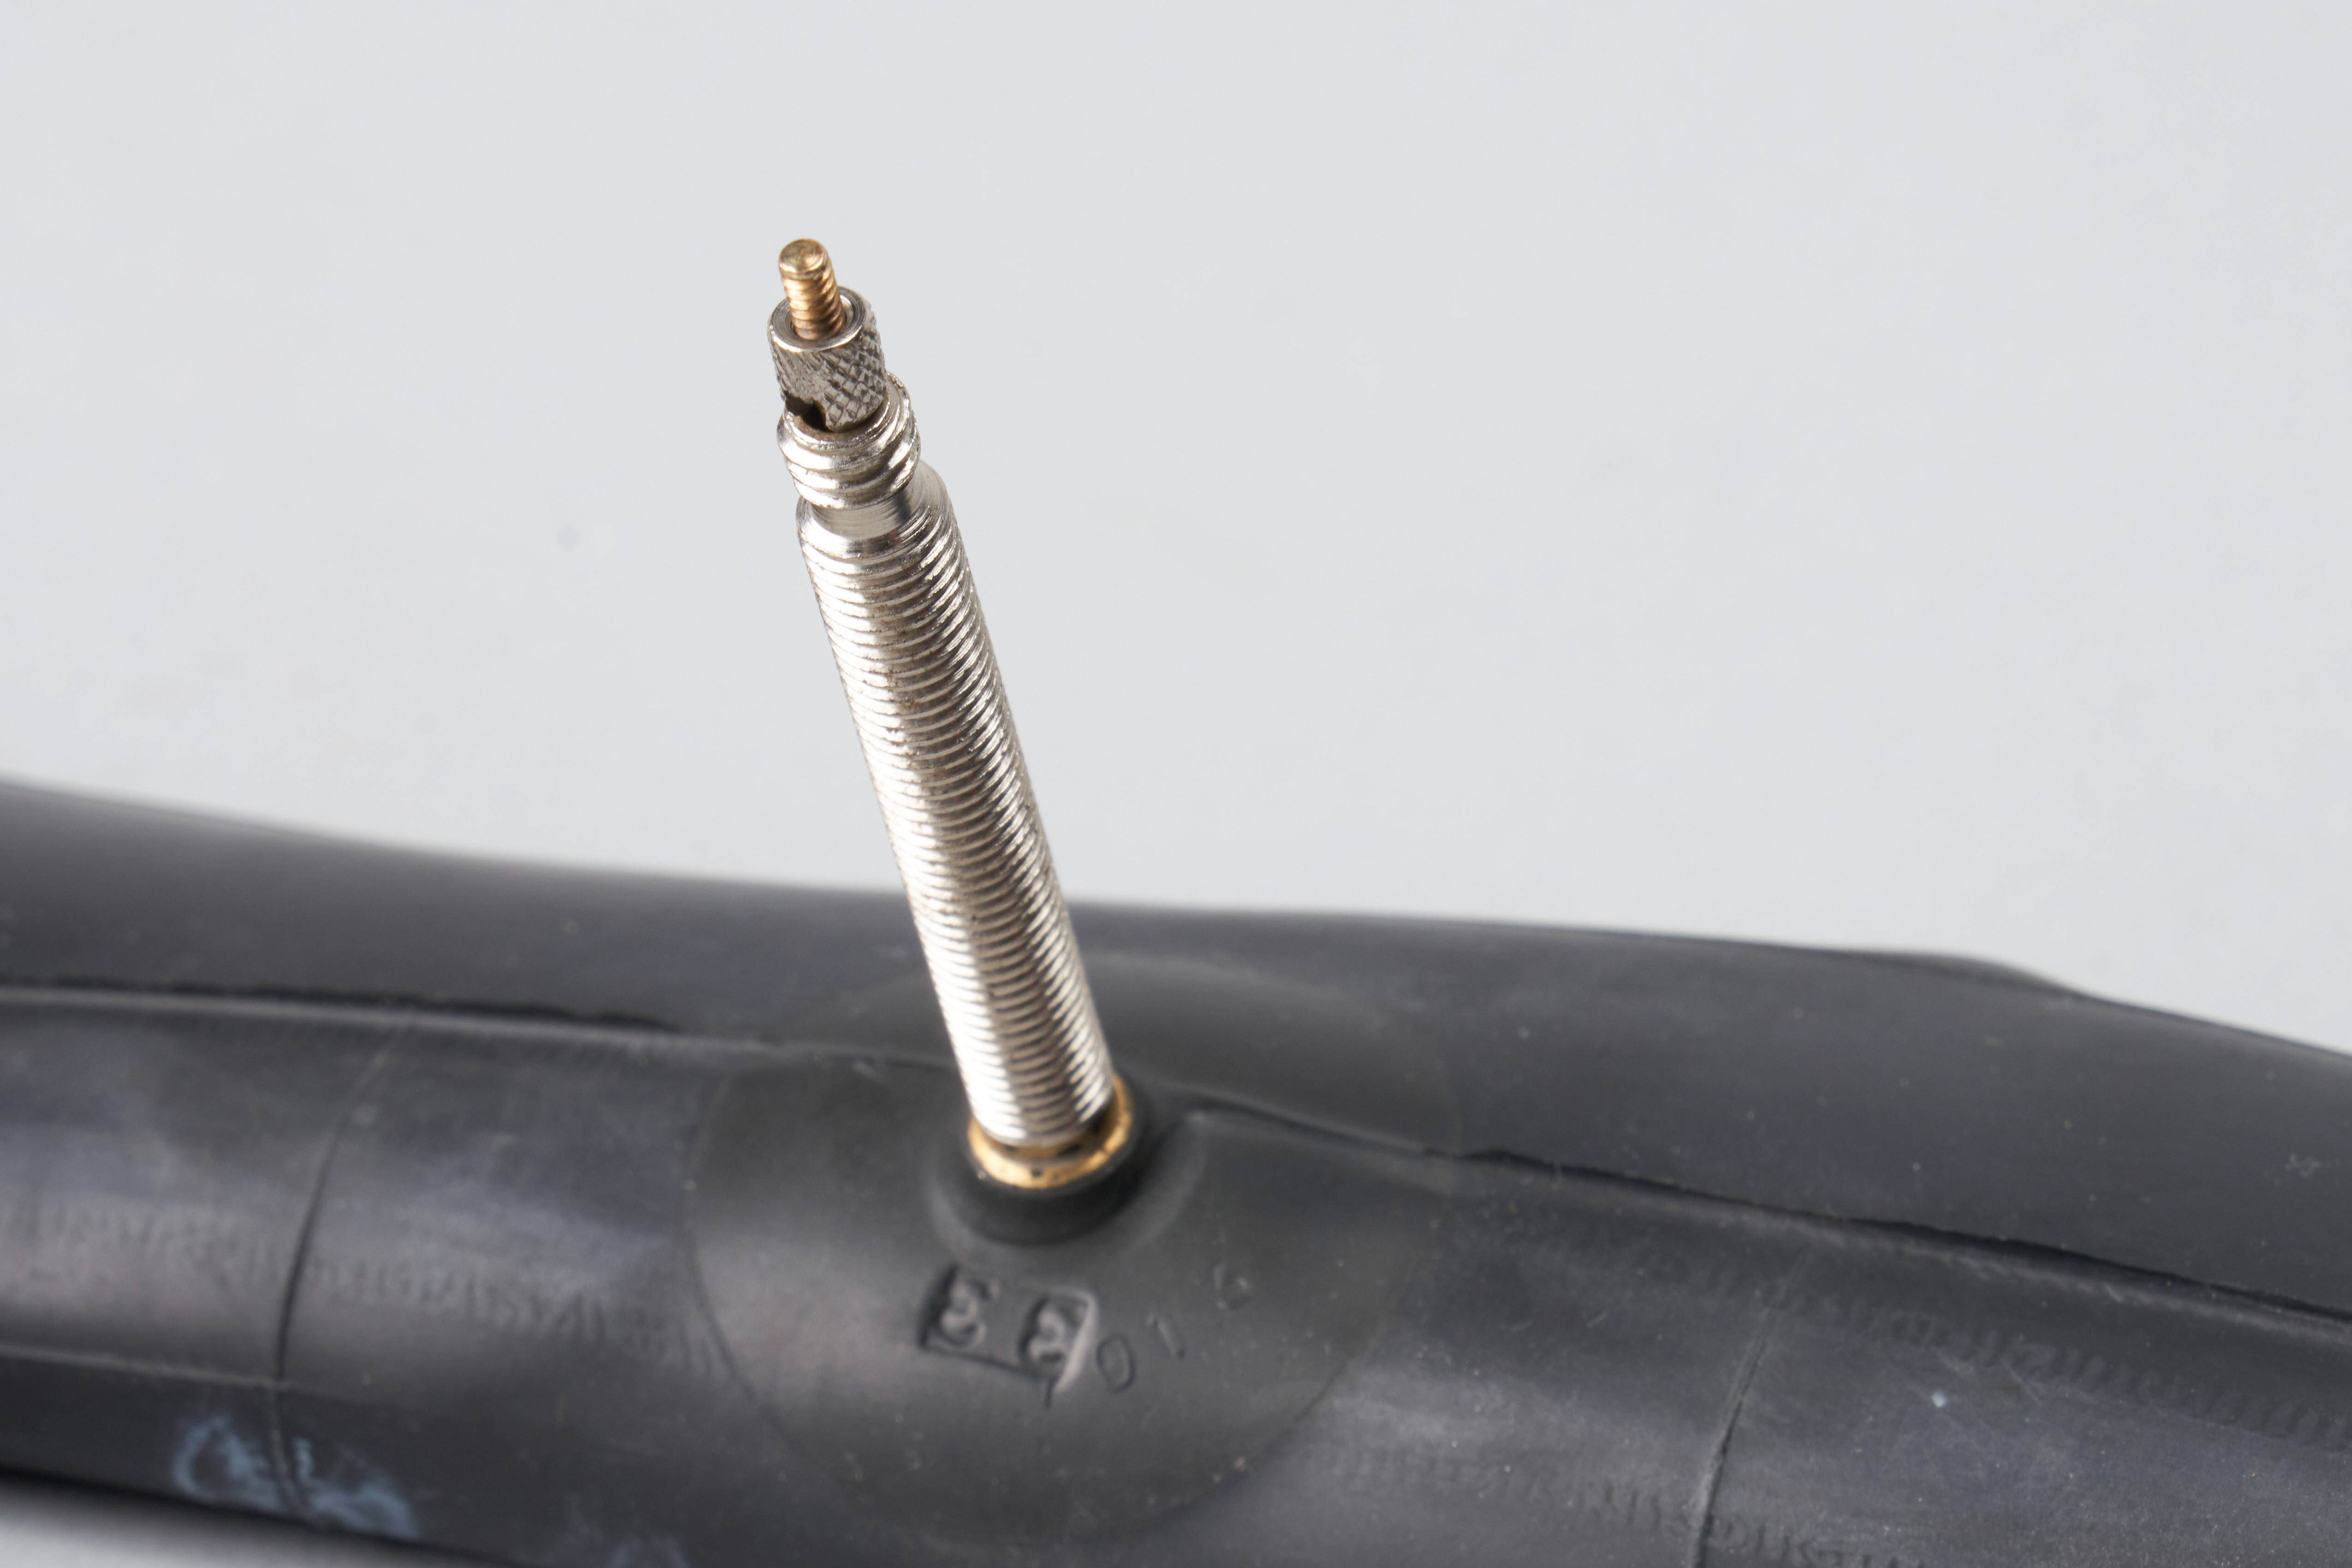 Presta valve against a white background
Presta valves are thin and feature a lockring to keep the valve closed. Presta valves are commonly found on road bikes and high-performance bicycles because of their lightweight design and ability to hold high pressures. According to Bicycle Guider, Presta valves are less prone to air leakage due to their internal valve mechanism. These valves require you to unscrew the lockring before inflating and screw it back on afterward to seal the valve.
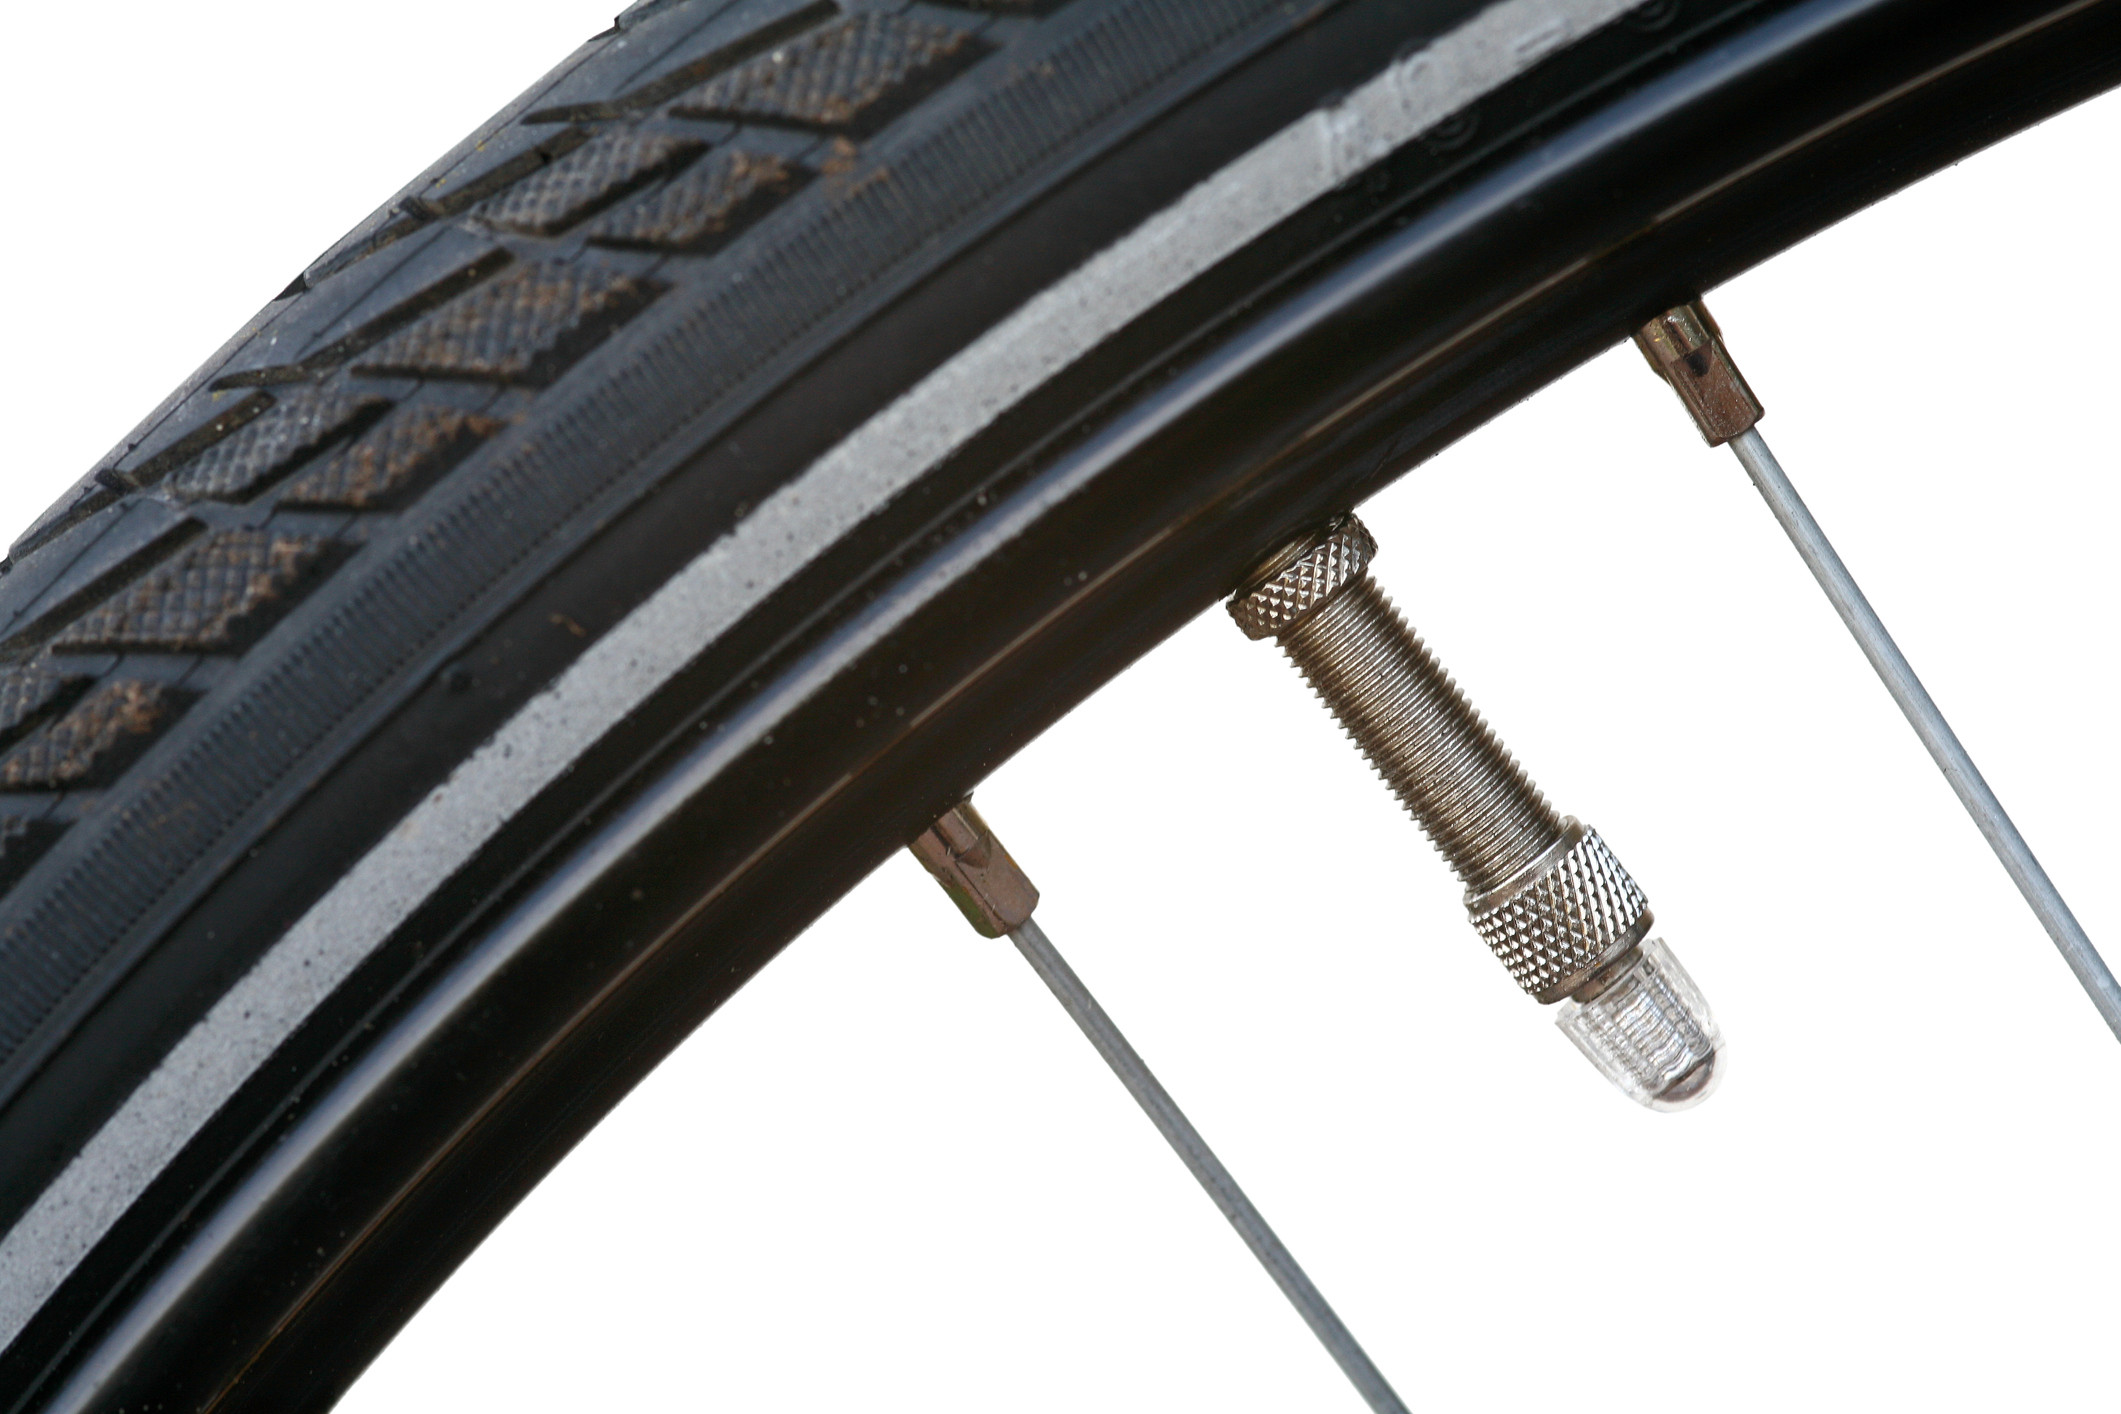
1.2. Schrader Valve
 Schrader valve against a white background
Schrader valves are wider and more robust, similar to those found on car tires. Schrader valves are often found on mountain bikes, hybrid bikes, and cheaper bicycles. They feature a spring-loaded pin that needs to be depressed to allow airflow. Bike Repair Tips notes that Schrader valves are more durable and easier to inflate at gas stations, thanks to their compatibility with standard air compressors.
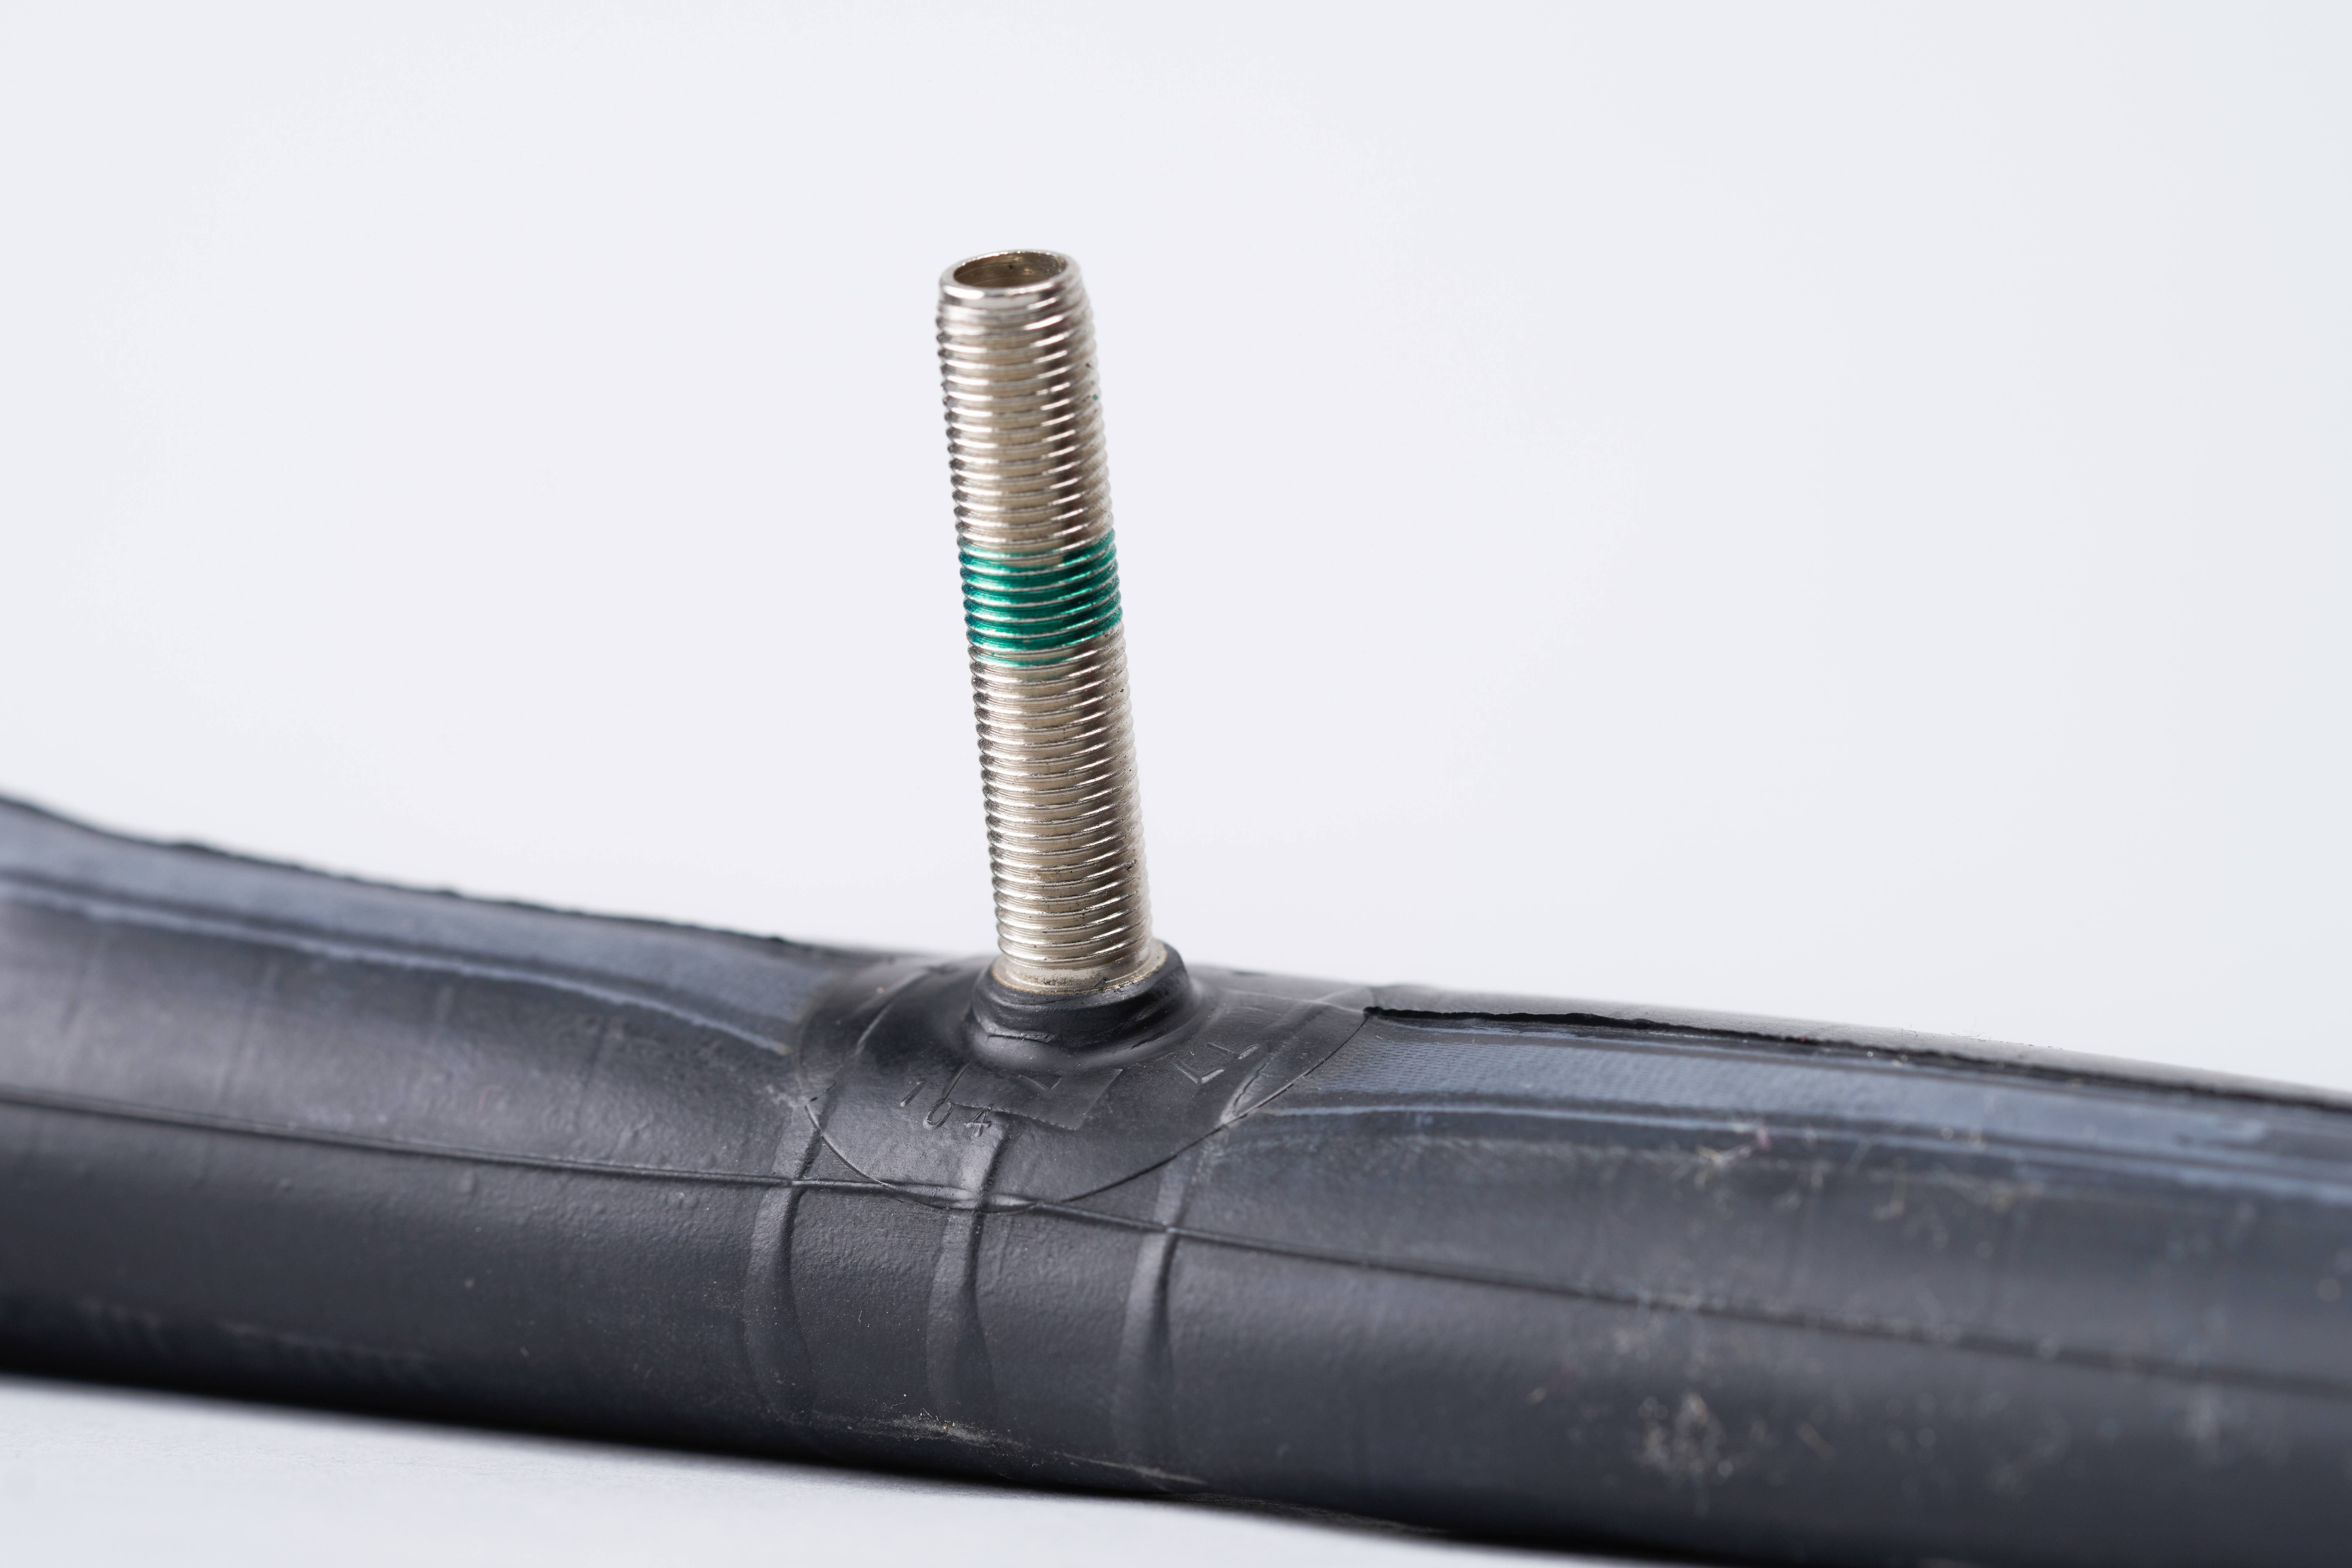
1.3. Dunlop/Woods Valve
 Dunlop valve against a white background
Dunlop valves, also known as Woods valves, are commonly used on older bikes, especially in Europe. Dunlop valves use a similar mechanism to Presta valves but are enclosed within a wider valve body. According to Cycling Weekly, Dunlop valves are easy to maintain and replace, making them a popular choice in regions where cycling is a traditional mode of transportation.
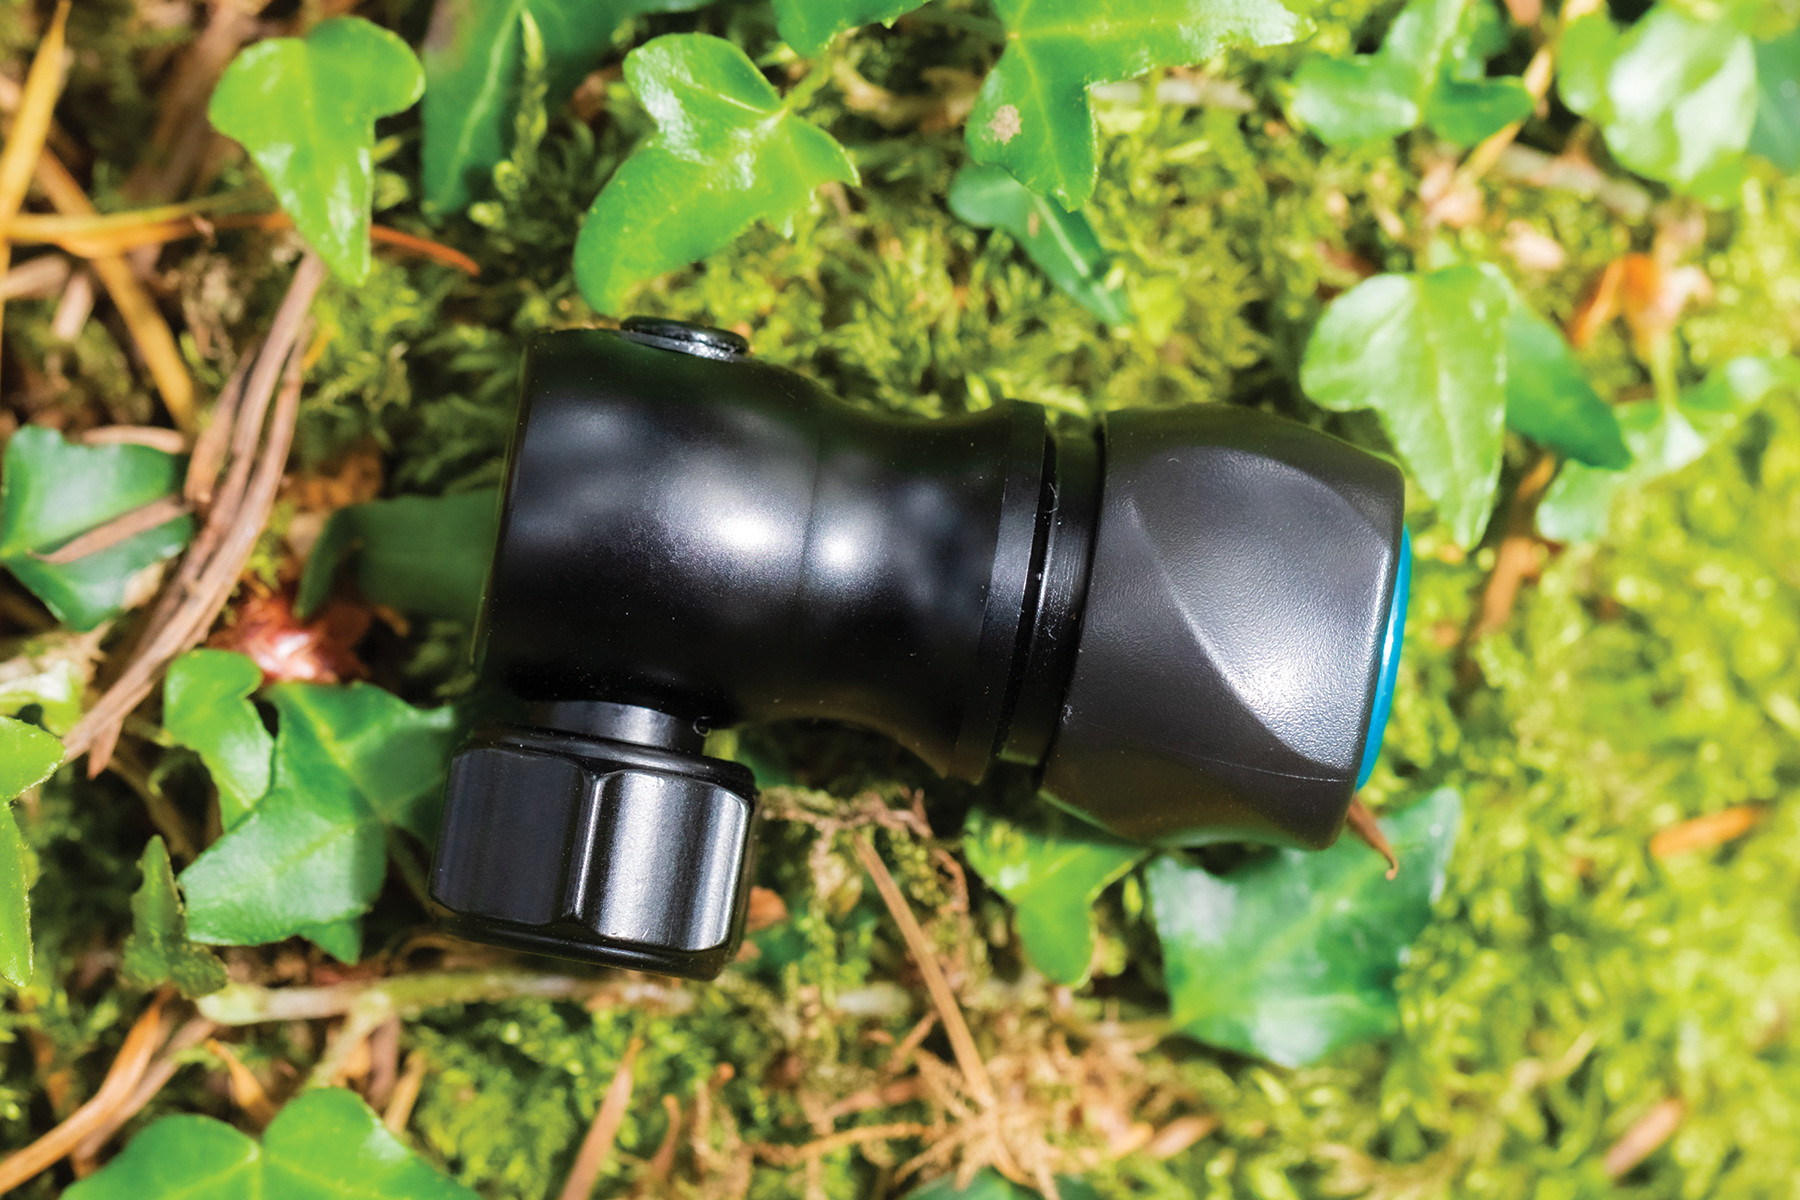
1.4. Tubeless Valve
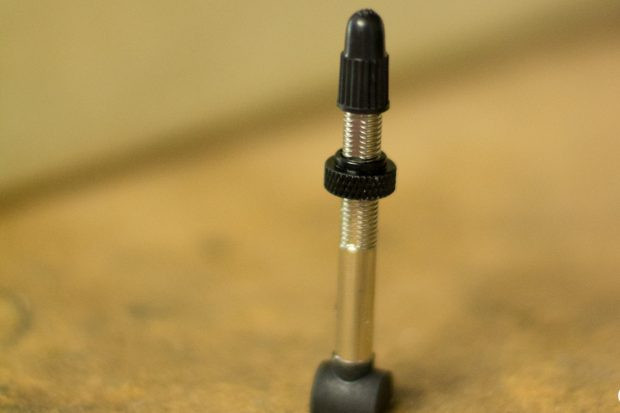 The RX830s come with long tubeless valves
Tubeless valves are used with tubeless tire setups, where the tire seals directly to the rim without an inner tube. Tubeless valves are typically Presta valves and are secured to the rim with a threaded locknut. Bikeradar explains that tubeless setups offer improved puncture resistance and lower rolling resistance, making them increasingly popular among cyclists.
2. Essential Tools: Choosing the Right Pump
Selecting the correct pump is vital for easy and efficient tire inflation. What types of bike pumps are available?
The primary types of bike pumps include track pumps (floor pumps), mini pumps, and CO2 inflators. Track pumps are ideal for home use due to their efficiency and built-in pressure gauges, while mini pumps and CO2 inflators are perfect for on-the-go inflation during rides.
2.1. Track Pump (Floor Pump)
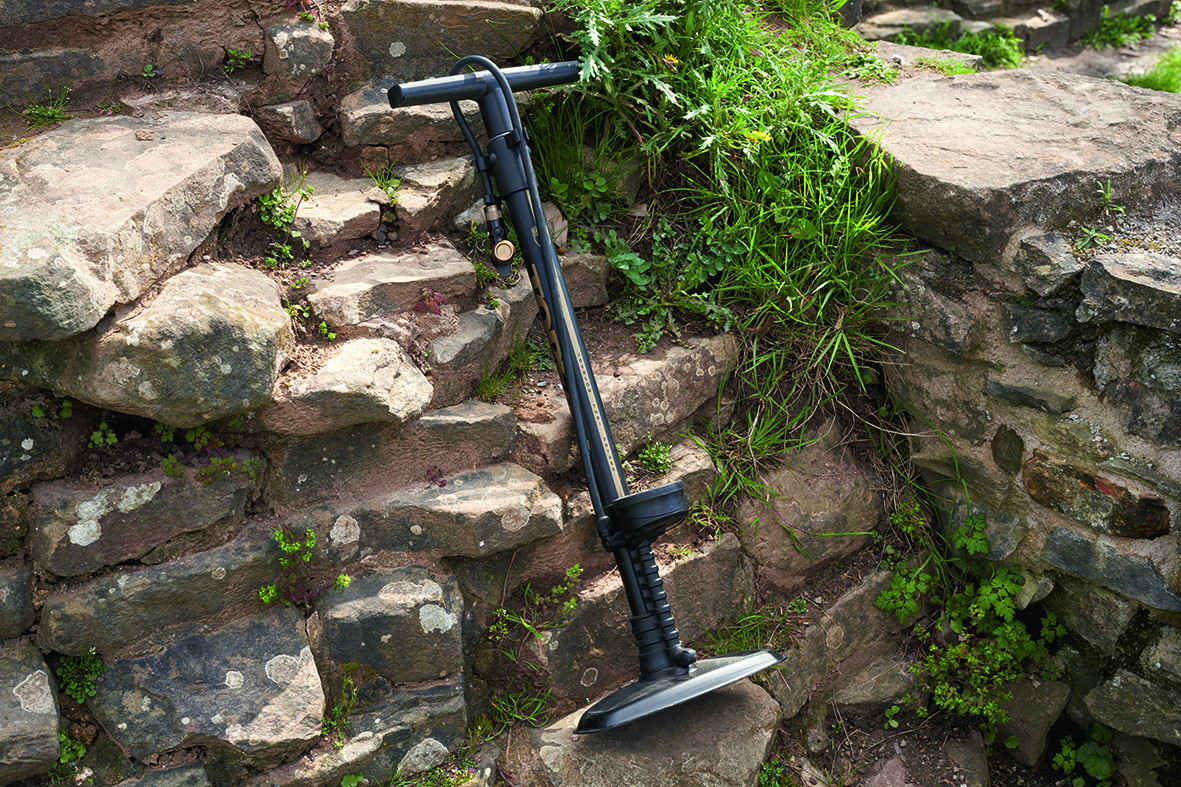 Topeak Tubi 2Stage
Track pumps, also known as floor pumps, are designed for home use and offer a stable base, long hose, and integrated pressure gauge. According to Cycling News, track pumps provide the most efficient way to inflate tires to the correct pressure. They often feature dual-head designs that can accommodate both Presta and Schrader valves without needing adapters.
2.2. Mini Pump
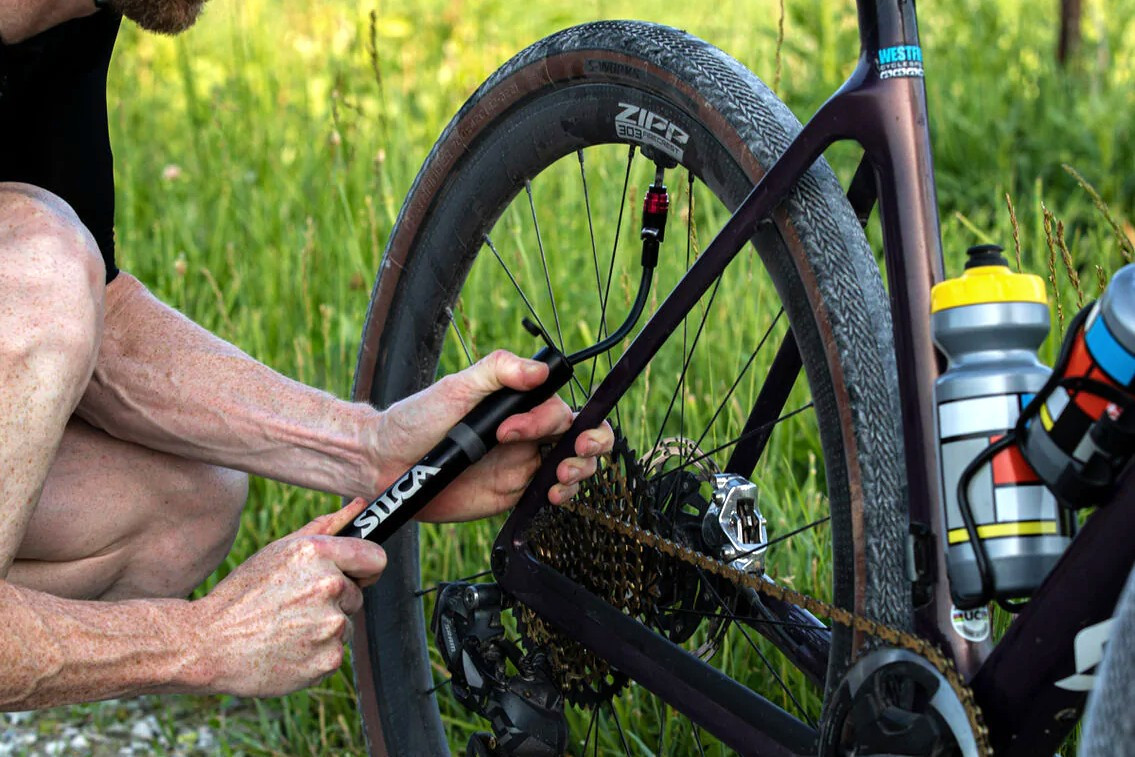 Silca Gravelero gravel mini-pump
Mini pumps are compact and lightweight, making them perfect for carrying on rides. Mini pumps are essential for fixing flats on the road or trail. Outdoor Biker recommends choosing a mini pump with a hose to reduce stress on the valve while inflating.
2.3. CO2 Inflator
 LifeLine CNC co2 inflators
CO2 inflators use compressed carbon dioxide cartridges to quickly inflate tires. CO2 inflators are a fast solution for emergency tire inflation during rides. Road Bike Action notes that CO2 inflators are convenient but not ideal for everyday use, as the CO2 can permeate the tube over time, causing it to deflate more quickly.
2.4. Handheld Digital Pressure Gauge
Consider purchasing a handheld digital pressure gauge for accurate measurements. A digital pressure gauge ensures precise tire inflation, which is vital for optimal performance and safety. According to Bicycling Magazine, digital gauges provide more accurate readings than traditional analog gauges, allowing you to fine-tune your tire pressure for different riding conditions.
3. Step-by-Step Guide: Inflating Your Bike Tires
Inflating your bike tires correctly ensures a smooth and safe ride. What is the proper procedure for inflating bike tires?
Follow these steps to inflate your bike tires effectively: prepare the valve, attach the pump, inflate to the correct pressure, disengage the pump, and close the valve. Each step is crucial for achieving optimal tire pressure and preventing damage to the valve or tire.
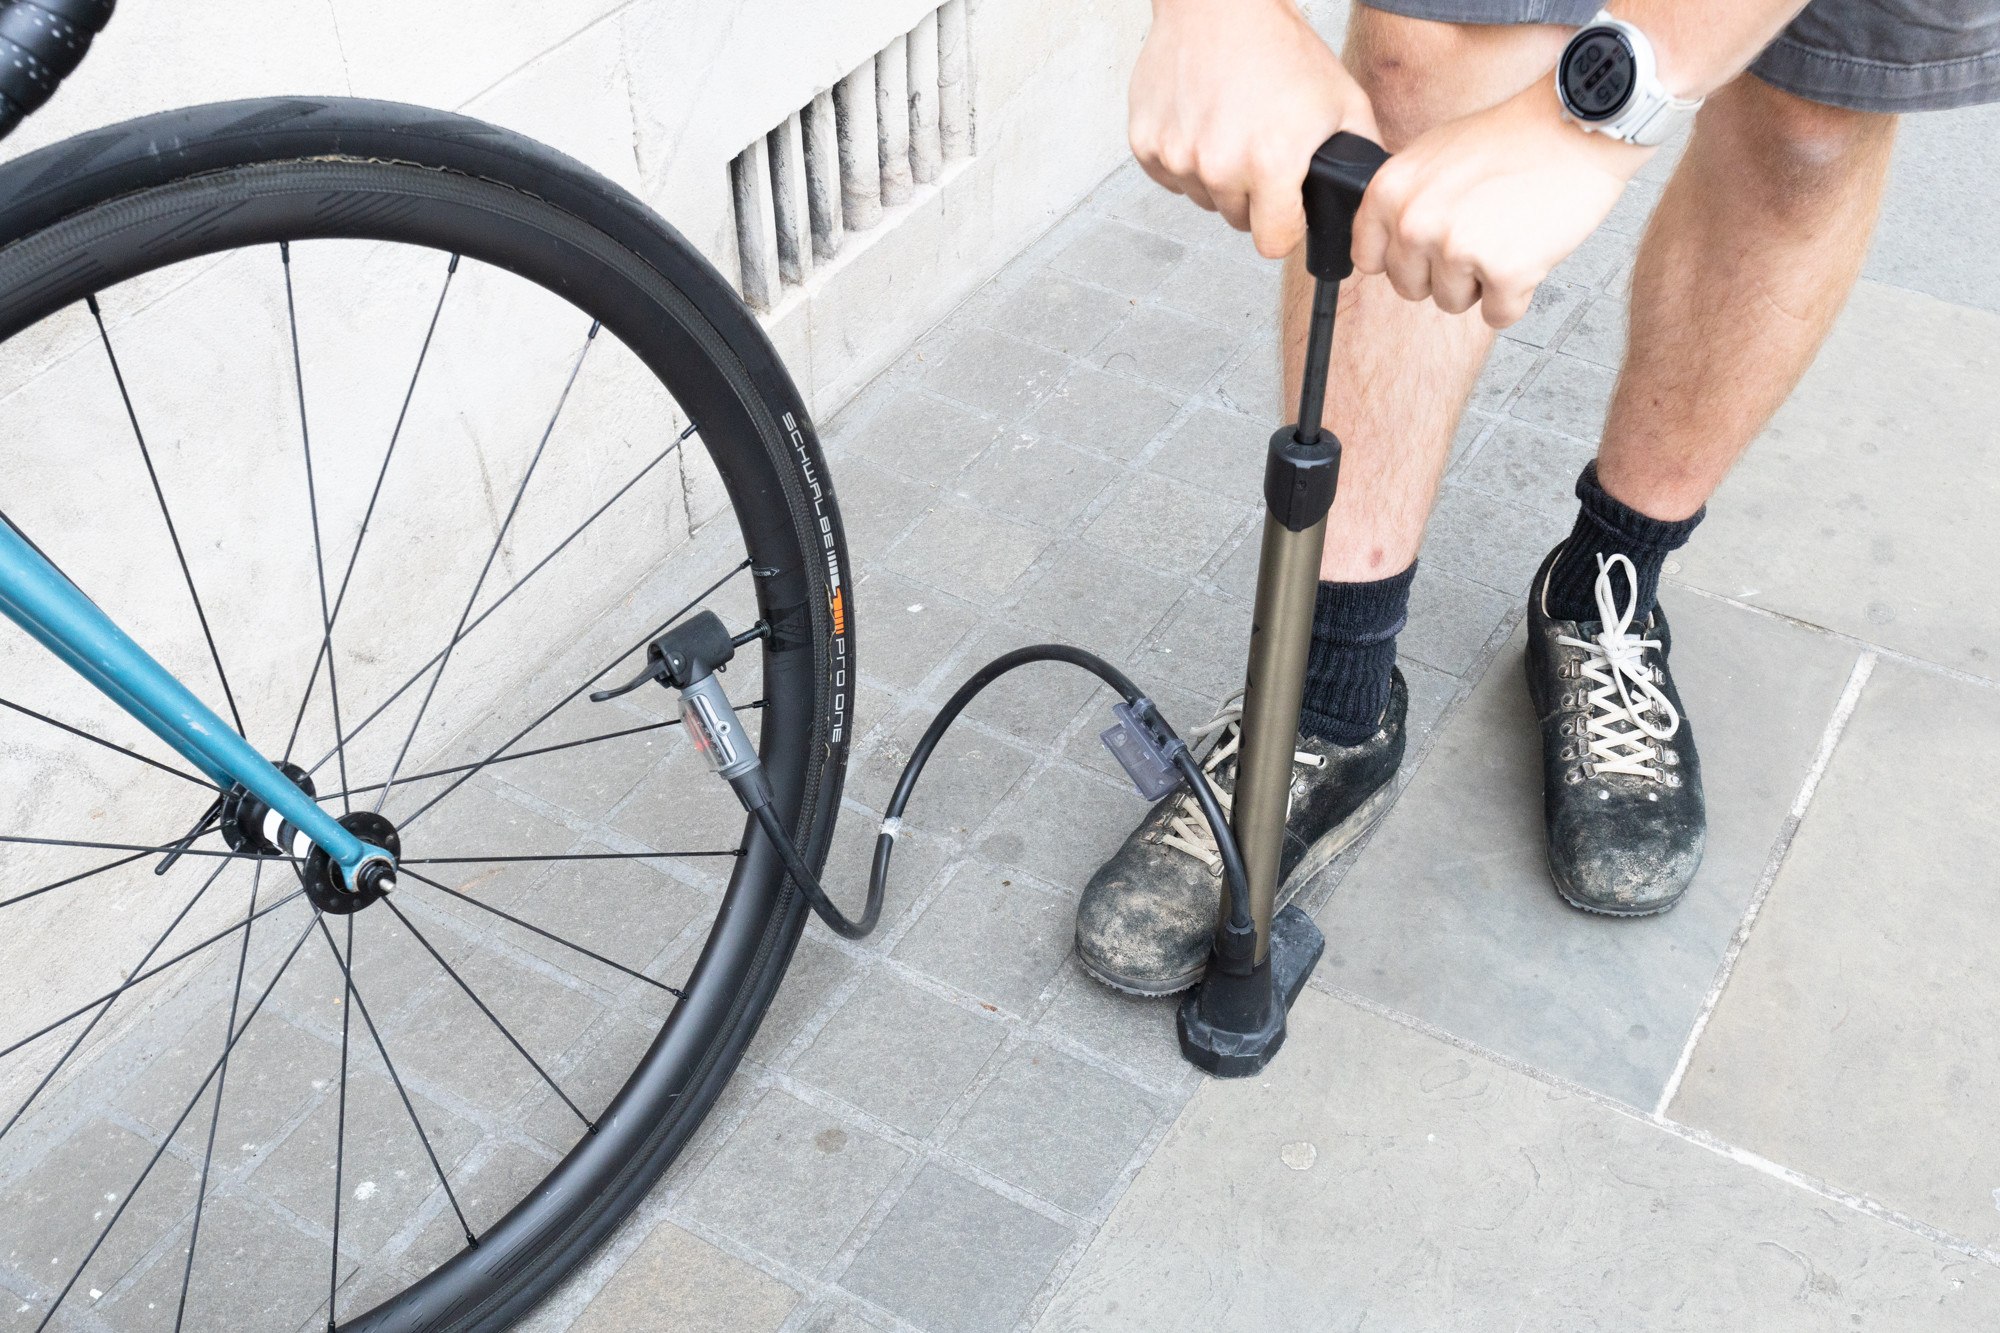
3.1. Prepare the Valve
 Inflating a Presta valve
Remove the dust cap from the valve and, if using a Presta valve, unscrew the lockring. Preparing the valve ensures a clean and accessible connection for the pump. Bike Commuter advises checking the valve for any debris or damage before proceeding to the next step.
3.2. Attach the Pump
 Inflating a Presta valve
Place the pump head over the valve and ensure it’s securely attached. For pumps with a lever, flip the lever to lock the pump in place. Securing the pump head creates an airtight seal, which is essential for efficient inflation. Mountain Bike Review recommends holding the valve stem from behind the tire to prevent it from pushing into the rim.
3.3. Inflate to the Correct Pressure
 Inflating a Presta valve
Inflate the tire to the recommended pressure, which is typically printed on the tire sidewall. Use a pressure gauge to ensure accurate inflation. Inflating to the correct pressure optimizes rolling resistance, comfort, and puncture protection. According to research from the Motorcycle Safety Foundation (MSF) in July 2025, proper tire inflation significantly enhances rider safety by improving handling and reducing the risk of blowouts.
3.4. Disengage the Pump
 Inflating a Presta valve
Remove the pump head from the valve. If your pump has a locking lever, release it before removing the head. Removing the pump head carefully prevents air from escaping the tire. Cycling Tips suggests using a quick, straight motion to minimize air loss.
3.5. Close the Valve
 Inflating a Presta valve
For Presta valves, screw the lockring back on. Replace the dust cap on both Presta and Schrader valves. Closing the valve protects it from dirt and debris and ensures that no air leaks out over time. According to Velo News, keeping the valve clean and properly sealed can extend the life of your inner tube.
4. Optimal Tire Pressure: Finding the Sweet Spot
Maintaining the correct tire pressure is crucial for optimal performance and comfort. What pressure should your bike tires be?
The ideal tire pressure depends on factors such as tire size, rider weight, and riding conditions. Check the tire sidewall for the manufacturer’s recommended pressure range, and adjust accordingly.
4.1. Factors Affecting Tire Pressure
Consider the following factors when determining your ideal tire pressure:
- Tire Size: Wider tires generally require lower pressures for the same level of support.
- Rider Weight: Heavier riders need higher pressures to prevent pinch flats and maintain efficient rolling.
- Riding Conditions: Rougher terrain may benefit from lower pressures for increased comfort and traction.
- Type of Bike: Road bikes typically require higher pressures than mountain bikes.
4.2. Recommended Tire Pressure Ranges
Here are general guidelines for tire pressure based on bike type:
| Bike Type | Tire Pressure (PSI) |
|---|---|
| Road Bike | 80-130 |
| Mountain Bike | 25-35 |
| Gravel Bike | 30-50 |
| Hybrid Bike | 40-70 |
4.3. Benefits of Correct Tire Pressure
- Improved Rolling Resistance: Correctly inflated tires roll more efficiently, reducing effort.
- Enhanced Comfort: Optimal pressure absorbs bumps and vibrations, increasing rider comfort.
- Reduced Puncture Risk: Proper inflation prevents pinch flats and protects against sharp objects.
- Better Handling: Accurate tire pressure provides optimal grip and control, improving handling.
5. Common Issues: Troubleshooting Inflation Problems
Even with the right equipment and knowledge, you may encounter issues while inflating your bike tires. What are common problems and how can you fix them?
Common problems include air leaks, difficulty attaching the pump, and tires not inflating fully. Troubleshooting these issues can save you time and frustration.
5.1. Air Leaks
If you hear air leaking while inflating, check the pump head connection and valve core. Air leaks often occur due to a loose connection or damaged valve core. Cycling Weekly recommends tightening the valve core with a valve core tool or replacing it if necessary.
5.2. Difficulty Attaching the Pump
If you find it hard to attach the pump head, ensure it is aligned correctly and that the valve is clean. Sometimes, the valve can become bent or clogged. Bike Radar suggests using a small amount of lubricant on the valve stem to ease the connection.
5.3. Tire Not Inflating Fully
If the tire isn’t inflating fully, check for punctures or damage to the inner tube. A puncture will prevent the tire from holding air. Global Cycling Network advises inspecting the tire and inner tube for any signs of damage and replacing the tube if needed.
5.4. Valve Stem Issues
A bent or damaged valve stem can prevent proper inflation. Inspect the valve stem for any visible damage and replace the inner tube if necessary. According to Velo News, a damaged valve stem can lead to slow leaks and eventual tire deflation.
6. Maintaining Your Tires: Best Practices
Proper tire maintenance extends the life of your tires and ensures safe riding. How often should you check and inflate your tires?
Regularly check your tire pressure before each ride, inspect the tires for wear and damage, and store your bike properly. Consistent maintenance keeps your tires in optimal condition.
6.1. Regular Pressure Checks
Check your tire pressure before every ride to ensure it’s within the recommended range. According to the American Motorcyclist Association (AMA), maintaining correct tire pressure is crucial for safe motorcycle operation. Regular checks prevent underinflation, which can lead to poor handling and increased puncture risk.
6.2. Inspecting for Wear and Damage
Inspect your tires for cuts, bulges, and excessive wear. Replace tires that show signs of damage. Motorcycle Magazine advises riders to look for signs of dry rot, cracking, or uneven wear patterns.
6.3. Proper Bike Storage
Store your bike in a cool, dry place away from direct sunlight to prevent tire degradation. Sunlight and heat can cause the rubber to break down over time. Bike Storage Solutions recommends keeping tires away from solvents and chemicals that can damage the rubber.
6.4. Cleaning Your Tires
Regularly clean your tires to remove dirt, debris, and road grime. Use a mild soap and water solution to clean the tires and sidewalls. According to Detailing World, keeping your tires clean not only improves their appearance but also helps prevent premature wear.
7. Exploring Tubeless Setups: An Advanced Option
Tubeless tires offer several advantages over traditional tube-type tires, including lower rolling resistance and reduced puncture risk. What are the benefits of tubeless tires, and how do you inflate them?
Tubeless tires use a sealed rim and tire combination, eliminating the need for an inner tube. They provide a smoother ride and are less prone to pinch flats.
7.1. Benefits of Tubeless Tires
- Lower Rolling Resistance: Tubeless tires can run at lower pressures without the risk of pinch flats, which improves rolling resistance and comfort.
- Reduced Puncture Risk: The sealant inside tubeless tires can seal small punctures automatically, reducing the likelihood of flats.
- Improved Grip: Lower tire pressures provide better grip on rough terrain.
- Weight Savings: Eliminating the inner tube can save weight, especially on high-performance bikes.
7.2. Inflating Tubeless Tires
Inflating tubeless tires requires a few extra steps compared to tube-type tires.
- Ensure Proper Seating: Make sure the tire beads are properly seated on the rim. This may require using a tubeless-specific floor pump or an air compressor.
- Add Sealant: Inject tubeless sealant into the tire through the valve stem.
- Inflate Quickly: Inflate the tire quickly to help the beads seat properly. You may hear a popping sound as the beads snap into place.
- Check for Leaks: Check the tire for any leaks and rotate the wheel to allow the sealant to seal any small punctures.
7.3. Tubeless Tire Maintenance
Regularly check the sealant level in your tubeless tires and add more as needed. The sealant can dry out over time, reducing its effectiveness. According to Velo News, refreshing the sealant every few months ensures optimal puncture protection.
7.4. Tubeless Valve Maintenance
Keep the tubeless valve clean and free from sealant buildup. Use a valve core tool to remove and clean the valve core periodically. According to Bikeradar, a clogged valve can prevent proper inflation and sealant flow.
8. Safety First: Important Precautions
Prioritizing safety is essential when inflating bike tires. What safety measures should you take?
Always wear eye protection, avoid overinflating tires, and inspect your tires regularly for damage. These precautions minimize the risk of accidents and injuries.
8.1. Wear Eye Protection
Wear safety glasses or goggles to protect your eyes from debris or sudden tire explosions. Eye protection prevents serious injuries in case of tire failure. According to the Motorcycle Safety Foundation (MSF), wearing proper protective gear, including eye protection, significantly reduces the risk of injuries in motorcycle accidents.
8.2. Avoid Overinflating
Never exceed the maximum pressure rating printed on the tire sidewall. Overinflating can cause the tire to explode, leading to injury. Consumer Reports advises checking the tire pressure regularly and never exceeding the recommended limit.
8.3. Inspect Tires Regularly
Regularly inspect your tires for signs of wear, damage, or embedded objects. Damaged tires can fail unexpectedly. Tire Review recommends replacing tires with cuts, bulges, or excessive wear to ensure safe riding.
8.4. Use a Reliable Pump
Use a high-quality pump with an accurate pressure gauge. A reliable pump ensures precise inflation and prevents overinflation. According to Popular Mechanics, investing in a quality pump is essential for maintaining proper tire pressure and extending the life of your tires.
9. Understanding Tire Markings: A Guide to Decoding Your Tires
Bike tires are marked with various codes and symbols that provide essential information about their size, pressure ratings, and construction. What do these markings mean?
Understanding tire markings helps you choose the right tires and maintain them properly. Key markings include tire size, pressure ratings, and load capacity.
9.1. Tire Size
Tire size is typically indicated in two formats:
- ISO (International Organization for Standardization): This format uses a three-digit number followed by a hyphen and a two-digit number (e.g., 559-25). The first number indicates the tire’s bead seat diameter in millimeters, and the second number indicates the tire’s width in millimeters.
- Imperial: This format uses inches (e.g., 26 x 2.125). The first number indicates the tire’s outer diameter in inches, and the second number indicates the tire’s width in inches.
According to Sheldon Brown, understanding tire size is crucial for ensuring compatibility with your bike’s rims and frame.
9.2. Pressure Ratings
Tire pressure ratings indicate the minimum and maximum pressures the tire can safely handle. This is typically expressed in PSI (pounds per square inch) or BAR (metric unit of pressure). Always stay within the recommended pressure range to avoid tire failure. Continental Tires advises checking the tire pressure regularly and adjusting it based on riding conditions and rider weight.
9.3. Load Capacity
Load capacity indicates the maximum weight the tire can support. This is crucial for ensuring safe riding, especially for touring bikes or bikes carrying heavy loads. The Bicycle Touring Pro recommends choosing tires with a load capacity that exceeds your combined weight (rider, bike, and gear) for added safety.
9.4. Tire Construction
Tire markings may also indicate the tire’s construction, such as tubeless-ready or folding bead. Tubeless-ready tires are designed to be used without inner tubes, while folding bead tires use a flexible material in the bead, making them easier to install and transport. Bikeradar explains that understanding tire construction helps you choose the right tires for your riding style and preferences.
10. FAQ: Answering Common Questions About Bike Tire Inflation
Here are some frequently asked questions about inflating bike tires:
10.1. How Often Should I Inflate My Bike Tires?
Check and inflate your tires before every ride to ensure optimal performance and safety. According to Bicycling Magazine, tires can lose pressure over time due to air permeation, so regular checks are essential.
10.2. Can I Use a Car Tire Pump to Inflate My Bike Tires?
Yes, you can use a car tire pump if it has a compatible Schrader valve. However, car tire pumps can overinflate bike tires quickly, so use caution and check the pressure frequently. Bike Commuter recommends using a bike-specific pump for more precise inflation.
10.3. What Happens If I Overinflate My Bike Tires?
Overinflating bike tires can cause a harsh ride, reduce grip, and increase the risk of tire explosion. Always stay within the recommended pressure range printed on the tire sidewall. Road Bike Action advises gradually releasing air until you reach the correct pressure if you accidentally overinflate your tires.
10.4. What Happens If I Underinflate My Bike Tires?
Underinflating bike tires can cause increased rolling resistance, poor handling, and a higher risk of pinch flats. Maintain proper tire pressure to avoid these issues. According to Mountain Bike Review, underinflating tires can also damage your rims.
10.5. How Do I Know What Type of Valve My Bike Has?
Look at the valve stem on your tire. Presta valves are thin with a lockring, Schrader valves are wider and similar to car tires, and Dunlop valves are common on older bikes. Cycling Weekly provides detailed guides and images to help you identify different valve types.
10.6. Can I Convert My Tires to Tubeless?
Yes, you can convert some tires and rims to tubeless if they are tubeless-ready. You will need tubeless-specific tires, rims, sealant, and valves. Global Cycling Network offers tutorials on how to convert your tires to tubeless.
10.7. How Much Does It Cost to Replace Bike Tires?
The cost of replacing bike tires varies depending on the type and quality of the tire. Entry-level tires can cost as little as $20, while high-end performance tires can cost over $100. Bicycle Blue Book provides pricing guides for various bike components, including tires.
10.8. Where Can I Buy Bike Tires and Pumps?
You can buy bike tires and pumps at local bike shops, sporting goods stores, and online retailers. Support your local bike shop for expert advice and service. REI and Amazon are popular online retailers for bike equipment.
10.9. How Do I Fix a Flat Tire?
Fixing a flat tire involves removing the wheel, taking out the inner tube, patching or replacing the tube, and reinstalling the wheel. Carry a spare tube, tire levers, and a pump or CO2 inflator on your rides. Park Tool offers detailed instructions and videos on how to fix a flat tire.
10.10. What is the Difference Between Clincher and Tubular Tires?
Clinchers use a separate inner tube and are the most common type of bike tire. Tubulars have the tube sewn inside the tire and are glued to the rim, typically used for racing. Velo News explains the differences between clincher and tubular tires and their respective advantages and disadvantages.
Inflating your bike tires correctly is a simple yet crucial aspect of motorcycle maintenance. By following this comprehensive guide, you can ensure a smooth, safe, and enjoyable ride. Remember to check your tire pressure regularly, inspect your tires for wear and damage, and maintain your equipment properly.
Ready to explore more about motorcycle tires, maintenance tips, and connect with a vibrant community of bikers? Visit usabikers.net today! Discover in-depth articles, join our forums, and gear up for your next adventure. Usabikers.net is your ultimate resource for all things motorcycle in the USA.
Address: 801 Sturgis Main St, Sturgis, SD 57785, United States
Phone: +1 (605) 347-2000
Website: usabikers.net