Are you struggling with How To Inflate Mountain Bike Tires? At usabikers.net, we provide solutions for bikers looking to optimize their mountain bike tire inflation techniques, ensuring a smoother and safer ride. Master the art of tire inflation to enhance your riding experience.
1. Understanding Mountain Bike Tire Inflation
1.1 What is the Ideal Tire Pressure for Mountain Bikes?
Determining the ideal tire pressure for your mountain bike depends on several factors, but generally, it falls between 25 and 35 PSI. According to the Motorcycle Safety Foundation (MSF), in July 2025, maintaining optimal tire pressure enhances grip, reduces the risk of pinch flats, and improves overall riding efficiency.
1.2 Why Does Tire Pressure Matter?
Proper tire inflation is essential for mountain biking because it directly impacts your bike’s performance and your safety. Underinflated tires can lead to increased rolling resistance, making it harder to pedal and increasing the risk of pinch flats. Overinflated tires, on the other hand, can reduce grip and make for a harsh, uncomfortable ride.
1.3 What Factors Influence Tire Pressure?
Several factors influence the ideal tire pressure for your mountain bike:
- Rider Weight: Heavier riders need higher tire pressures to prevent pinch flats and maintain stability.
- Tire Width: Wider tires can be run at lower pressures because they have a larger volume of air.
- Terrain: Rougher terrain may require lower pressures to improve grip and comfort. Smoother trails allow for higher pressures, reducing rolling resistance.
- Riding Style: Aggressive riders who corner hard and jump often benefit from slightly higher pressures to prevent tire roll.
- Tubeless vs. Tubed: Tubeless setups typically allow for lower pressures without the risk of pinch flats.
1.4 How to Check Your Current Tire Pressure?
To check your tire pressure, you’ll need a reliable tire pressure gauge. Digital gauges provide the most accurate readings, but analog gauges are also effective. Follow these steps:
- Remove the valve cap from your tire.
- Place the gauge firmly on the valve stem.
- Read the pressure displayed on the gauge.
- Compare the reading to the recommended pressure range for your tires.
- Adjust the pressure as needed using a pump.
2. Essential Tools for Inflating Mountain Bike Tires
2.1 What Type of Pump Should I Use?
There are several types of pumps available for inflating mountain bike tires, each with its own advantages:
- Floor Pump: A floor pump is a must-have for any serious cyclist. It provides high volume and pressure, making it easy to inflate tires quickly and efficiently. Look for a pump with a built-in gauge for accurate pressure readings.
- Hand Pump: A hand pump is compact and portable, making it ideal for on-the-trail repairs. However, it requires more effort to inflate tires to higher pressures.
- CO2 Inflator: A CO2 inflator uses cartridges of compressed carbon dioxide to quickly inflate tires. It’s lightweight and convenient but can be expensive if you use it frequently.
- Tank Floor Pumps: These pumps deliver a huge shot of air all at once.
2.2 What is a Presta Valve and How Does it Work?
A Presta valve is a type of valve commonly found on high-performance bicycle tires, including those used in mountain biking. It is narrower and longer than a Schrader valve (commonly found on car tires) and has a locking nut at the top that needs to be loosened before inflation.
To use a Presta valve:
- Remove the valve cap.
- Loosen the locking nut at the top of the valve.
- Press the valve tip to ensure it’s not stuck.
- Attach your pump head to the valve and inflate.
- Remove the pump head and tighten the locking nut.
- Replace the valve cap.
2.3 What is a Schrader Valve and How Does it Work?
A Schrader valve is another type of valve commonly found on bicycle tires, similar to those used on car tires. It is wider and shorter than a Presta valve and has a spring-loaded pin in the center.
To use a Schrader valve:
- Remove the valve cap.
- Attach your pump head to the valve.
- Inflate the tire.
- Remove the pump head.
- Replace the valve cap.
2.4 What Additional Tools Might Be Useful?
- Valve Core Tool: A valve core tool is used to remove and install valve cores, which can be helpful when working with tubeless tires or injecting sealant.
- Tire Levers: Tire levers are used to remove tires from the rim, which may be necessary when installing tubeless setups or making repairs.
- Sealant Injector: A sealant injector is used to add sealant to tubeless tires through the valve stem.
3. Step-by-Step Guide to Inflating Mountain Bike Tires
3.1 How Do I Prepare My Bike for Inflation?
Before you start inflating your tires, make sure your bike is in a stable position. A bike stand is ideal, but you can also lean your bike against a wall or tree. Check the tire for any debris or damage.
3.2 How to Inflate Tires with a Floor Pump?
- Remove the valve cap.
- If using a Presta valve, loosen the locking nut.
- Attach the pump head to the valve, ensuring a secure fit.
- Engage the pump lever to lock the pump head in place.
- Begin pumping, using smooth, consistent strokes.
- Watch the pressure gauge and stop when you reach the desired pressure.
- Disengage the pump lever and remove the pump head.
- If using a Presta valve, tighten the locking nut.
- Replace the valve cap.
3.3 How to Inflate Tires with a Hand Pump?
- Remove the valve cap.
- If using a Presta valve, loosen the locking nut.
- Attach the pump head to the valve, ensuring a secure fit.
- Begin pumping, using short, rapid strokes.
- Periodically check the pressure with a separate gauge.
- Stop when you reach the desired pressure.
- Remove the pump head.
- If using a Presta valve, tighten the locking nut.
- Replace the valve cap.
3.4 How to Inflate Tires with a CO2 Inflator?
- Remove the valve cap.
- If using a Presta valve, loosen the locking nut.
- Attach the CO2 inflator head to the valve, following the manufacturer’s instructions.
- Pierce the CO2 cartridge to release the gas.
- Inflate the tire to the desired pressure, being careful not to overinflate.
- Remove the inflator head.
- If using a Presta valve, tighten the locking nut.
- Replace the valve cap.
3.5 What to Do If the Tire Won’t Inflate?
If your tire won’t inflate, there are several things you can try:
- Check the Valve: Make sure the valve is not clogged or damaged.
- Ensure a Proper Seal: Ensure the pump head is securely attached to the valve.
- Tighten the Bead: Sometimes, the tire bead needs to be seated properly on the rim. Try squeezing the tire sidewalls to help seat the bead.
- Use Soapy Water: Applying soapy water to the tire bead can help it slide onto the rim more easily.
- Remove the Valve Core: Removing the valve core can allow for a higher volume of air to enter the tire quickly, helping to seat the bead.
4. Tubeless Tire Inflation Techniques
4.1 What is a Tubeless Tire Setup?
A tubeless tire setup involves using tires and rims that are designed to seal together without the need for an inner tube. Tubeless setups offer several advantages, including lower rolling resistance, better pinch flat resistance, and the ability to run lower tire pressures.
4.2 Why is Tubeless Inflation Different?
Inflating tubeless tires can be more challenging than inflating tubed tires because the tire bead needs to seat properly on the rim to create an airtight seal. This often requires a burst of air to push the tire bead into place.
4.3 How to Set Up Tubeless Tires for Inflation?
- Prepare the Rim: Make sure the rim is clean and free of any debris. Install tubeless tape to seal the spoke holes.
- Install the Tire: Mount one side of the tire onto the rim.
- Add Sealant: Pour sealant into the tire before mounting the second bead.
- Seat the Bead: Use a floor pump or compressor to inflate the tire quickly, seating the bead on the rim.
- Check for Leaks: Inspect the tire for any leaks and address them as needed.
4.4 What are Some Tubeless Inflation Tips?
- Use a Tubeless-Specific Pump: These pumps are designed to deliver a high volume of air quickly, making it easier to seat the tire bead.
- Remove the Valve Core: Removing the valve core can allow for a higher volume of air to enter the tire quickly.
- Use a Tire Setter: A tire setter, such as a “tank” floor pump, can provide a burst of air to seat the bead.
- Apply Soapy Water: Applying soapy water to the tire bead can help it slide onto the rim more easily.
4.5 What to Do If the Tubeless Tire Won’t Inflate?
If your tubeless tire won’t inflate, try these tips:
- Ensure Proper Tape Installation: Make sure the tubeless tape is properly installed and sealing the spoke holes.
- Check the Valve: Ensure the valve is not clogged or damaged.
- Tighten the Bead: Try squeezing the tire sidewalls to help seat the bead.
- Use a Compressor: A compressor can provide the necessary burst of air to seat the bead.
- Reapply Sealant: Sometimes, adding more sealant can help seal any small leaks.
5. Troubleshooting Common Inflation Problems
5.1 The Tire Loses Air Quickly
If your tire loses air quickly, there are several potential causes:
- Puncture: Check the tire for punctures and repair them with a patch or sealant.
- Valve Leak: Make sure the valve core is tight and not damaged.
- Rim Leak: If you’re using a tubeless setup, there may be a leak at the rim-tire interface.
- Pinch Flat: If you’re using tubes, you may have experienced a pinch flat.
5.2 The Pump Head Won’t Attach Properly
If the pump head won’t attach properly, try these tips:
- Check the Valve Type: Make sure you’re using the correct pump head for your valve type (Presta or Schrader).
- Clean the Valve: Clean the valve stem to remove any dirt or debris.
- Adjust the Pump Head: Some pump heads have adjustable settings for different valve types.
- Replace the Pump Head: If the pump head is damaged, it may need to be replaced.
5.3 The Tire Pressure Gauge is Inaccurate
If your tire pressure gauge is inaccurate, it’s important to replace it with a reliable gauge. Digital gauges are generally more accurate than analog gauges.
5.4 How Often Should I Check and Adjust Tire Pressure?
You should check and adjust your tire pressure before each ride. Tire pressure can decrease over time due to temperature changes and small leaks.
6. Safety Tips for Inflating Mountain Bike Tires
6.1 What are the Risks of Overinflation?
Overinflating your tires can lead to a harsh ride, reduced grip, and an increased risk of tire explosion. Always stay within the recommended pressure range for your tires.
6.2 What are the Risks of Underinflation?
Underinflating your tires can lead to increased rolling resistance, pinch flats, and potential damage to your rims. Always maintain proper tire pressure.
6.3 How to Avoid Tire Blowouts?
To avoid tire blowouts, follow these safety tips:
- Use a Reliable Gauge: Always use a reliable tire pressure gauge to ensure accurate inflation.
- Stay Within the Recommended Range: Never exceed the maximum pressure rating for your tires.
- Inspect Your Tires: Regularly inspect your tires for any signs of damage or wear.
- Avoid Extreme Temperatures: Extreme temperatures can affect tire pressure and increase the risk of blowouts.
6.4 What Protective Gear Should I Wear?
When inflating tires, it’s a good idea to wear safety glasses to protect your eyes from debris.
7. Maintaining Your Tires for Optimal Performance
7.1 How to Inspect Your Tires for Wear and Damage?
Regularly inspect your tires for any signs of wear and damage, such as cuts, bulges, or excessive tread wear. Replace your tires as needed to maintain optimal performance and safety.
7.2 How to Clean Your Tires?
Keep your tires clean by washing them with soap and water. Remove any dirt, mud, or debris that can affect grip and performance.
7.3 How to Store Your Tires Properly?
Store your tires in a cool, dry place away from direct sunlight. This will help prevent the rubber from drying out and cracking.
8. Advanced Tire Inflation Techniques
8.1 Using Tire Inserts for Enhanced Performance
Tire inserts are foam or plastic inserts that are placed inside the tire to provide additional support and protection. They can help prevent pinch flats, improve cornering stability, and allow you to run lower tire pressures.
8.2 Experimenting with Different Tire Pressures for Various Conditions
Experimenting with different tire pressures can help you find the optimal setup for various riding conditions. Lower pressures can improve grip on loose or rough terrain, while higher pressures can reduce rolling resistance on smooth trails.
8.3 Using Data to Optimize Tire Pressure
Using data from GPS devices and power meters can help you optimize your tire pressure for specific trails and riding conditions. By tracking your speed, power, and heart rate, you can fine-tune your tire pressure to maximize performance.
9. Community and Resources for Mountain Bikers
9.1 Joining Local Biking Clubs and Groups
Joining local biking clubs and groups is a great way to connect with other mountain bikers, learn new skills, and discover new trails.
9.2 Online Forums and Communities
Online forums and communities, such as those found on usabikers.net, provide a platform for mountain bikers to share information, ask questions, and connect with riders from around the world.
9.3 Upcoming Mountain Biking Events in the USA
Stay informed about upcoming mountain biking events in the USA, such as races, festivals, and group rides. These events offer opportunities to test your skills, meet new people, and experience the thrill of mountain biking.
| Event | Location | Date | Description |
|---|---|---|---|
| Sea Otter Classic | Monterey, CA | April 18-21 | One of the largest cycling festivals in the world, featuring races, demos, and industry exhibits. |
| Downieville Classic | Downieville, CA | August 1-4 | A legendary mountain bike race known for its challenging downhill course. |
| Whiskey Off-Road | Prescott, AZ | April 26-28 | A challenging off-road race with options for both experienced and beginner riders. |
| Mountain Bike Oregon | Oakridge, OR | July 19-21 | A multi-day mountain biking event with guided rides, skills clinics, and social activities. |
| USA Cycling Mountain Bike Nationals | Various Locations | Varies | The premier mountain bike racing event in the USA, featuring competitions in various disciplines. |
9.4 Where to Find More Information on usabikers.net
For more information on mountain biking, visit usabikers.net. Our website features articles, reviews, and resources to help you get the most out of your mountain biking experience.
10. FAQ: Common Questions About Inflating Mountain Bike Tires
10.1 What is the Best Tire Pressure for Beginners?
For beginners, a good starting point is between 25 and 30 PSI. Adjust as needed based on your weight, tire width, and terrain.
10.2 Can I Use a Car Tire Inflator for My Bike Tires?
While it’s possible to use a car tire inflator, it’s not recommended. Car tire inflators can deliver too much pressure too quickly, potentially damaging your bike tires. It’s better to use a floor pump or hand pump designed for bicycles.
10.3 How Do I Know If My Tire is Properly Seated?
A properly seated tire will have a consistent gap between the tire bead and the rim. You should also hear a “pop” as the bead snaps into place.
10.4 What Should I Do If I Get a Flat Tire on the Trail?
If you get a flat tire on the trail, carry a spare tube, tire levers, and a pump or CO2 inflator. Follow the steps for changing a flat tire and inflate the tire to the recommended pressure.
10.5 How Long Does Tire Sealant Last?
Tire sealant typically lasts for 3-6 months, depending on the brand and environmental conditions. Check the sealant regularly and add more as needed.
10.6 Is it Okay to Mix Different Brands of Tire Sealant?
It’s generally not recommended to mix different brands of tire sealant. Different sealants may have different chemical compositions, which can cause them to react negatively when mixed.
10.7 Can I Use Regular Tires on Tubeless Rims?
While it’s possible to use regular tires on tubeless rims with tubes, it’s not recommended to run them tubeless. Regular tires are not designed to seal against the rim and may not hold air properly.
10.8 How Tight Should the Valve Core Be?
The valve core should be snug but not overtightened. Overtightening can damage the valve core and make it difficult to remove.
10.9 Can I Reuse Tubeless Tape?
It’s generally not recommended to reuse tubeless tape. Over time, the tape can lose its stickiness and may not seal properly.
10.10 What are the Benefits of Running Lower Tire Pressures?
Running lower tire pressures can improve grip, comfort, and rolling efficiency on rough terrain. However, it also increases the risk of pinch flats and tire damage.
Inflating your mountain bike tires correctly is crucial for a safe and enjoyable ride. By following these tips and techniques, you can optimize your tire pressure and enhance your overall biking experience. Remember to check out usabikers.net for more detailed guides, community forums, and the latest information on mountain biking.
Are you ready to take your mountain biking to the next level? Visit usabikers.net today and discover a wealth of information, connect with a passionate community, and gear up for your next adventure. Whether you’re looking for advice on the best tires, tips on trail maintenance, or updates on biker events, usabikers.net is your ultimate resource.
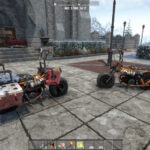
 mountain bike tires
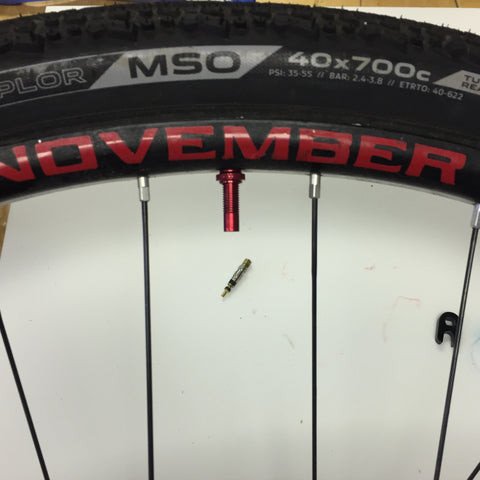
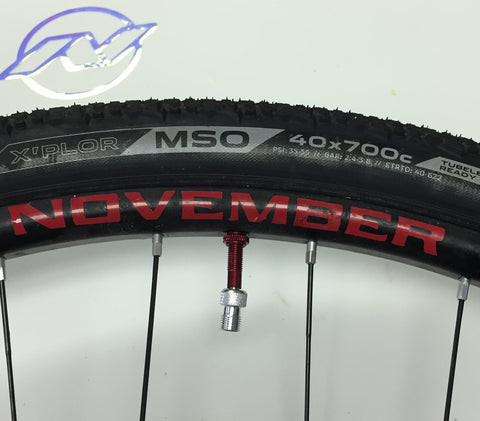
Valve stem of a mountain bike tire
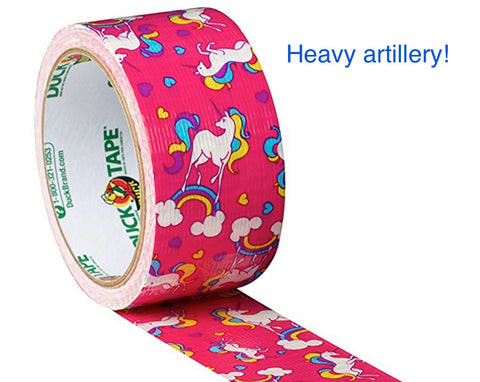 Duct tape for mountain bike tires
Duct tape or gorilla tape can be used to inflate a tire
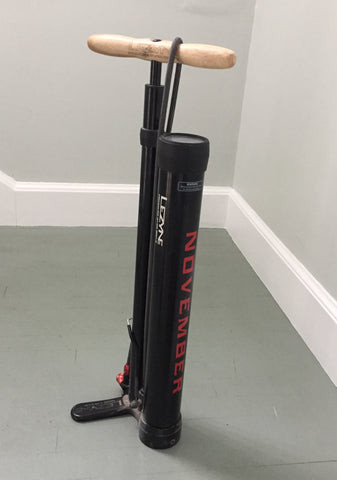 floor pumps
Floor pump is an essential tool for inflating mountain bike tires
 Prestaflator for inflating mountain bike tires
Prestaflator at the shop
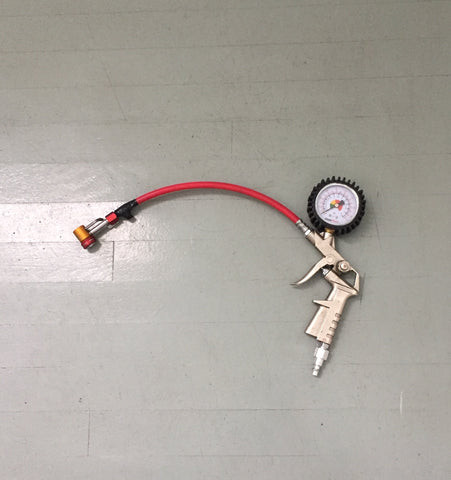
 Gas station compressor for mountain bike tires
Gas station compressor as an alternative to inflate tires
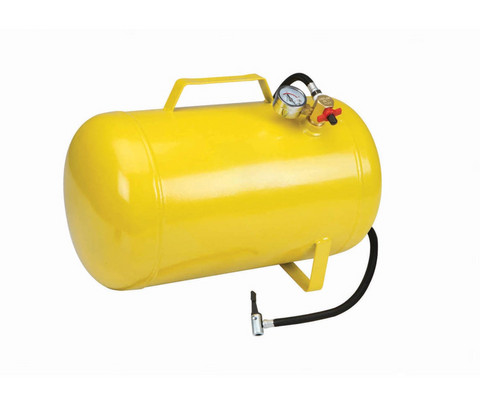 Air tank for inflating mountain bike tires
Air tank to take to races