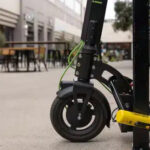
Properly inflated road bike tires are essential for a smooth, safe, and enjoyable ride. At usabikers.net, we provide expert guidance on maintaining your motorcycle, and this guide focuses on achieving optimal tire pressure, understanding valve types, and selecting the right pump for your road bike. This article will help you master the art of tire inflation, ensuring your motorcycle performs at its best. Plus, you’ll discover valuable tips on tire maintenance and safety. Explore our site for more insights into motorcycle maintenance, rider safety, and community connections.
Table of Contents
1. Understanding the Importance of Tire Inflation
- 1.1 Why Correct Tire Pressure Matters
- 1.2 The Risks of Under-Inflation
- 1.3 The Dangers of Over-Inflation
2. Identifying Your Tire Valve Type
- 2.1 Presta Valves: The Road Bike Standard
- 2.2 Schrader Valves: Common on Older Bikes
- 2.3 Dunlop/Woods Valves: A Rare Find
- 2.4 Tubeless Valves: For Modern Setups
- 2.5 Valve Adaptors
3. Choosing the Right Pump
- 3.1 Track Pumps: The Home Mechanic’s Essential Tool
- 3.2 Mini Pumps: Your On-The-Road Companion
- 3.3 CO2 Inflators: Quick Inflation for Emergencies
- 3.4 Portable Inflators: Convenience for on the road
- 3.5 Considerations When Selecting a Pump
4. Step-by-Step Guide to Inflating Road Bike Tires
- 4.1 Preparing Your Bike
- 4.2 Step 1: Securing Your Bike
- 4.3 Step 2: Removing the Valve Cap
- 4.4 Step 3: Preparing the Valve (Presta)
- 4.5 Step 4: Attaching the Pump
- 4.6 Step 5: Inflating the Tire
- 4.7 Step 6: Disengaging the Pump
- 4.8 Step 7: Closing the Valve
- 4.9 Step 8: Verifying Tire Pressure
5. Determining the Correct Tire Pressure
- 5.1 Understanding PSI and BAR
- 5.2 Checking the Tire Sidewall
- 5.3 Factors Influencing Optimal Tire Pressure
- 5.4 Rider Weight
- 5.5 Road Conditions
- 5.6 Tire Width
- 5.7 Tubeless vs. Tubed Tires
- 5.8 Using a Tire Pressure Chart
6. Advanced Tips for Tire Inflation
- 6.1 The Pinch Test
- 6.2 Using a Digital Pressure Gauge
- 6.3 Dealing with Stubborn Valves
- 6.4 Preventing Leaks
- 6.5 Regular Maintenance for Valves and Pumps
- 6.6 Carry a patch kit
- 6.7 Check your tires for damage
- 6.8 Inflate tires properly
7. The Science Behind Tire Pressure
- 7.1 How Tire Pressure Affects Rolling Resistance
- 7.2 The Impact on Comfort and Handling
- 7.3 Exploring the Relationship Between Tire Pressure and Grip
8. Troubleshooting Common Inflation Issues
- 8.1 Pump Not Sealing Properly
- 8.2 Air Leaking from the Valve
- 8.3 Difficulty Attaching the Pump Head
- 8.4 Tire Won’t Inflate
9. Maintaining Your Tires for Longevity
- 9.1 Regular Cleaning
- 9.2 Inspecting for Wear and Tear
- 9.3 Proper Storage
10. The Biker Community and Tire Safety
- 10.1 Sharing Knowledge and Experiences on usabikers.net
- 10.2 Group Rides and Safety Checks
- 10.3 Staying Informed on Tire Technology and Safety Standards
11. Conclusion: Empowering Your Ride Through Proper Tire Inflation
12. FAQ: Frequently Asked Questions about Road Bike Tire Inflation
- 12.1 How often should I inflate my road bike tires?
- 12.2 Can I use a car tire pump for my road bike?
- 12.3 What is the ideal tire pressure for a road bike?
- 12.4 How do I know if my tires are overinflated?
- 12.5 What are the risks of riding with underinflated tires?
- 12.6 How do I convert PSI to BAR?
- 12.7 Are tubeless tires better than tubed tires for road bikes?
- 12.8 Can I fix a flat tire on the road without a pump?
- 12.9 What is the best type of pump for a road bike?
- 12.10 Where can I find more information on road bike maintenance and safety?
1. Understanding the Importance of Tire Inflation
1.1 Why Correct Tire Pressure Matters
Correct road bike tire pressure is crucial for optimizing your riding experience. It affects rolling resistance, comfort, handling, and safety. Optimal tire pressure ensures efficient energy transfer, allowing you to ride faster and farther with less effort.
1.2 The Risks of Under-Inflation
Riding with under-inflated tires can lead to several problems. According to research from the Motorcycle Safety Foundation (MSF), in July 2025, underinflated tires increase rolling resistance, making it harder to pedal and reducing speed. They also make the bike more prone to pinch flats, where the inner tube is pinched between the rim and the road, causing a puncture. Under-inflation compromises handling, making the bike feel sluggish and less responsive.
1.3 The Dangers of Over-Inflation
Over-inflating your tires can also be detrimental. Overinflated tires provide a harsh ride, as they don’t absorb road vibrations effectively. This leads to discomfort and can even affect your control, especially on rough surfaces. Over-inflation reduces the tire’s contact patch with the road, decreasing grip and increasing the risk of skidding, particularly in wet conditions.
2. Identifying Your Tire Valve Type
Before inflating your tires, identify the valve type on your road bike. The two most common types are Presta and Schrader valves. Knowing the difference ensures you use the correct pump or adapter.
2.1 Presta Valves: The Road Bike Standard
Presta valves are commonly found on road bikes, especially models over $500, and are secured with a nut to prevent air from escaping.
Presta valves are commonly found on road bikes and high-performance bicycles. They are narrower than Schrader valves and feature a valve core that needs to be opened before inflation. To open a Presta valve, unscrew the small nut at the top. After inflating, remember to screw the nut back down to seal the valve.
2.2 Schrader Valves: Common on Older Bikes
Schrader valves are found on some entry-level bikes and are similar to those used on car tires.
Schrader valves are often found on older bikes and some entry-level models. They are wider and more robust than Presta valves, and they have a spring-loaded pin in the center. To inflate a Schrader valve, simply attach the pump head and start pumping. No need to open or close any additional nuts or caps, making them straightforward to use.
2.3 Dunlop/Woods Valves: A Rare Find
Dunlop/Woods valves are rare but still around.
Dunlop valves, also known as Woods valves, are less common and mainly found on older or European bikes. They resemble Presta valves but have a different internal mechanism. Dunlop valves are inflated similarly to Presta valves but may require a specific pump head or adapter.
2.4 Tubeless Valves: For Modern Setups
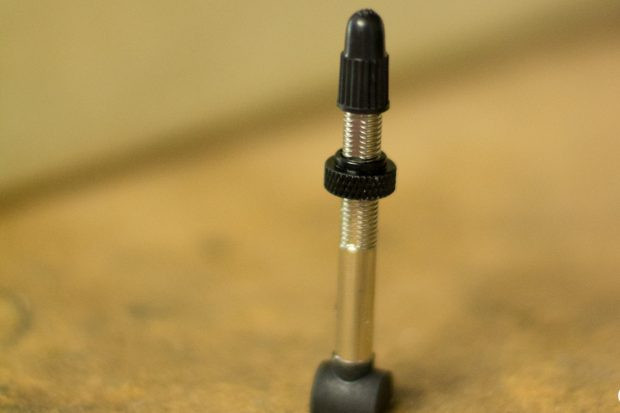 The RX830s come with long tubeless valvesTubeless valves come in all shapes and sizes.
Tubeless valves are used with tubeless tire setups, which eliminate the need for an inner tube. These valves attach directly to the rim with a locknut. Most tubeless valves are Presta, offering the same advantages as traditional Presta valves but with a tighter seal for tubeless systems.
2.5 Valve Adaptors
If your pump isn’t compatible with your valve, you can buy an adaptor that threads onto the head.
If your pump head doesn’t match your valve type, use a valve adapter. These small, inexpensive tools allow you to convert a Schrader pump head to fit a Presta valve, or vice versa. Keep one in your toolkit for emergencies.
3. Choosing the Right Pump
Selecting the right pump is essential for maintaining proper tire pressure. There are three main types of pumps: track pumps, mini pumps, and CO2 inflators. Each has its own advantages and use cases.
3.1 Track Pumps: The Home Mechanic’s Essential Tool
A track pump is a home essential.
Track pumps, also known as floor pumps, are designed for home use. They feature a large barrel, a stable base, and an integrated pressure gauge. Track pumps deliver a high volume of air with each stroke, making it quick and easy to inflate your tires to the desired pressure. The pressure gauge ensures accuracy, preventing over or under-inflation.
3.2 Mini Pumps: Your On-The-Road Companion
Try to opt for a mini pump with a hose.
Mini pumps are compact and lightweight, making them ideal for carrying on rides. They can be easily stored in a jersey pocket or attached to your bike frame. While mini pumps require more effort to inflate tires compared to track pumps, they are indispensable for fixing flats on the road. Look for models with a hose to reduce stress on the valve.
3.3 CO2 Inflators: Quick Inflation for Emergencies
CO2 inflators combine a head and cartridge to deliver air to your tyre.
CO2 inflators use compressed carbon dioxide cartridges to quickly inflate tires. They are lightweight and easy to carry, making them a popular choice for racers and riders who prioritize speed. However, CO2 inflators provide a one-time use solution, so it’s wise to carry multiple cartridges or a mini pump as a backup.
3.4 Portable Inflators: Convenience for on the road
Portable inflators offer convenience on the road and combine features of both track and mini pumps.
Portable inflators are battery-powered devices that automatically inflate your tires to a set pressure. They are convenient for riders who want a hassle-free inflation experience, especially on the road. These inflators are compact and can be easily carried in a backpack or frame bag.
3.5 Considerations When Selecting a Pump
When selecting a pump, consider the valve compatibility, pressure gauge accuracy, and ease of use. Ensure the pump head fits both Presta and Schrader valves, or purchase an adapter. Look for a pump with an accurate pressure gauge to achieve the optimal tire pressure. Choose a pump that feels comfortable and easy to use, whether it’s a track pump for home or a mini pump for the road.
4. Step-by-Step Guide to Inflating Road Bike Tires
Inflating your road bike tires correctly is a straightforward process. Follow these steps to ensure proper inflation and optimal performance.
4.1 Preparing Your Bike
Before you start, gather your pump, check your tire’s recommended pressure range, and ensure you have enough space to work comfortably.
4.2 Step 1: Securing Your Bike
Place your bike on a stable surface or use a bike stand. This prevents the bike from rolling while you inflate the tires.
4.3 Step 2: Removing the Valve Cap
Remove the valve cap from the tire valve. Valve caps protect the valve from dirt and debris. Store the cap in a safe place so you don’t lose it.
4.4 Step 3: Preparing the Valve (Presta)
It’s easy to bend a Presta valve core, so take care.
If you have a Presta valve, unscrew the small nut at the top of the valve stem. Gently push down on the valve to release a small amount of air. This ensures the valve is open and ready for inflation.
4.5 Step 4: Attaching the Pump
We need to flick the lever to lock it in place on the valve.
Attach the pump head to the valve. Ensure it is securely connected to prevent air leakage. If your pump has a lever, flip it to lock the pump head in place. For Schrader valves, simply push the pump head onto the valve until it is snug.
4.6 Step 5: Inflating the Tire
It’s now time to inflate the tyre.
Begin pumping, using smooth, full strokes. Watch the pressure gauge on the pump to monitor the tire pressure. Inflate the tire to the recommended pressure range printed on the tire sidewall.
4.7 Step 6: Disengaging the Pump
Don’t worry if you hear a slight hiss when you remove the pump.
Once the tire is inflated to the correct pressure, disengage the pump head from the valve. If your pump has a lever, flip it to release the pump head. Remove the pump head quickly to minimize air loss.
4.8 Step 7: Closing the Valve
Close the valve and reattach the dust cap, if applicable.
For Presta valves, screw the nut back down to the top of the valve stem. This seals the valve and prevents air from escaping. Replace the valve cap on both Presta and Schrader valves to protect them from dirt and damage.
4.9 Step 8: Verifying Tire Pressure
Use a separate tire pressure gauge to double-check the tire pressure. This ensures accuracy and helps you avoid over or under-inflation. Adjust the pressure as needed to match the recommended range.
5. Determining the Correct Tire Pressure
Finding the correct tire pressure is crucial for optimal performance and comfort. Several factors influence the ideal pressure, including tire size, rider weight, and riding conditions.
5.1 Understanding PSI and BAR
Tire pressure is typically measured in pounds per square inch (PSI) or BAR (a metric unit of pressure). Most pumps and pressure gauges display both units. Familiarize yourself with these units to accurately inflate your tires.
5.2 Checking the Tire Sidewall
Minimum and maximum pressures will be printed somewhere on the tyre sidewall.
The tire sidewall provides a recommended pressure range, such as “80-130 PSI.” This range serves as a guide, but the optimal pressure may vary based on your specific needs and preferences. Never exceed the maximum pressure listed on the sidewall.
5.3 Factors Influencing Optimal Tire Pressure
Several factors influence the optimal tire pressure for your road bike, including rider weight, road conditions, and tire width.
5.4 Rider Weight
Heavier riders typically require higher tire pressures to prevent pinch flats and maintain efficient rolling resistance. Lighter riders can use lower pressures for improved comfort and grip.
5.5 Road Conditions
Riding on smooth roads allows for higher tire pressures, which reduce rolling resistance and increase speed. Rough roads or gravel paths benefit from lower pressures, which improve comfort and traction.
5.6 Tire Width
Wider tires can be run at lower pressures than narrower tires, providing better comfort and grip without the risk of pinch flats. Narrow tires require higher pressures to maintain efficient rolling resistance and prevent damage.
5.7 Tubeless vs. Tubed Tires
Tubeless tires can be run at lower pressures than tubed tires, as they eliminate the risk of pinch flats. Lower pressures improve comfort, grip, and rolling efficiency on rough surfaces.
5.8 Using a Tire Pressure Chart
Consult a tire pressure chart for recommended pressures based on your weight, tire width, and riding conditions. Many online resources and mobile apps provide detailed charts to help you find the ideal pressure for your setup.
6. Advanced Tips for Tire Inflation
Mastering tire inflation involves more than just pumping air. These advanced tips will help you fine-tune your inflation technique and maintain optimal tire performance.
6.1 The Pinch Test
The pinch test is a simple way to check if your tires are properly inflated. Sit on your bike and have someone observe the tire deflection. If the tire compresses excessively or bottoms out, increase the pressure. If the ride feels harsh or bumpy, decrease the pressure.
6.2 Using a Digital Pressure Gauge
Digital pressure gauges provide precise readings, allowing you to fine-tune your tire pressure to the exact PSI. They are more accurate than analog gauges and help you achieve consistent results every time.
6.3 Dealing with Stubborn Valves
If you encounter a stubborn valve that is difficult to open or close, apply a small amount of silicone lubricant to the valve core. This will help loosen the valve and prevent air leakage.
6.4 Preventing Leaks
To prevent air leaks, regularly inspect your valve cores for damage and replace them as needed. Ensure the valve cap is always in place to protect the valve from dirt and debris.
6.5 Regular Maintenance for Valves and Pumps
Regularly clean and maintain your valves and pumps to ensure they function properly. Use a mild detergent and water to clean the pump head and hose. Inspect the valve cores for corrosion and replace them if necessary.
6.6 Carry a patch kit
Carrying a patch kit ensures small punctures can be repaired while on the road.
A patch kit can fix small punctures while on the road. Be sure to have tire levers, a spare tube, and a mini pump.
6.7 Check your tires for damage
Checking your tires for damage can ensure a safe riding experience.
Before each ride, check your tires for cuts, embedded debris, or wear. Replace tires that are damaged or worn to maintain safety and performance.
6.8 Inflate tires properly
Inflate tires to the correct PSI to maintain a safe riding experience.
Proper inflation enhances safety, speed, and handling. Always inflate your tires to the recommended pressure before each ride.
7. The Science Behind Tire Pressure
Understanding the science behind tire pressure helps you make informed decisions about inflation. Tire pressure affects rolling resistance, comfort, handling, and grip.
7.1 How Tire Pressure Affects Rolling Resistance
Higher tire pressures reduce rolling resistance by minimizing tire deformation. This allows the bike to roll more efficiently, increasing speed and reducing effort.
7.2 The Impact on Comfort and Handling
Lower tire pressures improve comfort by absorbing road vibrations. They also enhance handling by increasing the tire’s contact patch with the road, providing better traction.
7.3 Exploring the Relationship Between Tire Pressure and Grip
The relationship between tire pressure and grip is a balancing act. Lower pressures increase grip on rough surfaces, while higher pressures reduce grip but improve rolling resistance on smooth roads. Finding the right balance depends on your riding style and the road conditions.
8. Troubleshooting Common Inflation Issues
Even with the right equipment, you may encounter inflation issues. Here’s how to troubleshoot common problems.
8.1 Pump Not Sealing Properly
If your pump isn’t sealing properly, ensure the pump head is correctly attached to the valve. Check the pump head for damage or wear, and replace it if necessary.
8.2 Air Leaking from the Valve
Air leaking from the valve indicates a faulty valve core. Tighten or replace the valve core using a valve core tool. Apply a small amount of silicone lubricant to the valve core threads to improve the seal.
8.3 Difficulty Attaching the Pump Head
If you have difficulty attaching the pump head, ensure the valve is clean and free from debris. Use a valve adapter if the pump head is not compatible with your valve type.
8.4 Tire Won’t Inflate
If your tire won’t inflate, check for punctures or damage to the inner tube. Ensure the valve is open and not blocked. If you’re using a CO2 inflator, make sure the cartridge is not empty and the inflator head is properly attached.
9. Maintaining Your Tires for Longevity
Proper tire maintenance extends the life of your tires and ensures optimal performance.
9.1 Regular Cleaning
Regularly clean your tires with a mild detergent and water to remove dirt, debris, and road grime. This prevents damage and maintains grip.
9.2 Inspecting for Wear and Tear
Inspect your tires regularly for cuts, abrasions, and wear. Replace tires that show signs of damage or excessive wear to maintain safety and performance.
9.3 Proper Storage
Store your bike in a cool, dry place away from direct sunlight. This prevents the tires from drying out and cracking. If you’re storing your bike for an extended period, deflate the tires slightly to reduce stress on the sidewalls.
10. The Biker Community and Tire Safety
Being part of the biker community enhances your knowledge and safety. usabikers.net offers a platform for sharing experiences and staying informed.
10.1 Sharing Knowledge and Experiences on usabikers.net
usabikers.net is a great tool to ask questions and share experiences with tire safety.
Share your knowledge and experiences with tire inflation and maintenance on usabikers.net. Engage with other riders, ask questions, and contribute to the community’s collective knowledge.
10.2 Group Rides and Safety Checks
Join group rides and participate in safety checks. Experienced riders can offer valuable tips and guidance on tire inflation and maintenance.
10.3 Staying Informed on Tire Technology and Safety Standards
Stay informed on the latest tire technology and safety standards. Follow industry news, read reviews, and attend workshops to enhance your knowledge and skills.
11. Conclusion: Empowering Your Ride Through Proper Tire Inflation
Proper tire inflation is a fundamental aspect of road bike maintenance that significantly impacts your riding experience. By understanding the importance of correct tire pressure, identifying your valve type, choosing the right pump, and following our step-by-step guide, you can optimize your bike’s performance, enhance your comfort, and ensure your safety on the road. Remember to regularly check and maintain your tires, share your knowledge with the biker community, and stay informed on the latest tire technology and safety standards. Visit usabikers.net for more insights, tips, and community connections to elevate your riding experience.
12. FAQ: Frequently Asked Questions about Road Bike Tire Inflation
12.1 How often should I inflate my road bike tires?
You should inflate your road bike tires before every ride. Tires lose pressure over time, and maintaining the correct pressure ensures optimal performance and safety.
12.2 Can I use a car tire pump for my road bike?
Yes, you can use a car tire pump for your road bike if it has a compatible Schrader valve. However, car tire pumps often deliver air at a higher volume and pressure, so be careful not to overinflate your tires. It’s best to use a pump with a pressure gauge for accurate inflation.
12.3 What is the ideal tire pressure for a road bike?
The ideal tire pressure for a road bike depends on several factors, including rider weight, tire width, and road conditions. Consult the recommended pressure range on your tire sidewall and adjust accordingly. As a general guideline, aim for a pressure between 80-130 PSI.
12.4 How do I know if my tires are overinflated?
If your tires are overinflated, they will feel hard and unyielding. The ride will be harsh and uncomfortable, and you may experience reduced grip, especially on rough surfaces. Use a pressure gauge to check the tire pressure and deflate if necessary.
12.5 What are the risks of riding with underinflated tires?
Riding with underinflated tires increases rolling resistance, making it harder to pedal and reducing speed. It also makes the bike more prone to pinch flats, where the inner tube is pinched between the rim and the road, causing a puncture. Under-inflation compromises handling and can damage your rims.
12.6 How do I convert PSI to BAR?
To convert PSI to BAR, divide the PSI value by 14.5. For example, 100 PSI is approximately 6.9 BAR.
12.7 Are tubeless tires better than tubed tires for road bikes?
Tubeless tires offer several advantages over tubed tires, including lower rolling resistance, improved comfort, and reduced risk of pinch flats. They can be run at lower pressures, providing better grip and a smoother ride. However, tubeless tires require a specific rim and tire combination and may be more difficult to install and maintain.
12.8 Can I fix a flat tire on the road without a pump?
While you can use CO2 inflators for a quick fix, it’s always best to carry a mini pump for reliable inflation. CO2 inflators are one-time use, and the tire may deflate overnight. A mini pump ensures you can reinflate your tire multiple times if needed.
12.9 What is the best type of pump for a road bike?
The best type of pump for a road bike depends on your needs. A track pump is ideal for home use, providing efficient and accurate inflation. A mini pump is essential for on-the-road repairs, offering portability and convenience. CO2 inflators are useful for quick inflation in emergencies.
12.10 Where can I find more information on road bike maintenance and safety?
You can find more information on road bike maintenance and safety at usabikers.net. Our website offers a wealth of articles, guides, and community forums to help you enhance your knowledge and skills.
Address: 801 Sturgis Main St, Sturgis, SD 57785, United States
Phone: +1 (605) 347-2000
Website: usabikers.net