
Riding with properly inflated bike tires is crucial for any cyclist, whether you’re a seasoned pro or just starting out. Underinflated tires can lead to a sluggish ride, poor handling, and an increased risk of punctures. Knowing How To Pump A Bike Tire correctly is not just a basic maintenance skill, it’s essential for enjoying a safe and efficient cycling experience.
This comprehensive guide will walk you through each step of inflating your bike tires, ensuring you have the right pressure for optimal performance and comfort. We’ll cover everything from identifying your valve type and choosing the right pump, to understanding tire pressure and maintaining your tires for the long haul. Let’s get started and make sure you’re rolling smoothly!
Step-by-Step Guide: Inflating Your Bike Tire
Pumping up your bike tire might seem straightforward, but following these steps will ensure you do it correctly and efficiently.
1. Identify Your Valve Type and Choose the Right Pump
Before you begin, it’s essential to determine what type of valve your bike has. The two most common types are Presta and Schrader valves. Less commonly, you might encounter Dunlop valves. Most modern pumps are designed to work with both Presta and Schrader valves, often with a dual-head design.
If your valve has a dust cap, remove it. This cap is primarily for keeping dirt out and is not essential for inflation.
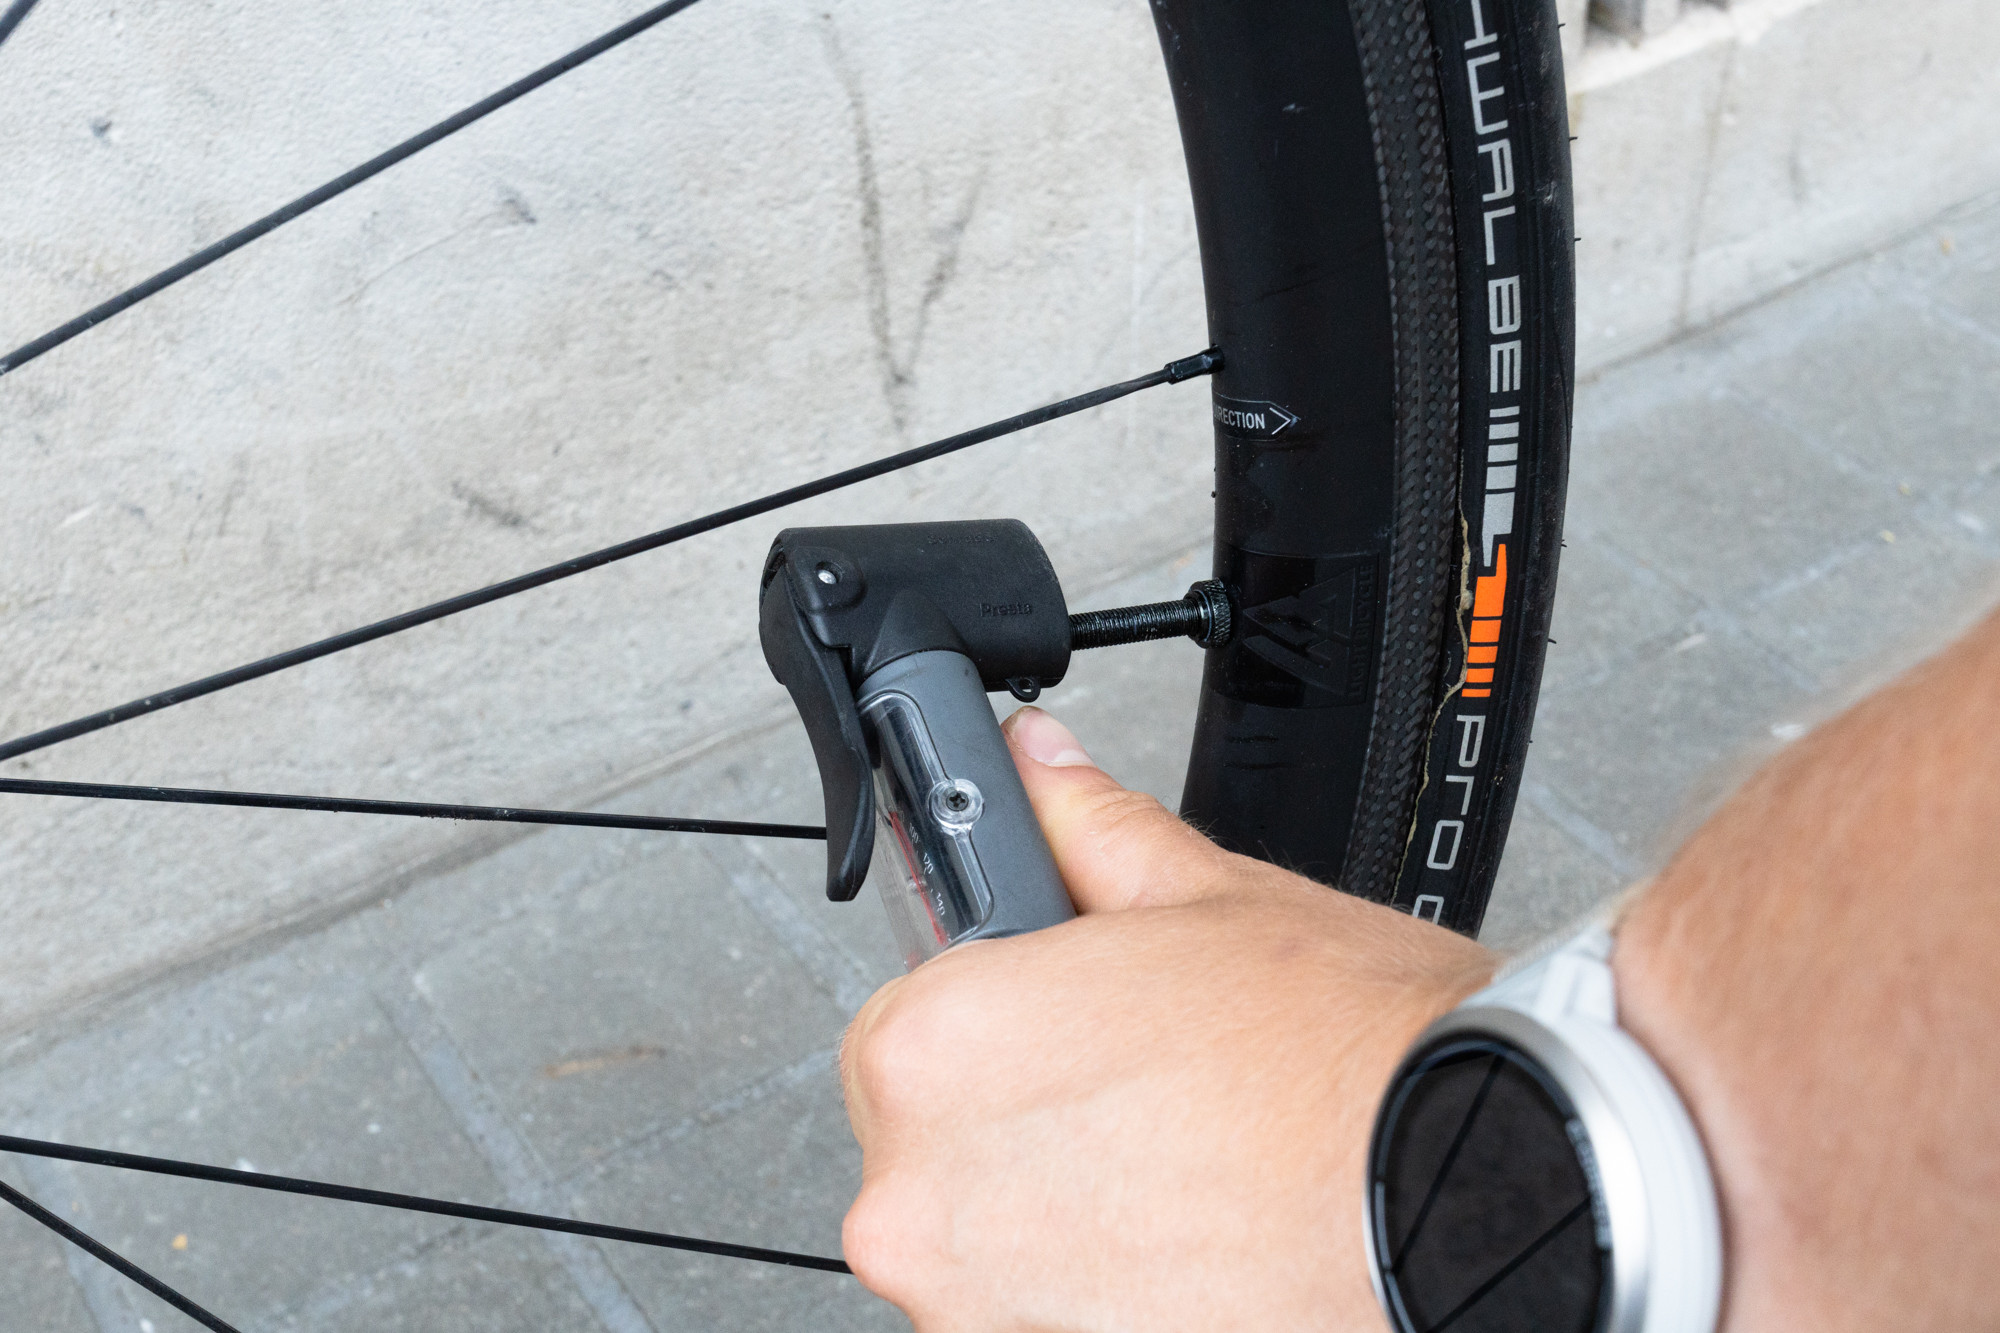
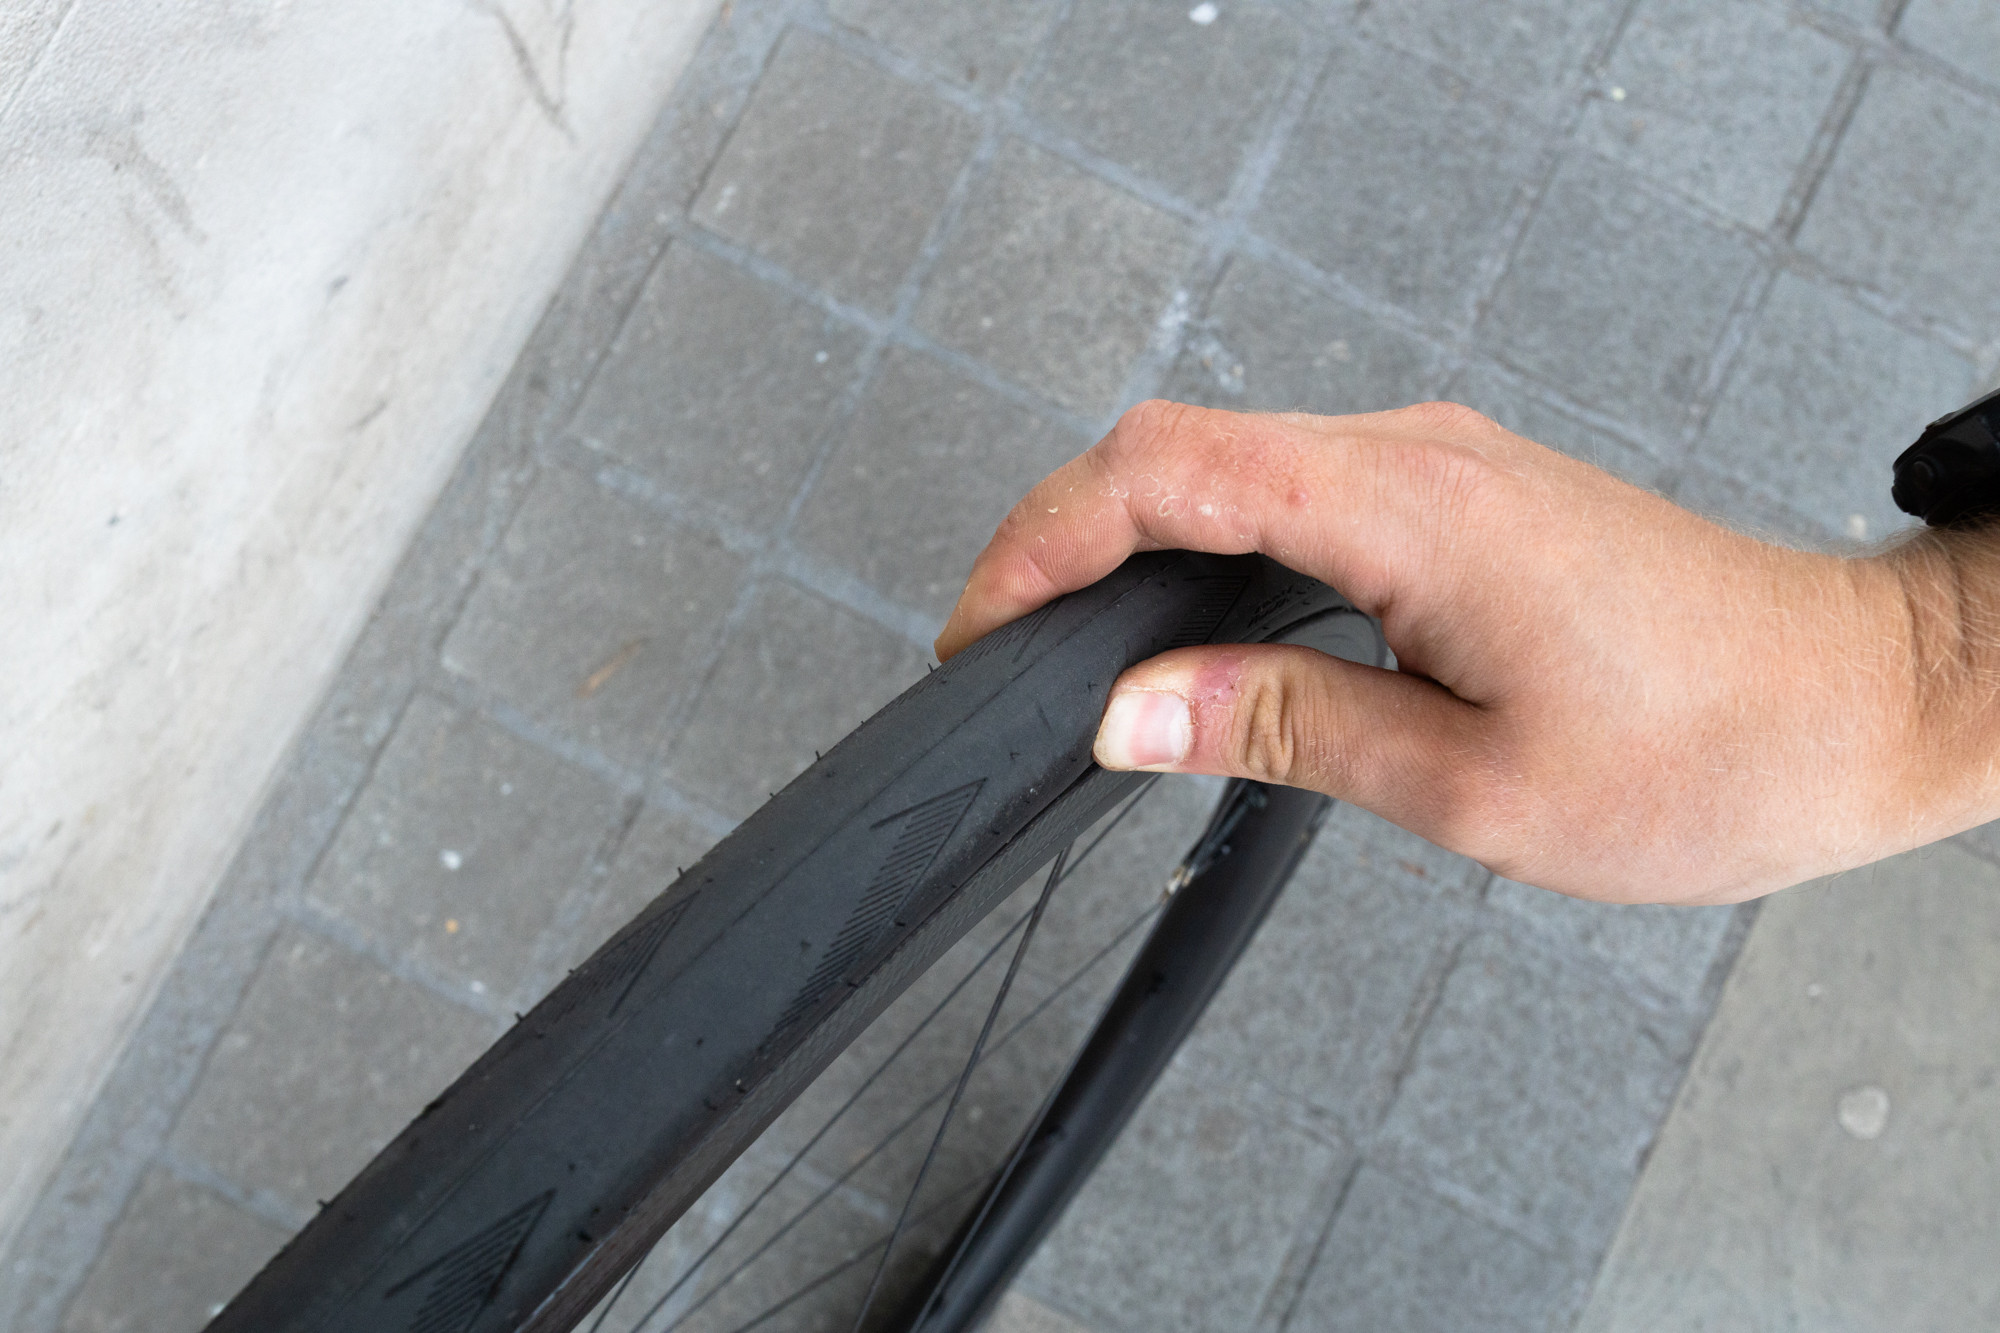
 Close-up of a pump head connecting to a Presta valve, illustrating the initial step of valve engagement for inflation.
Image alt text: Preparing to pump a Presta valve with a compatible pump head.
2. Prepare the Valve for Inflation
The preparation differs slightly depending on your valve type.
For Schrader Valves: These are similar to car tire valves and are straightforward. Once the dust cap is off, you can proceed to attach the pump.
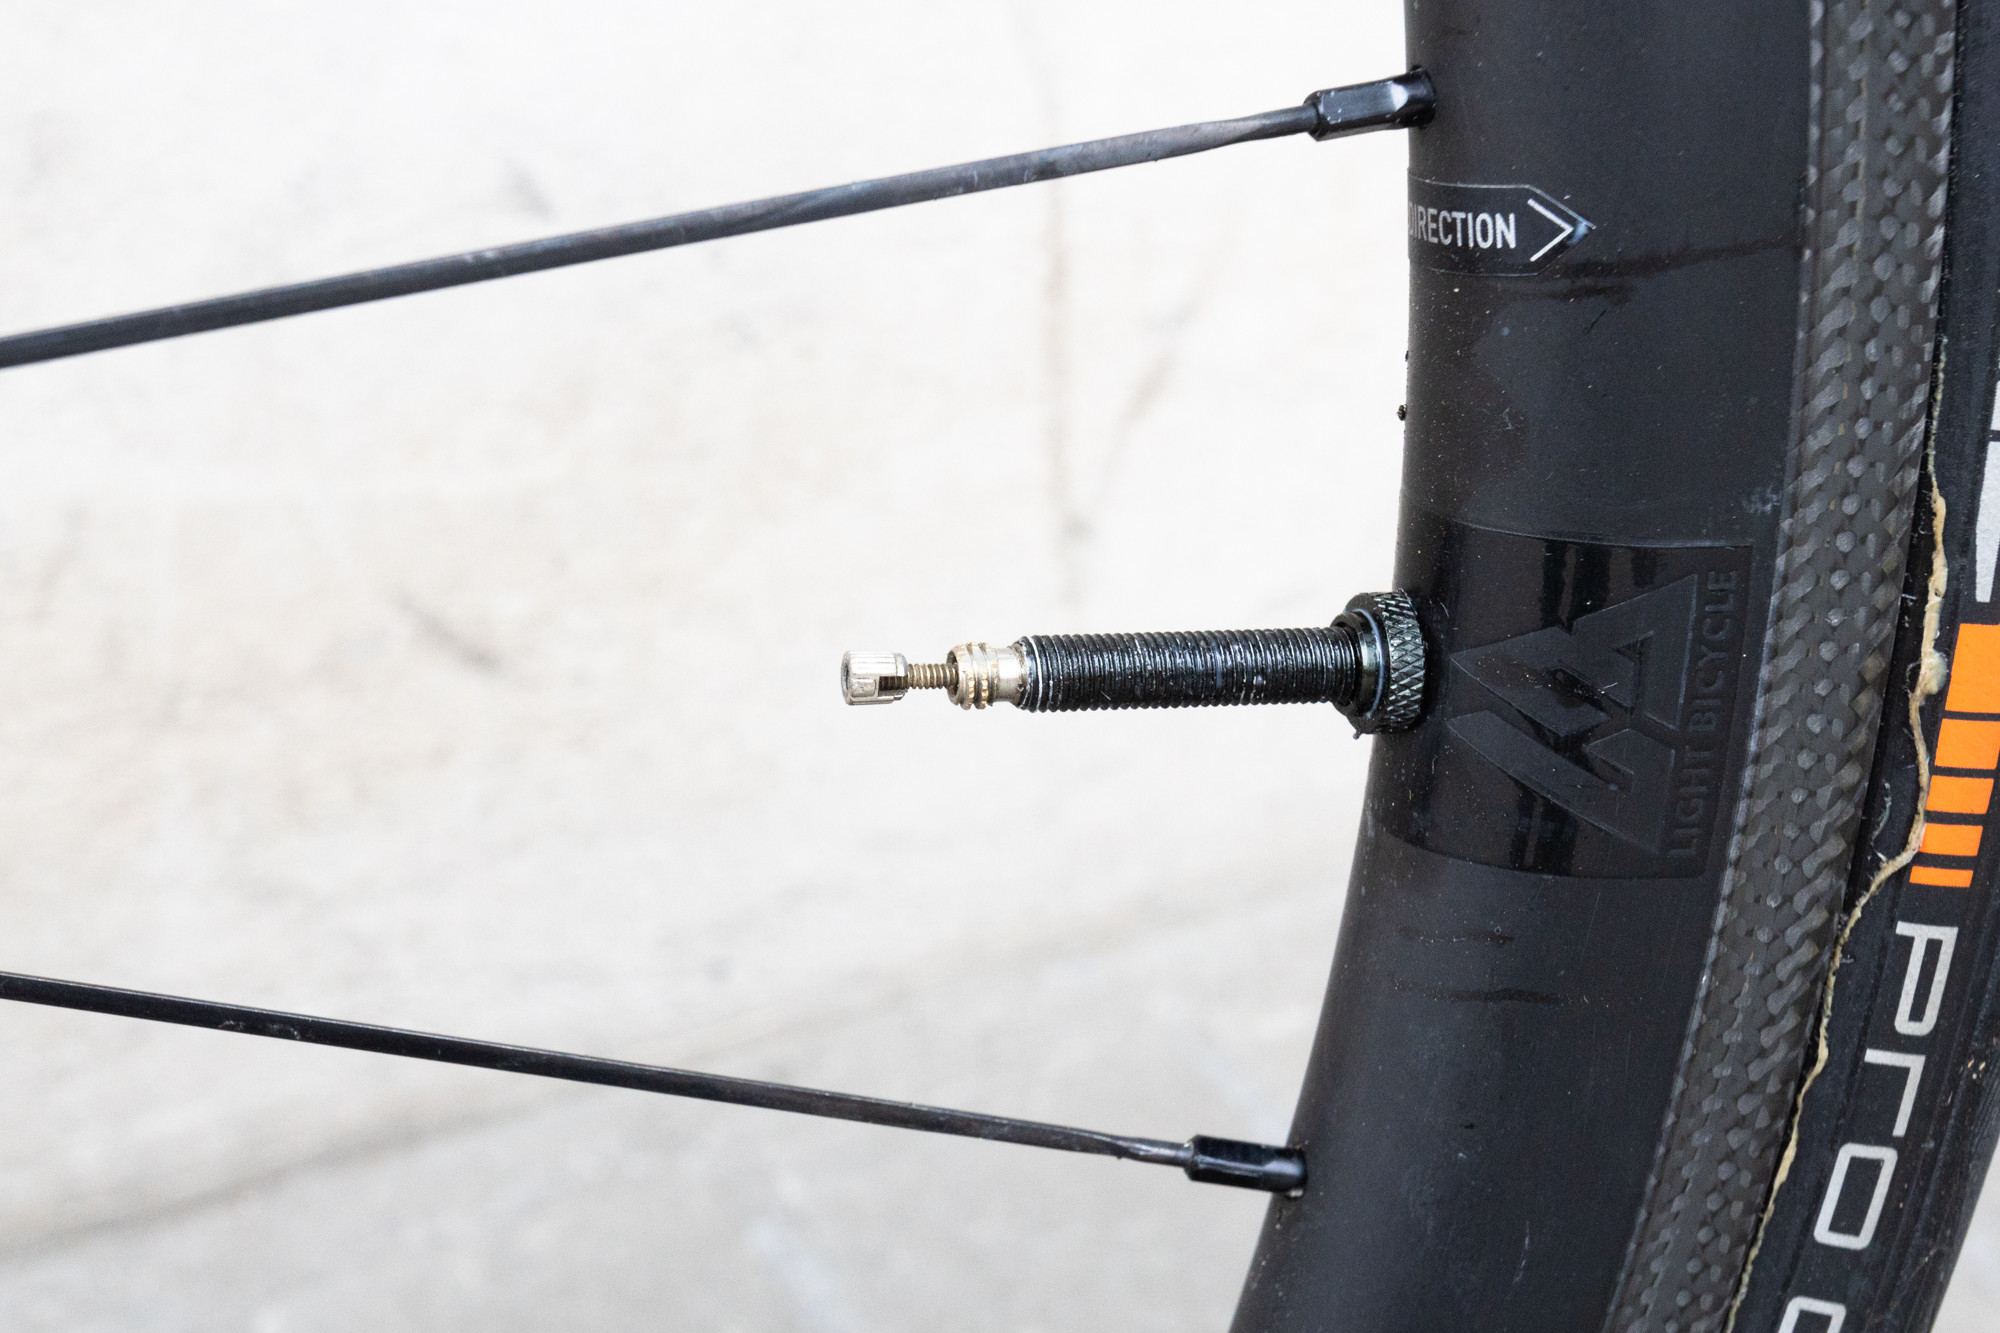
For Presta Valves: After removing the dust cap, you’ll see a small threaded lockring at the tip of the valve. Unscrew this lockring by turning it counter-clockwise. After unscrewing, briefly press the valve core to release a small amount of air. This step isn’t strictly necessary, but it can help to ensure a better seal when you attach the pump head, especially if the valve hasn’t been used recently. Be gentle as Presta valves can be delicate.
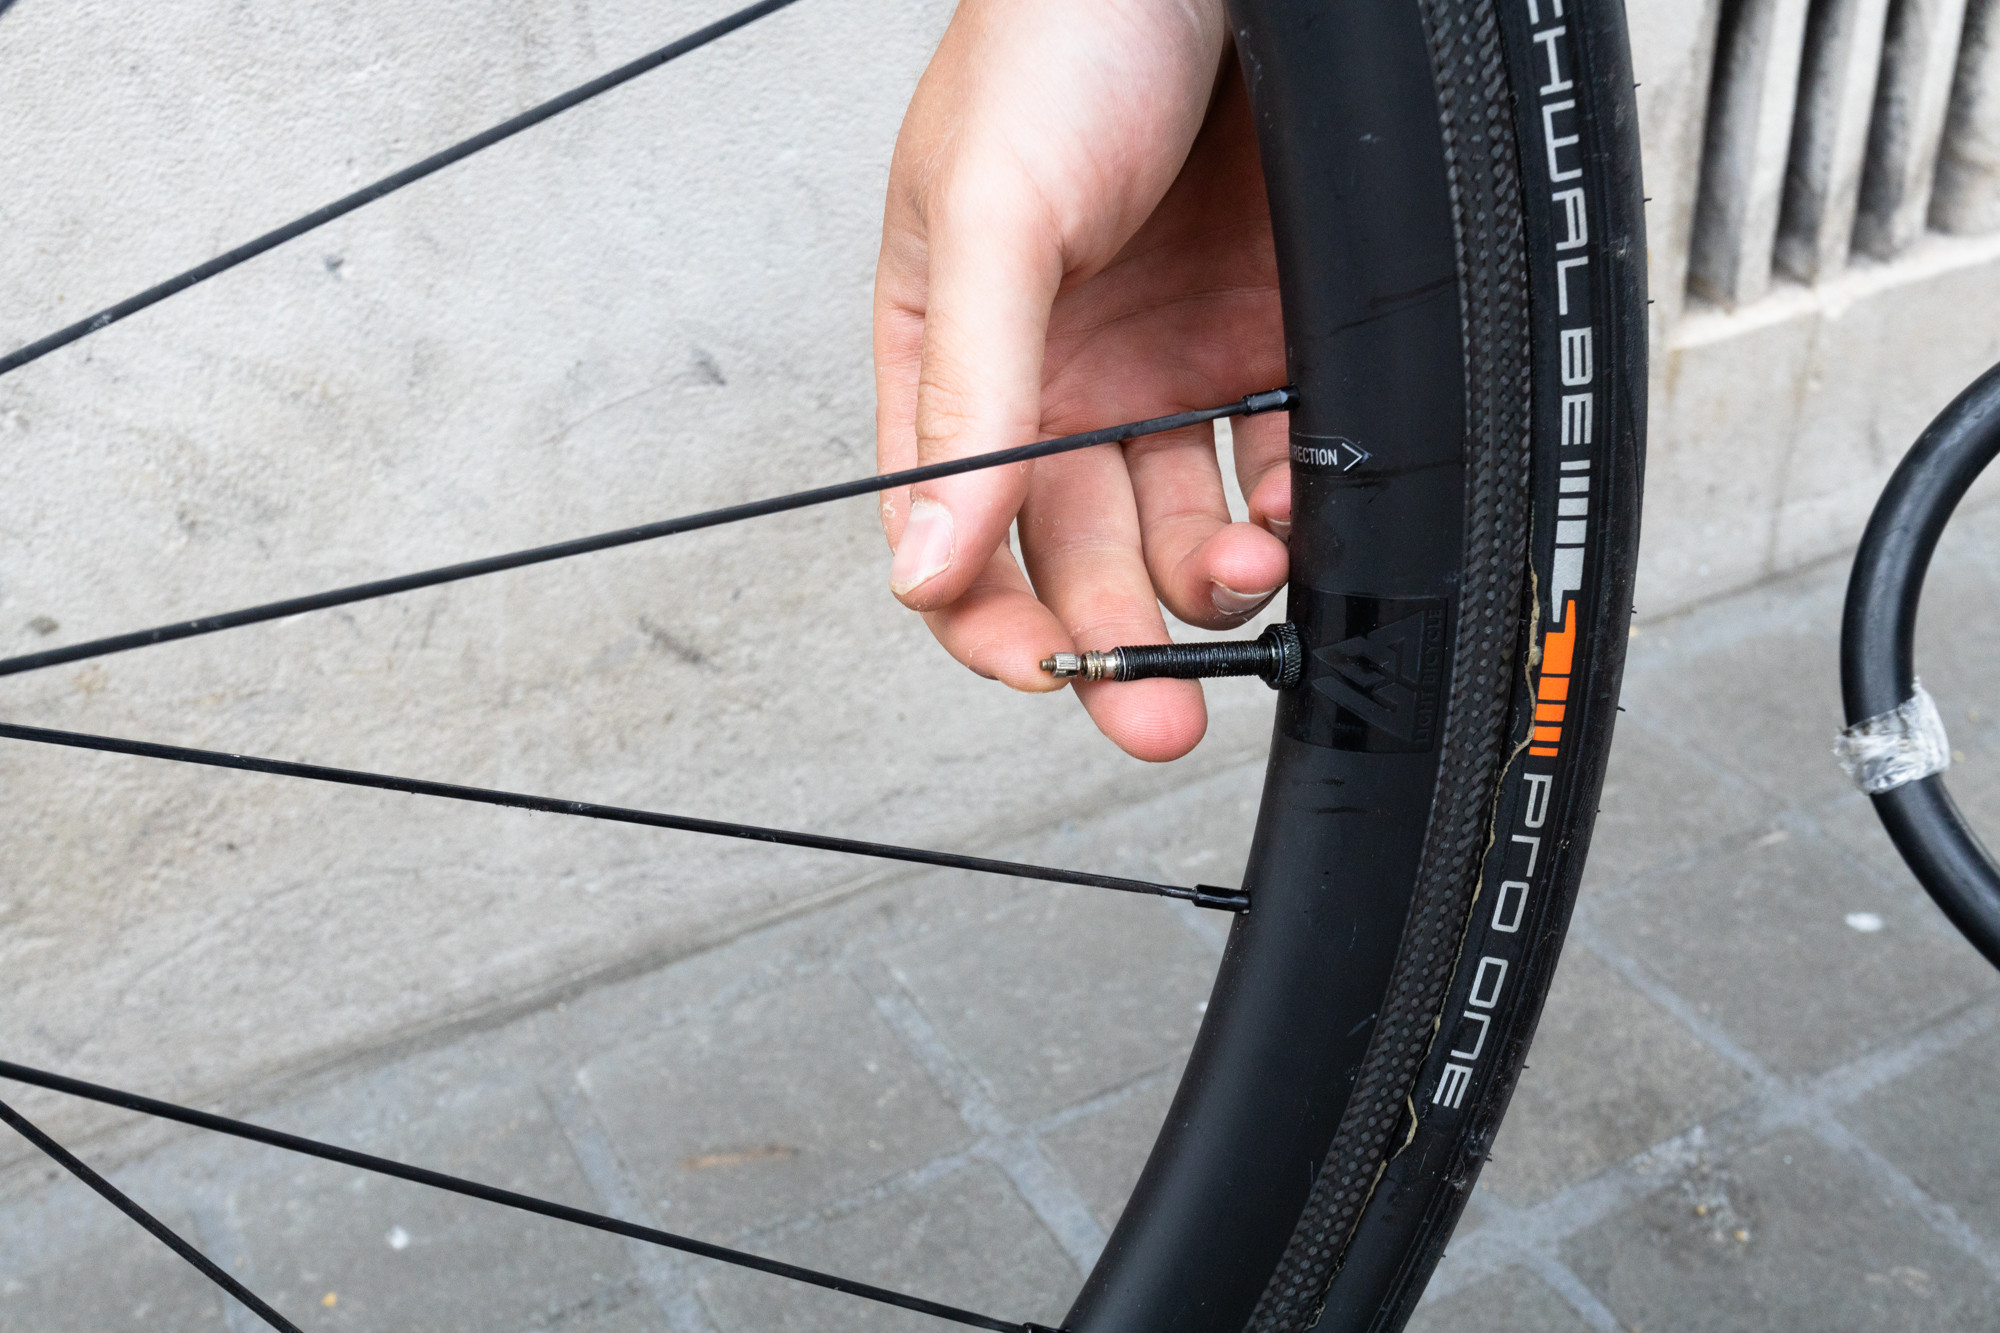
 Close-up showing the delicate nature of a Presta valve and the careful handling required during preparation for inflation.
Image alt text: Gently unscrewing the lockring on a Presta bike valve.
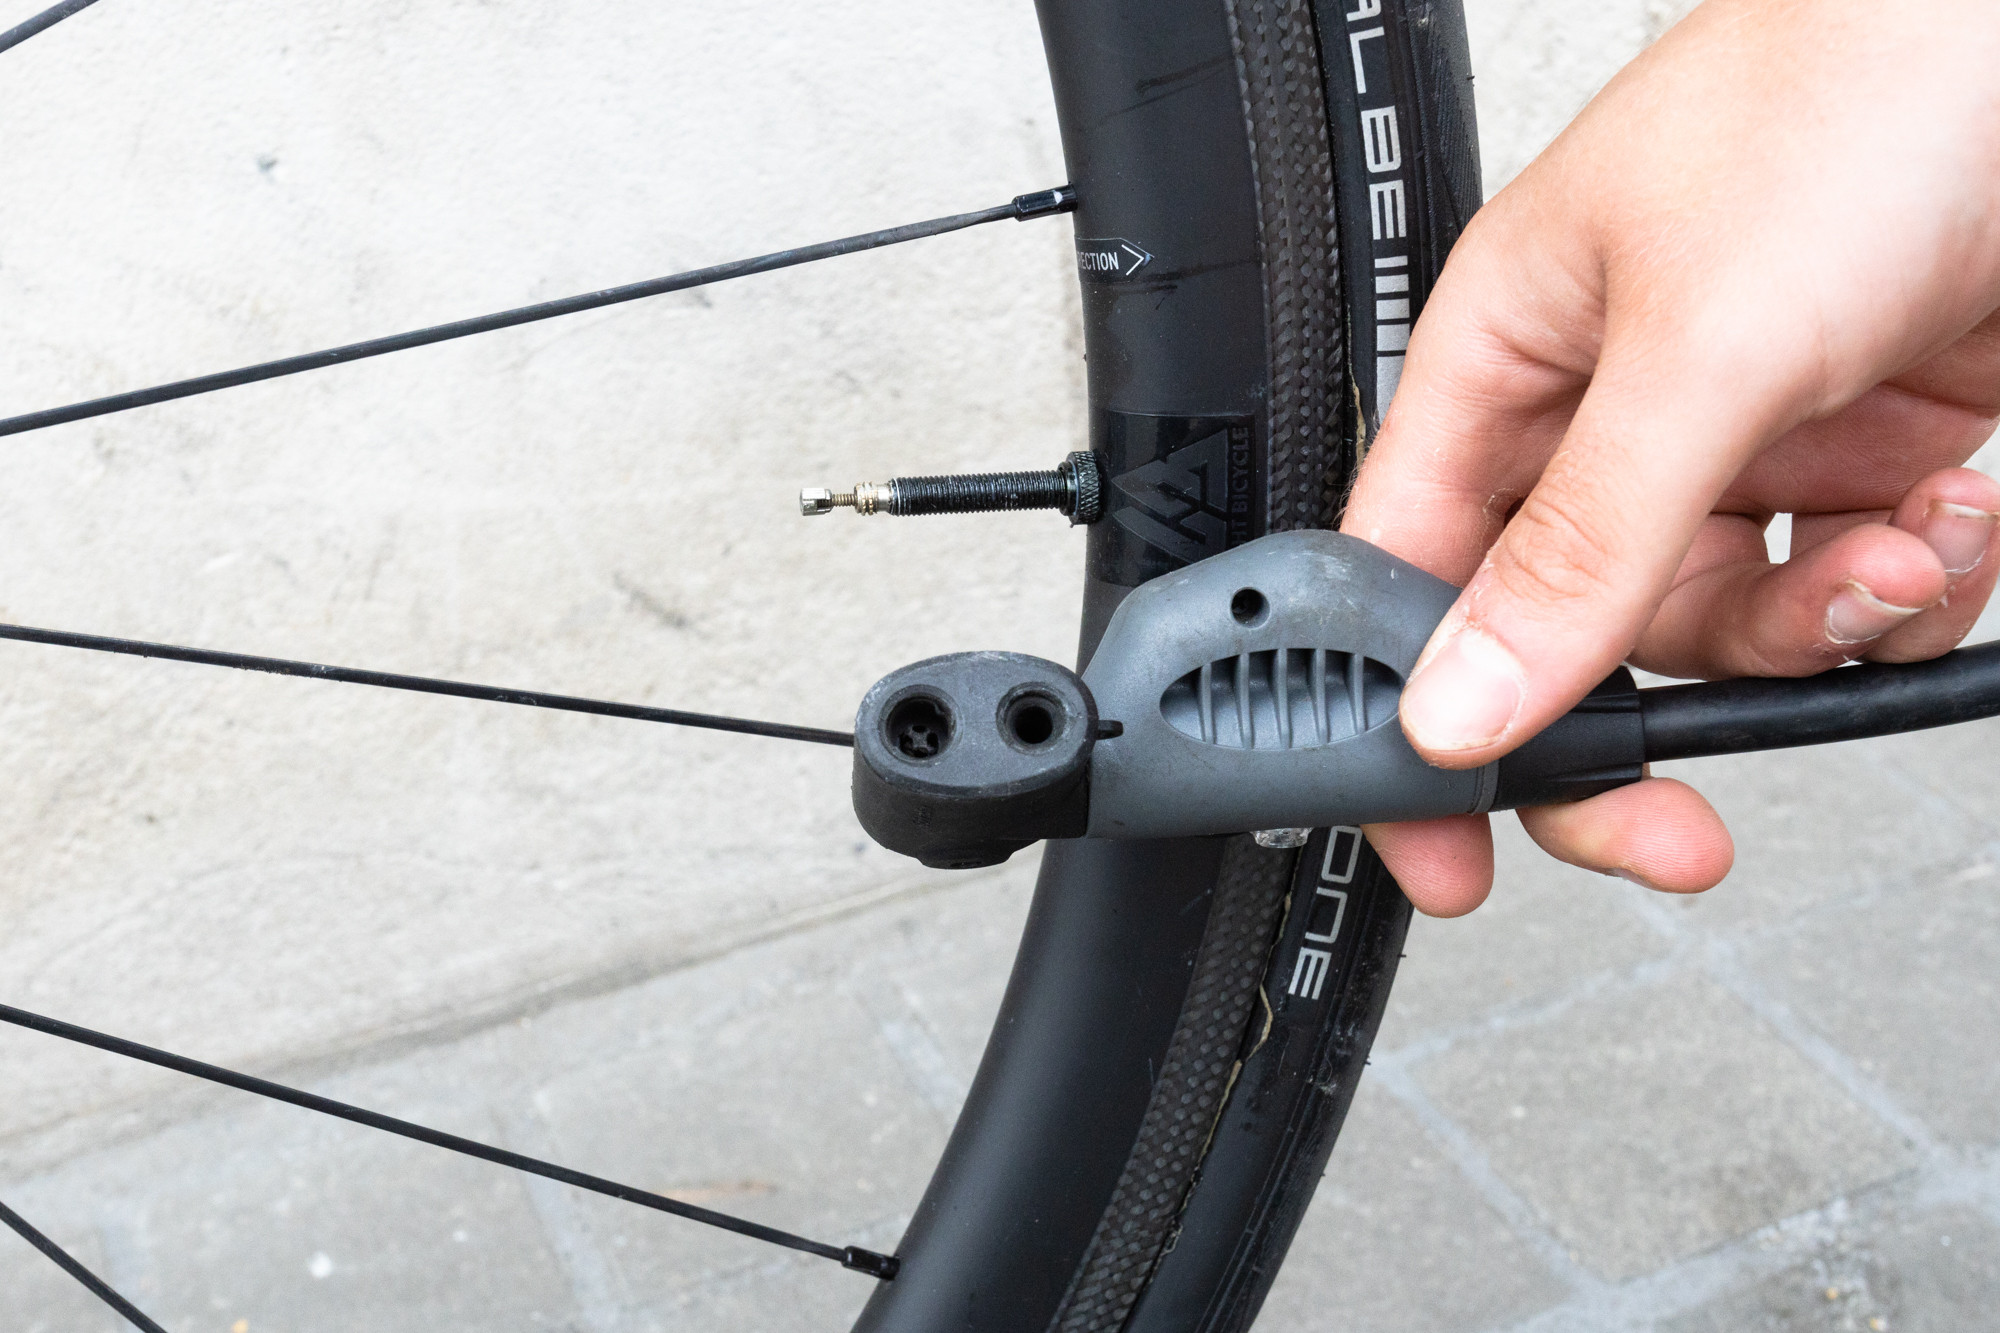
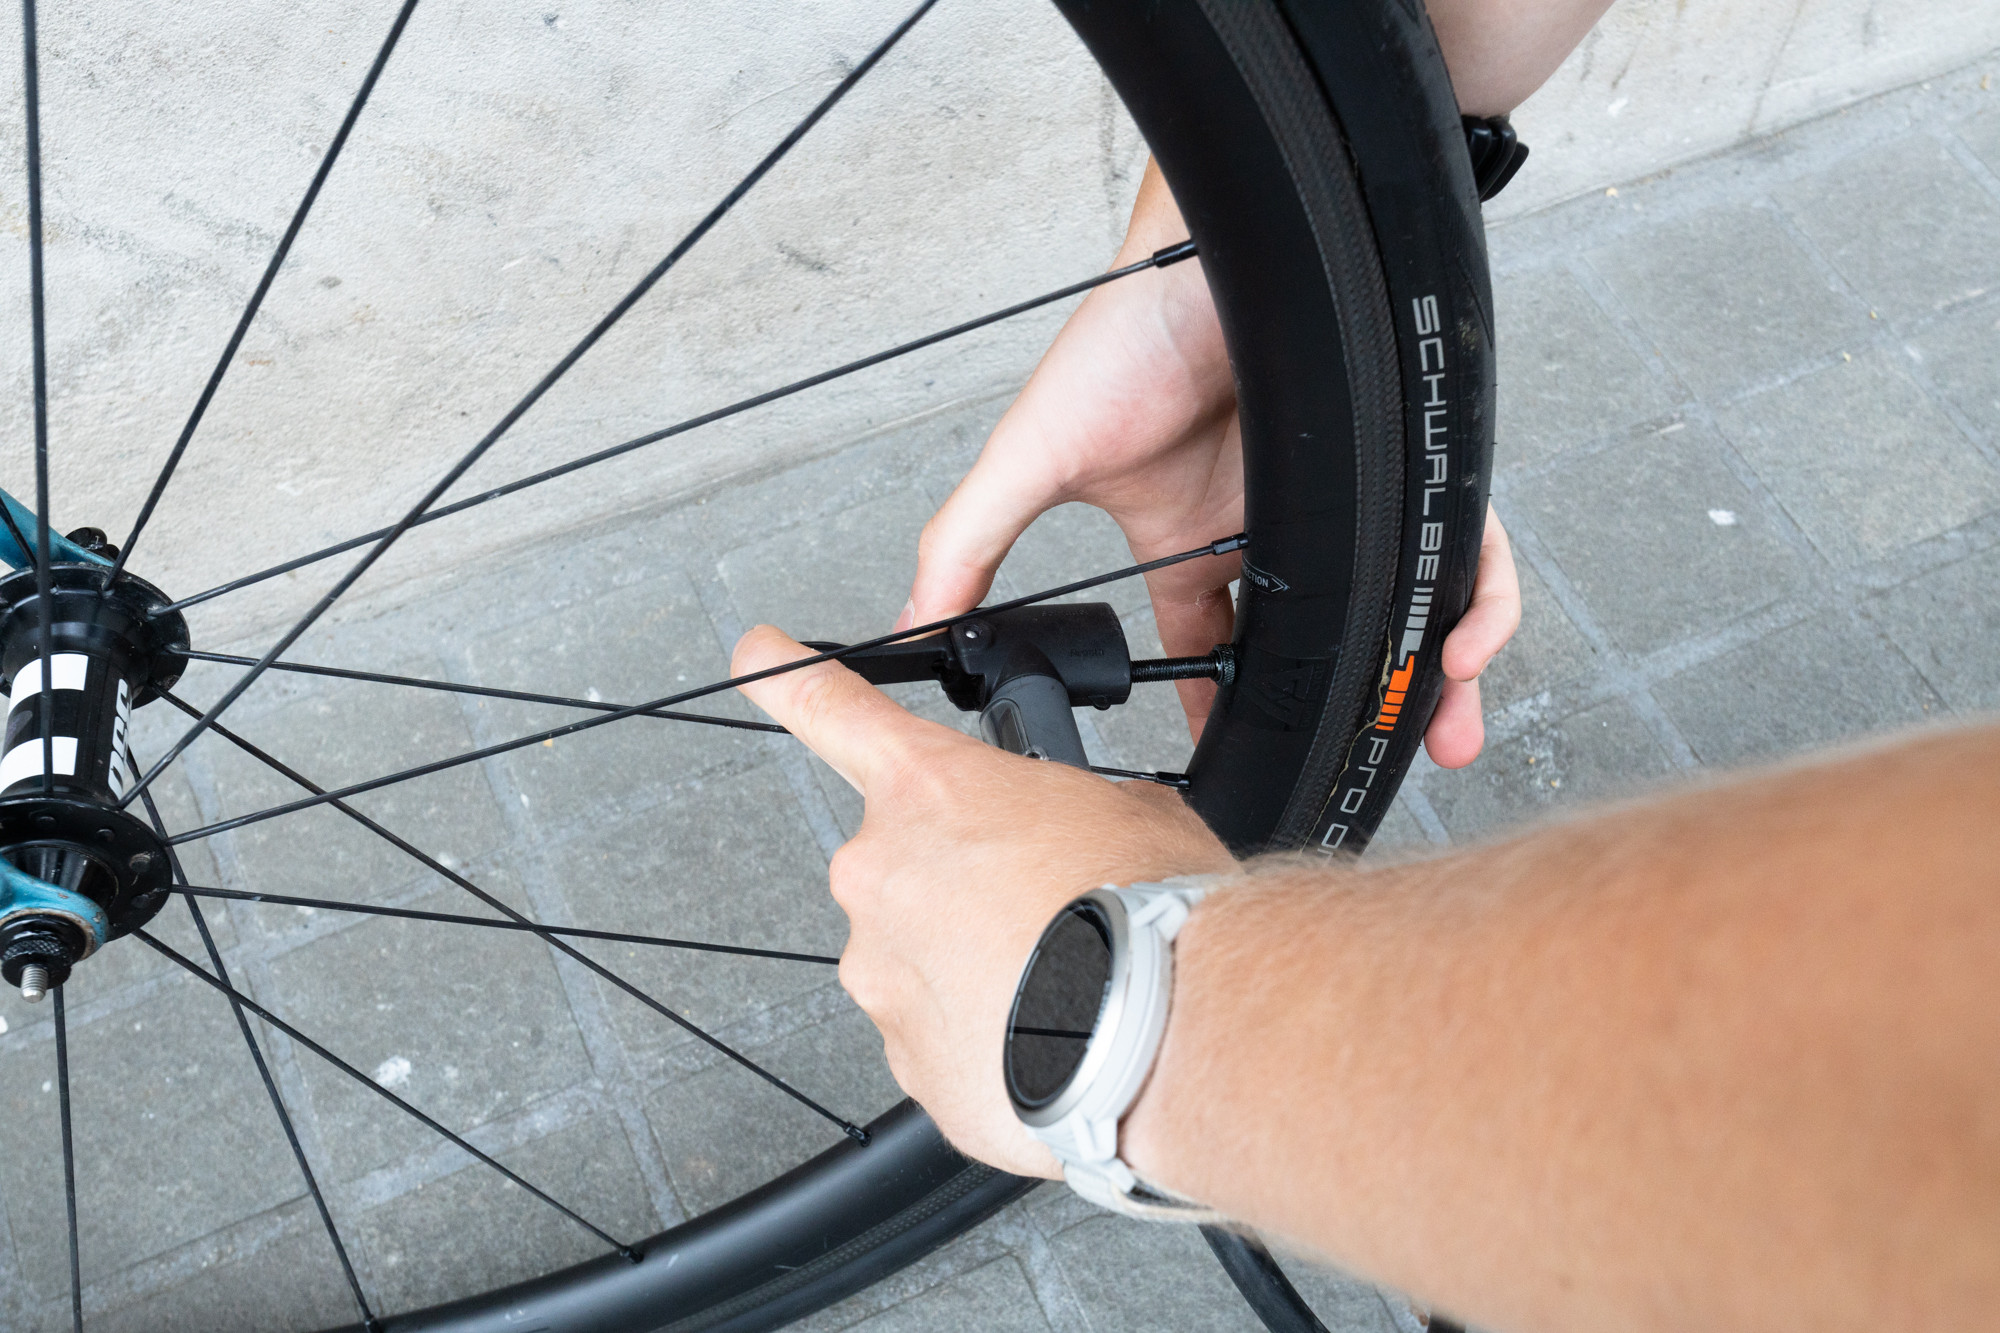
3. Securely Attach the Pump Head to the Valve
Now, attach the pump head to the prepared valve.
Attaching to a Presta Valve: Carefully push the pump head straight onto the valve. Presta valves are more delicate than Schrader valves, so avoid applying excessive sideways force which could bend or damage the valve core.
Attaching to a Schrader Valve: Push the pump head onto the valve. Schrader valves are more robust and can handle a firmer connection.
Pump head designs vary. Some feature a lever that needs to be flipped to lock the head securely onto the valve. Others create a seal simply by firmly pressing them onto the valve. Listen for a secure engagement and ensure the pump head is straight on the valve. A hissing sound during attachment is normal as some air escapes momentarily, but it should stop once properly sealed.
If you are pumping a completely flat tire, you might find the valve pushes back into the rim, making it tricky to attach the pump head. To counter this, gently hold the valve in place from behind the tire with your fingers while attaching the pump head.
 Demonstration of locking the pump lever to secure the connection to the bike valve for effective inflation.
Image alt text: Locking the pump lever on a Presta valve for a secure fit.
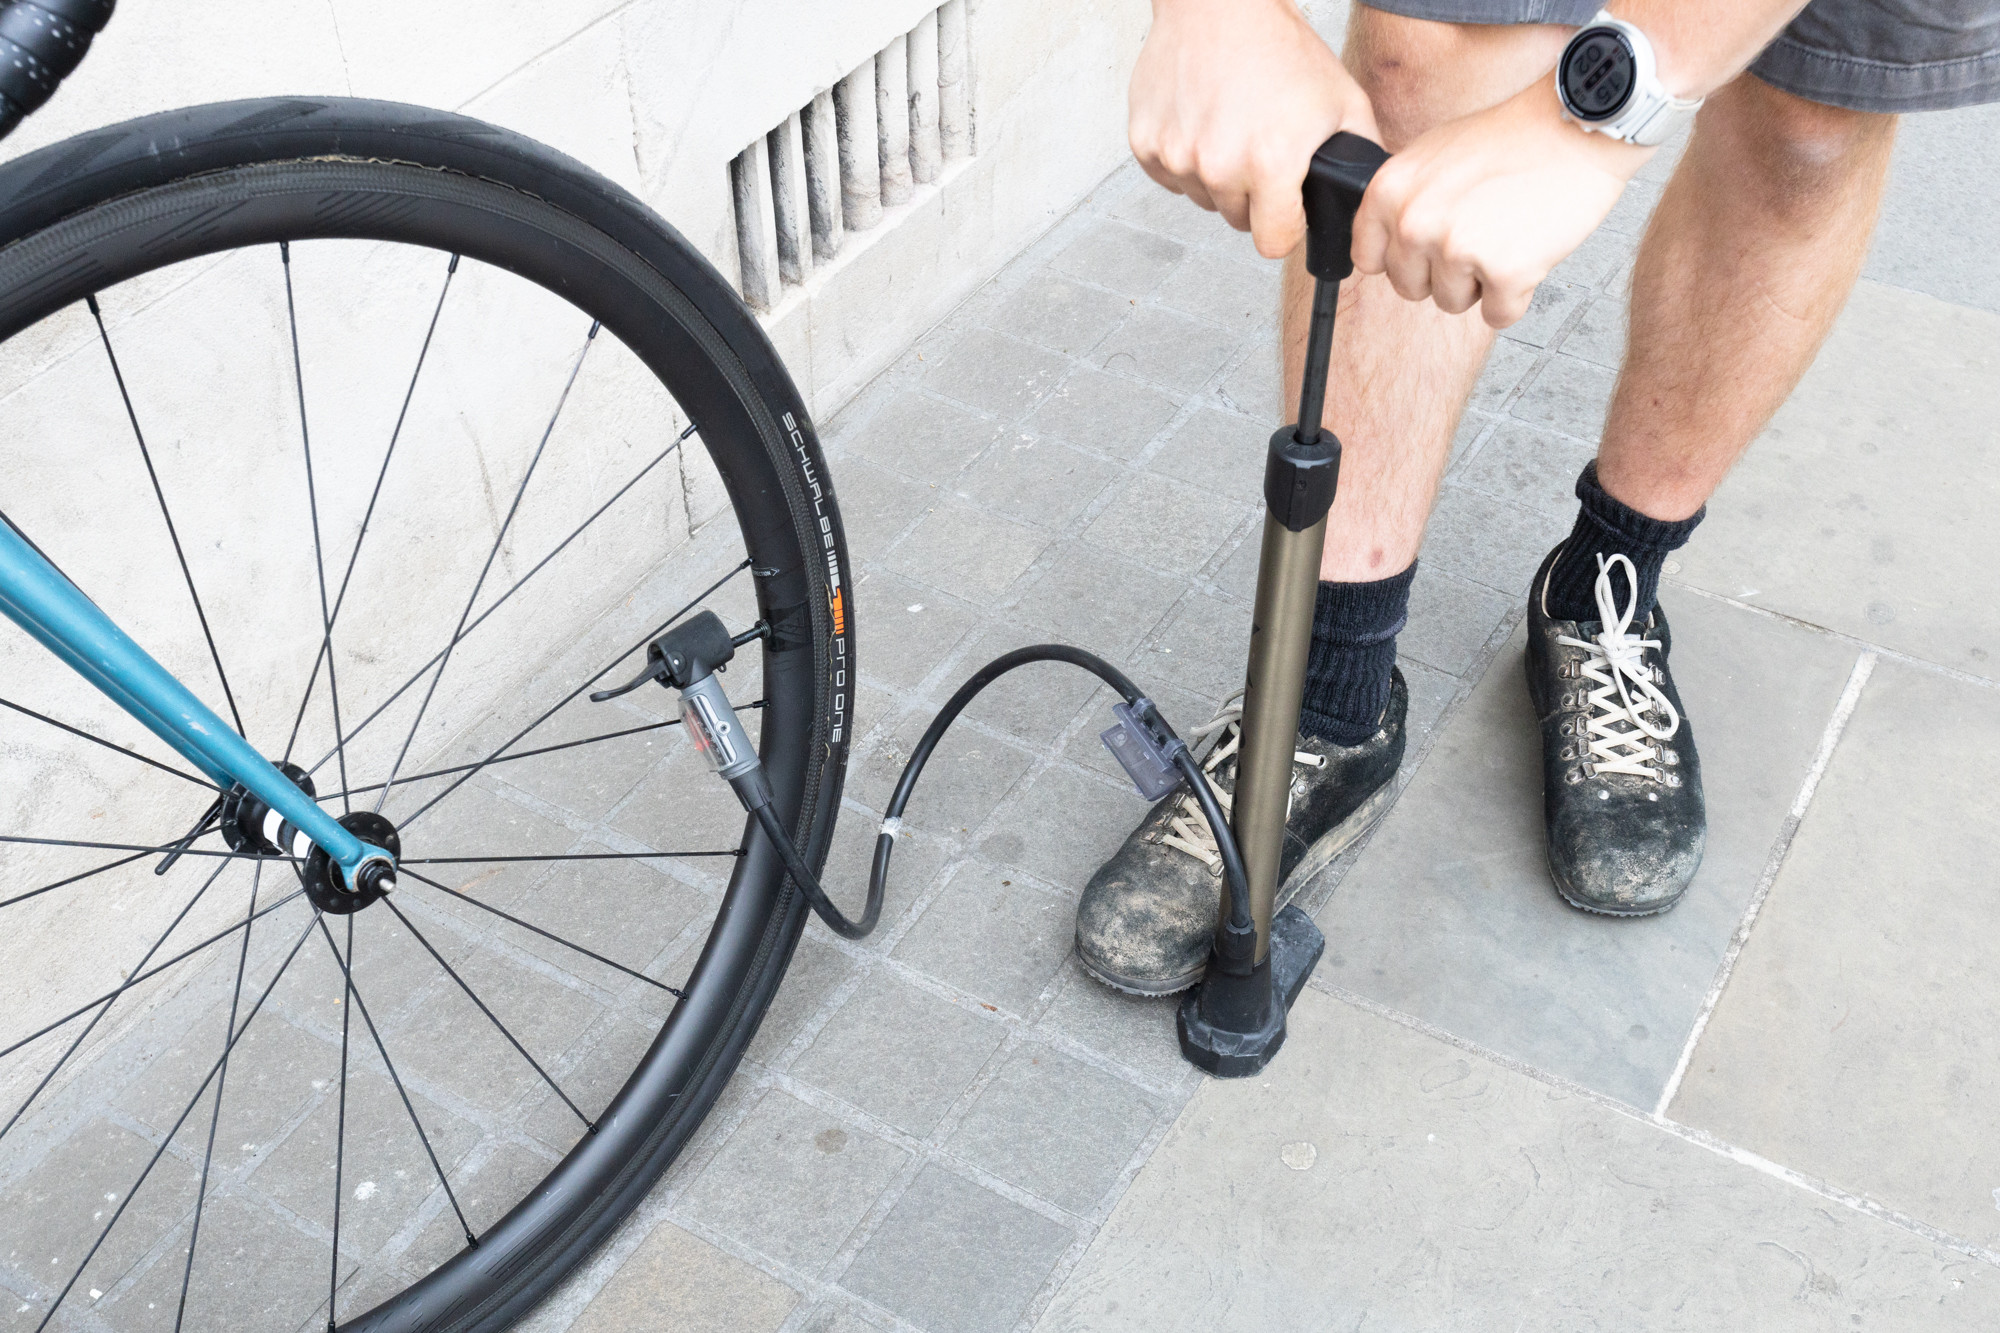
4. Inflate the Tire to the Correct Pressure
Begin pumping air into the tire. Use smooth, full strokes of the pump. If you’re using a track pump, utilize your body weight in addition to your arm strength on the downstroke. This makes inflation much easier and faster, particularly at higher pressures.
Keep an eye on the pressure gauge if your pump has one. If you don’t have a gauge, you can periodically squeeze the tire to get a sense of the pressure. However, using a pump with a gauge is highly recommended for accuracy.
If the tire isn’t inflating, double-check that the pump head is correctly and securely attached to the valve. If it’s still not inflating, or if the tire rapidly loses air after pumping, you might have a puncture in the inner tube.
 Action shot of inflating a bike tire with a track pump, emphasizing the technique for efficient air delivery.
Image alt text: Inflating a bike tire using a track pump to the desired pressure.
5. Detach the Pump Head
Once you’ve reached the desired pressure, it’s time to remove the pump head from the valve.
If your pump head has a locking lever, flip it back to the open position. Then, quickly and smoothly pull the pump head straight off the valve. It’s normal to hear a brief hissing sound as you detach the pump – this is just air escaping from the pump hose, not from your tire valve.
 Action of removing the pump head from the valve, illustrating the quick release to minimize air loss.
Image alt text: Removing the pump head from the Presta valve after inflation.
6. Secure the Valve
After inflating and removing the pump, finish by securing the valve.
For Presta Valves: Screw the threaded lockring clockwise back down to the valve stem until it is finger-tight. Then, if your valve had a dust cap, reinstall it.
For Schrader Valves: Simply reinstall the dust cap. The Schrader valve has a spring-loaded core that automatically seals shut.
 Final step of securing the bike valve by closing the lockring and replacing the dust cap for protection.
Image alt text: Closing the Presta valve and reattaching the dust cap.
Understanding Bike Valve Types: Presta, Schrader, and More
Knowing your bike valve type is crucial for using the correct pump and ensuring proper inflation. Let’s explore the common types you might encounter.
Presta Valve
Presta valves are the more slender of the two common types and are typically found on road bikes and higher-end bicycles. They are also known as Sclaverand or French valves.
Key Features of Presta Valves:
- Narrower Diameter: Requires a smaller valve hole in the rim, which can contribute to rim strength.
- Lockring: Features a lockring to seal the valve shut and prevent air from escaping.
- Higher Pressure Capability: Generally better suited for higher tire pressures used in road cycling.
- Often Found On: Road bikes, high-performance mountain bikes, and gravel bikes.
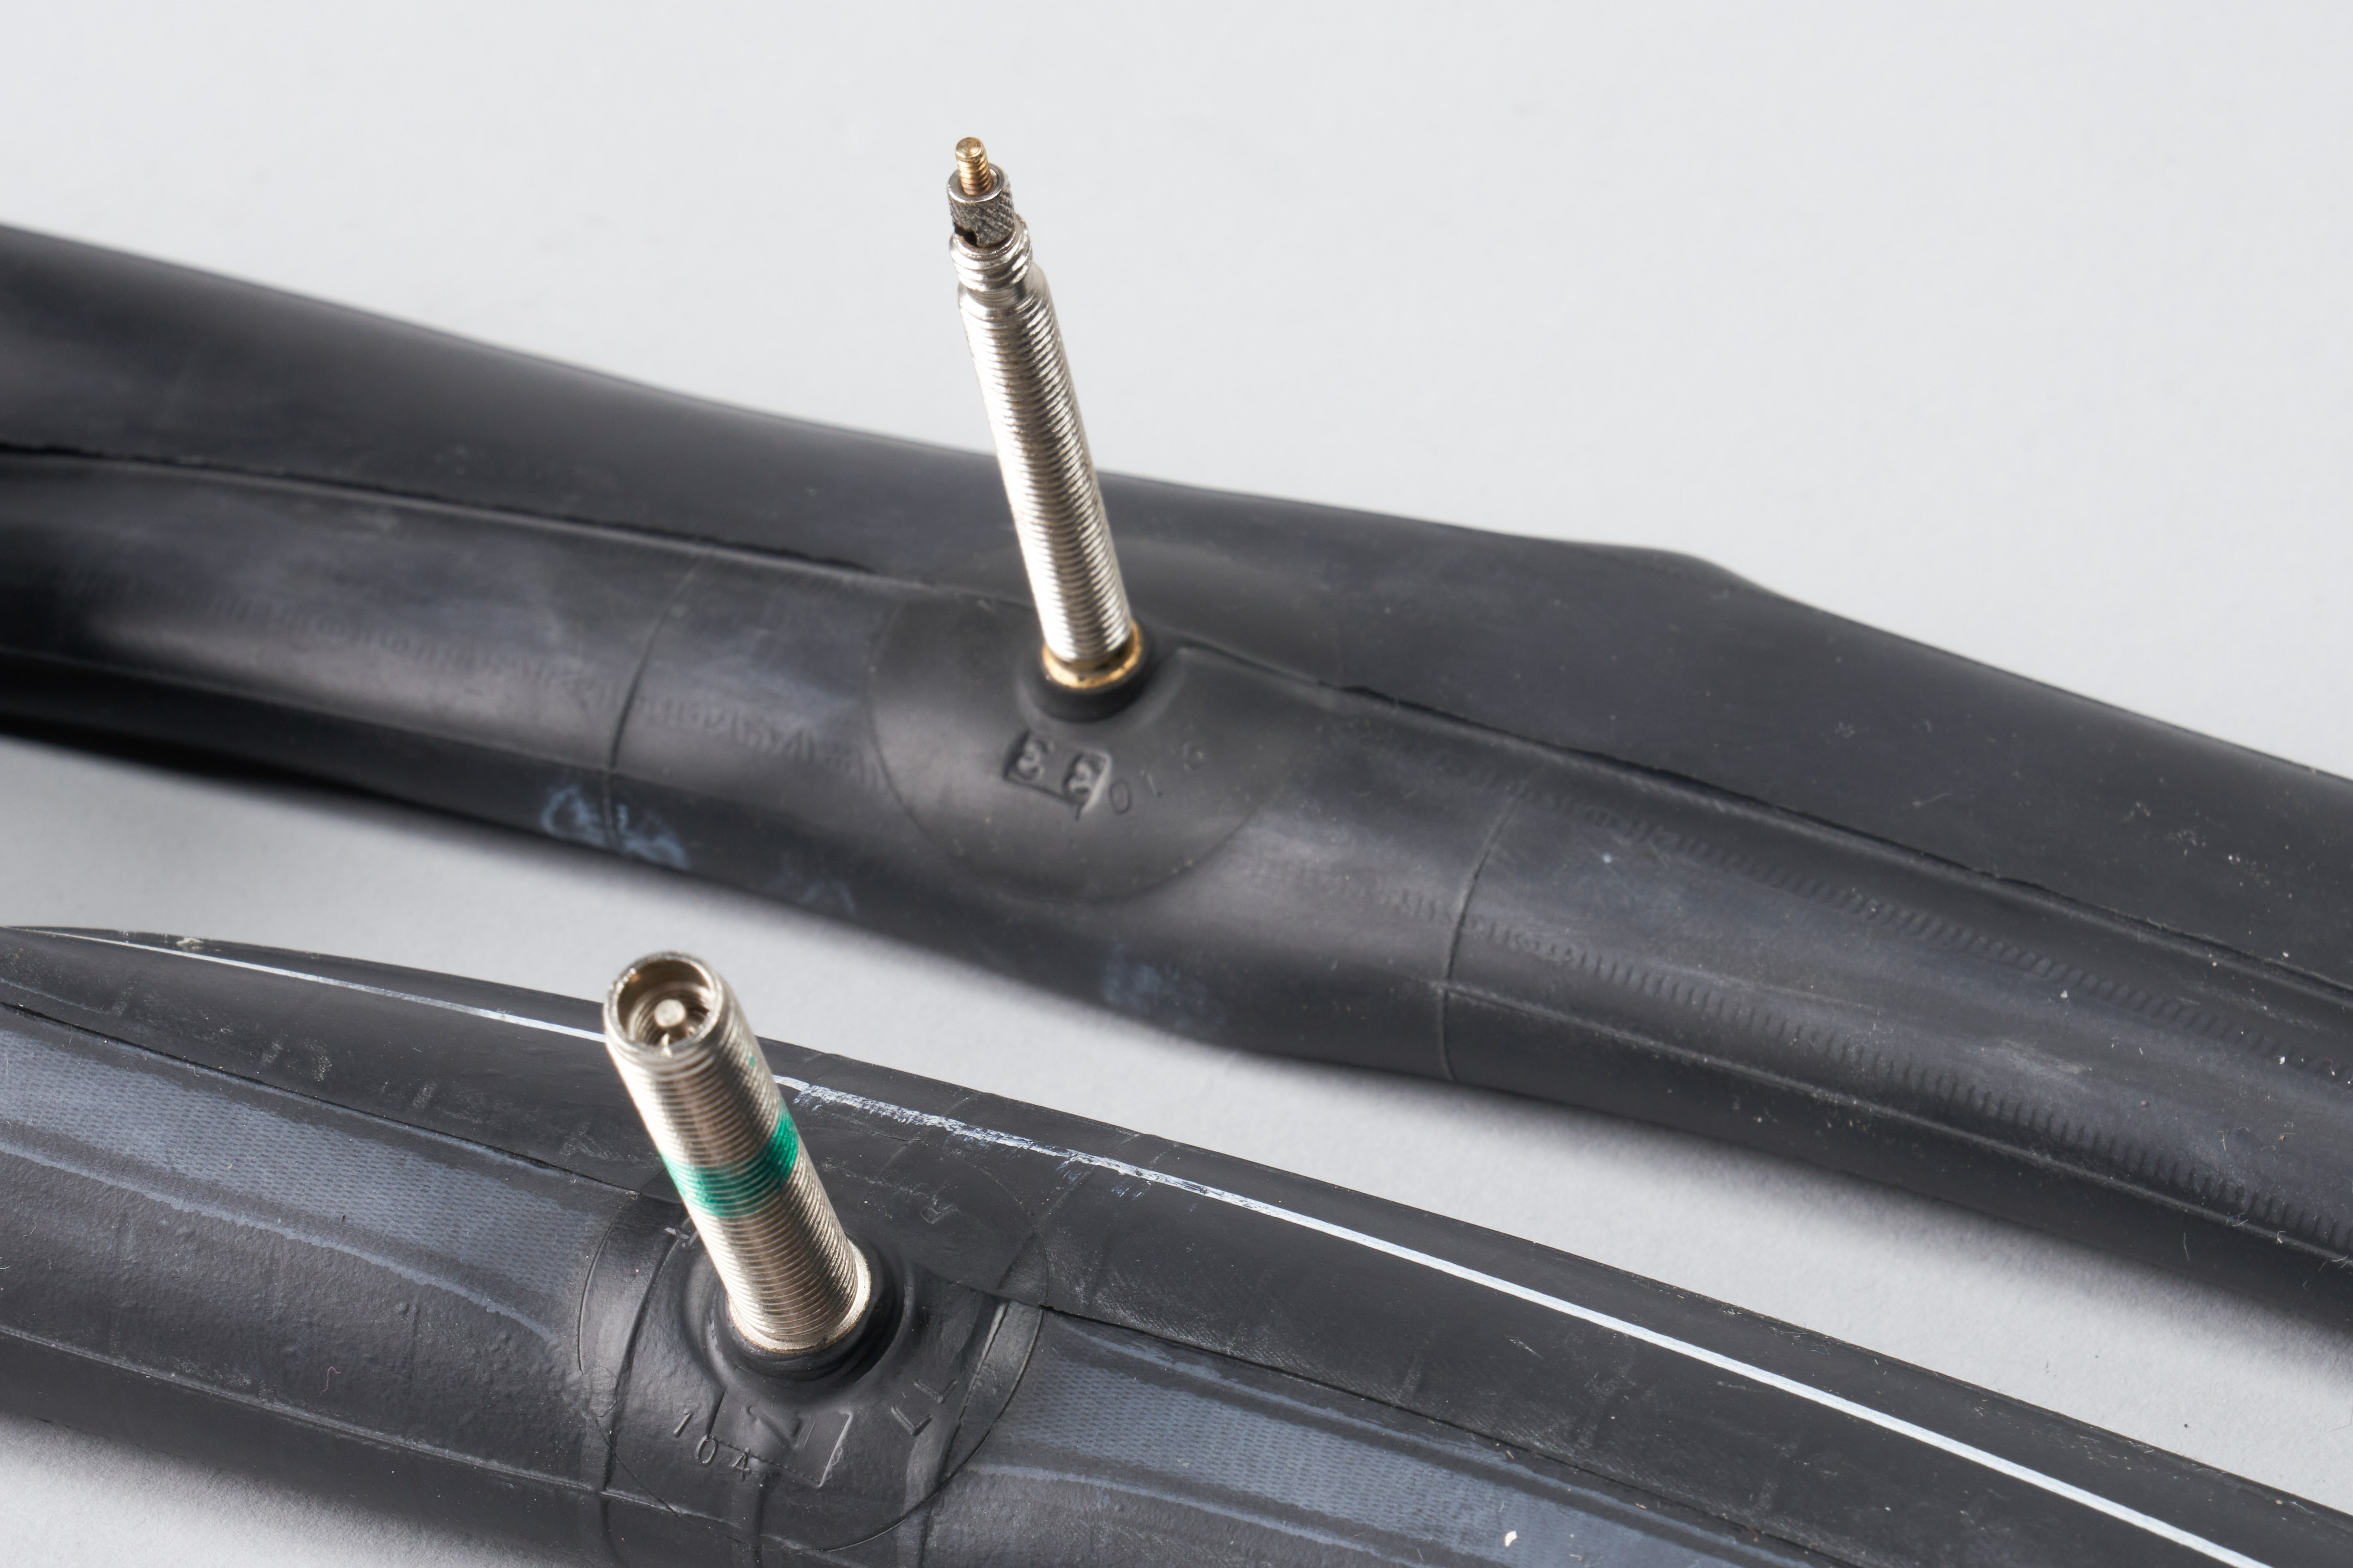 Comparison image highlighting the distinct appearances of Presta and Schrader valves, showcasing their design differences.
Image alt text: Side-by-side comparison of Presta and Schrader bike valves.
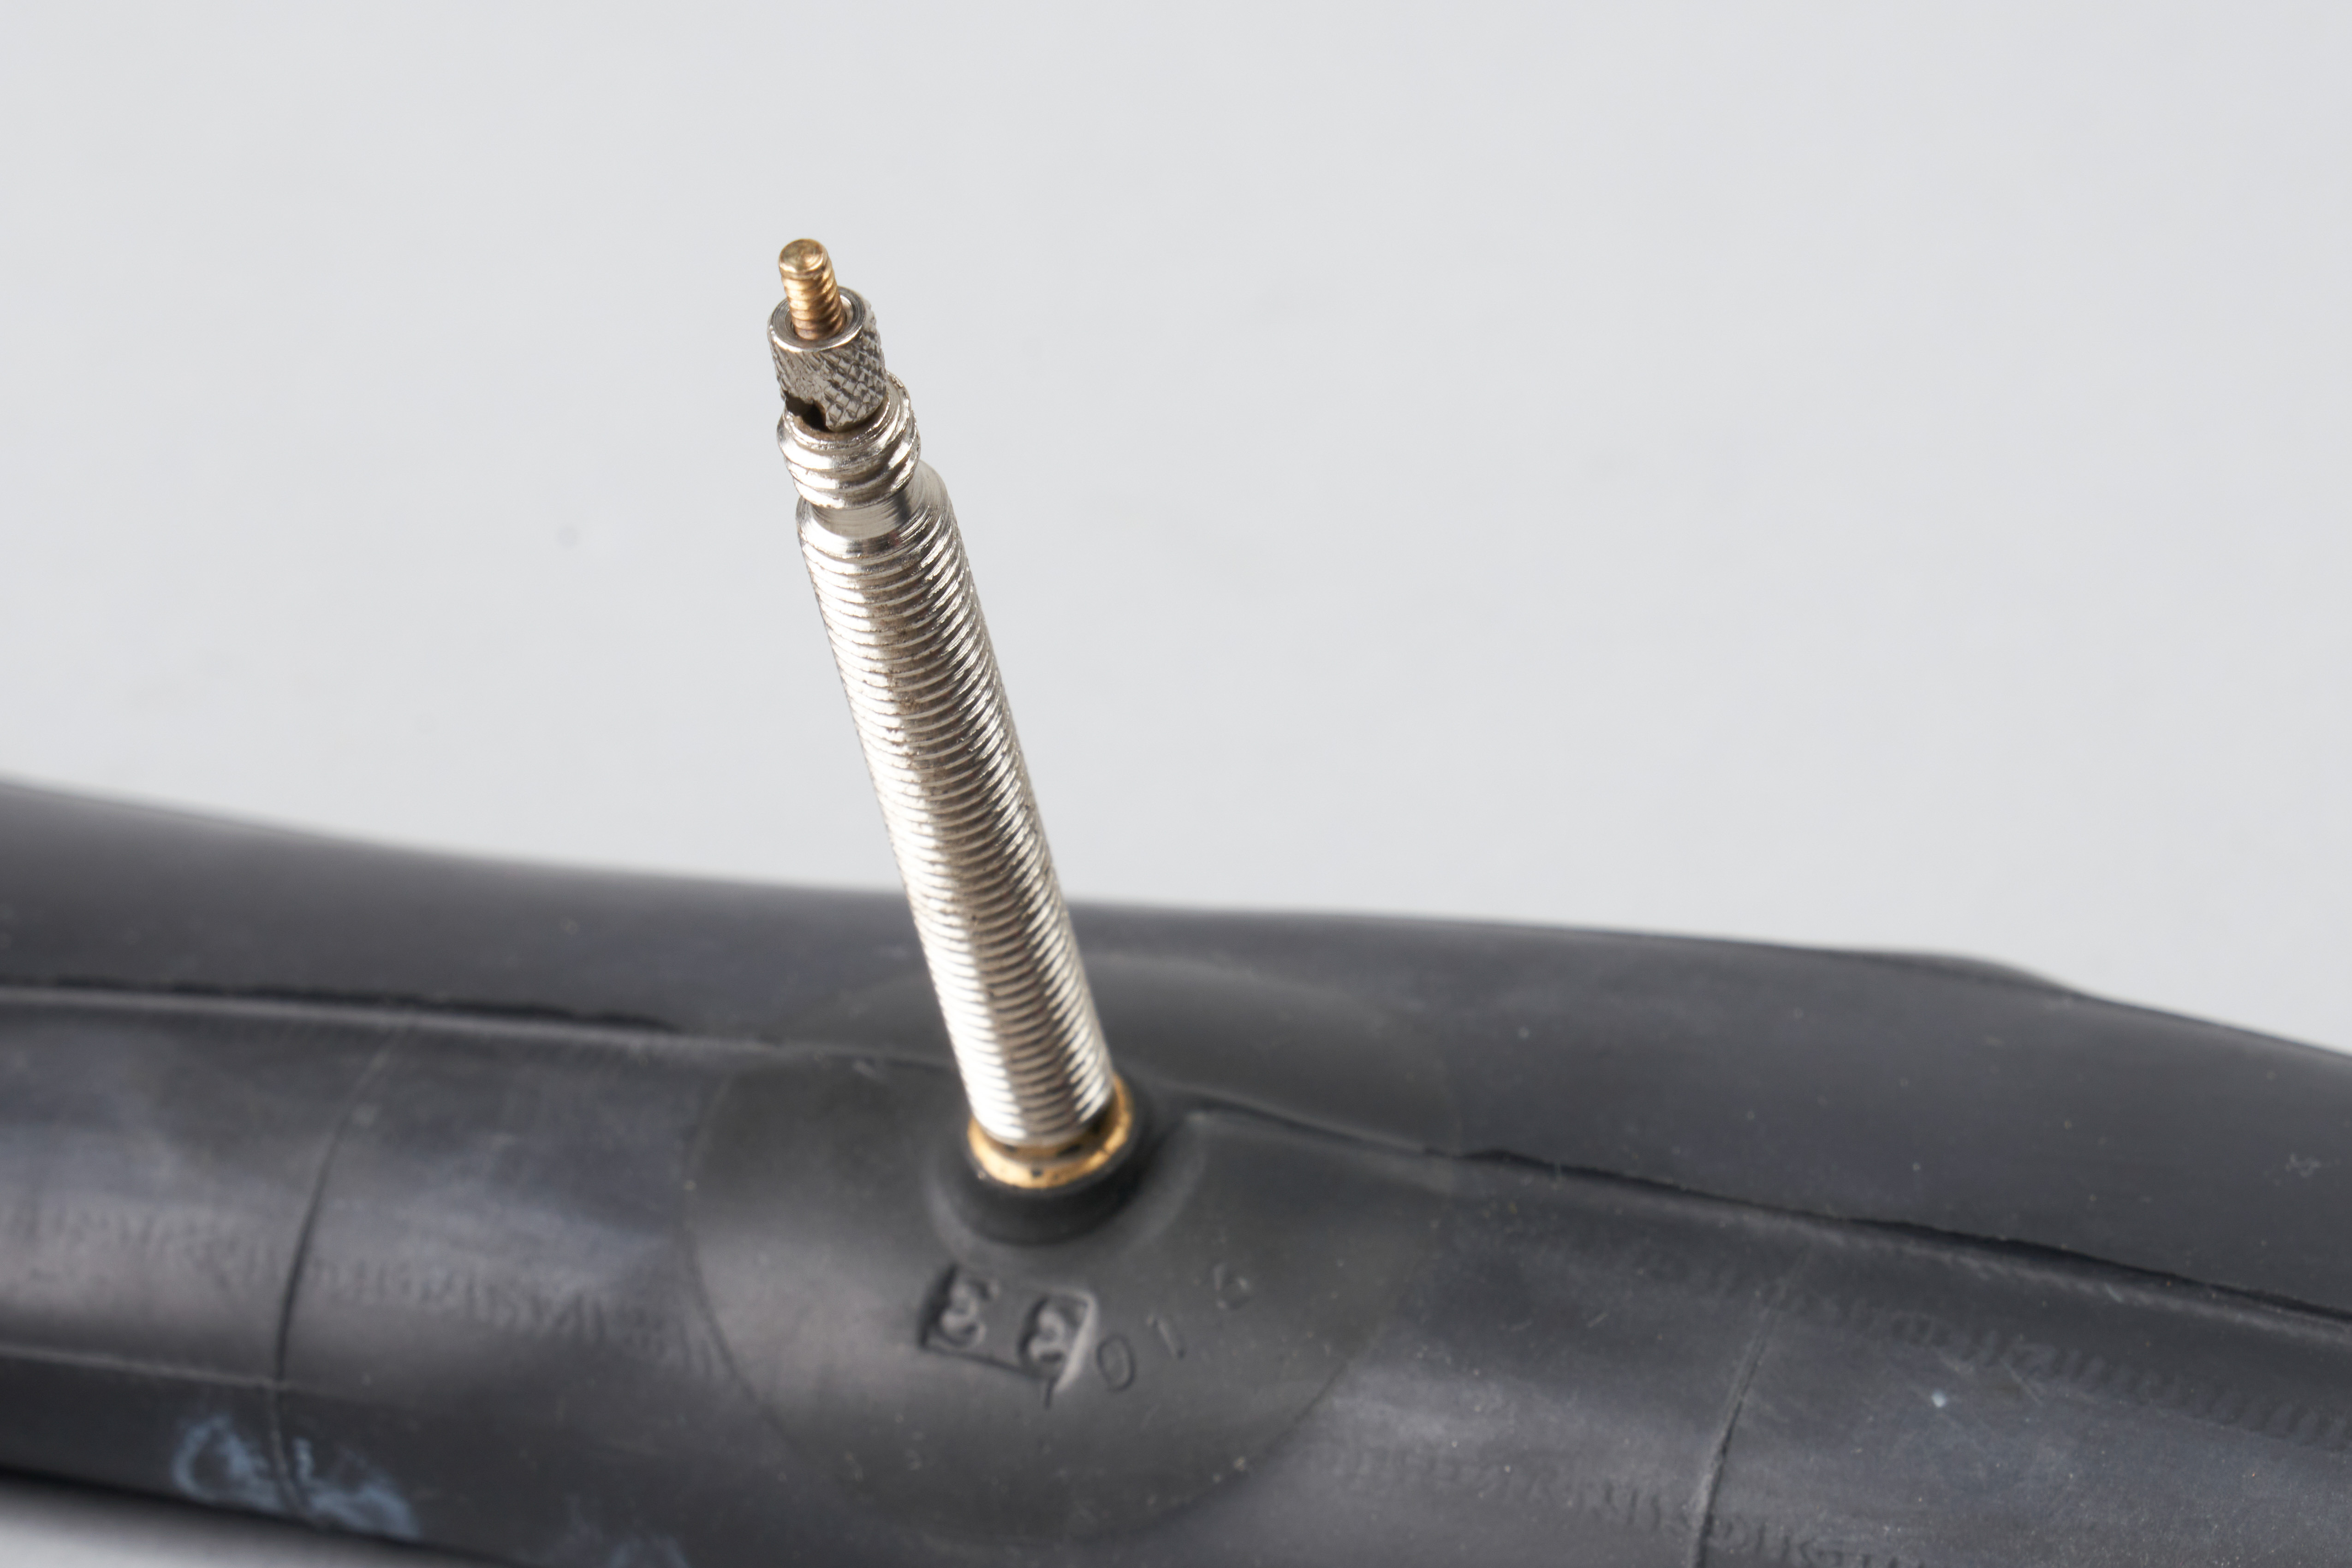 Detailed view of a Presta valve, emphasizing its slender design and components like the valve core and lock nut.
Image alt text: Close-up of a Presta valve, commonly used on performance bicycles.
Schrader Valve
Schrader valves are wider and sturdier than Presta valves, and are the same type of valve found on car tires. They are also known as American valves.
Key Features of Schrader Valves:
- Wider Diameter: More robust and less prone to damage.
- Spring-Loaded Core: Features a spring-loaded core that seals automatically, preventing air from escaping once the pump is removed.
- Simpler to Inflate: Generally easier to inflate at gas stations or with generic air compressors due to their similarity to car tire valves.
- Often Found On: Mountain bikes, hybrid bikes, comfort bikes, and children’s bikes.
 Detailed view of a Schrader valve, highlighting its wider, robust design and the internal spring mechanism.
Image alt text: Close-up of a Schrader valve, frequently found on mountain and hybrid bikes.
Dunlop/Woods Valve
Dunlop valves, also known as Woods valves, are less common in many parts of the world but are still prevalent in some European countries, particularly on older or Dutch-style bikes.
Key Features of Dunlop/Woods Valves:
- Similar to Presta Core: Uses a valve core similar to a Presta valve but within a wider Schrader-like valve body.
- Simple Inflation: Can often be inflated with Presta or Schrader pumps, sometimes requiring slight adjustments to the pump head.
- Traditional Design: Less common on modern performance bikes.
- Often Found On: Older bikes, Dutch-style city bikes.
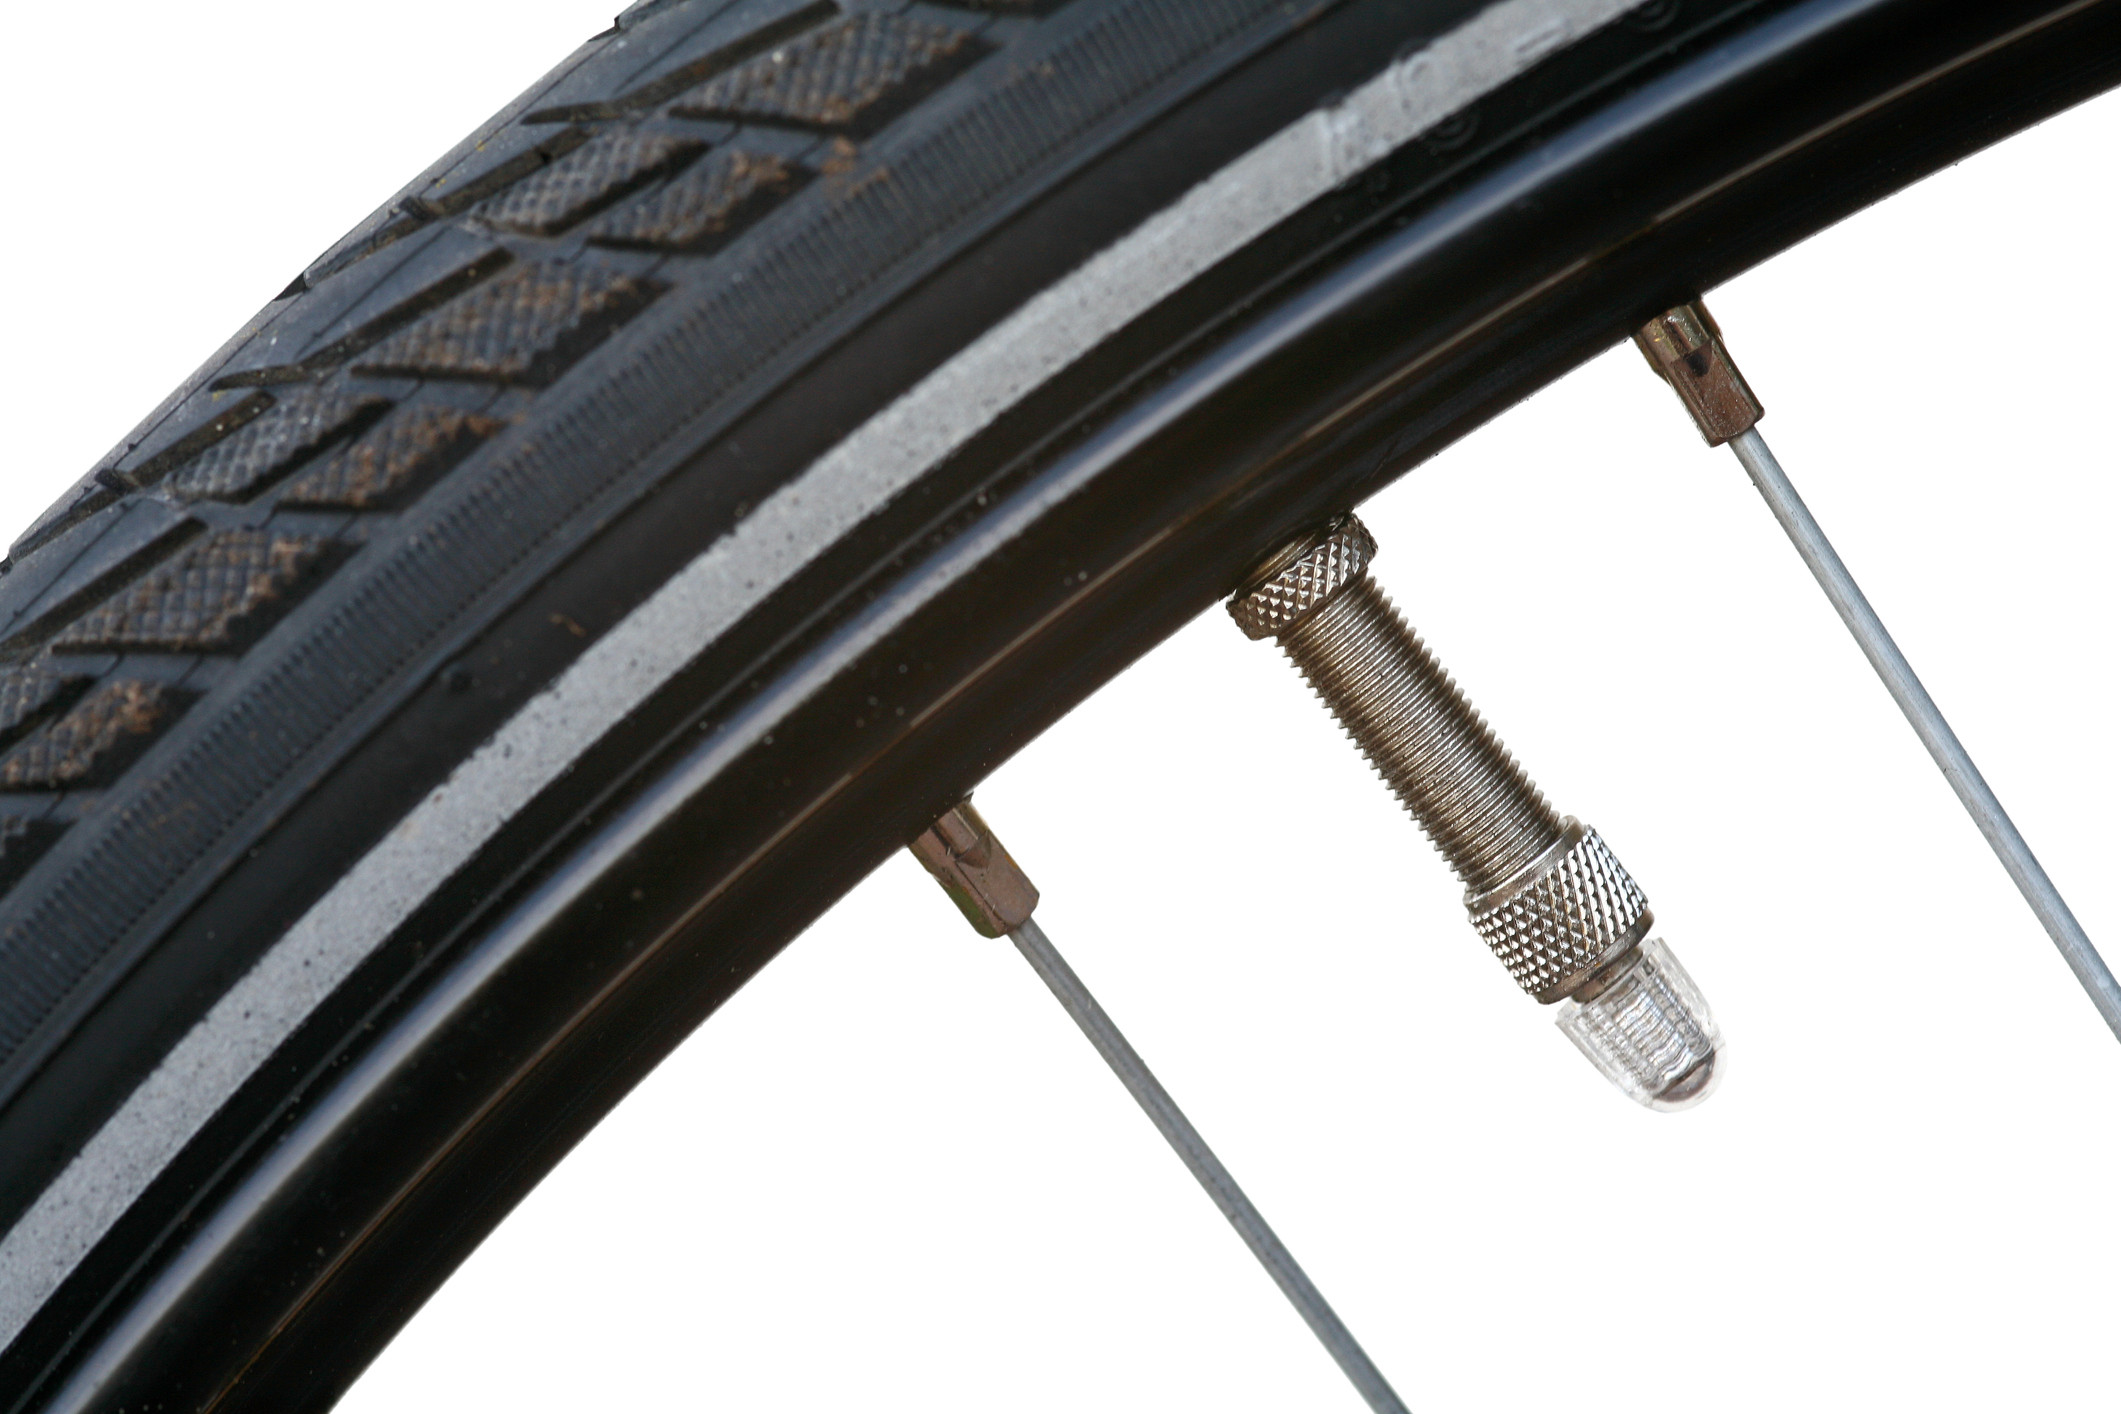 Image of a Dunlop valve, showcasing its classic design that is common on traditional European bicycles.
Image alt text: Dunlop valve, a traditional valve type seen on European city bikes.
Tubeless Valve
Tubeless valves are specifically designed for tubeless tire setups, where the tire seals directly to the rim without an inner tube. These valves attach directly to the rim and are usually Presta type, though Schrader tubeless valves exist.
Key Features of Tubeless Valves:
- Direct Rim Attachment: Threads directly into the rim with a locknut to create an airtight seal.
- Presta Dominant: Most tubeless valves are Presta, but Schrader versions are also available.
- Essential for Tubeless Systems: Required for maintaining air pressure in tubeless tire setups.
- Often Found On: Bikes set up with tubeless tires, especially mountain, gravel, and increasingly road bikes.
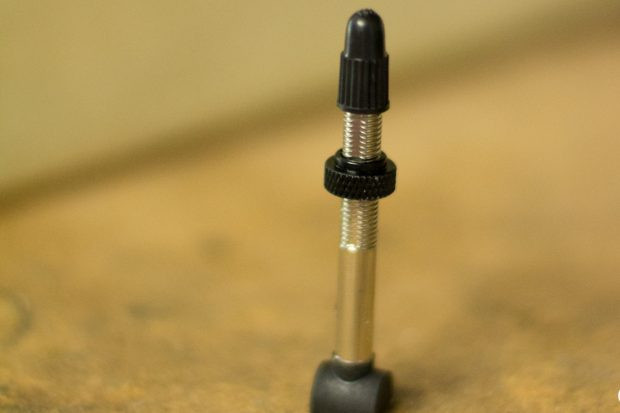 Image of tubeless valves, highlighting their variety in shapes and sizes designed for different rim profiles and tubeless setups.
Image alt text: Tubeless valves, essential components for tubeless bicycle tire systems.
Determining the Right Bike Tire Pressure (PSI)
Achieving the correct tire pressure is vital for ride quality, comfort, and performance. Tire pressure is measured in PSI (pounds per square inch) or BAR (metric unit, approximately equal to atmospheric pressure).
Why Correct Tire Pressure Matters:
- Comfort: Proper pressure allows the tire to absorb bumps and vibrations, improving ride comfort. Overinflated tires can feel harsh and transmit every road imperfection to the rider.
- Grip and Traction: Correct pressure optimizes the contact patch of the tire with the ground, maximizing grip, especially in corners and on varied surfaces.
- Rolling Resistance: Optimal pressure minimizes rolling resistance, making your ride more efficient and faster. Underinflated tires increase rolling resistance, requiring more effort to pedal.
- Puncture Prevention: Proper inflation reduces the risk of pinch flats (snakebite punctures) caused by the rim compressing the inner tube against the ground.
Finding Your Ideal Tire Pressure:
- Check Tire Sidewall: Most tires have a recommended pressure range printed on the sidewall. This range provides a starting point.
- Consider Rider Weight and Terrain: Heavier riders generally need higher pressures. Rougher terrain might benefit from slightly lower pressures for better comfort and grip.
- Experiment and Adjust: Tire pressure is not a fixed number. Experiment within the recommended range to find what feels best for your riding style and typical conditions.
- Use a Pressure Gauge: For accurate inflation, always use a pump with a pressure gauge. “Pinch testing” is unreliable and can lead to under or overinflation.
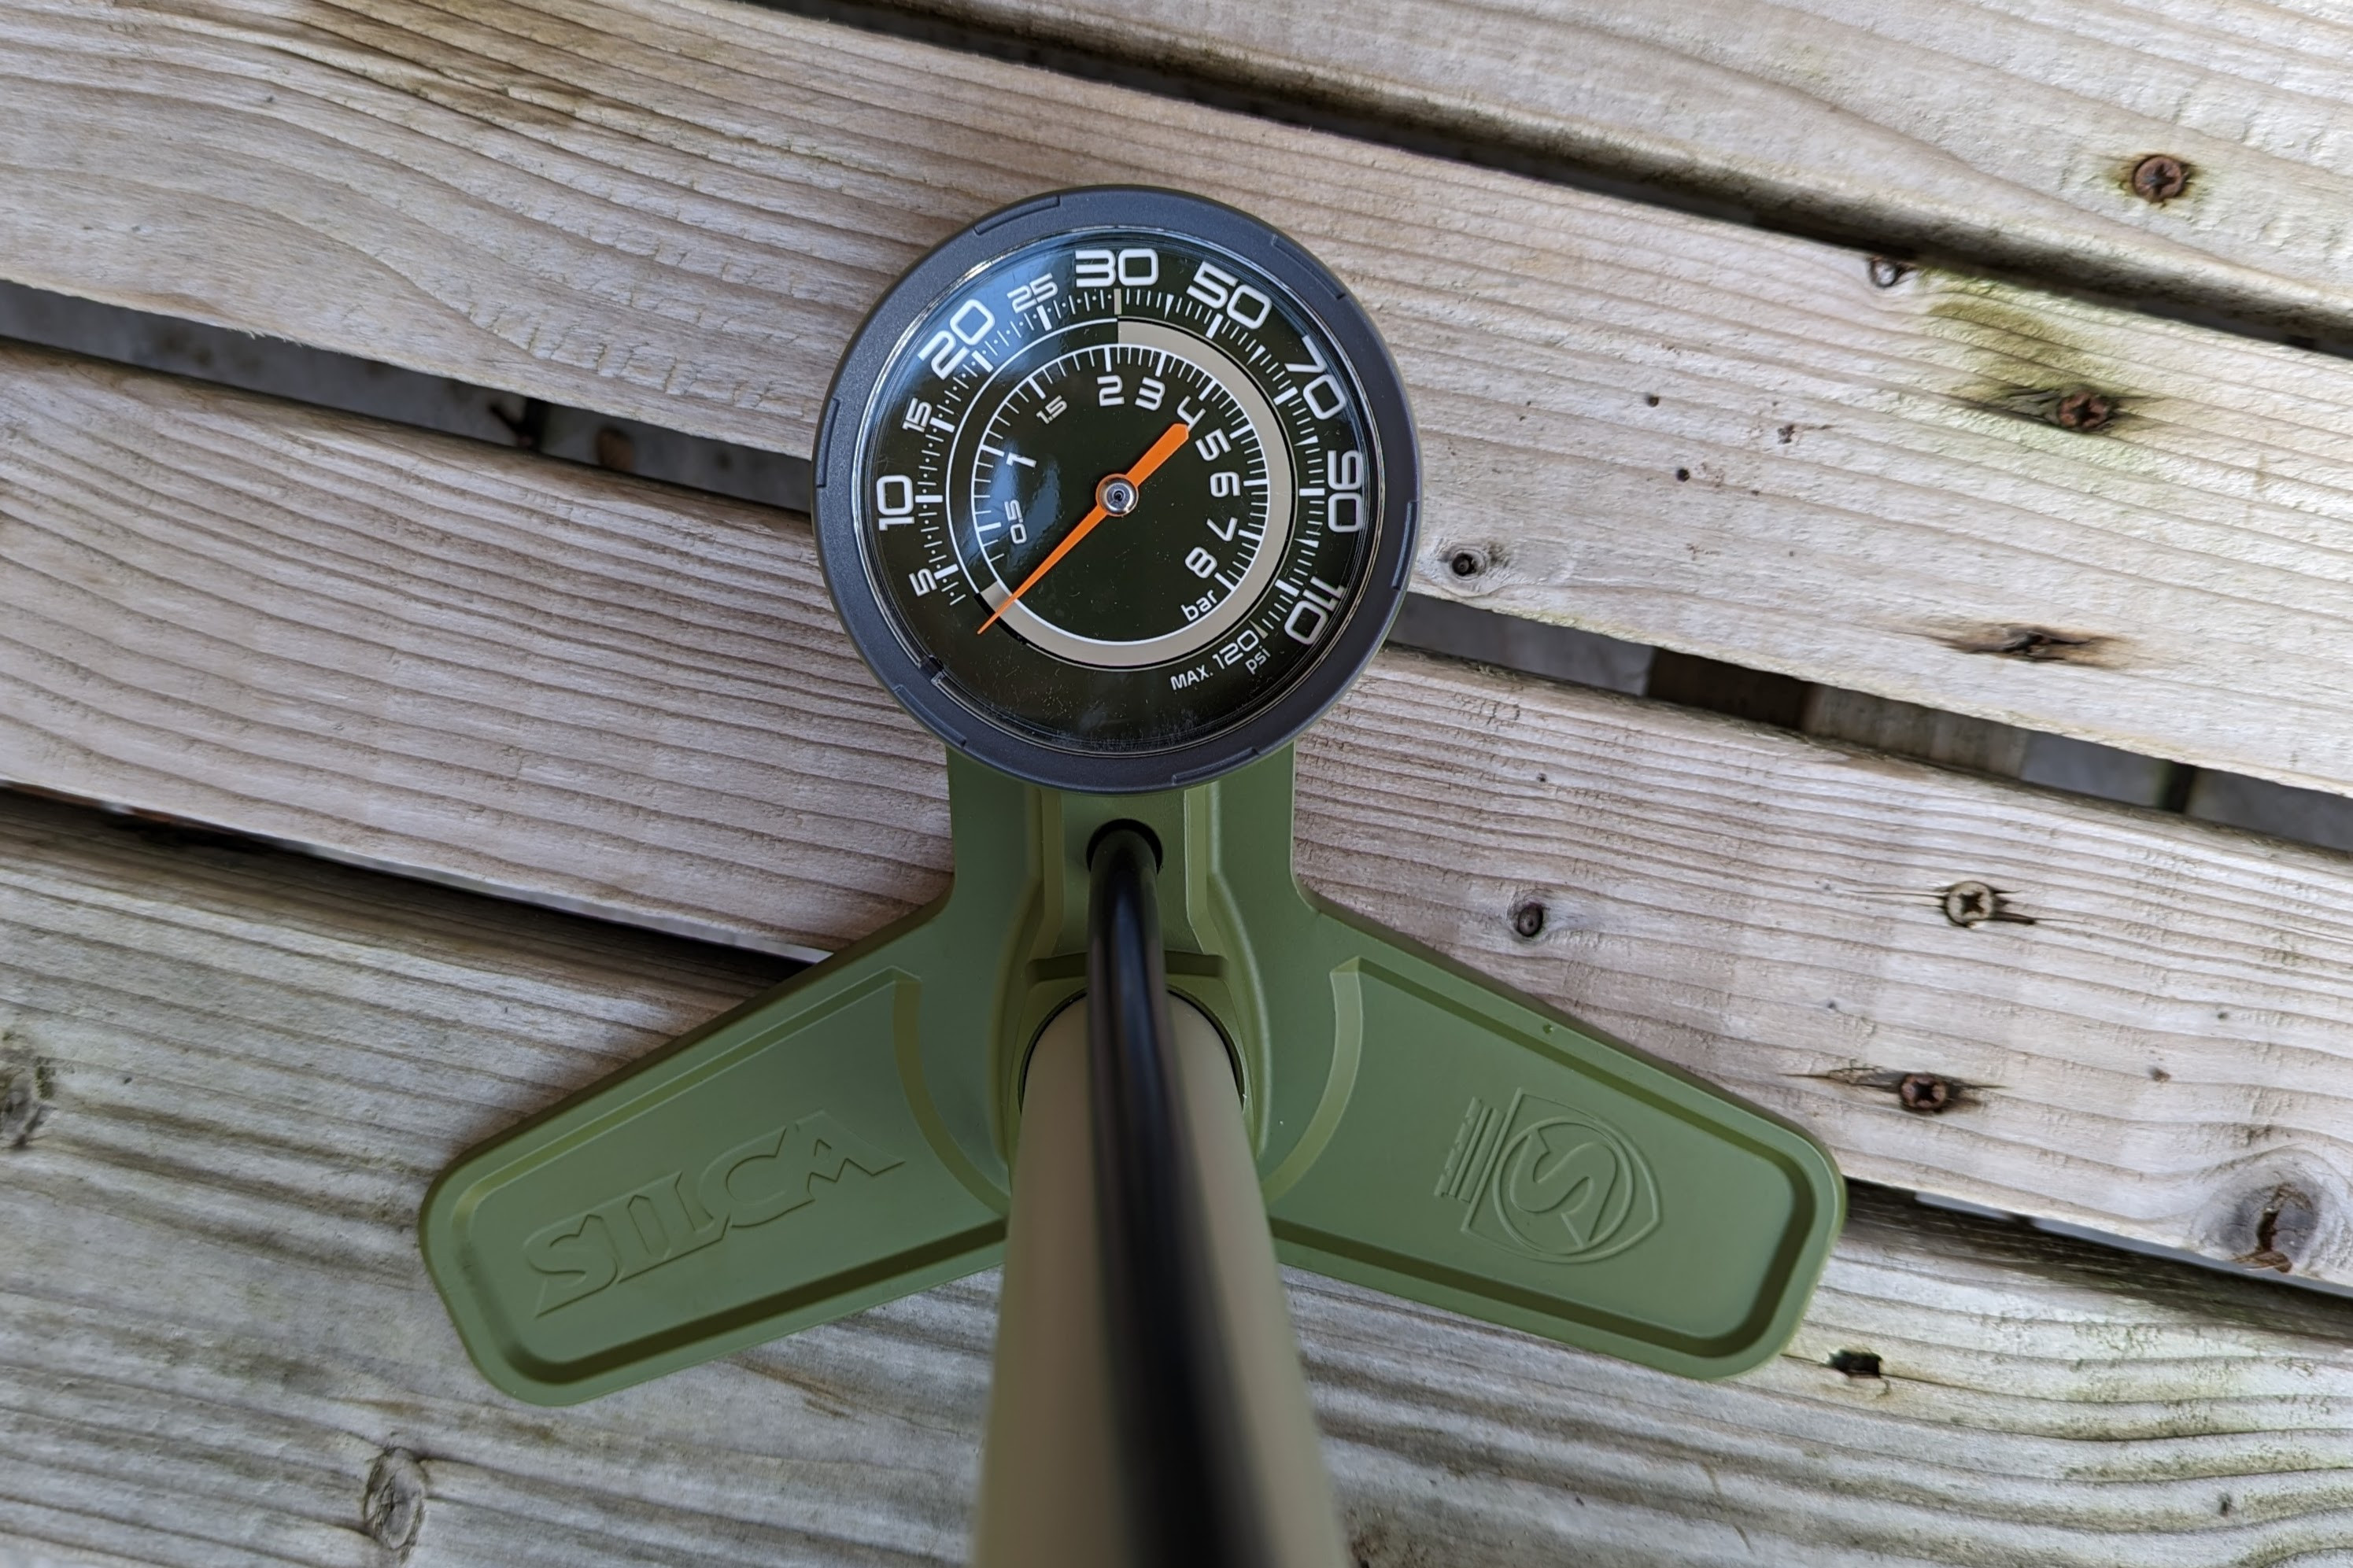 Image of a track pump gauge displaying pressure, emphasizing the importance of accurate pressure measurement for bike tires.
Image alt text: Pressure gauge on a track pump, crucial for accurate bike tire inflation.
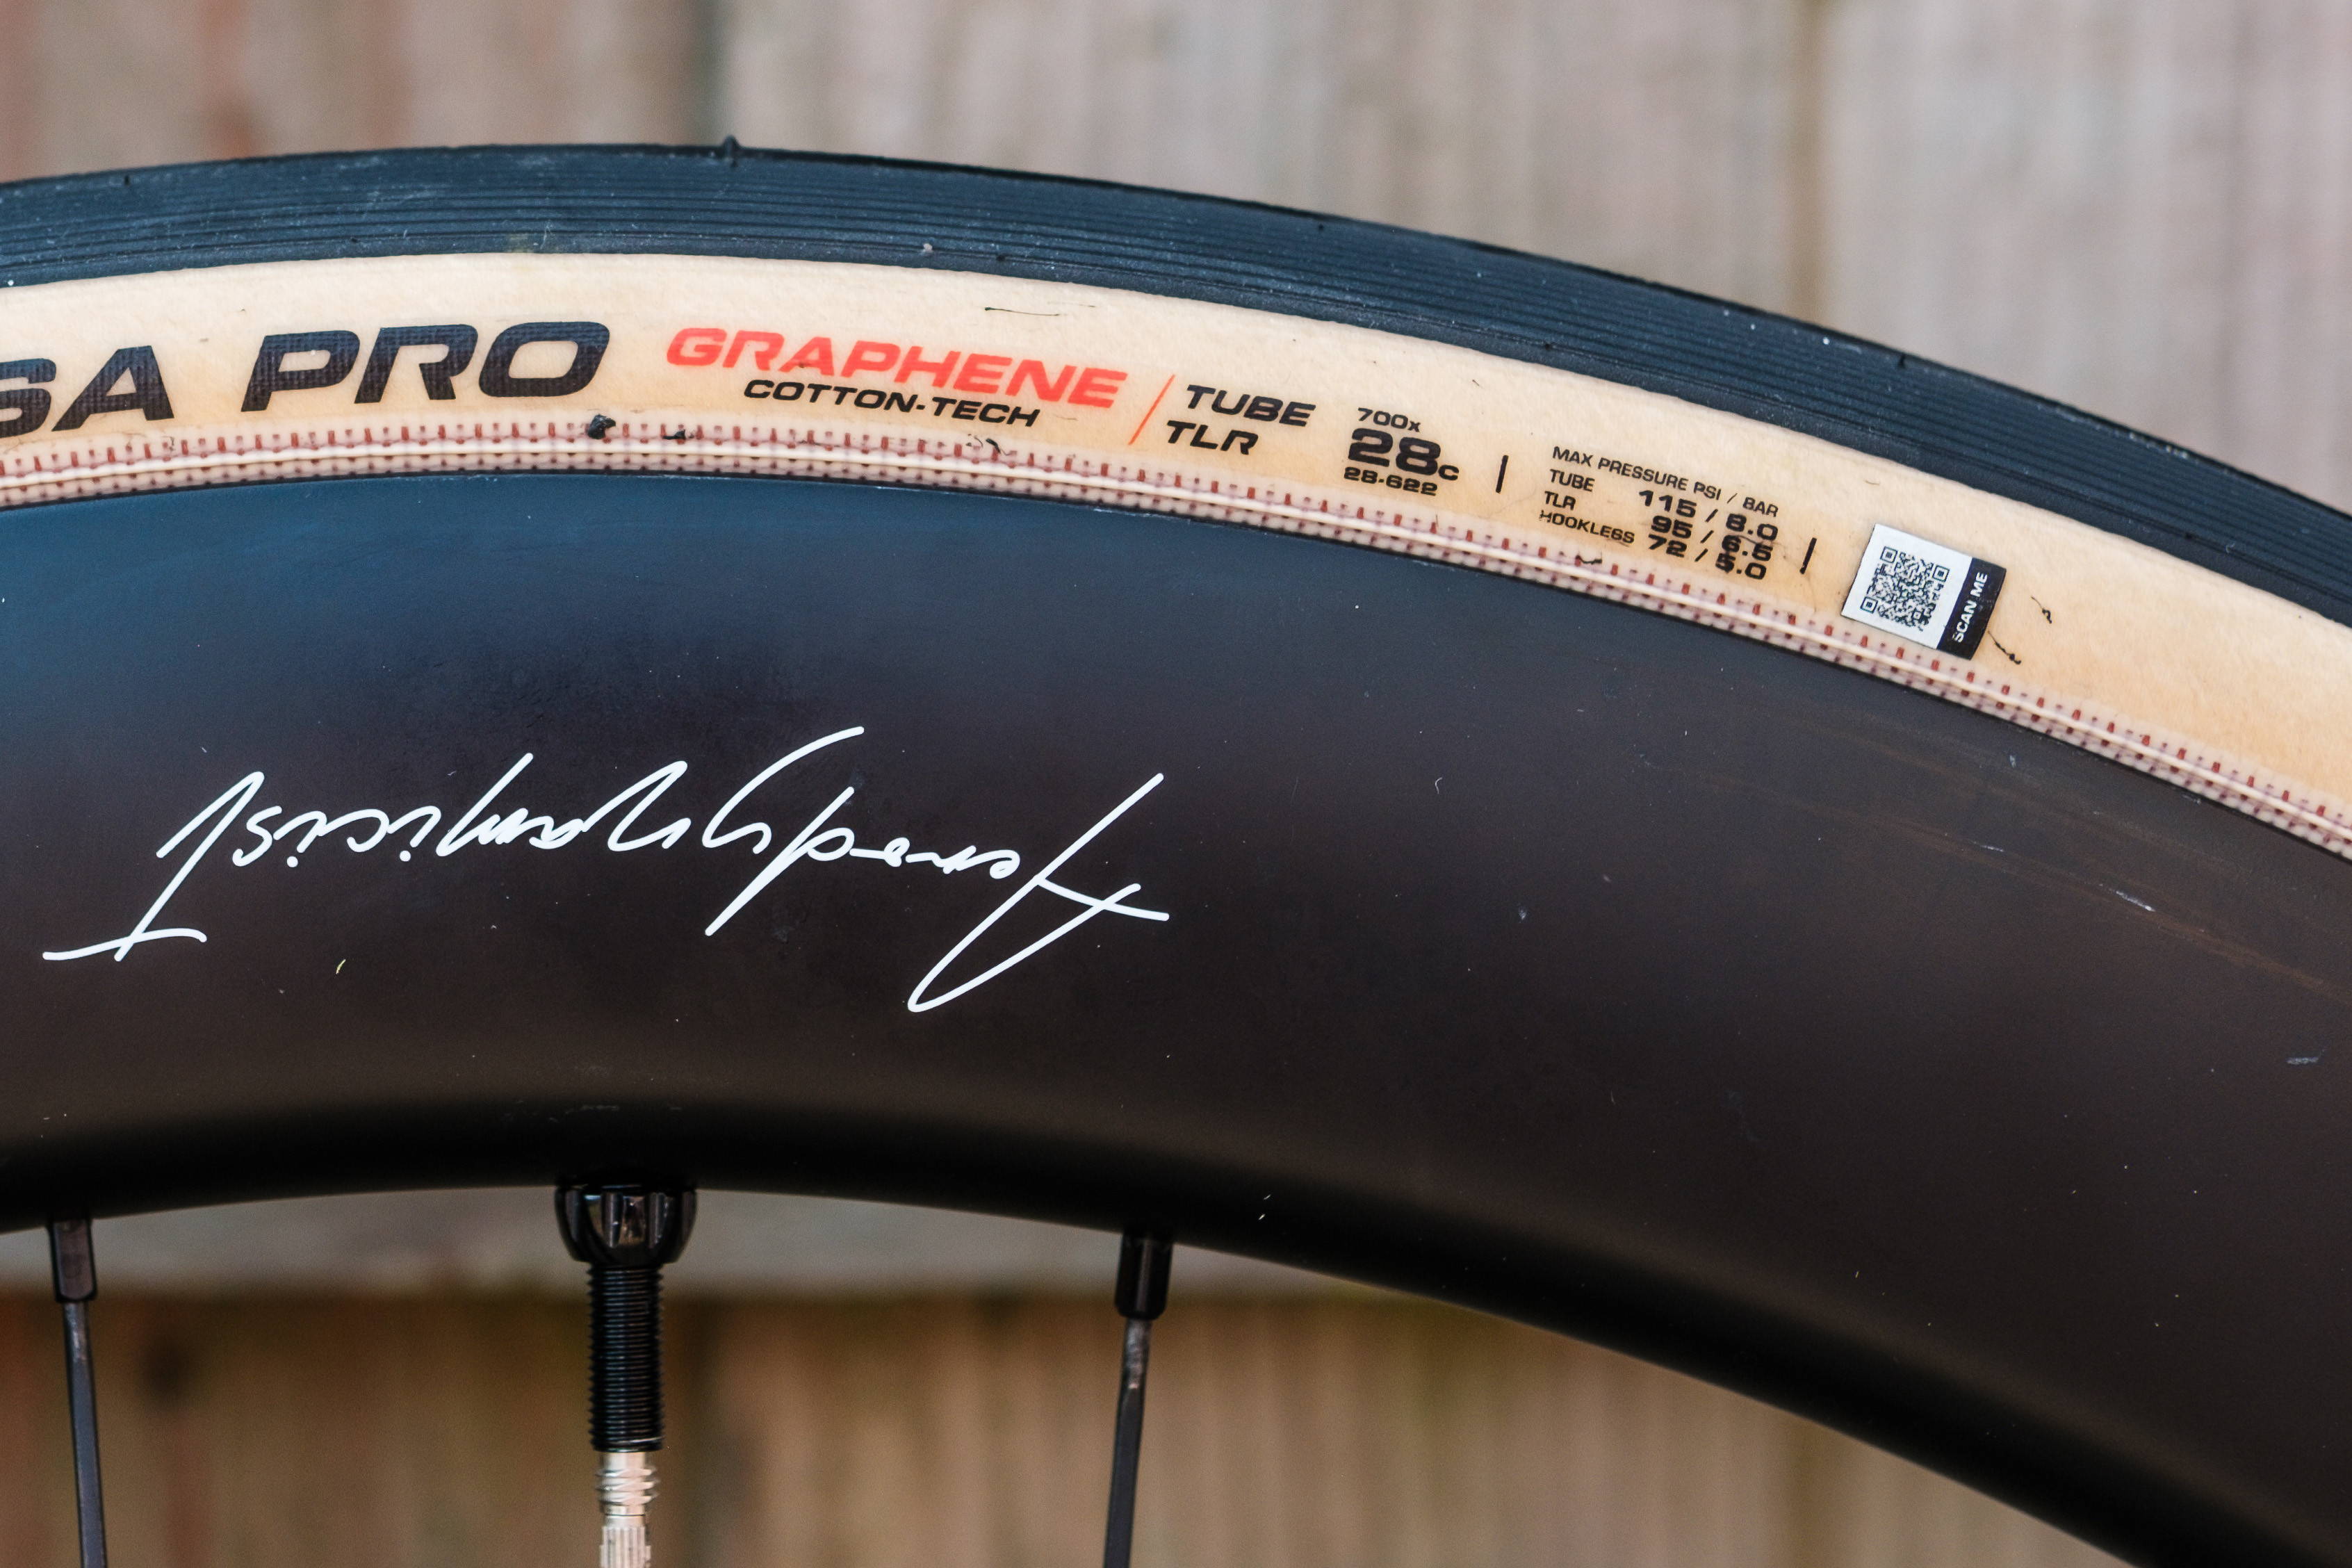 Image showing tire sidewall markings indicating the minimum and maximum recommended tire pressures for rider safety and performance.
Image alt text: Tire sidewall markings showing minimum and maximum pressure ratings.
Refer to specific guides for optimizing tire pressure for different bike types and terrains:
- Road Bike Tire Pressure Guide
- Gravel Bike Tire Pressure Guide
- Mountain Bike Tire Pressure Guide
Choosing the Right Bike Pump: Track, Mini, and CO2 Inflators
Having the right pump makes tire inflation easy and efficient, whether at home or on the road. Ideally, cyclists should own both a track pump for home use and a portable pump for emergencies.
Track Pump (Floor Pump)
A track pump, also known as a floor pump, is a home essential for regular tire maintenance.
Advantages of Track Pumps:
- Efficiency: High volume output allows for quick inflation.
- Stability: Footplate provides stability and leverage for easier pumping.
- Pressure Gauge: Most track pumps include an integrated pressure gauge for accurate inflation.
- Comfort: Ergonomic handles and longer hoses make them comfortable to use.
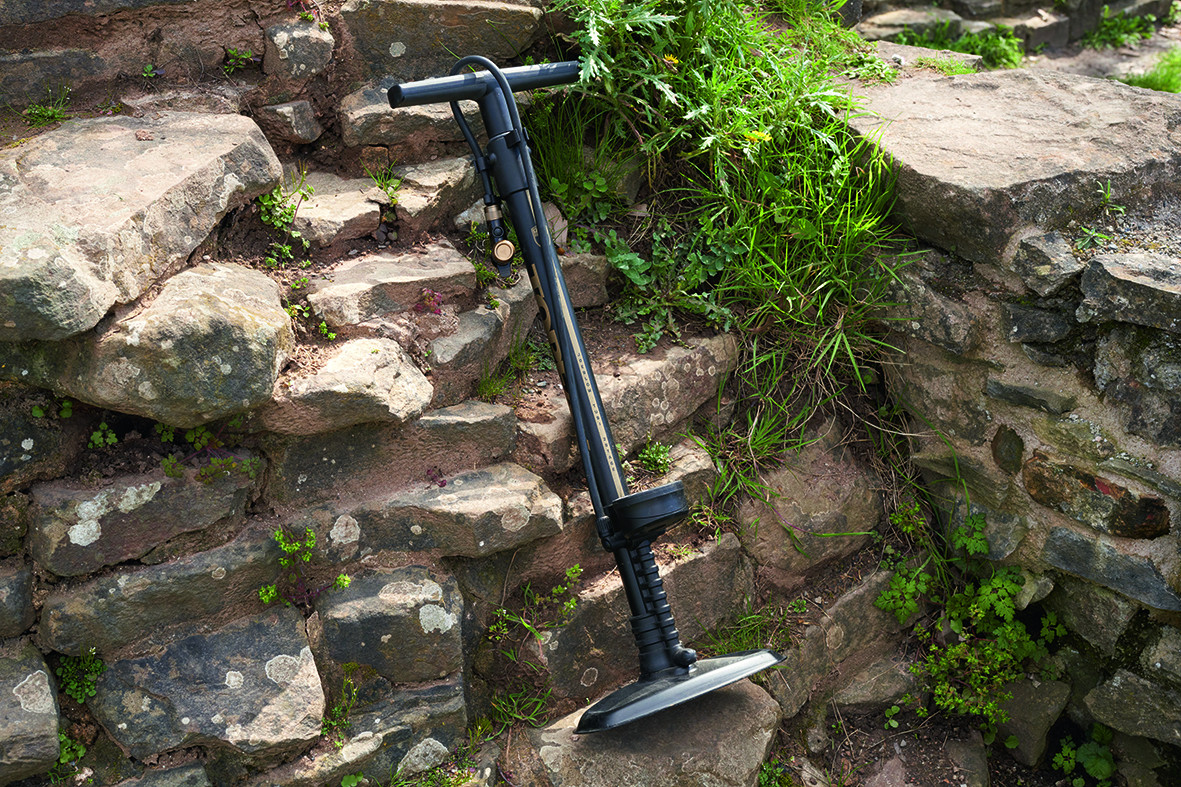 Image of a track pump, showcasing its essential features like a stable base, gauge, and comfortable handle for home use.
Image alt text: Track pump, an essential tool for home bike maintenance and tire inflation.
Mini Pump (Hand Pump)
Mini pumps are compact and portable, designed to be carried on rides for roadside repairs.
Advantages of Mini Pumps:
- Portability: Small and lightweight, easily fits in a jersey pocket or bike bag.
- Emergency Use: Essential for fixing flats while out on a ride.
- Versatility: Many mini pumps are compatible with both Presta and Schrader valves.
Considerations for Mini Pumps:
- Effort: Requires more effort and time to inflate tires compared to track pumps.
- Pressure Accuracy: Often lack pressure gauges, making it harder to achieve precise inflation on the go. Look for models with gauges for better accuracy.
- Hose Feature: Mini pumps with a hose can reduce stress on the valve during inflation, preventing damage.
 Image of a mini pump, highlighting its compact design and portability for on-the-go bike repairs and tire inflation.
Image alt text: Compact mini pump, ideal for carrying on bike rides for emergency tire inflation.
CO2 Inflators
CO2 inflators use cartridges of compressed carbon dioxide to quickly inflate tires.
Advantages of CO2 Inflators:
- Speed: Extremely fast inflation, ideal for racing or quick repairs.
- Compactness: Very small and lightweight, easy to carry.
Disadvantages of CO2 Inflators:
- One-Time Use: Each cartridge is single-use.
- No Pressure Control: Difficult to control precise pressure; can easily overinflate.
- Environmental Impact: CO2 cartridges contribute to waste.
- Not for Regular Use: Best for emergencies, not for daily inflation needs.
- Air Leakage: CO2 can permeate inner tubes faster than air, leading to tires deflating more quickly over time. It’s advisable to deflate and re-inflate with air using a pump as soon as possible after using CO2.
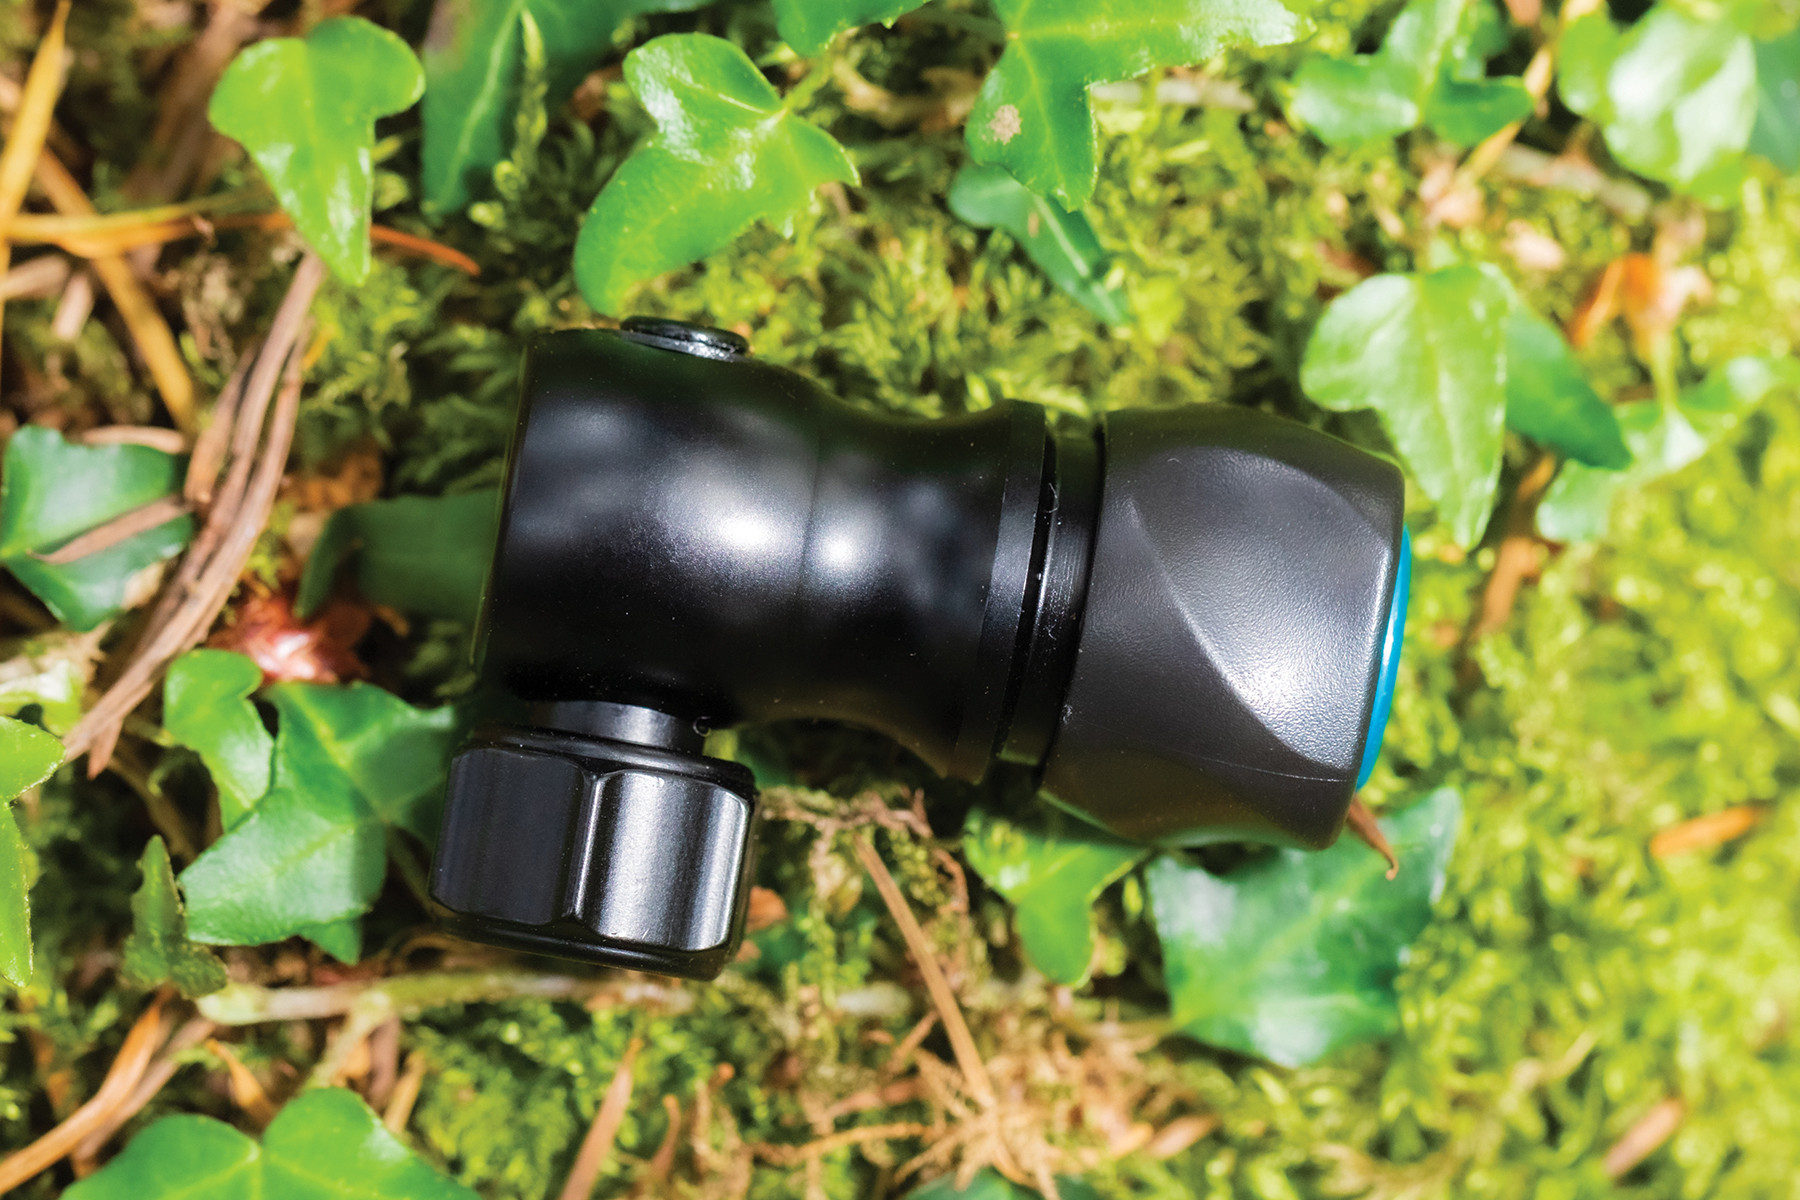 Image of CO2 inflators and cartridges, illustrating a rapid inflation system for quick tire fixes during rides.
Image alt text: CO2 inflators and cartridges, used for rapid bike tire inflation.
The Mechanics of a Bike Pump: How It Works
Understanding how a bike pump works can help you use it more effectively. Pumps operate on a simple principle of pressure differential.
Basic Pump Operation:
- Piston Action: A pump uses a piston inside a cylinder. When you push down on the pump handle, the piston compresses air within the cylinder.
- Check Valves: Two one-way check valves control airflow.
- Inlet Valve: Allows air to enter the pump cylinder from the outside when the piston is pulled up.
- Outlet Valve: Opens to allow pressurized air to flow into the tire when the pressure in the pump cylinder exceeds the tire pressure. It also prevents air from flowing back out of the tire into the pump.
- Pressure Build-up: With each downstroke, the piston pressurizes air, and the outlet valve directs it into the tire, gradually increasing tire pressure.
- Continuous Inflation: Repeating the up and down strokes of the pump continues to force air into the tire until the desired pressure is reached.
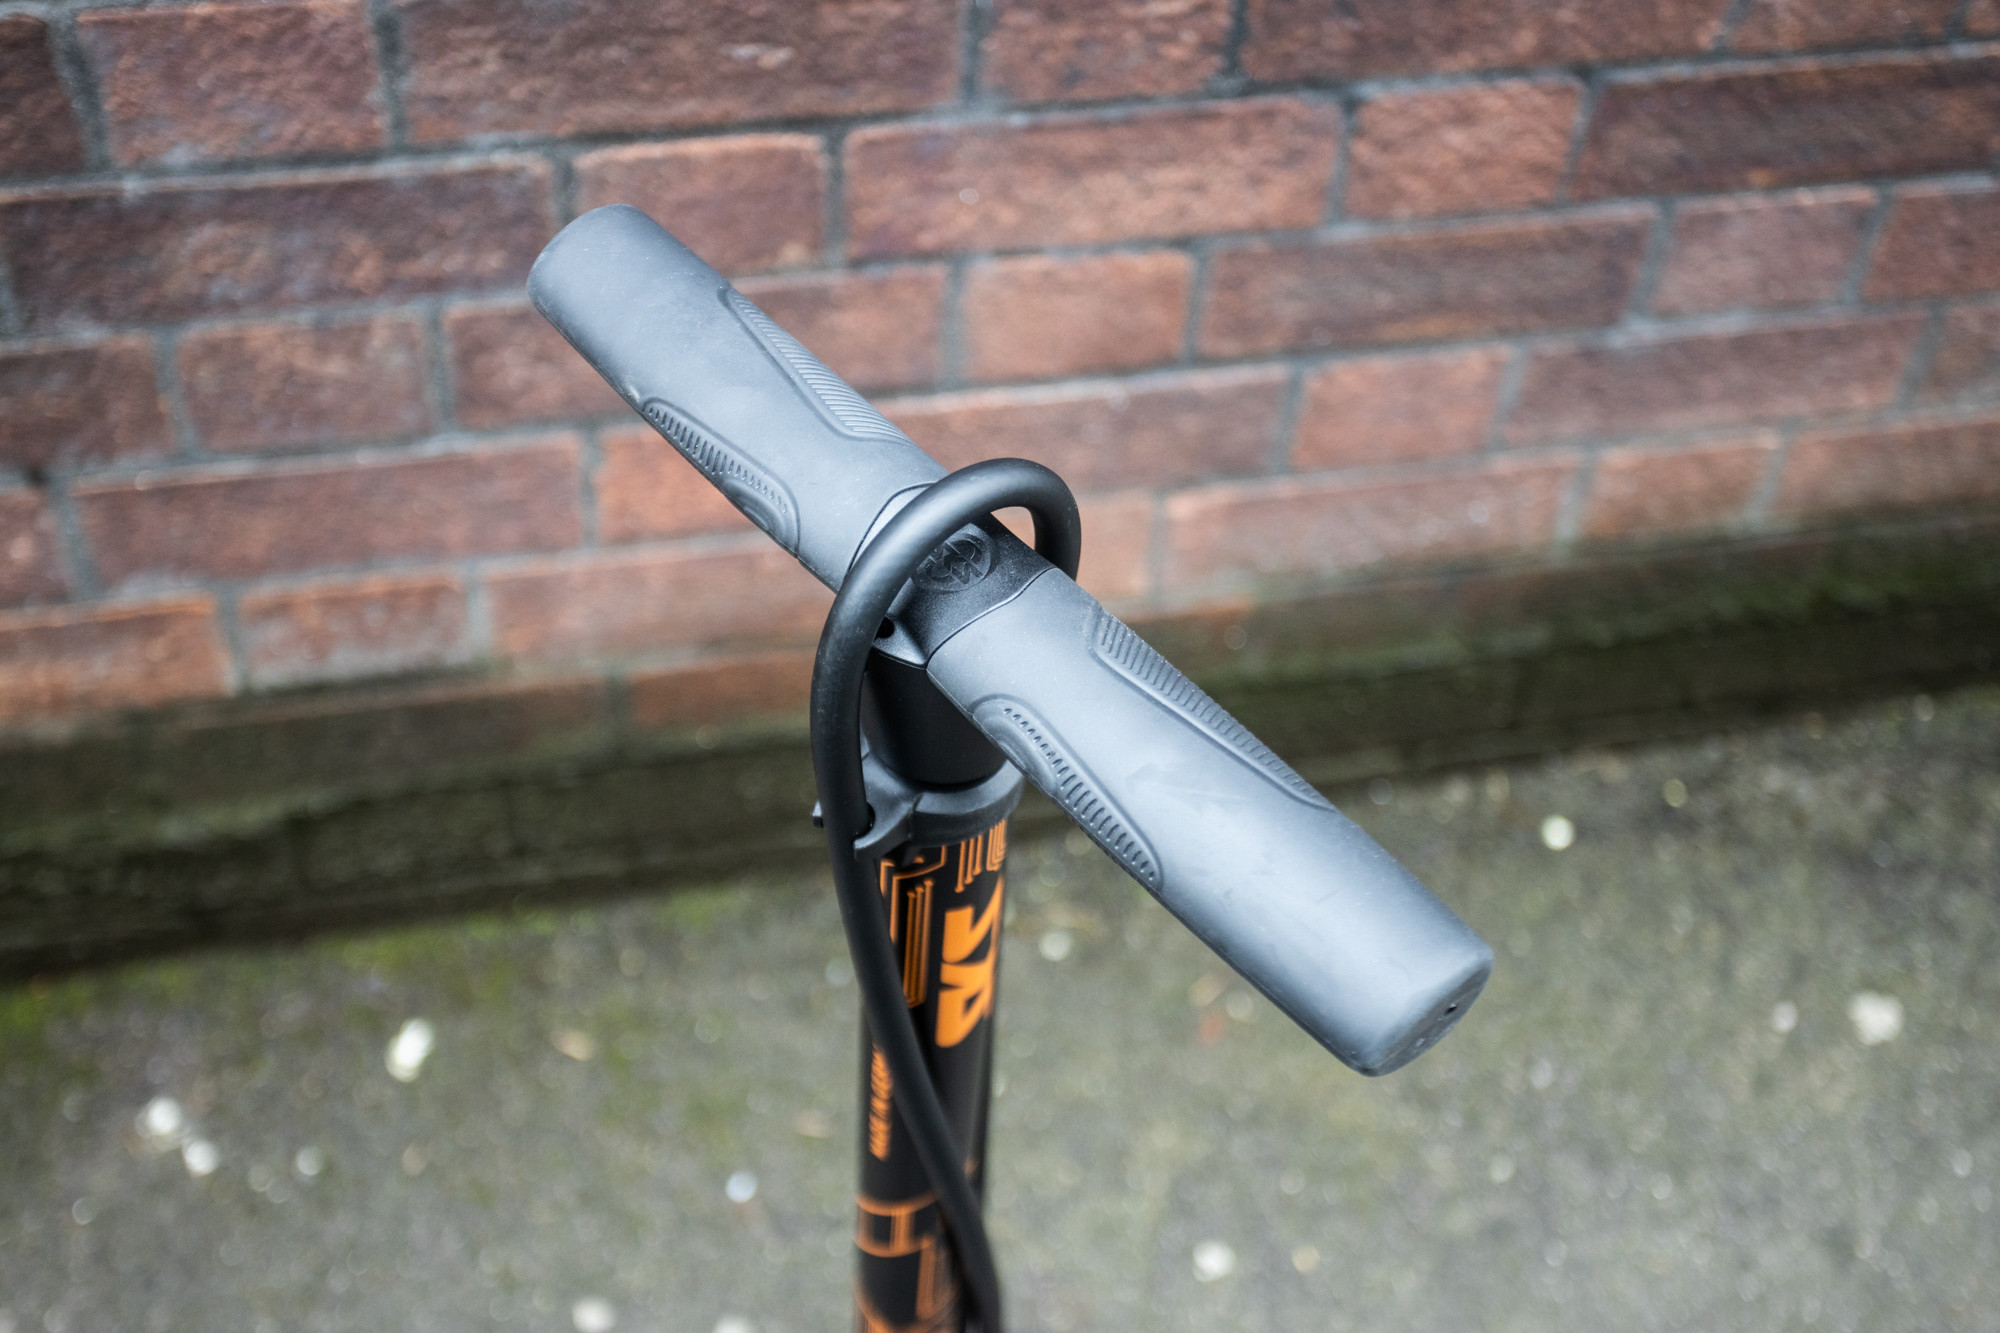 Close-up of a pump handle, highlighting ergonomic design for user comfort and efficient air pumping action.
Image alt text: Ergonomic handle of a bike pump, designed for comfortable and efficient grip.
Pump Head (Chuck) Design:
The pump head, or chuck, is the interface between the pump and the tire valve. It must create an airtight seal to efficiently inflate the tire.
- Dual Head Designs: Many modern pumps feature dual heads or reversible heads to accommodate both Presta and Schrader valves.
- Lever Locks: Some pump heads use a locking lever to ensure a secure, airtight connection to the valve, especially important for Presta valves.
- Threaded vs. Push-On: Pump heads can be push-on with a lever lock or threaded for a screw-on connection. Push-on with lever lock is more common for track and mini pumps for speed and ease of use. Threaded connections are less common nowadays but may offer a very secure seal.
- Hose Connection: Many track pumps and some mini pumps use a hose to connect the pump head to the valve. This reduces stress on the valve during pumping and makes it easier to reach valves, especially on wheels with disc brakes or tight clearances.
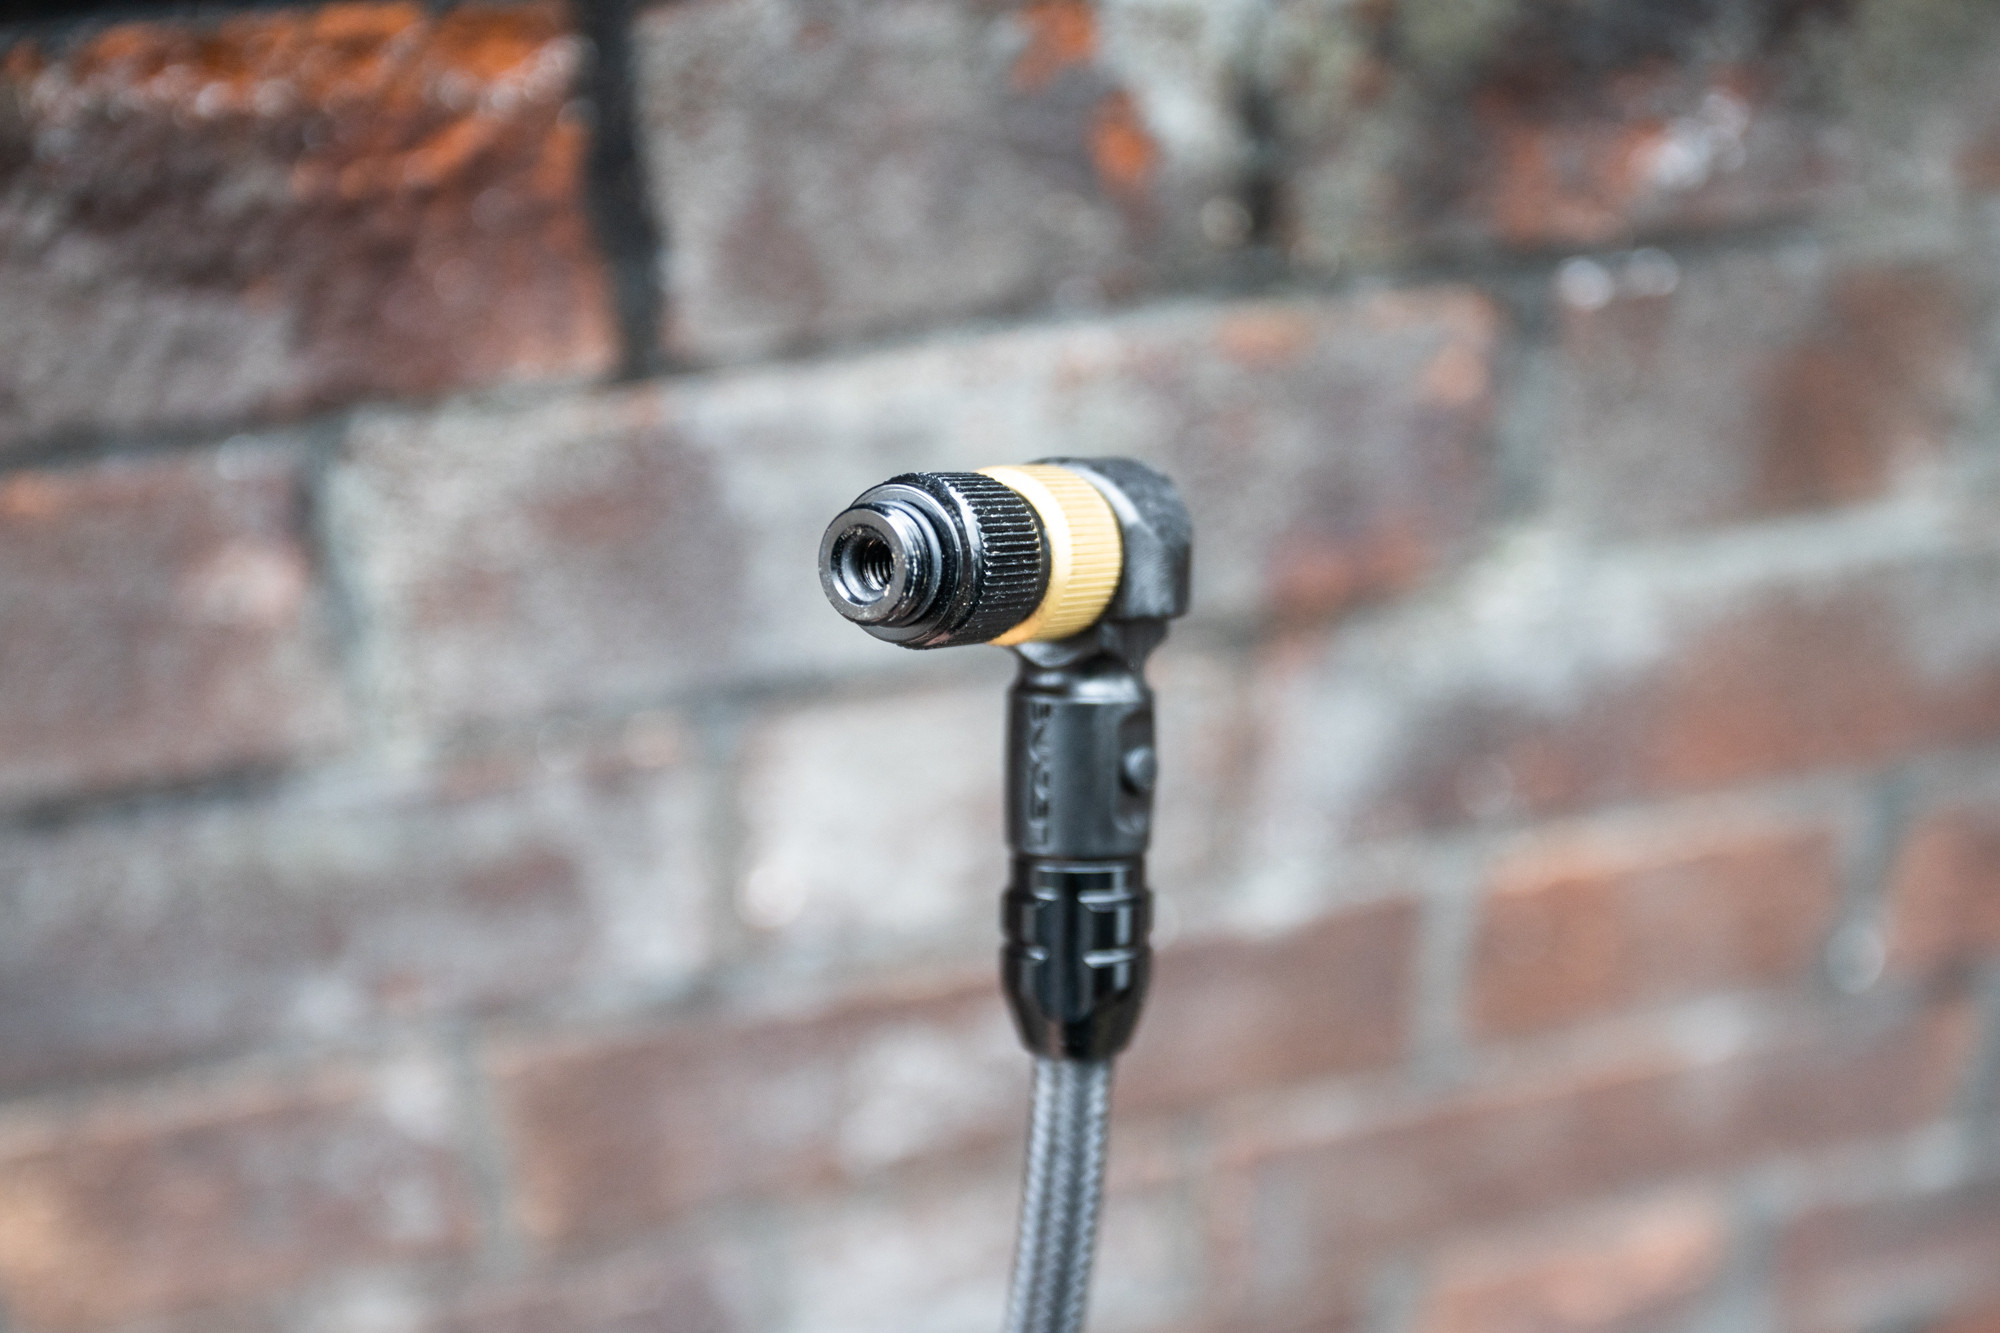 Detailed view of a pump head, showing its dual valve compatibility and lever mechanism for secure attachment to bike valves.
Image alt text: Dual-compatible pump head with lever lock, designed for Presta and Schrader valves.
How Often Should You Pump Your Bike Tires?
Regularly checking and maintaining your bike tire pressure is crucial for optimal performance and tire longevity.
Recommended Inflation Frequency:
- Before Every Ride: Ideally, check your tire pressure before each ride, especially for longer or more demanding rides. Tires naturally lose pressure over time, even without punctures.
- Weekly at Minimum: If you don’t ride daily, check and inflate your tires at least once a week.
- After Storage: If your bike has been in storage, check and inflate tires before riding. Tires lose pressure when sitting idle, and leaving them deflated long-term can damage inner tubes.
- Seasonal Changes: Temperature changes affect tire pressure. Cooler temperatures decrease pressure, and warmer temperatures increase it. Adjust pressure seasonally to maintain optimal levels.
Quick Pressure Check:
If you don’t have a pump with a gauge readily available, a quick squeeze test can give you a rough idea of tire pressure. If the tire feels very soft or easily deflects to the rim when you press firmly, it likely needs more air. However, this is not a substitute for using a pressure gauge for accurate inflation.
 Guidance on checking bike tire pressure through a pinch test, alongside recommending use of a pump or gauge for accuracy.
Image alt text: Pinching a bike tire to check pressure, alongside a pump for accurate inflation.
For precise pressure readings, consider investing in a dedicated bike tire pressure gauge.
Why is Pumping Up Your Bike Tires Necessary?
Maintaining proper tire pressure is not just about comfort; it significantly impacts your overall cycling experience and the lifespan of your tires.
Benefits of Properly Inflated Tires:
- Improved Ride Quality: Absorbs shocks and vibrations for a smoother, more comfortable ride.
- Enhanced Performance: Reduces rolling resistance for faster and more efficient cycling.
- Better Handling and Control: Provides optimal grip and traction for confident cornering and control, especially on varied surfaces.
- Puncture Prevention: Minimizes the risk of pinch flats and other types of punctures.
- Increased Tire Longevity: Prevents premature tire wear caused by riding on underinflated tires, which can overheat and degrade faster.
- Safety: Ensures stable and predictable bike handling, contributing to safer riding conditions.
 Image showcasing a cyclist riding a mountain bike, emphasizing the connection between tires and terrain for optimal performance.
Image alt text: Cyclist riding a mountain bike, highlighting tire interaction with the trail.
How Bike Tires Retain Air: Inner Tubes and Tubeless Systems
Understanding how your bike tires hold air involves knowing about inner tubes and tubeless systems.
Inner Tubes:
The most common system for holding air in bike tires uses inner tubes.
- Airtight Bladder: An inner tube is a separate airtight, inflatable bladder made of butyl rubber or latex that sits inside the tire casing and against the rim.
- Valve Integration: The inner tube incorporates the valve (Presta, Schrader, or Dunlop) through which you inflate the tire.
- Protection and Inflation: The tire casing provides structure, protection from abrasion and punctures, and grip, while the inner tube holds the air pressure to inflate the tire to its functional shape.
 Image of a bike inner tube, showing its construction and valve, the core component for air retention in standard bike tires.
Image alt text: Bike inner tube, the standard component for holding air in bicycle tires.
Tubeless Tires:
Tubeless tire systems offer an alternative to inner tubes, especially popular in mountain biking, gravel riding, and increasingly road cycling.
- Airtight Tire and Rim Seal: Tubeless systems rely on a specially designed tire and rim that create an airtight seal directly, without needing an inner tube.
- Tubeless Sealant: Liquid tubeless sealant is added inside the tire. This sealant automatically plugs small punctures and air leaks, enhancing puncture resistance and maintaining air pressure.
- Benefits of Tubeless:
- Puncture Resistance: Sealant self-seals many punctures.
- Lower Pressure Riding: Allows riding at lower tire pressures for improved comfort, traction, and rolling resistance on rough surfaces, without the risk of pinch flats.
- Pinch Flat Elimination: Removes the risk of pinch flats since there is no inner tube to be pinched between the rim and obstacle.
Tubeless technology is becoming increasingly prevalent, especially on mountain bikes, gravel bikes, and modern road bikes.
Tubular Tires:
Tubular tires, also known as “tubs” or sew-ups,” are a less common type, primarily used in professional road and cyclocross racing.
- Sewn-In Tube: A tubular tire has the inner tube sewn directly into the tire casing, creating a single unit.
- Glued to Rim: Tubular tires are glued to special tubular rims, not mounted with beads like clinchers or tubeless tires.
- High Performance: Offer performance advantages in racing, such as lower rolling resistance and pinch flat resistance, but are less practical for everyday riding due to complex installation and repair.
Conclusion: Stay Pumped for a Better Ride
Knowing how to pump a bike tire and maintaining proper tire pressure is a fundamental skill for every cyclist. It’s a simple yet highly effective way to enhance your riding experience, improve safety, and ensure your bike performs at its best. Make it a routine to check your tires regularly, invest in a good pump, and enjoy the benefits of well-inflated tires on every ride. Happy cycling!