Putting on a bike tire can be tricky, but it’s a crucial skill for any cyclist. This comprehensive guide from usabikers.net will provide you with step-by-step instructions and expert tips on mastering this essential maintenance task. Whether you’re dealing with tight beads, tubeless setups, or simply looking for the best technique, we’ve got you covered. Learn about essential tools, insider tricks, and how to choose the right tire for your ride. With usabikers.net, you’ll be back on the road or trail in no time, enjoying the freedom and thrill of the ride.
1. Understanding Bike Tyre Basics
Before diving into the installation process, it’s crucial to understand the fundamental components of a bike tire and how they interact with the rim. This knowledge will make the process smoother and prevent potential issues.
1.1. What are the Key Components of a Bike Tyre?
Understanding the parts of a bike tyre is essential for proper installation and maintenance. Key components include the tyre bead, casing, tread, and sidewall. The tyre bead is the edge of the tyre that sits in the rim, ensuring a secure fit. The casing is the body of the tyre, providing structure and flexibility. The tread is the rubber compound on the outside, offering grip and traction. The sidewall protects the casing and displays important information like size and pressure recommendations. According to a study by the European Tyre and Rim Technical Organisation (ETRTO) in November 2023, understanding these components helps cyclists choose the right tyres and maintain them effectively.
| Component | Description | Function |
|---|---|---|
| Tyre Bead | The edge of the tyre that sits inside the rim. | Secures the tyre to the rim, creating an airtight seal. |
| Casing | The main body of the tyre, usually made of nylon or similar fabric. | Provides structure, flexibility, and puncture resistance. |
| Tread | The outer rubber layer that contacts the road or trail. | Offers grip, traction, and rolling efficiency. |
| Sidewall | The side of the tyre, connecting the bead and the tread. | Protects the casing from damage and displays tyre information. |
1.2. Clincher vs. Tubeless vs. Tubular Tyres: What’s the Difference?
Knowing the differences between clincher, tubeless, and tubular tyres is vital for choosing the right type for your bike and riding style. Clincher tyres require an inner tube to hold air and are the most common type due to their ease of installation and repair. Tubeless tyres, on the other hand, create an airtight seal with the rim, eliminating the need for an inner tube, which reduces the risk of pinch flats and allows for lower tyre pressures. Tubular tyres are glued to the rim and are typically used by professional cyclists for their superior performance and lightweight properties. As stated in a report by the American Motorcyclist Association (AMA) in June 2024, understanding these differences helps riders make informed decisions based on their needs and preferences.
| Tyre Type | Description | Advantages | Disadvantages |
|---|---|---|---|
| Clincher | Uses a separate inner tube to hold air; the tyre bead hooks onto the rim. | Easy to install and repair, widely available, and relatively inexpensive. | More prone to pinch flats and higher rolling resistance compared to tubeless. |
| Tubeless | Forms an airtight seal with the rim without an inner tube; sealant is used to prevent air leaks. | Lower risk of pinch flats, ability to run lower tyre pressures for better grip and comfort, and self-sealing capabilities for small punctures. | More complex to install and maintain, requires tubeless-compatible rims and tyres, and sealant needs to be periodically replaced. |
| Tubular | The tyre is sewn around the inner tube and glued onto the rim; typically used by professional cyclists. | Superior performance due to the ability to run very high pressures and low rolling resistance; lighter than clinchers and tubeless setups; can be ridden flat for a short distance without damaging the rim. | Most difficult to install and repair, requires specialized glue, and repairs often involve replacing the entire tyre. |
1.3. Understanding Tyre and Rim Sizes
Understanding tyre and rim sizes is crucial for ensuring compatibility and proper fit. Tyre sizes are typically indicated by two numbers: the width and the diameter (e.g., 700x25c). The width is the tyre’s cross-sectional measurement, and the diameter refers to the inner diameter of the tyre bead. Rims also have corresponding measurements, with the inner width being particularly important for tubeless setups. A mismatch in sizes can lead to difficulties in installation and potentially unsafe riding conditions. According to research from the Motorcycle Safety Foundation (MSF) in July 2025, correct sizing ensures optimal performance and safety.
| Measurement | Description | Importance |
|---|---|---|
| Tyre Width | The width of the tyre in millimeters (e.g., 23mm, 25mm, 28mm). | Affects comfort, rolling resistance, and aerodynamics; wider tyres provide more comfort and grip, while narrower tyres may offer lower rolling resistance. |
| Tyre Diameter | The inner diameter of the tyre bead in millimeters (e.g., 622mm for 700c tyres). | Must match the rim diameter for compatibility; ensures the tyre can be properly mounted on the rim. |
| Rim Width | The inner width of the rim in millimeters (e.g., 17mm, 19mm, 21mm). | Affects tyre shape and volume; wider rims support wider tyres better, providing improved stability and handling. Crucial for tubeless setups to ensure a proper seal between the tyre and the rim. |
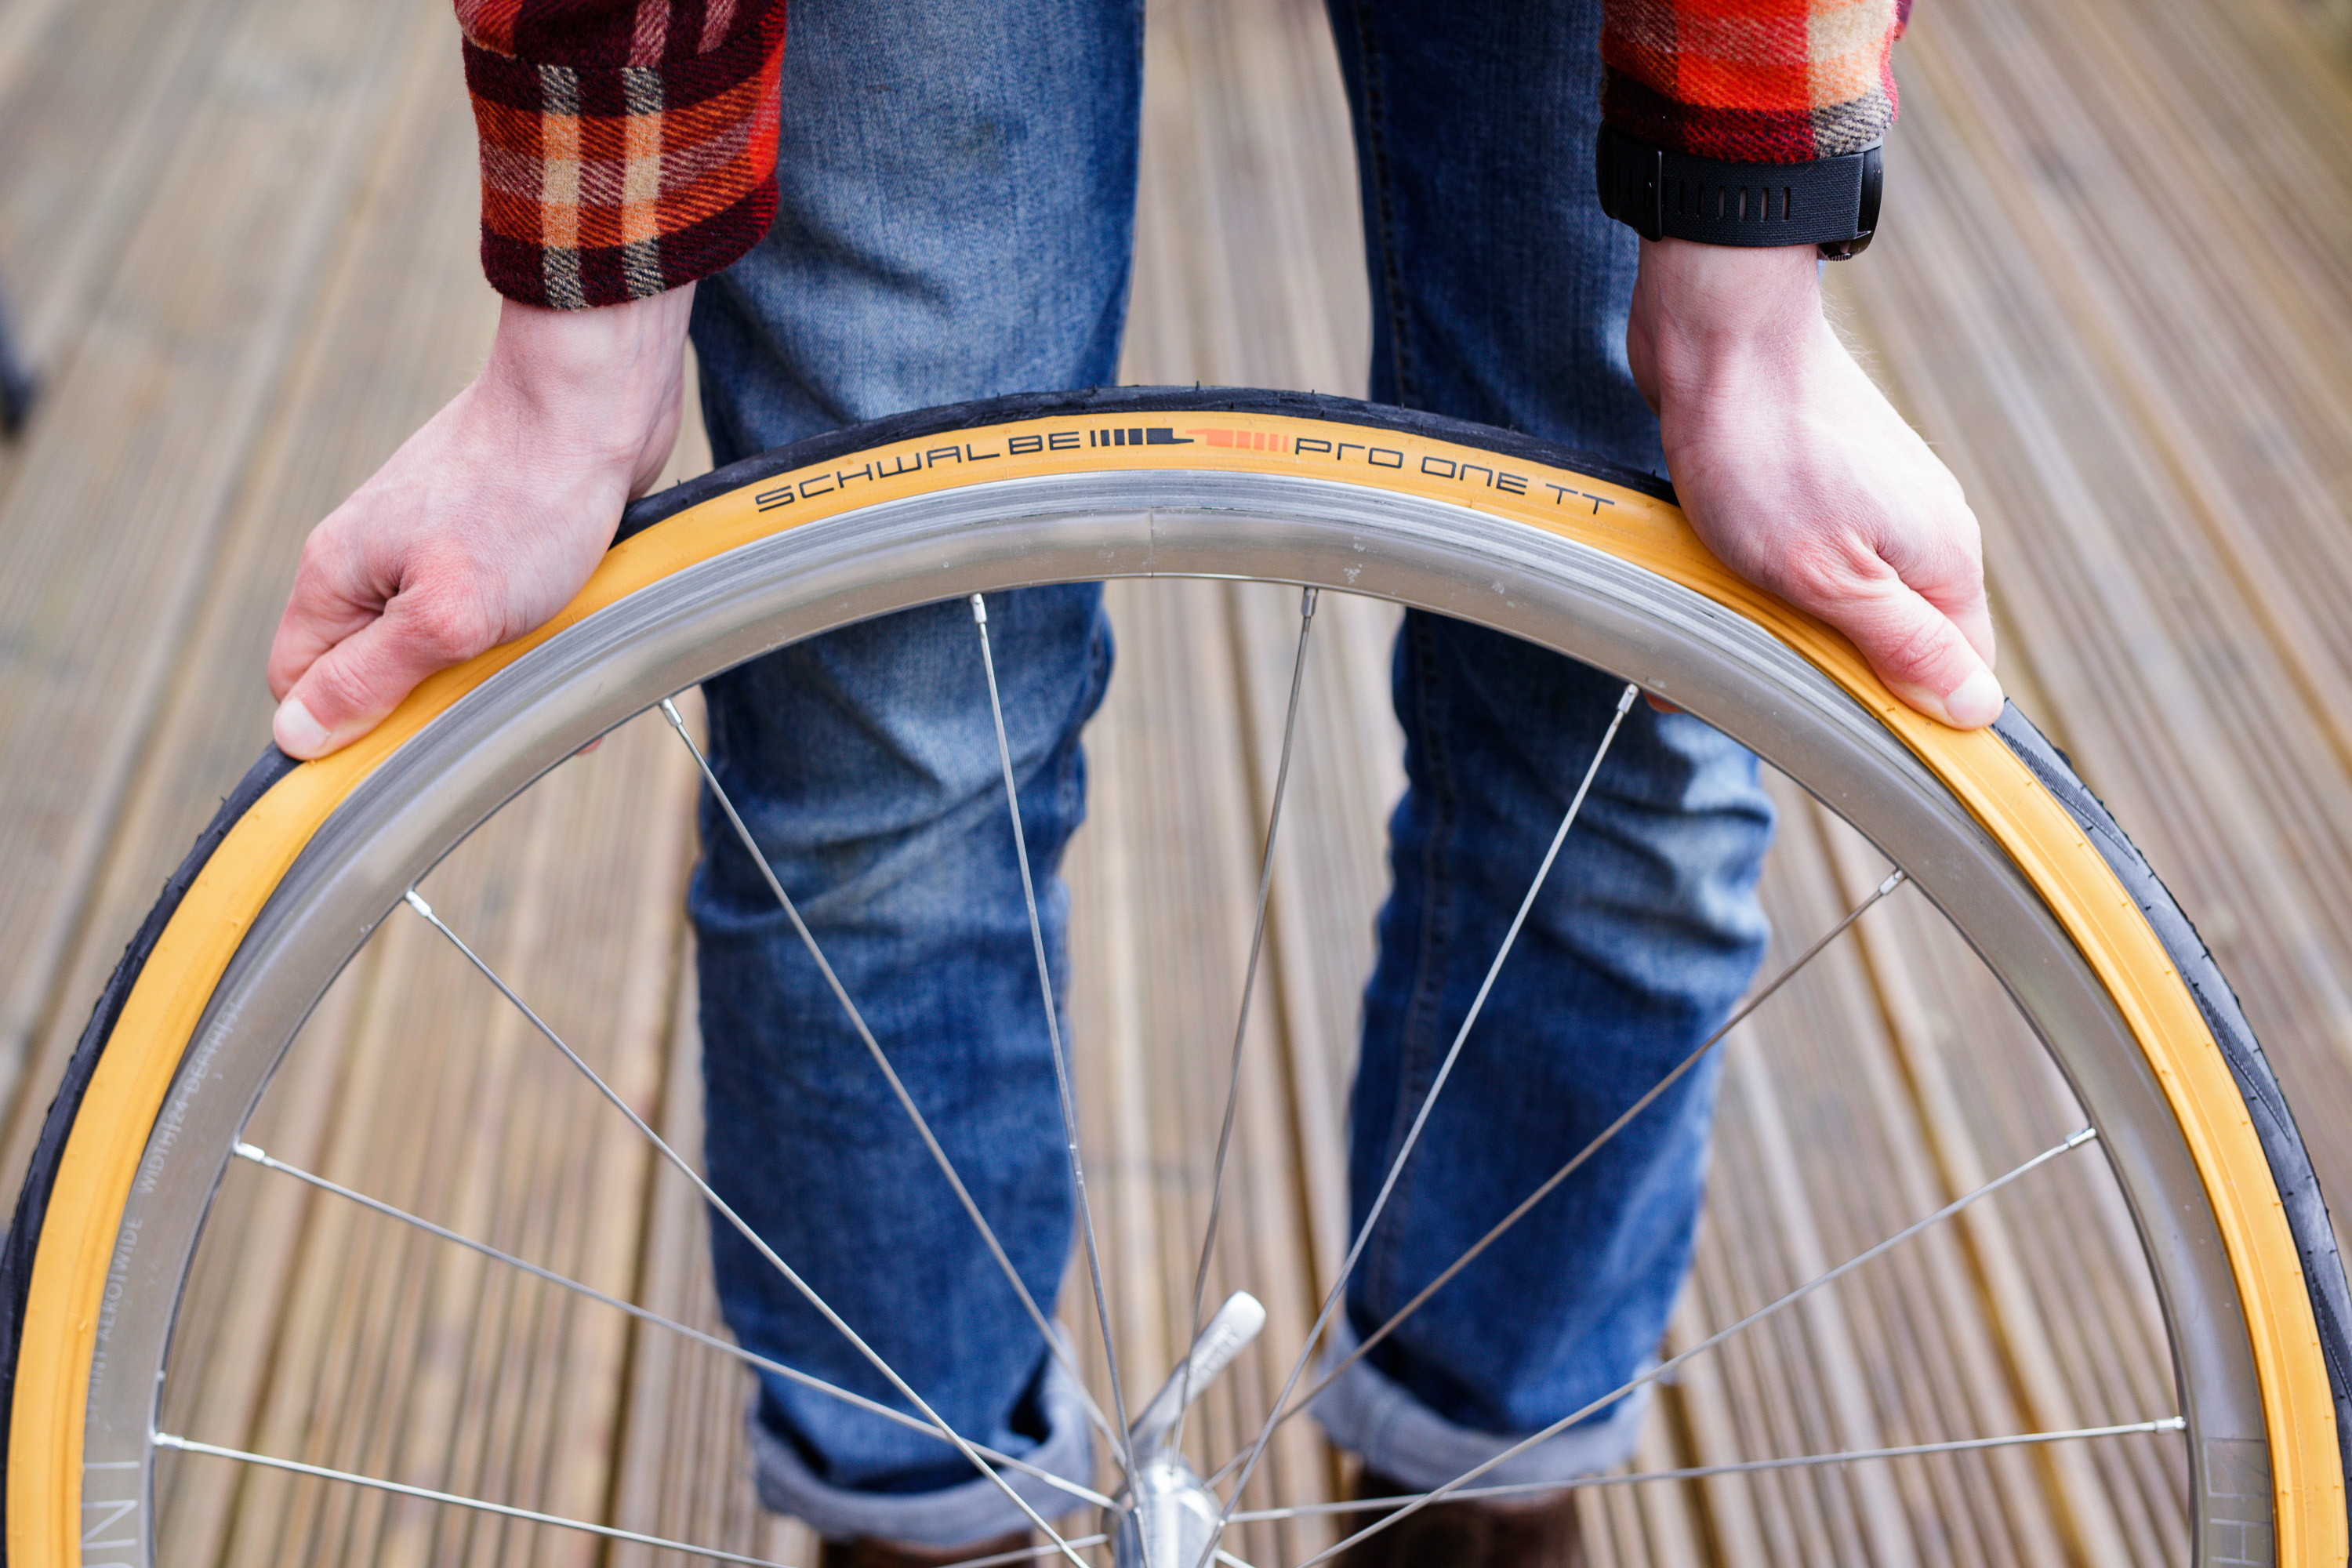
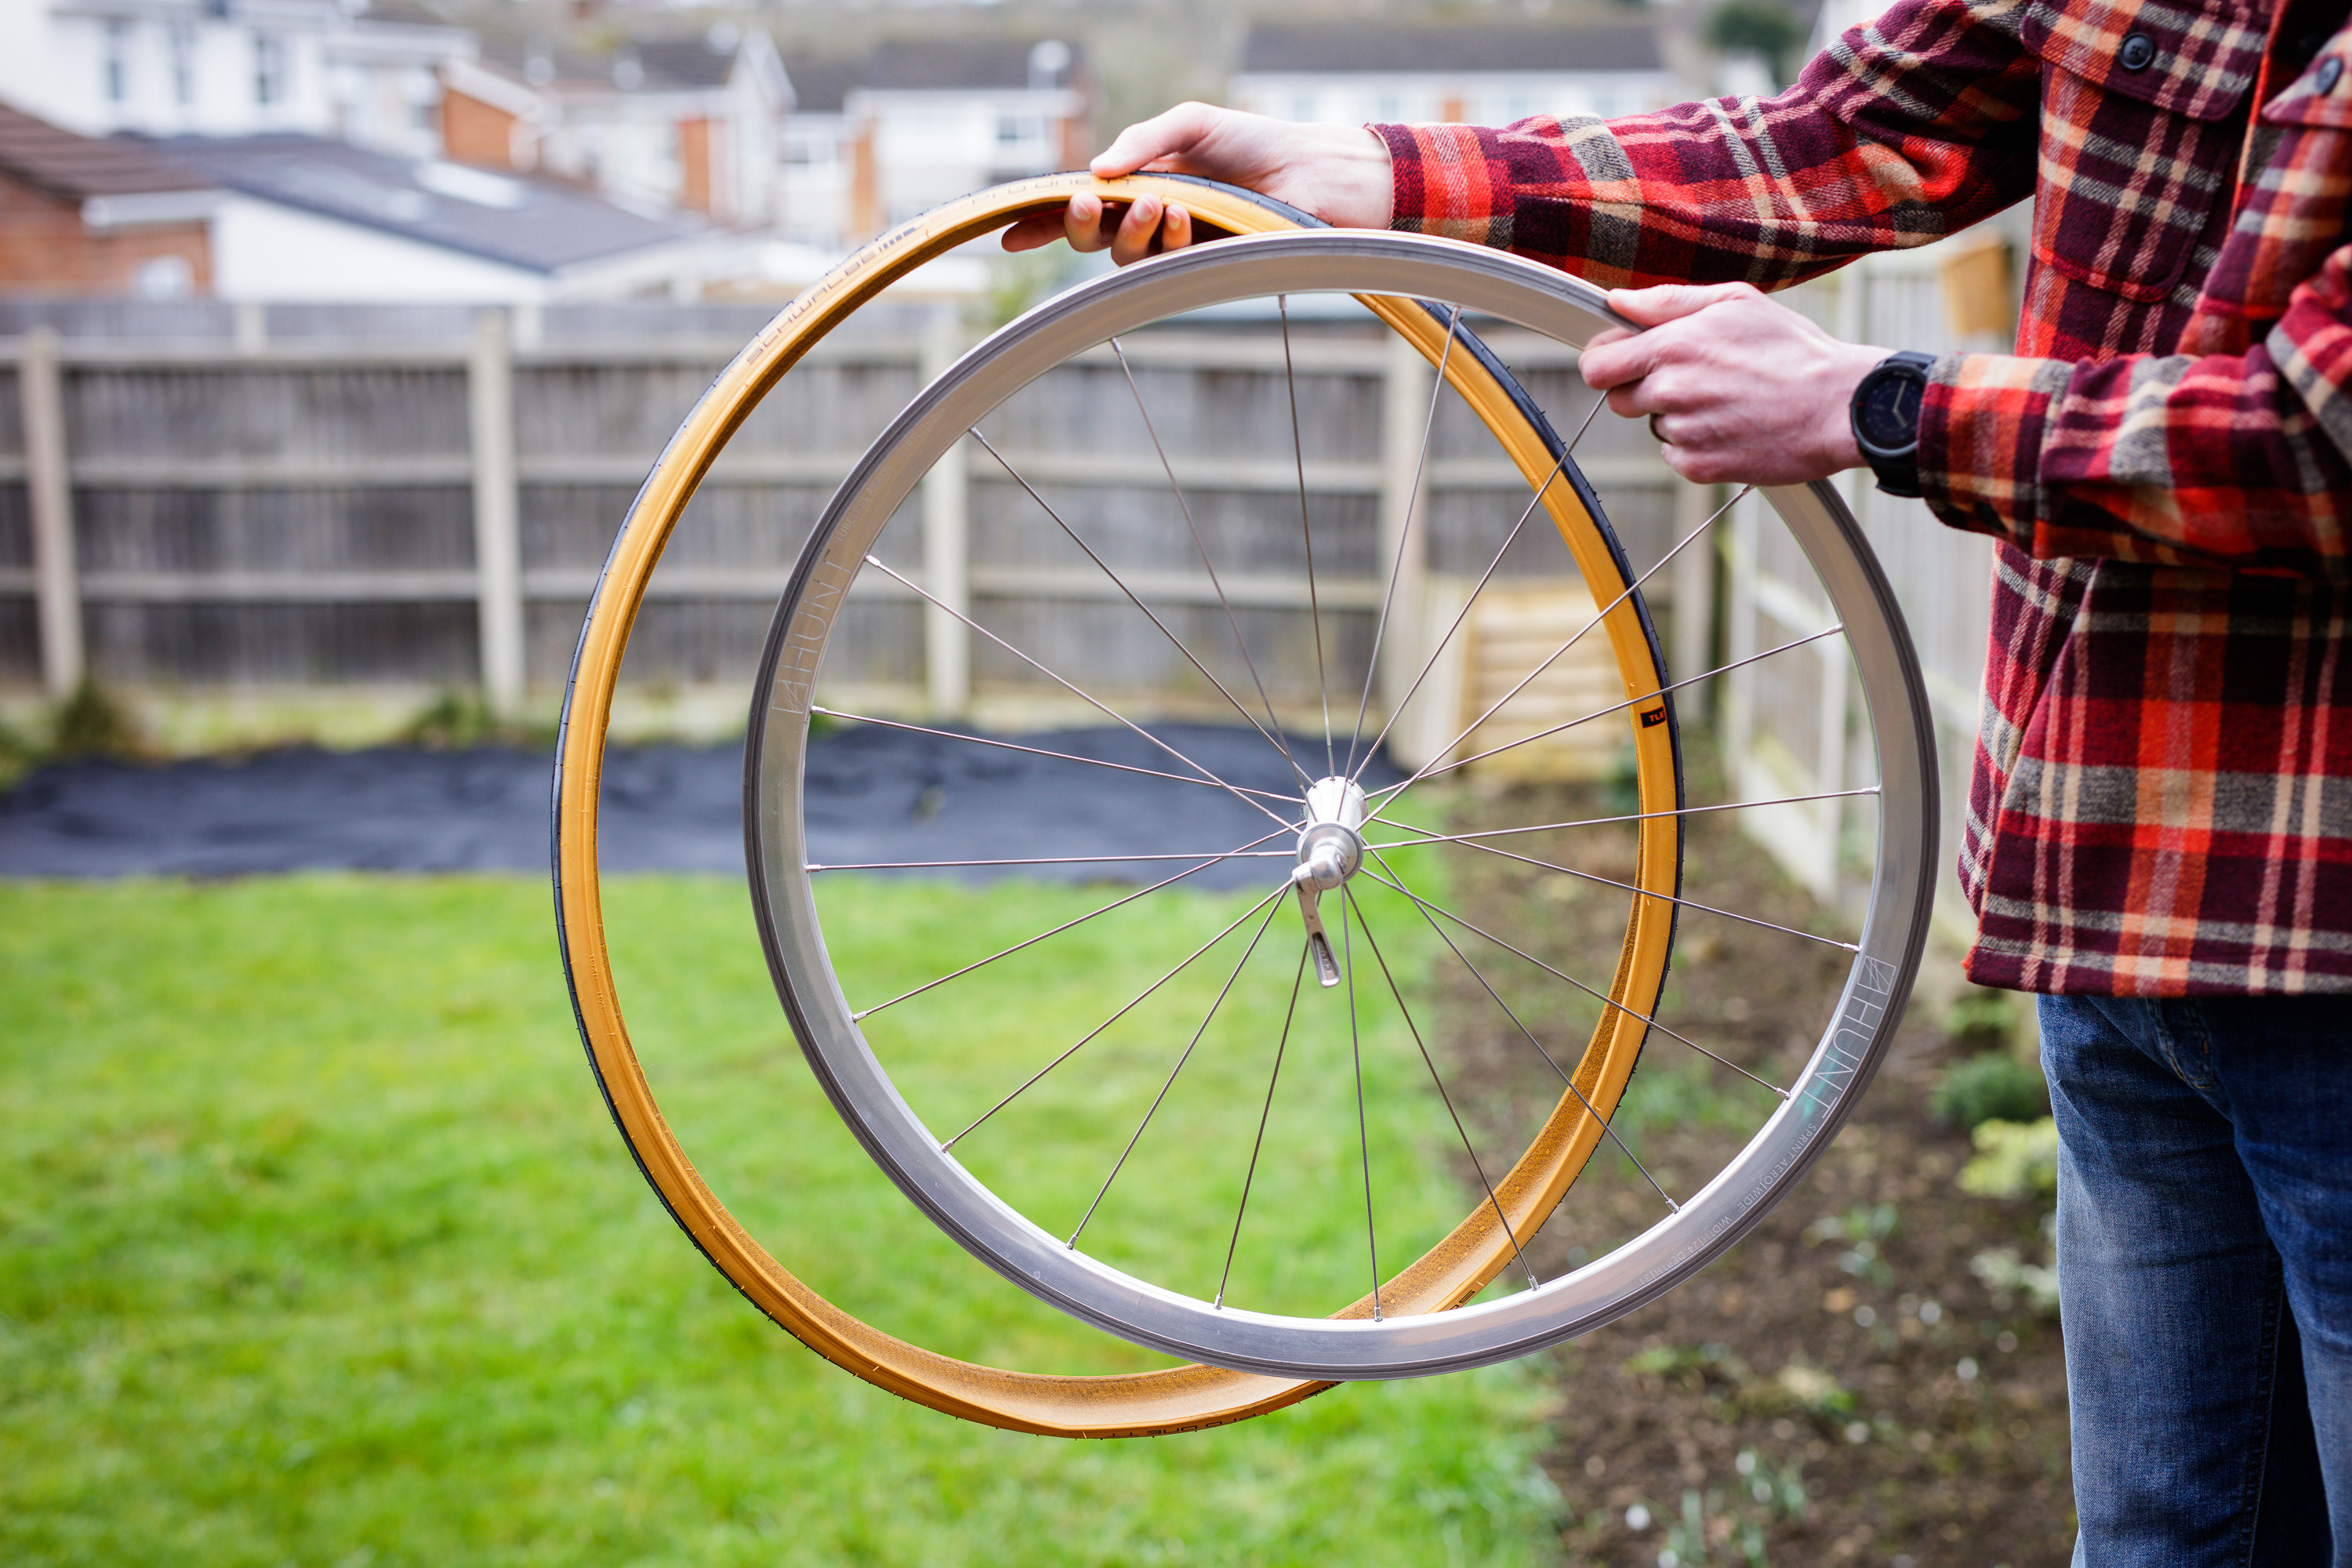 Person holding bicycle tyre next to a wheel
2. Essential Tools and Preparation
Having the right tools and preparing your workspace will make the tyre installation process much smoother and more efficient.
2.1. Must-Have Tools for Changing a Bike Tyre
Having the right tools on hand is essential for changing a bike tyre efficiently and without causing damage. The most important tools include tyre levers, a pump (floor or hand pump), and a multi-tool or wrench for removing the wheel. Tyre levers help to safely remove the tyre from the rim without pinching the inner tube or damaging the rim. A reliable pump ensures you can inflate the tyre to the correct pressure. A multi-tool or wrench is necessary for detaching the wheel from the bike frame. As noted by the League of American Bicyclists in April 2023, these tools are crucial for both roadside repairs and home maintenance.
| Tool | Description | Function |
|---|---|---|
| Tyre Levers | Small, flat tools made of plastic or composite material. | Used to safely pry the tyre bead over the rim edge during removal and installation, preventing damage to the rim and inner tube. |
| Pump | A device for inflating the tyre; can be a floor pump or a portable hand pump. | Inflates the tyre to the recommended pressure, ensuring optimal performance and preventing flats. |
| Multi-Tool/Wrench | A compact tool with various wrenches, screwdrivers, and other useful functions. | Used to loosen and tighten the wheel’s axle nuts or quick-release lever, allowing for wheel removal and installation. |
2.2. Setting Up Your Workspace
Setting up your workspace properly is crucial for an efficient and hassle-free tyre change. Choose a clean, flat surface where you have enough room to maneuver. Gather all your tools and materials within easy reach. Protect your bike frame by laying down a soft cloth or mat to prevent scratches. Good lighting is also important for clear visibility. According to a guide by the Bicycle Product Suppliers Association (BPSA) in September 2024, a well-organized workspace minimizes frustration and potential errors.
| Item | Purpose | Benefits |
|---|---|---|
| Clean, Flat Surface | Provides a stable and organized area for working on the bike. | Prevents small parts from getting lost, ensures the bike remains stable, and reduces the risk of accidental damage. |
| Soft Cloth/Mat | Protects the bike frame from scratches and scuffs. | Maintains the bike’s aesthetic appeal and prevents corrosion from exposed metal. |
| Good Lighting | Enhances visibility of small parts and intricate details. | Reduces eye strain, prevents errors, and ensures all components are properly aligned and secured. |
2.3. Inspecting the Tyre and Rim Before Installation
Inspecting the tyre and rim before installation is an essential step to ensure safety and prevent future issues. Check the tyre for any cuts, embedded debris, or signs of wear. Examine the rim for dents, cracks, or damage to the rim tape. Make sure the rim tape is properly seated and covers all spoke holes to prevent punctures. Replacing a worn-out tyre or damaged rim tape can save you from potential flats and accidents. As noted in a technical bulletin by the ETRTO in February 2025, thorough inspection contributes to a safer and more reliable riding experience.
| Checkpoint | Description | Importance |
|---|---|---|
| Tyre Condition | Look for cuts, bulges, embedded objects (glass, thorns), and excessive wear on the tread. | Prevents flats and blowouts during rides; ensures the tyre provides optimal grip and rolling resistance. |
| Rim Condition | Check for dents, cracks, or bends in the rim; ensure the rim tape is properly installed and covers all spoke holes. | Prevents tyre damage and flats caused by sharp edges or spoke holes; ensures the tyre sits securely on the rim. |
| Rim Tape Condition | Ensure the rim tape is properly seated, covers all spoke holes, and is not torn or damaged. | Prevents the inner tube from being punctured by the spoke holes; ensures a smooth surface for the tyre to sit against, reducing the risk of flats. If using tubeless setup, ensures an air tight seal to prevent air leakage. |
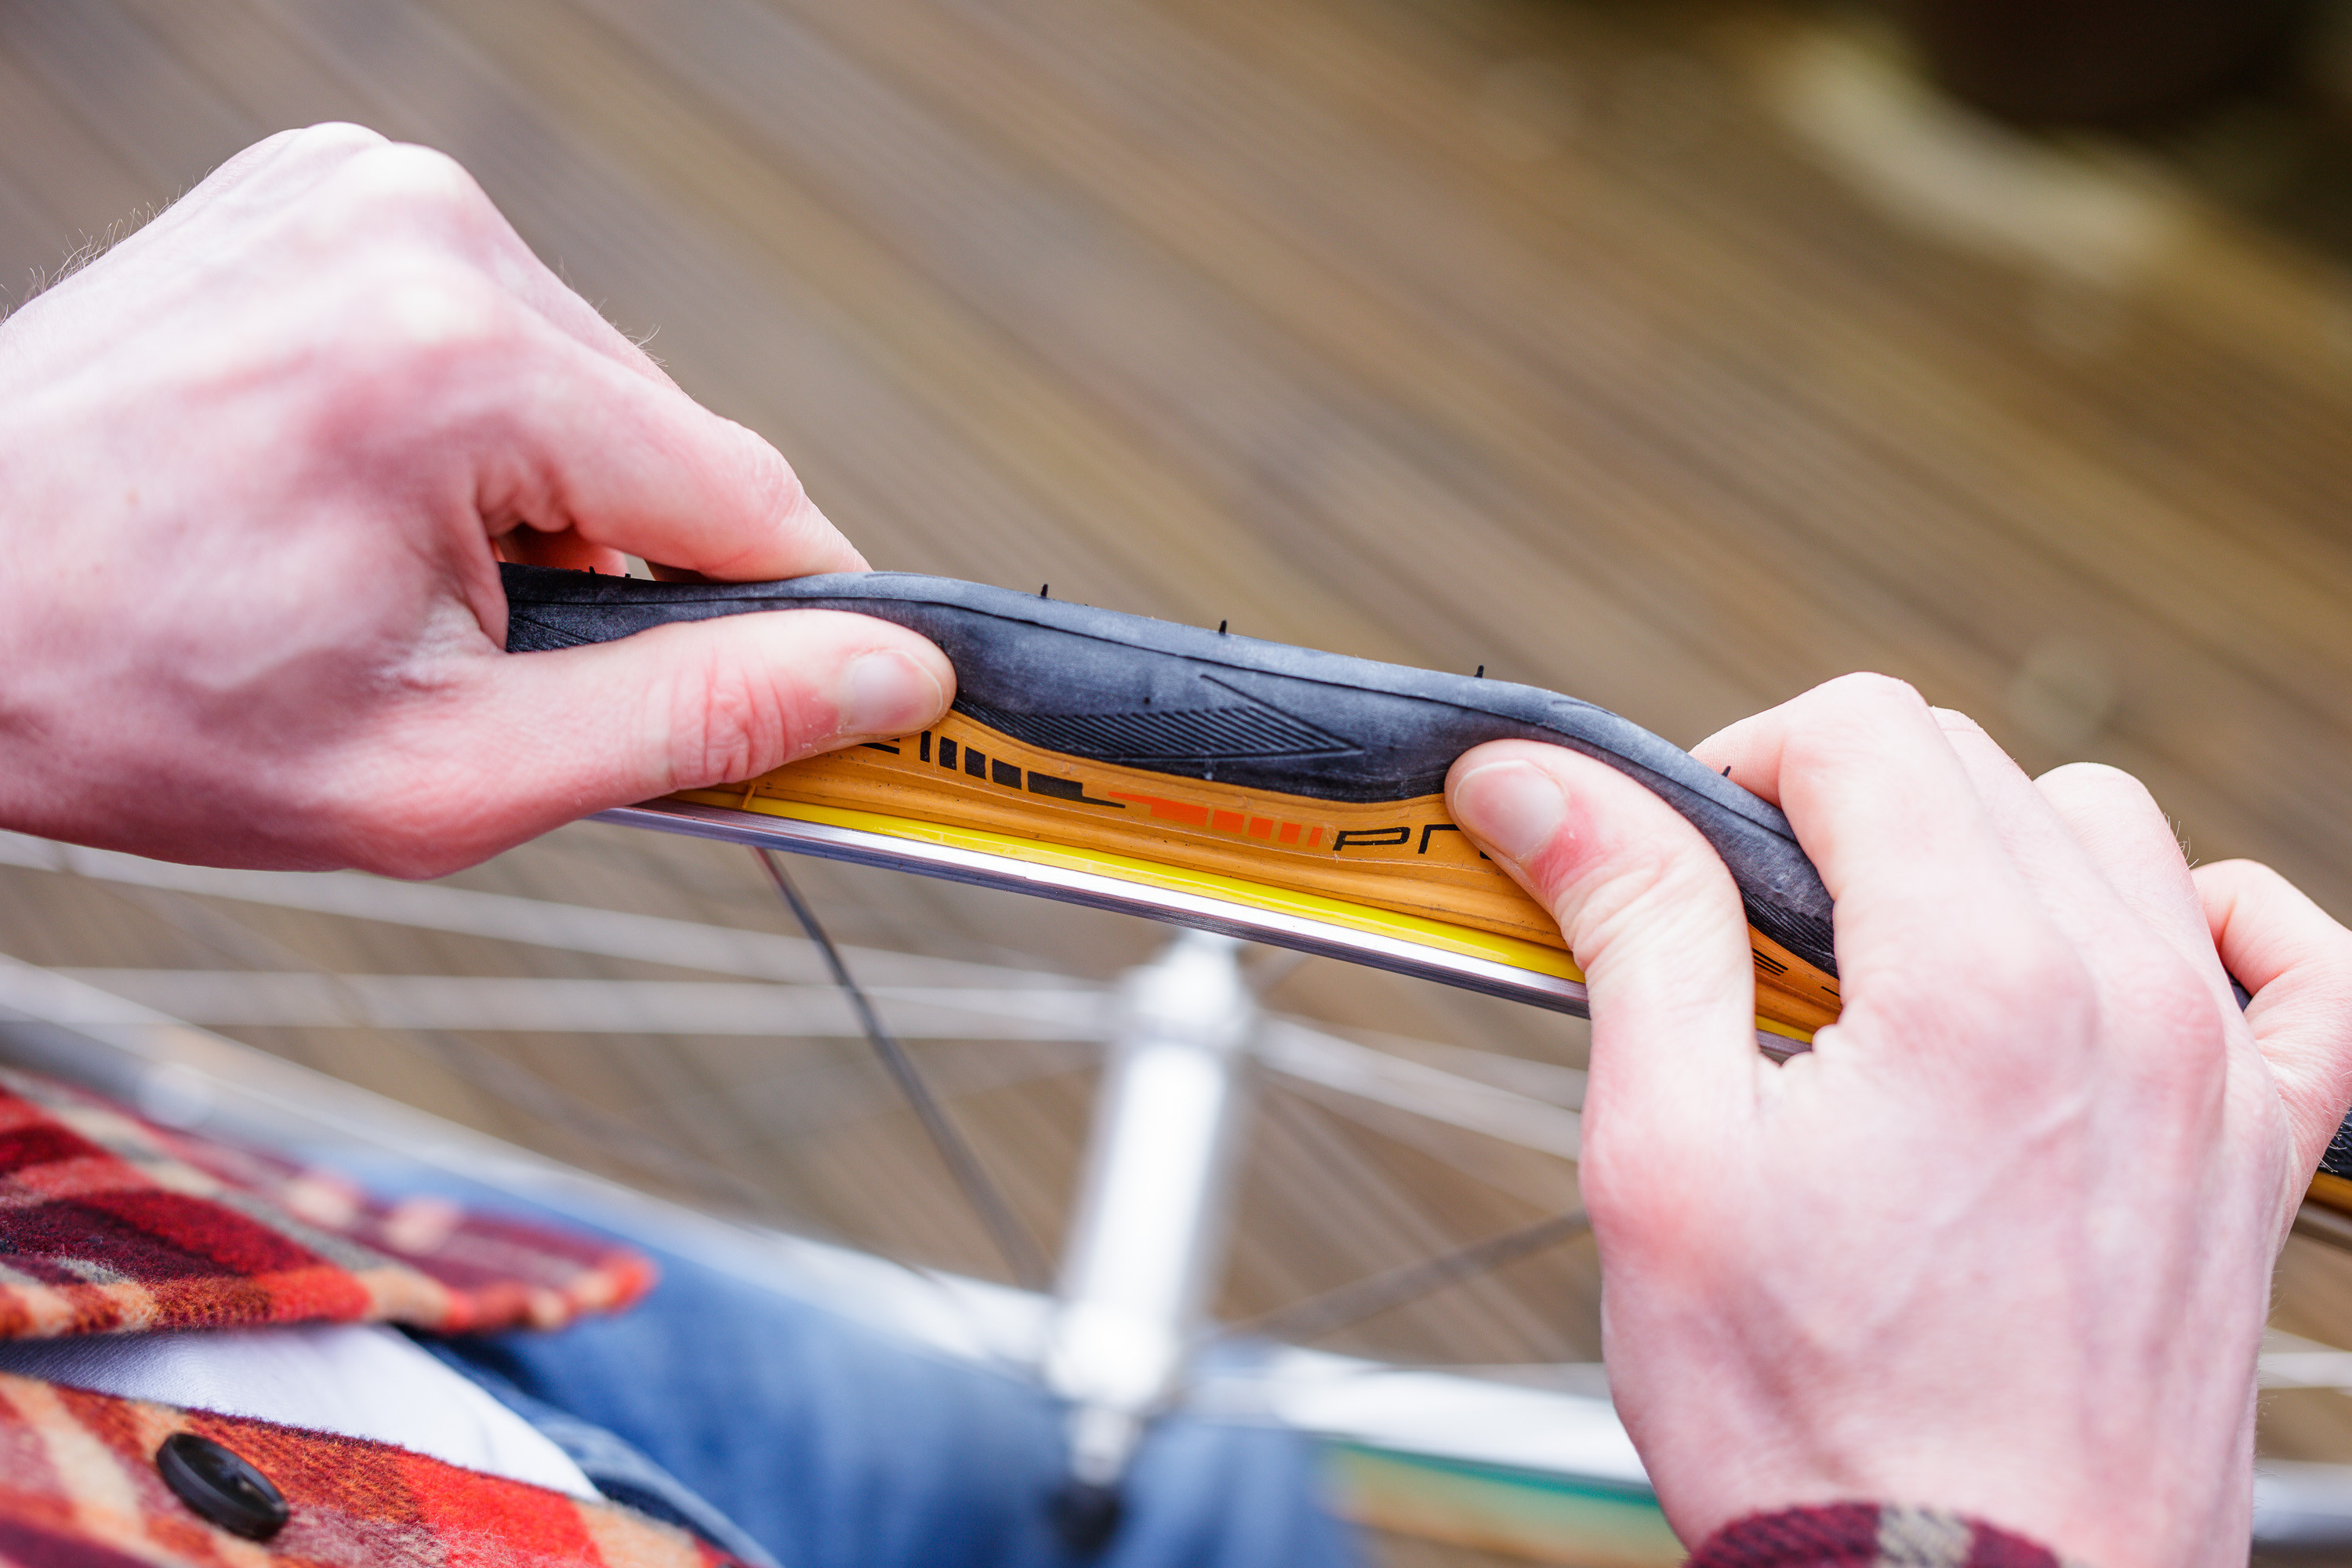
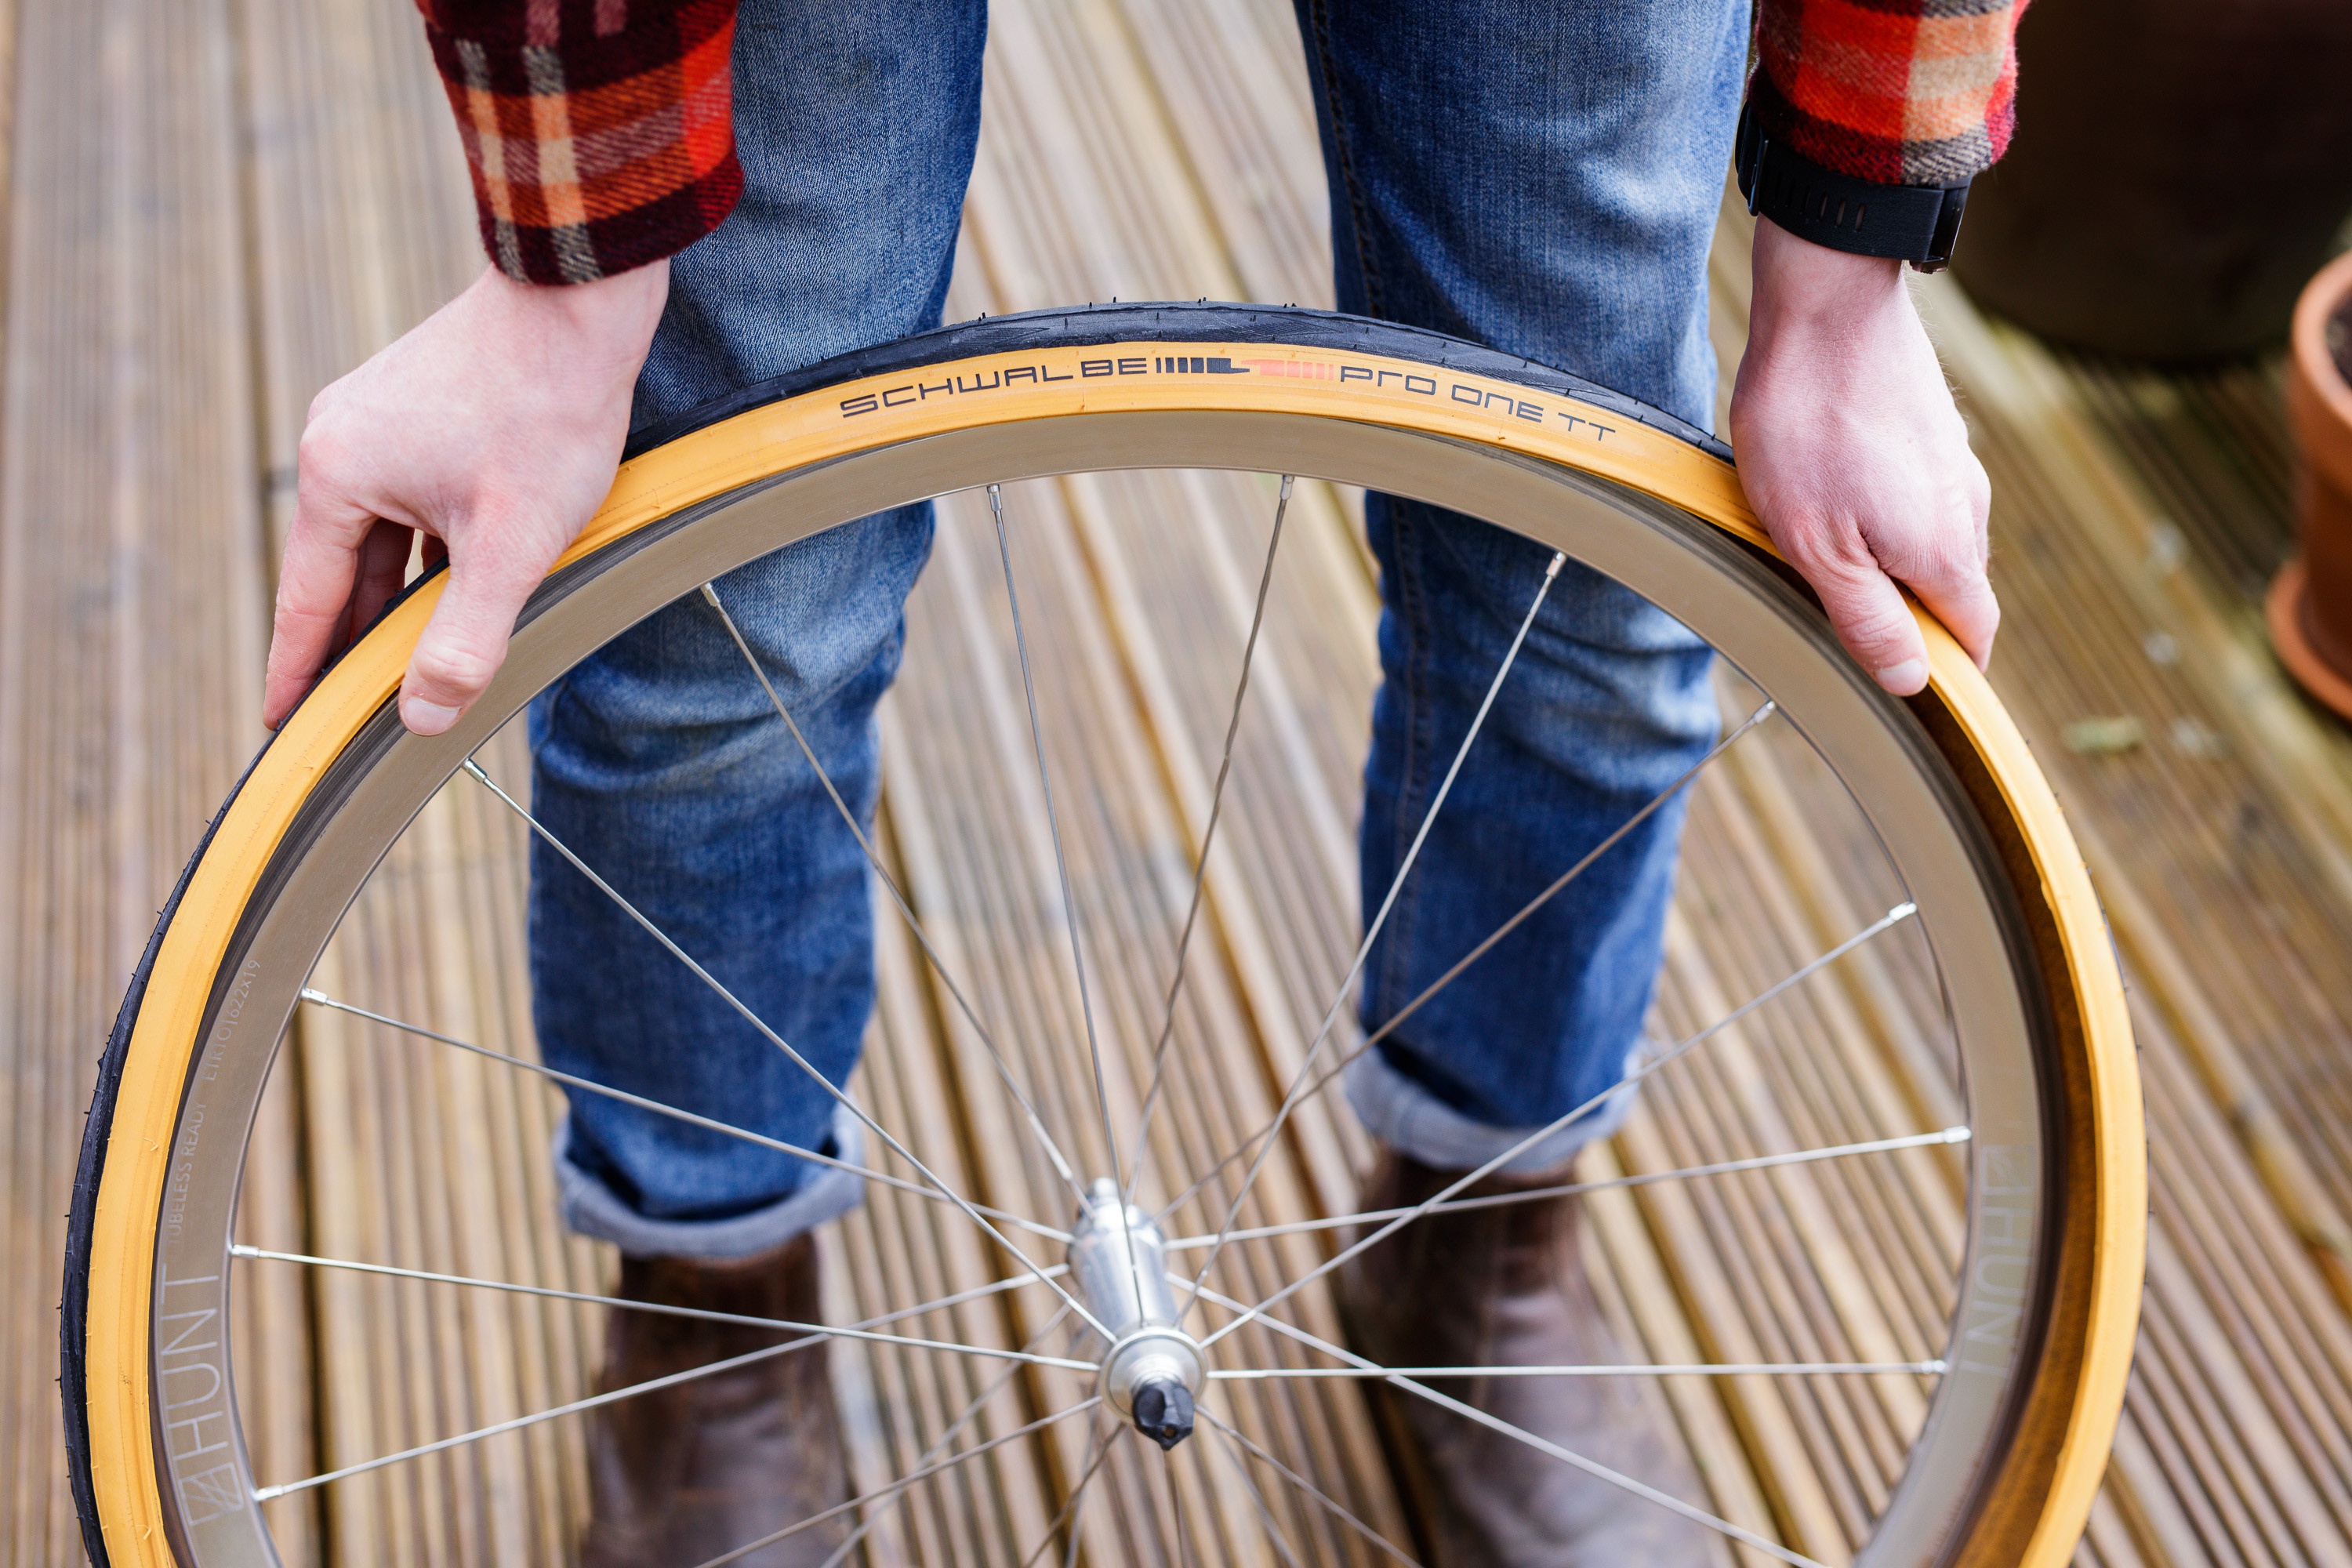 Person fitting a bicke tyre
3. Step-by-Step Guide: Installing a Clincher Tyre
Installing a clincher tyre involves a series of precise steps to ensure proper seating and prevent damage. Follow this guide for a smooth and successful installation.
3.1. Deflating and Removing the Old Tyre
Before installing a new tyre, you need to remove the old one. Start by fully deflating the tyre by pressing the valve core. Use tyre levers to gently pry one side of the tyre bead over the rim edge. Insert the lever under the bead and hook it onto a spoke. Use a second lever a few inches away to lift the tyre further. Once a section is off, you can usually slide one lever around the rim to remove the rest of the tyre. According to a guide by Park Tool in January 2024, proper deflation and lever technique prevent damage to the rim and tube.
| Step | Action | Importance |
|---|---|---|
| Deflate Tyre | Press the valve core to release all air from the inner tube. | Makes the tyre more pliable and easier to remove, reducing the risk of pinching the inner tube during levering. |
| Insert Tyre Levers | Insert one tyre lever under the tyre bead and hook it onto a spoke. Use a second lever a few inches away to lift the tyre further. | Distributes the force and prevents bending or damaging the rim; provides a secure grip for levering the tyre off. |
| Slide Lever | Once a section of the tyre is off the rim, slide one lever around the rim to remove the rest of the tyre bead. | Allows for quick and efficient removal of the tyre without needing multiple levers; minimizes the risk of pinching the inner tube or damaging the rim. |
3.2. Inserting the Inner Tube
With one side of the tyre off the rim, remove the inner tube and inspect it for damage. Lightly inflate the new or repaired inner tube to give it some shape. Insert the valve into the valve hole of the rim. Carefully tuck the inner tube inside the tyre, ensuring it is not twisted or pinched. According to a guide by the Bicycle Technical Education Program (BTEP) in August 2023, proper tube insertion prevents pinch flats and ensures a smooth ride.
| Step | Action | Importance |
|---|---|---|
| Inspect Tube | Check the inner tube for punctures, cuts, or signs of wear. | Prevents immediate flats upon installation; ensures the tube is in good condition to hold air properly. |
| Inflate Slightly | Add just enough air to give the inner tube some shape. | Prevents the tube from being pinched or twisted during installation; makes it easier to handle and position inside the tyre. |
| Tuck Inside Tyre | Carefully place the inner tube inside the tyre, ensuring it is evenly distributed and not twisted or pinched. | Avoids pinch flats caused by the tube being trapped between the tyre and the rim; ensures the tube sits properly for optimal performance and comfort. |
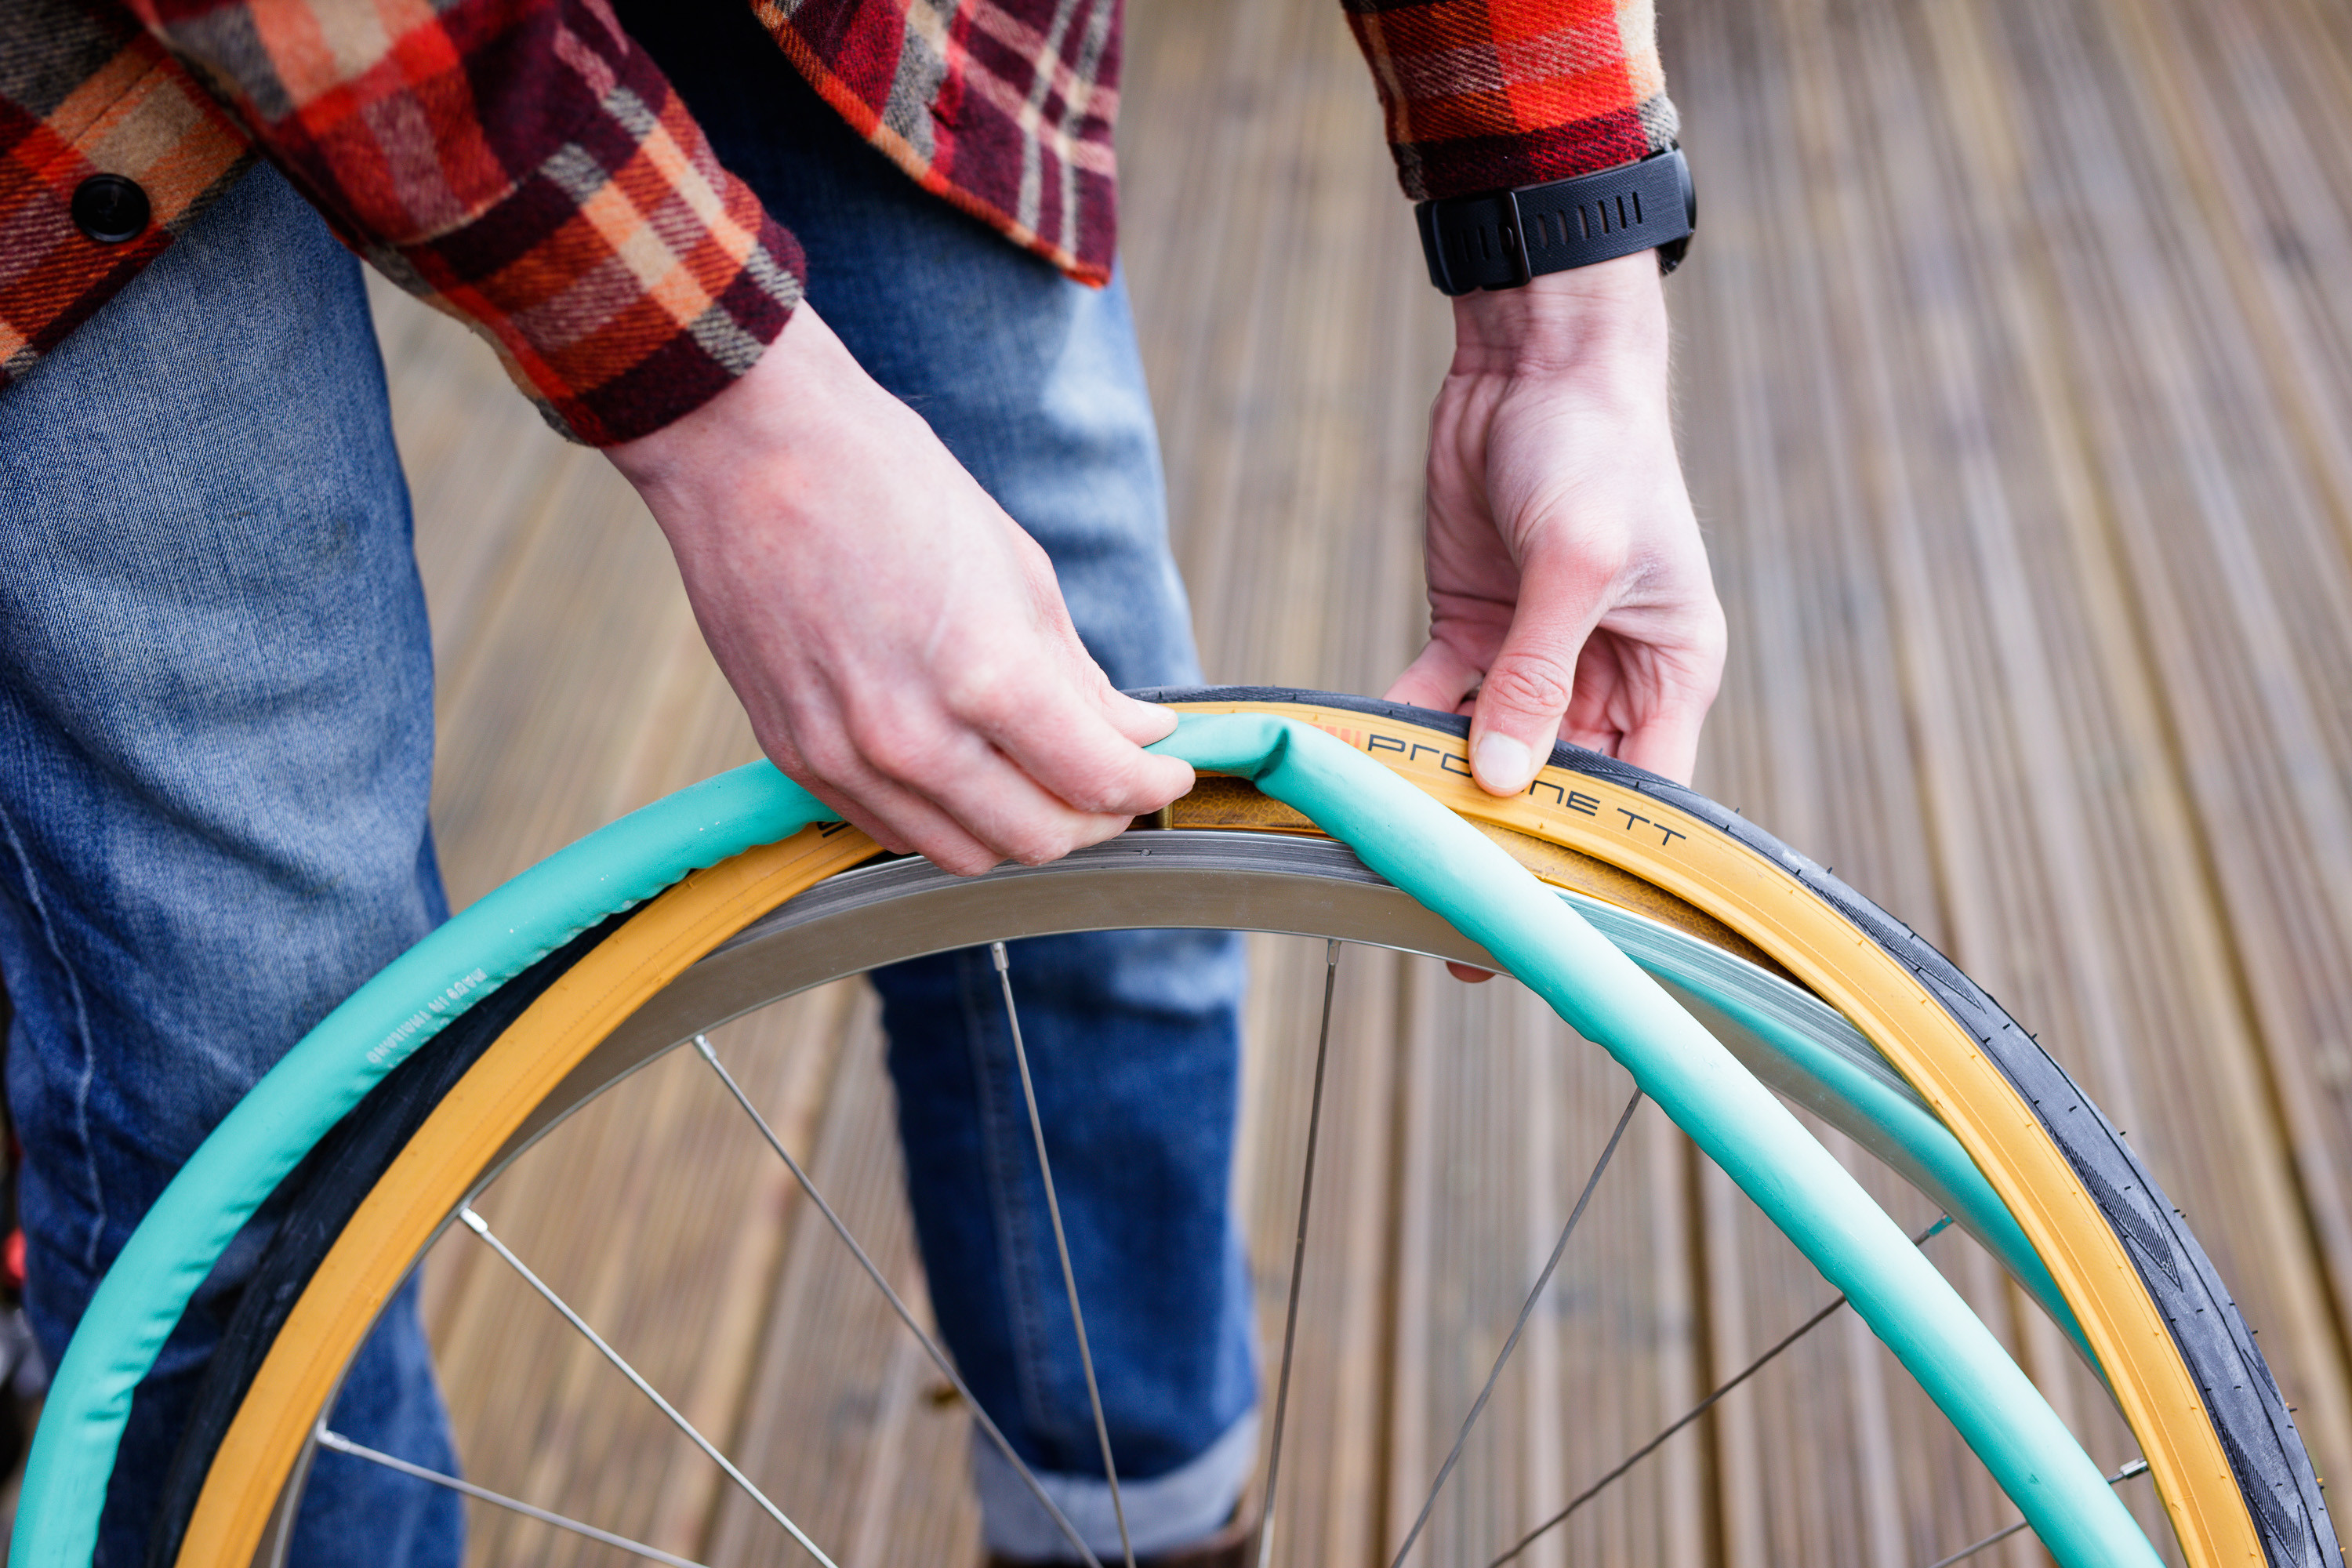 Persona installing an inner tube.
3.3. Seating One Bead of the Tyre
Start by placing one bead of the tyre onto the rim. Use your hands to roll the tyre onto the rim, working around the circumference. Ensure the tyre bead sits inside the rim channel. This step is usually straightforward and doesn’t require tools. A proper seating ensures the tyre is correctly positioned for the next steps. According to a guide by the American Bicycling Education Association (ABEA) in December 2024, correct bead seating is essential for safety and performance.
| Step | Action | Importance |
|---|---|---|
| Place One Bead | Position one side of the tyre bead inside the rim channel. | Provides a stable base for installing the rest of the tyre; ensures the tyre is properly aligned with the rim. |
| Roll Tyre Onto Rim | Use your hands to gradually roll the tyre onto the rim, working around the entire circumference of the wheel. | Distributes the pressure evenly, preventing any one section from being overly stressed; ensures the tyre bead sits securely in the rim channel. |
| Ensure Bead Is Seated | Check that the tyre bead is fully inside the rim channel. | Prevents uneven seating, which can lead to vibrations and poor handling; ensures the tyre is properly positioned for inflation, reducing the risk of blowouts. |
3.4. Seating the Second Bead: Techniques for Tight Tyres
Seating the second bead can be challenging, especially with tight tyres. Start opposite the valve and use your thumbs to push the tyre bead over the rim edge. Keep the seated part of the tyre in the rim’s central channel to create slack. If it gets too difficult, use tyre levers carefully, inserting them under the bead and gently levering it over the rim. Avoid pinching the inner tube. The League of American Bicyclists emphasized in July 2023 that patience and proper technique are key to avoiding damage.
| Technique | Action | Importance |
|---|---|---|
| Start Opposite Valve | Begin seating the second bead opposite the valve stem. | Distributes the tension evenly, making it easier to seat the final section of the tyre; provides a balanced approach to tyre installation. |
| Use Thumbs To Push | Use your thumbs to gradually push the tyre bead over the rim edge. | Allows for controlled application of force, reducing the risk of pinching the inner tube; provides a tactile feel for proper seating. |
| Keep Seated Part In Central Channel | Ensure the already seated part of the tyre is in the rim’s central channel to create slack. | Provides extra room for seating the final section of the tyre; maximizes the available slack, making it easier to maneuver the tyre bead. |
| Use Tyre Levers Carefully | If needed, use tyre levers to gently pry the remaining section of the tyre bead over the rim. | Provides additional leverage when the tyre is too tight to seat by hand; minimizes the risk of damage to the rim and tyre when used correctly. |
| Avoid Pinching Inner Tube | Be careful not to pinch the inner tube between the tyre and the rim. | Prevents immediate flats upon inflation; ensures the inner tube is free from obstructions and can properly hold air. |
 Person installing bike tyre onto a wheel
3.5. Checking Tyre Seating and Inflation
After seating both beads, inspect the tyre to ensure it is evenly seated around the rim. Look for a consistent gap between the tyre and the rim edge. Inflate the tyre to the recommended pressure indicated on the tyre sidewall. Check again for proper seating as you inflate. The Motorcycle Safety Foundation (MSF) advises in its safety guidelines from March 2025 that correct inflation and seating are critical for safe riding.
| Step | Action | Importance |
|---|---|---|
| Inspect Tyre Seating | Check the tyre for consistent spacing around the rim. | Ensures the tyre is properly aligned and seated, preventing uneven wear and handling issues; maximizes the tyre’s contact patch for optimal grip. |
| Inflate To Recommended Pressure | Inflate the tyre to the pressure specified on the tyre sidewall. | Optimizes rolling resistance, comfort, and grip; prevents pinch flats and blowouts caused by under or over-inflation. |
| Re-check Tyre Seating | As you inflate, continue to check that the tyre remains evenly seated around the rim. | Catches any seating issues early, allowing for correction before full inflation; ensures the tyre is properly positioned to handle the pressure and stresses of riding. |
4. Installing Tubeless Tyres: A Detailed Guide
Installing tubeless tyres requires a slightly different approach than clinchers, focusing on achieving an airtight seal.
4.1. Preparing the Rim for Tubeless Setup
Preparing the rim correctly is crucial for a successful tubeless setup. Start by using tubeless-specific rim tape, ensuring it covers the entire rim bed and extends slightly up the sidewalls. Press the tape firmly to eliminate air bubbles. Install a tubeless valve and tighten the retaining nut. The Bicycle Technical Education Program (BTEP) recommends in its tubeless setup guide from October 2024 that careful preparation avoids leaks and ensures a secure seal.
| Step | Action | Importance |
|---|---|---|
| Apply Rim Tape | Use tubeless-specific rim tape to cover the entire rim bed, extending slightly up the sidewalls. | Creates an airtight barrier, preventing air from escaping through the spoke holes; ensures a secure and reliable tubeless seal. |
| Press Tape Firmly | Press the tape firmly onto the rim, eliminating any air bubbles. | Ensures uniform adhesion and eliminates potential leak paths; provides a smooth, airtight surface for the tyre bead to seal against. |
| Install Tubeless Valve | Insert a tubeless valve into the valve hole and tighten the retaining nut. | Provides a secure and reliable valve for inflating and deflating the tyre; ensures the valve is properly sealed to prevent air leakage. |
4.2. Mounting the Tubeless Tyre
Mounting a tubeless tyre is similar to a clincher, but often requires more force. Seat one bead of the tyre onto the rim. Insert the tubeless valve. Use your hands to work the second bead onto the rim, starting opposite the valve. If it’s too tight, use tyre levers carefully. The Tyre Glider or Crankbrothers Speedier Lever can be helpful. Ensure both beads are seated in the rim channel. Park Tool emphasizes in its guide from November 2023 that proper seating is crucial for an airtight seal.
| Step | Action | Importance |
|---|---|---|
| Seat One Bead | Place one side of the tyre bead inside the rim channel. | Provides a stable base for installing the rest of the tyre; ensures the tyre is properly aligned with the rim. |
| Insert Tubeless Valve | Ensure the tubeless valve is properly installed and tightened. | Provides a secure and reliable valve for inflating and deflating the tyre; ensures the valve is properly sealed to prevent air leakage. |
| Work Second Bead On | Use your hands to gradually work the second bead onto the rim, starting opposite the valve. | Distributes the pressure evenly, preventing any one section from being overly stressed; ensures the tyre bead sits securely in the rim channel. |
| Use Tyre Levers | If needed, use tyre levers to gently pry the remaining section of the tyre bead over the rim. | Provides additional leverage when the tyre is too tight to seat by hand; minimizes the risk of damage to the rim and tyre when used correctly. |
| Ensure Beads Are Seated | Check that both tyre beads are fully inside the rim channel. | Prevents uneven seating, which can lead to vibrations and poor handling; ensures the tyre is properly positioned for inflation, reducing the risk of blowouts. |
4.3. Adding Sealant and Inflating the Tyre
Before fully inflating, add tubeless sealant through the valve core (after removing it) or directly into the tyre before seating the second bead. Rotate the wheel to coat the inside of the tyre with sealant. Use a tubeless-specific pump or compressor to inflate the tyre quickly. Listen for the beads snapping into place. The League of American Bicyclists advises in its tubeless guide from December 2023 that rapid inflation is key to seating the beads.
| Step | Action | Importance |
|---|---|---|
| Add Sealant | Pour tubeless sealant through the valve core or directly into the tyre before seating the second bead. | Seals small punctures and air leaks, maintaining tyre pressure and preventing flats; ensures the tyre remains inflated even after encountering sharp objects. |
| Rotate Wheel | Rotate the wheel to evenly coat the inside of the tyre with sealant. | Distributes the sealant to cover the entire inner surface, maximizing its effectiveness; ensures comprehensive puncture protection and minimizes air leakage. |
| Inflate Quickly | Use a tubeless-specific pump or compressor to inflate the tyre rapidly. | Forces the tyre beads to seat properly against the rim, creating an airtight seal; provides the necessary pressure to overcome initial resistance and ensure a secure connection. |
| Listen For Snap | Listen for the beads snapping into place as the tyre inflates. | Confirms that the tyre is properly seated and sealed against the rim; provides audible feedback that the installation is progressing correctly. |
4.4. Checking for Leaks and Final Adjustments
After inflation, check the tyre for leaks, especially around the valve and bead areas. If you find leaks, rotate the wheel so the sealant can coat the area. Add more air if necessary. Ensure the tyre pressure is within the recommended range. The Motorcycle Safety Foundation (MSF) recommends in its safety guidelines from January 2024 a thorough leak check for safe tubeless riding.
| Step | Action | Importance |
|---|---|---|
| Check For Leaks | Inspect the tyre around the valve and bead areas for any signs of air leakage. | Identifies potential weak spots in the tubeless seal, allowing for early intervention; prevents gradual air loss and ensures the tyre remains properly inflated during rides. |
| Rotate Wheel | If leaks are found, rotate the wheel to allow the sealant to coat the leaking area. | Distributes the sealant to the leak, effectively sealing it and preventing further air loss; maximizes the sealant’s ability to repair minor punctures. |
| Add Air | If necessary, add more air to maintain the recommended tyre pressure. | Ensures optimal rolling resistance, grip, and comfort; prevents pinch flats and blowouts caused by under-inflation. |
 Checking for a pinched inner tube
5. Troubleshooting Common Issues
Even with careful installation, you might encounter some common issues. Here’s how to troubleshoot them.
5.1. Dealing with a Tyre That Just Won’t Seat
If a tyre refuses to seat properly, start by deflating it and ensuring the beads are in the rim’s central channel. Apply soapy water to the bead and rim to help it slip into place. Inflate quickly using a compressor or tubeless-specific pump. If it still won’t seat, try using a tyre bead jack. The Bicycle Product Suppliers Association (BPSA) suggests in its troubleshooting guide from February 2024 that these steps usually resolve seating issues.
| Issue | Action | Importance |
|---|---|---|
| Tyre Won’t Seat | Deflate the tyre completely and ensure the beads are in the rim’s central channel. | Provides the maximum amount of slack for the tyre beads to move into position; ensures the beads are properly aligned for seating. |
| Apply Soapy Water | Apply soapy water to the tyre bead and rim interface. | Lubricates the tyre bead and rim, allowing it to slip into place more easily; reduces friction and resistance during inflation. |
| Inflate Quickly | Use a compressor or tubeless-specific pump to inflate the tyre rapidly. | Generates the necessary pressure to force the tyre beads to seat properly against the rim; provides the initial force to overcome any resistance. |
5.2. Preventing Pinch Flats During Installation
Pinch flats occur when the inner tube is pinched between the tyre and the rim. To prevent this, ensure the inner tube is slightly inflated before installation. Carefully seat one bead of the tyre, then insert the tube, making sure it’s not twisted or pinched. When seating the second bead, use your thumbs to push the tyre over the rim, avoiding tyre levers if possible. The American Bicycling Education Association (ABEA) emphasizes in its training materials from March 2024 that careful technique minimizes pinch flats.
| Precaution | Action | Importance |
|---|---|---|
| Slightly Inflate Tube | Add just enough air to give the inner tube some shape. | Prevents the tube from being pinched or twisted during installation; makes it easier to handle and position inside the tyre. |
| Seat One Bead Carefully | Place one side of the tyre bead inside the rim channel before inserting the inner tube. | Provides a stable base for the inner tube; ensures the tube is properly aligned and less likely to be pinched during seating. |
| Use Thumbs To Push | Use your thumbs to gradually push the tyre bead over the rim edge instead of relying on tyre levers. | Allows for controlled application of force, reducing the risk of pinching the inner tube; provides a tactile feel for proper seating. |
5.3. Dealing with Leaks in Tubeless Setups
If you experience leaks in a tubeless setup, first rotate the wheel so the sealant can coat the leaking area. If the leak persists, add more sealant. For larger punctures, use a tubeless tyre plug to seal the hole. If all else fails, insert an inner tube as a temporary fix. The Tyre Review Council (TRC) suggests in its tubeless troubleshooting guide from April 2024 that these steps address most tubeless leaks.
| Leak Type | Action | Importance |
|---|---|---|
| Small Leaks | Rotate the wheel to allow the sealant to coat the leaking area. | Distributes the sealant to the leak, effectively sealing it and preventing further air loss; maximizes the sealant’s ability to repair minor punctures. |
| Persistent Leaks | Add more sealant to the tyre. | Increases the concentration of sealant, providing better coverage and sealing capabilities; ensures the sealant can effectively plug any remaining leaks. |
| Larger Punctures | Use a tubeless tyre plug to seal the hole. | Provides a robust and durable seal for larger punctures that sealant alone cannot fix; allows you to continue riding without needing to replace the tyre or insert an inner tube. |
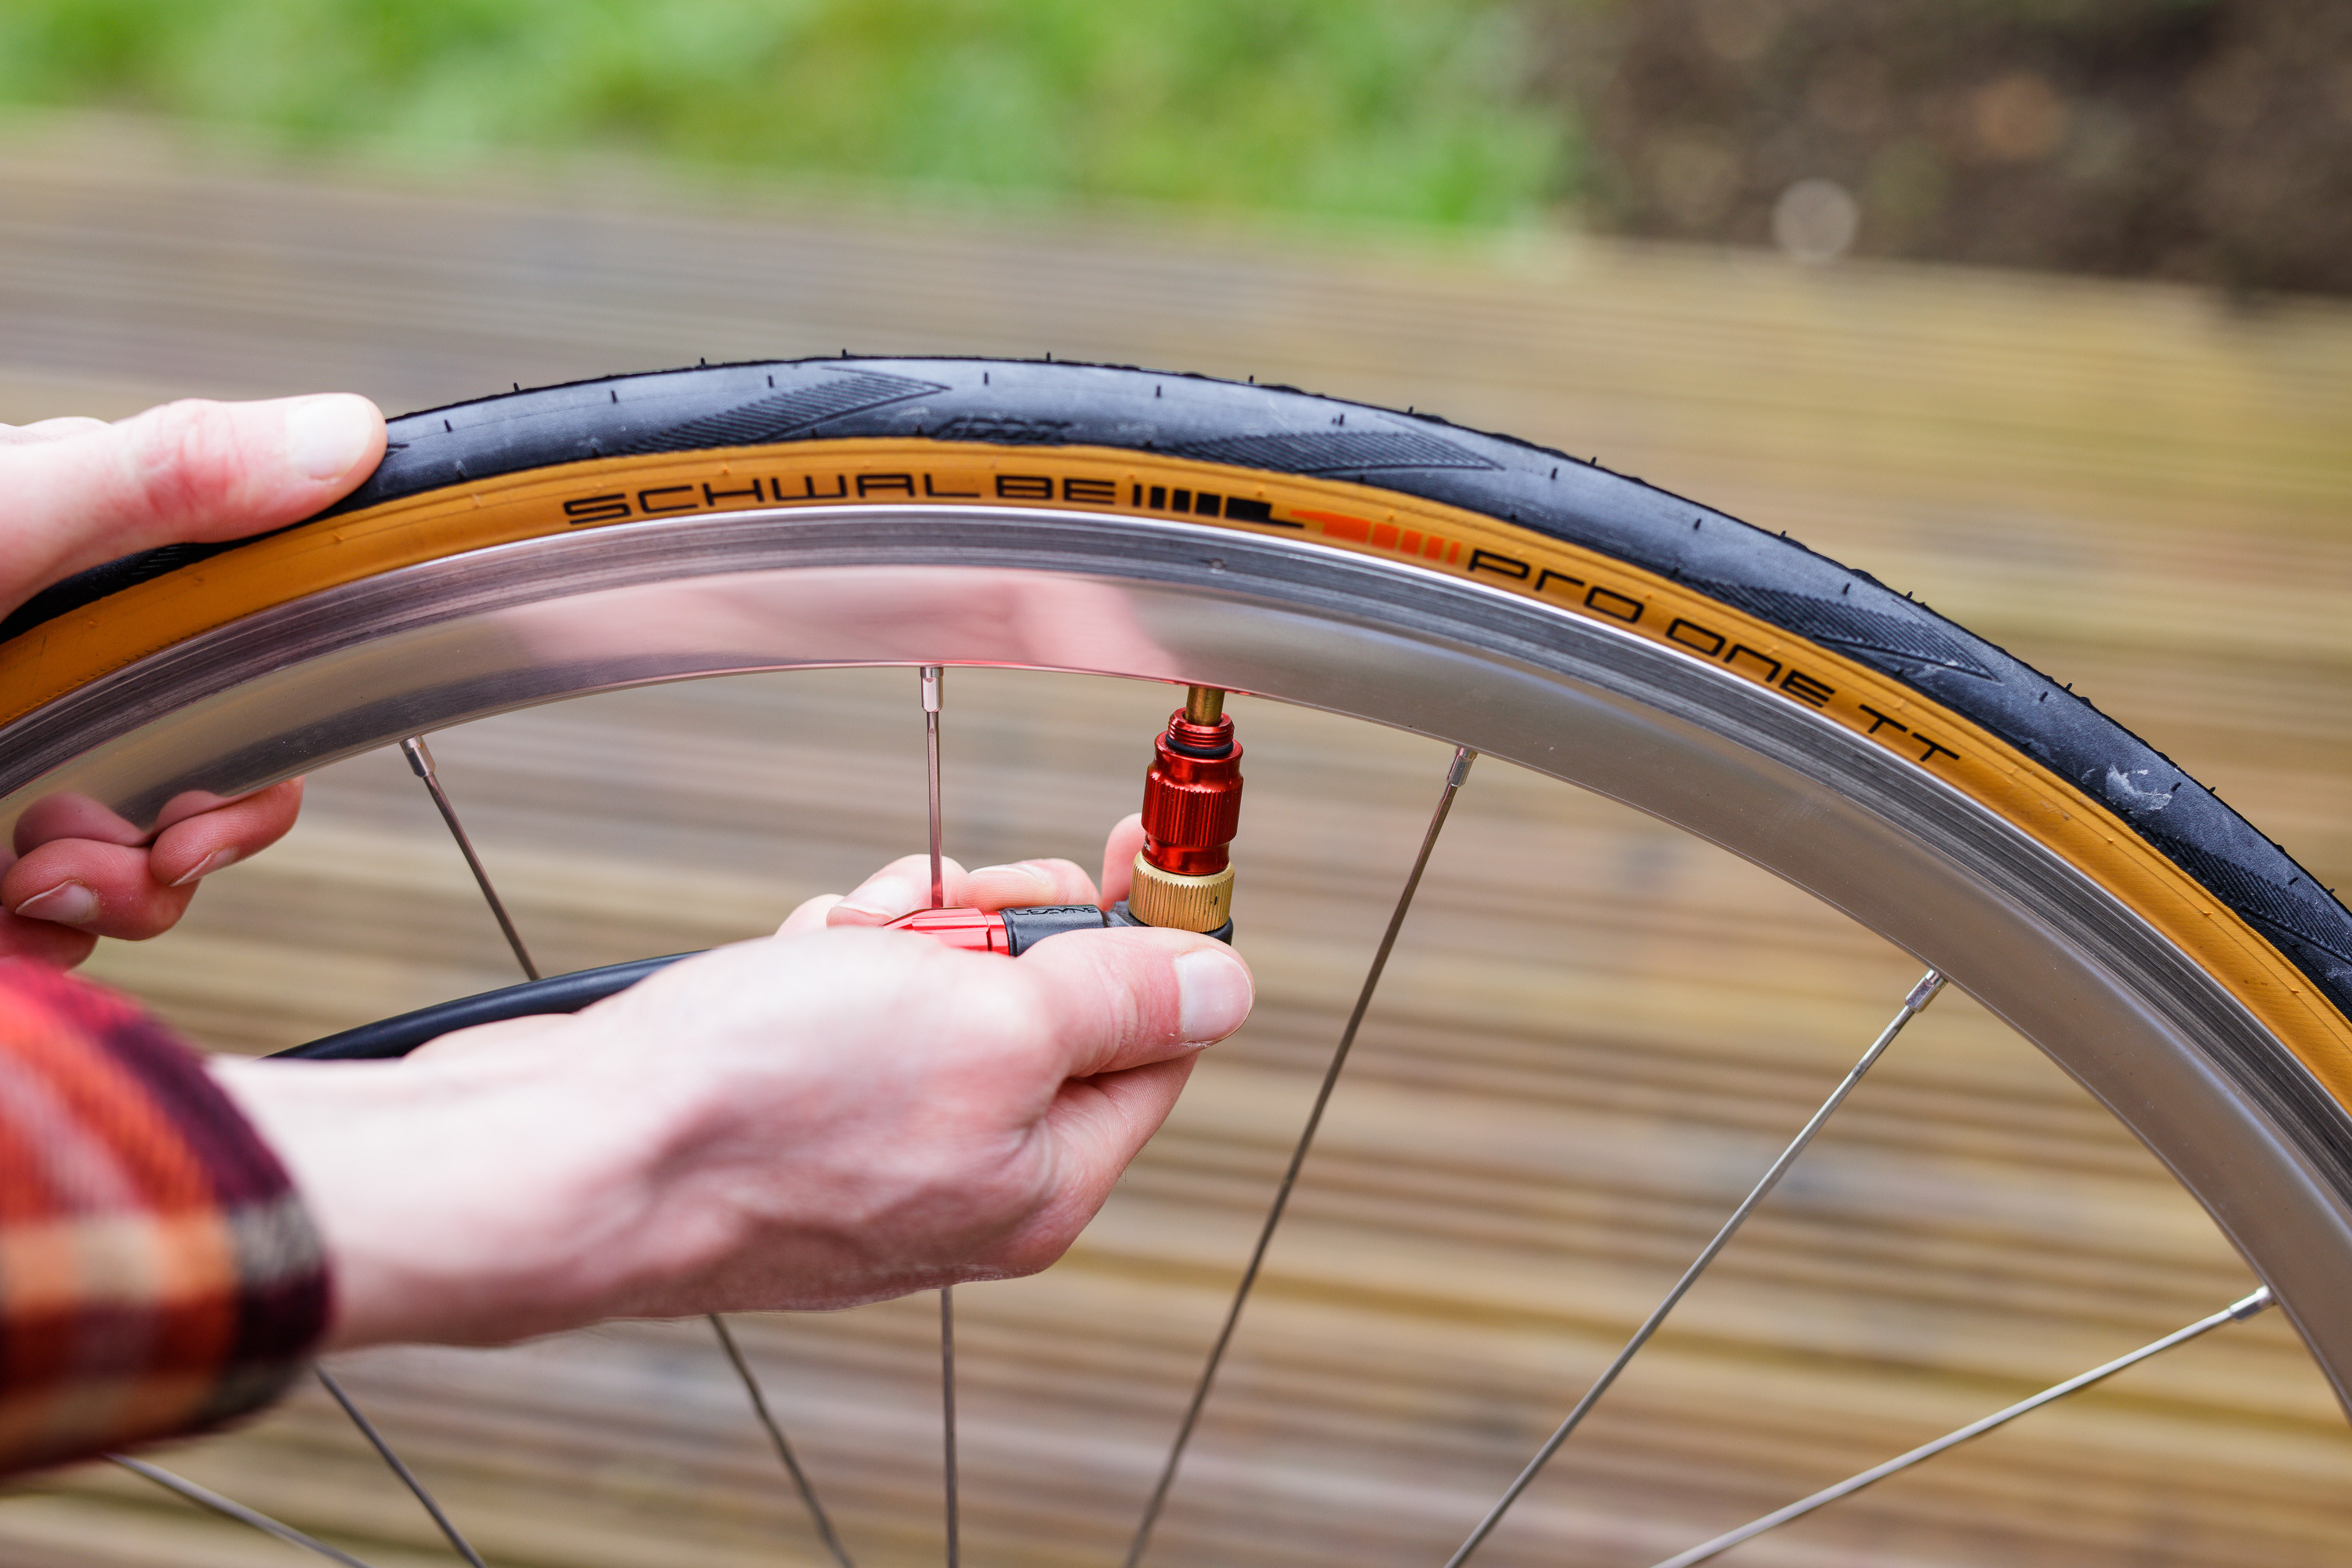 Inflating a bike tyre
6. Tips for Easier Tyre Installation
Here are some additional tips and tricks to make tyre installation easier, regardless of the tyre type.
6.1. Using Soapy Water as a Lubricant
Soapy water can be a game-changer when installing tight tyres. Apply a small amount to the tyre beads and the rim. The lubrication helps the tyre slip over the rim edge more easily. Be careful not to get soapy water on the brake rotors or pads. According to a study by the Bicycle Technical Education Program (BTEP) in May 2024, soapy water significantly reduces the force needed to seat tight tyres.
| Benefit | Description | Application |
|---|---|---|
| Reduced Friction | Soapy water acts as a lubricant, reducing friction between the tyre bead and the rim. | Apply a small amount to the tyre beads and the rim. |
| Easier Seating | The lubrication helps the tyre slip over the rim edge more easily. | Carefully work the tyre onto the rim, ensuring the beads are properly seated. |
| Prevents Damage | Reduces the force needed, minimizing the risk of damaging the rim or tyre. | Ensure the rim and tyre are clean before applying soapy water. |
6.2. Warming Up the Tyre Before Installation
Warming up the tyre can make it more pliable and easier to work with. Place the tyre in a warm room or use a hairdryer on a low setting to gently warm the rubber. Be careful not to overheat the tyre. This technique is particularly useful for new or stiff tyres. The League of American Bicyclists recommends in its winter maintenance guide from June 2024 that warming tyres can improve flexibility in cold conditions.
| Benefit | Description | Application |
|---|---|---|
| Increased Pliability | Warming up the tyre makes the rubber more flexible and easier to manipulate. | Place the tyre in a warm room or use a hairdryer on a low setting to gently warm the rubber. |
| Easier Manipulation | The increased pliability makes it easier to seat the tyre beads on the rim. | Work the tyre onto the rim, ensuring the beads are properly seated. |
| Reduced Resistance | Warming the tyre reduces the resistance encountered when seating the tyre beads. | Be careful not to overheat the tyre, as excessive heat can damage the rubber. |
6.3. Choosing the Right Tyre Levers
The right tyre levers can make a big difference in how easily you can install or remove a tyre. Opt for levers made of strong plastic or composite material with a thin, wide tip. Avoid metal levers, which can damage rims. Tyre Glider and Crankbrothers Speedier Lever are modern evolutions that can continuously install the bead. The American Bicycling Education Association (ABEA) recommends in its tool guide from July 2024 that selecting the right levers protects your rims and makes the job easier.
| Feature | Importance | Recommendation |
|---|---|---|
| Material | Strong plastic or composite material protects the rim from damage. | Avoid metal levers, which can scratch or dent the rim. |
| Tip Design | A thin, wide tip helps to lift the tyre bead without pinching the inner tube. | Look for levers with a rounded or beveled edge to prevent damage to the rim or tyre. |
| Modern Evolutions | Tyre Glider and Crankbrothers Speedier Lever can continuously install the bead. | Consider these modern options for easier and more efficient tyre installation. |
7. Tyre Maintenance and Longevity
Proper tyre maintenance is essential for maximizing tyre life and ensuring safe riding.
7.1. Checking Tyre Pressure Regularly
Regularly checking tyre pressure is crucial for optimal performance and safety. Use a reliable gauge to ensure the pressure is within the recommended range indicated on the tyre sidewall. Underinflated tyres can lead to pinch flats and increased rolling resistance, while overinflated tyres can reduce grip and comfort. The Motorcycle Safety Foundation (MSF) recommends in its safety guidelines from August 2024