
Removing a pedal arm from your bike can be a simple task with the right knowledge and tools, ensuring your bike stays in top condition for all your adventures. At usabikers.net, we’re dedicated to providing you with the most reliable information and guidance to keep you riding smoothly. This guide provides detailed steps on pedal arm removal, maintenance tips, and where to find the best resources for all your biking needs.
1. Why Would You Need to Remove a Pedal Arm?
You might need to remove a pedal arm, also known as a crank arm, for several reasons. These include replacing damaged parts, performing routine maintenance, or upgrading your bike’s components. Understanding when and why this task is necessary can save you time and money in the long run.
Common Reasons for Pedal Arm Removal
- Damage Assessment: Inspecting the crank arm and pedal for wear or damage.
- Component Upgrade: Replacing old crank arms with new, high-performance parts.
- Maintenance: Cleaning and lubricating the pedal and crank arm threads.
- Thread Repair: Fixing stripped threads on the crank arm or pedal.
- Preventative Action: Addressing minor issues before they escalate into major problems.
2. Essential Tools for Pedal Arm Removal
Having the right tools on hand is crucial for a smooth and efficient pedal arm removal. Here’s a list of essential tools you’ll need:
List of Necessary Tools
- Crank Puller: This tool is specifically designed to remove crank arms from the bottom bracket spindle.
- Socket Wrench: A wrench with sockets to fit the crank arm bolts.
- Allen Wrench Set: For loosening and tightening bolts on some crank arms.
- Pedal Wrench: A thin, long-handled wrench designed to fit pedal axles.
- Flathead Screwdriver: Useful for removing caps or covers on the crank arm.
- WD-40 or Lubricant: To loosen any stuck bolts or threads.
- Hammer: For gently tapping the crank arm into place during reinstallation.
- Torque Wrench: To ensure bolts are tightened to the correct specification during reinstallation.
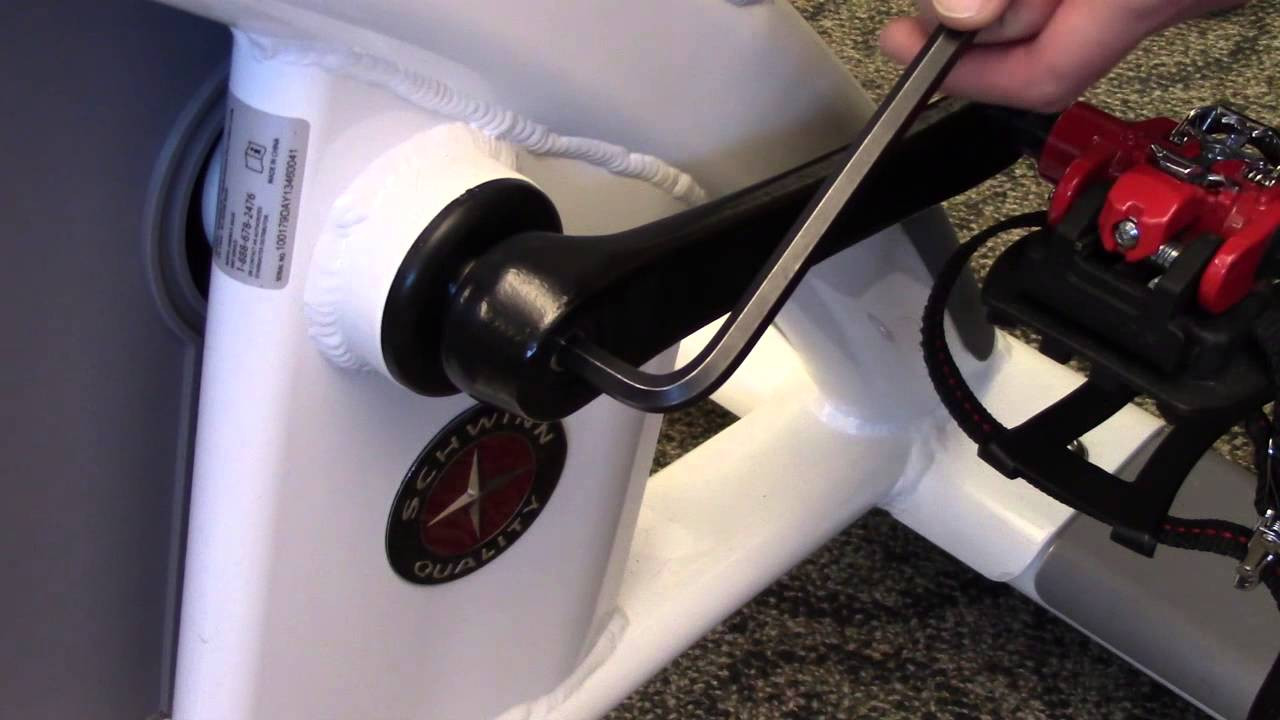 Crank Puller Tool for Removing Bike Pedal Arm
Step-by-Step Guide to Using a Crank Puller
- Prepare the Crank Puller: Ensure the crank puller is correctly assembled with the appropriate tip.
- Insert the Puller: Screw the threaded end of the crank puller into the crank arm.
- Tighten the Puller: Use a wrench to tighten the puller, pressing against the bottom bracket spindle.
- Remove the Arm: Continue tightening until the crank arm comes loose.
3. Step-by-Step Guide: Removing a Pedal Arm
Follow these detailed steps to safely and effectively remove a pedal arm from your bike. Each step is designed to help both beginners and experienced bikers achieve the best results.
Detailed Removal Process
- Prepare Your Bike: Place your bike on a stable surface or bike stand to prevent any movement during the process.
- Remove the Pedal: Use a pedal wrench to remove the pedal from the crank arm. Remember that the left pedal is reverse-threaded, so turn it clockwise to loosen.
- Remove the Crank Arm Cap: Use a flathead screwdriver to gently remove the cap covering the crank arm bolt.
- Loosen the Crank Arm Bolt: Use a socket wrench or Allen wrench to loosen the bolt holding the crank arm to the bottom bracket spindle.
- Apply Lubricant: Spray some WD-40 or lubricant into the shaft to help loosen the crank arm if it’s stuck.
- Attach the Crank Puller: Screw the crank puller into the crank arm, ensuring it is securely in place.
- Tighten the Crank Puller: Use a wrench to tighten the crank puller, pressing against the bottom bracket spindle until the crank arm comes loose.
- Remove the Crank Arm: Once the crank arm is loose, carefully remove it from the bottom bracket spindle.
- Inspect the Components: Check the crank arm, pedal, and bottom bracket for any signs of damage or wear.
4. Understanding Thread Direction
Understanding thread direction is crucial to avoid damaging your bike components. Most pedals have standard threading, but the left pedal is reverse-threaded to prevent it from loosening during riding.
Standard vs. Reverse Threading
- Right Pedal: Standard threading (tighten clockwise, loosen counter-clockwise).
- Left Pedal: Reverse threading (tighten counter-clockwise, loosen clockwise).
Why Reverse Threading Matters
Reverse threading on the left pedal prevents it from unscrewing due to the motion of pedaling. This design ensures that the pedal remains securely attached during use.
5. Choosing the Right Crank Puller
Selecting the right crank puller is essential for successful pedal arm removal. Different bikes may require different types of crank pullers, so understanding the variations is key.
Types of Crank Pullers
- Standard Crank Puller: Works with most square taper crank arms.
- Self-Extracting Crank Bolt: Simplifies the removal process without needing a separate puller tool.
- ISIS Crank Puller: Designed for crank arms with an ISIS (International Splined Interface Standard) bottom bracket.
Factors to Consider When Selecting a Crank Puller
- Compatibility: Ensure the puller is compatible with your bike’s crank arm type.
- Durability: Choose a puller made from high-quality materials to withstand repeated use.
- Ease of Use: Opt for a puller that is easy to install and operate.
- Price: Balance cost with quality to get the best value for your money.
6. Common Mistakes to Avoid
Avoiding common mistakes can save you time, prevent damage to your bike, and ensure a smooth pedal arm removal process.
Frequent Errors During Removal
- Using the Wrong Tools: Using incorrect tools can damage the crank arm or bottom bracket.
- Forgetting Reverse Threading: Attempting to loosen the left pedal in the wrong direction can strip the threads.
- Applying Excessive Force: Forcing the crank puller can damage the tool or the bike components.
- Neglecting Lubrication: Failing to lubricate stuck bolts can make removal difficult and cause damage.
Tips for Avoiding These Mistakes
- Double-Check Tool Compatibility: Ensure you are using the correct tools for your specific bike model.
- Remember Thread Direction: Always check the thread direction before attempting to loosen or tighten pedals.
- Use Gentle Force: Apply steady, even pressure when using the crank puller.
- Lubricate Thoroughly: Use WD-40 or another lubricant to loosen stuck bolts and threads.
7. Reinstalling the Pedal Arm
After removing the pedal arm, reinstalling it correctly is just as important. Follow these steps to ensure a secure and proper fit.
Step-by-Step Reinstallation Guide
- Clean the Components: Clean the crank arm, bottom bracket spindle, and pedal threads to remove any dirt or debris.
- Apply Grease: Apply a thin layer of grease to the bottom bracket spindle and pedal threads to prevent corrosion and ensure smooth installation.
- Position the Crank Arm: Align the crank arm so it is 180 degrees opposite the other crank arm. This ensures proper pedaling motion.
- Insert the Crank Arm: Slide the crank arm onto the bottom bracket spindle.
- Tighten the Crank Arm Bolt: Use a socket wrench or Allen wrench to tighten the bolt holding the crank arm to the spindle.
- Torque to Specification: Use a torque wrench to tighten the bolt to the manufacturer’s recommended torque specification. This ensures a secure fit without over-tightening.
- Replace the Cap: Reinstall the cap covering the crank arm bolt.
- Install the Pedal: Use a pedal wrench to install the pedal into the crank arm. Remember to tighten the left pedal counter-clockwise.
Ensuring Proper Alignment
Proper alignment of the crank arms is essential for comfortable and efficient pedaling. Ensure that the crank arms are 180 degrees opposite each other to maintain a balanced pedaling motion.
8. Maintenance Tips for Pedal Arms
Regular maintenance of your pedal arms can extend their lifespan and keep your bike running smoothly. Here are some essential maintenance tips.
Regular Maintenance Practices
- Cleaning: Regularly clean the crank arms and pedals to remove dirt, grime, and debris.
- Lubrication: Apply grease to the pedal threads and bottom bracket spindle to prevent corrosion and ensure smooth operation.
- Inspection: Regularly inspect the crank arms and pedals for signs of wear, damage, or loose bolts.
- Tightening Bolts: Check and tighten the crank arm bolts and pedal bolts regularly to ensure they are properly secured.
Extending the Life of Your Pedal Arms
- Use Quality Components: Invest in high-quality crank arms and pedals that are durable and long-lasting.
- Avoid Overloading: Avoid putting excessive stress on the crank arms by maintaining a smooth and consistent pedaling style.
- Store Your Bike Properly: Store your bike in a dry place to prevent corrosion and damage to the components.
9. Troubleshooting Common Issues
Even with careful maintenance, you may encounter issues with your pedal arms. Here are some common problems and how to troubleshoot them.
Identifying and Resolving Problems
- Loose Crank Arm: If the crank arm feels loose, tighten the crank arm bolt to the manufacturer’s recommended torque specification.
- Stripped Threads: If the threads on the crank arm or pedal are stripped, replace the damaged component.
- Creaking Noises: Creaking noises from the crank arm or pedal area may indicate loose bolts, dry threads, or worn components. Clean, lubricate, and tighten the bolts to resolve the issue.
- Bent Crank Arm: If the crank arm is bent, replace it immediately to prevent further damage and ensure safe riding.
When to Seek Professional Help
If you are unable to resolve the issue yourself, or if you are not comfortable working on your bike, seek professional help from a qualified bike mechanic.
10. Finding the Right Parts and Services
Knowing where to find the right parts and services can save you time and ensure you get quality components for your bike.
Recommended Resources
- Local Bike Shops: Local bike shops offer a wide range of parts, accessories, and repair services.
- Online Retailers: Online retailers such as usabikers.net provide a convenient way to shop for bike parts and accessories from the comfort of your home.
- Manufacturer Websites: Manufacturer websites often offer replacement parts and detailed information about their products.
What to Look for in a Bike Mechanic
- Experience: Choose a bike mechanic with experience working on your specific type of bike.
- Certifications: Look for mechanics with certifications from reputable organizations such as the Barnett Bicycle Institute.
- Reputation: Check online reviews and ask for recommendations from other cyclists.
11. Safety Precautions
Safety should always be a top priority when working on your bike. Follow these safety precautions to prevent injuries and ensure a safe working environment.
Ensuring a Safe Working Environment
- Wear Safety Glasses: Wear safety glasses to protect your eyes from debris and chemicals.
- Wear Gloves: Wear gloves to protect your hands from grease, oil, and sharp edges.
- Work in a Well-Lit Area: Ensure you have adequate lighting to see what you are doing.
- Keep Your Work Area Clean: Keep your work area clean and organized to prevent accidents.
- Use the Right Tools: Use the right tools for the job and follow the manufacturer’s instructions.
Preventing Injuries
- Be Careful with Sharp Objects: Be careful when handling sharp objects such as screwdrivers and knives.
- Avoid Overexertion: Take breaks when needed to avoid overexertion and fatigue.
- Know Your Limits: If you are not comfortable performing a task, seek professional help.
12. Upgrading Your Pedal Arms
Upgrading your pedal arms can improve your bike’s performance and enhance your riding experience.
Benefits of Upgrading
- Improved Performance: Upgrading to lighter and stiffer crank arms can improve your pedaling efficiency and power transfer.
- Enhanced Durability: Upgrading to high-quality crank arms can increase their lifespan and reduce the risk of damage.
- Better Aesthetics: Upgrading to stylish crank arms can enhance the overall appearance of your bike.
Choosing the Right Upgrade
- Consider Your Riding Style: Choose crank arms that are appropriate for your riding style and terrain.
- Set a Budget: Determine how much you are willing to spend on the upgrade.
- Read Reviews: Read online reviews and ask for recommendations from other cyclists.
13. Pedal Arm Compatibility
Ensuring compatibility between your pedal arms, pedals, and bottom bracket is crucial for a smooth and safe riding experience.
Understanding Compatibility
- Crank Arm Length: Choose crank arms that are the appropriate length for your body size and riding style.
- Pedal Thread Size: Ensure that your pedals have the correct thread size for your crank arms.
- Bottom Bracket Type: Ensure that your crank arms are compatible with your bike’s bottom bracket type.
Ensuring Proper Fit
- Consult a Bike Mechanic: Consult a bike mechanic to ensure that you are choosing compatible components.
- Read Product Descriptions: Read product descriptions carefully to ensure that the components are compatible with your bike.
- Check Online Resources: Check online resources such as usabikers.net for compatibility charts and information.
14. The Importance of Torque Specifications
Using a torque wrench to tighten bolts to the manufacturer’s recommended torque specification is essential for ensuring a secure and safe fit.
Why Torque Matters
- Prevents Over-Tightening: Over-tightening bolts can damage the components and strip the threads.
- Prevents Under-Tightening: Under-tightening bolts can cause the components to come loose during riding.
- Ensures a Secure Fit: Tightening bolts to the correct torque specification ensures a secure and safe fit.
Using a Torque Wrench
- Set the Torque Wrench: Set the torque wrench to the manufacturer’s recommended torque specification.
- Tighten the Bolt: Use the torque wrench to tighten the bolt until it clicks, indicating that the correct torque has been reached.
- Double-Check: Double-check the torque specification to ensure that it is correct.
15. Exploring Different Types of Pedals
Understanding the different types of pedals available can help you choose the best option for your riding style and preferences.
Types of Pedals
- Flat Pedals: Flat pedals are simple and versatile, suitable for a wide range of riding styles.
- Clipless Pedals: Clipless pedals provide a more secure connection between your feet and the bike, improving pedaling efficiency and power transfer.
- Hybrid Pedals: Hybrid pedals combine the features of flat pedals and clipless pedals, offering versatility and convenience.
Choosing the Right Pedal
- Consider Your Riding Style: Choose pedals that are appropriate for your riding style and terrain.
- Set a Budget: Determine how much you are willing to spend on the pedals.
- Read Reviews: Read online reviews and ask for recommendations from other cyclists.
16. Benefits of a Well-Maintained Bike
Maintaining your bike regularly offers numerous benefits, enhancing your riding experience and prolonging the life of your bike.
Advantages of Regular Maintenance
- Improved Performance: A well-maintained bike performs better, offering a smoother and more efficient riding experience.
- Enhanced Safety: Regular maintenance ensures that your bike is safe to ride, reducing the risk of accidents.
- Extended Lifespan: Regular maintenance can extend the lifespan of your bike, saving you money in the long run.
- Reduced Repair Costs: Catching and addressing minor issues early can prevent them from escalating into major problems, reducing repair costs.
Creating a Maintenance Schedule
- Daily Checks: Perform daily checks before each ride to ensure that your bike is in good working condition.
- Weekly Maintenance: Perform weekly maintenance tasks such as cleaning and lubricating the chain.
- Monthly Maintenance: Perform monthly maintenance tasks such as checking and tightening bolts.
- Annual Tune-Up: Take your bike to a qualified mechanic for an annual tune-up.
17. Joining the Biker Community
Connecting with other bikers can enhance your riding experience, providing opportunities to share knowledge, experiences, and camaraderie.
Benefits of Community Involvement
- Knowledge Sharing: Learn from the experiences of other bikers and share your own knowledge.
- Camaraderie: Connect with other bikers who share your passion for riding.
- Group Rides: Participate in group rides and explore new routes.
- Support: Receive support and encouragement from other bikers.
How to Get Involved
- Join a Local Bike Club: Join a local bike club to connect with other bikers in your area.
- Attend Bike Events: Attend bike events such as races, festivals, and workshops.
- Participate in Online Forums: Participate in online forums and social media groups for bikers.
- Visit usabikers.net: Visit usabikers.net to connect with a vibrant community of bikers and access valuable resources.
18. Safety Gear Essentials
Wearing the right safety gear is essential for protecting yourself while riding your bike.
Must-Have Safety Gear
- Helmet: A helmet is the most important piece of safety gear, protecting your head in the event of a crash.
- Gloves: Gloves protect your hands from abrasions and provide a better grip on the handlebars.
- Eye Protection: Eye protection such as sunglasses or goggles protects your eyes from debris and glare.
- Reflective Clothing: Reflective clothing makes you more visible to other road users, especially in low-light conditions.
- Bike Lights: Bike lights make you more visible to other road users and help you see in the dark.
Choosing the Right Gear
- Prioritize Fit and Comfort: Choose gear that fits properly and is comfortable to wear.
- Look for Quality: Invest in high-quality gear that is durable and reliable.
- Consider Your Riding Conditions: Choose gear that is appropriate for the weather and riding conditions.
19. The Role of Bike Fit
Ensuring that your bike fits you properly is essential for comfort, efficiency, and injury prevention.
Benefits of a Proper Bike Fit
- Improved Comfort: A proper bike fit reduces strain and discomfort, allowing you to ride longer and more comfortably.
- Enhanced Efficiency: A proper bike fit optimizes your pedaling motion, improving your efficiency and power transfer.
- Reduced Risk of Injury: A proper bike fit reduces the risk of injuries such as knee pain, back pain, and numbness in the hands and feet.
Getting a Bike Fit
- Visit a Bike Fitter: Visit a qualified bike fitter for a professional bike fit.
- Adjust Your Bike: Adjust your bike yourself using online resources and guidelines.
- Experiment: Experiment with different adjustments to find the most comfortable and efficient riding position.
20. Navigating Legal Requirements for Bikers in the USA
Understanding and complying with the legal requirements for bikers in the USA is essential for ensuring your safety and avoiding fines or penalties.
Key Legal Considerations
- Helmet Laws: Check the helmet laws in your state to ensure that you are complying with the requirements.
- Traffic Laws: Obey all traffic laws, including traffic signals, stop signs, and lane markings.
- Bike Lights: Use bike lights at night and in low-light conditions.
- Registration: Check if your state requires bike registration.
Staying Informed
- Consult State Laws: Consult your state’s Department of Transportation website for detailed information on bike laws.
- Join a Bike Advocacy Group: Join a bike advocacy group to stay informed about changes in bike laws.
- Visit usabikers.net: Visit usabikers.net for updates and information on bike laws and regulations in the USA.
By following this comprehensive guide, you can confidently remove and maintain your pedal arms, ensuring your bike is always ready for your next adventure. Remember to visit usabikers.net for more expert tips, resources, and community support. Happy riding!
Call to Action
Ready to dive deeper into the world of biking? Visit usabikers.net now to explore our comprehensive articles, engage in our vibrant forums, and connect with a community of passionate bikers. Whether you’re looking for detailed guides, expert advice, or the latest updates on bike culture in the USA, usabikers.net is your ultimate resource. Join us today and take your biking experience to the next level! You can also visit us at our location at 801 Sturgis Main St, Sturgis, SD 57785, United States or call us at +1 (605) 347-2000.
FAQ: Removing Pedal Arms
1. What is a pedal arm on a bike?
A pedal arm, also known as a crank arm, is the lever that connects the pedal to the bottom bracket spindle, allowing you to transfer power from your legs to the drivetrain.
2. Why would I need to remove a pedal arm?
You might need to remove a pedal arm to replace a damaged part, perform maintenance, or upgrade your bike’s components.
3. What tools are needed to remove a pedal arm?
Essential tools include a crank puller, socket wrench, Allen wrench set, pedal wrench, flathead screwdriver, WD-40 or lubricant, hammer, and torque wrench.
4. How do I use a crank puller?
Insert the crank puller into the crank arm, tighten it against the bottom bracket spindle, and continue tightening until the crank arm comes loose.
5. What is the thread direction for bike pedals?
The right pedal has standard threading (tighten clockwise, loosen counter-clockwise), while the left pedal has reverse threading (tighten counter-clockwise, loosen clockwise).
6. What common mistakes should I avoid when removing a pedal arm?
Avoid using the wrong tools, forgetting reverse threading, applying excessive force, and neglecting lubrication.
7. How do I reinstall a pedal arm?
Clean the components, apply grease, position the crank arm 180 degrees opposite the other arm, insert the arm, tighten the bolt, and torque to specification.
8. What maintenance tips can extend the life of my pedal arms?
Regularly clean and lubricate the crank arms and pedals, inspect for wear, and tighten bolts as needed.
9. What should I do if my crank arm feels loose?
Tighten the crank arm bolt to the manufacturer’s recommended torque specification.
10. Where can I find the right parts and services for my bike?
Visit local bike shops, online retailers like usabikers.net, or manufacturer websites for parts and services.