
Replacing your bike chain might seem daunting if you’re not a seasoned cyclist, but it’s a crucial part of bike maintenance that every rider should learn. Like brake pads or tires, a bike chain is a consumable component. Over time, it wears out, affecting your bike’s shifting performance and potentially damaging other parts of your drivetrain, such as the cassette and chainrings. Knowing how to replace your bike chain at home is not only a valuable skill but also a money-saver, preventing costly repairs down the line.
Before we dive into the steps, it’s important to understand why chain replacement is necessary. A worn chain stretches over time, meaning the distance between its links increases. This elongation causes it to mesh poorly with the gears, leading to skipping, poor shifting, and accelerated wear on your cassette and chainrings. Regular chain replacement, therefore, is a proactive measure to maintain your bike’s efficiency and longevity.
This guide will walk you through the process of replacing your bike chain in eight easy-to-follow steps. With just a few tools and about 15 minutes, you can perform this essential maintenance task yourself and save around £8-£15 on labor costs at a bike shop.
What You’ll Need:
- New Bike Chain (compatible with your bike’s speed – e.g., 11-speed, 12-speed)
- Chain Tool (also known as a chain breaker)
- Optional: Chain Checker Tool, Cleaning Supplies (Degreaser, Brushes, Rags)
Step-by-Step Guide to Replacing Your Bike Chain:
1. Removing the Old Bike Chain
First things first, we need to remove the old, worn-out chain. Most modern bike chains, especially Shimano and SRAM, use chain pins to connect the links. Some chains may use a quick link, which can be hand-operated or require pliers for removal. For chains with pins, you’ll need a chain tool.
To remove a chain with a chain tool, locate a pin on your chain. Position the chain in the chain tool so the pin is aligned with the tool’s pin punch. Ensure the tool is correctly seated and then gently turn the handle to push the chain pin out. You only need to push the pin out far enough to break the chain – do not remove it completely unless you are working with a Shimano chain and using a dedicated Shimano pin. Once you’ve pushed the pin partially out, the chain should split apart.
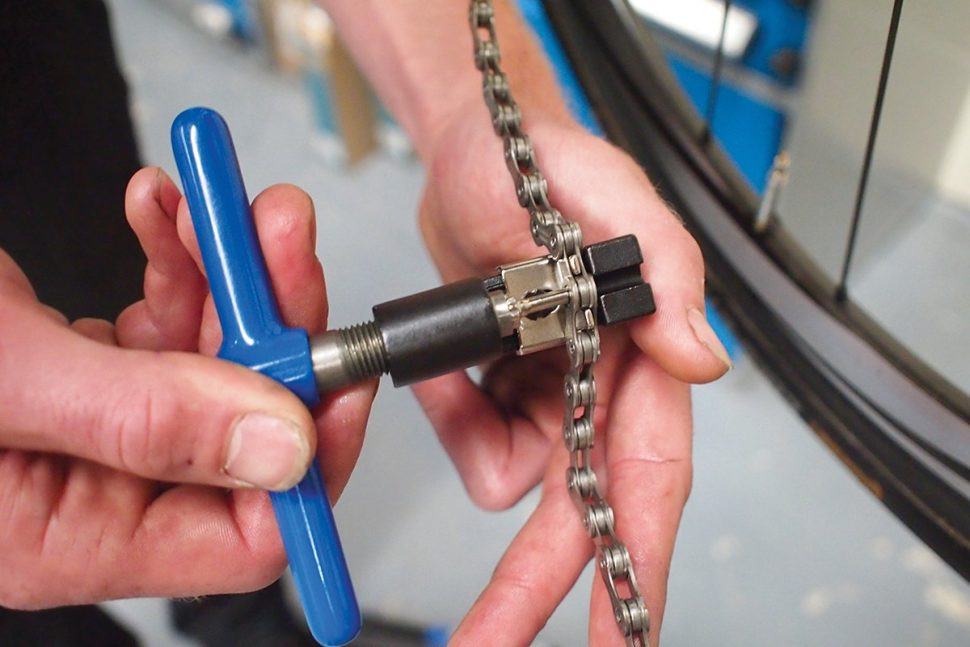 Removing the old bike chain with a chain tool
2. Cleaning and Inspecting the Cassette and Chainrings
With the old chain removed, now is an excellent opportunity to clean your cassette and chainrings. These components accumulate grime and dirt over time, which can accelerate wear and tear on your new chain. Use a degreaser and brushes to thoroughly clean the cassette and chainrings.
While cleaning, inspect the teeth of your cassette and chainrings. Look for any signs of wear, such as teeth that are significantly pointed or shaped like shark fins. Excessive wear on these components indicates they may also need replacing soon. However, if they look reasonably symmetrical and in good condition, cleaning them before installing the new chain will suffice. A clean drivetrain ensures smoother shifting and prolongs the life of your new chain.
3. Threading the New Bike Chain
Now it’s time to install the new chain. Before you start, make sure you have the correct type of chain for your bike. Chains are specific to the number of gears (speeds) on your cassette. For instance, an 11-speed bike requires an 11-speed chain. Check your bike’s specifications or the markings on your old chain to ensure compatibility.
Begin by shifting your bike’s gears to the smallest cog on the rear cassette and the smallest chainring at the front. This provides the least tension and makes threading the chain easier. Start threading the new chain through the front derailleur cage, then guide it over the rear cassette and around the upper jockey wheel of the rear derailleur. Continue threading it through the derailleur cage, ensuring it passes inside the guide between the cage plates, and finally around the lower jockey wheel.
 Threading the new bicycle chain through derailleur
4. Determining the Correct Bike Chain Length
An important step in replacing a bike chain is to ensure it’s the correct length. A chain that is too long can cause poor shifting and may even damage your derailleur. A chain that is too short will put excessive stress on the drivetrain and suspension (on full-suspension bikes).
To determine the correct length, with the new chain threaded through the derailleurs and around the smallest sprocket and chainring, bring the two ends of the chain together. Pull them until they meet near the bottom of the chainstay. The ideal length is the longest possible length that still maintains some tension on the rear derailleur in this small cog-small chainring combination, preventing the chain from dragging or being excessively slack. When deciding where to break the chain, remember that you will be joining an inner link to an outer link.
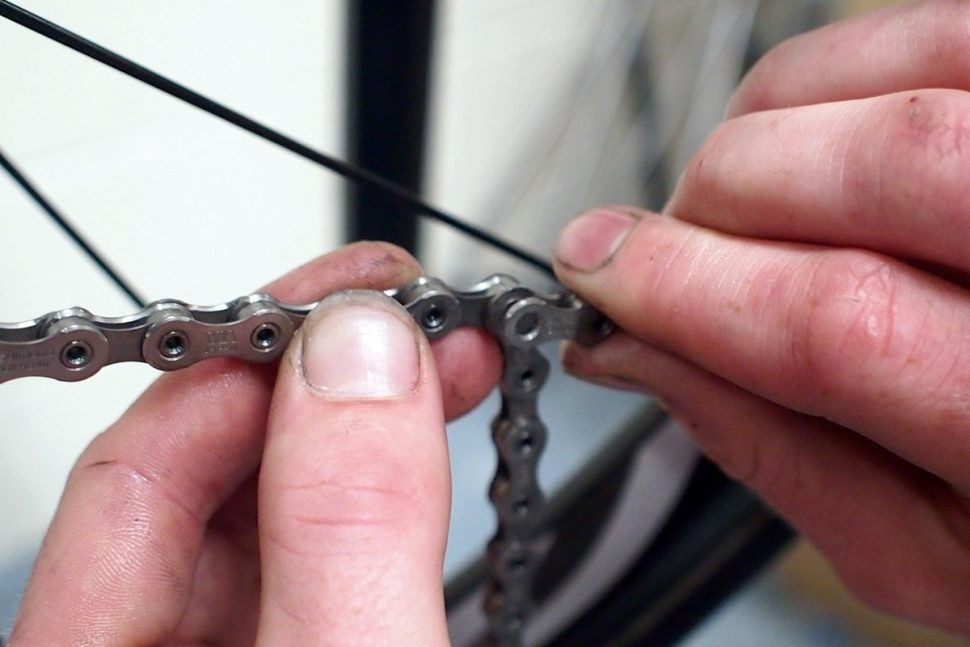 Measuring the new bike chain for correct length
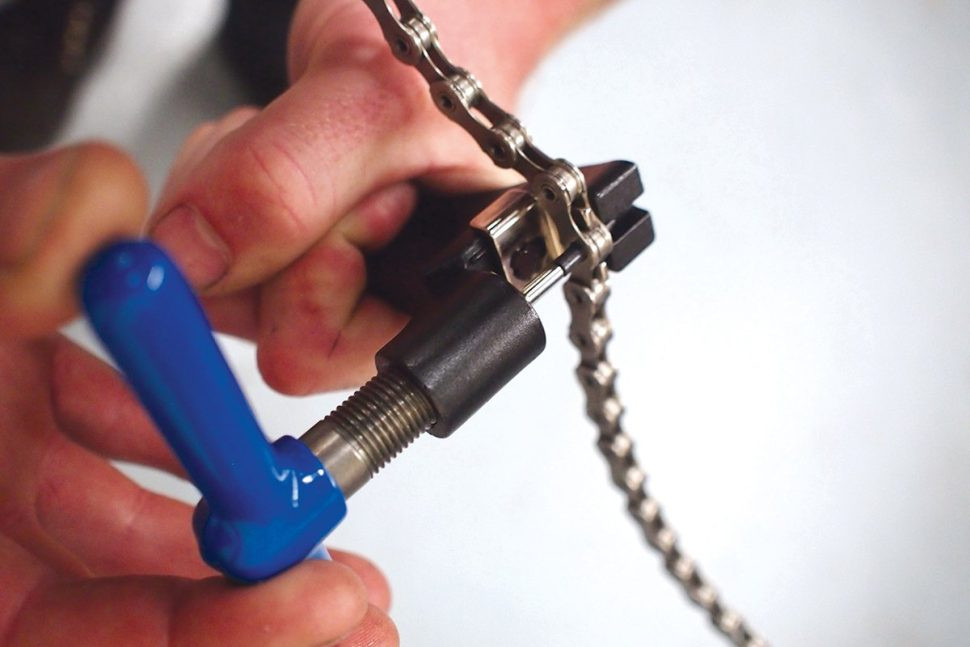
5. Cutting the New Bike Chain to Size
Once you’ve determined the correct length, you’ll need to cut the new chain to size using your chain tool. Identify the link that needs to be removed to achieve the desired length. Position the chain in the chain tool, aligning the pin of the link you want to remove with the tool’s pin punch.
Carefully turn the handle of the chain tool to push the pin out and separate the chain at the desired point. Ensure everything is aligned correctly to avoid damaging the chain tool or the chain itself. It’s often recommended to leave the chain slightly longer rather than too short, as a slightly longer chain is generally less problematic than one that’s too short.
 Cutting the bike chain to the correct size with chain tool
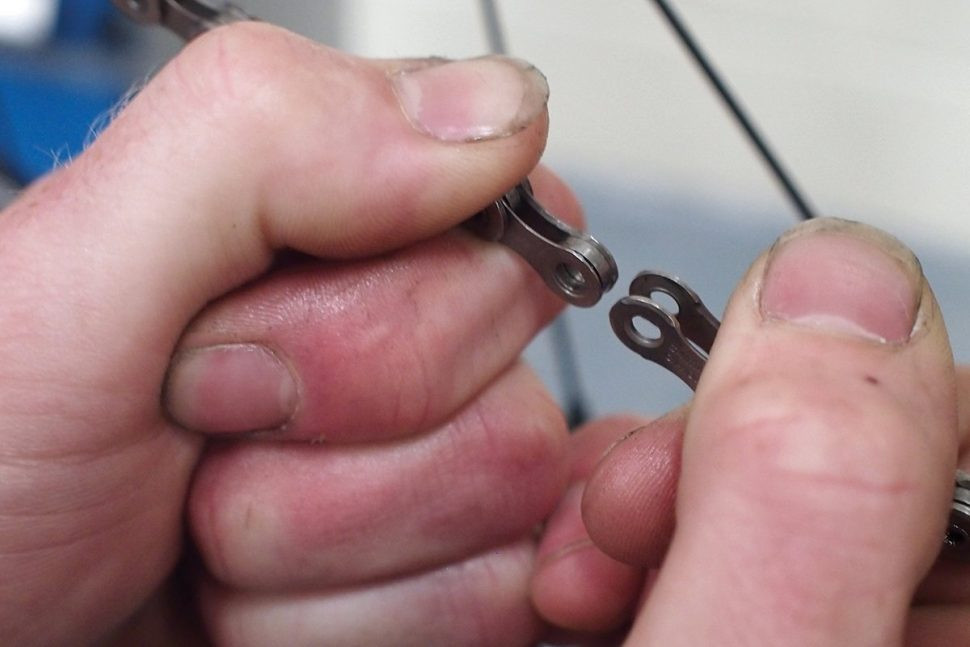
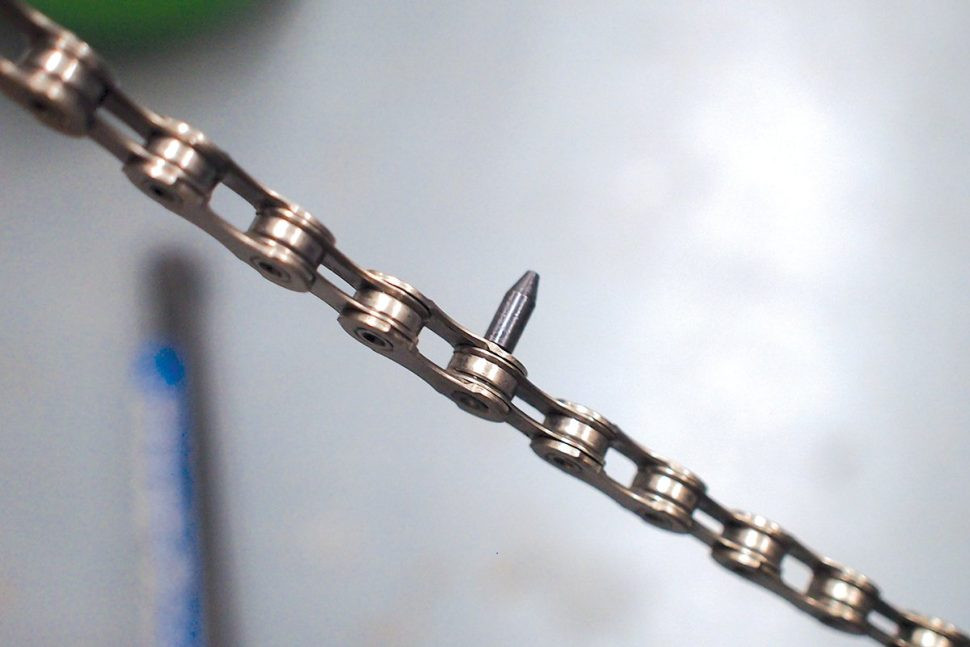
6. Inserting the Connecting Pin or Quick Link
Most new chains come with either a connecting pin (typically for Shimano chains) or a quick link (common with SRAM and other brands) to join the two ends of the chain. If you’re using a connecting pin, locate the special pin that came with your new chain.
Bring the two ends of the chain together, aligning the inner link with the outer link where you broke the chain. Insert the pointed end of the connecting pin through the aligned links from the drive side of the bike. Push it through until it holds the chain together on its own. If you are using a quick link, simply insert each half of the quick link into the open ends of the chain.
 Inserting the chain connecting pin to join chain ends
7. Pushing the Connecting Pin Home or Securing Quick Link
If you are using a connecting pin, use the chain tool again to push the pin fully into place. Position the joining link in the chain tool and carefully turn the handle to push the pin in until it is flush with the outer plate of the chain link. Work slowly and check frequently to avoid pushing the pin too far. Once the pin is flush, remove the chain tool. For quick links, some are designed to snap together by hand, while others might require pliers to squeeze them together until they click into place. Refer to the quick link manufacturer’s instructions for the best method.
 Pushing the chain pin home with a chain tool
8. Final Checks and Completion
After joining the chain, inspect the newly connected link to ensure it moves freely. Sometimes, the new link can be a little stiff. If it is, and if you’ve used a connecting pin, you can use the chain tool to slightly back out the pin and then push it back in, or gently flex the chain laterally at the stiff link to loosen it up. For quick links, ensure it is properly seated and locked.
Once you are satisfied that the new chain is correctly installed and moves freely, you’re all done! If you used a Shimano connecting pin with an extended breaking tip, you can now snap off the excess piece of the pin using pliers or the back of the chain tool. Take your bike for a short test ride to check the shifting and ensure everything is running smoothly with your new bike chain.
 Completed bike chain replacement
Top Tip: Remember to always use a new connecting pin when replacing a Shimano chain. Quick links can sometimes be reused, but it’s generally recommended to replace them with each new chain for optimal reliability. Regularly checking your chain for wear with a chain checker tool will help you determine when it’s time for a replacement, preventing premature wear on your cassette and chainrings and ensuring smooth, efficient cycling.