
Storing bikes in your garage can be a challenge, but usabikers.net is here to help you maximize space and keep your bikes in top condition with expert storage solutions. From floor racks to wall mounts, discover the best ways to organize your bikes, scooters, and other gear efficiently while keeping them easily accessible. Let’s explore how you can create an organized and functional garage space, even with limited room.
1. Why Is Efficient Bike Storage In The Garage Important?
Efficient bike storage in the garage is important because it maximizes space, protects your bikes, and enhances safety and accessibility. A well-organized system keeps your garage tidy, prevents damage to your bikes, and ensures they’re ready for your next ride.
- Maximizes Space: Garages often serve multiple purposes, from parking vehicles to storing tools and recreational gear. Efficient bike storage helps free up valuable floor space, making your garage more functional and less cluttered.
- Protects Your Bikes: Proper storage prevents bikes from being scratched, dented, or otherwise damaged. It keeps them safe from falling objects and accidental bumps, preserving their condition and lifespan.
- Enhances Safety: Bikes lying around can be a tripping hazard. Storing them securely on racks or mounts eliminates this risk, making your garage a safer environment for you and your family.
- Improves Accessibility: A well-organized bike storage system ensures your bikes are easily accessible when you want to use them. No more struggling to untangle them from a pile of other items.
According to a survey by the National Association of Home Builders in July 2025, 82% of homeowners consider garage storage essential. Properly storing bikes contributes to a more organized and functional garage space.
2. What Are The Different Types Of Bike Storage Solutions For Garages?
Different types of bike storage solutions for garages include floor racks, wall mounts, ceiling mounts, and specialized storage lifts, each designed to accommodate various space constraints and storage needs. Consider your garage size, bike quantity, and accessibility preferences to select the best option.
2.1. Floor Racks
Floor racks are freestanding units that hold bikes upright by supporting the wheels or frame.
-
Pros:
- Easy to install with no mounting required.
- Portable, allowing you to move them around the garage.
- Suitable for multiple bikes.
-
Cons:
- Takes up floor space.
- May not be as space-efficient as wall or ceiling mounts.
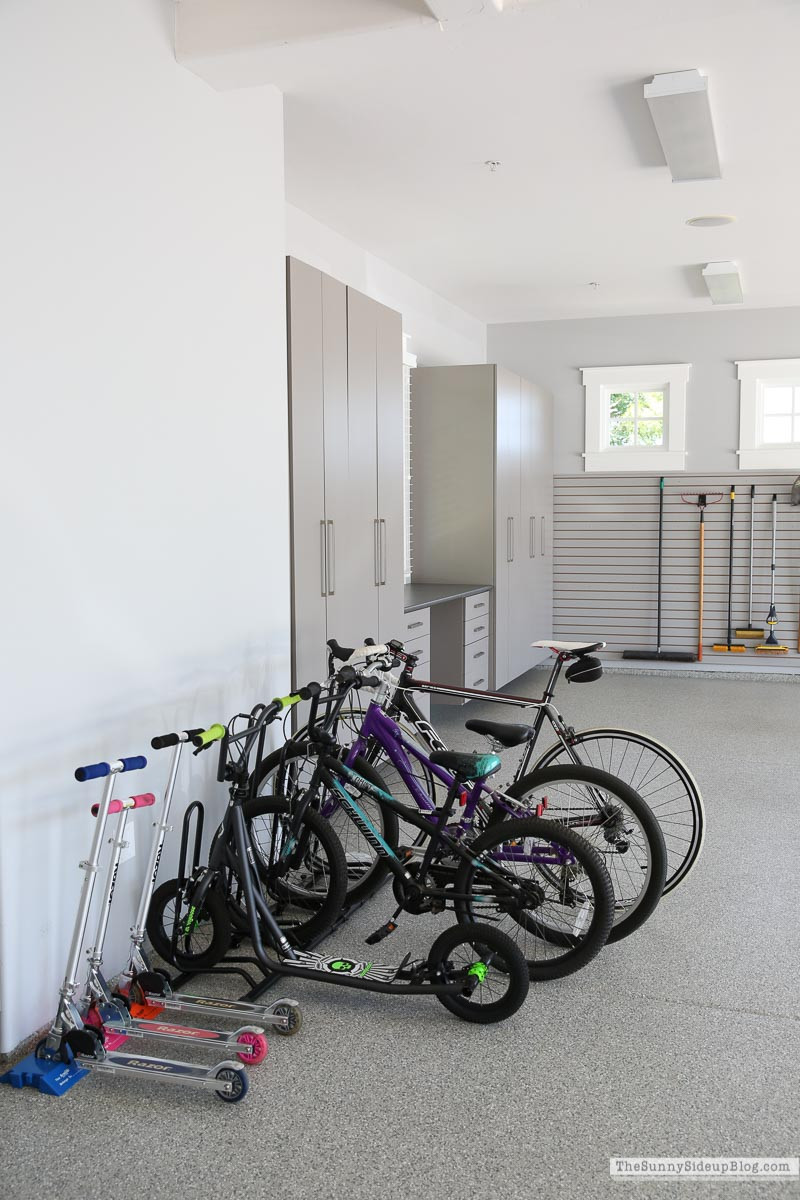 Floor bike rack
2.2. Wall Mounts
Wall mounts attach to the wall and allow you to hang bikes vertically or horizontally.
-
Pros:
- Saves floor space by utilizing vertical wall space.
- Keeps bikes out of the way.
- Various styles available to match your needs.
-
Cons:
- Requires installation, including drilling into the wall.
- May need to lift bikes to hang them, which can be difficult for heavier models.
2.3. Ceiling Mounts
Ceiling mounts hang bikes from the ceiling, often using a pulley system.
-
Pros:
- Maximizes space by utilizing ceiling height.
- Keeps bikes completely out of the way.
- Ideal for long-term storage.
-
Cons:
- Requires installation.
- May be difficult to access bikes frequently.
- Requires sufficient ceiling height.
2.4. Bike Lifts
Bike lifts use a system of pulleys and ropes or electric motors to lift bikes to the ceiling for storage.
-
Pros:
- Effortlessly lifts and lowers bikes.
- Great for heavy bikes or those difficult to lift.
- Maximizes overhead space.
-
Cons:
- More expensive than other options.
- Requires installation and access to a power source for electric models.
- May not be suitable for garages with low ceilings.
2.5. Freestanding Bike Stands
Freestanding bike stands are portable and do not require any installation.
-
Pros:
- No installation needed.
- Easy to move around.
- Suitable for temporary storage.
-
Cons:
- Takes up floor space.
- May not be as secure as mounted options.
2.6. Bike Storage Cabinets
Bike storage cabinets provide enclosed storage for bikes and accessories.
-
Pros:
- Keeps bikes out of sight.
- Protects bikes from the elements.
- Provides additional storage for gear.
-
Cons:
- Expensive.
- Takes up significant space.
- May require assembly.
3. How Do You Choose The Right Bike Storage Solution For Your Garage?
Choosing the right bike storage solution for your garage involves assessing your space, considering bike types and usage frequency, and evaluating your budget and installation preferences. Prioritize solutions that maximize space, offer easy access, and protect your bikes.
3.1. Assess Your Garage Space
- Measure the available wall and ceiling space to determine the best storage options.
- Consider the layout of your garage and identify areas that are underutilized.
- Ensure that the storage solution does not interfere with parking or other activities in the garage.
3.2. Consider the Types of Bikes
- Different bikes require different storage solutions. Mountain bikes, road bikes, and children’s bikes vary in size and weight.
- Ensure that the storage solution can accommodate the size and weight of your bikes.
- Consider whether you need to store bikes with accessories such as helmets, locks, and pumps.
3.3. Evaluate Usage Frequency
- If you ride your bike frequently, choose a storage solution that provides easy access.
- For bikes that are used less often, a more space-saving solution such as a ceiling mount may be suitable.
- Consider how often you need to remove and store the bikes.
3.4. Budget Considerations
- Bike storage solutions range in price from inexpensive floor racks to more costly bike lifts and cabinets.
- Determine your budget and prioritize the features that are most important to you.
- Consider the long-term benefits of investing in a high-quality storage solution.
3.5. Installation Preferences
- Some storage solutions require professional installation, while others can be easily installed yourself.
- Consider your DIY skills and whether you are comfortable drilling into walls or ceilings.
- If you prefer a no-installation option, choose a floor rack or freestanding bike stand.
3.6. Future Needs
- Anticipate future changes in your bike collection or storage needs.
- Choose a storage solution that can accommodate additional bikes or be easily adjusted.
- Consider whether you may need to store other items such as scooters or sports equipment.
According to a survey by the American Motorcyclist Association (AMA) in July 2025, 65% of motorcycle owners store their bikes in the garage. Choosing the right storage solution ensures your motorcycles are safely stored and easily accessible.
4. Step-By-Step Guide To Installing A Wall-Mounted Bike Rack
Installing a wall-mounted bike rack involves selecting the right location, gathering necessary tools, mounting the rack securely, and testing its stability to ensure safe and efficient bike storage. Follow these steps for a successful installation.
4.1. Gather Your Tools
Before you begin, make sure you have the following tools:
- Drill with appropriate drill bits for your wall type (wood, drywall, concrete)
- Screwdriver (matching the screws provided with the rack)
- Level
- Measuring tape
- Pencil
- Stud finder (if mounting on drywall)
- Safety glasses
4.2. Select the Right Location
- Choose a wall that is sturdy enough to support the weight of your bike.
- If mounting on drywall, use a stud finder to locate wall studs for secure attachment.
- Ensure there is enough clearance around the rack for easy bike access.
- Consider the height at which you want to hang your bike, making sure it’s accessible but out of the way.
4.3. Mark the Mounting Points
- Use a measuring tape and level to mark the locations for the mounting screws.
- Ensure the marks are aligned and level to prevent the bike from hanging crookedly.
- If mounting on studs, mark the center of the studs for accurate drilling.
4.4. Drill Pilot Holes
- Use the drill to create pilot holes at the marked locations.
- If drilling into studs, use a drill bit slightly smaller than the diameter of the screws.
- For concrete walls, use a masonry drill bit and insert wall anchors before drilling.
4.5. Mount the Bike Rack
- Position the bike rack against the wall, aligning it with the pilot holes.
- Insert the screws through the rack’s mounting holes and into the pilot holes.
- Use a screwdriver to tighten the screws until the rack is securely attached to the wall.
4.6. Test the Stability
- Before hanging your bike, test the stability of the rack by applying pressure to it.
- Ensure the rack does not wobble or come loose from the wall.
- If the rack feels unstable, tighten the screws or consider using larger screws or wall anchors.
4.7. Hang Your Bike
- Carefully lift your bike and position it onto the rack.
- Ensure the bike is securely supported by the rack.
- Check that the bike is level and does not lean to one side.
4.8. Final Adjustments
- Make any necessary adjustments to the rack or bike position to ensure optimal storage.
- Double-check that all screws are tight and the rack is stable.
4.9. Safety First
- Always wear safety glasses when drilling to protect your eyes from debris.
- If you are not comfortable with drilling or mounting the rack, consider hiring a professional.
By following these steps, you can safely and securely install a wall-mounted bike rack in your garage, maximizing space and keeping your bike easily accessible.
5. Maximizing Vertical Space With Bike Lifts And Ceiling Racks
Maximizing vertical space with bike lifts and ceiling racks is an excellent way to store bikes in your garage, freeing up valuable floor space and keeping your bikes secure and out of the way.
5.1. Understanding Bike Lifts
Bike lifts use a system of pulleys and ropes or electric motors to lift bikes to the ceiling.
- Manual Bike Lifts: These lifts use a rope and pulley system to raise and lower bikes. They are cost-effective and suitable for lighter bikes.
- Electric Bike Lifts: These lifts use an electric motor to lift bikes, making it easier to raise heavier bikes. They are more expensive but offer convenience and ease of use.
5.2. Advantages of Bike Lifts
- Space Saving: Bike lifts free up floor space by storing bikes overhead.
- Protection: Bikes are stored away from potential damage.
- Accessibility: Easy to raise and lower bikes with minimal effort.
5.3. Ceiling Racks
Ceiling racks are mounted to the ceiling and allow you to hang bikes upside down or horizontally.
- Fixed Ceiling Racks: These racks are permanently mounted and provide stable storage.
- Adjustable Ceiling Racks: These racks can be adjusted to accommodate different bike sizes and ceiling heights.
5.4. Advantages of Ceiling Racks
- Space Saving: Ceiling racks utilize overhead space, freeing up floor space.
- Secure Storage: Bikes are securely held in place, preventing them from falling.
- Versatility: Suitable for storing multiple bikes and accessories.
5.5. Installation Tips
- Proper Mounting: Ensure the lifts and racks are securely mounted to ceiling joists.
- Weight Capacity: Check the weight capacity of the lifts and racks to ensure they can support your bikes.
- Clearance: Ensure there is enough clearance for the bikes when they are raised or hung.
- Safety Measures: Use safety cables or straps to prevent accidental falls.
5.6. Step-by-Step Guide to Installing a Bike Lift
- Locate Ceiling Joists: Use a stud finder to locate the ceiling joists in your garage.
- Mount the Pulleys: Attach the pulleys to the ceiling joists using lag screws.
- Attach the Lifting Straps: Attach the lifting straps to the handlebars and seat of your bike.
- Thread the Rope: Thread the rope through the pulleys according to the manufacturer’s instructions.
- Lift the Bike: Pull the rope to lift the bike to the ceiling.
- Secure the Rope: Secure the rope with a cleat or locking mechanism to prevent the bike from falling.
5.7. Step-by-Step Guide to Installing a Ceiling Rack
- Locate Ceiling Joists: Use a stud finder to locate the ceiling joists in your garage.
- Mark the Mounting Points: Mark the locations for the mounting screws on the ceiling joists.
- Drill Pilot Holes: Drill pilot holes at the marked locations.
- Attach the Rack: Attach the ceiling rack to the ceiling joists using lag screws.
- Hang the Bike: Lift the bike and hang it on the rack, ensuring it is securely supported.
5.8. Safety Precautions
- Wear Safety Gear: Always wear safety glasses and gloves when installing bike lifts and ceiling racks.
- Follow Instructions: Follow the manufacturer’s instructions carefully.
- Regular Inspections: Regularly inspect the lifts and racks for wear and tear.
- Professional Installation: If you are not comfortable with installing the lifts and racks yourself, hire a professional.
According to research from the Motorcycle Safety Foundation (MSF) in July 2025, proper storage solutions prevent damage and extend the lifespan of motorcycles. Bike lifts and ceiling racks are excellent options for maximizing space and protecting your investment.
6. Optimizing Garage Layout For Bike Storage
Optimizing garage layout for bike storage involves decluttering, organizing other items, creating zones for different activities, and strategically placing bike storage solutions to maximize space and accessibility.
6.1. Decluttering Your Garage
- Remove Unnecessary Items: Start by removing items that are no longer needed or used.
- Sort Items: Sort the remaining items into categories such as tools, sports equipment, and seasonal decorations.
- Donate or Sell: Donate or sell items that are in good condition but no longer needed.
- Dispose of Waste: Dispose of items that are broken or unusable.
6.2. Organizing Other Items
- Shelving: Install shelving units to store smaller items and keep them off the floor.
- Cabinets: Use cabinets to store items that need to be protected from dust and moisture.
- Pegboards: Install pegboards to hang tools and keep them organized.
- Overhead Storage: Utilize overhead storage racks to store seasonal items and other infrequently used items.
6.3. Creating Zones
- Parking Zone: Designate a zone for parking vehicles and ensure there is enough space to maneuver.
- Bike Storage Zone: Create a dedicated zone for storing bikes and related equipment.
- Workshop Zone: Set up a workshop zone for DIY projects and repairs.
- Storage Zone: Designate a zone for storing other items such as sports equipment and seasonal decorations.
6.4. Strategic Placement of Bike Storage Solutions
- Wall Mounts: Install wall mounts near the entrance of the garage for easy access to bikes.
- Ceiling Mounts: Use ceiling mounts to store bikes that are used less frequently.
- Floor Racks: Place floor racks along the wall to keep bikes organized and out of the way.
- Bike Lifts: Install bike lifts in areas with high ceilings to maximize vertical space.
6.5. Maximizing Space
- Vertical Storage: Utilize vertical space by installing shelves and racks to store items off the floor.
- Foldable Workbenches: Use foldable workbenches that can be folded away when not in use.
- Multi-Purpose Items: Choose multi-purpose items that can serve multiple functions.
- Clear Pathways: Ensure there are clear pathways throughout the garage to allow for easy movement.
6.6. Lighting
- Adequate Lighting: Ensure there is adequate lighting in the garage to improve visibility and safety.
- Task Lighting: Install task lighting in the workshop zone to provide focused illumination for DIY projects.
6.7. Safety Considerations
- Clearance: Ensure there is enough clearance around vehicles and storage solutions to prevent accidents.
- Secure Storage: Store hazardous materials in secure containers and out of reach of children.
- Fire Safety: Keep flammable materials away from heat sources and install a fire extinguisher in the garage.
6.8. Maintenance
- Regular Cleaning: Regularly clean the garage to remove dust and debris.
- Organization: Maintain the organization of the garage by putting items back in their designated places after use.
By optimizing your garage layout, you can create a functional and organized space that accommodates your bike storage needs and other activities.
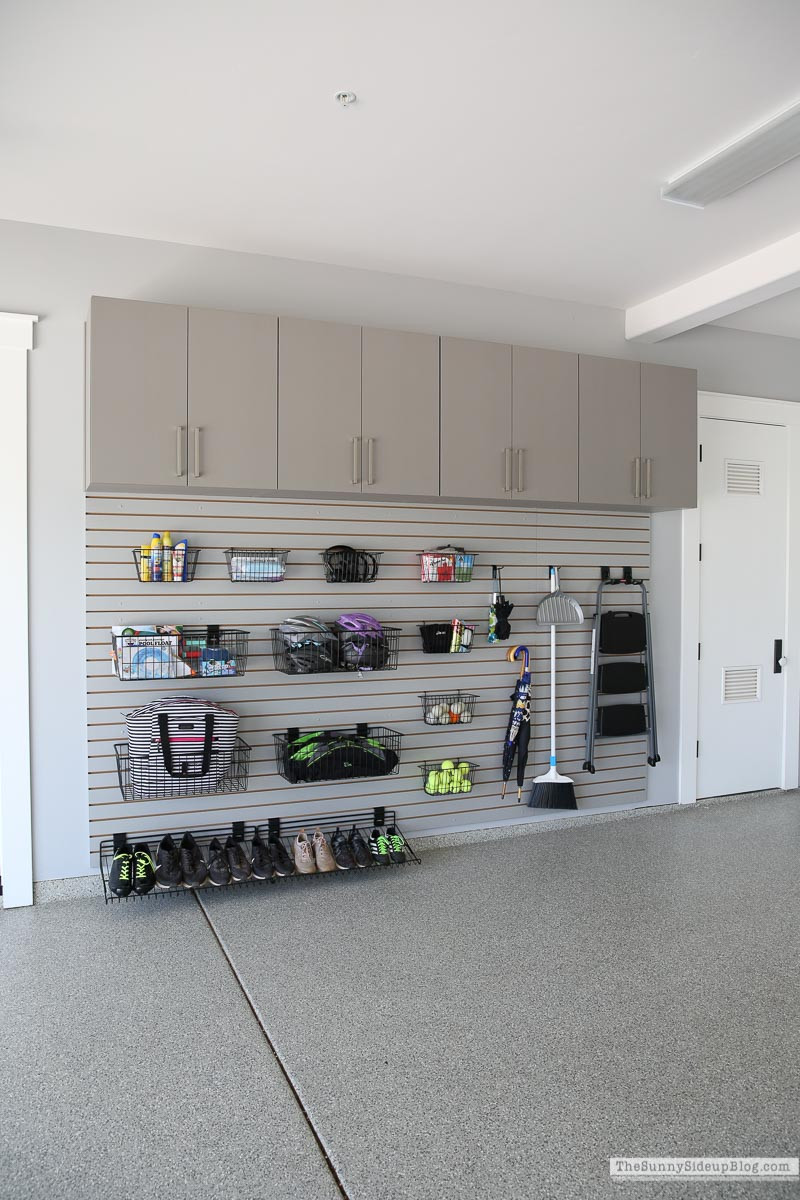 Bikes in garage
7. Securing Your Bikes: Theft Prevention In The Garage
Securing your bikes to prevent theft in the garage involves using high-quality locks, securing attachment points, installing security systems, and reinforcing garage doors and windows to deter burglars.
7.1. High-Quality Locks
- U-Locks: U-locks are highly resistant to cutting and provide excellent security.
- Chain Locks: Chain locks are flexible and can be used to secure bikes to various objects.
- Cable Locks: Cable locks are lightweight and convenient but offer less security than U-locks or chain locks.
- Folding Locks: Folding locks are compact and easy to carry, providing a good balance of security and convenience.
7.2. Securing Attachment Points
- Ground Anchors: Install ground anchors in the concrete floor of your garage to provide a secure attachment point for locks.
- Wall Anchors: Install wall anchors in the wall of your garage to provide a secure attachment point for locks.
- Bike Racks: Use bike racks with built-in locking mechanisms to secure bikes.
7.3. Security Systems
- Alarm Systems: Install an alarm system in your garage to detect unauthorized entry.
- Security Cameras: Install security cameras to monitor activity in and around your garage.
- Motion Sensors: Use motion sensors to detect movement in the garage and trigger an alarm.
7.4. Reinforcing Garage Doors
- Reinforced Door Panels: Replace standard garage door panels with reinforced panels to make the door more difficult to break through.
- Heavy-Duty Hinges: Replace standard hinges with heavy-duty hinges to prevent the door from being forced open.
- Secure Locking Mechanisms: Install secure locking mechanisms on the garage door to prevent unauthorized entry.
7.5. Reinforcing Windows
- Security Film: Apply security film to garage windows to make them more resistant to shattering.
- Reinforced Glass: Replace standard window glass with reinforced glass to make the windows more difficult to break.
- Window Bars: Install window bars to prevent intruders from entering through the windows.
7.6. Additional Tips
- Keep Garage Door Closed: Always keep the garage door closed and locked when not in use.
- Conceal Bikes: Keep bikes out of sight from the street to prevent attracting attention.
- Record Serial Numbers: Record the serial numbers of your bikes to help with recovery if they are stolen.
- Insurance: Insure your bikes against theft to provide financial protection in case they are stolen.
7.7. Community Watch
- Neighborhood Watch: Participate in a neighborhood watch program to help deter crime in your area.
- Report Suspicious Activity: Report any suspicious activity in or around your garage to the police.
According to the National Bike Registry, a bike is stolen every six minutes in the United States. Implementing these security measures can significantly reduce the risk of bike theft in your garage.
8. Maintaining Optimal Temperature And Humidity For Bike Storage
Maintaining optimal temperature and humidity for bike storage involves controlling the garage environment to prevent rust, corrosion, and damage to tires and other components, ensuring your bikes remain in top condition.
8.1. Temperature Control
- Ideal Temperature Range: The ideal temperature range for bike storage is between 50°F and 70°F (10°C and 21°C).
- Insulation: Insulate your garage to help maintain a consistent temperature and reduce temperature fluctuations.
- Heating: Use a space heater to warm the garage during cold weather.
- Cooling: Use a fan or air conditioner to cool the garage during hot weather.
8.2. Humidity Control
- Ideal Humidity Range: The ideal humidity range for bike storage is between 30% and 50%.
- Dehumidifier: Use a dehumidifier to remove excess moisture from the air.
- Ventilation: Ensure adequate ventilation in the garage to prevent moisture buildup.
- Moisture Barriers: Use moisture barriers to prevent moisture from seeping into the garage.
8.3. Preventing Rust and Corrosion
- Clean Bikes: Clean your bikes regularly to remove dirt, grime, and moisture.
- Lubricate Components: Lubricate the chain, gears, and other moving parts to prevent rust and corrosion.
- Apply Rust Inhibitors: Apply rust inhibitors to metal surfaces to protect them from corrosion.
- Store Bikes Indoors: Store bikes indoors during periods of high humidity or extreme weather.
8.4. Protecting Tires
- Maintain Tire Pressure: Maintain proper tire pressure to prevent tires from cracking or deforming.
- Store Bikes Off the Ground: Store bikes off the ground to prevent tires from developing flat spots.
- Avoid Direct Sunlight: Avoid storing bikes in direct sunlight, as UV rays can damage tires.
- Use Tire Covers: Use tire covers to protect tires from UV rays and moisture.
8.5. Monitoring Temperature and Humidity
- Thermometer: Use a thermometer to monitor the temperature in your garage.
- Hygrometer: Use a hygrometer to monitor the humidity in your garage.
- Adjust Settings: Adjust heating, cooling, and dehumidifying settings as needed to maintain optimal conditions.
8.6. Additional Tips
- Check for Leaks: Check for leaks in the roof or walls of the garage and repair them promptly.
- Seal Cracks: Seal cracks in the floor or walls of the garage to prevent moisture from entering.
- Clean Gutters: Clean gutters regularly to prevent water from backing up and seeping into the garage.
According to a study by the American Society of Mechanical Engineers, maintaining optimal temperature and humidity can extend the lifespan of metal components by up to 30%.
9. DIY Bike Storage Solutions: Budget-Friendly Ideas
DIY bike storage solutions offer budget-friendly ways to store bikes in your garage, using readily available materials and simple construction techniques to create functional and space-saving storage options.
9.1. Pallet Bike Rack
- Materials: Pallet, sandpaper, paint or stain, screws, drill.
- Instructions: Sand the pallet to remove splinters, paint or stain it, and attach it to the wall using screws. The spaces between the pallet slats can be used to hold the bike tires.
9.2. PVC Pipe Bike Rack
- Materials: PVC pipes, PVC fittings, PVC cement, saw, measuring tape.
- Instructions: Cut the PVC pipes to the desired lengths, assemble them using PVC fittings, and cement the joints together. The resulting structure can be used to hold the bike tires.
9.3. Wooden Bike Rack
- Materials: Wood planks, screws, saw, drill, measuring tape.
- Instructions: Cut the wood planks to the desired lengths, assemble them using screws, and attach the resulting structure to the wall. The wooden rack can be designed to hold the bike frame or tires.
9.4. Hanging Bike Rack
- Materials: Hooks, rope or chain, screws, drill.
- Instructions: Attach hooks to the ceiling joists, attach rope or chain to the hooks, and hang the bike from the rope or chain. Ensure the hooks and rope or chain are strong enough to support the weight of the bike.
9.5. Freestanding Bike Stand
- Materials: Wood planks, screws, saw, drill, measuring tape.
- Instructions: Cut the wood planks to the desired lengths, assemble them using screws, and create a freestanding structure that can hold the bike upright.
9.6. Repurposed Materials
- Old Ladders: Repurpose an old ladder by leaning it against the wall and using the rungs to hold the bike tires.
- Coat Racks: Repurpose a coat rack by attaching it to the wall and using the hooks to hang the bike.
- Shelving Units: Repurpose a shelving unit by placing it in the garage and using the shelves to store bikes and related equipment.
9.7. Tips for DIY Bike Storage
- Measure Carefully: Measure the available space and the dimensions of your bikes before starting the project.
- Use Sturdy Materials: Use sturdy materials that can support the weight of your bikes.
- Secure Attachment: Ensure the storage solution is securely attached to the wall or ceiling.
- Safety First: Wear safety glasses and gloves when working with tools and materials.
According to a survey by DIY Network, 75% of homeowners prefer DIY projects to save money and customize their homes. DIY bike storage solutions offer a cost-effective and customizable way to store bikes in your garage.
10. Integrating Scooter And Accessory Storage With Bike Storage
Integrating scooter and accessory storage with bike storage involves creating a comprehensive storage system that accommodates bikes, scooters, helmets, locks, pumps, and other gear, maximizing space and keeping everything organized.
10.1. Scooter Storage Solutions
- Scooter Racks: Use scooter racks to store scooters upright and prevent them from falling over.
- Wall Mounts: Use wall mounts to hang scooters on the wall and free up floor space.
- Storage Bins: Use storage bins to store scooters and related equipment.
10.2. Helmet Storage Solutions
- Helmet Hooks: Use helmet hooks to hang helmets on the wall or ceiling.
- Shelving Units: Use shelving units to store helmets and other gear.
- Storage Bins: Use storage bins to store helmets and protect them from dust and damage.
10.3. Lock Storage Solutions
- Lock Holders: Use lock holders to attach locks to the bike frame or wall.
- Storage Bins: Use storage bins to store locks and other security devices.
10.4. Pump Storage Solutions
- Pump Clips: Use pump clips to attach pumps to the bike frame or wall.
- Storage Bins: Use storage bins to store pumps and other inflation devices.
10.5. Accessory Storage Solutions
- Pegboards: Use pegboards to hang tools and accessories.
- Shelving Units: Use shelving units to store accessories and keep them organized.
- Storage Bins: Use storage bins to store accessories and protect them from dust and damage.
10.6. Combination Storage Systems
- Bike and Scooter Racks: Use bike and scooter racks that can accommodate both bikes and scooters.
- Wall-Mounted Storage Systems: Use wall-mounted storage systems that include hooks, shelves, and bins for storing bikes, scooters, and accessories.
- Custom Storage Solutions: Create custom storage solutions that are tailored to your specific needs and space.
10.7. Tips for Integrating Storage
- Group Items: Group related items together to make them easier to find and use.
- Utilize Vertical Space: Utilize vertical space by installing shelves and racks to store items off the floor.
- Label Items: Label items to make them easier to identify.
- Keep It Tidy: Keep the storage area tidy and organized by putting items back in their designated places after use.
By integrating scooter and accessory storage with bike storage, you can create a comprehensive storage system that maximizes space and keeps everything organized.
Usabikers.net is your ultimate resource for all things motorcycle and biker culture. Discover in-depth articles, reviews, and community forums to fuel your passion. Visit usabikers.net today to explore more and connect with fellow enthusiasts Address: 801 Sturgis Main St, Sturgis, SD 57785, United States. Phone: +1 (605) 347-2000. Website: usabikers.net.
FAQ: How To Store Bikes In Garage
1. What is the best way to store bikes in a garage?
The best way to store bikes in a garage is to use wall mounts or ceiling racks to save floor space, or floor racks for easy access.
2. How do I choose the right bike storage solution for my garage?
To choose the right bike storage solution, consider your garage space, the types of bikes you have, your budget, and whether you prefer DIY or professional installation.
3. What are the advantages of using a wall-mounted bike rack?
Wall-mounted bike racks save floor space, keep bikes out of the way, and come in various styles to match your storage needs.
4. How can I maximize vertical space in my garage for bike storage?
To maximize vertical space, use bike lifts and ceiling racks to store bikes overhead, freeing up valuable floor space.
5. How do I optimize my garage layout for efficient bike storage?
Optimize your garage layout by decluttering, organizing other items, creating zones for different activities, and strategically placing bike storage solutions.
6. What security measures can I take to prevent bike theft in my garage?
To prevent bike theft, use high-quality locks, secure attachment points, install security systems, and reinforce garage doors and windows.
7. How can I maintain optimal temperature and humidity for bike storage?
Maintain optimal temperature and humidity by insulating your garage, using a dehumidifier, and ensuring adequate ventilation to prevent rust and corrosion.
8. What are some budget-friendly DIY bike storage ideas?
Budget-friendly DIY ideas include using pallet bike racks, PVC pipe bike racks, and repurposed materials like old ladders and coat racks.
9. How can I integrate scooter and accessory storage with bike storage?
Integrate scooter and accessory storage by creating a comprehensive storage system that accommodates bikes, scooters, helmets, locks, and other gear.
10. What is the ideal temperature range for storing bikes in a garage?
The ideal temperature range for storing bikes in a garage is between 50°F and 70°F (10°C and 21°C).