As someone who works in the cycling industry and regularly tests bikes, you might expect me to be fully on board with the latest trends, including tubeless tires. However, all my personal bikes are set up with inner tubes for bike tires. This isn’t to say I’m unaware of the tubeless revolution. I’ve ridden, worked on, and even sold tubeless setups. I understand their popularity, but for road cycling, I still find myself reaching for inner tubes.
Tubeless technology definitely has its place, particularly in mountain biking and gravel riding where the benefits of lower pressures and reduced pinch flats are significant. For higher volume gravel tires, going tubeless is almost a necessity to maximize speed and comfort. I even rode the Paris-Roubaix challenge on 28mm tires with inner tubes and had no punctures, a personal victory! Yet, I acknowledge that tubeless would have likely offered a faster ride with the ability to run lower pressures on wider tires.
 A tubeless tyre unhooked from a rim showing the white tubeless sealant
Messy tubeless sealant on a bike wheel, highlighting the inconvenience of tubeless tire maintenance.
My hesitation with tubeless on road bikes boils down to what I call the “dark side” of tubeless. When tubeless systems work perfectly, they are fantastic. I’ve experienced the smooth ride and speed of tubeless tires with carbon wheels firsthand. The trouble starts when they don’t function as intended.
The primary appeal of tubeless is puncture sealing. The idea of continuing a ride as sealant plugs a hole, minimizing pressure loss and avoiding roadside stops, is undeniably attractive. In those ideal scenarios, tubeless feels like a dream. But the reality isn’t always so smooth.
What bothers me is the added complexity and potential hassle compared to the simplicity of a traditional tire and Inner Tube For Bike. For someone like me who (luckily) doesn’t often puncture, the extra effort and cost associated with tubeless feel unwarranted. Give me a set of top-tier road bike tires, like Continental GP5000 or Vittoria Corsa Pro, paired with latex inner tubes for bike, and I’m perfectly content. The performance difference, especially in terms of watts saved with tubeless, isn’t significant enough for my riding style, as our own lab tests have shown.
I’m not eager to spend time perfecting tubeless tape application on rims. The thought of dealing with sealant sloshing around inside my wheels and potentially spilling onto my garage floor is unappealing. And the periodic maintenance – removing old sealant, cleaning everything, checking valves, and refilling – feels like unnecessary work. For me, simplicity is key.
While some cyclists, especially gravel riders who frequently change setups, argue that managing tubeless isn’t overly burdensome, or they simply top up sealant until tire replacement, my experience leans towards preferring the straightforwardness of inner tubes for bike. There are fewer variables that can go wrong.
I’m sure I’m not alone in experiencing the frustration of sealant spraying from a deflating tubeless tire, hoping desperately it seals before all the air escapes, potentially covering both bike and rider in the process.
As someone who takes pride in maintaining a clean bike and kit, sealant mess is a major deterrent. Dried sealant can be stubbornly difficult to remove from bike frames and can even stain cycling apparel.
Beyond the mess on my bike, the cleanup involved in tubeless tire changes and wheel maintenance is also a drawback.
For me, the perceived advantages of road tubeless simply don’t outweigh the added fuss when it comes to tire changes and general upkeep.
Setting up a new tubeless wheel and tire initially is usually straightforward. However, as a tire tester, frequently switching tubeless tires becomes a chore. Removing a tire, cleaning sealant from the rim, trying to salvage sealant, mounting a new tire onto a sealant-coated rim, and hoping for a proper seal – it’s not an enjoyable process.
In contrast, removing a tire and inner tube for bike and installing a fresh tire is remarkably simple. While tools and techniques exist to minimize tubeless mess, my priority when changing a tire is efficiency and minimal hassle.
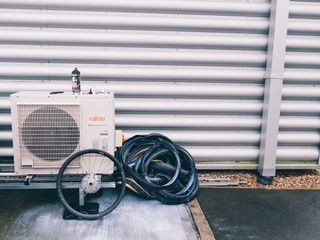 A stack of tubeless tyres and a wheel on the floor along with tubelss sealant
Tubeless tire setup with sealant, illustrating the components and potential for mess associated with tubeless systems.
Having worked as a bike mechanic before joining Cyclingnews, I have considerable experience with both systems. While wider rims and tires, along with updated ERTRO guidelines, have improved tubeless compatibility and user experience, I still prefer a standard inner tube for bike and tire swap over any tubeless installation or troubleshooting.
The cost of labor for tubeless maintenance also adds up. Replacing tubeless tape, valves, and sealant is significantly more expensive than a simple inner tube for bike and tire change. While a professional mechanic can ensure a perfect tubeless setup, the ongoing cost and effort are factors to consider.
Furthermore, the uncertainty and stress associated with tubeless punctures are significant. If sealant fails to seal a larger hole, you’re left stranded regardless, potentially covered in sealant. The anxiety of a tire unseating or not reseating with a pump on the roadside is a real concern, akin to range anxiety with electric vehicles.
While tubeless repair plugs are available and effective in many cases, they aren’t foolproof. If a plug fails or is difficult to install, resorting to an emergency inner tube for bike, often on a tight tubeless tire coated in sealant, is rarely a pleasant experience.
And let’s not forget the potential issues of faulty rim tape, leaky valves, and dried sealant buildup on expensive carbon rims.
Some cyclists are drawn to tubeless to avoid the perceived difficulty of inner tube for bike replacement. They believe tubeless will solve all their puncture problems. However, preparedness for tubeless failures is crucial.
In my view, knowing how to change an inner tube for bike is a fundamental cycling skill. Being able to fix a flat, whether tubeless or tube-type, is essential for any cyclist venturing beyond short distances. For me, changing a tube is simply less complicated and less trouble.
When dealing with a puncture with inner tubes for bike, there’s no sealant mess. I can properly inspect the tire, remove debris, check rim tape, install a new tube or tire boot with confidence, and continue my ride without worrying about whether the repair will hold.
In contrast, cleaning sealant-covered rims and tires can be wasteful and messy. Some sealants even raise environmental concerns due to their chemical nature and disposal.
Safety is another consideration. While the risk may be small, the possibility of a tubeless tire blowing off the rim is a concern. Although I’ve used tubeless on various rims without major incidents, the theoretical increased risk of blowouts is something I can’t ignore.
Modern bike technology increasingly pushes towards tubeless, with wider rims and tires optimized for tubeless setups. The lower pressures tubeless allows enhance comfort and reduce rolling resistance, benefits I fully appreciate.
Perhaps in the future, I’ll fully embrace tubeless for my road bikes. Technology continues to evolve, and tubeless systems will undoubtedly improve.
But for now, I’ll stick with the simplicity and reliability of inner tubes for bike on my road rides, enjoying the pure feeling of fast tires and latex tubes on smooth tarmac.