Like many outdoor enthusiasts, I’m comfortable in my domain. For me, that’s skiing. I can talk tech specs all day long, rattle off brand reputations, and even tell you which boot flex ratings are lying. But when the snow melts and the trails call, I hop on a mountain bike and suddenly feel like I’m speaking a different language.
For years, mountain biking has been my enjoyable summer escape, but shrouded in a bit of mystery. Terms like “enduro” floated around me like confusing jargon. Were these bikes built for grueling 24-hour races? Were cross-country bikes the ones loaded down with camping gear for multi-day adventures? (The latter sounded less than appealing, by the way. Luxury base camp, anyone?) And suspension travel? How much was enough, and did the front and rear need to match? Don’t even get me started on carbon frames costing more than a semester of college tuition – would that actually help me conquer that one rocky climb that always defeats me?
A serene view from a mountain ridge, showcasing the allure of mountain biking amidst stunning natural landscapes.
My bike shop visits became a cycle of minor repairs and major self-doubt. Each trip seemed to reinforce my newbie status.
“Your chain keeps slipping because your derailleur hanger is bent.”
“No, wait, your chain keeps slipping because you’ve shattered your rear hub this time.”
“Actually,” one mechanic sighed, “your chain keeps slipping because… well, let’s just say it’s user error. And have your brakes always sounded like that?”
My inner monologue screamed, “But I can fix a flat tire!” – a skill I clung to as my sole badge of bike competence. But voicing that felt weak, like admitting further ignorance. The frustration was real, almost therapist-appointment-worthy (and I try to project an image of total competence to my therapist!).
So, if you’re nodding along in shared bewilderment, this guide is for you. I’ve teamed up with Nate Miller, owner of Ridgway Wrench, a fantastic bike shop located near Telluride. Nate’s a true expert. He’s spent over 25 years wrenching on bikes, dominates single-speed races in his spare time (which is also his job, essentially), and, crucially, is patient enough to explain bike basics without making you feel, well, like an idiot.
Understanding Mountain Bike Categories and Suspension Travel
Let’s start with the fundamentals: bike categories. Just like skis are categorized by waist width for different snow conditions, mountain bikes are largely defined by their suspension travel. For the uninitiated (and I was squarely in this camp), suspension travel is the maximum distance your bike’s shocks compress. Think of it as how much squish you get when you ride over bumps, rocks, or even small drops.
A mountain biker gracefully navigates the Sneffels Highline Trail, exemplifying responsible trail riding in the breathtaking San Juan Mountains.
Downhill Mountain Bikes: 180-220mm rear travel; 180-200mm front travel. As the name suggests, these bikes are built for one purpose: descending. They are robust, heavily suspended machines designed to handle big air and steep, technical trails. “Downhill bikes are strictly for downhill riding; they are not designed for climbing,” Nate explained. “These are for riders who are hitting the bike park, riding lifts, wearing full-face helmets and body armor.” In essence, downhill bikes are specialized tools, not ideal for the average rider looking for versatility.
Enduro Mountain Bikes: 150-160mm rear travel; 150-180mm front travel. Enduro bikes bridge the gap between downhill and all-around trail bikes, but their heart is still in the descent. They can handle uphill climbs, albeit with less enthusiasm due to their weight and generous suspension. Enduro bikes excel in bike parks and lift-accessed riding, offering a balance of downhill capability and some pedaling efficiency. “You can pedal them uphill,” Nate conceded, “but most riders choose not to unless they have to get to the good downhills.”
Trail Mountain Bikes: 120-140mm rear travel; 130-150mm front travel. “Trail bikes are the versatile all-rounders,” Nate stated. They occupy the sweet spot between enduro and cross-country bikes, offering enough suspension for challenging descents while remaining light and efficient enough for longer rides with significant climbs. “These are perfect for riders heading out for a few hours, maybe packing lunch and a rain jacket,” he elaborated. “Trail bike geometry is well-balanced; they climb efficiently and descend confidently. More travel doesn’t necessarily equate to more speed.” For most riders, a trail bike offers the ideal blend of uphill and downhill performance. When considering a trail bike, ask yourself: “Am I catching air?” and “Do I ride aggressively, needing more suspension for demanding terrain?”. As price points increase in this category, expect to see weight reductions and component upgrades.
Cross-Country Mountain Bikes: 100-120mm front and rear travel; or front suspension only (hardtail). Cross-country (XC) bikes prioritize efficiency and climbing prowess. They are lighter and faster on ascents but require more skill and finesse on technical descents due to their reduced suspension. Some cross-country bikes are “hardtails,” meaning they only have front suspension. “Are you riding once or twice a week for shorter rides, or are you looking to explore further afield?” Nate asked. If shorter, more frequent rides are your style, a cross-country bike might be a great fit. Hardtail bikes are also excellent for beginners as they provide less forgiveness, forcing riders to develop better line choice and riding technique. “Riding a hardtail through a rock garden demands precise line selection, which really helps you learn fundamental bike handling skills and body positioning.”
After our conversation, I realized I’m firmly in the “trail” bike category. But then another question loomed: Is a carbon frame worth the investment? Would it magically propel me up those frustrating climbs?
 A man overlooks a mountain while sitting on his mountain bike.
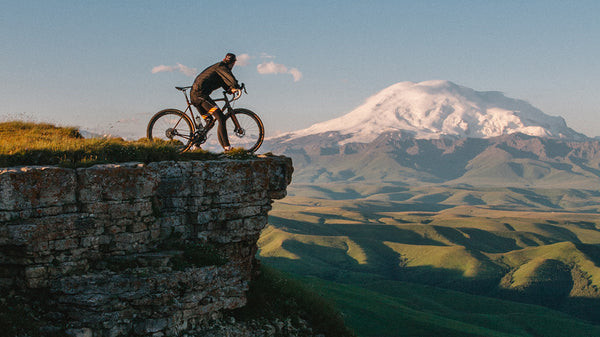
A cyclist pauses to admire the panoramic mountain vista, captured in a photograph by Dmitrii Vaccinium/Unsplash, highlighting the rewarding views accessible through mountain biking.
Mountain Bike Frame Materials: Carbon vs. Aluminum
Carbon vs. Aluminum. “Carbon fiber frames offer a distinct ride feel,” Nate explained. “Carbon tends to be more compliant, dissipating vibrations and trail chatter before they reach your body. This can improve comfort and handling.” However, the weight difference between a comparable carbon and aluminum frame might only be a pound or two. “For a strong rider, that weight difference might be negligible,” he noted. The decision often boils down to budget and how much time you spend on the bike. (So, perhaps blaming my aluminum frame for uphill struggles was just another manifestation of my… inexperience. See “technique tips” below.) If you’re considering a hardtail frame, carbon becomes a more compelling upgrade over aluminum, and titanium, if your budget allows, offers an even smoother ride.
Moving on to another area of personal confusion: pedals. Riding without being clipped in always felt precarious to me, akin to riding a horse without stirrups.
Mountain Bike Pedals: Clipless vs. Flats
Clipless vs. Flats. “Clipless pedals are more efficient for power transfer,” Nate stated simply. “You can generate power on both the upstroke and downstroke.” Flat pedals offer the advantage of easily putting a foot down for quick dabs or bailouts, but they don’t provide the same connected feel and pedaling efficiency as clipless systems. Regardless of your bike type or pedal preference, Nate shared a list of essential components and gear.
Mountain Bike Must-Haves
- Tubeless Tires: Tubeless setups reduce rotational weight and allow for lower tire pressures without the risk of pinch flats. Lower pressure increases traction and makes the ride smoother by absorbing more bumps.
- Seat-Post Dropper: A dropper post allows you to lower your saddle on the fly, getting it out of the way for descents and technical sections, improving maneuverability.
- Single Chain Ring Drivetrain (1x): A single front chainring simplifies shifting and provides efficient power transfer, helping maintain traction on climbs.
- Hydraulic Brakes: Hydraulic brakes offer superior stopping power and modulation compared to mechanical brakes. Mechanical brake cables can stretch, require frequent adjustments, and feel less responsive. Hydraulic systems, while more complex, offer consistent performance. However, hydraulic fluid can degrade over time, absorbing moisture and becoming contaminated, lowering its boiling point. This is why regular brake bleeding at a shop is important, especially if your brakes feel spongy or noisy.
- Pump: While CO2 cartridges offer quick tire inflation, a reliable hand pump is crucial for longer rides. If you have a slow leak and exhaust your CO2, you’ll be walking.
- Spare Tube: Even with tubeless tires, a spare tube is essential backup. Tubeless sealant can sometimes fail to seal larger punctures, requiring a tube to get you home. (And yes, for the record, changing a flat tire is a skill I do possess!)
- Tire Levers: “Pedros tire levers are the best,” according to Nate.
- Multi-tool with Chain Breaker, Extra Chain Links, and Quick Link: A compact multi-tool with chain repair tools is invaluable for trailside repairs.
- Gorilla Tape: Gorilla tape is incredibly versatile. It can temporarily fix broken zip ties or serve as a “tire boot” to reinforce a slashed tire sidewall. Wrap some around your hand pump for easy access.
Mountain bikes parked in a grassy meadow, showcasing the unique and remote destinations accessible through mountain biking, often quicker than hiking.
Mountain Bike Technique Tips
Beyond gear, technique is paramount. Here are some pointers to improve your riding.
Uphill Technique Tips: “For climbs, aim to be a couple of gears away from your easiest gear, saving those for true bailouts,” Nate advised. Higher torque in a slightly harder gear helps prevent rear wheel spin-out. Shift your weight forward, hover slightly off the saddle, and engage your core for stability and power. Dropping your saddle can also be beneficial on steep climbs, allowing for greater freedom of movement to maintain balance. “I sometimes lower my seat for tricky uphill sections where I need to shift my weight dynamically,” Nate mentioned.
For switchbacks, shift to an easier gear, aim wide on the entry, and cut towards the apex of the corner.
Downhill Technique Tips: “First and foremost, don’t fixate on your front tire,” Nate stressed. “Look ahead, about 10 feet in front of you, anticipating what’s coming.” Just like in skiing, focus on where you want to go – the smooth line between rocks – rather than the obstacles themselves.
Before each descent, check your tire pressure. This guide from ENVE provides a helpful starting point for tubeless tire pressures. Lighter riders need less pressure, and vice versa. (Terrain also influences pressure, but that’s a more advanced topic). “If you feel the rim hitting the ground or the tire squirming in corners, your pressure is too low,” Nate cautioned.
Always remember to unlock your suspension before descending. “We’ve all forgotten to do this,” Nate admitted. “Worst case scenario, you can damage your suspension, leading to a blown damper and a bouncy, uncontrolled ride.”
Brake before corners, not throughout them. Feather your rear brake for control, and avoid grabbing the front brake too aggressively, which can lead to going over the handlebars. Use speed to your advantage; momentum helps you roll over smaller obstacles.
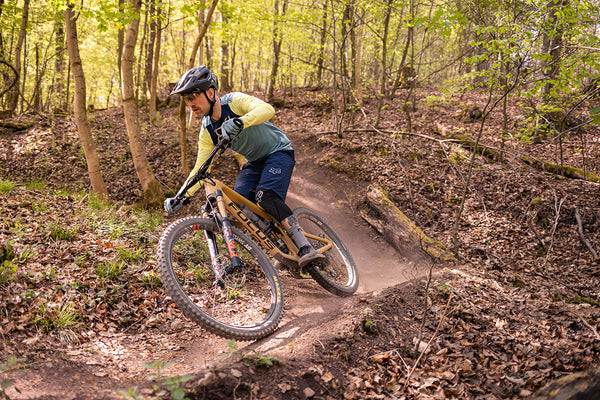 Downhill mountain biker in the forest
A downhill mountain biker speeds through a sun-dappled forest, illustrating the thrill and freedom of single-track mountain biking. Photo by Axel Brunst/Unsplash.
Trust your tires. Relax your grip – avoid a death grip on the handlebars. “If you’re tense, all the trail vibrations transfer directly to you, increasing the chance of accidents.” Maintain a balanced weight distribution, leaning slightly forward, similar to skiing, to keep the front tire engaged and maintain control.
For downhill switchbacks, anticipate the turn well in advance. Do most of your braking before initiating the turn. Feather the rear brake through the corner as needed. The approach mirrors uphill switchbacks: enter wide and cut to the inside. “I often think about cornering like a race car driver,” Nate shared, “What’s the fastest line through the turn? Watch racing – whether F1 or downhill skiing – and learn. The principles are similar.”
Hopefully, this guide has helped you feel a little less overwhelmed by the world of mountain bikes. (You’re welcome!) Now, get geared up and hit the trails!
—
Article by Kimberly Beekman
Kimberly Beekman is a seasoned outdoor writer with extensive experience in the ski industry, formerly holding editor-in-chief roles at Skiing Magazine and SKI Magazine. Currently a freelance writer based in Steamboat, Colorado, she dedicates her time to skiing powder and sharing her outdoor adventures.
[