For over a decade, the thrill of motorcycle riding has been a constant in my life. However, combining this passion with my love for cycling presented a unique challenge: how to transport my mountain bike on my motorcycle. The market offers very limited options for Motorcycle Bike Racks. While companies like 2×2 Cycles provide solutions, their high prices and limited vehicle compatibility were major roadblocks for me. Their racks, while innovative, simply didn’t fit my budget or my 2004 Harley Davidson Sportster. This sparked a months-long internet search for inspiration, aiming to design and build my own motorcycle bike rack.
Despite being a novice welder with, let’s say, “developing” welding skills, I was determined. After extensive online research, I pieced together design ideas to create a rack that would carry my mountain bike vertically on my Harley Davidson Sportster. Cost was a significant factor. With 2×2 Cycles’ Harley rack priced around $365, my goal was ambitious: build a functional and reliable motorcycle bike rack for under $150. Fortunately, my Sportster came with a spare luggage rack and sissy bar, which had been gathering dust in my garage – perfect starting materials for this DIY project.
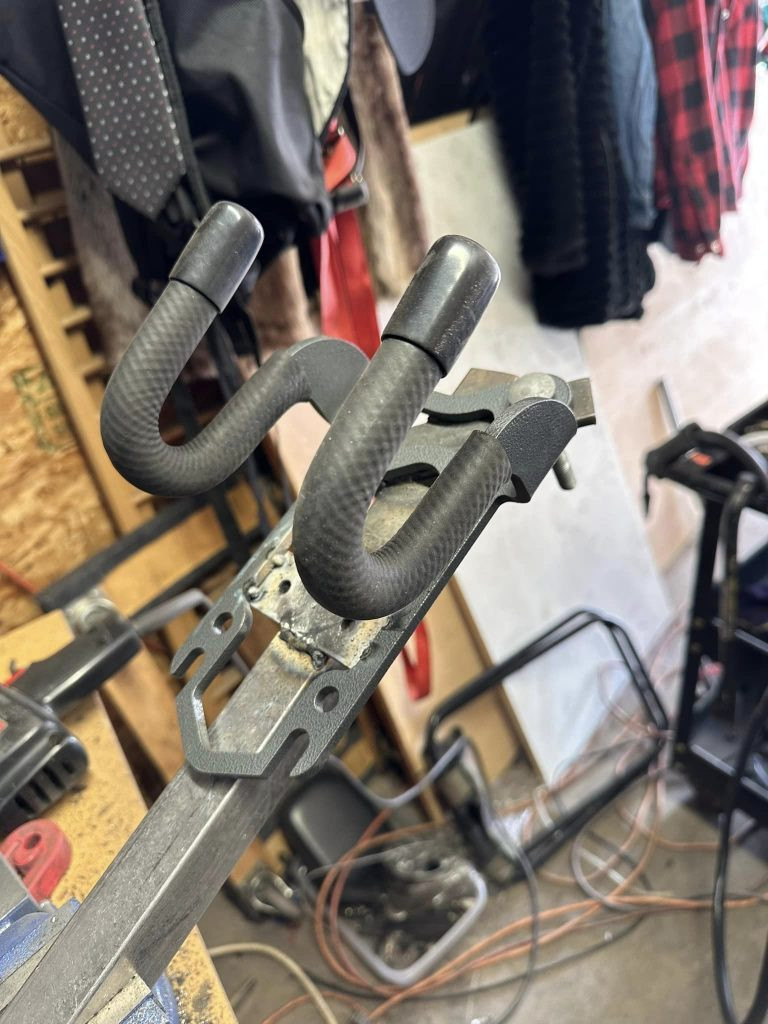
My approach was more about vision than meticulous planning. I sketched out a rough concept of the rack, focusing on the desired look and function rather than precise measurements. It was a hands-on process of marking, cutting, and constant adjustments using clamps and straps to visualize the final product. A crucial component I discovered was the Lolo Racks DIY Bike Rack Hook. This hook system allows for vertical bike mounting by the handlebar, promising stability and security – ideal for a motorcycle bike rack. Investing $45 in the hook plus $15 for shipping was a worthwhile expenditure for this key part of the build.
 Lolo rack diy single hook
Close-up of the Lolo Rack Hook, showcasing its robust design after being welded and bolted onto the square tubing for the DIY motorcycle bike rack project.
With the Lolo Rack Hook in hand, I proceeded to determine the necessary height for the rack. Considering my Giant Trance 29er, the rack needed to elevate the bike sufficiently to prevent the rear wheel from hitting the motorcycle’s wheel or the road. A trip to Home Depot yielded a 48in x 1in x 1/16in square tubing, which I cut into appropriate lengths for the rack structure.
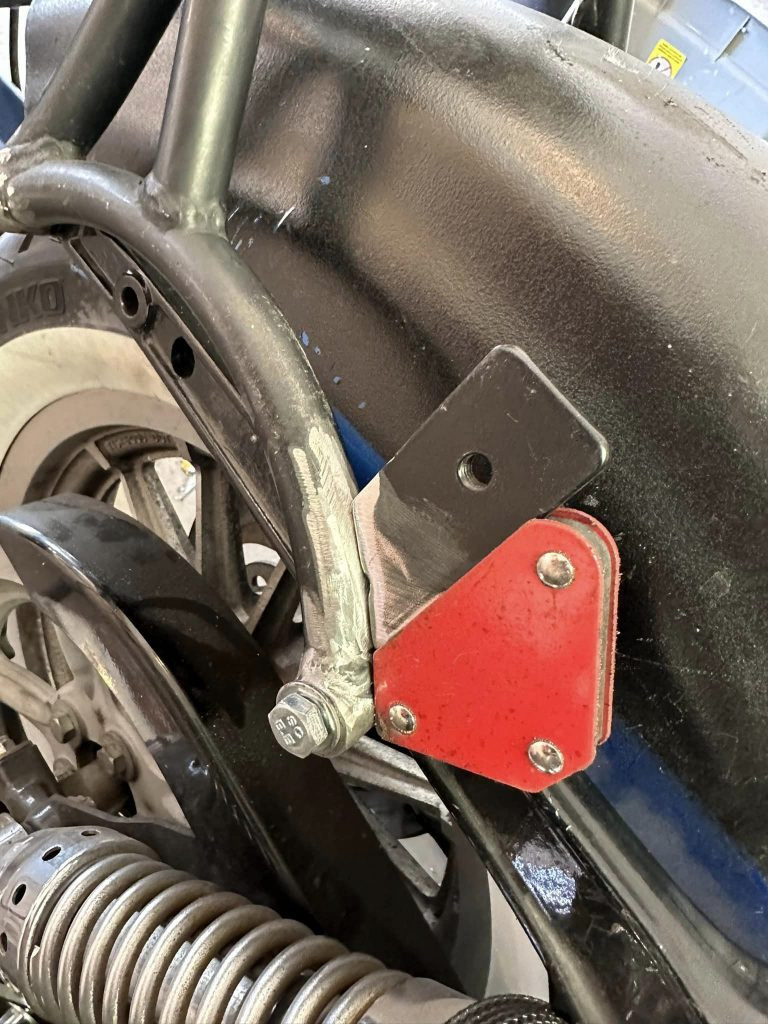
The sissy bar, originally included with the Harley Sportster, is shown here. It served as the foundational element for constructing the DIY motorcycle bike rack, providing a solid mounting point.
Utilizing the sissy bar as the foundation, I planned to weld the square tubing to it. To ensure structural integrity at the base, I repurposed an old Harley brake rotor, cutting it into pieces to serve as gussets for added strength.
Cut pieces from a discarded Harley brake rotor, prepared to be used as gussets in the motorcycle bike rack construction, adding reinforcement to welded joints.

Initial welds connecting the gussets to the square tubing of the motorcycle bike rack. Note: These welds were later improved for enhanced strength and appearance.
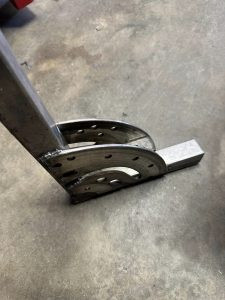
Double-sided gussets welded onto the motorcycle bike rack frame, demonstrating a robust reinforcement strategy for increased durability and stability.
Throughout the construction, adaptability was key. Whenever a design aspect didn’t quite work, I improvised and found solutions. The entire project was driven by a mental image of the finished motorcycle bike rack and its intended functionality, rather than a rigid blueprint. I dedicated my Thanksgiving break and much of December to this project, and I could see my welding skills improving with each step. Despite working in Marketing, far from metal fabrication, I was motivated to see if I could actually create this DIY motorcycle bike rack.
Around Christmas, I shared progress photos on our Facebook Fanpage, and by Christmas Eve, I reached a significant milestone: the metalwork – cutting, welding, shaping – was complete. The rack was assembled, and I was eager for a test ride.
Installation on the Harley was straightforward. After bolting everything securely and strapping my Giant Trance onto the rack, it was time for the first test. Starting with cautious rides around my street, I gradually increased speed, ensuring stability. Feeling confident, I ventured onto the main road, incrementally reaching 20, 30, 40, and then 45 mph. I stopped after a quarter mile to inspect the straps and capture a few photos of my creation in action.
 motorcycle bicycle rack
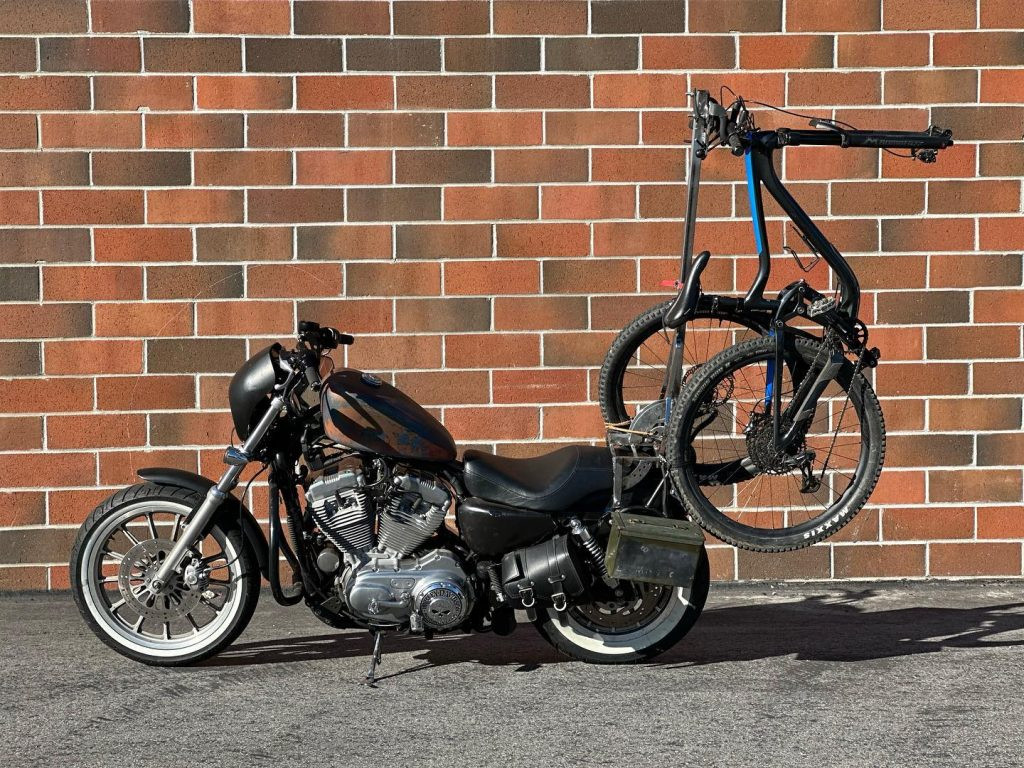
Side view of the DIY motorcycle bike rack mounted on the Harley Davidson Sportster, successfully carrying a mountain bike during an initial low-speed test ride.
Rear perspective of the motorcycle with the newly built bike rack, showing the vertical bike mount and strap system securing the bicycle for transport.
Following these initial tests, I pushed the speed up to 55 mph. Several miles into the ride, the motorcycle bike rack was holding firm. Before even mounting my bike, I performed a weld strength test. Gripping the Lolo Racks hook, I pulled back forcefully – so forcefully that the motorcycle’s front wheel lifted off the ground, confirming the welds were robust.
 bicycle rack on a motorcycle
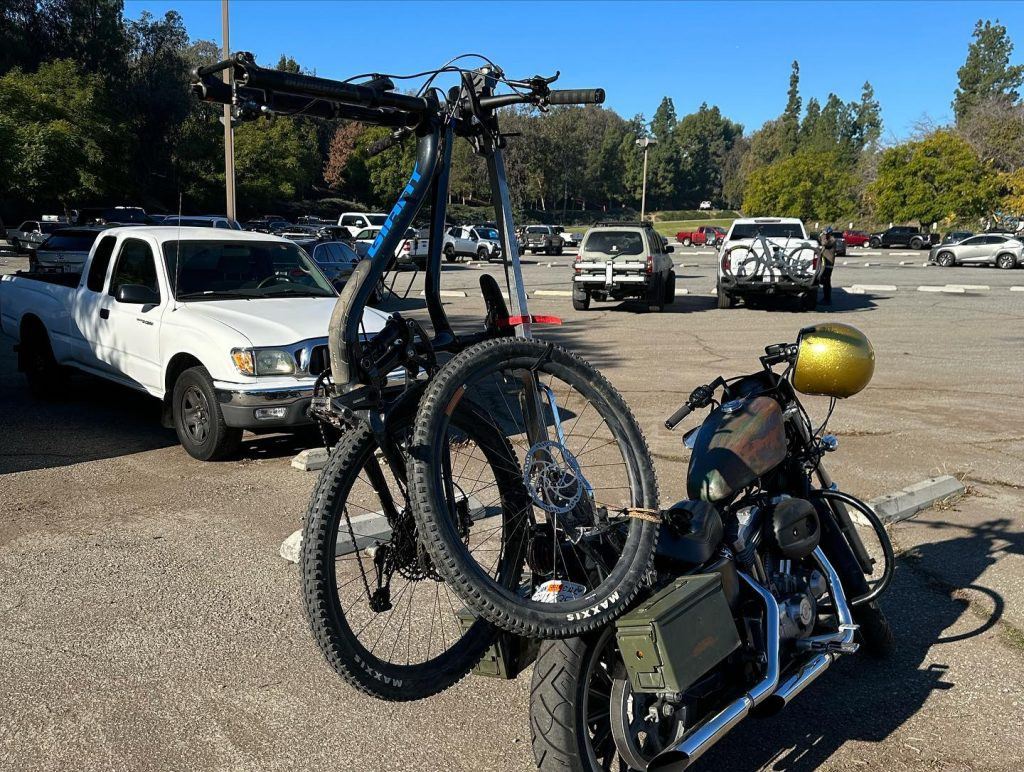
Close-up shot highlighting the bicycle rack on the motorcycle, emphasizing the secure attachment point of the Lolo Rack Hook and the vertical bike positioning.
 Harley with a bike rack
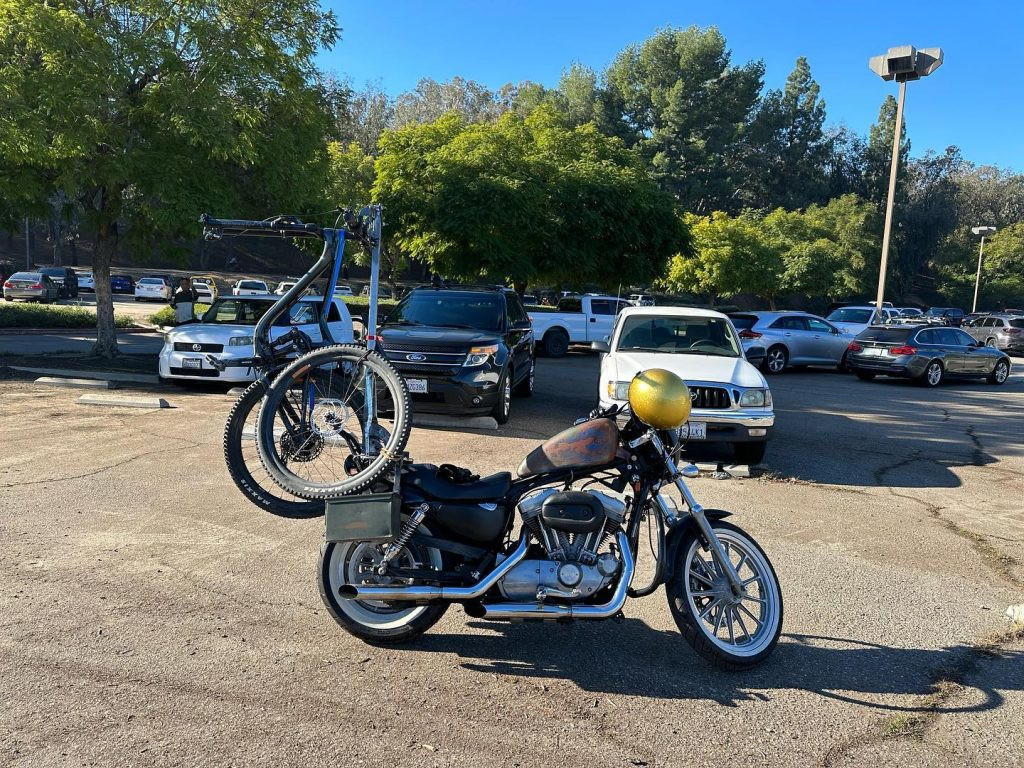
The Harley Davidson Sportster equipped with the completed DIY motorcycle bike rack, parked at the Fullerton Loop, showcasing the successful integration of the rack and bicycle.
Riding to the Fullerton Loop, the motorcycle bike rack garnered considerable attention. Many onlookers were impressed, and some even took photos, intrigued by the unique setup.
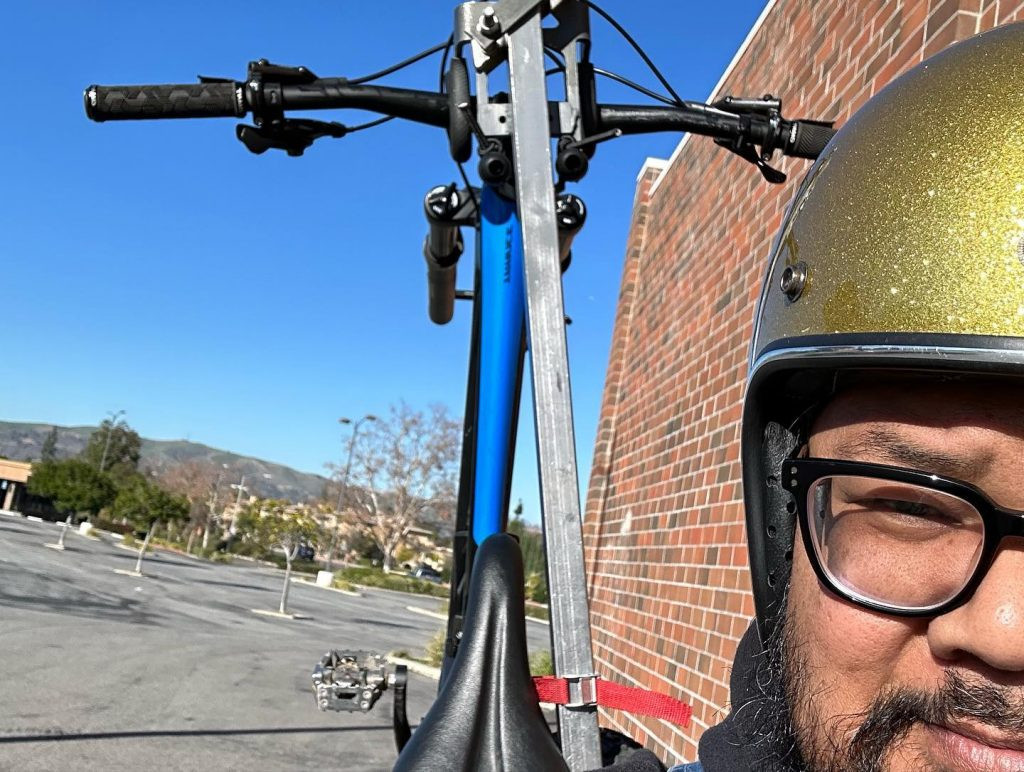
Action shot of the motorcycle bike rack in use during a 10-mile test ride with a Giant Trance 29er mounted, confirming the rack’s reliability and stability under riding conditions.
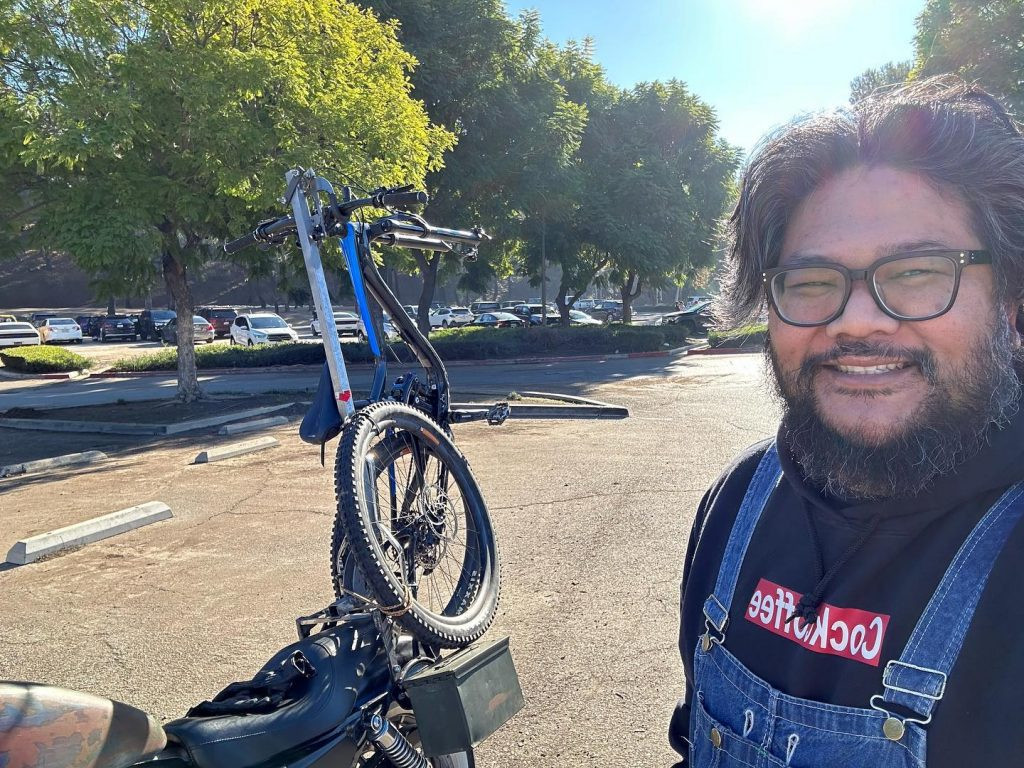
Proudly displaying the DIY motorcycle bike rack after a successful test ride, highlighting the functionality and homemade aesthetic of the custom-built carrier.
After a 10-mile test ride with the Giant Trance 29er, everything held perfectly. The final step is to spray paint the motorcycle bike rack to prevent rust. Initially, some people were skeptical about this project, questioning its feasibility and safety. While I appreciate their concerns, the successful outcome speaks for itself. Concerns about the bike’s weight affecting the motorcycle’s center of gravity are understandable, but in practice, carrying a bicycle is comparable to carrying a passenger – and significantly lighter than some passengers! This DIY motorcycle bike rack project proved to be a rewarding and cost-effective solution, perfectly blending my passions for motorcycling and mountain biking.