Knowing how to replace bike pedals is a fundamental skill for any cyclist who wants to perform their own bike maintenance or upgrade components. While it might seem straightforward—simply threading pedals in or out of the crank arms—there are crucial details that are easy to overlook. By following these comprehensive steps, you’ll ensure you replace your bike pedals correctly and efficiently.
Step 1: Gather the Right Tools for Replacing Bike Pedals
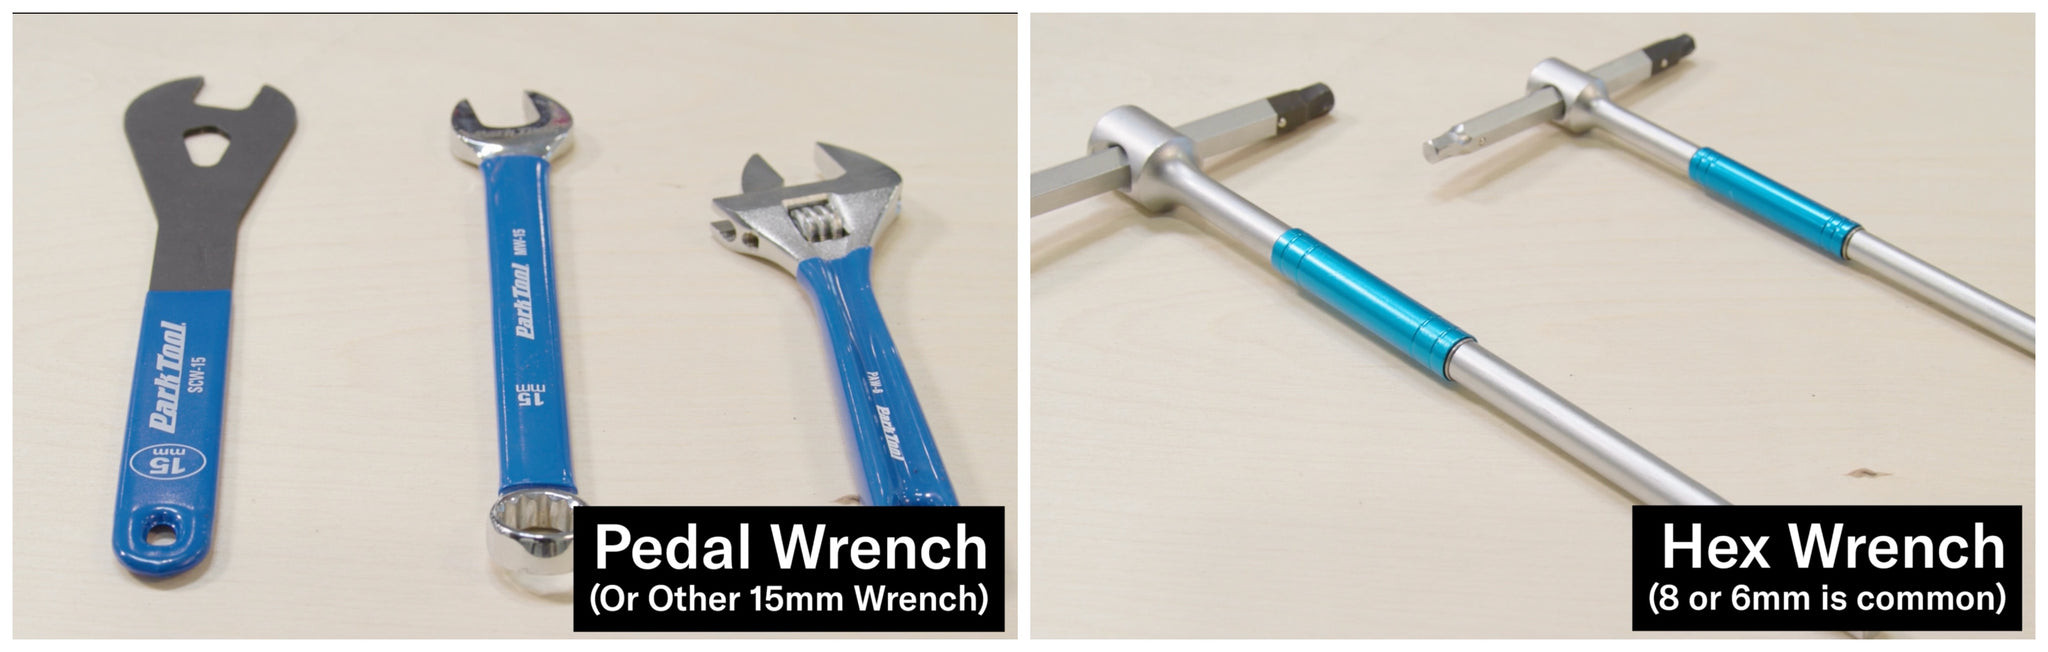 Selection of tools needed for bike pedal replacement including pedal wrench, hex wrenches, and grease
To successfully install or remove your bike pedals, having the appropriate tool is essential. First, examine your pedals to determine the type of tool required. Generally, you’ll need one of these three options when Replacing Bike Pedals:
- Pedal Wrench / 15mm Wrench: Typically used for older and budget-friendly pedals. These pedals feature flat sections on the spindle designed for a 15mm wrench. Pedal wrenches are specifically designed to be thin, allowing them to fit easily between the pedal and crank arm. While a dedicated pedal wrench is recommended, a narrow 15mm box wrench or a small adjustable crescent wrench can also work if they are thin enough.
Important Note: Using a thin 15mm cone wrench, as shown, requires caution. These wrenches are very thin and can potentially damage the wrench flats on your pedals. A dedicated pedal wrench is always the better choice for replacing bike pedals safely.
-
8mm Hex Wrench: Commonly required for many modern clipless and flat pedals. This wrench fits into the end of the pedal spindle.
-
6mm Hex Wrench: Another common size for modern pedals, also fitting into the end of the pedal spindle.
Most contemporary clipless and flat pedals utilize a standard hex wrench, either 8mm or 6mm, which inserts into the pedal spindle end.
Step 2: Understanding Pedal Thread Direction for Correct Replacement

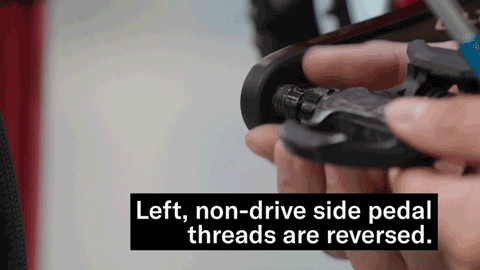
A common point of confusion when replacing bike pedals is the thread direction. It’s crucial to remember that pedals have different thread directions on each side of the bike:
- Right / Drive Side Pedal: Features a standard thread. Turn clockwise to tighten (righty-tighty).
- Left / Non-Drive Side Pedal: Features a reverse thread. Turn counterclockwise to tighten (lefty-tighty).
The reverse threading on the left pedal is designed to prevent the pedal from loosening due to the motion of pedaling.
Here’s a helpful mnemonic to remember the correct direction when replacing bike pedals:
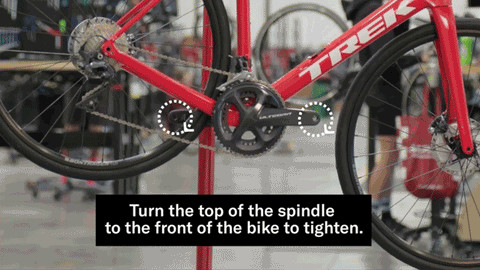
- To Install: Rotate the TOP of the pedal spindle towards the FRONT of the bike to tighten.
- To Remove: Rotate the TOP of the pedal spindle towards the REAR of the bike to loosen.
While it’s usually evident which pedal is right and which is left, if you’re unsure, most pedals are marked with “R” (Right) and “L” (Left) on the pedal spindle. If markings are absent, examine the pedal threads closely to determine the tightening direction.
Step 2.5: Greasing Pedal Threads: A Must-Do Before Replacing
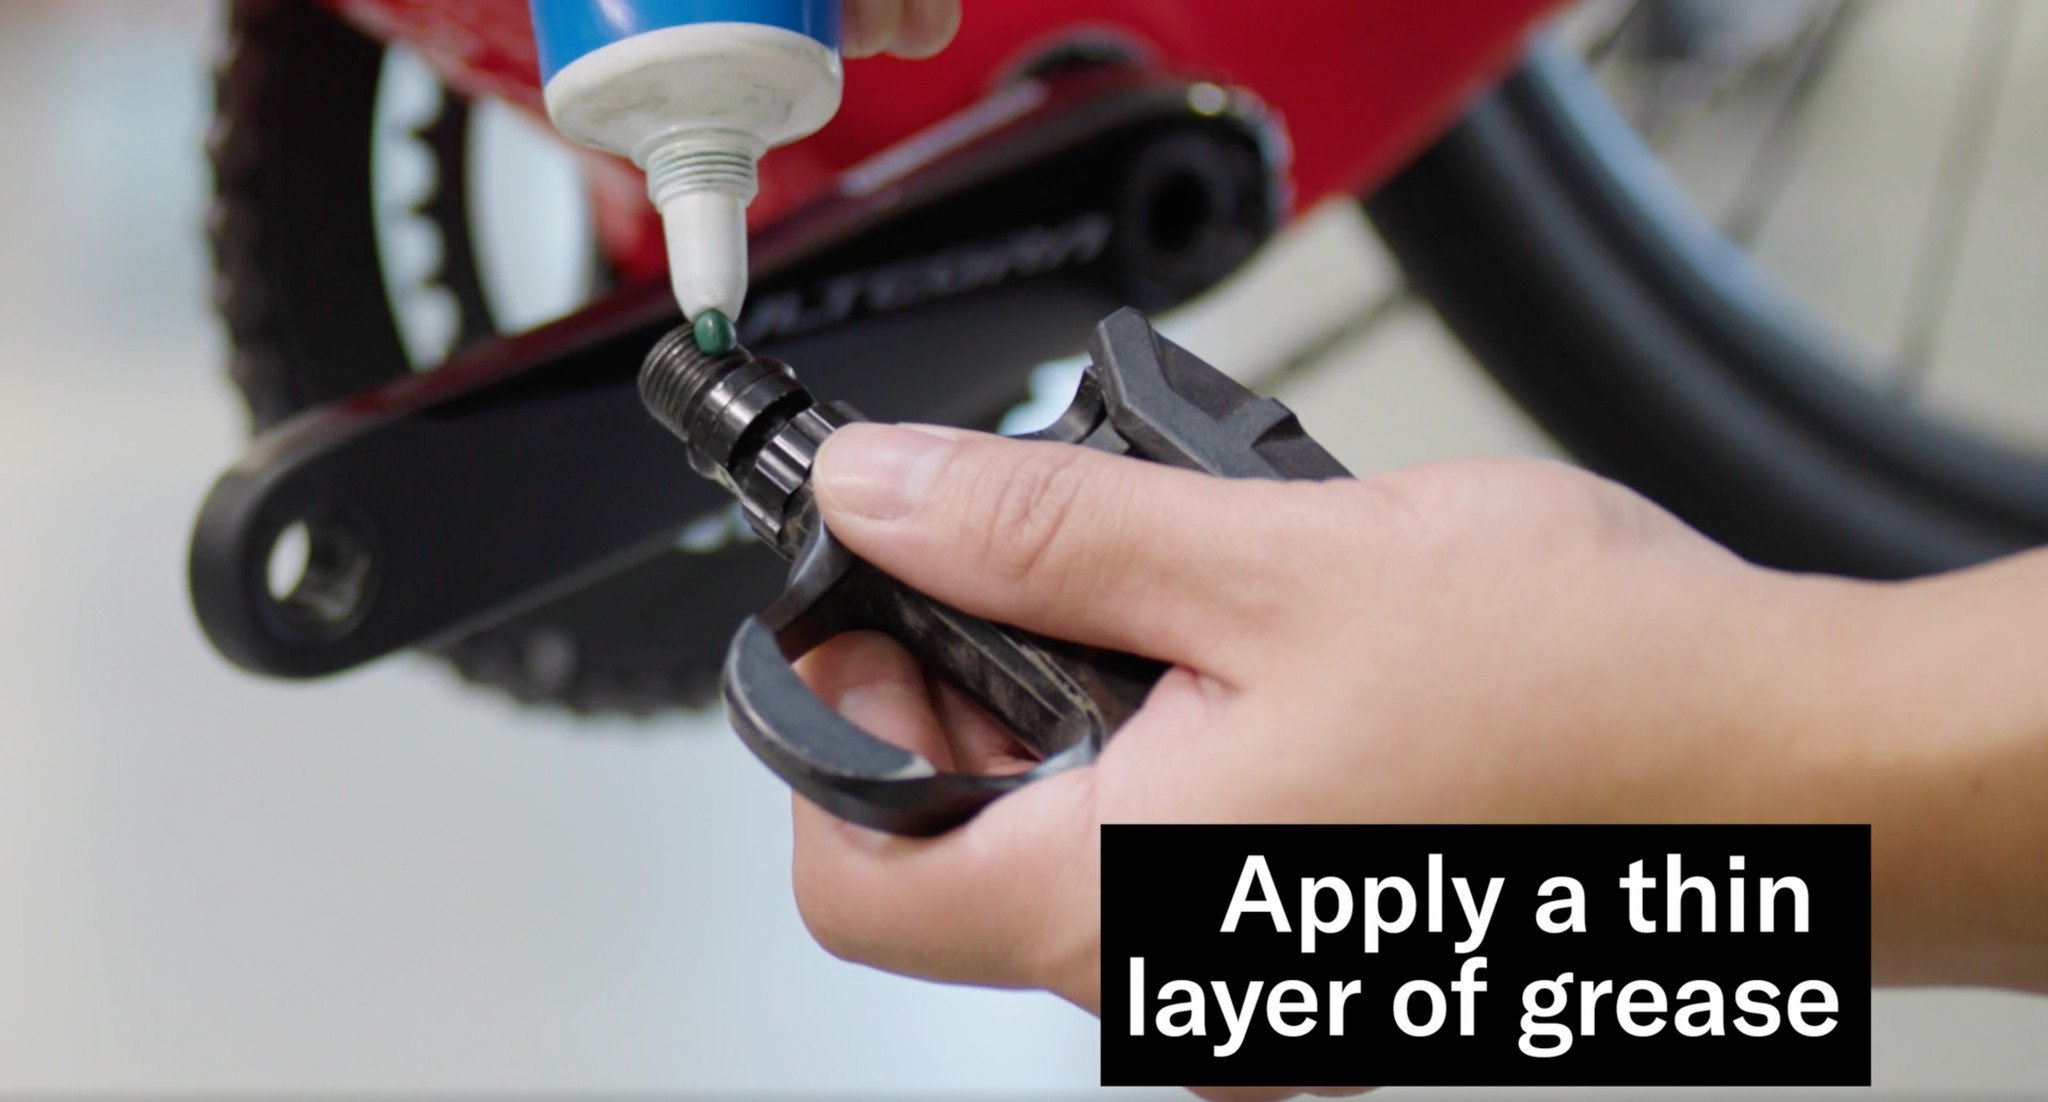 Applying grease to bike pedal threads before installation to prevent seizing
Nobody wants to struggle with a pedal that’s seized in place. Before you install your new pedals or reinstall existing ones, always apply grease to the pedal spindle threads. Grease acts as a barrier against corrosion, making future pedal removal much easier. If you are reinstalling used pedals, take a moment to wipe the threads clean before applying fresh grease. You only need a small amount of grease; a dab thinly spread over the threads is sufficient for replacing bike pedals effectively.
While bike-specific grease is ideal, a small tube is affordable and will last for many pedal replacements. If you prefer a non-bike-specific option, waterproof grease or anti-seize compounds available at most hardware and auto parts stores will work. In an emergency, Vaseline can be used, or you can install pedals without grease, but ensure you apply proper grease as soon as possible.
Step 3: Properly Tightening Your Bike Pedals After Replacement
Bike pedals don’t require excessive tightening. The natural spinning motion of the cranks while riding actually helps to keep the pedals securely tightened. The typical recommended torque for pedals is around 360 inch-pounds, which is just over 40.5 Newton meters.
However, many experienced mechanics don’t adhere strictly to torque specifications or even use a torque wrench when replacing bike pedals. A common and effective technique is to tighten the pedals by hand until the spindle makes contact with the crank arm, and then apply a single firm “oomph” with a pedal wrench or hex wrench to finalize tightening. This approach provides sufficient tightness to prevent loosening during rides, without making the pedals overly difficult to remove later.
Important Tip: Avoiding Cross-Threading When Replacing Bike Pedals
Cross-threading is a serious issue that occurs when the pedal threads don’t align correctly with the threads inside the crank arm. If you cross-thread your pedals, you can damage the crank arm threads, and in a worst-case scenario, a pedal could detach while riding, leading to a dangerous situation.
To prevent cross-threading when replacing bike pedals, ensure you are threading the pedals into the crank arm as straight as possible. Pedals should always thread in smoothly and easily, and you should not encounter significant resistance during the initial tightening. If you do feel resistance, stop immediately, remove the pedal, and try again. Inspect, clean, and re-grease both the pedal spindle threads and the threads inside the crank arm before attempting to reinstall.
Conclusion: Replacing Bike Pedals is a Simple Skill to Master
Replacing bike pedals is a straightforward maintenance task once you understand the key steps and potential pitfalls. By using the correct tools, understanding thread direction, greasing threads, and avoiding cross-threading, you can confidently replace your bike pedals and keep your bike in top condition for all your rides.