
Inspired by the thrilling Speeder Bike chase in Star Wars: Return of the Jedi? You’re not alone! For many fans, the low-level, high-speed flight of those iconic vehicles is unforgettable. This DIY project takes that inspiration and merges it with the exciting world of First Person View (FPV) multi-rotor racing. If you’re fascinated by RC flight and have a love for all things Star Wars, prepare to embark on a journey to build your very own Imperial speeder bike drone.
This project started with a simple desire: to bring the fantasy of piloting a speeder bike into reality. The goal was to create a flyable version of the Imperial Speeder Bikes from the movie, something that could be personally piloted and enjoyed. Like any good maker, I always have a quirky project on the workbench, and this one was next in line.
Selecting the Perfect Speeder Bike Model
The foundation of this project is a 1:6 scale Hasbro Power Of The Force series Speeder Bike. For those deep into Star Wars lore, this is officially known as a “74-Z Speeder Bike” or “Imperial Speeder Bike”. Hasbro re-released many of their classic 80s toys when the special edition films came out in ’97, often using the original molds. The model used here is stamped 1999, part of a series that included Scout Trooper, Luke, and Leia versions.
 Close-up of the Speeder Bike model detailing the texture and panel lines, showcasing its scale and design.
These older Hasbro toys are excellent for DIY projects because they are lightweight, thanks to their plastic construction, and relatively easy to disassemble. While most of the shell is made of styrene, the more delicate parts are constructed from a vinyl-like material, offering surprising durability for its weight. If you’re looking to replicate this project, these models are still available, often found on eBay for around $50.
Achieving Lift: Designing the Quad Rotor System
The major hurdle was figuring out how to lift the speeder bike without making it look like a standard quadcopter with a model tacked on. To tackle this, CAD software was used to experiment with different rotor layouts. Starting with an overhead picture of the model, the design process focused on ensuring the rotors:
- Barely cleared the rider and bike elements.
- Maintained the center of lift directly above the center of gravity.
- Could generate enough lift, estimated around 600 grams.
The final design incorporated four 7-inch rotors powered by 880kv 28mm motors. Typically, these motors are paired with 10 or 11-inch two-blade propellers on an 11.1v Lipo battery. To compensate for the smaller 7-inch rotor diameter, three-bladed propellers were chosen, and the system was powered by a 14.4v 2200mAh Lipo battery. While not the most efficient setup, this configuration kept the quadcopter compact and provided the necessary lift for the somewhat heavier speeder bike frame.
 Overhead view of the Speeder Bike showing the rotor placement and overall design, emphasizing the compact quadcopter integration.
Building the Frame and Integrating Components
The structural support for the rotors is built from 10mm carbon fiber tubes, utilizing stick-mount style motor mounts. To ensure the speeder bike flies level during forward motion, both the autopilot system and the rotors were angled forward by approximately 10 degrees. This forward tilt compensates for the aerodynamic forces in flight, resulting in a more natural and level speeder bike appearance when in motion.
 Close-up of the carbon fiber booms and motor mounts, highlighting the construction details of the drone frame.
For flight control, a 3DRobotics PixHawk was used. However, the author notes that various other flight controllers like Naze32 or KK2 would also be suitable. Tuning the PixHawk proved somewhat challenging due to the close spacing between the front and rear rotors. Despite this, with careful adjustments, stable and smooth flight was achieved.
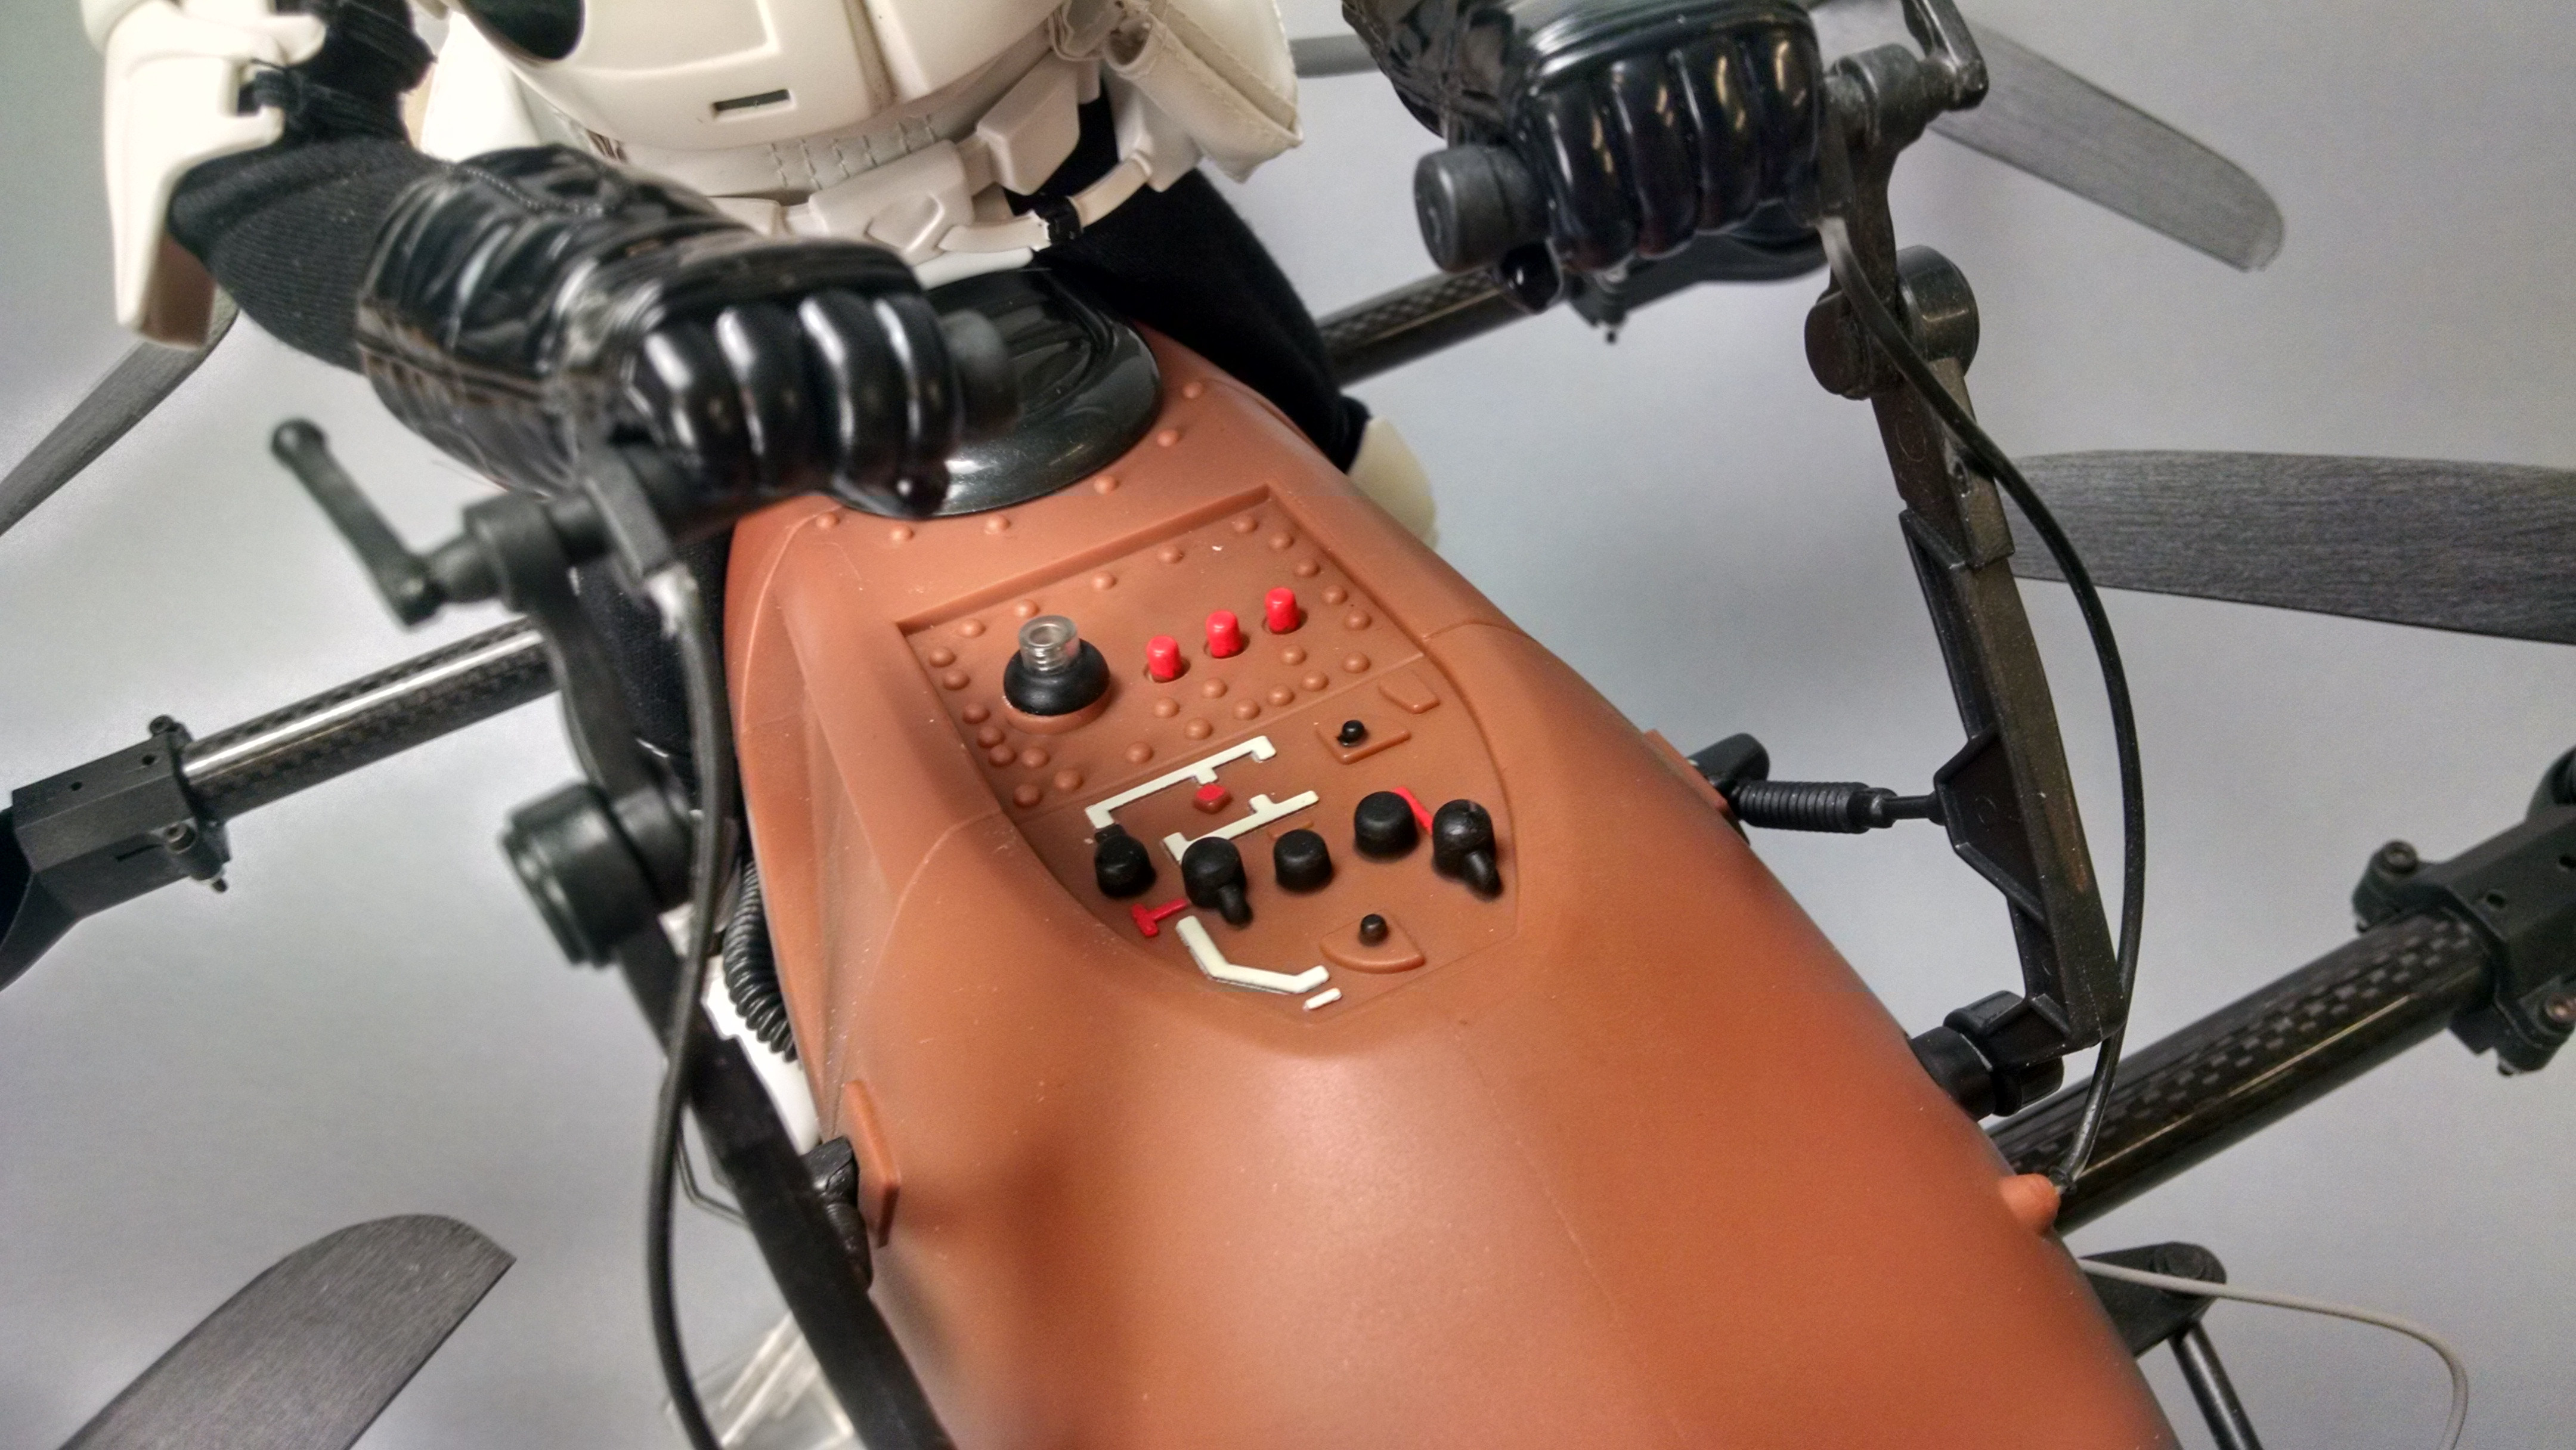
 Angled shot of the Speeder Bike drone from the front, showcasing the forward tilt of the rotors and the overall assembled structure.
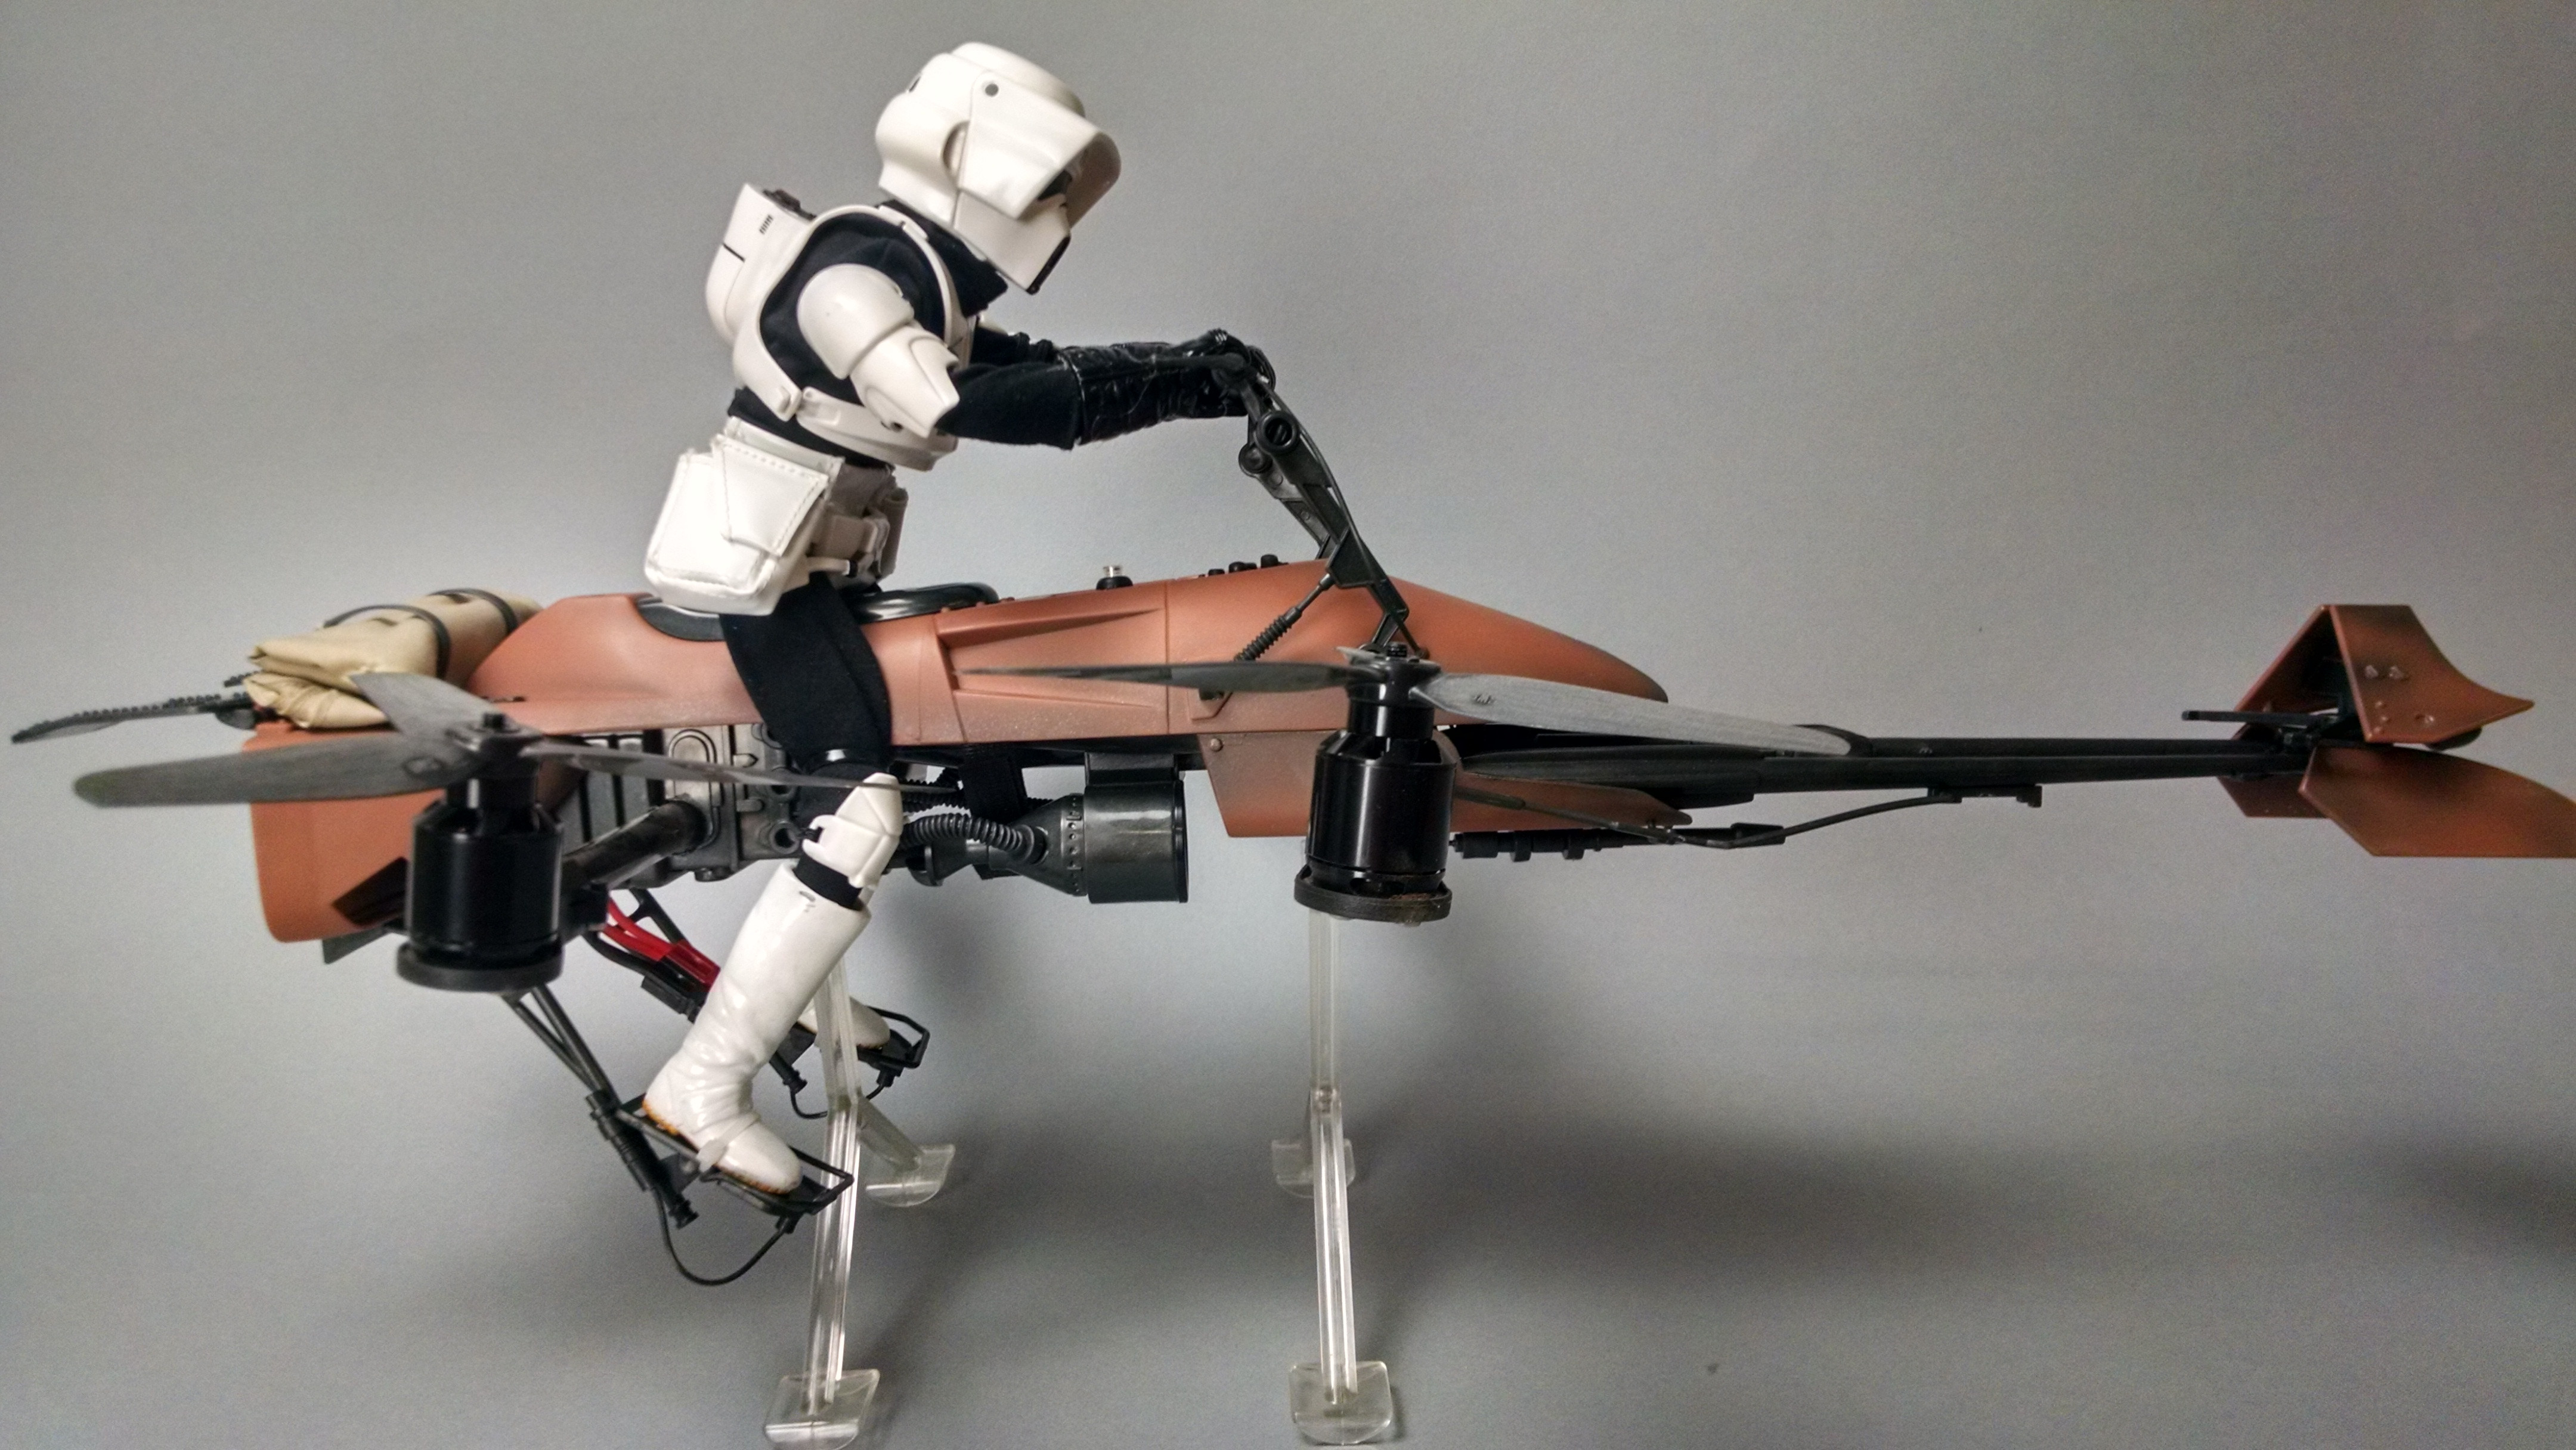
 Side view of the Speeder Bike drone, emphasizing the slim profile and integration of the drone components within the model.
 Rear view of the Speeder Bike drone, showing the motor and propeller setup and the overall compact design from the back.
 Detail shot of the motors and propellers mounted on the carbon fiber booms, providing a closer look at the power system components.
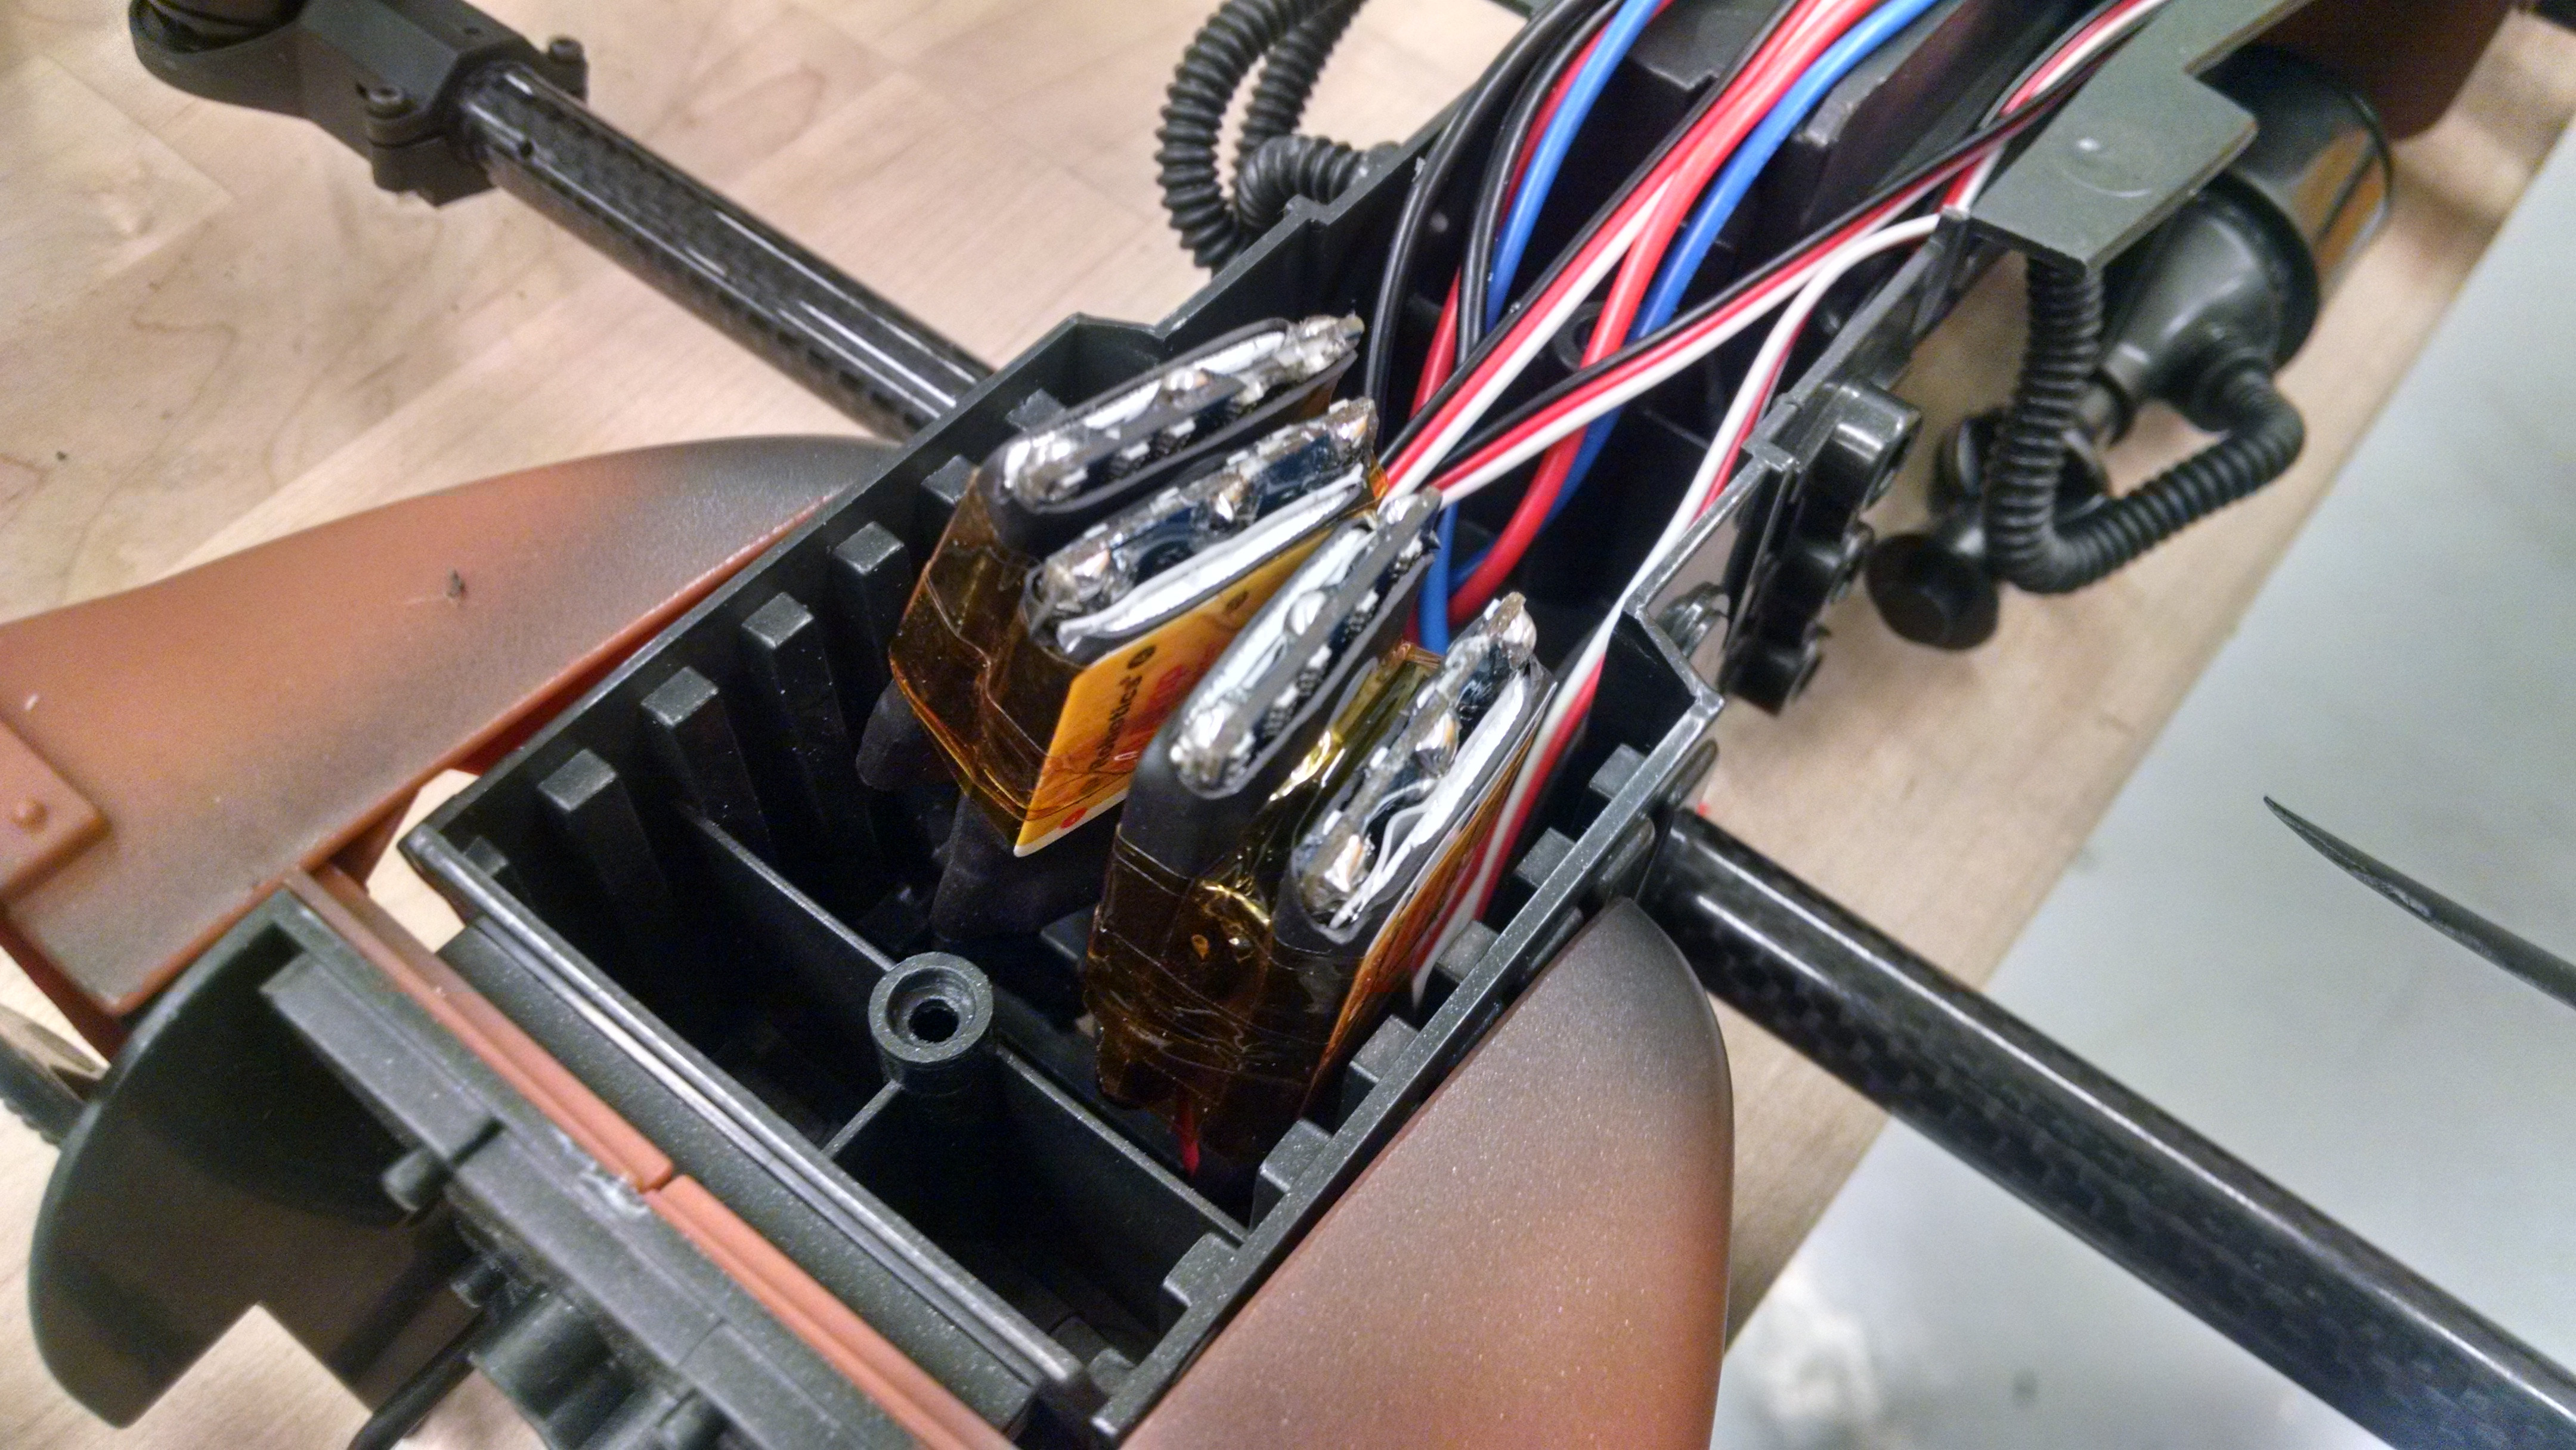
 Underside view of the Speeder Bike drone, revealing the wiring and component layout beneath the model, showing the integration of the drone mechanics.
 Close-up of the PixHawk flight controller mounted on the Speeder Bike, highlighting the brain of the drone and its integration into the model.
Rider Modification for Weight Savings
The power system was designed to handle around 600g of total weight. With the speeder bike itself weighing approximately 475g, there wasn’t much capacity left for the rider figure. The original rider, a Barbie-doll style figure, was surprisingly heavy, clocking in at over 200g with armor and clothing.
To significantly reduce weight, a new rider body was constructed from pipe cleaners and repurposed Nerf darts (any type of round foam would work). A 6mm carbon fiber tube was run through this lightweight skeleton, acting as a mounting point into a drilled hole in the speeder bike seat. This new skeleton dramatically reduced rider weight to just around 15g and offered much greater flexibility than the original plastic figure. For added security during flight, the rider’s boots and legs were zip-tied to the speeder bike to prevent them from being drawn into the rotors.
 Close-up of the modified rider figure, showcasing the lightweight pipe cleaner and foam construction and the carbon tube mounting system.
 Side view of the Speeder Bike with the lightweight rider in place, demonstrating the weight-saving modifications and overall aesthetic.
First Person View and Future Flights
For an immersive flying experience, the stock helmet of the rider can be swapped out for an FPV camera. This camera, a combination camera and video transmitter unit from Spektrum, pairs with FatShark Dominator video goggles. A small security camera DVR was used to record the FPV footage on the ground, allowing for review and sharing of the speeder bike flights.
 Speeder Bike with the FPV camera mounted on the rider's helmet, ready for a first-person view flight experience.
 Action shot of the Speeder Bike drone in flight outdoors, captured by Stephen Warrener, showing the drone in action and its flight capabilities.
 Another dynamic shot of the Speeder Bike drone flying, highlighting its speed and maneuverability in an outdoor environment.
 Low-angle shot of the Speeder Bike drone in flight, emphasizing its low-level flying capability and the Star Wars speeder bike aesthetic.
With the successful completion of this Imperial speeder bike, plans are already underway for a Luke Skywalker version to enable speeder bike racing through trees! Furthermore, the project opens up possibilities for converting other Hasbro Star Wars vehicles into unique and flyable drones. This DIY speeder bike project proves that with a little ingenuity and some readily available RC components, you can bring a piece of the Star Wars universe into your own backyard.