Painting a bike frame might seem daunting, but it’s achievable with the right approach and dedication. At usabikers.net, we provide expert advice to help you conquer this DIY project and give your beloved motorcycle a fresh, personalized look. By following our detailed guide, you can achieve a professional-quality finish without breaking the bank. Let’s dive into bike frame restoration, custom paint jobs, and essential bike maintenance.
1. What is Involved in Painting a Bike Frame?
Painting a bike frame involves several key steps, from preparation to the final clear coat. A successful paint job requires meticulous attention to detail and a commitment to quality, which starts with understanding the overall process.
- Disassembly: Completely dismantle the bike, removing all components from the frame.
- Stripping: Remove the existing paint and rust to expose the bare metal.
- Cleaning: Thoroughly clean the frame to ensure proper adhesion of the new paint.
- Priming: Apply multiple coats of primer to create a smooth, even base.
- Painting: Apply several thin coats of your chosen color, allowing each coat to dry properly.
- Clear Coating: Seal the paint with multiple layers of clear coat for protection and shine.
- Finishing: Wet sand, buff, and polish the frame to achieve a flawless finish.
1.1. Why is Preparation Important?
Preparation is paramount in painting a bike frame. Proper preparation ensures that the new paint adheres correctly, resulting in a durable and visually appealing finish. Skipping steps or cutting corners can lead to peeling, chipping, and other imperfections.
- Adhesion: A clean, smooth surface allows the primer and paint to bond effectively.
- Appearance: A well-prepared surface ensures an even and consistent color.
- Durability: Proper preparation extends the life of the paint job by preventing premature wear and tear.
1.2. What Tools and Materials Do I Need?
Gathering the necessary tools and materials is crucial before starting your bike frame painting project. Having everything on hand will streamline the process and minimize potential setbacks.
| Tool/Material | Use |
|---|---|
| Wrenches and Screwdrivers | Disassembling the bike |
| Paint Stripper | Removing old paint |
| Sandpaper | Smoothing surfaces and preparing for paint (various grits) |
| Sanding Block | Ensuring even sanding |
| Metal Primer | Providing a base for the paint |
| Bike Paint | Applying color to the frame |
| Clear Coat | Protecting the paint and adding shine |
| Masking Tape | Protecting areas from paint |
| Tack Cloth | Removing dust and debris |
| Safety Glasses | Protecting eyes from chemicals and particles |
| Gloves | Protecting hands from chemicals and paint |
| Respirator | Protecting lungs from harmful fumes |
| Buffing Compound | Polishing the finished paint job |
| Buffing Pads | Attaching to a power buffer for efficient polishing |
| Microfiber Cloths | Wiping surfaces and applying buffing compound |
2. How Do You Disassemble the Bike Frame?
Disassembling the bike frame is the first step in the painting process. Take your time and be methodical to ensure you don’t damage any components.
2.1. Removing Components
Start by removing all components attached to the frame, including wheels, handlebars, seat, and any cables or housings.
- Wheels: Detach the wheels using appropriate wrenches or quick-release levers.
- Handlebars: Disconnect brake and shift cables, then remove the handlebars from the stem.
- Seat: Loosen the seat post clamp and remove the seat and seat post.
- Cables: Carefully disconnect and remove all brake and shift cables, noting their routing for reassembly.
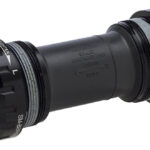
- Bottom Bracket and Crankset: Use the appropriate tools to remove the bottom bracket and crankset.
- Fork: Remove the fork from the head tube.
- Any other components: Remove any other components such as the headset, derailleurs or any other accessories attached to the frame.
2.2. Labeling and Organizing Parts
As you disassemble the bike, label and organize all the parts to make reassembly easier.
- Use Labels: Attach labels to each part or group of parts, noting their location and orientation.
- Take Photos: Take photos of each step of the disassembly process to reference later.
- Organize Storage: Store the parts in labeled containers or bags to keep them organized and prevent loss.
3. What is the Best Way to Strip the Old Paint?
Removing the old paint is a critical step in preparing the bike frame for a new finish. There are several methods to strip paint, each with its own advantages and disadvantages.
3.1. Chemical Stripping
Chemical stripping involves applying a chemical solution to dissolve the old paint. This method is effective for removing multiple layers of paint but requires careful handling due to the hazardous nature of the chemicals.
- Apply Stripper: Apply a thick layer of chemical stripper to the frame, following the manufacturer’s instructions.
- Wait: Allow the stripper to sit for the recommended time, typically 20-30 minutes.
- Scrape: Use a plastic scraper to remove the softened paint.
- Clean: Clean the frame with a solvent to remove any remaining residue.
- Repeat: Repeat the process if necessary to remove all traces of the old paint.
Safety Precautions: Always wear safety glasses, gloves, and a respirator when working with chemical strippers. Work in a well-ventilated area to avoid inhaling harmful fumes.
3.2. Sandblasting
Sandblasting uses abrasive particles propelled at high speed to remove paint and rust. This method is highly effective but requires specialized equipment and can damage the frame if not done correctly.
- Set Up: Set up a sandblasting cabinet or work in a designated outdoor area.
- Blast: Use a sandblasting gun to direct abrasive particles at the frame, removing paint and rust.
- Inspect: Inspect the frame for any damage or imperfections.
- Clean: Clean the frame with compressed air to remove any remaining particles.
Professional Advice: Sandblasting is best left to professionals who have experience with the equipment and understand the proper techniques to avoid damaging the frame.
3.3. Manual Sanding
Manual sanding involves using sandpaper and sanding blocks to remove the old paint by hand. This method is time-consuming but offers the most control and is suitable for smaller projects or frames with delicate features.
- Start with Coarse Grit: Begin with a coarse-grit sandpaper (e.g., 80-grit) to remove the bulk of the old paint.
- Switch to Medium Grit: Use a medium-grit sandpaper (e.g., 120-grit) to smooth the surface and remove any remaining paint.
- Finish with Fine Grit: Finish with a fine-grit sandpaper (e.g., 220-grit or higher) to create a smooth surface for priming.
- Sand Evenly: Use a sanding block to ensure even pressure and prevent gouging the frame.
- Clean: Clean the frame with a tack cloth to remove any sanding dust.
4. What are the Steps to Cleaning the Bike Frame?
After stripping the old paint, cleaning the bike frame is essential to remove any residue and ensure proper adhesion of the new paint.
4.1. Degreasing
Use a degreaser to remove any oil, grease, or wax from the frame.
- Apply Degreaser: Apply a generous amount of degreaser to the frame.
- Scrub: Use a brush or sponge to scrub the frame, paying attention to hard-to-reach areas.
- Rinse: Rinse the frame thoroughly with water.
- Dry: Allow the frame to air dry or use a clean cloth to dry it.
4.2. Removing Rust
If there is any rust on the frame, remove it using a rust remover or a wire brush.
- Apply Rust Remover: Apply rust remover to any areas affected by rust, following the manufacturer’s instructions.
- Scrub: Use a wire brush or abrasive pad to scrub the rust away.
- Rinse: Rinse the frame thoroughly with water.
- Dry: Allow the frame to air dry or use a clean cloth to dry it.
4.3. Final Cleaning
Give the frame a final cleaning with a tack cloth to remove any remaining dust or debris.
- Wipe Down: Wipe the entire frame with a tack cloth, ensuring all surfaces are clean.
- Inspect: Inspect the frame for any imperfections or contaminants.
- Repeat: Repeat the cleaning process if necessary to ensure the frame is completely clean.
5. How Do You Prime a Bike Frame?
Priming is a crucial step in painting a bike frame. Primer provides a smooth, even base for the paint to adhere to, resulting in a durable and professional-looking finish.
5.1. Choosing the Right Primer
Select a primer that is compatible with the frame material and the type of paint you will be using.
- Metal Primer: Use a self-etching metal primer for steel or aluminum frames.
- Epoxy Primer: Use an epoxy primer for added corrosion protection.
- Filler Primer: Use a filler primer to fill in any imperfections or scratches on the frame.
5.2. Applying the Primer
Apply multiple thin coats of primer, allowing each coat to dry before applying the next.
- Shake the Can: Shake the primer can thoroughly for several minutes to ensure the contents are well mixed.
- Apply First Coat: Hold the can about 10-12 inches from the frame and apply a thin, even coat of primer.
- Allow to Dry: Allow the primer to dry for the recommended time, typically 20-30 minutes.
- Apply Second Coat: Apply a second thin coat of primer, ensuring complete coverage.
- Allow to Dry: Allow the primer to dry completely, typically overnight.
- Inspect: Inspect the primed frame for any imperfections or runs.
5.3. Sanding the Primer
After the primer has dried completely, sand it lightly with fine-grit sandpaper to create a smooth surface for painting.
- Wet Sand: Wet sand the primer with 400-grit sandpaper, using water to lubricate the surface.
- Sand Evenly: Sand the primer evenly, paying attention to any runs or imperfections.
- Clean: Clean the frame with a tack cloth to remove any sanding dust.
6. What is the Process to Paint a Bike Frame?
Painting the bike frame is where you bring your vision to life. Take your time and apply multiple thin coats for the best results.
6.1. Choosing the Right Paint
Select a paint that is durable, weather-resistant, and compatible with the primer you used.
- Acrylic Lacquer: Acrylic lacquer paints are easy to apply and dry quickly, making them a popular choice for DIY projects.
- Enamel Paint: Enamel paints are durable and offer good resistance to scratches and chips.
- Two-Part Urethane: Two-part urethane paints provide a professional-quality finish with excellent durability and gloss.
6.2. Applying the Paint
Apply multiple thin coats of paint, allowing each coat to dry before applying the next.
- Shake the Can: Shake the paint can thoroughly for several minutes to ensure the contents are well mixed.
- Apply First Coat: Hold the can about 10-12 inches from the frame and apply a thin, even coat of paint.
- Allow to Dry: Allow the paint to dry for the recommended time, typically 20-30 minutes.
- Apply Second Coat: Apply a second thin coat of paint, ensuring complete coverage.
- Allow to Dry: Allow the paint to dry completely, typically overnight.
- Inspect: Inspect the painted frame for any imperfections or runs.
- Apply Additional Coats: Apply additional coats as needed to achieve the desired color and coverage.
6.3. Dealing with Runs and Imperfections
If you encounter any runs or imperfections in the paint, address them before applying the next coat.
- Allow to Dry: Allow the paint to dry completely.
- Sand: Lightly sand the run or imperfection with fine-grit sandpaper.
- Clean: Clean the frame with a tack cloth to remove any sanding dust.
- Reapply Paint: Reapply a thin coat of paint to the affected area.
7. How Many Clear Coats Do You Need?
Applying a clear coat is essential to protect the paint and add a glossy finish. Multiple coats of clear coat are recommended for maximum protection and durability.
7.1. Choosing the Right Clear Coat
Select a clear coat that is compatible with the paint you used and offers good UV protection.
- Acrylic Clear Coat: Acrylic clear coats are easy to apply and provide good gloss.
- Urethane Clear Coat: Urethane clear coats offer excellent durability and UV protection.
- Two-Part Clear Coat: Two-part clear coats provide a professional-quality finish with superior durability and gloss.
7.2. Applying the Clear Coat
Apply multiple thin coats of clear coat, allowing each coat to dry before applying the next.
- Shake the Can: Shake the clear coat can thoroughly for several minutes to ensure the contents are well mixed.
- Apply First Coat: Hold the can about 10-12 inches from the frame and apply a thin, even coat of clear coat.
- Allow to Dry: Allow the clear coat to dry for the recommended time, typically 20-30 minutes.
- Apply Additional Coats: Apply additional coats of clear coat, allowing each coat to dry before applying the next.
- Inspect: Inspect the clear-coated frame for any imperfections or runs.
7.3. How Many Coats?
Applying at least six coats of clear coat is crucial, following the entire “subcoats,” sit, and sand process meticulously between each one.
8. What are the Steps for Final Finishing?
The final finishing steps are essential for achieving a professional-quality finish. Wet sanding, buffing, and polishing will remove any imperfections and bring out the shine.
8.1. Wet Sanding
Wet sanding involves using fine-grit sandpaper and water to smooth the clear coat.
- Prepare: Gather your materials: a bucket of clean water, fine-grit sandpaper (600, 800, 1000, 1500, 2000, and 3000 grits), a sanding block, and a spray bottle.
- Start with 600 or 800 Grit: Begin with 600 or 800-grit sandpaper, soaking it in water for a few minutes until it’s pliable.
- Sand in Circular Motions: Wet the surface of the clear coat with the spray bottle and gently sand in small, circular motions. Use the sanding block to maintain even pressure.
- Progress to Finer Grits: After sanding with the 600 or 800-grit sandpaper, rinse the surface and switch to the next finer grit (1000-grit). Repeat the sanding process, ensuring you remove the scratches from the previous grit.
- Continue Sanding: Continue sanding with progressively finer grits (1500, 2000, and 3000), rinsing the surface and the sandpaper between each grit. The goal is to gradually refine the surface, making it smoother with each pass.
- Final Rinse: After sanding with the 3000-grit sandpaper, rinse the surface thoroughly with clean water and dry it with a microfiber cloth.
8.2. Buffing
Buffing uses a power buffer and buffing compound to remove fine scratches and swirl marks.
- Apply Compound: Apply a small amount of buffing compound to the buffing pad.
- Buff: Use the power buffer to buff the frame, using light pressure and overlapping strokes.
- Clean: Clean the frame with a microfiber cloth to remove any remaining buffing compound.
8.3. Polishing
Polishing uses a polishing compound to enhance the shine and gloss of the clear coat.
- Apply Polish: Apply a small amount of polishing compound to a clean microfiber cloth.
- Polish: Use the microfiber cloth to polish the frame, using light pressure and circular motions.
- Clean: Clean the frame with a clean microfiber cloth to remove any remaining polishing compound.
9. What are Some Expert Tips for a Flawless Finish?
Achieving a flawless finish requires attention to detail and adherence to best practices.
9.1. Temperature and Humidity
Paint in a well-ventilated area with moderate temperature and low humidity.
- Ideal Conditions: The ideal temperature for painting is between 65°F and 75°F (18°C and 24°C) with humidity below 50%.
- Avoid Extremes: Avoid painting in direct sunlight, extreme heat, or high humidity, as these conditions can affect the drying and curing process.
9.2. Following Can Instructions
Always follow the manufacturer’s instructions on the paint and clear coat cans.
- Read Carefully: Read and understand the instructions before starting your project.
- Adhere to Recommendations: Follow the recommended drying times, application techniques, and safety precautions.
9.3. Cleanliness
Maintain a clean work environment to prevent dust and debris from contaminating the paint.
- Clean Surfaces: Clean the frame and surrounding surfaces with a tack cloth before painting.
- Minimize Dust: Minimize dust by sweeping the floor and covering nearby objects.
10. How Do You Reassemble the Bike Frame?
After painting and finishing the bike frame, reassemble the components carefully, following the reverse order of disassembly.
10.1. Reattaching Components
Reattach all the components to the frame, ensuring they are properly aligned and secured.
- Fork: Reinstall the fork into the head tube.
- Bottom Bracket and Crankset: Reinstall the bottom bracket and crankset using the appropriate tools.
- Cables: Reconnect and route all brake and shift cables, referring to your notes and photos from the disassembly process.
- Handlebars: Reattach the handlebars to the stem and reconnect the brake and shift cables.
- Seat: Reinstall the seat and seat post, adjusting the height and alignment as needed.
- Wheels: Reattach the wheels using appropriate wrenches or quick-release levers.
- Any other components: Reattach any other components or accessories.
10.2. Adjusting and Testing
After reassembling the bike, adjust and test all components to ensure they are functioning properly.
- Brakes: Adjust the brakes to ensure they are responsive and effective.
- Shifters: Adjust the shifters to ensure smooth and accurate gear changes.
- Alignment: Check the alignment of the wheels and handlebars.
- Test Ride: Take the bike for a test ride to ensure everything is working properly.
Need more guidance? Explore usabikers.net for in-depth articles, community forums, and expert advice to help you master bike maintenance and customization. Join our vibrant community of motorcycle enthusiasts today!
Contact us:
Address: 801 Sturgis Main St, Sturgis, SD 57785, United States
Phone: +1 (605) 347-2000
Website: usabikers.net
FAQ: Painting Your Bike Frame
1. Can I paint my bike frame without disassembling it?
While it’s possible, it’s not recommended. Disassembling the bike frame allows for thorough preparation and ensures a professional-quality finish by reaching all areas and avoiding overspray on components.
2. What kind of paint should I use for my bike frame?
Acrylic lacquer, enamel, and two-part urethane paints are all suitable for bike frames. Acrylic lacquer is easy to apply, enamel is durable, and two-part urethane provides a professional-quality finish.
3. How many coats of paint do I need on my bike frame?
Generally, two to three thin coats of paint are sufficient for full coverage, but it depends on the paint’s opacity. Make sure each coat is allowed to dry before applying the next for best results.
4. Do I need to sand between coats of paint?
Sanding between coats of paint isn’t always necessary, but it can help smooth out any imperfections. If you notice runs or rough spots, lightly sand with fine-grit sandpaper before applying the next coat.
5. How long should I wait before applying the clear coat?
Allow the final coat of paint to dry completely, typically overnight, before applying the clear coat. This ensures the paint has fully cured and won’t be disturbed by the clear coat application.
6. How many coats of clear coat should I apply?
Applying at least six coats of clear coat is crucial, following the entire “subcoats,” sit, and sand process meticulously between each one, as mentioned earlier.
7. Can I use spray paint for my bike frame?
Yes, you can use spray paint for your bike frame. However, use high-quality spray paint specifically designed for metal surfaces and follow the application instructions carefully for best results.
8. How do I prevent runs in the paint?
To prevent runs, apply thin, even coats of paint and avoid holding the spray can too close to the frame. Keep the can moving and overlap each pass slightly for consistent coverage.
9. What is wet sanding and why is it important?
Wet sanding is a technique used to smooth the clear coat after it has dried. It involves using fine-grit sandpaper and water to remove imperfections and create a smooth surface for buffing and polishing.
10. How do I reassemble the bike after painting?
Reassemble the bike by reversing the disassembly process. Refer to your notes and photos from the disassembly to ensure all parts are correctly installed and properly aligned.