
Having responsive and reliable bike brakes is crucial for any cyclist. If you’re finding your bike brakes feel too soft or require excessive squeezing to engage, you’re not alone. Many factory settings leave brakes feeling less effective than they could be. While bike shops often charge for this simple service, adjusting your bike brakes at home is an easy and cost-effective task you can master yourself. This guide will walk you through how to adjust your bike brakes, ensuring they are grippy and responsive, giving you confidence and control on every ride.
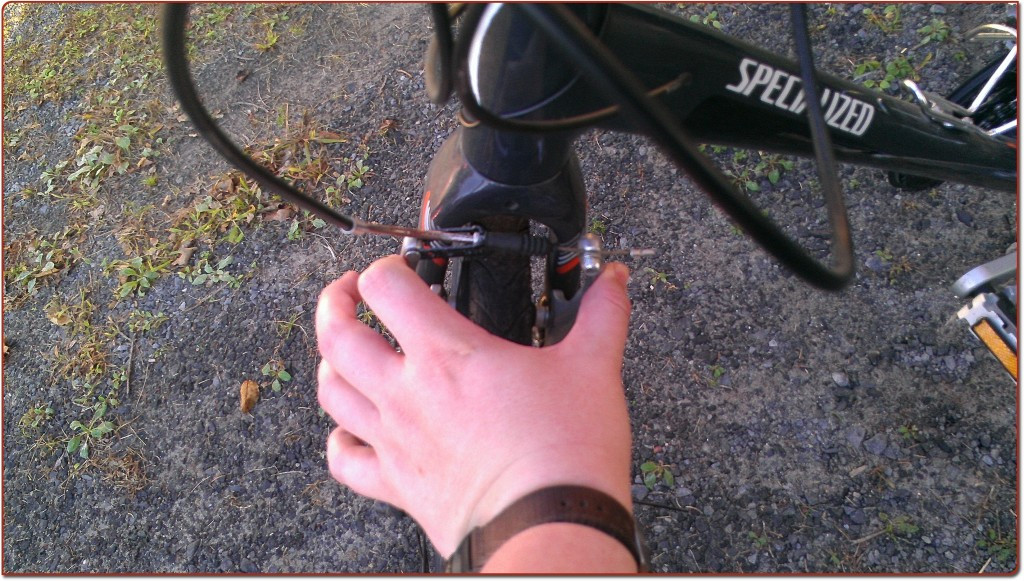
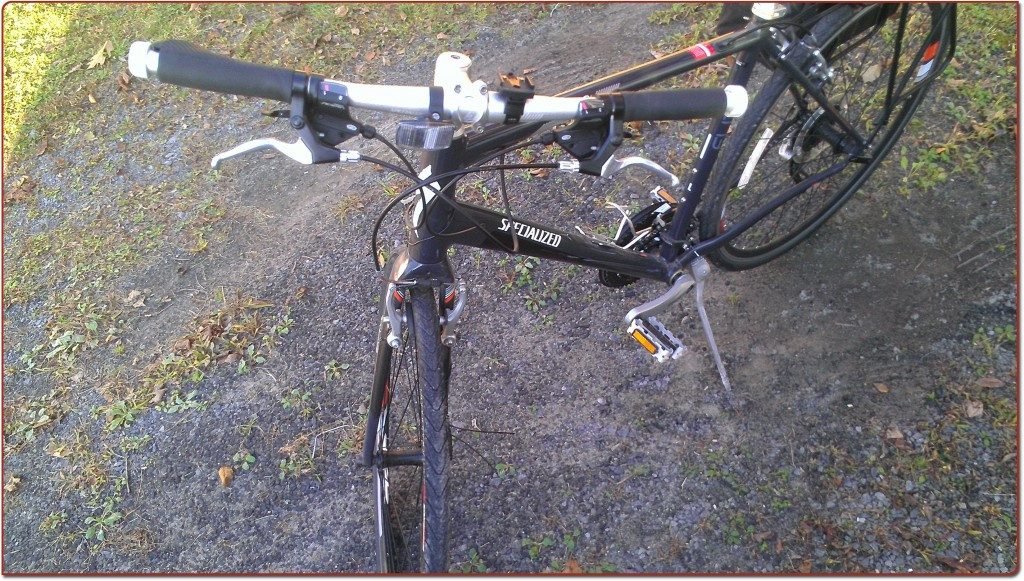 Cyclist preparing to adjust bike brakes
Understanding Your Bike Brake Components
Before we dive into the adjustment process, it’s helpful to familiarize yourself with the basic parts of your bike’s braking system. Most standard bikes utilize caliper brakes, and understanding these components will make the adjustment process much clearer. Here are the key parts we’ll be working with:
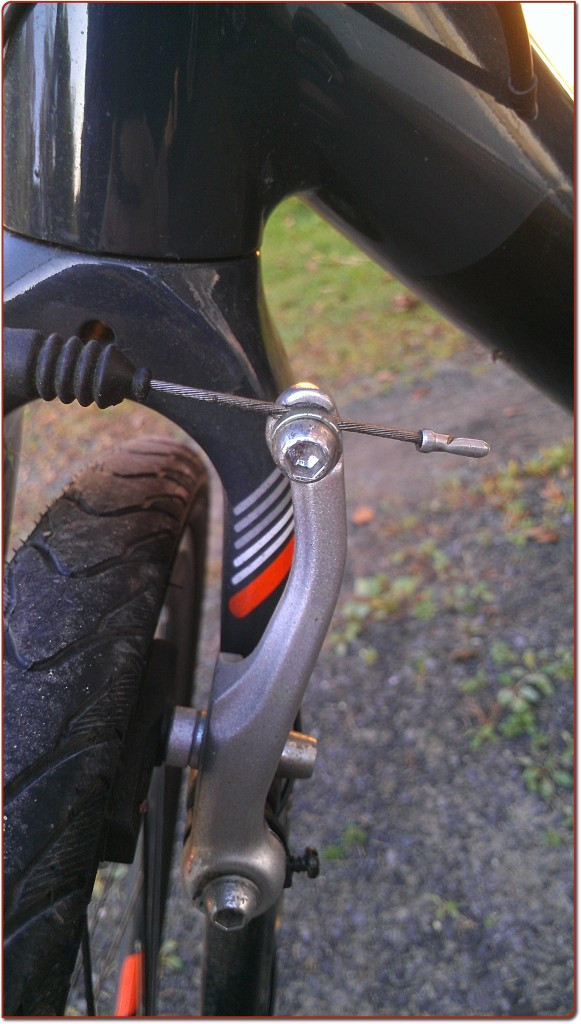
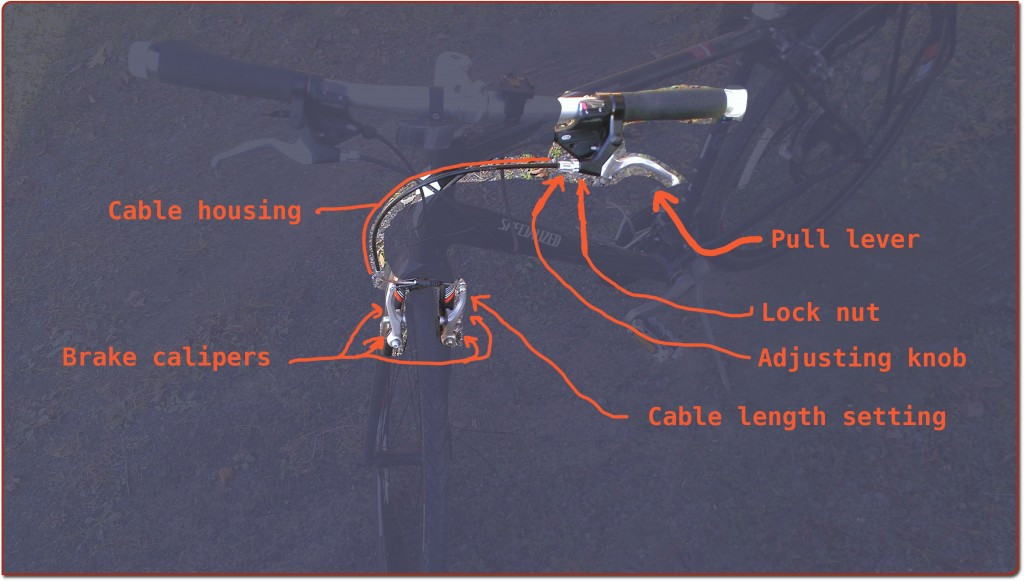 Diagram showing bike brake parts: pull lever, cable housing, cable, brake calipers, adjusting knob, lock nut, cable length setting
- Pull Lever: Located on your handlebars, this is what you squeeze to activate the brakes.
- Cable and Cable Housing: The cable runs inside the housing, connecting the brake lever to the brake calipers. When you pull the lever, it pulls the cable.
- Brake Calipers: These are the mechanisms near your wheels that house the brake pads. When activated, they clamp together, pressing the brake pads against the wheel rim to slow you down.
- Brake Pads: Usually made of rubber or a composite material, these are the parts that make direct contact with the wheel rim to create friction and stop the bike. (Not explicitly shown in the diagram but located within the calipers).
- Adjusting Knob (Barrel Adjuster): This small knob allows for fine-tuning the cable housing length, which in turn affects brake responsiveness.
- Lock Nut: This nut secures the adjusting knob in place, preventing it from loosening due to vibration.
- Cable Length Setting (Cable Anchor Bolt): A screw or bolt that clamps the brake cable to the calipers. While it can adjust cable length, it’s typically not the primary adjustment point for brake responsiveness.
Pre-Adjustment Checks: Ensuring Safety and Effectiveness
Before you start adjusting your brakes, take a moment to perform a quick inspection. This ensures your brakes are in good condition and ready for adjustment, and it also highlights potential issues that might need addressing before proceeding.
-
Inspect Brake Pads: Check your brake pads for wear. If the rubber is thin or worn down, it’s time to replace them. Also, ensure the pads are correctly aligned with the wheel rim. They should make full contact with the rim surface when engaged. Misaligned or worn pads will significantly reduce braking performance, regardless of adjustment.
-
Verify Cable Anchor Bolt Tightness: Make sure the cable anchor bolt (cable length setting) at the brake caliper is securely tightened. This bolt clamps the cable and if loose, can cause brake failure. Generally, this bolt should be tight and not require adjustment for typical brake tuning.
Safety First: It’s crucial to emphasize safety when working with brakes. After making any adjustments, thoroughly test your brakes before riding your bike. Spin each wheel individually and apply the corresponding brake lever to ensure they engage properly and bring the wheel to a stop effectively. Do this in a safe, controlled environment before heading out on the road or trails.
Step-by-Step Guide: Adjusting Your Bike Brakes for Optimal Grip
Our method focuses on adjusting the cable housing length using the adjusting knob, a simple yet effective way to improve brake responsiveness. This method is generally easier and quicker than directly altering the cable length at the anchor bolt. We’ll use a two-step approach for efficient adjustment: first, we’ll tighten the brakes to their maximum, then we’ll gradually loosen them to find the ideal balance.
For demonstration, we’ll use the front brake, but the process is identical for the rear brake.
-
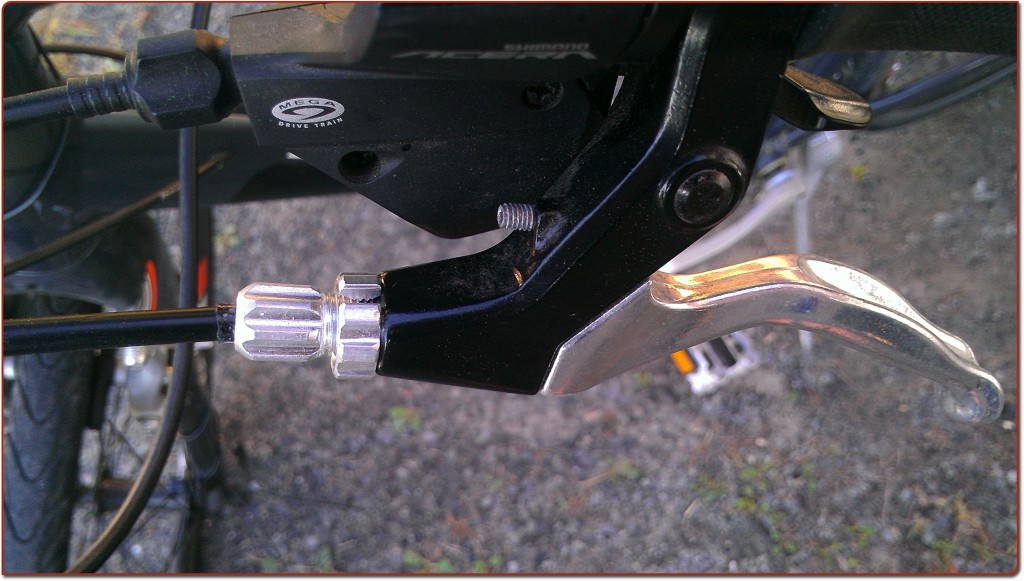
Release the Lock Nut: Locate the lock nut on the brake lever assembly, situated closer to the lever itself than the adjusting knob. This nut secures the adjusting knob. Unscrew the lock nut counter-clockwise, turning it away from the lever, as far as it will go. This will loosen its hold on the adjusting knob, allowing you to make adjustments.
 Close-up of the lock nut on the brake lever, unscrewed to loosen it
 -
Manually Clamp the Brake Calipers: Move down to the brake calipers near the wheel. Grasp both arms of the caliper, close to where the brake pads are located. Squeeze the caliper arms inwards, towards the wheel rim. This action simulates the brakes being fully engaged, bringing the brake pads into contact with the wheel rim.
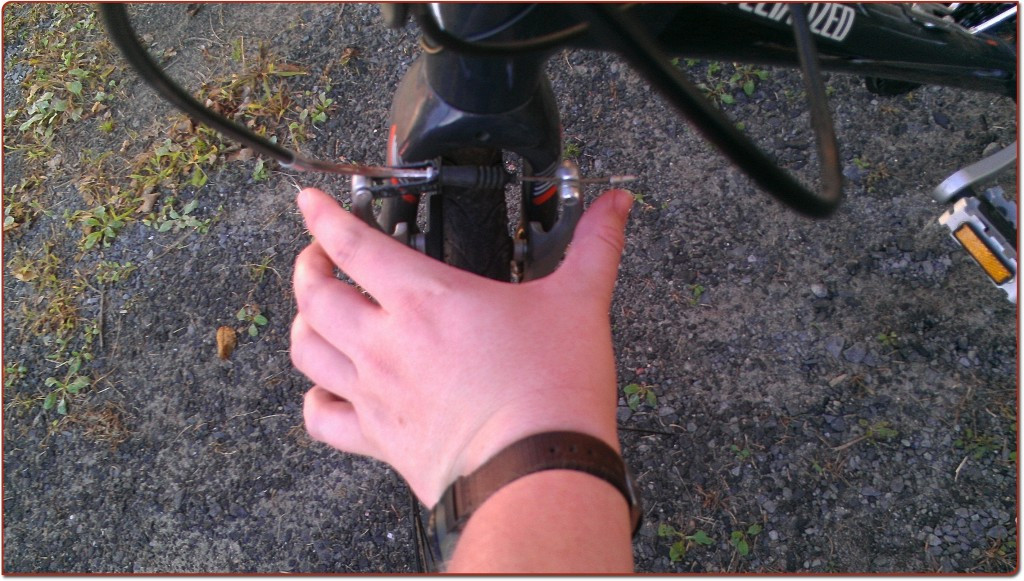 Hands grasping the brake calipers, ready to squeeze them closed
Continue squeezing until the brake pads are firmly pressed against the wheel rim. If you have someone to help, they can hold the calipers closed while you proceed to the next step. However, it’s easily manageable to do this yourself.
 Brake calipers squeezed closed, with brake pads contacting the wheel rim
 -
Unscrew the Adjusting Knob (Barrel Adjuster): While holding the calipers closed (or having a helper do so), turn the adjusting knob counter-clockwise. Continue unscrewing it as far as it will go, almost to the point where it would detach from the brake lever assembly. This action maximizes the length of the cable housing, effectively tightening the brake cable.
Now, release your grip on the calipers and check the brake lever feel. Ideally, with the adjusting knob fully unscrewed, your brakes should now engage quite quickly, possibly even too quickly.
-
Fine-tuning the Adjustment: If the brakes are now engaging too soon (meaning the brake pads are rubbing against the rim even when the lever is not pulled, or the braking action is too abrupt with minimal lever movement), you need to back off the adjustment slightly.
Gently apply pressure to the brake lever and, while maintaining that pressure, slowly screw the adjusting knob clockwise, turning it inwards. As you screw it in, you’re effectively shortening the cable housing, which will loosen the brake cable tension and reduce the brake’s initial bite.
Continue turning the adjusting knob clockwise, testing the brake lever feel periodically, until you reach a point where the brakes engage just how you want them. You’re aiming for a balance where the brakes are not dragging when the lever is released, but they engage firmly and responsively when you pull the lever, without requiring excessive travel.
-
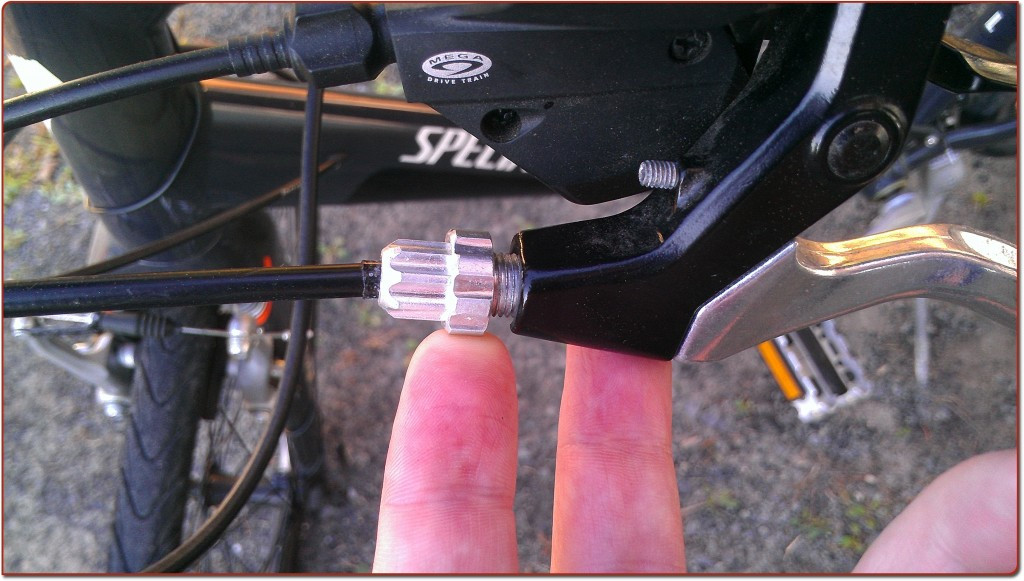
Addressing Insufficient Brake Engagement: If, even with the adjusting knob fully unscrewed, your brakes still don’t engage quickly enough, it might indicate that the brake cable has too much slack. In this case, you could consider adjusting the cable length setting at the caliper. However, this is a more involved adjustment.
Caution: If you are not comfortable working with mechanical adjustments, or if you are unsure, it is always best to consult a professional bike mechanic. Improper adjustment of the cable anchor bolt can lead to brake failure.
If you are confident, you can slightly loosen the cable anchor bolt, pull a small amount of extra cable through to effectively shorten it, and then re-tighten the bolt securely. After adjusting the cable anchor bolt, you’ll need to repeat the entire adjustment process from step 1 to fine-tune the brake responsiveness using the adjusting knob.
 Close-up of the cable length setting screw (cable anchor bolt) at the brake caliper
 -
Secure the Lock Nut: Once you’ve achieved the desired brake feel and responsiveness with the adjusting knob, it’s time to secure your setting. Screw the lock nut clockwise, tightening it against the adjusting knob and the brake lever assembly. This will prevent the adjusting knob from turning and ensure your brakes remain properly adjusted.
 Close-up of the lock nut being screwed back into place to secure the brake adjustment
Final Checks and Safety Verification
After adjusting your brakes, thorough testing is paramount before you ride.
-
Visual Inspection: Ensure all components are correctly positioned and secured. The brake caliper arms should be symmetrical, and the cable housing should be properly seated. Visually compare your brake setup to how it looked before you started, ensuring nothing appears out of place.
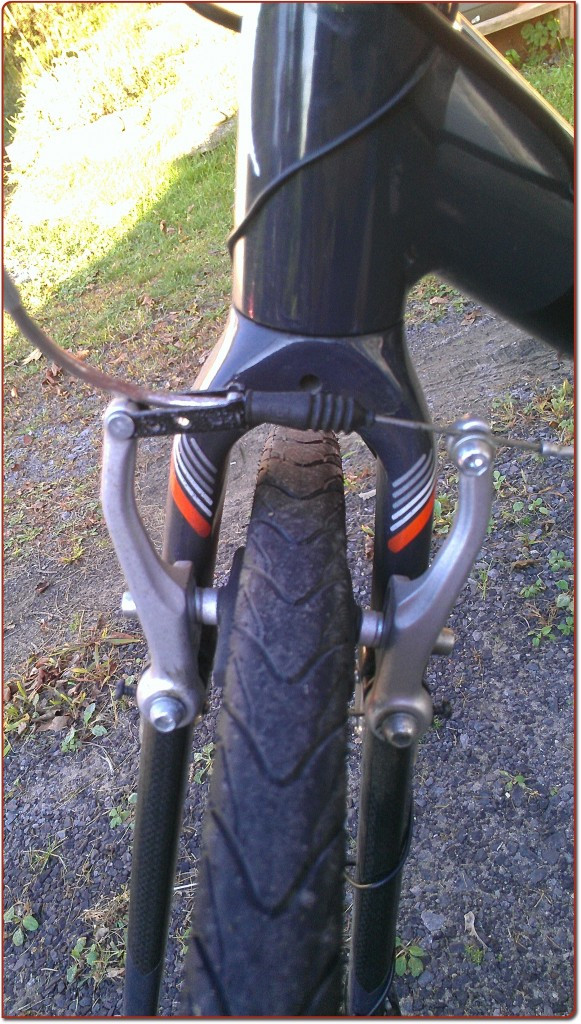 Front bike brake assembly after adjustment, ready for final checks
 -
Wheel Spin Test: Lift the front wheel off the ground and spin it freely. Listen and watch closely to ensure the brake pads are not rubbing against the rim when the brake lever is not engaged. If you hear or see rubbing, it indicates the brakes are still too tight. You’ll need to slightly screw the adjusting knob clockwise to loosen them further and repeat the spin test.
-
Brake Lever Test: Spin the wheel again and firmly pull the brake lever. The wheel should stop quickly and effectively. Check that the brake lever doesn’t travel too far back to the handlebars before the brakes engage firmly. A good brake setup will have a responsive feel with firm engagement after a reasonable amount of lever travel.
-
Road Test (Controlled Environment): Before heading out for a regular ride, perform a test ride in a safe, traffic-free area. Ride at a slow to moderate speed and test both your front and rear brakes independently and together. Ensure they provide sufficient stopping power and control without feeling spongy or requiring excessive force.
By following these steps, you can effectively adjust your bike brakes for enhanced performance and safety. Regular brake checks and adjustments are part of essential bike maintenance, ensuring you can always ride with confidence and control.